[ESP/ENG] Maquillaje: brillante labio decorado paso a paso ✨️💋 Makeup: shiny lip decorated step by step
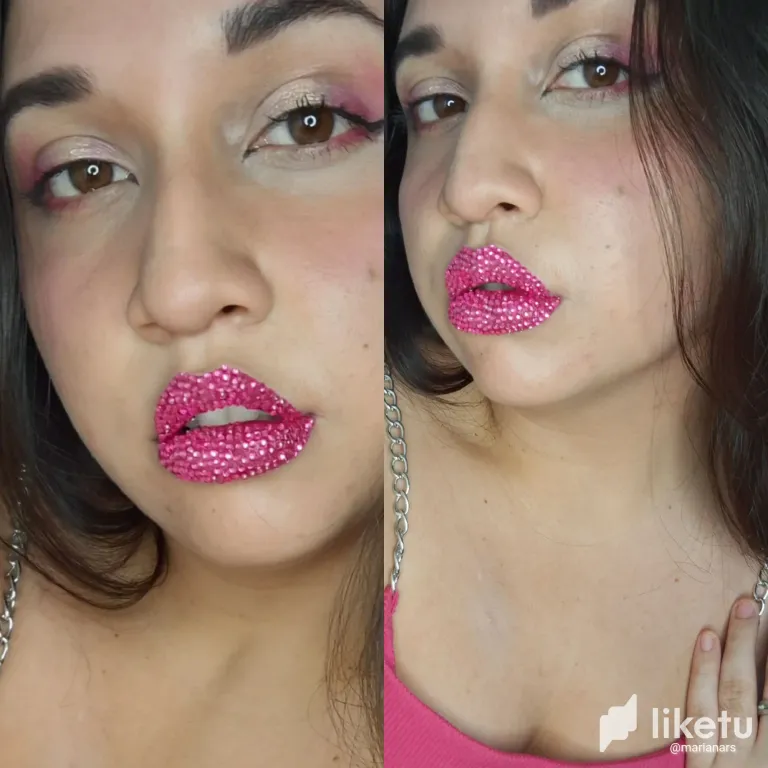
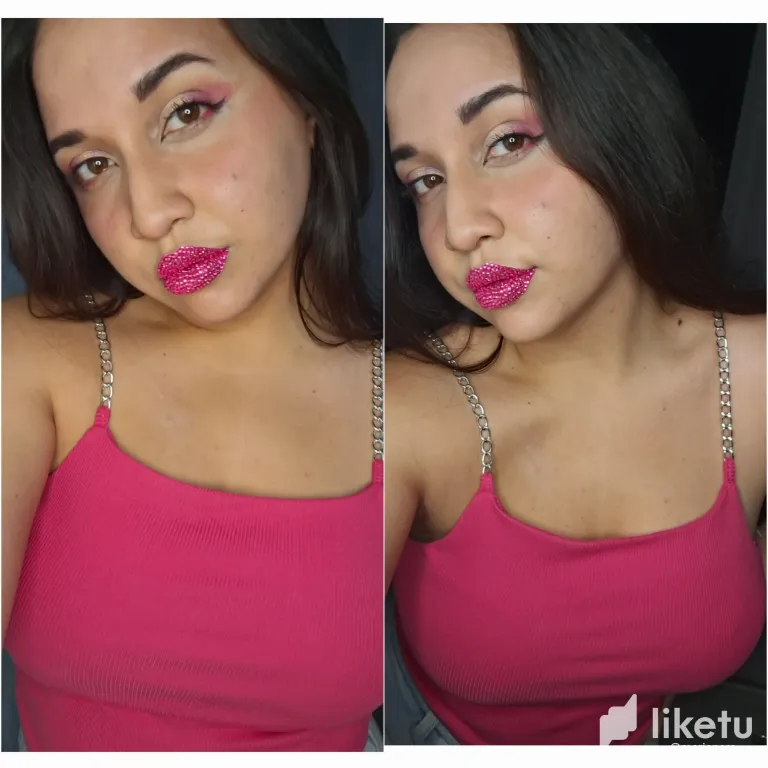
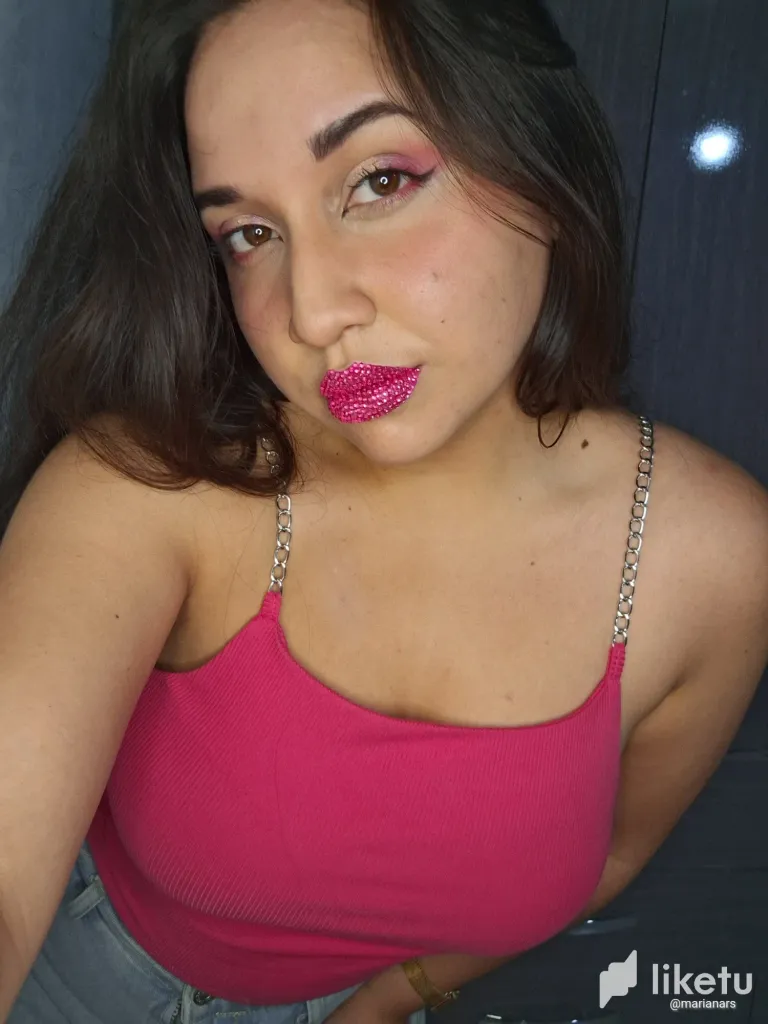
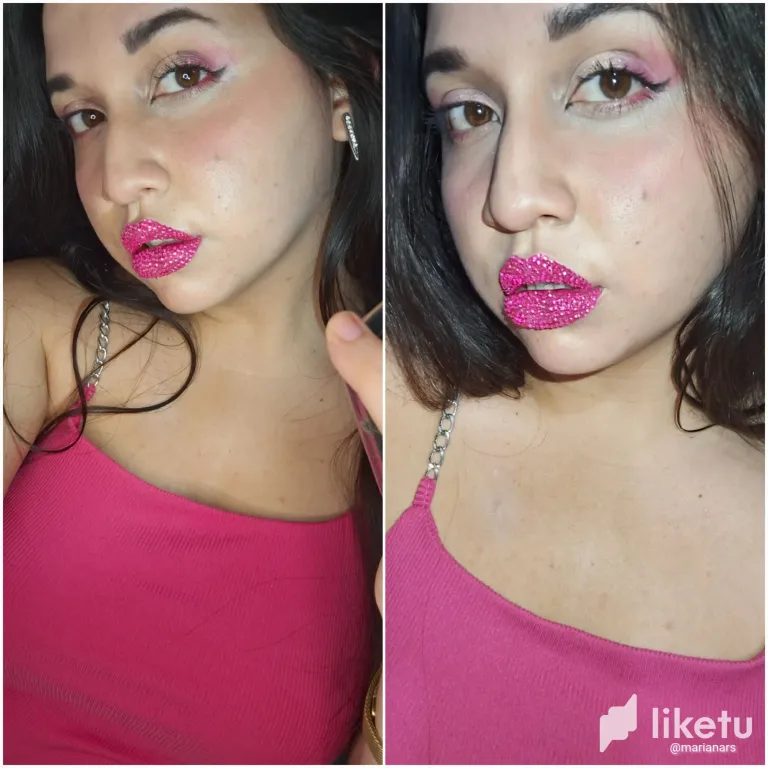
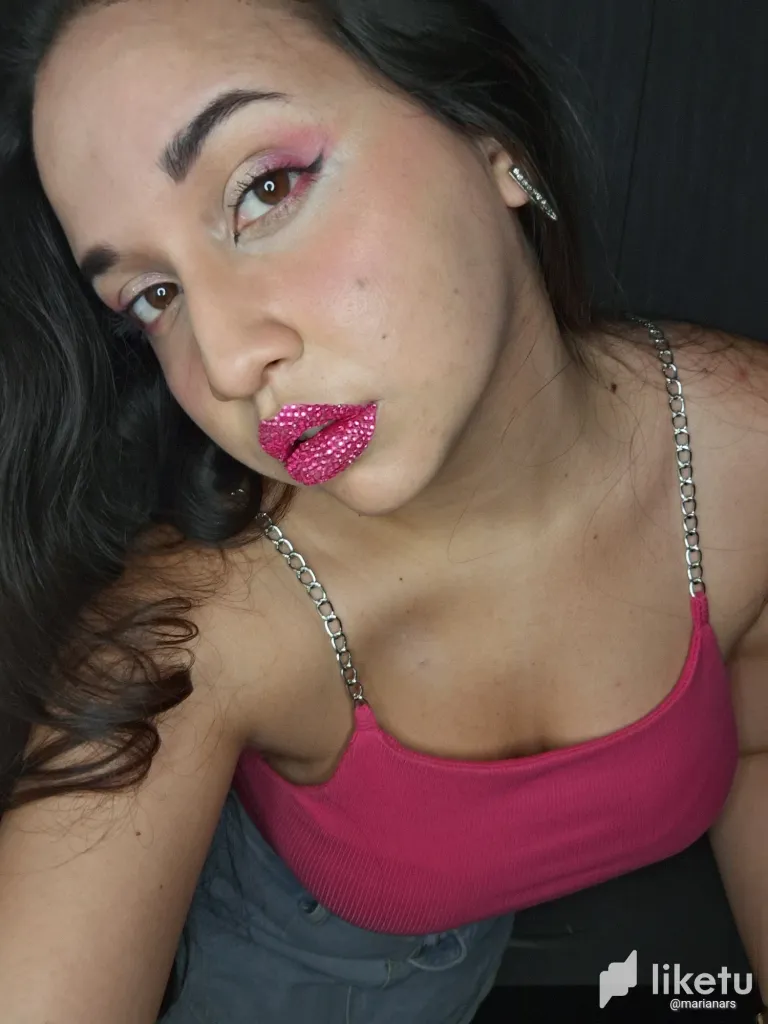
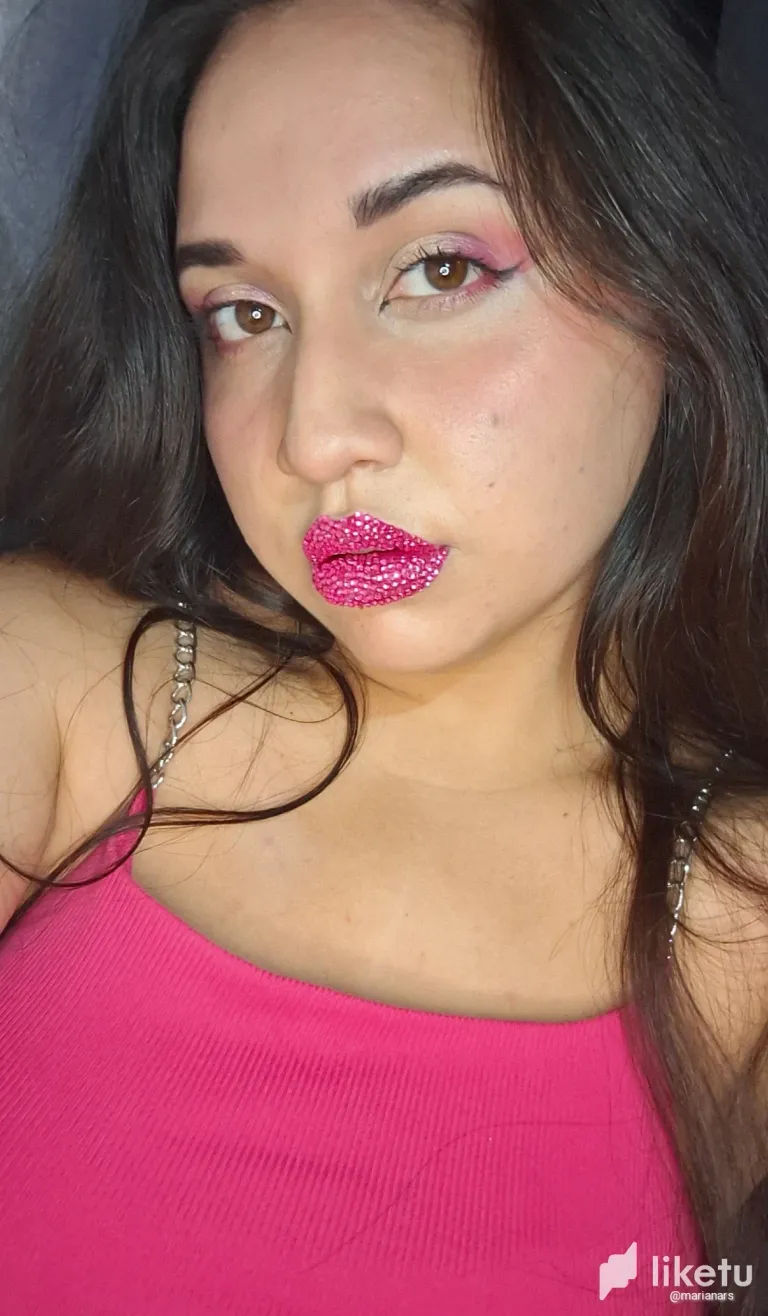
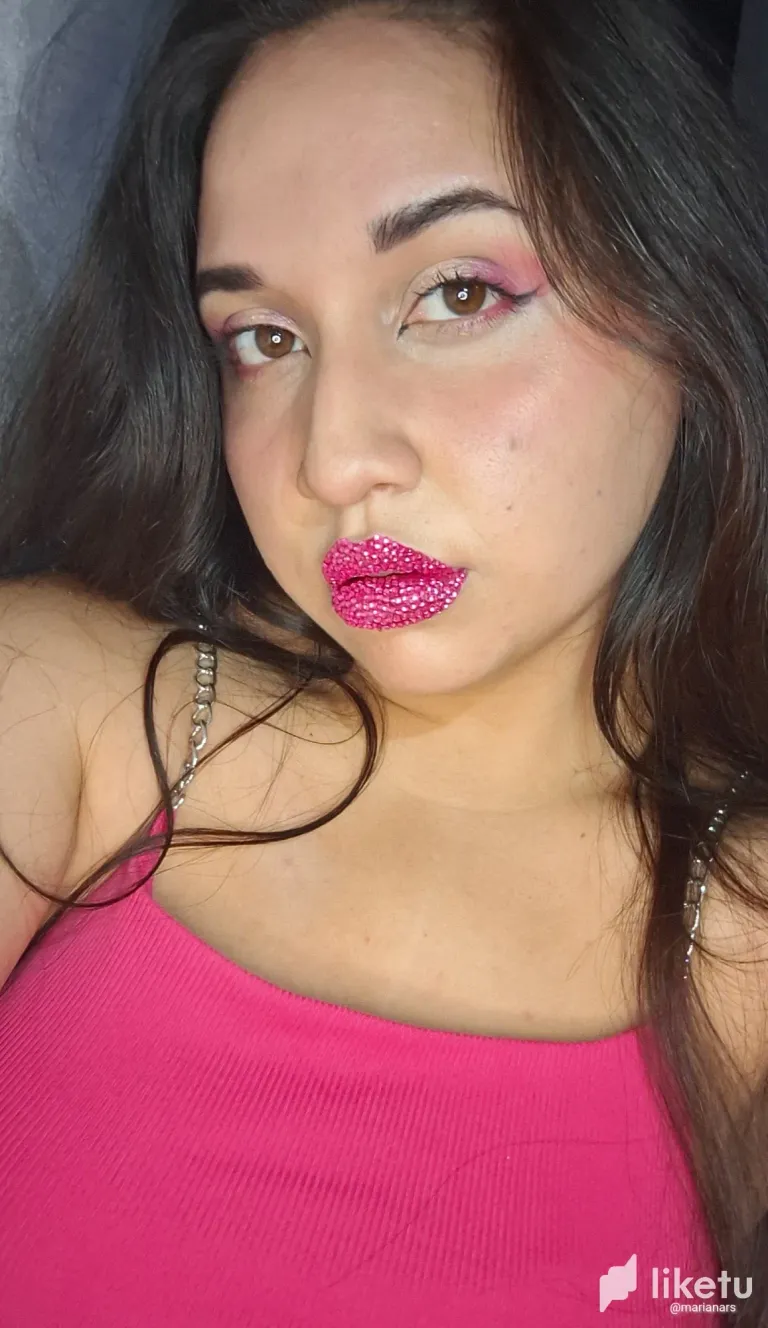
Hola amigos de esta linda comunidad, es un placer estar aquí y mostrarles este maquillaje en donde el foco de atención son nuestros labios, éstos van decorados con piedras brillantes a color que hacen que nuestro maquillaje tenga un acabado divertido y extravagante.
Nuestros labios emularan a una bola de disco con glamour y brillo.
Paso a paso
Step-by-step
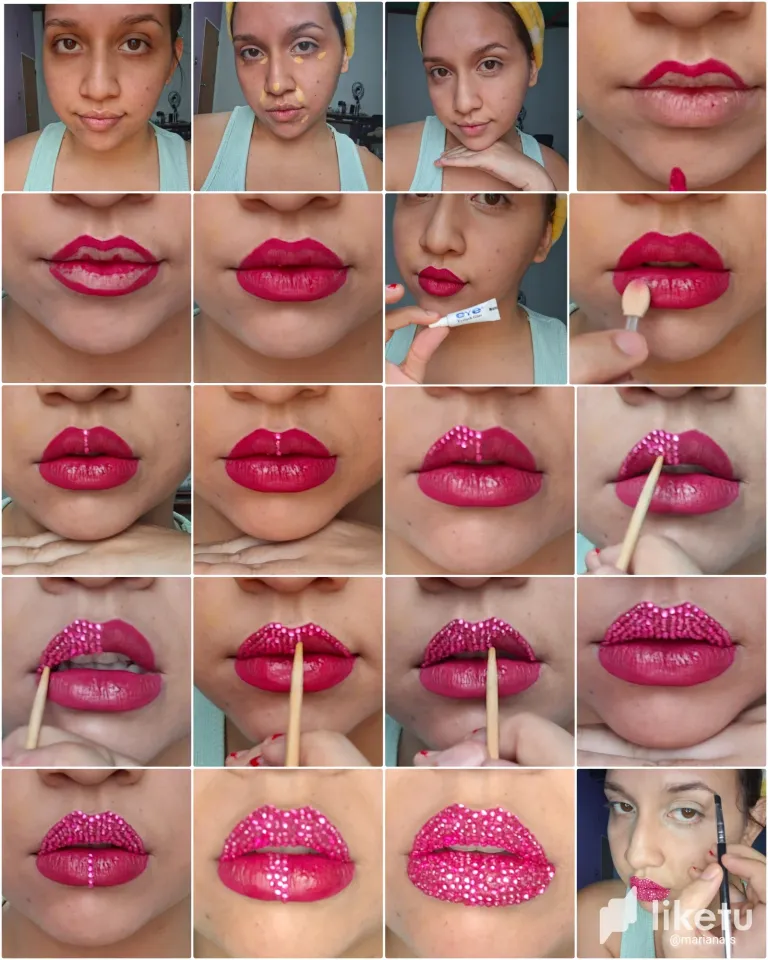
- Primero empezaremos con un color salmón en barra para cubrir las ojeras y desperfectos de la piel como manchitas, pasamos a usar un corrector más claro sobre la zona de ojeras y surcos, luego de esto aplicamos base a toquesitos suaves sobre el rostro, dejaremos los labios despejados de base.
- First we start with a salmon color stick to cover dark circles and skin flaws such as blemishes, then we use a lighter concealer on the area of dark circles and furrows, after this we apply foundation with soft touches on the face, leaving the lips clear of foundation.
- Para los labios escogemos un color lo más parecido a las piedras a usar, en este caso yo usé un color fucsia, delineamos los labios y vamos rellenando, una vez pintados los labios con un pincel agregamos sobre ellos una capa de pegamento para pestañas, esto ayudara a que las piedras que aplicaremos se queden fijadas, partimos desde el medio de nuestro labio haciendo una línea de piedritas con un palillo o un aplicador, es bueno empezar con esta línea en medio para tener una guía e ir rellenandolos de forma equitativa, primero realizamos el relleno de piedritas de un lado del labio y luego del otro, lo mejor también es hacer una delineado de piedritas para que así no sobresalgan de los labios una vez pongamos las demás, repetimos el mismo procedimiento en el labio inferior.
- For the lips we choose a color as close to the stones to use, in this case I used a fuchsia color, we outline the lips and fill them, once the lips are painted with a brush we add on them a layer of eyelash glue, this will help to fix the stones that we will apply, we start from the middle of our lip making a line of pebbles with a toothpick or an applicator, It is good to start with this line in the middle to have a guide and fill them in evenly, first we fill in the pebbles on one side of the lip and then the other, it is also best to make a line of pebbles so that they do not protrude from the lips once we put the rest, repeat the same procedure on the lower lip.
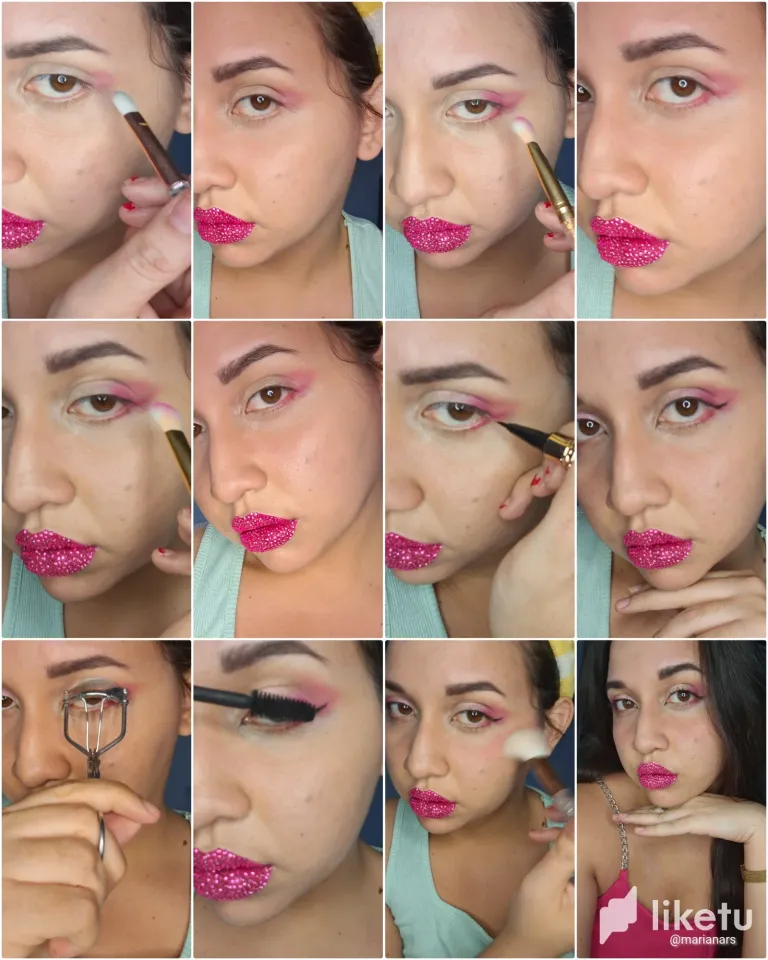
- Peinamos y sombreamos las cejas procurando dejar el principio de las mismas más claras que el final.
- Comb and shade the eyebrows, making sure to leave the beginning of the eyebrows lighter than the end.
- Para los ojos se puede dejar un look sencillo, pero yo quise optar en este caso por pintarlos de color rosa para que combinará con los labios, para eso con una brocha de difuminado aplicamos en la zona exterior una sombra rosa intenso y la difuminamos hacia adentro, hacemos una pequeña línea en la línea de pestañas inferiores y en medio del párpado aplicamos una color más claro de acabado brilloso, hacemos un pequeño delineado en negro, rizamos y aplicamos máscaras en las pestañas.
- For the eyes you can leave a simple look, but I wanted to opt in this case to paint them pink to match the lips, for that with a blending brush apply a deep pink shadow on the outer area and blend it inward, make a small line on the lower lash line and in the middle of the eyelid apply a lighter color of glossy finish, make a small black eyeliner, curl and apply mascara on the eyelashes.
- Aplicamos rubor sobre nuestros pómulos y mejillas, también polvo traslúcido sobre el rostro.
- We apply blush on our cheekbones and cheeks, as well as translucent powder on the face.
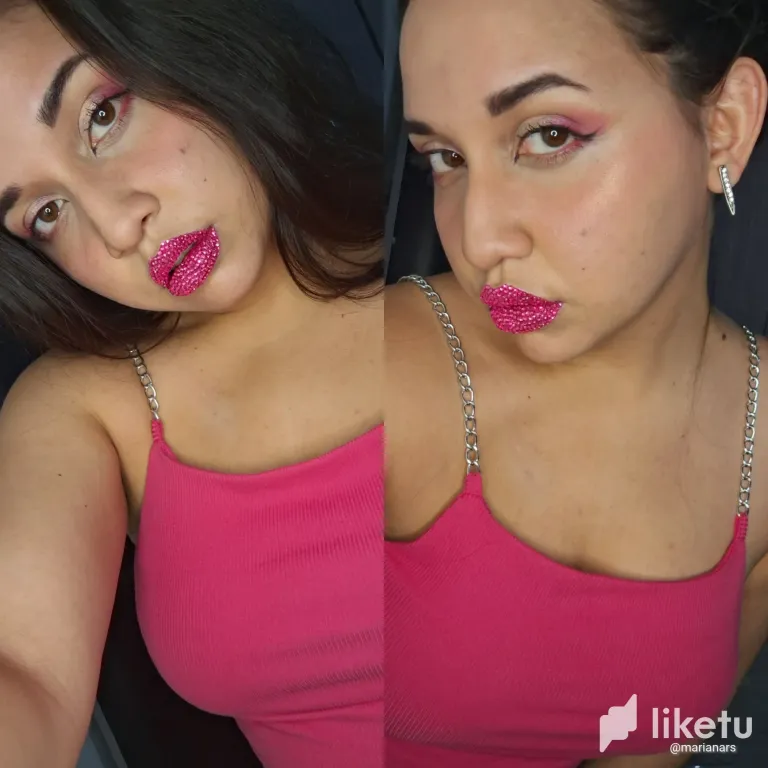
El resultado son unos labios brillantes que resaltan con la mínima interacción con la luz 💕 me encantó, me llevó dos horas y media este maquillaje pero valió la paciencia porque miren que llamativos son. Y ustedes ¿ya se han hecho los labios decorados antes?
The result is glossy lips that stand out with the slightest interaction with light 💕 I loved it, it took me two and a half hours for this makeup but it was worth the patience because look how striking they are. And you guys have you had your lips done decorated before?
.
.
.
• Photos taken of a galaxy a54.
• Traductor/translator: DeepL.
• Collage Editor: Polish.

For the best experience view this post on Liketu
Congratulations @marianars! You have completed the following achievement on the Hive blockchain And have been rewarded with New badge(s)
Your next target is to reach 20000 upvotes.
You can view your badges on your board and compare yourself to others in the Ranking
If you no longer want to receive notifications, reply to this comment with the word
STOPCheck out our last posts:
I've never seen sparkling lips like this, it matches your dress, it's like candy, I love candy
Thanks 😊
❤️