[ESP/ENG] Técnica de drapeado: inspirado en el arcoiris 🌈 Draping technique: inspired by the rainbow

🩷🧡💛💚💙🩵💜
Hola amigos, hoy traigo un maquillaje con la técnica de drapeado inspirándome en el arcoiris, es mi primera vez intentándo esta técnica y tuvo sus deficiencias pero me entusiasma que vean el proceso y sepan que me divertí, y aunque el resultado es un poco caótico es creativo y aquí estará el paso a paso.
Hi friends, today I bring a makeup with the draping technique inspired by the rainbow, is my first time trying this technique and had its shortcomings but I'm excited that you see the process and know that I had fun, and although the result is a bit chaotic is creative and here will be the step by step.
Te explico como lo hacemos ♡
I'll explain how we do it ♡
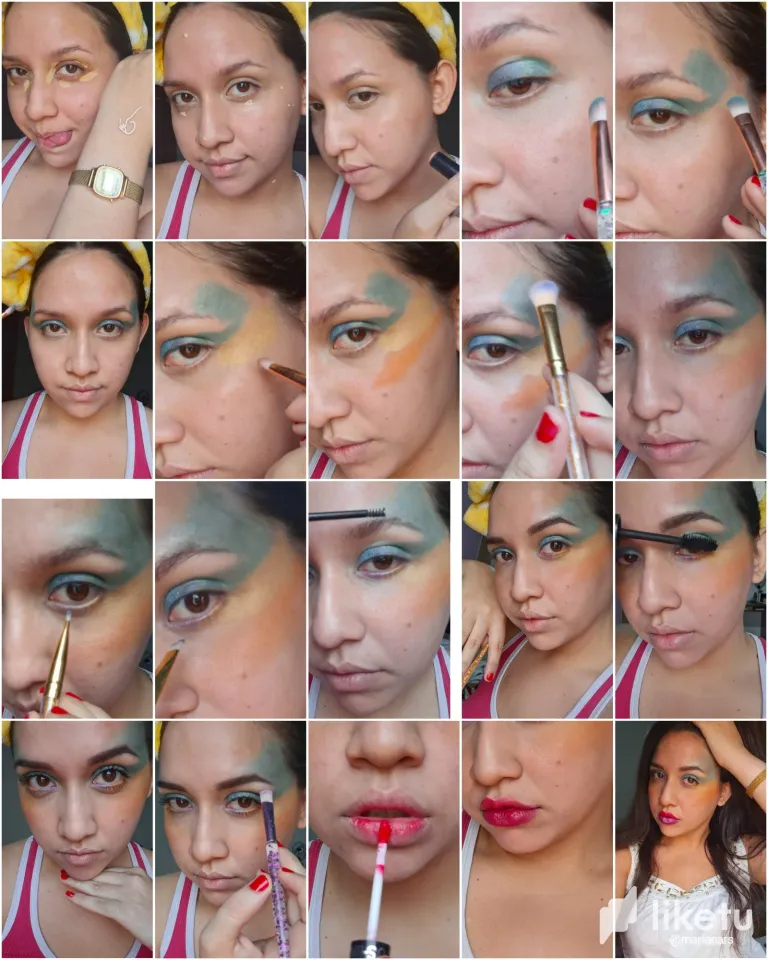
- Como de costumbre aplicamos corrector y base a toquesitos por el rostro, difuminamos y continuamos colocando un poco de contorno nude sobre la línea de cabello y bajo los pómulos.
- As usual, apply concealer and foundation in small touches on the face, blend and continue with a little nude contouring on the hairline and under the cheekbones.
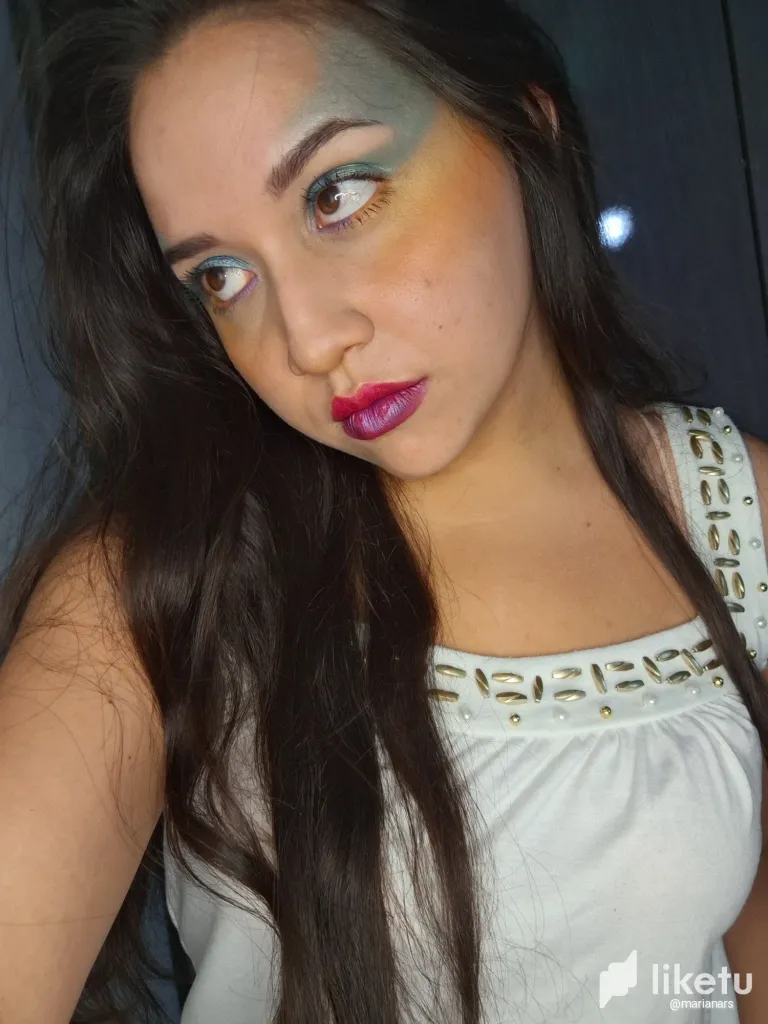
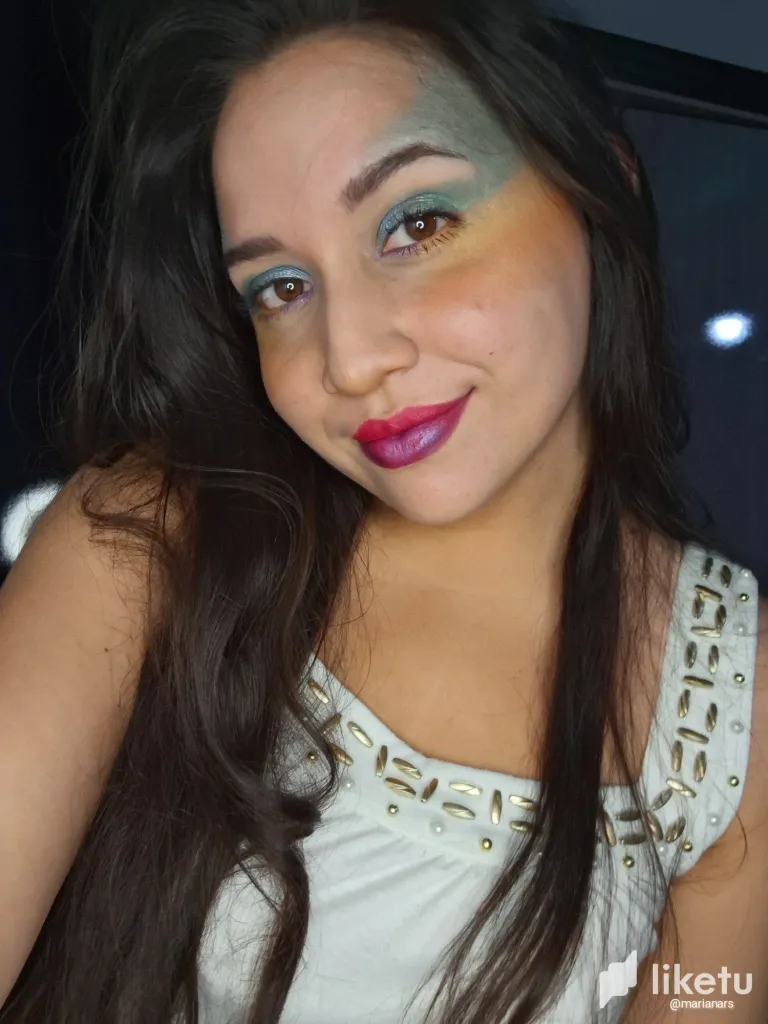
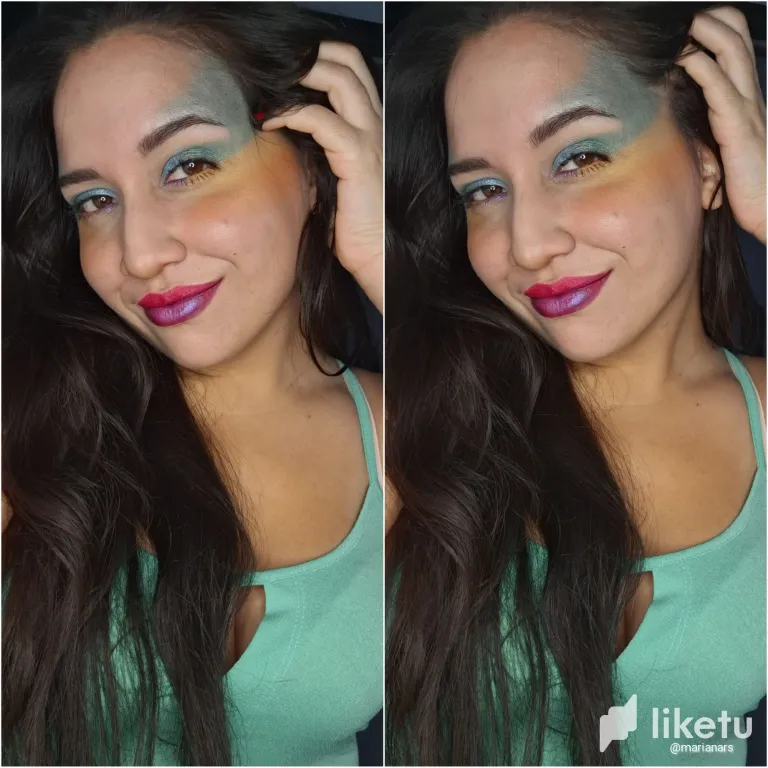
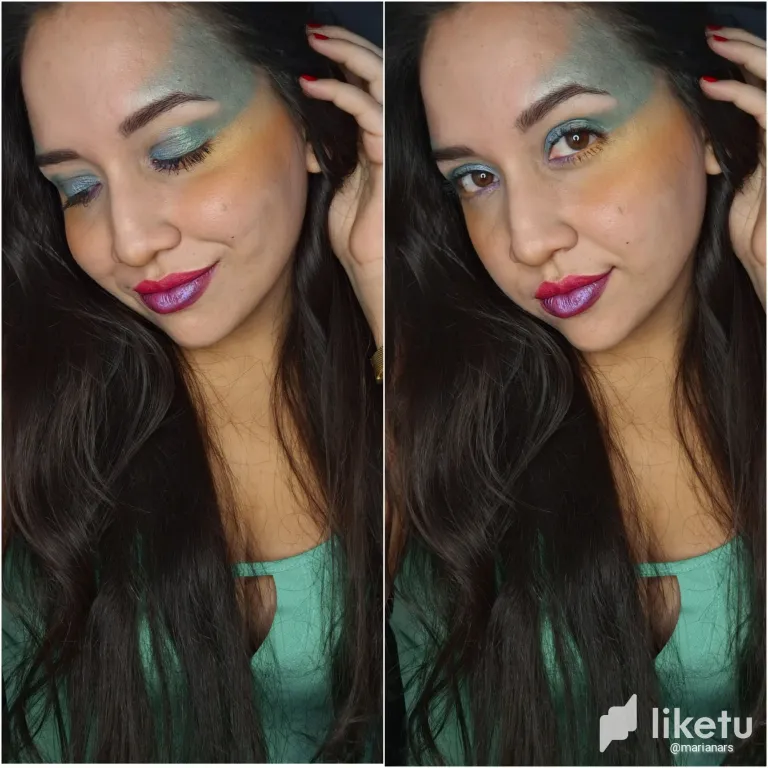
- Con una brocha plana distribuimos as sombras primero en los párpados agregamos verde al final del mismo y azul al principio, con el verde hacemos una forma ascendente hasta la sien procurando abarcar parte del párpado fijo pero no del todo, bajo el verde de la sien agregamos sombra amarilla ( en mi caso esta casi no pigmentó T.T) bajo esta sombra amarilla aplicamos sombra naranja hasta la mejilla, y sobre el verde de la sien aplicamos el azul, con una brocha para difuminar compactamos los colores y difuminamos, tratamos de juntar los colores (tuve problemas con el verde T.T) con una brocha pequeña de delineado hacemos una línea amarilla en la línea de agua hasta la mitad y el resto que va hacia el lagrimal lo hacemos de color morado, agregamos un poco de sombra del color de nuestra piel sobre el espacio vacío entre la ceja y la cuenca, aplicamos máscara de pestañas, definimos la cejas con cepillo y sombra oscurita.
- With a flat brush we distribute the shadows first on the eyelids we add green at the end of it and blue at the beginning, with the green we make an ascending form up to the temple trying to cover part of the fixed eyelid but not all of it, under the green of the temple we add yellow shadow (in my case this almost did not pigment T.T) under this yellow shadow we apply orange shadow up to the cheek, and on the green of the temple we apply blue, with a blending brush we compact the colors and blend, we try to join the colors (I had problems with the green T.T) with a small eyeliner brush we make a yellow line in the water line until the middle and the rest that goes to the tear trough we do it in purple, we add a bit of shadow of our skin color on the empty space between the eyebrow and the eye socket, we apply mascara, and we define the eyebrows with a brush and dark shadow.
- Para completar la imagen aplicamos un labial en tono del color púrpura en el labio inferior y en el labio superior difuminamos un color rojizo.
- To complete the image we apply a purple lipstick on the lower lip and on the upper lip we blend a reddish color.
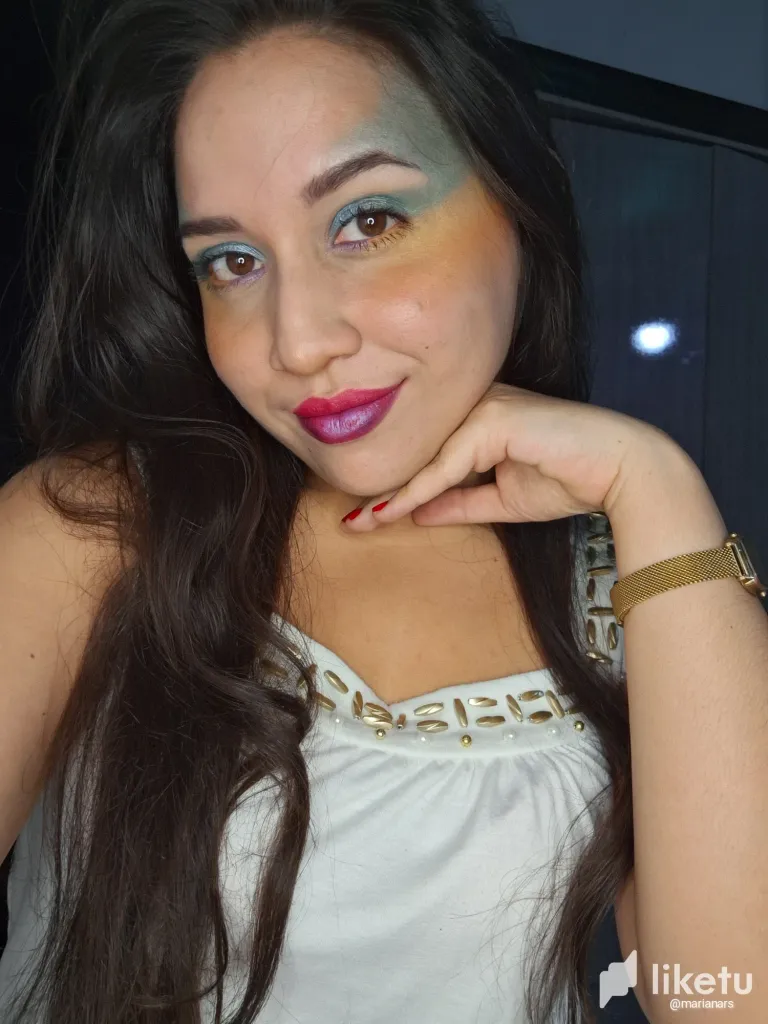
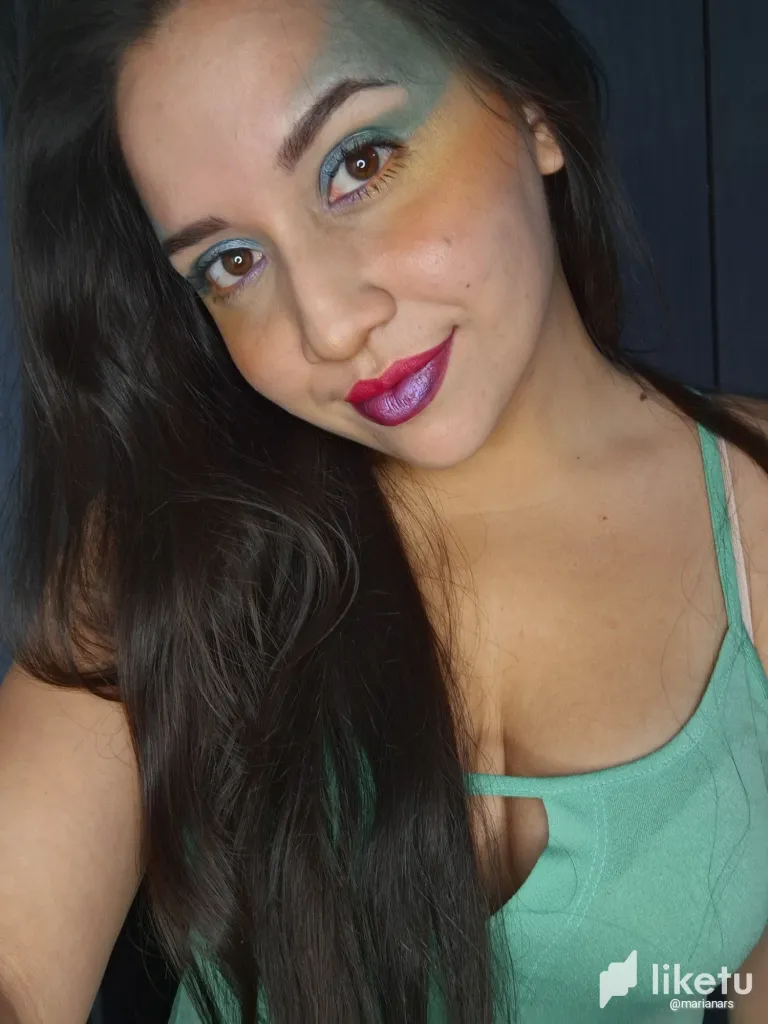
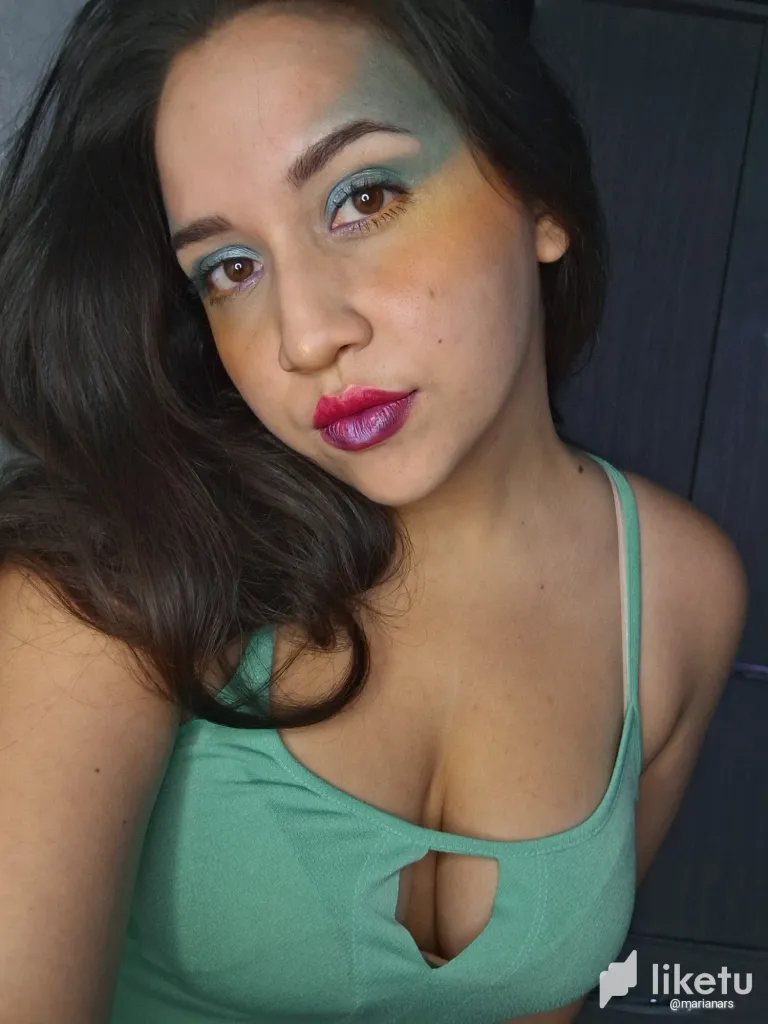
Y así la imagen está completa, me gustó porque es algo diferente, debo mejorar mi técnica y usar colores más vivos pero es un buen comienzo, me encanta improvisar y lo volvería hacer con pigmentos.
And so the image is complete, I liked it because it is something different, I must improve my technique and use more vivid colors but it is a good start, I love to improvise and I would do it again with pigments.
.
.
.
• Photos taken of a galaxy a54.
• Traductor/translator: DeepL.
• Collage Editor: Polish.

For the best experience view this post on Liketu
!LOL
Posted using Hive Images
lolztoken.com
To prove he wasn’t a chicken.
Credit: marshmellowman
@marianars, I sent you an $LOLZ on behalf of hivephoto
(6/10)
Looks so lovely 😍😍
Aaaaw thanks ♡
Welcome