[ESP - ENG] Angel and demon makeup! 😈
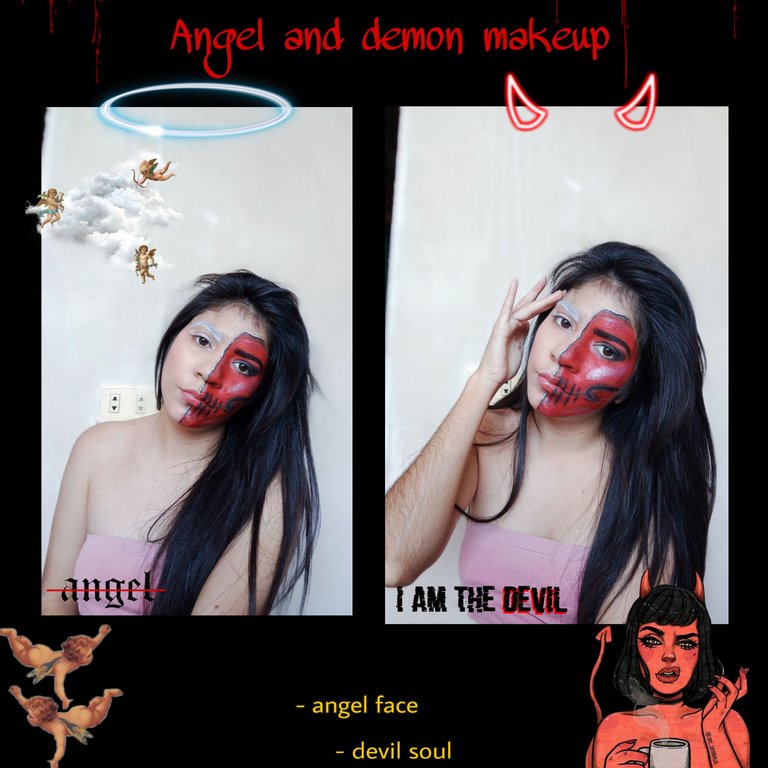
¡Hola hola amores de Hive! Hoy es otro día y quería continuar haciendo maquillajes, así que acá estoy con uno del bien y el "mal" si, quise hacer un maquillaje de angel y demonio, estaba muy entusiasmada y aunque tuve algunas complicaciones (se me fue la luz en el proceso) logré terminarlo, así que comencemos.
Hello hello Hive lovers! Today is another day and I wanted to continue doing makeovers, so here I am with one of good and "evil" yes, I wanted to do an angel and demon makeover, I was very excited and although I had some complications (my power went out in the process) I managed to finish it, so let's start.
Materiales / Materials:
- Tónico facial / Facial tonic.
- Jabón facial neutro / Neutral facial soap.
- Primer / Primer.
- Crema hidratante / Moisturizing cream.
- Protector solar / Sunscreen.
- Paleta de Sombras / Shadow Palette.
- Delineador / Eyeliner.
- Pintura roja / Red paint.
- Base / Foundation.
- Beauty blender / Beauty blender.
- Polvo suelto / Loose powder.
- Rubor / Blush.
- Iluminador / highlighter.
- Pinceles / Brushes
Procedimiento / Procedure:
ESPAÑOL
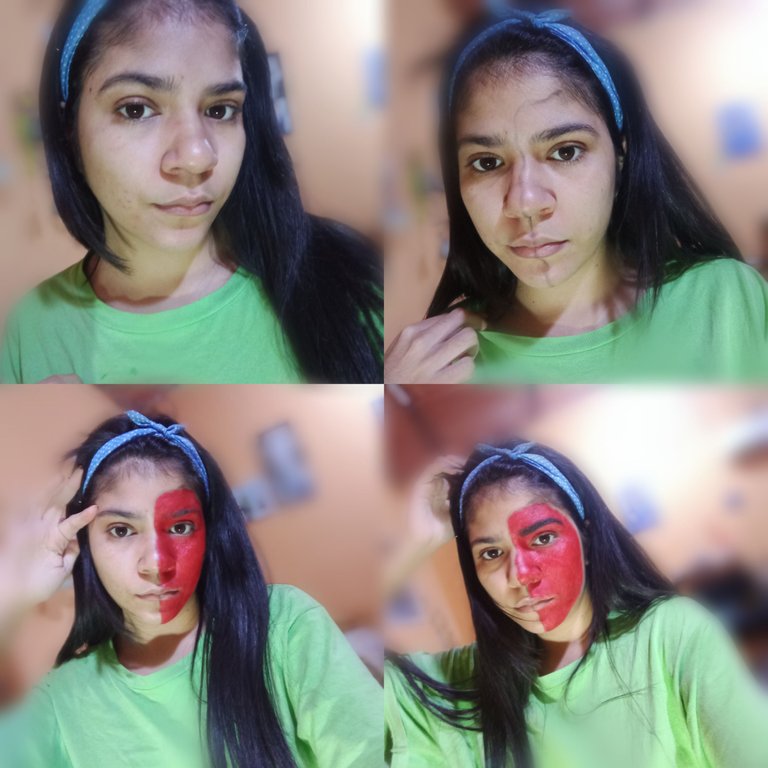
Paso 1:
Antes de comenzar el maquillaje, preparo mi rostro para proteger mi cutis de tanto maquillaje, es por eso que primero lo limpio con tónico facial, para luego lavarlo con jabón facial neutro, luego aplicó primer, crema hidratante y protector solar.
Paso 2:
Para comenzar a maquillarme, he tomado sombra negra y una brocha plana y he dividido mi rostro con una línea, para así saber cuál parte sería la de demonio y cuál la del angel.
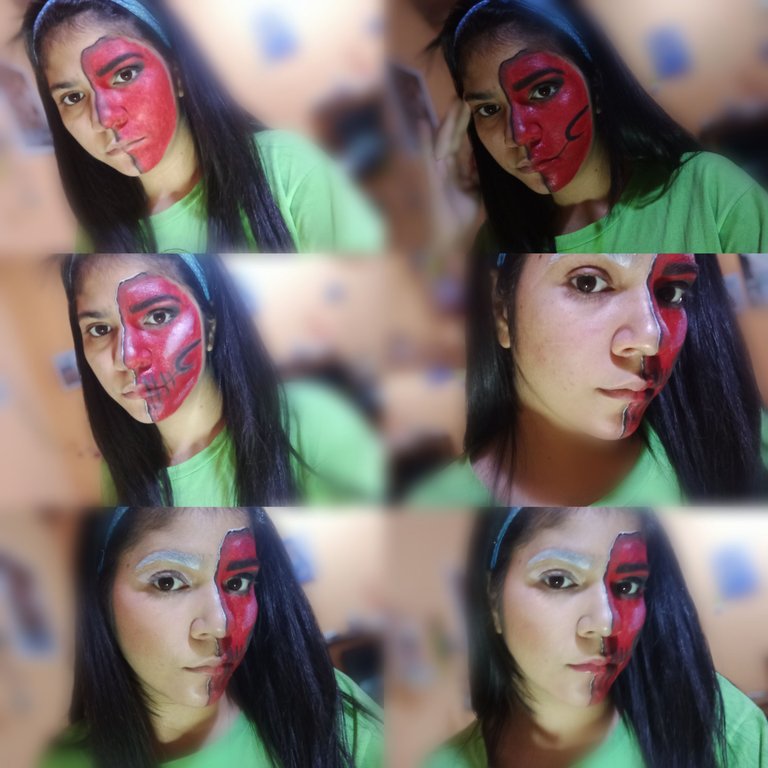
Comencé a aplicar la pintura roja en mi rostro poco a poco con un pincel, luego de rellenarlo todo, tome un pincel delgado y pomada, delinee mi ceja y la rellene, la hice más oscura para que así resaltara el color y combinará más con el rojo, luego tome mi delineador liquido y remarque la línea que dividía mi rostro.
ENGLISH
Step 1:
Before starting the makeup, I prepare my face to protect my complexion from so much makeup, that's why I first clean it with facial toner, then wash it with neutral facial soap, then I applied primer, moisturizer and sunscreen.
Step 2:
To start my makeup, I took black shadow and a flat brush and divided my face with a line, so I know which part would be the demon part and which part would be the angel part.
I started to apply the red paint on my face little by little with a brush, after filling it all in, I took a thin brush and pomade, I outlined my eyebrow and filled it in, I made it darker so that it would highlight the color and combine more with the red, then I took my liquid eyeliner and highlighted the line that divided my face.
Paso 3:
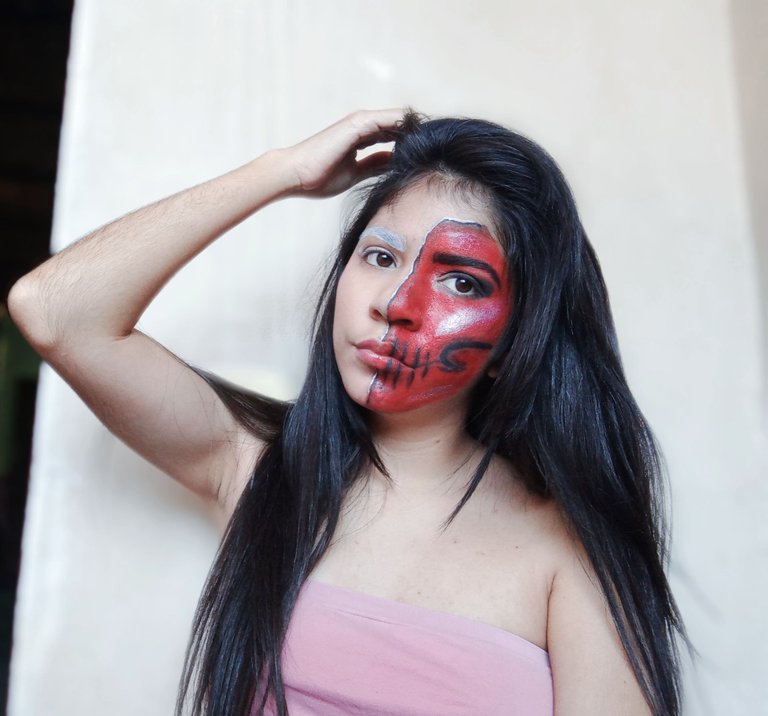
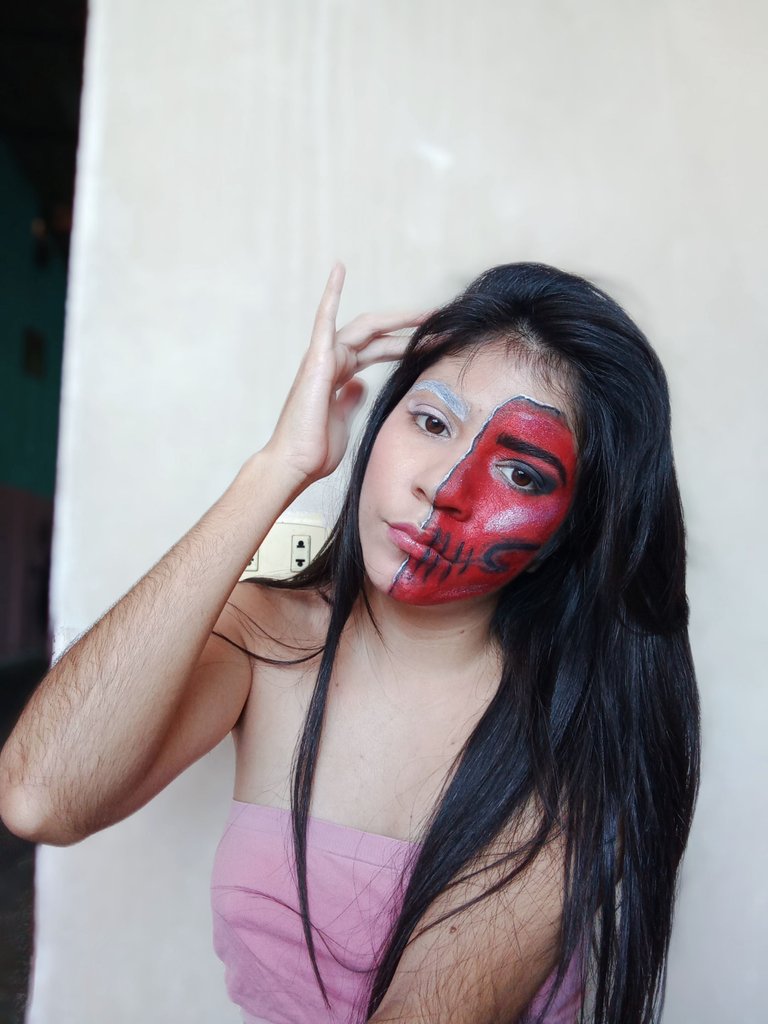
Aplique sombra negra en mi ojo, en la parte superior e inferior en pequeños círculos, luego difumine las orillas del maquillaje, tome el delineador y recree los vacíos de una calavera, pero solo pocos, agregue líneas en la mitad del labio y difumine con sombra negra.
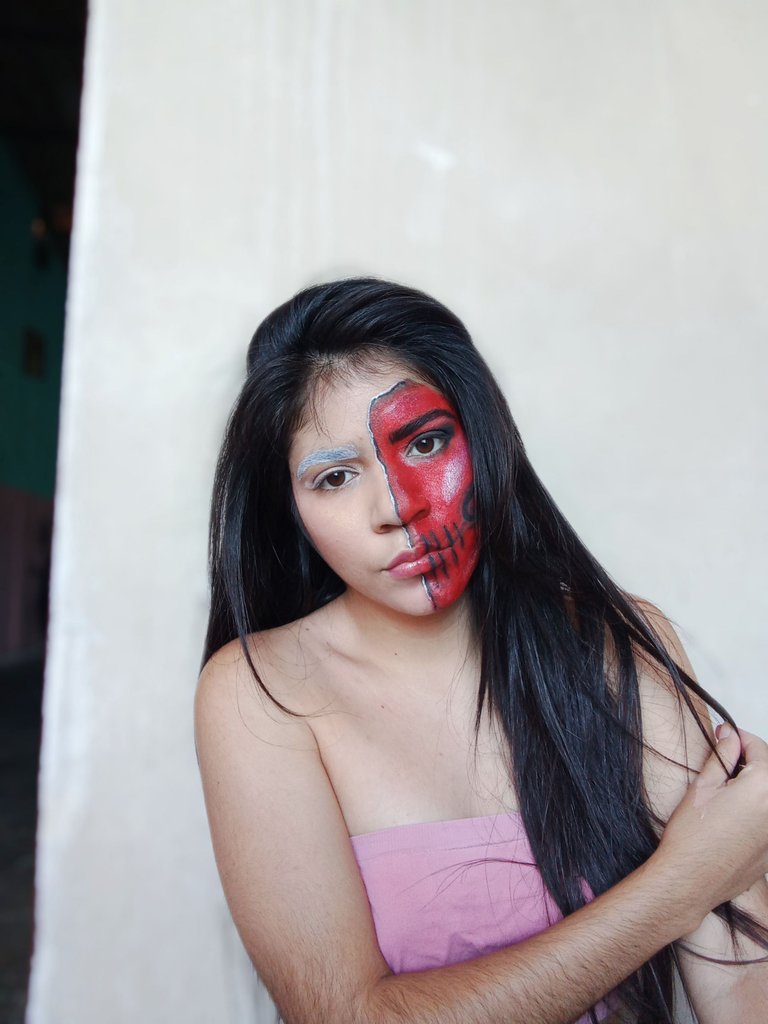
Luego de esto tome mi Beauty blender y comencé a presionar en el maquillaje con un poco de pintura como salpicaduras, esto para agregar textura al maquillaje.
Luego agregue sombra blanca en algunos puntos (como el pómulo) para resaltar e iluminar esa zona.
Paso 4:
En la otra parte de mi rostro, delinee y pinte mi ceja con pintura blanca, luego coloque una cinta adhesiva en la parte final de mi ojo y agregue sombra blanca y un poco de dorada.
Retire la cinta y agregue pequeños puntos de base y lo exparci con mi beauty blender, lo sellé con polvo suelto y agregue contorno en mis pomulos.
Luego de esto agregue rubor e iluminador en mi pómulo, coloque brillo labial en la mitad de mis labios y ¡Listo! Maquillaje terminado.
Step 3:
Apply black shadow on my eye, on the top and bottom in small circles, then blend the edges of the makeup, take the eyeliner and recreate the gaps of a skull, but only few, add lines in the middle of the lip and blend with black shadow.
After this I took my Beauty blender and started to press on the makeup with a little bit of paint as splashes, this to add texture to the makeup.
Then add white shadow in some spots (such as the cheekbone) to highlight and illuminate that area.
Step 4:
On the other part of my face, I lined and painted my eyebrow with white paint, then placed tape on the end of my eye and added white shadow and a little gold.
I removed the tape and added small dots of foundation and spread it with my beauty blender, sealed it with loose powder and added contour on my cheeks.
After that I added blush and highlighter on my cheekbone, put lip gloss on the middle of my lips and that's it! Makeup finished.
El resultado / The result:
¡Muchas gracias por leer mi post! Se supone que este maquillaje lo iba a hacer antes pero no tenía muchos ánimos, sin embargo acá estoy y aunque tuve problemas logré terminarlo y eso me alegra mucho ¡Nos leemos pronto! XOXO.
Thank you so much for reading my post! I was supposed to do this makeup before but I didn't have much encouragement, however here I am and although I had problems I managed to finish it and that makes me very happy. See you soon! XOXO.
Cover created in: PicsArt.
Text translated with: DeepL.
All photos of the procedure and results belong to me.