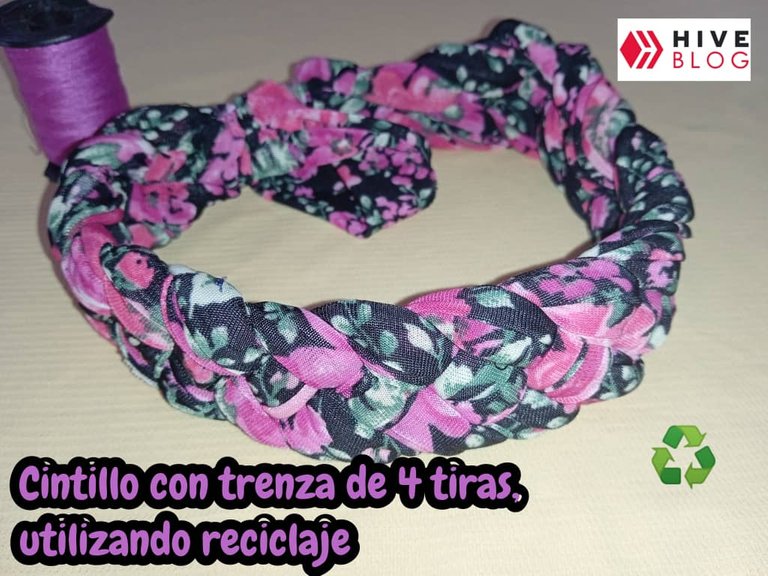
[ESP-ENG] Diy: Les muestro como realice, Cintillo con trenza de 4 tiras, utilizando reciclaje 🎽 ♻️/Diy: I show you how to make a 4-strip braid headband, using recycling 🎽 ♻️
Hola, como la están pasando amigos de la comunidad de Hive diy? Yo muy contenta y bendecida por compartir con todos ustedes, en esta oportunidad les mostraré como realice un hermoso cintillo, con trenza de 4 hilos, reutilizando una franela, la cual ya no usaba, la tela es elástica, por lo cual se amolda mejor a cintillo y el estampado también es muy bonito, verán lo fácil que se hace.
Hello, how are friends of the Hive diy community doing? I am very happy and blessed to share with all of you, this time I will show you how I made a beautiful headband, with a 4-wire braid, reusing a flannel, which I no longer used, the fabric is elastic, so it adapts better to headband and print is also very pretty, you will see how easy it is done.
Cintillo con trenza de 4 tiras, utilizando reciclaje 🎽 ♻️
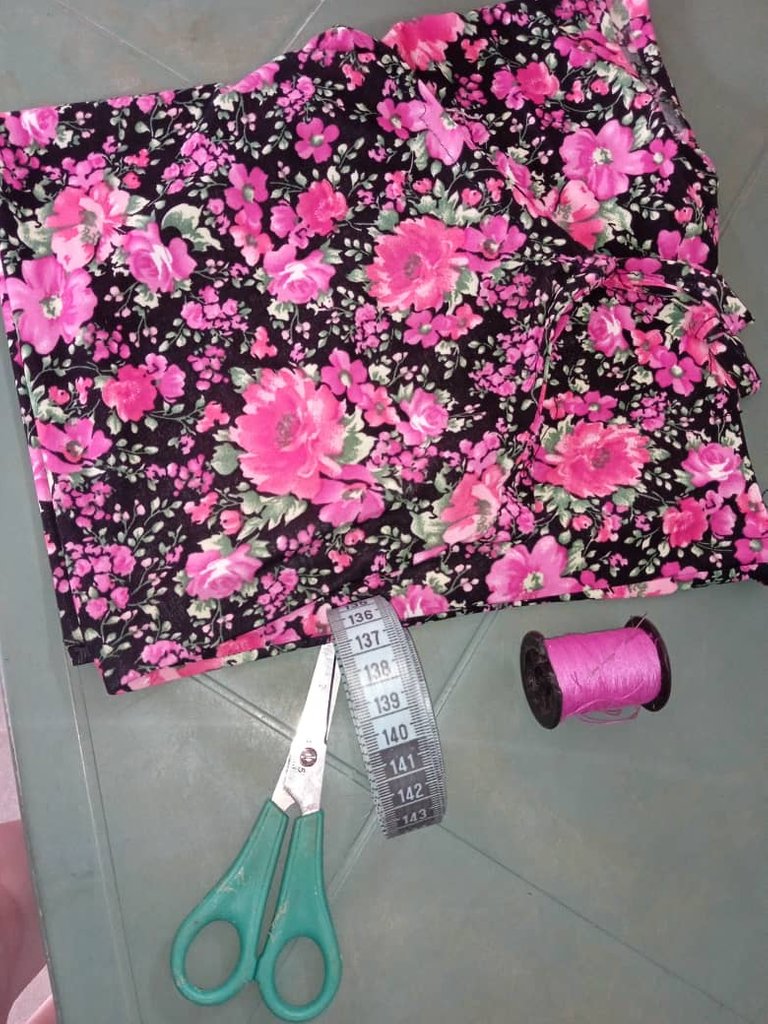
Materiales
1 franela estampada reciclada
Tijera
Hilo y aguja
Cinta metrica
Headband with 4-wire braid, using recycling 🎽 ♻️
Materials
1 recycled printed flannel
Scissors
needle and thread
Measuring tape
Procedimiento/Process
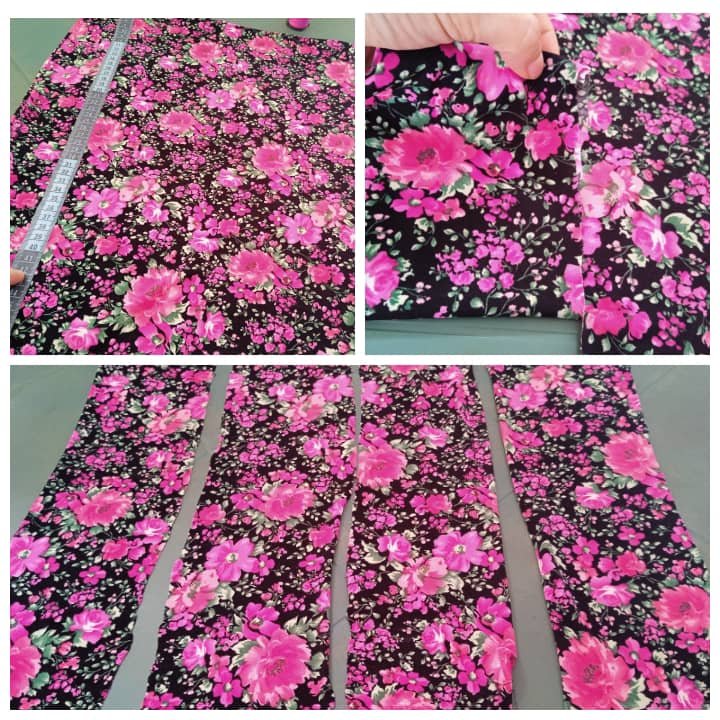
1.Para comenzar este proyecto, vamos a recortar 4 tiras de aproximadamente 50 cm x 6 cm.
1.To start this project, we are going to cut 4 strips of approximately 50 cm x 6 cm.
2.Luego doblamos cada tira por ambos lados, colocamos una encima de la otra y con aguja e hilo cosemos muy bien ese extremo.
2.Then we fold each strip on both sides, place one on top of the other and with a needle and thread we sew that end very well.

3.Despues separamos las 4 tiras y comenzamos el trenzado, con las 3 del lado derecho, hacemos una trenza normal y la 4 tira, la llevamos al centro , pero, por debajo y así sucesivamente, hasta culminar con las tiras.
3.Then we separate the 4 strips and begin the braiding, with the 3 on the right side, we make a normal braid and the 4th strip, we bring it to the center, but below, and so on, until we finish with the strips.

4.En este paso cosemos este otro extremo y así la trenza está lista.
4.In this step we sew this other end and thus the braid is ready.

5.Despues vamos a cortar otra tira de la tela de franela de 14 cm x 6 cm y cosemos a ambos extremos de la trenza, esto para darle la forma circular y por ende del cintillo y listo.
5.Then we are going to cut another 14 cm x 6 cm strip of flannel fabric and sew it to both ends of the braid, this to give it a circular shape and therefore the headband and that's it.

Cintillo listo!


Hasta aquí mi Proyecto de este día, espero les haya gustado, muchas gracias por el apoyo brindado. Saludos
So Project for this day, I hope you liked it, thank you very much for the support. Greetings
Todas las imágenes son de mi autoria por @mariarodriguez, tomadas especialmente para esta publicación.
All images are my own by @mariarodriguez, taken especially for this publication.

!discovery 30
!diy
This post was shared and voted inside the discord by the curators team of discovery-it
Join our Community and follow our Curation Trail
Discovery-it is also a Witness, vote for us here
Delegate to us for passive income. Check our 80% fee-back Program
Esta genial! Siempre es bueno reutilizar las cosas que ya no usamos para darles una segunda vida!
¡Felicidades! Esta publicación obtuvo upvote y fue compartido por @la-colmena, un proyecto de Curación Manual para la comunidad hispana de Hive que cuenta con el respaldo de @curie.
Si te gusta el trabajo que hacemos, te invitamos a darle tu voto a este comentario y a votar como testigo por La Colmena.
Si quieres saber más sobre nuestro proyecto, te invitamos a acompañarnos en nuestro servidor de Discord.