Diadema de corona para niña.

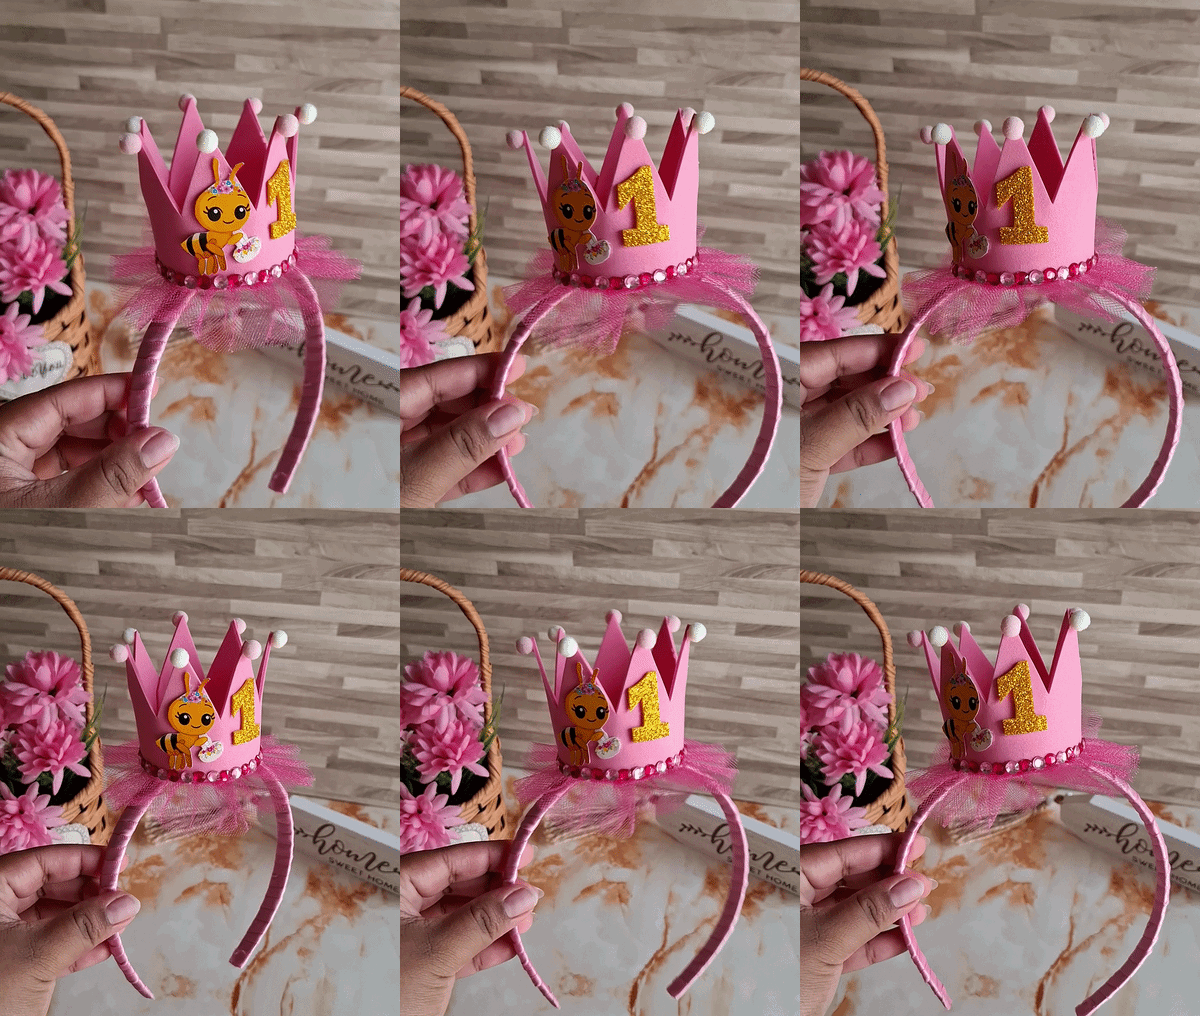
Saludos amigos de la comunidad HiveDiy, un gusto saludarles, hoy lunes comienzo de semana y ya casi final de mes, deseo que todos sus proyectos se cumplan y que sean días de bendiciones para todos, en esta oportunidad les quiero compartir la parte dos de la decoración para una niña de un año, anteriormente les mostré la guirnalda de borlas, ahora les muestro cómo hice la diadema de corona.
Greetings, friends of the HiveDiy community—it is a pleasure to say hello. As we start the week—and near the end of the month—I hope all your projects come to fruition and that these days bring blessings to everyone. Today, I want to share part two of the decorations for a one-year-old girl's celebration; I previously showed you the tassel garland, and now I’ll show you how I made the crown headband.

Está diadema de corona además se le agregó un dibujo de la abejita chiquitita, en Pinterest encontré varias ideas así que de todas la clienta eligió una que llevara tull y la corona en foami, la verdad esta idea es perfecta para realizar en casa para nuestras pequeñas ya sea un familiar, amigo y hasta para vender, a continuación les mostraré el paso a paso, espero les guste.
For this crown headband, I also added a design of a tiny little bee; I found several ideas on Pinterest, and the client chose one featuring tulle and a foam crown. Honestly, this is a perfect project to make at home for the little ones in your life—whether for family, friends, or even to sell. Below, I’ll show you the step-by-step process; I hope you like it.

| Materiales | Materials |
|---|---|
| Foami rosa, dorado | Pink foami, golden |
| Tull fucsia, tijera | Tull fuchsia, scissors |
| Silicona, pegatinas | Silicone, stickers |
| Cinta rosa, cintillo plástico | Pink ribbon, plastic belt |
| Pompones | Pompoms |
Paso a paso / Step by step
El primer paso que vamos a realizar será seleccionar el color de la cinta a utilizar en este caso será de color rosado, comencé a cubrir el cintilo aplicando silicon y dando vueltas hasta cubrir todo por completo. Utilicé un cintillo plástico pero también puedes usar solo cinta.
The first step we are going to take will be to select the color of the tape to use in this case it will be pink, I began to cover the belt by applying silicone and turning around until it covers everything completely. I used a plastic belt but you can also use only tape.
 |  |  |
|---|
Ahora vamos a realizar la forma de la corona en foami, la forma tiene siente puntas cortamos y unimos, realice el número uno en color dorado y pegamos en el centro. Para continuar con nuestra decoración vamos a seleccionar el tull, será de color fucsia.
Now we are going to make the shape of the crown in foami, the shape has felt tips we cut and join, make the number one in golden color and glue in the center. To continue with our decoration we are going to select the tull, it will be fuchsia color.
 |  |
|---|
 |  |
|---|
Vamos a cortar una franja de 48 x 8 cm, doblamos en la mitad y en el borde vamos a pasar hilo con una aguja, vamos a formar una especie de círculo y unimos en los extremos, en la parte inferior vamos a cortar un círculo de foami y pegamos de un lado, y del otro lado pegamos un círculo de fieltro rosado.
We are going to cut a strip of 48 x 8 cm, we fold in half and on the edge we are going to pass thread with a needle, we are going to form a kind of circle and join at the ends, at the bottom we are going to cut a circle of foami and glue on one side, and on the other side we stick a circle of pink felt.
 |  |
|---|
 |  |
|---|
Del lado donde nos queda el círculo de foami pegamos la corona, para cubrir el borde colocamos las pegatinas brillantes de color fucsia y rosa, también vamos a pegar pompones en las puntas de la corona, ten en cuenta que estos deben ser pequeños.
On the side where we have the foam circle we glue the crown, to cover the edge we place the shiny fuchsia and pink stickers, we are also going to stick pompoms on the tips of the crown, keep in mind that these must be small.
 |  |
|---|
Por último pegamos la abejita justo al lado del uno, ahora unimos al cintillo aplicando silicon caliente, y listo, de esta forma termine la diadema para niña, espero les pueda ser útil este tutorial para los días de cumpleaños, muchas gracias por el apoyo y por visitar mi publicación, nos vemos en una próxima oportunidad con más ideas creativas.
Finally we glued the bee right next to the one, now we join the belt applying hot silicone, and that's it, in this way finish the headband for girl, I hope this tutorial can be useful for birthdays, thank you very much for the support and for visiting my publication, see you in a next opportunity with more creative ideas.
 |  |
|---|
Más del resultado final:
More of the final result:

Contenido original. - original content.
Los separadores y banner fueron realizados en Canva. - The dividers and banner were made in Canva.
Fotografías tomadas con mi Samsung A55. - Photographs taken with my Samsung A55.
Gif creado desde Giphy / Gif created from Giphy
Traducción de: Google traductor - Translation of: Google translator.
Posted Using INLEO
You've been curated by @amazingdrinks! Delegations welcome!
Posted via HiveSuite
You've been curated by @plantpoweronhive! Delegations welcome!
@marile21 el detalle de la abejita está demasiado bella y delicada. Un trabajo impecable, ¡gracias por compartir el paso a paso! 👏✨