ESP | ENG Una linda pulsera elaborada con cristales transparentes 💎 / A beautiful bracelet made with transparent crystals 💎

Muy feliz viernes amigos creativos y para todos los miembros de la comunidad Jewelry, ya entrando al fin de semana espero hayan tenido días de mucho éxito y bendiciones, nuevamente por acá encantada de compartir con ustedes mis creaciones, en esta ocasión será una pulsera y espero sean de su agrado.
Very happy Friday creative friends and to all the members of the Jewelry community, as we enter the weekend I hope you have had very successful and blessed days, here again I am delighted to share with you my creations, this time it will be a bracelet. and I hope you like them.
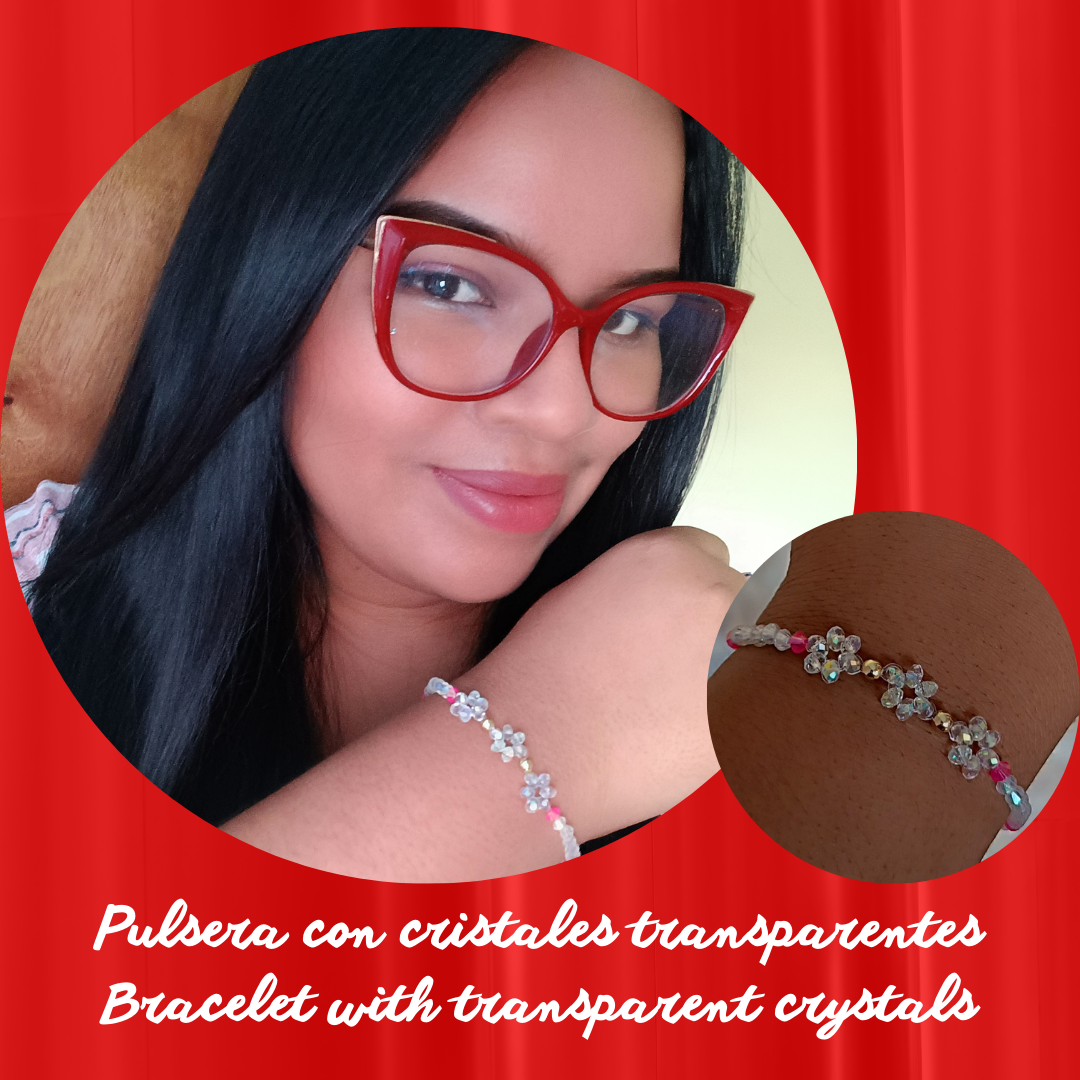
Hoy decidí compartir una pulsera que elaboré con cristales transparentes, cabe destacar que es una pulsera que considero utilizar en una ocasión especial con alguna prenda de color blanco 🤍 es sencilla de elaborar y queda muy linda al lucir. Pienso que este modelo le da un toque especial a nuestro outfit, a continuación les voy a mostrar el paso a paso y los materiales que utilicé.
Today I decided to share with you a bracelet that I made with clear crystals. It should be noted that it is a bracelet that I consider wearing on a special occasion with a white garment. It is easy to make and looks very pretty when worn. I think this model gives a special touch to our outfit, below I am going to show you step by step and the materials I used.
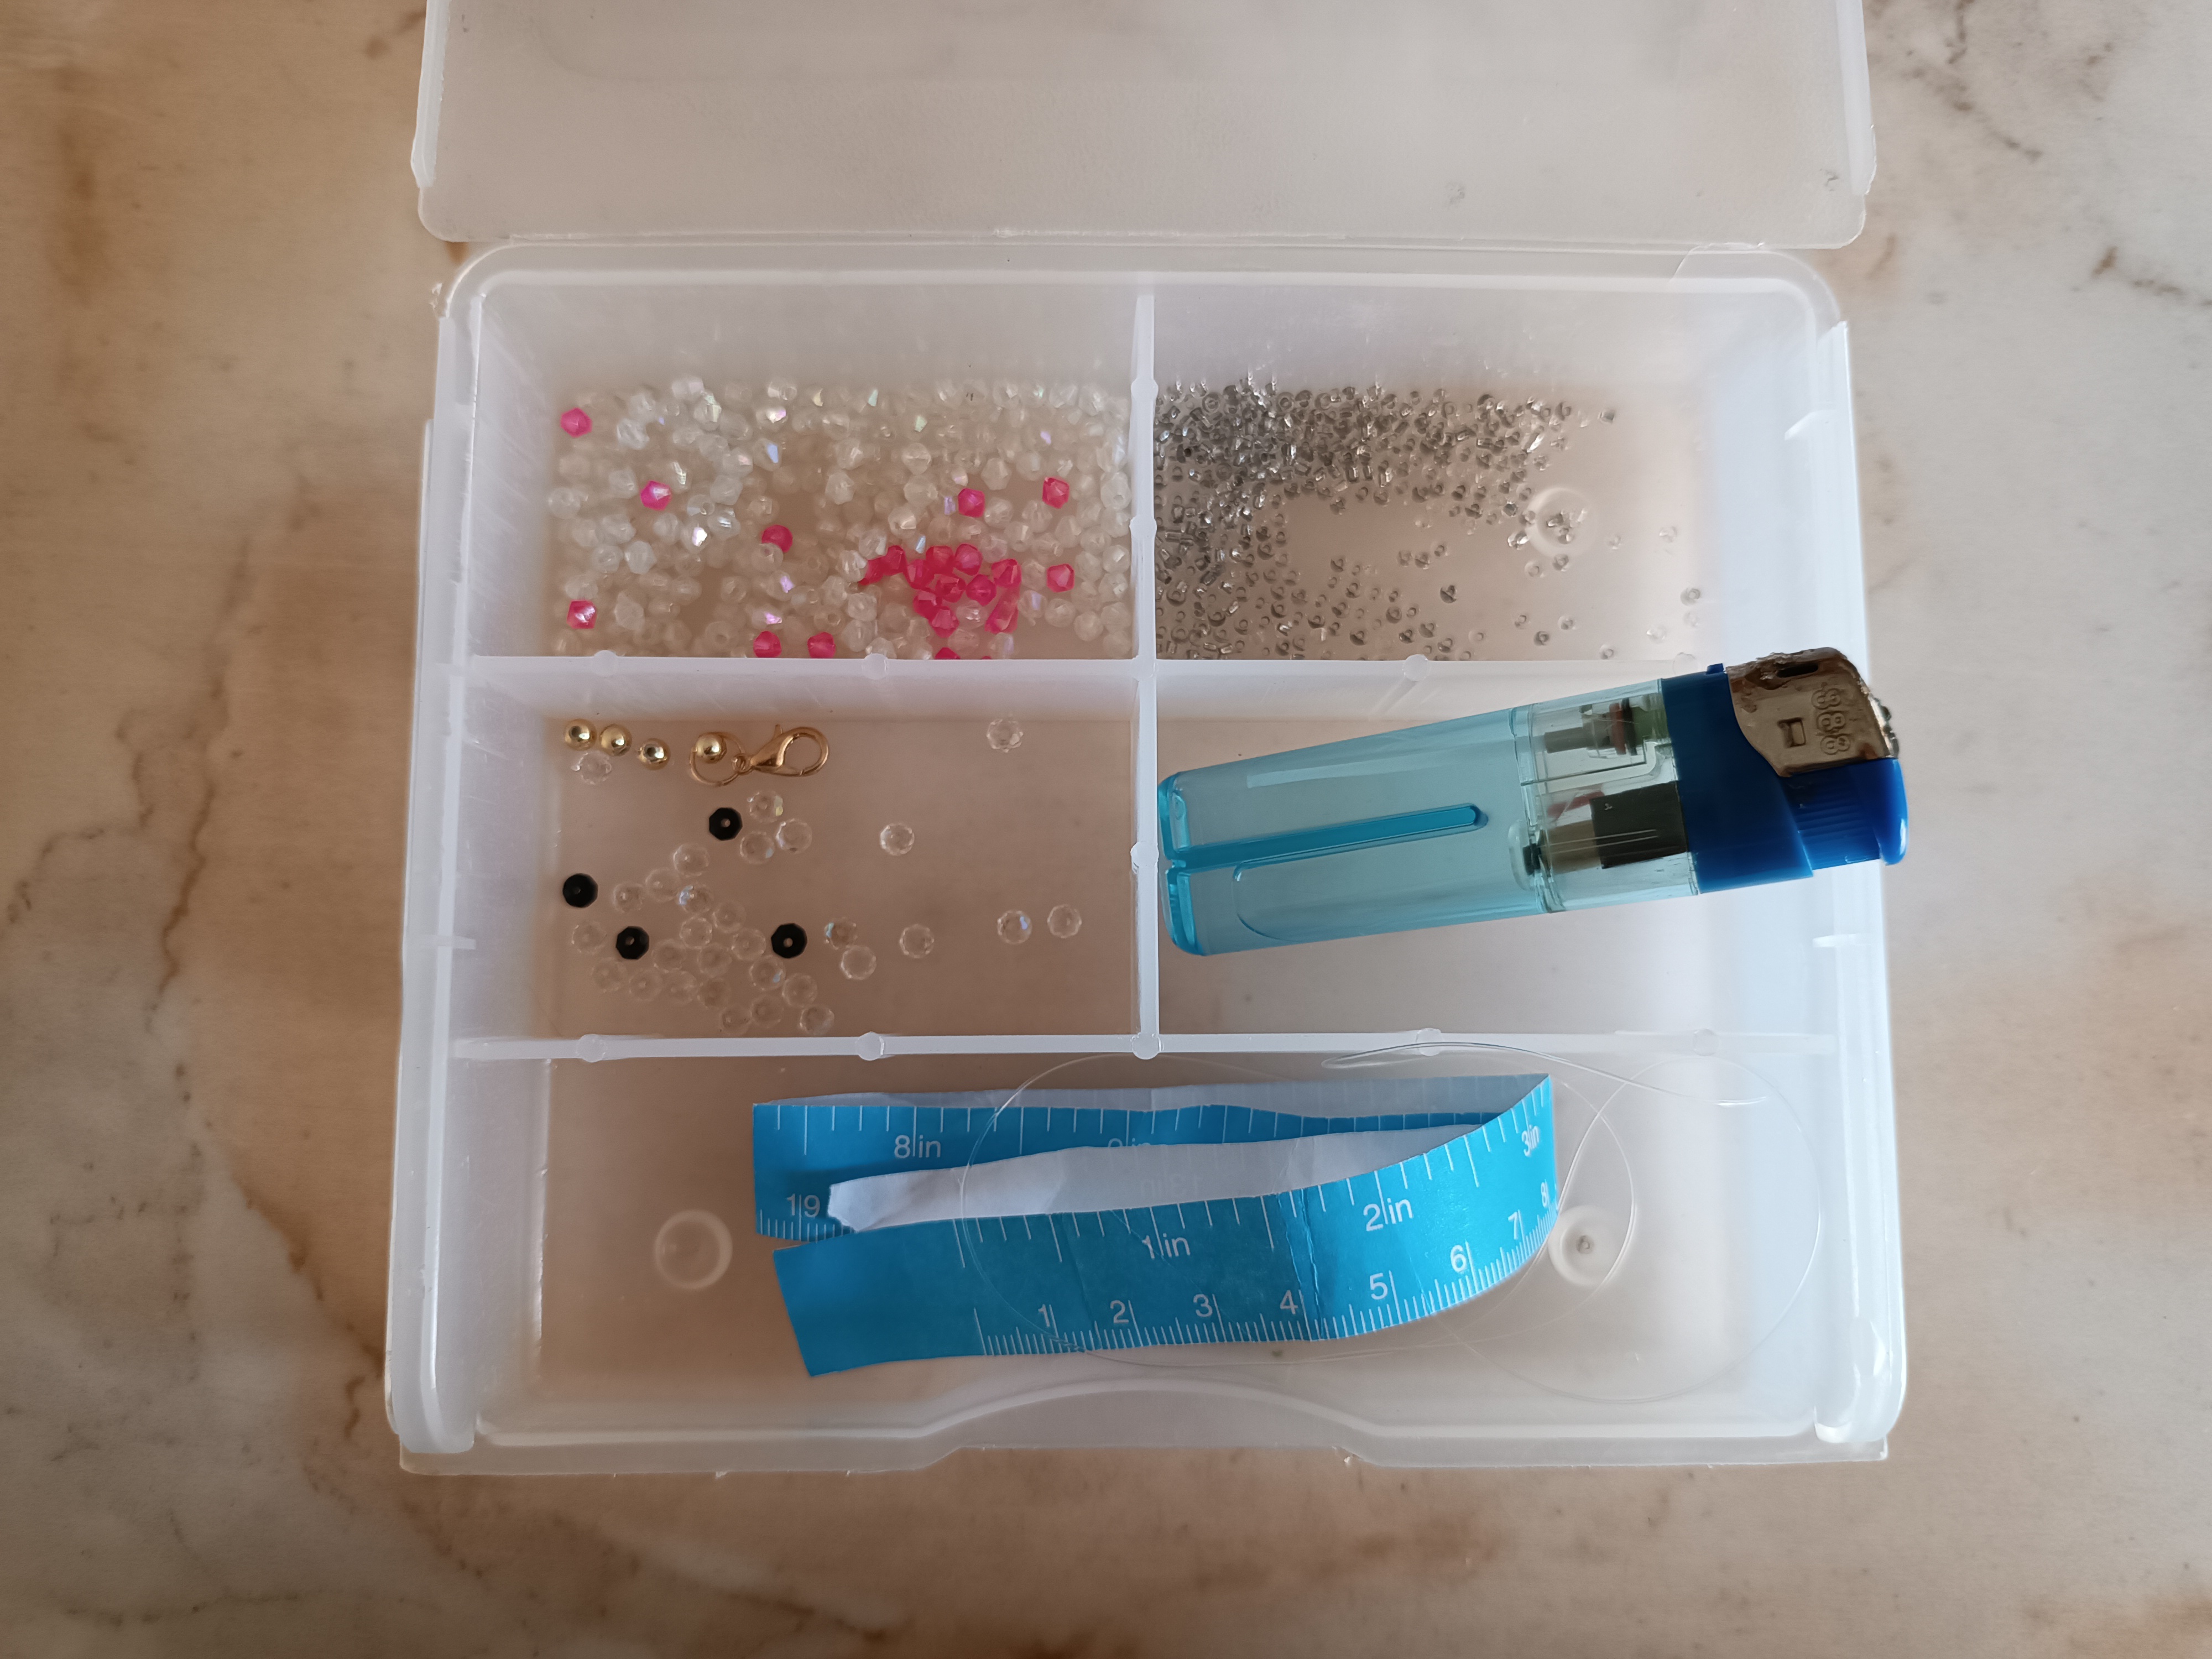
Materiales:
✅28 cristales transparentes.
✅5 Cristales color fucsia.
✅18 cristales checos.
✅1 Broche.
✅1 Argolla.
✅1 Tapa nudo.
✅2 balines dorados.
✅Tijera.
✅Encendedor.
✅Cinta métrica.
✅Pinza punta plana y redonda.
✅22 cm de goma elástica para bisutería.
Materials:
28 transparent crystals.
5 fuchsia crystals.
18 Czech crystals.
1 Brooch.
1 ring.
1 knot cover.
2 golden balls.
Scissors.
Lighter.
Measuring tape.
Flat and round nose tweezers.
22 cm of elastic band for jewelry.
Paso a paso / Step by Step
Lo primero que realicé fue tomar la goma elástica y la coloqué doble corté a una medida de 22 cm, luego coloqué el broche en medio del la goma, tomé un cristal transparente e introducimos en la punta derecha y la punta izquierda la pasé a través del cristal luego lo llevamos junto al broche bien ajustado.
The first thing I did was take the elastic band and placed it in a double cut at a measurement of 22 cm, then I placed the brooch in the middle of the band, I took a transparent crystal and inserted it through the right end and passed through the left end. We finish through the glass and then take it along with the clasp tightly.
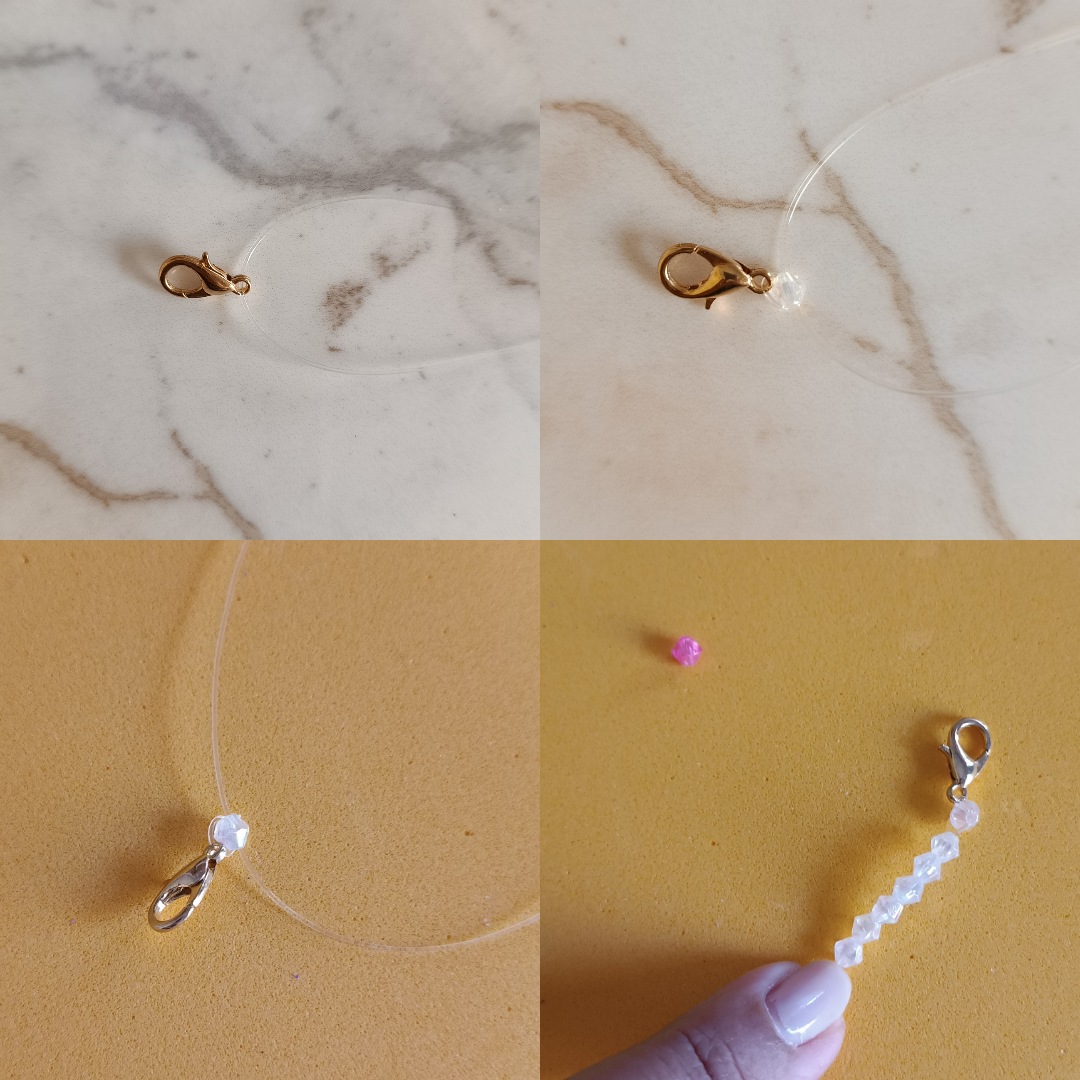

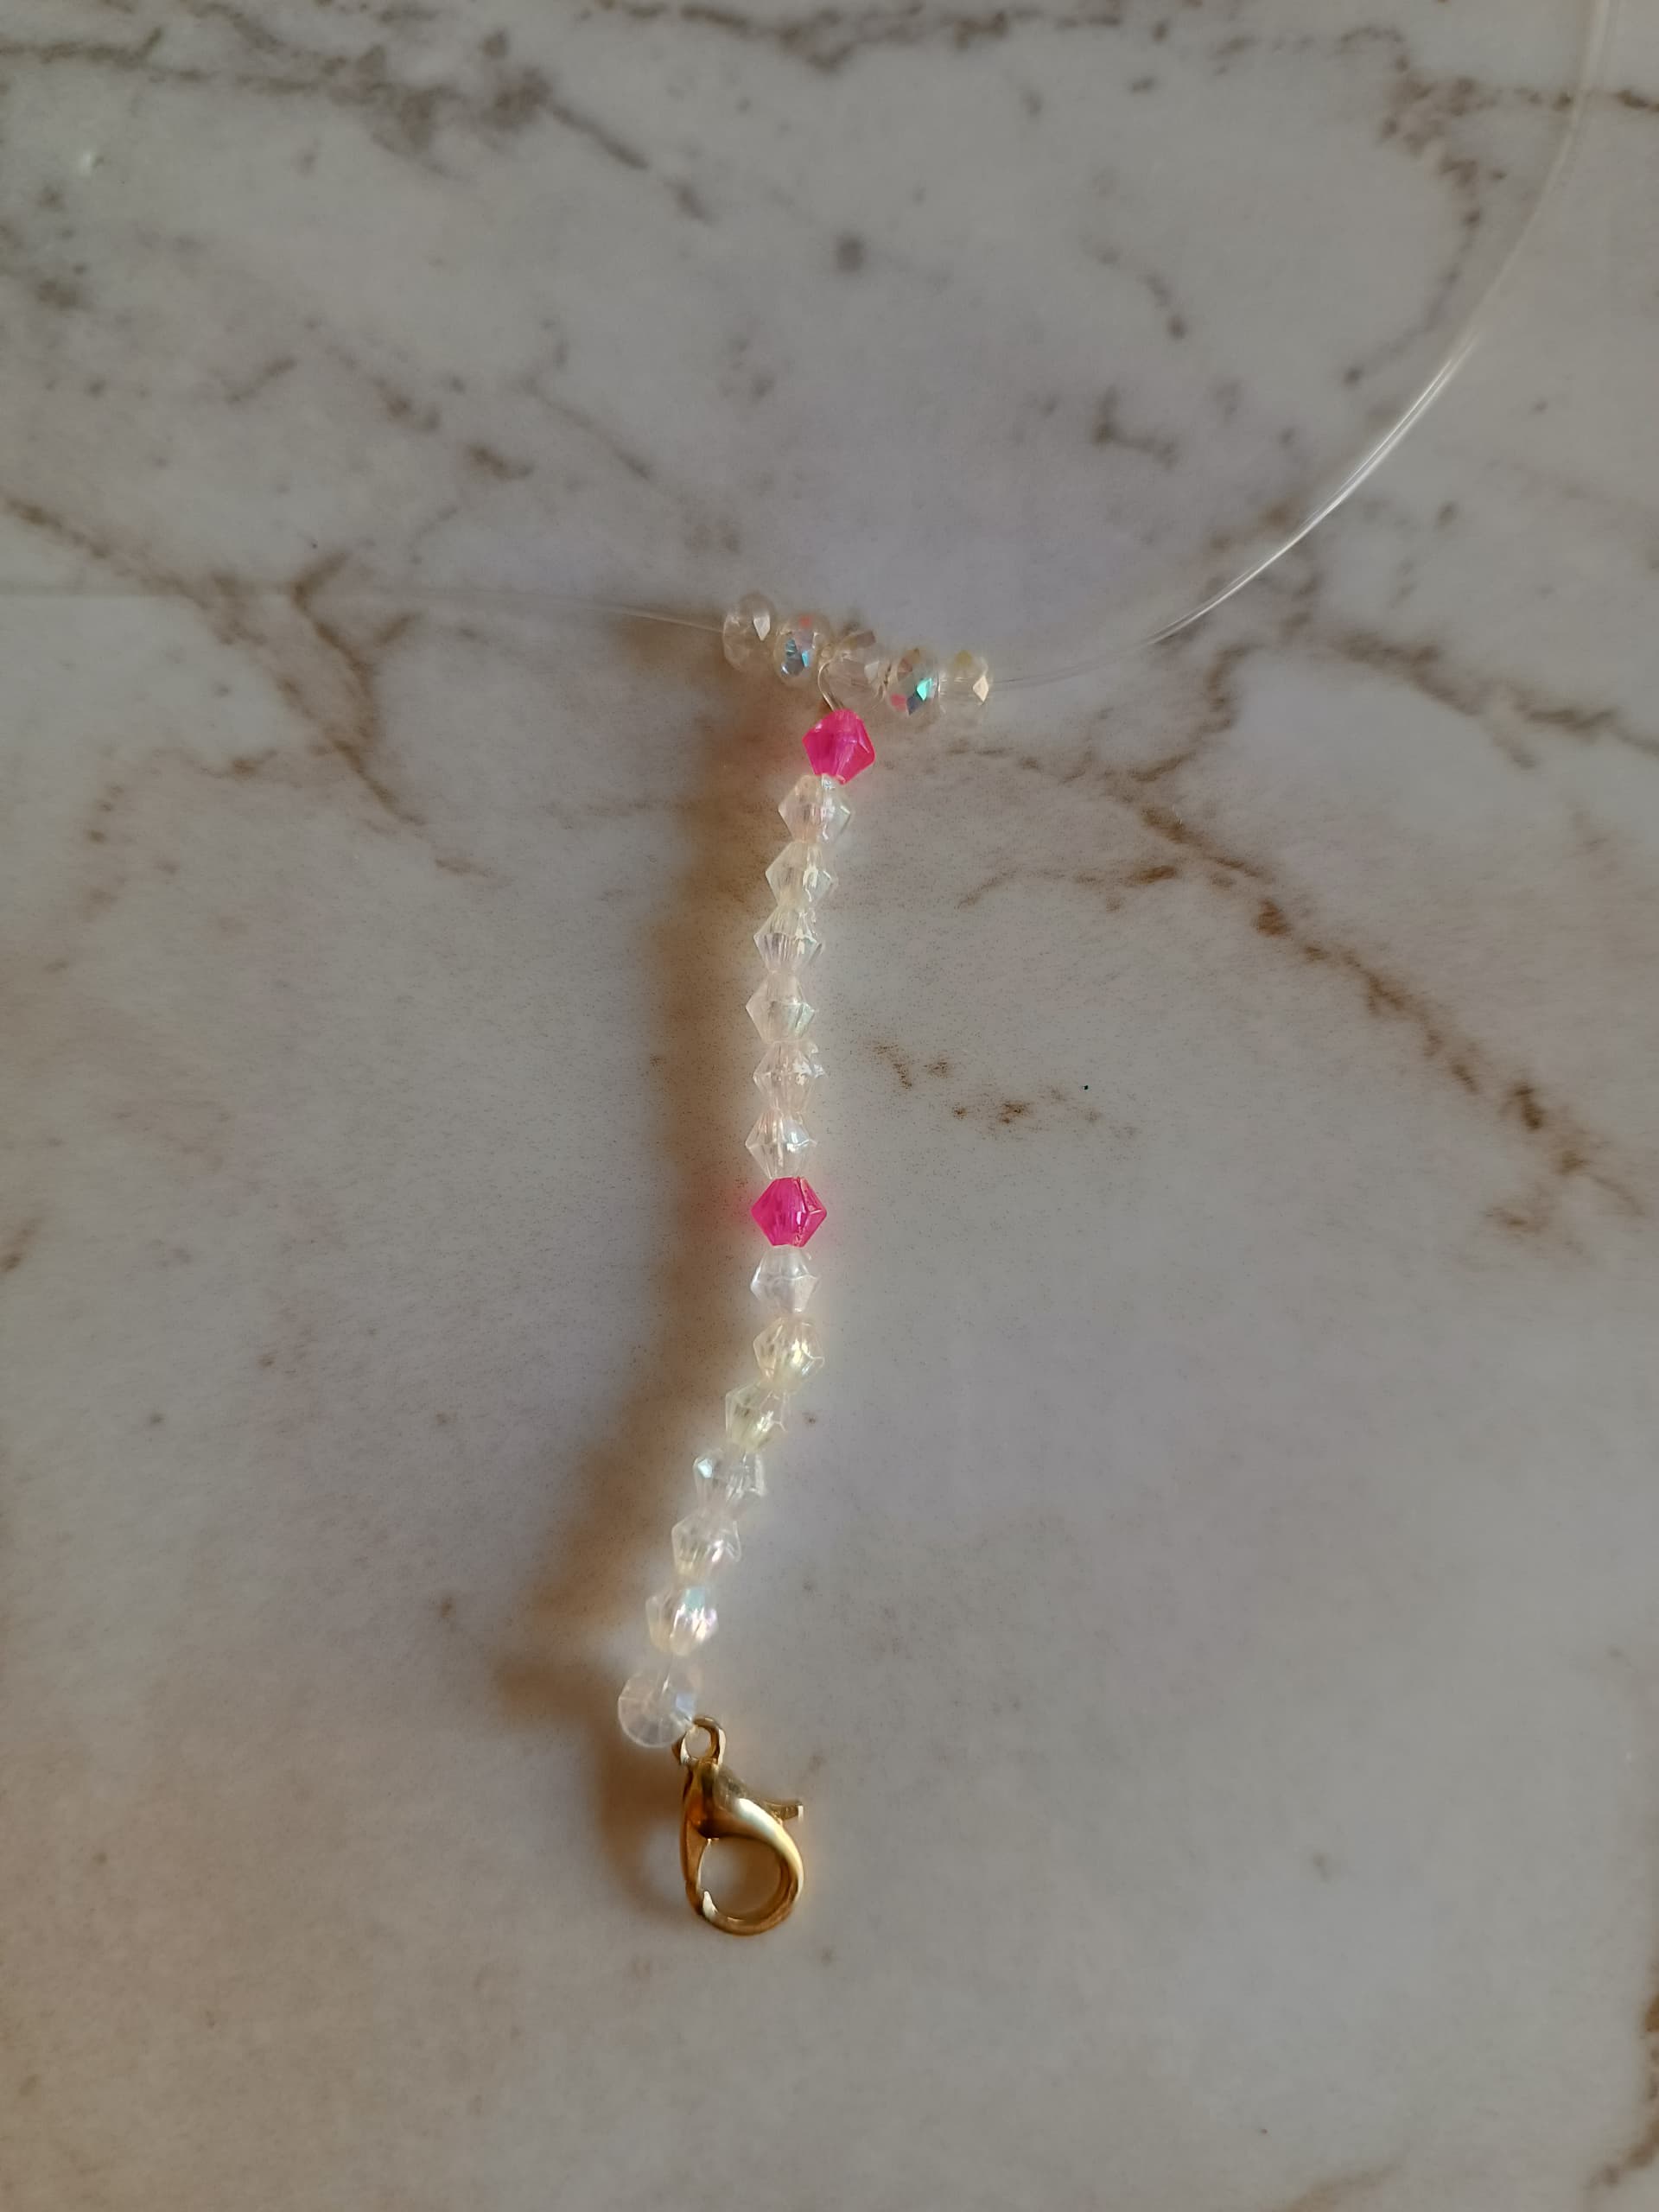
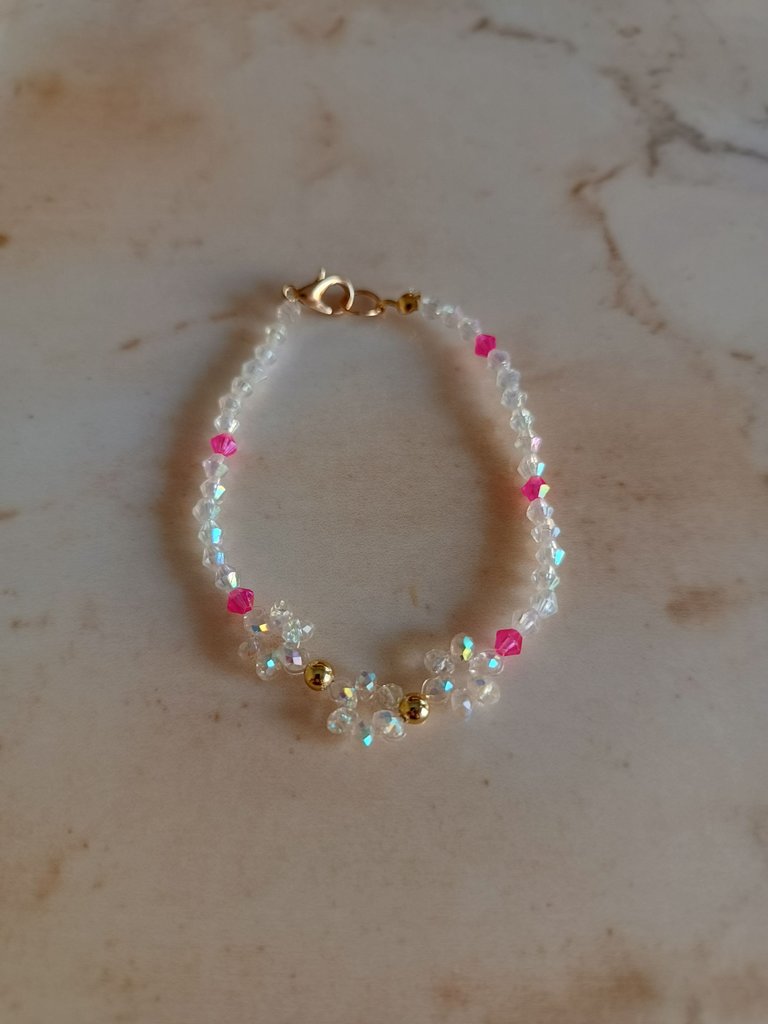
Ahora voy a unir la goma elástica e introducimos seis cristales transparentes y uno fucsia, este paso lo repetí una vez más, ahora con el cristal checo voy a realizar una especie de flor de la siguiente forma: introducimos un cristal checo en la punta derecha y la punta izquierda la pasamos a través del cristal lo llevamos al fondo, luego en cada punta de la goma elástica coloqué dos cristales de cada lado el último cristal checo para cerrar también lo coloqué en la punta derecha pasando la otra punta por el cristal.
Now I am going to join the elastic band and insert six transparent crystals and one fuchsia. I repeated this step one more time. Now with the Czech crystal I am going to make a kind of flower in the following way: we introduce a Czech crystal at the right end and pass the left tip through the crystal, we take it to the bottom, then at each end of the elastic band I placed two crystals on each side. I also placed the last Czech crystal to close on the right end, passing the other end through the crystal.
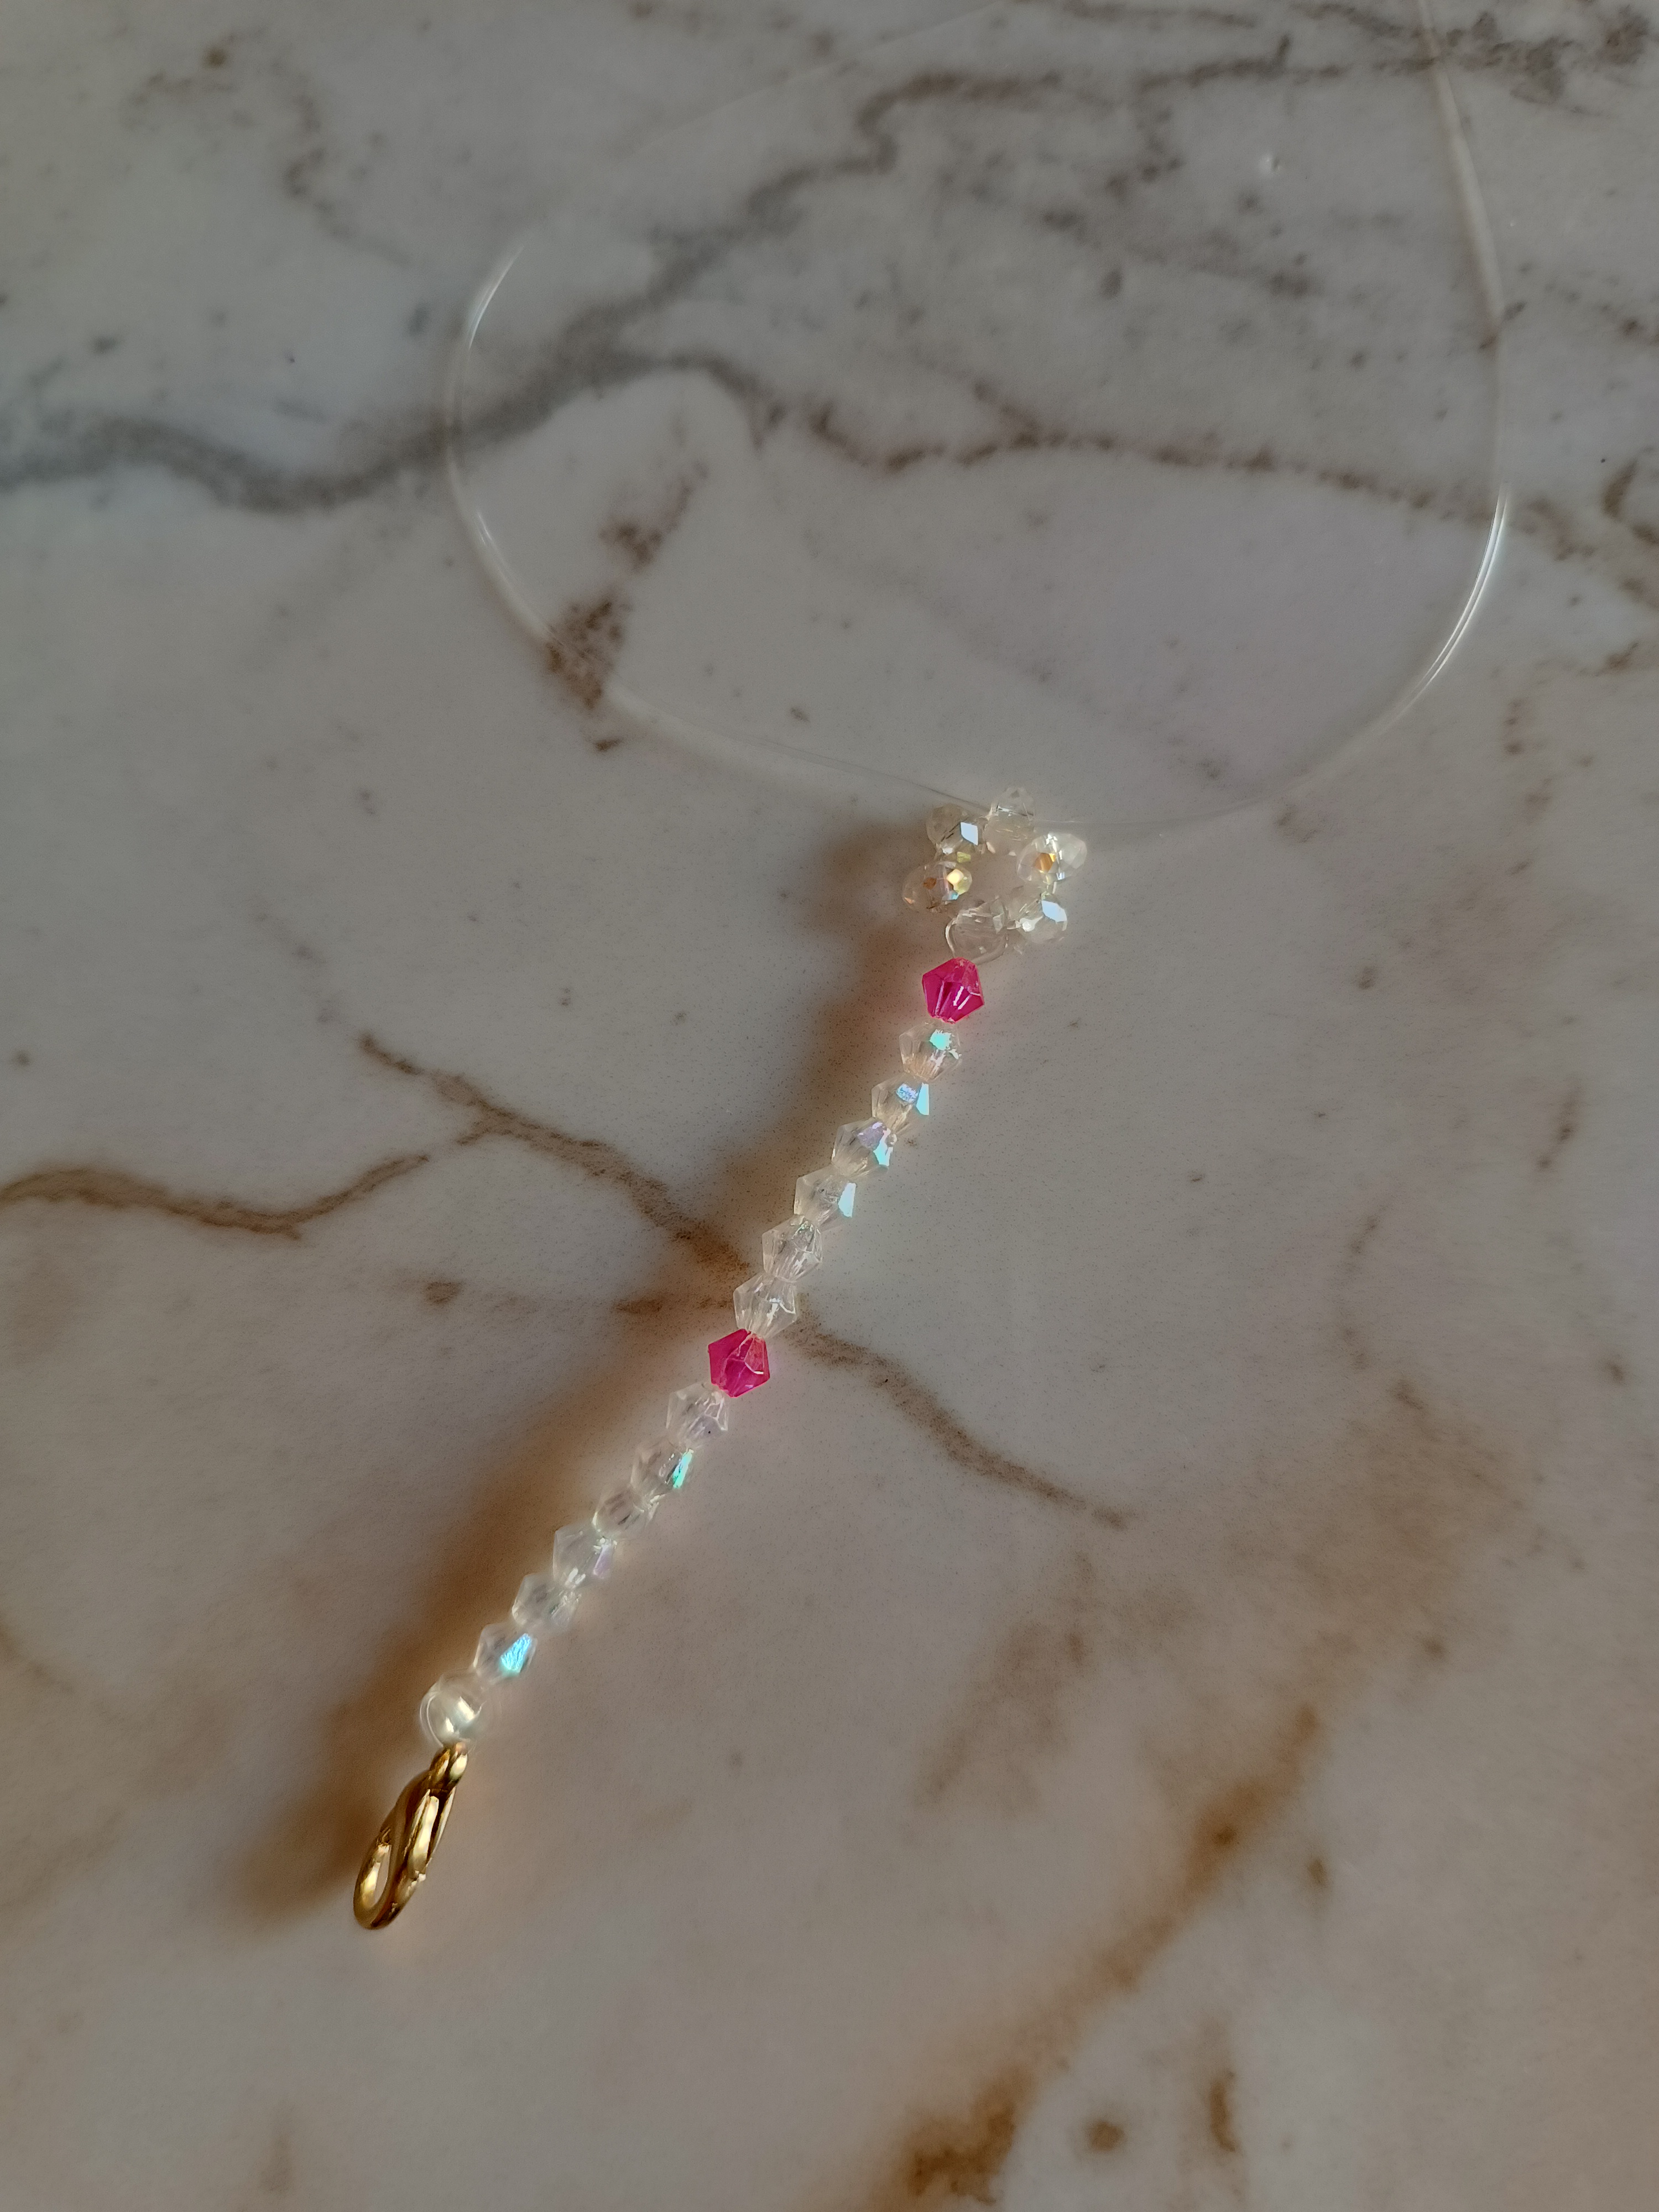
Seguido de esto coloqué un balín dorado, realicé otra flor de la misma forma ya mencionada seguido de otro balín finalizando con otra flor, en total tres flores y dos balines de por medio.
Following this I placed a golden ball, I made another flower in the same way already mentioned followed by another ball ending with another flower, in total three flowers and two balls in between.
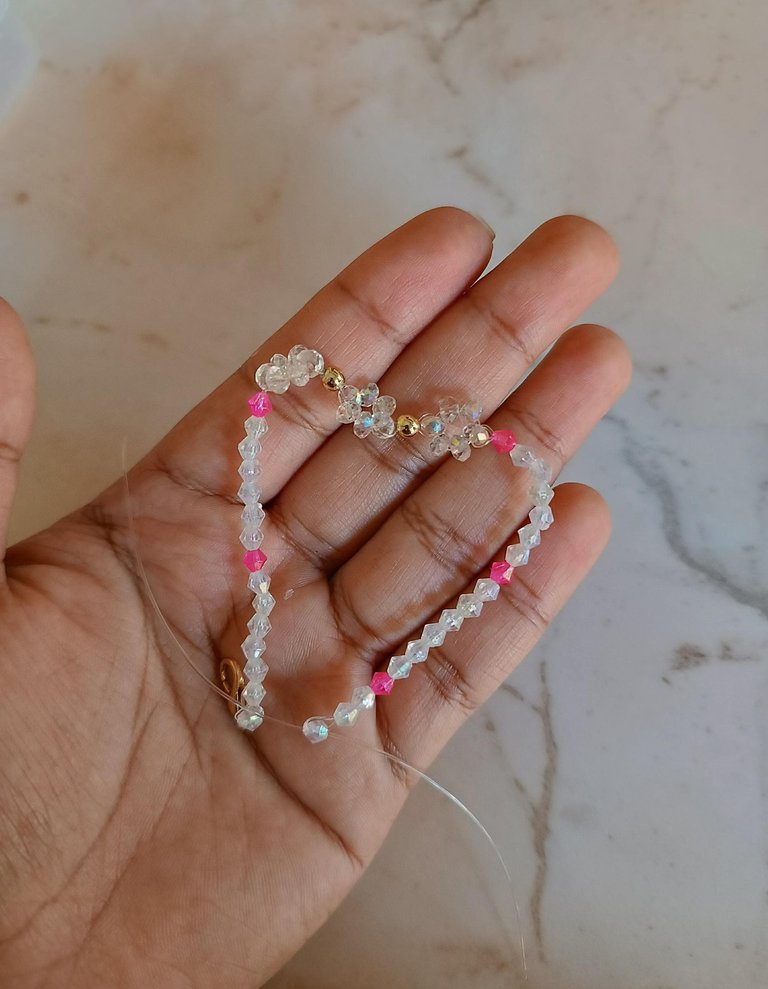
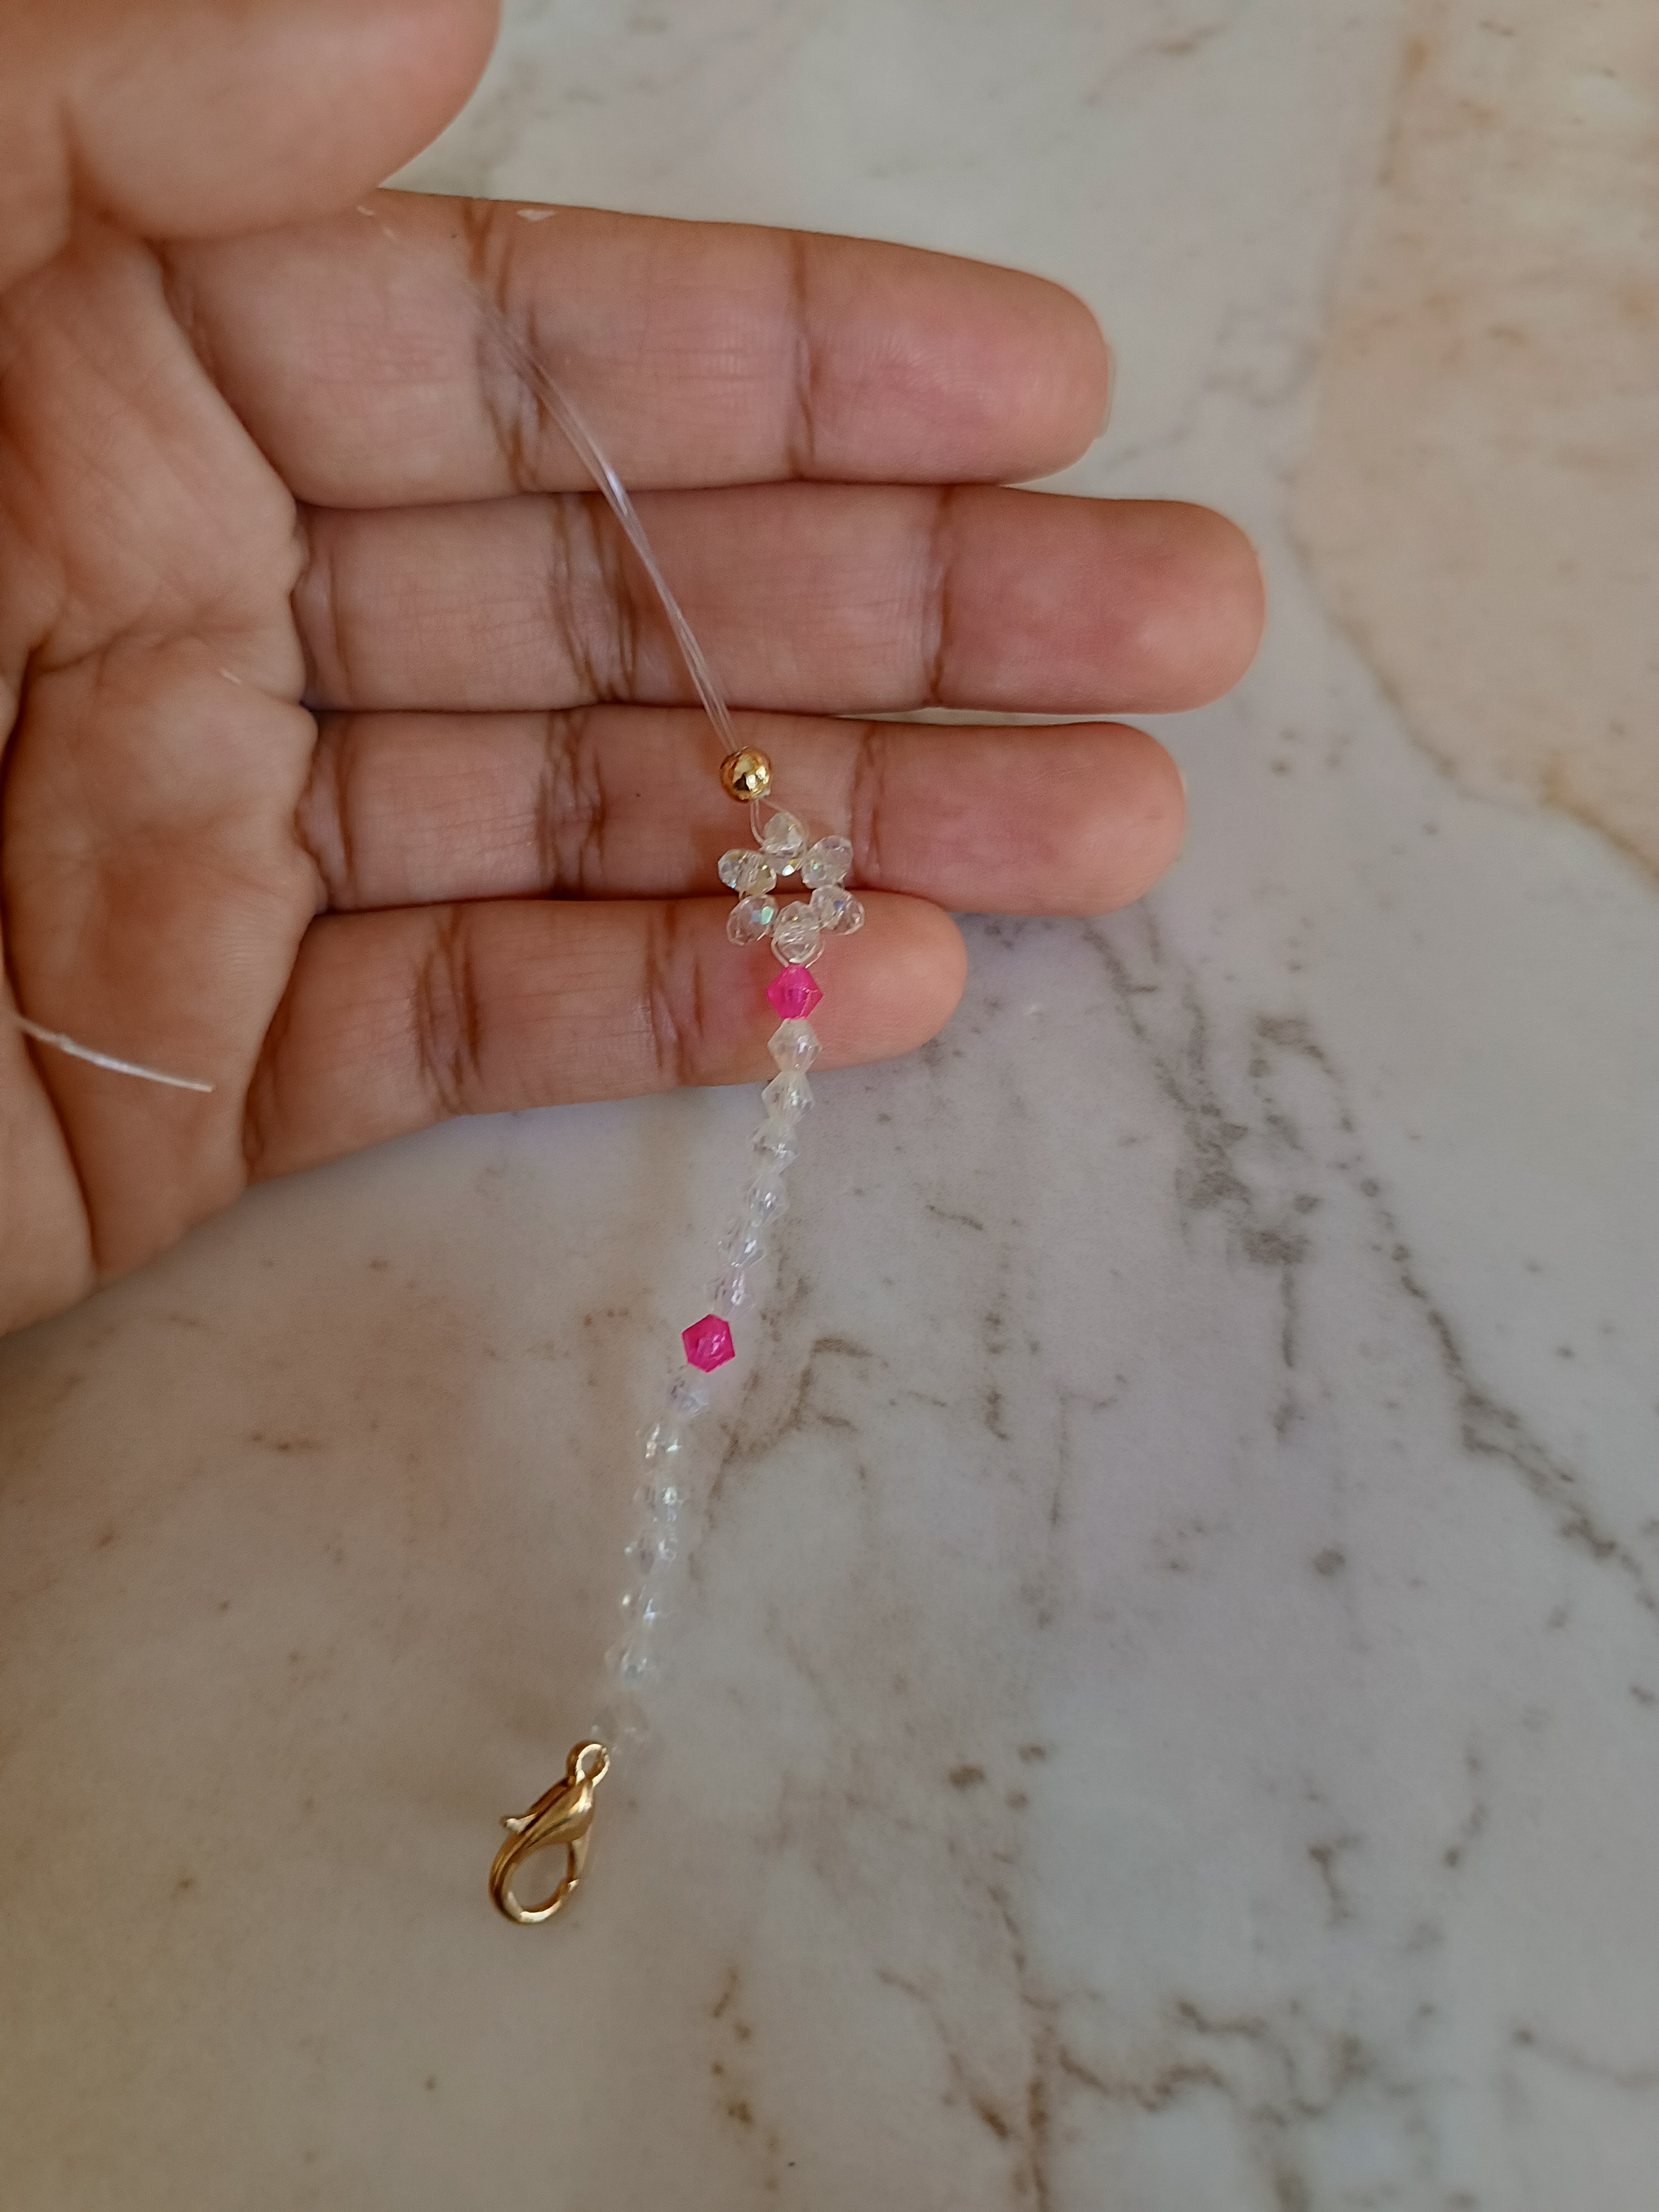
Ahora introducimos un cristal fucsia seguido de seis cristales transparentes, repitiendo el paso una vez más, por último colocamos solo tres cristales en la punta cerrando el último mediante la técnica de pasar las puntas a través del cristal.
Now we introduce a fuchsia crystal followed by six transparent crystals, repeating the step once again, finally we place only three crystals on the tip, closing the last one using the technique of passing the points through the crystal.

El último paso es colocar el tapa nudo junto al último cristal que se colocó, con ayuda de una pinza punta plana apretamos y colocamos la argolla con ayuda de una pinza punta redonda cerramos, realizamos un nudo cortamos el resto de goma elástica que sobra y con un encendedor quemamos la punta y fijamos para que no se suelte.
The last step is to place the knot cover next to the last glass that was placed, with the help of flat-nose pliers we press and place the ring with the help of round-nose pliers we close, we make a knot we cut the rest of the elastic band excess and with a lighter we burn the tip and fix it so that it does not come loose.
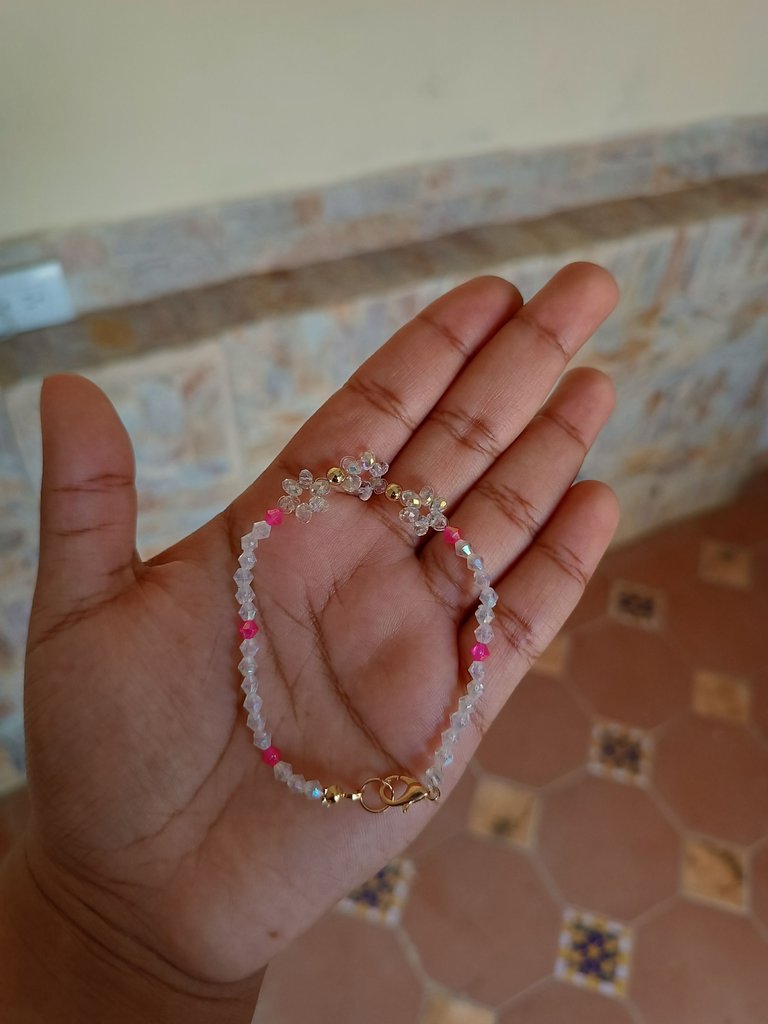
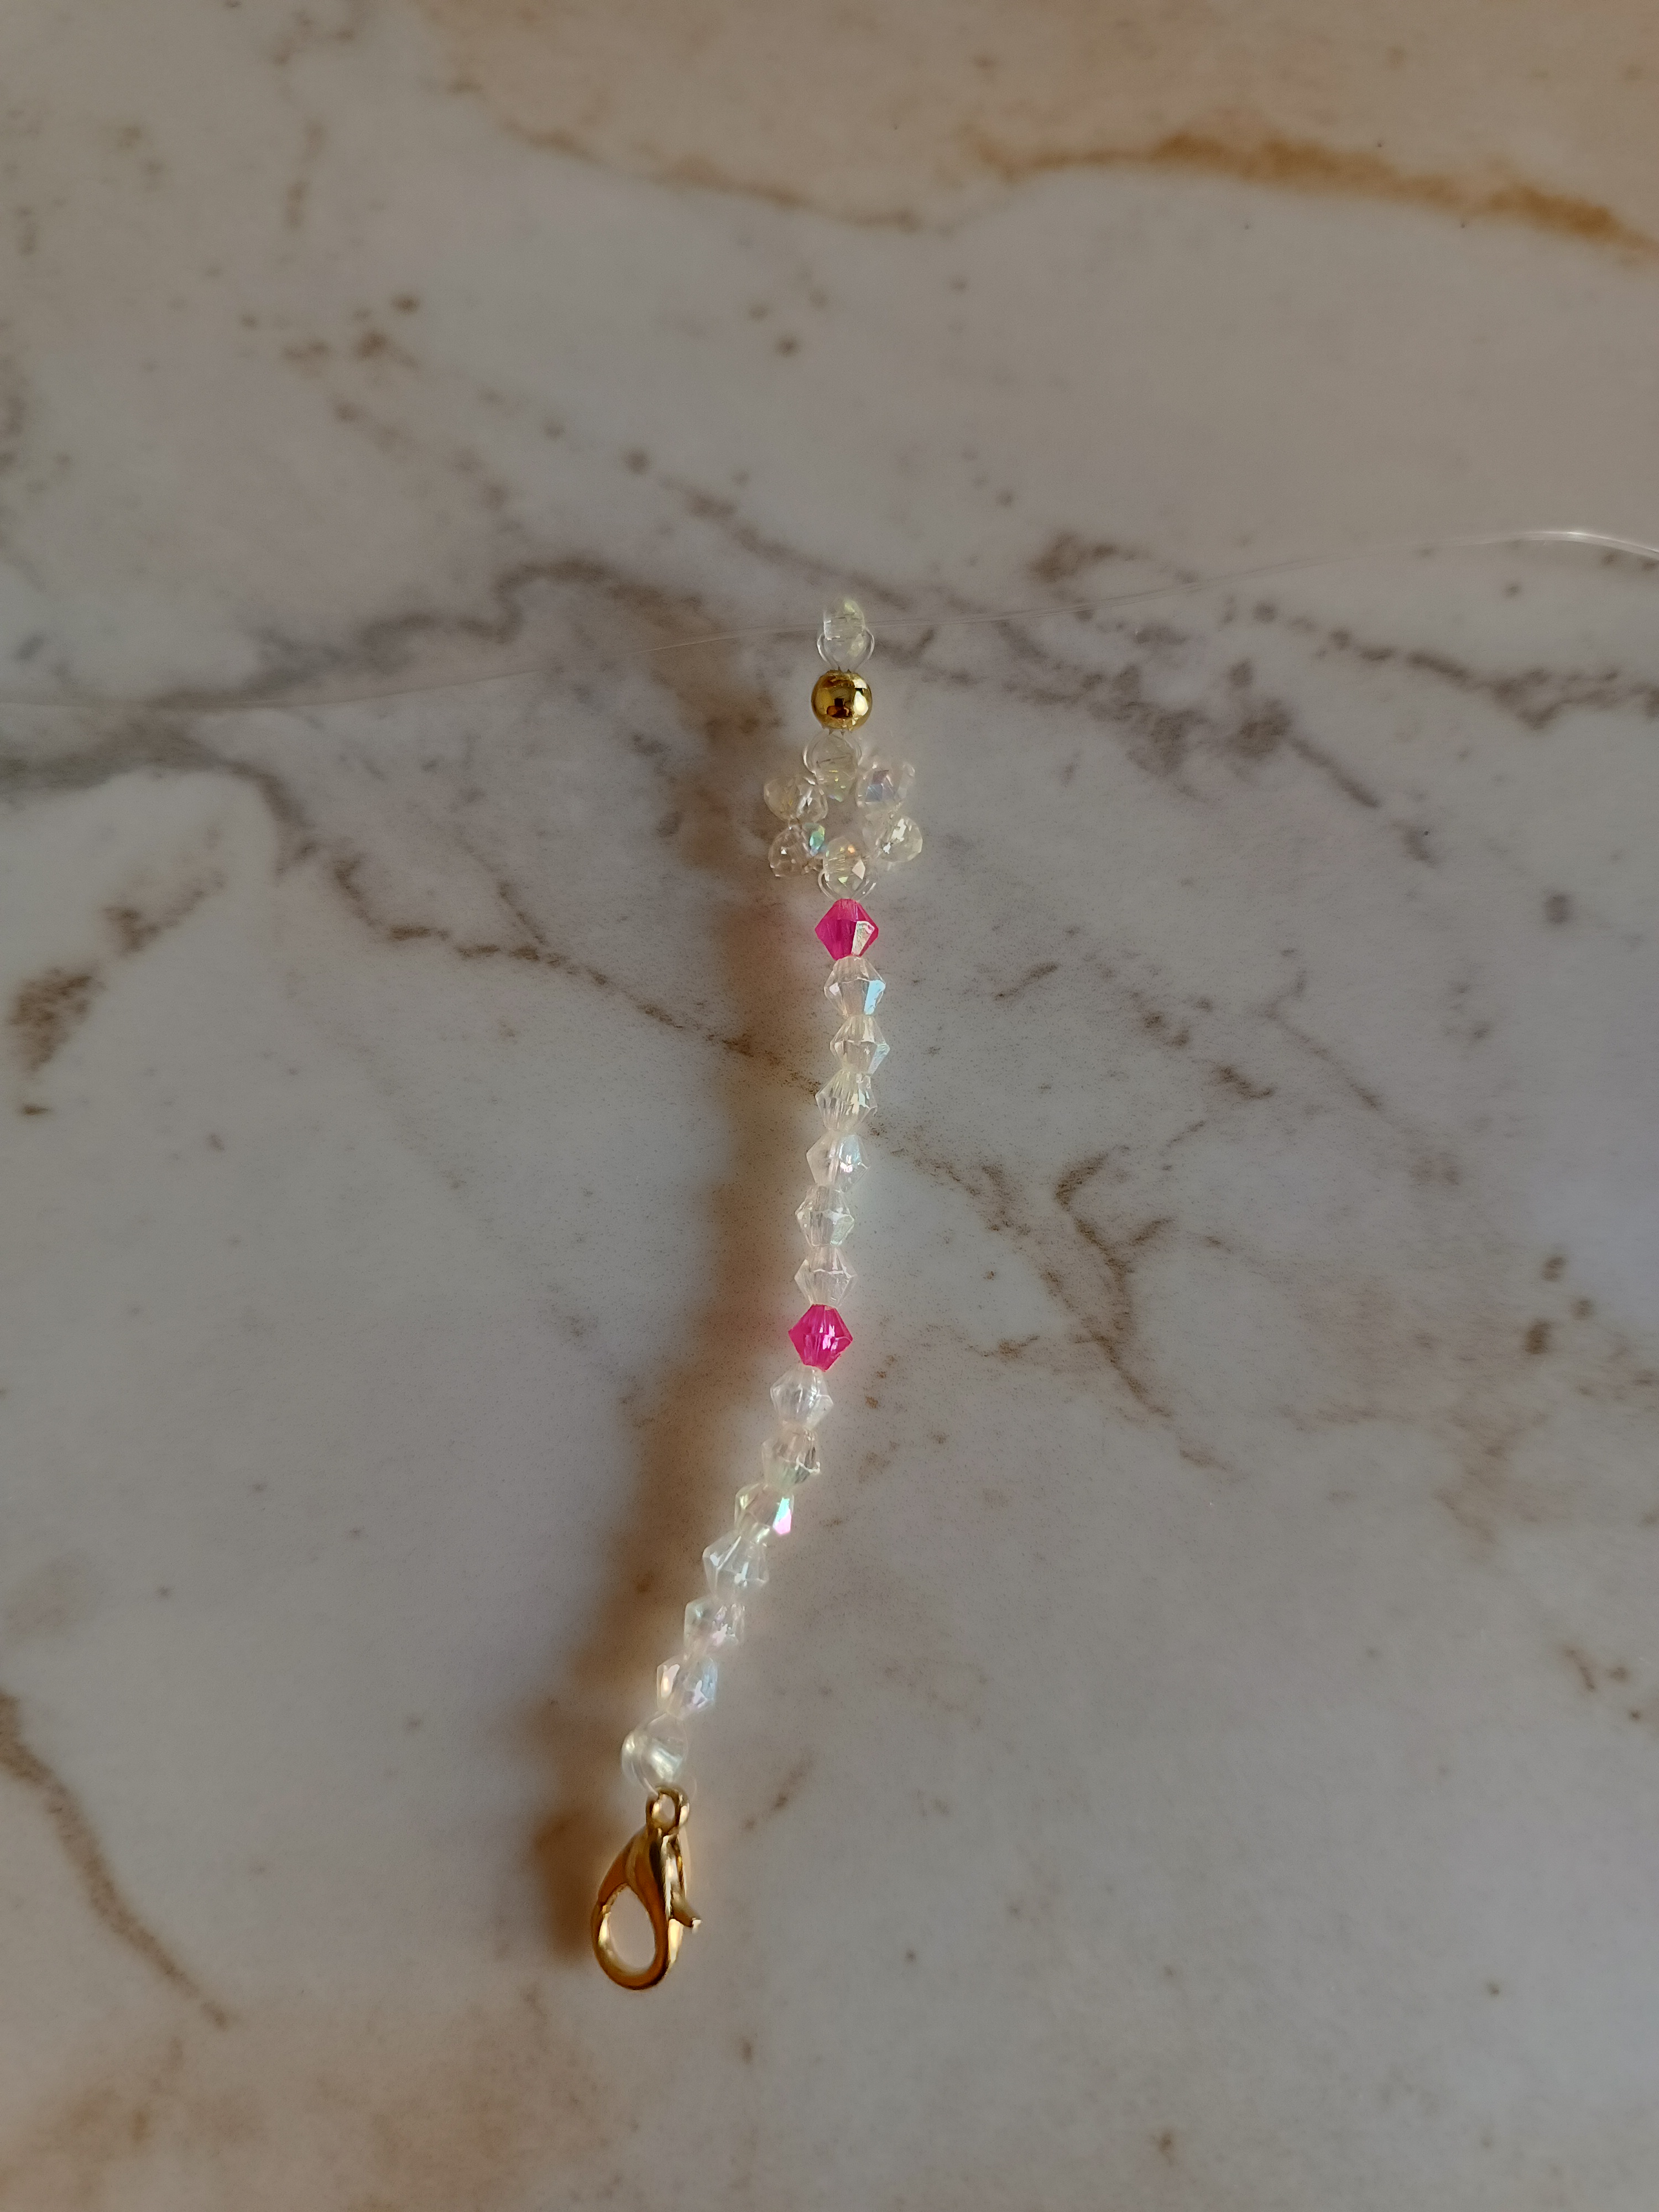
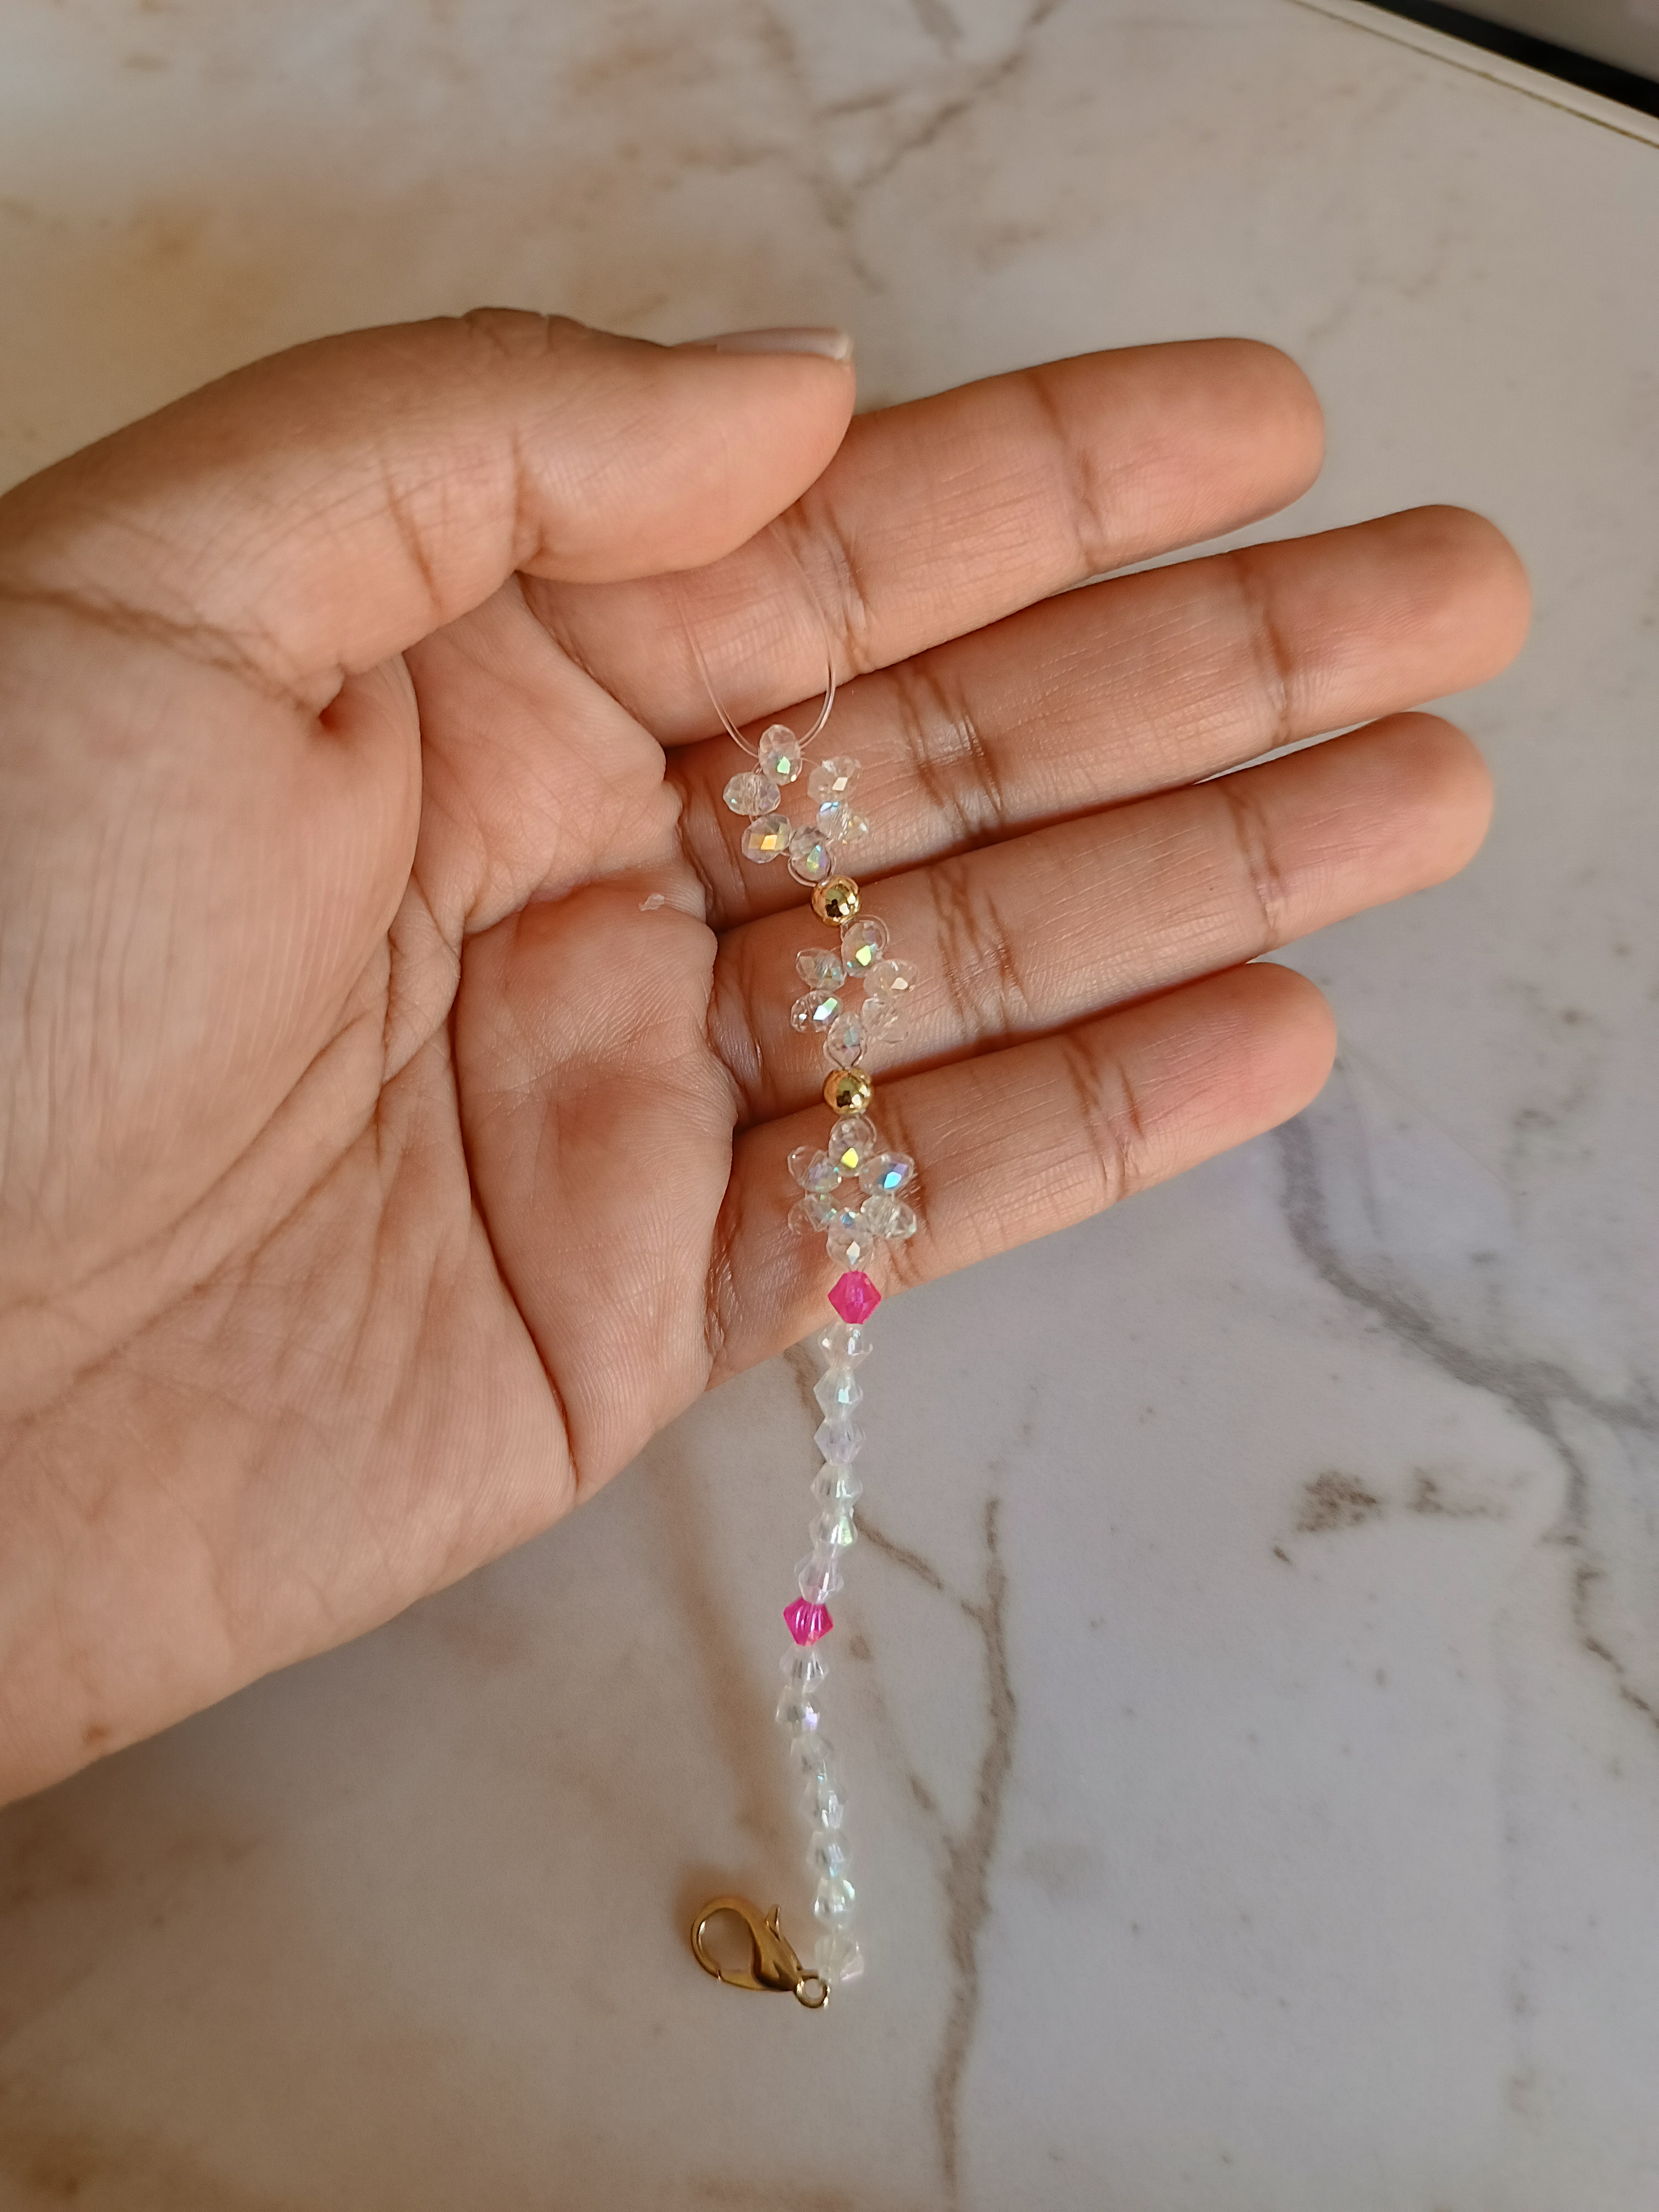
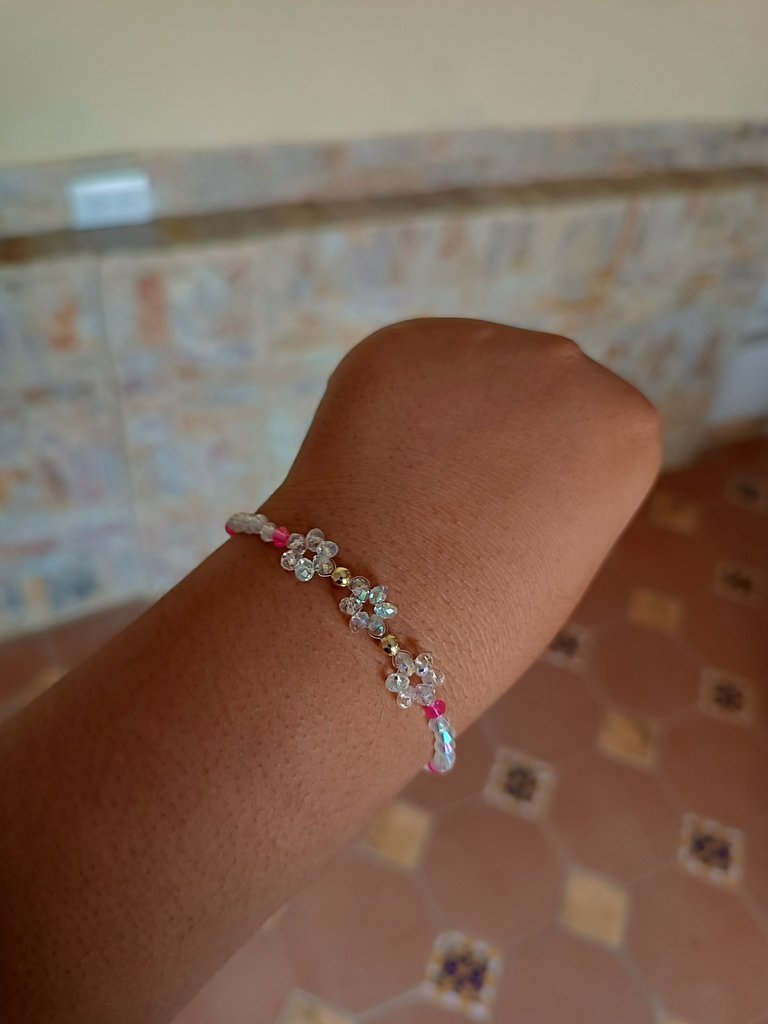
Y lista nuestra pulsera, ahora la podemos lucir en el momento adecuado 😉. Una prenda linda y sencilla nunca nos debe faltar este accesorio combina muy bien a la hora de salir, espero les haya gustado este tutorial.
And our bracelet is ready, now we can show it off at the right time 😉. A cute and simple garment should never be missing. This accessory combines very well when going out. I hope you liked this tutorial.

Muchas gracias por visitar mi publicación, me siento súper contenta de estar aquí y espero que nos volvamos a encontrar en una próxima oportunidad con más ideas.
Thank you very much for visiting my publication, I feel super happy to be here and I hope we meet again at the next opportunity with more ideas.

Contenido original. - original content.
Los separadores y banner fueron realizados en Canva. - The dividers and banner were made in Canva.
Las fotografias son tomadas con mi teléfono Redmi Note 11s y editadas en PicsArt - The photographs are taken with my Redmi Note 11s phone and edited in PicsArt.
Traducción de: Google traductor - Translation of: Google translator.

It looks stylish, elegant, and beautiful. Love its design and color. Good to see how you made this. Great job!
Muchas gracias 🫂
Congratulations, your post has been upvoted by @dsc-r2cornell, which is the curating account for @R2cornell's Discord Community.
Enhorabuena, su "post" ha sido "up-voted" por @dsc-r2cornell, que es la "cuenta curating" de la Comunidad de la Discordia de @R2cornell.
Muchas gracias por el apoyo 😊
Linda y delicada pulsera @marile21, se te ve muy bonita, saluditos 🌹
Muchas gracias querida por visitar mi publicación, feliz noche 😘