Electric Rabbit - Holozing Fan-Art! [ENG/ESP]
Electric Rabbit! ⚡️
Happy afternoon/evening community!
Finally I have been able to take some time to share with you all a new Fan-Art illustration of @holozing's universe. Since a few days ago I wanted to make my version of the character Electric Rabbit but due to lack of time I had to develop it in parts and today I finally finished it. I've done this work with a lot of love for all of you, I hope you like this version and without more to say let's start...!!!!
¡Feliz tarde/noche comunidad!
Finalmente he podido sacar algo de tiempo para compartir con todos ustedes una nueva ilustración Fan-Art del universo de @holozing. Desde hace unos días he querido realizar mi versión del personaje Electric Rabbit pero por falta de tiempo tuve que desarrollarlo por partes y hoy finalmente lo he terminado. Este trabajo lo he hecho con mucho cariño para todos ustedes espero les guste esta versión y sin mas que decir comencemos..!!

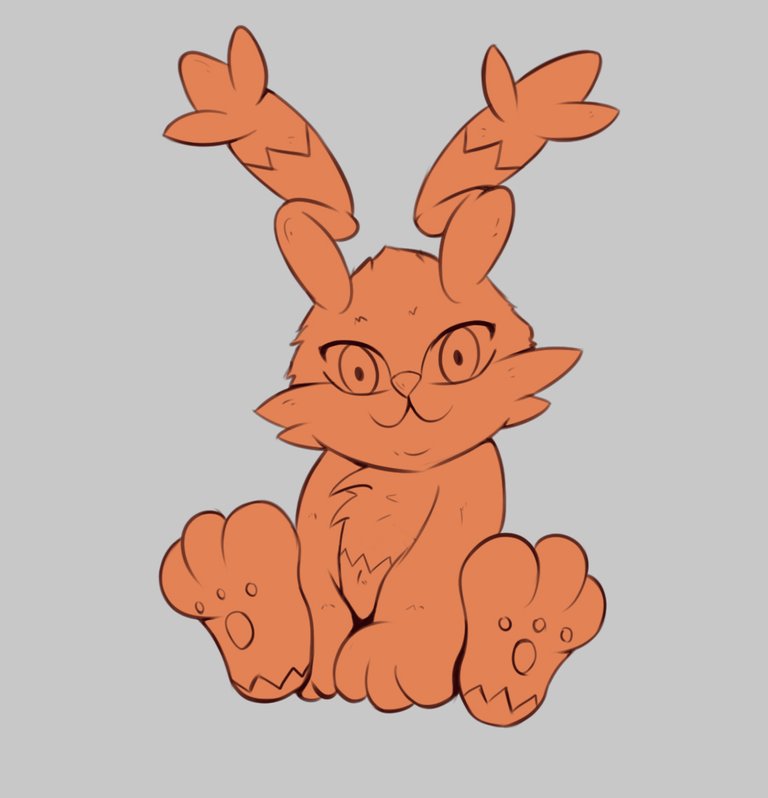
Creative Process | Proceso Creativo💡
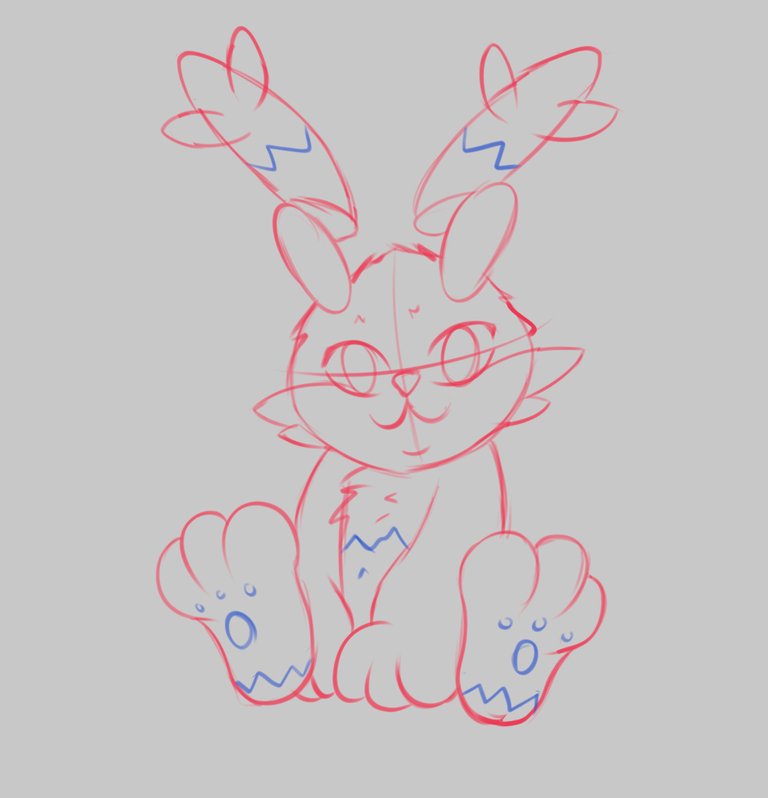
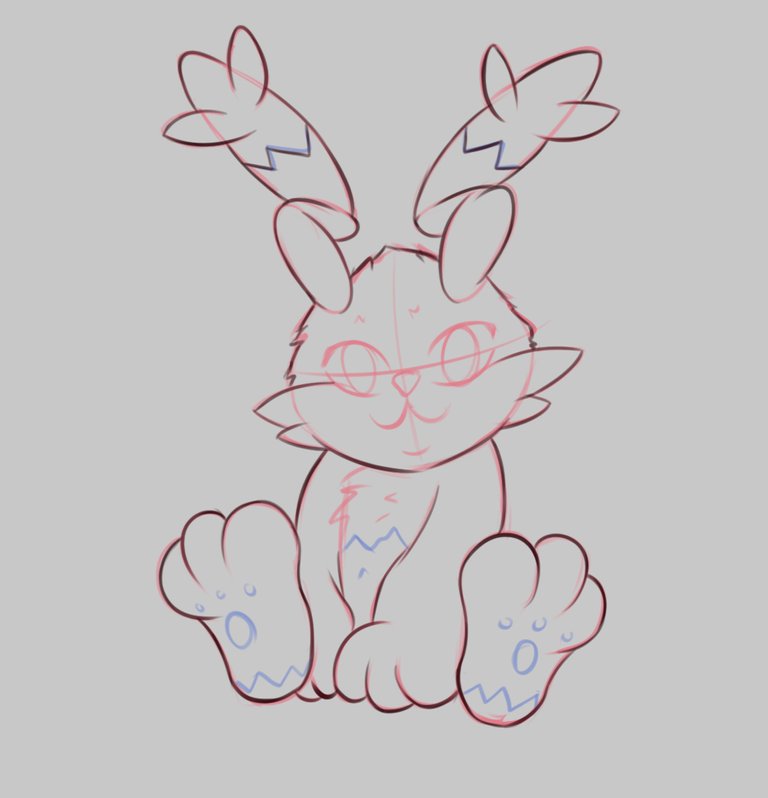
To make this illustration I was helped by some references of rabbits and some kawaii characters. I started defining the pose that the character would have, I decided at the end to make the rabbit sitting to make it look a little more Kawaii. Then I was defining a little better the lines to have a cleaner sketch as possible. Then I lowered the opacity of the sketch and made a lineart to fix some mistakes and define the lines.
Para realizar esta ilustración me fue de gran ayuda algunas referencias de conejos y algunos personaje tipo kawaii. Comencé definiendo la pose que tendría el personaje, decidí al final realizar al conejo sentado para que se viera un poco mas Kawaii. Luego fui definiendo un poco mejor las líneas para tener un boceto lo mas limpio posible. Después baje la opacidad del boceto y fui realizando un lineart para arreglar algunos errores y definir las líneas.
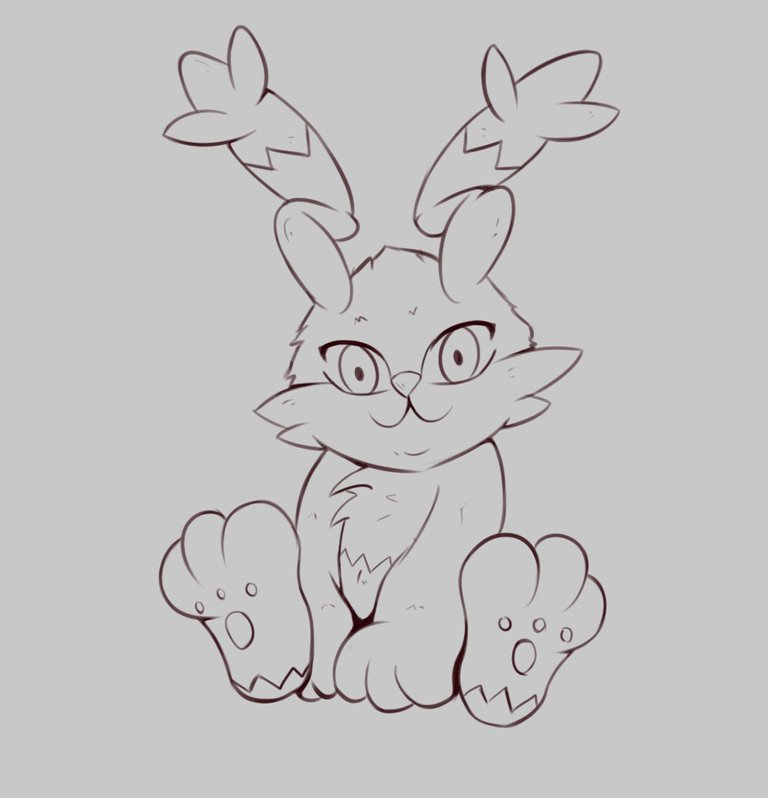
After finally finishing the lineart, I placed the colors, first I added a layer below my lineart and with an orange color I marked all the silhouette of the character. On top of this base layer I added all the colors that the character would have.
Luego de terminar finalmente el lineart pase a colocar los colores, primero agregue una capa por debajo de mi lineart y con un color naranja marque toda la silueta del personaje. Por encima de esta capa base fui agregando todos los colores que tendría el personaje.
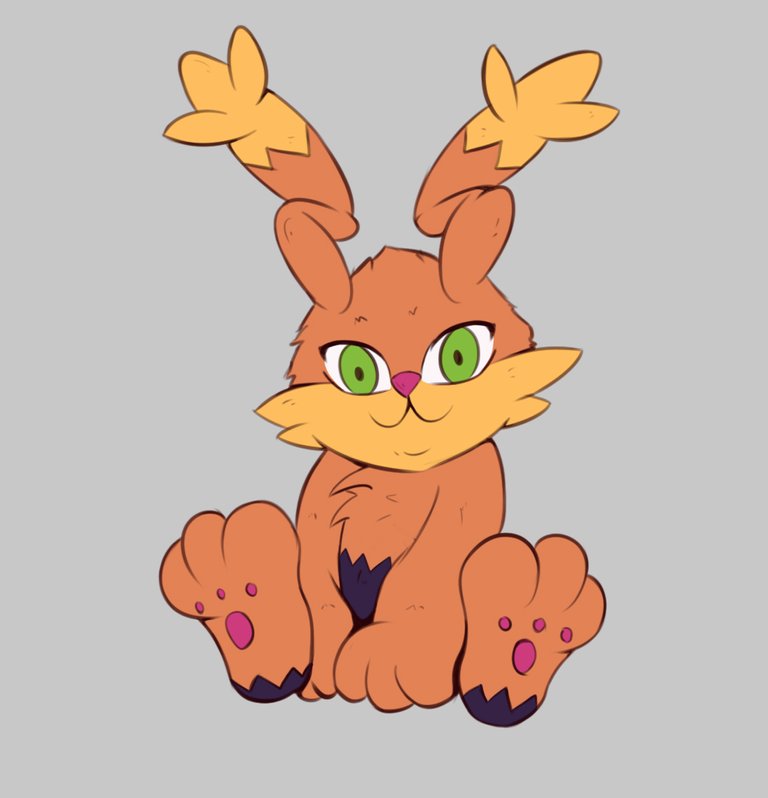
Then I went to work on the shadows of the character, at this point I can not show you the whole process because I made all the shadows in a single layer but really the procedure is the same as I have been doing lately, then in a new layer I was making the light tones separately to have more control in both intensity and color.
Después pase a trabajar en las sombras del personaje, en este punto no puedo mostrarles la totalidad del proceso debido a que realice todas las sombras en una sola capa pero realmente el procedimiento es el mismo que he venido haciendo últimamente, después en una nueva capa fui realizando los tonos de luz por separado para tener un mayor control tanto en intensidad como color.
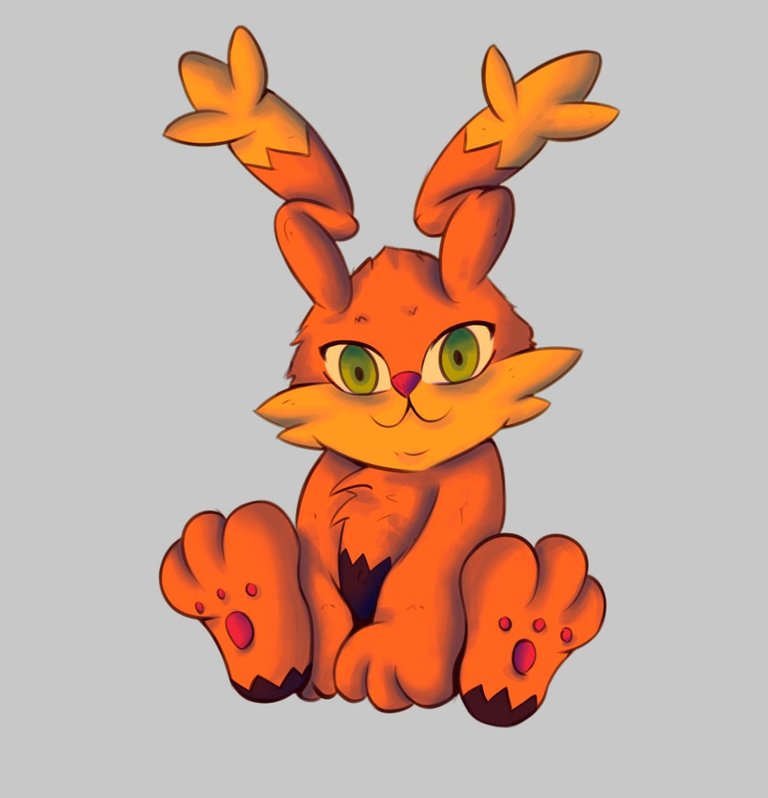
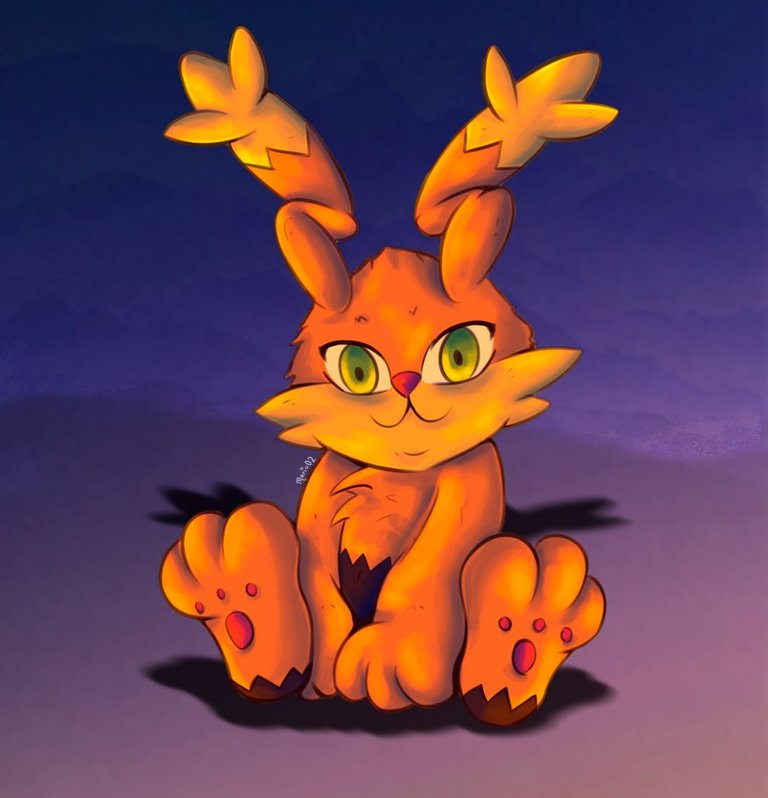
Once I had the character practically ready I started working on the background of the illustration, in this case I wanted to make a background a little more elaborate that would combine with the character and also help the composition of the image to stand out a little more.
With this in mind I started making a gradient between violet and magenta tones with the help of a textured brush, then I used the lasso to make a kind of mountains or something like that that I was shaping with a layer mask. I marked a limit where the ground would be and placed a parallel shadow under my character. With this base I worked little by little on all the details that this background would have.
Una vez tenia al personaje prácticamente listo pase a trabajar en el fondo de la ilustración, en este caso quería realizar un fondo un poco mas elaborado que combinara con el personaje además de ayudar a la composición de la imagen a destacar un poco mas.
Con esto en cuenta comencé realizando un degradado entre tonos violetas y magenta con ayuda de un pincel texturizado, luego utilice el lazo para hacer una especie de montañas o algo así que fui dándoles forma con una mascara de capa. Marque un limite en donde estaría el suelo y coloque una sombra paralela debajo de mi personaje. Con esta base fui trabajando poco a poco en todos los detalles que tendría este fondo.
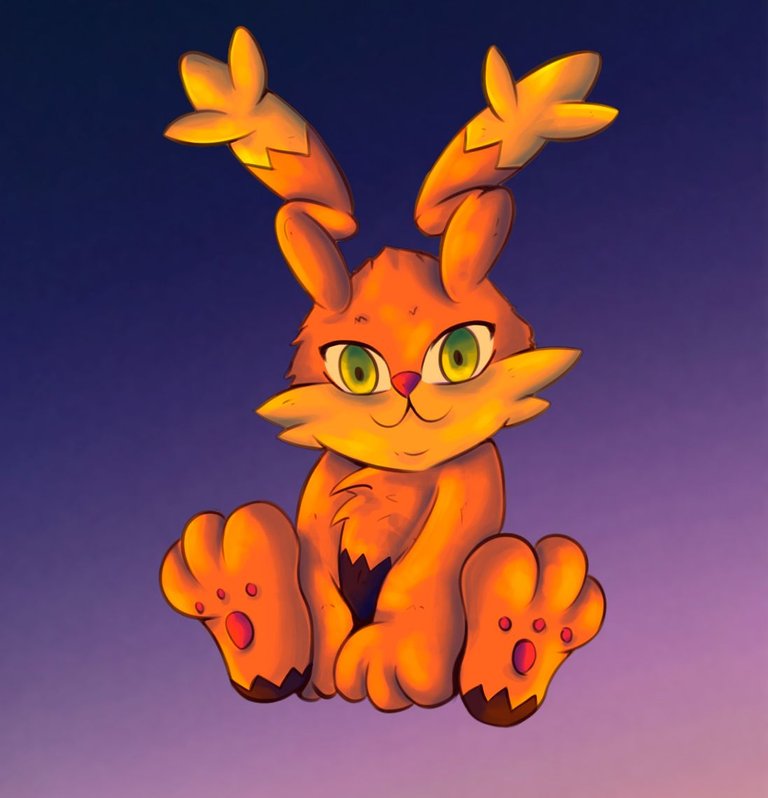
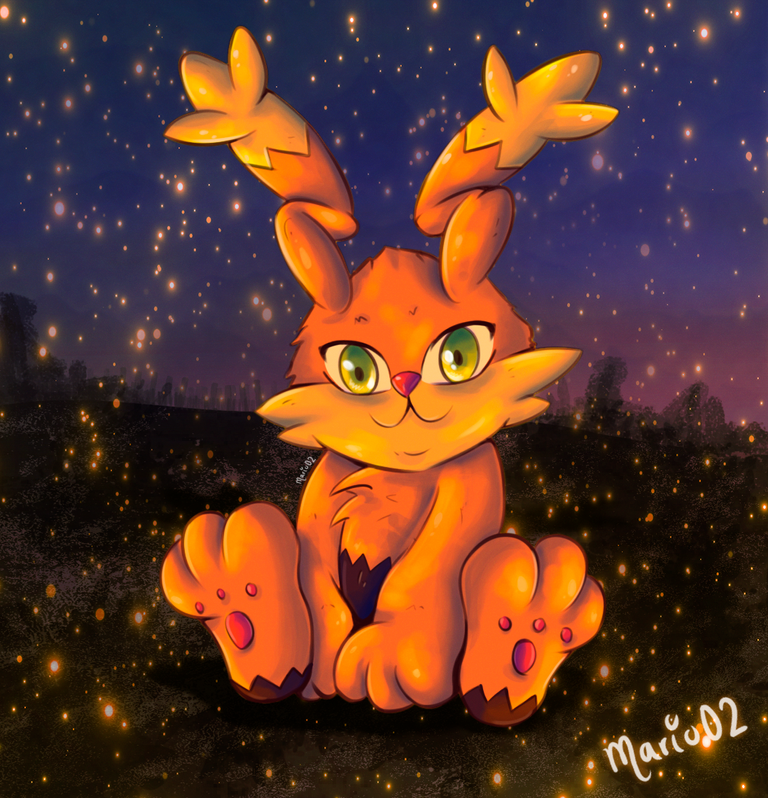
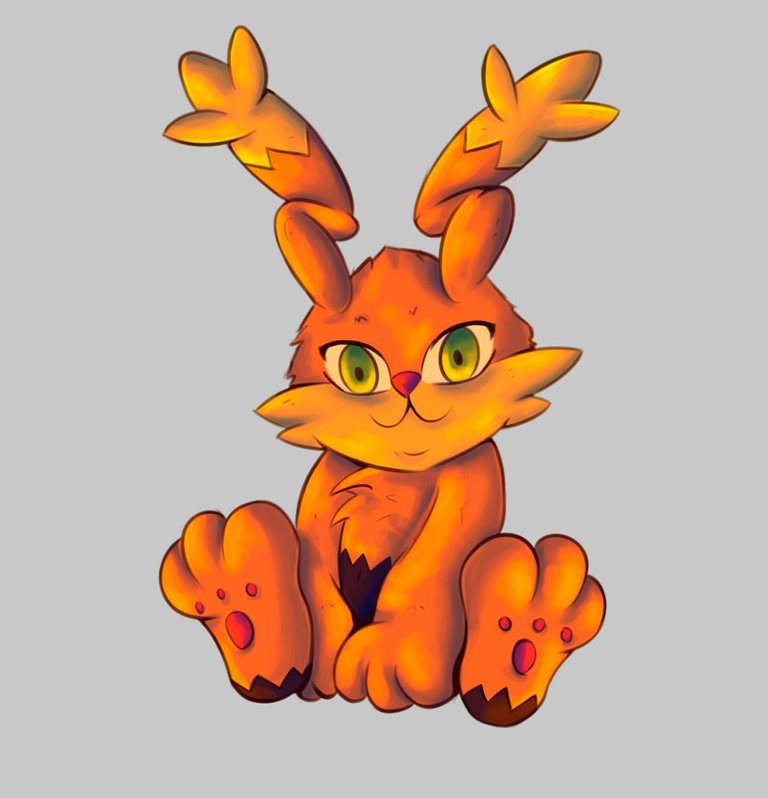
Final result of the Illustration | Resultado final de la ilustración
To finish and not to bore you more, I gave even more details to the background, adding some textures by means of brushes that helped me to compose in a simpler way the environment. Finally I added some particles around my character to give a sense of power and brightness.
Thanks so much for watching and see you next time! 🙏
Ya para finalizar y no aburrirlos mas le di aun mas detalles al fondo, agregando algunas texturas por medio de pinceles que me ayudaron a componer de forma mas sencilla la ambientación. Por último agregue algunas partículas alrededor de mi personaje para dar sensación de poder y brillo.
¡Muchas gracias por ver y hasta la próxima! 🙏
Tools Used | Herramientas Utilizadas:
- Photoshop CC versión 64 bits
- Tablet Huion H610 PRO V2
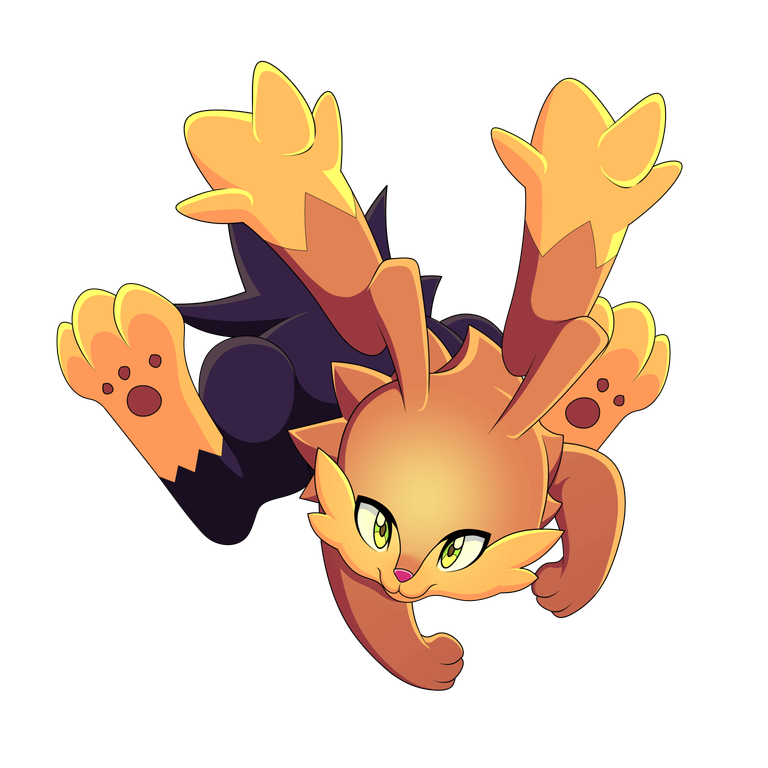
REFERENCE

The illustration and separators used in the post are my property.
Translated with DeepL (free versión)
Impecable hermano. Te quedo muy única la cara, y la paleta de colores elegida 10/10.
Muchísimas gracias por apreciar los detalles amigo mío!! 🙏
Very cute 🥰
Thank you friend!
Que hermoso! es muy tierno 🤩🧡🧡
❤️
Que bonito amigo
Muchísimas gracias!!! 🙏
Congratulations @mario02! You have completed the following achievement on the Hive blockchain And have been rewarded with New badge(s)
Your next target is to reach 18000 upvotes.
You can view your badges on your board and compare yourself to others in the Ranking
If you no longer want to receive notifications, reply to this comment with the word
STOPCheck out our last posts:
Que materiales utilizaste para dibujar