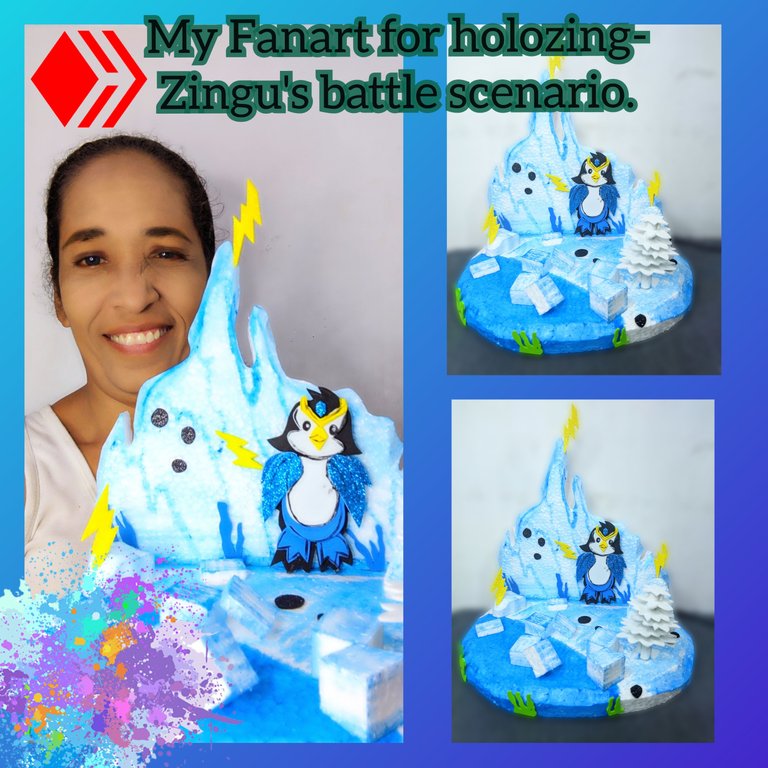
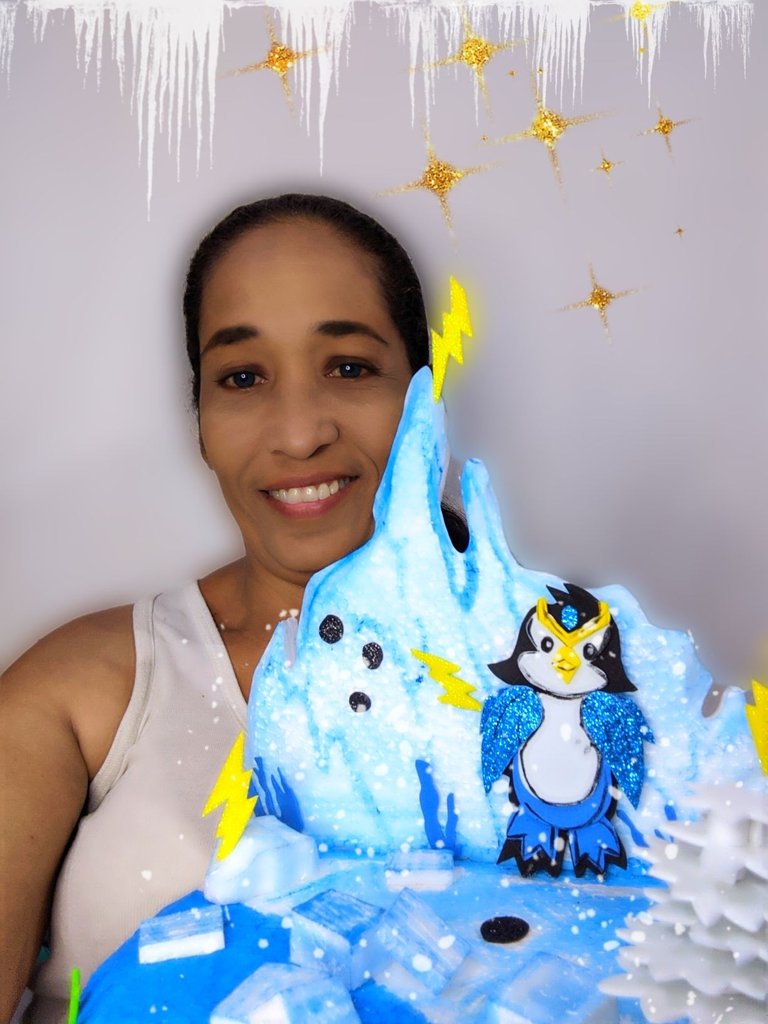
Happy and blessed day everyone, today I am very excited because I want to show you my art created especially for holozing, from the moment this new character came out, I loved it and wanted to do something with it, so without thinking too much, I went into my workshop and unleashed my imagination.
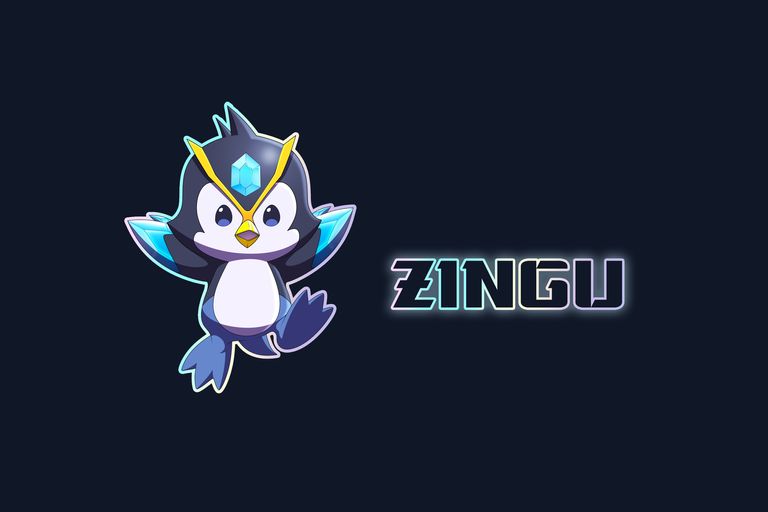
Zingu is a beautiful character created for the game
#holozing very cute, his appearance reflects tenderness, but be careful not to trust behind this angelic and tender face is a strong character and with big surprises when it comes to battle, and more when it comes to face flying creatures, creatures of grass and earth, so his appearance serves to make his opponents trust him giving him a significant advantage.
I wanted to recreate Zingu in his element, ice, so I made a model of a scenario that represents in all its splendour everything that this tender and charismatic character has, here I show you how it was step by step.
🧊 MATERIALS ❄️
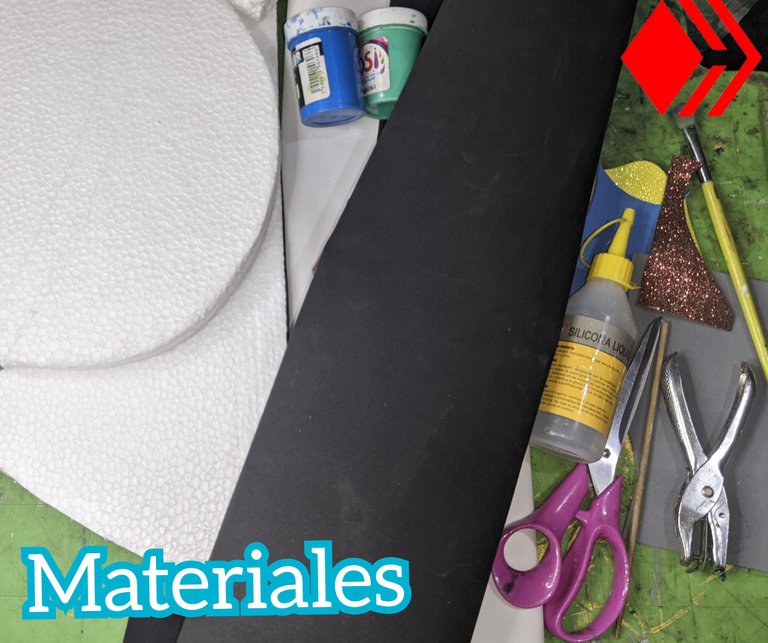
❄ ️ Anime or icopor.
🧊 Liquid silicone.
❄ ️ Coloured foami: black, white, yellow, yellow, blue and green.
🧊 Cold paints: blue, black and white.
❄ ️ Toothpicks.
🧊 Anime cutter.
❄️ Scissors
🧊 pencil.
🧊 CREATIVE PROCESS ❄️
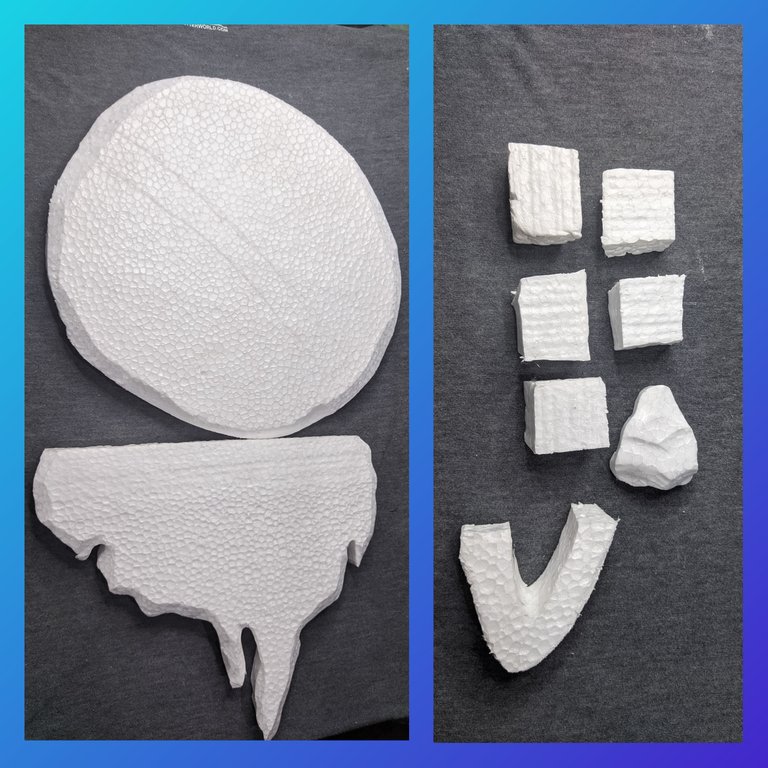
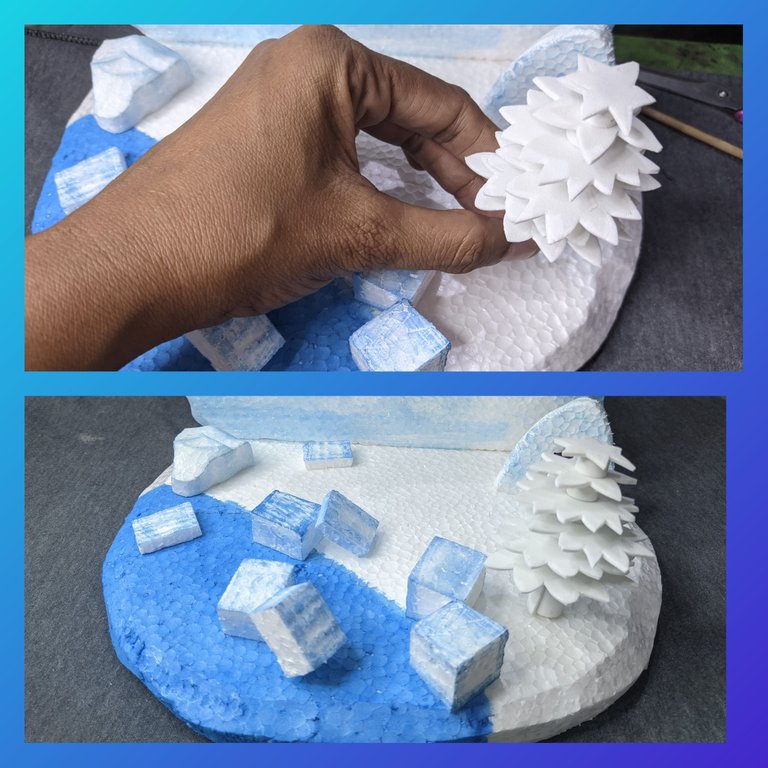
❄️ We started working with the animé, for that I worked with the electronic cutter, and cut the base of my model, and the background part, I cut it in a way that it will be little uniform, looking to give more realism to the ice floes.
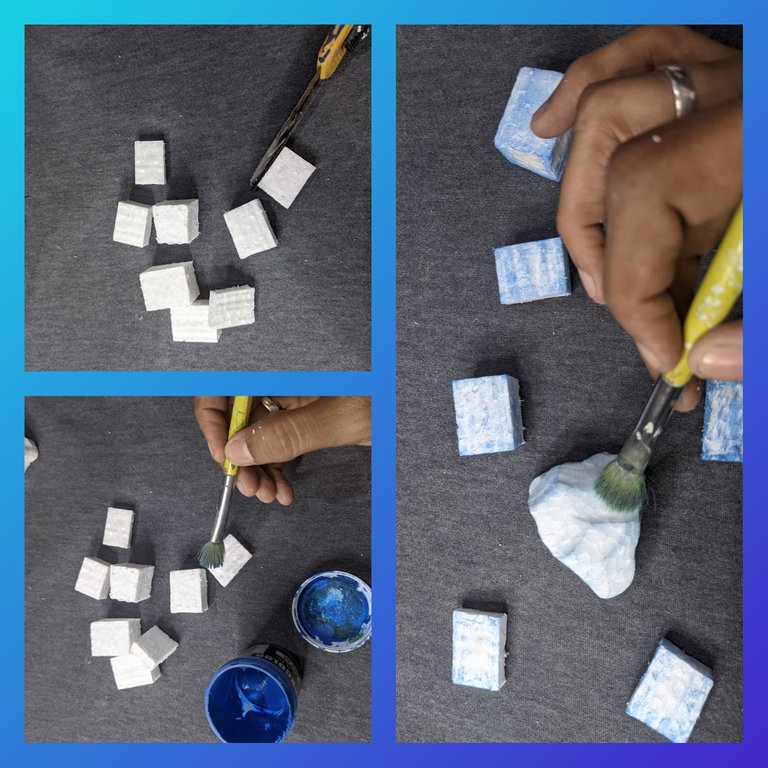
Then I cut out small figures that will be our ice cubes, also some ice floes, remembering that it must be without definition.
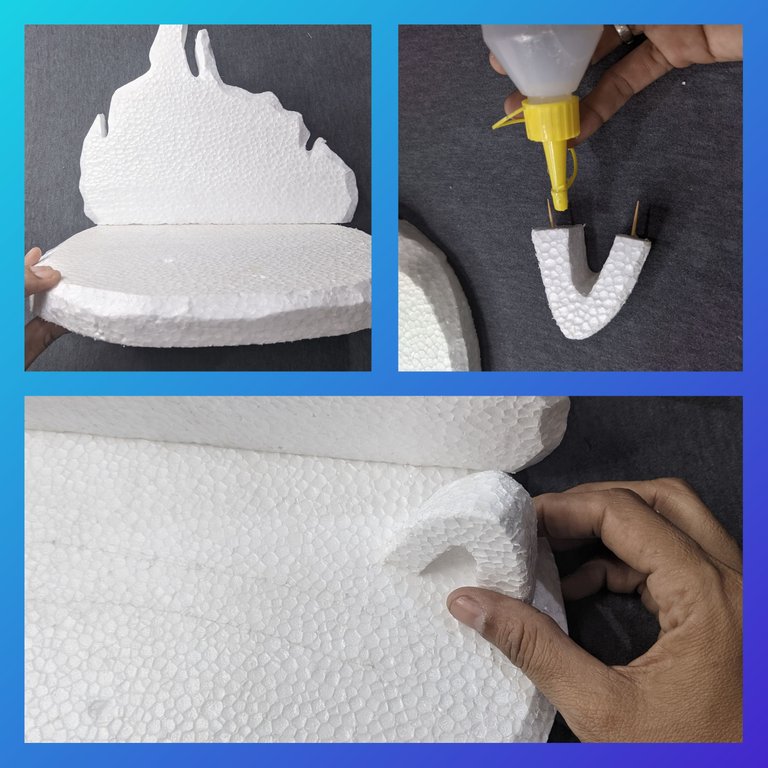
❄ ️ Take the cut out backing and put three toothpicks on it and then with the liquid silicone stick it to the base, fix it well and let it dry well.
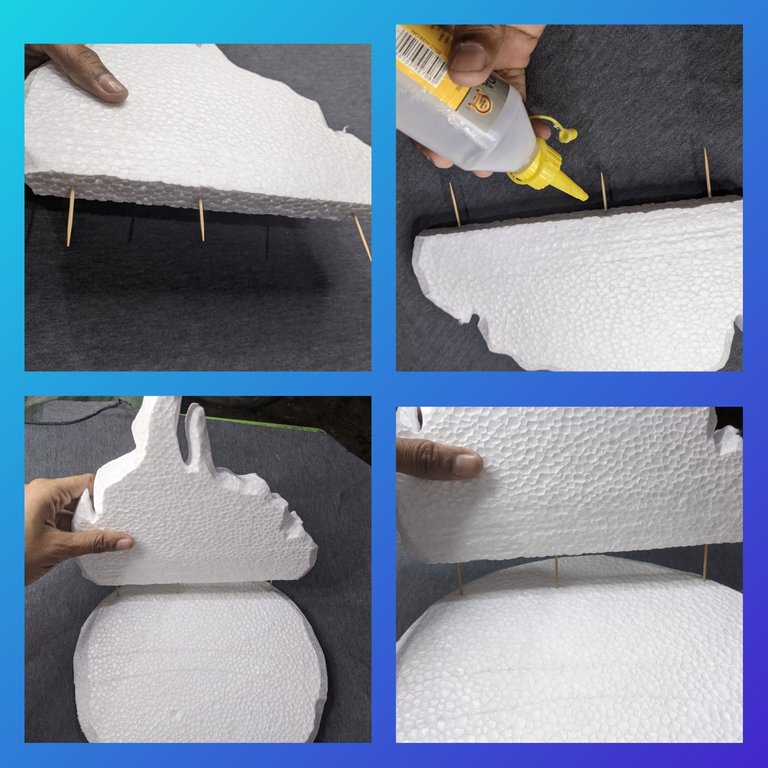
❄ ️ I repeated the same procedure with one of the icebergs and we pasted it in.
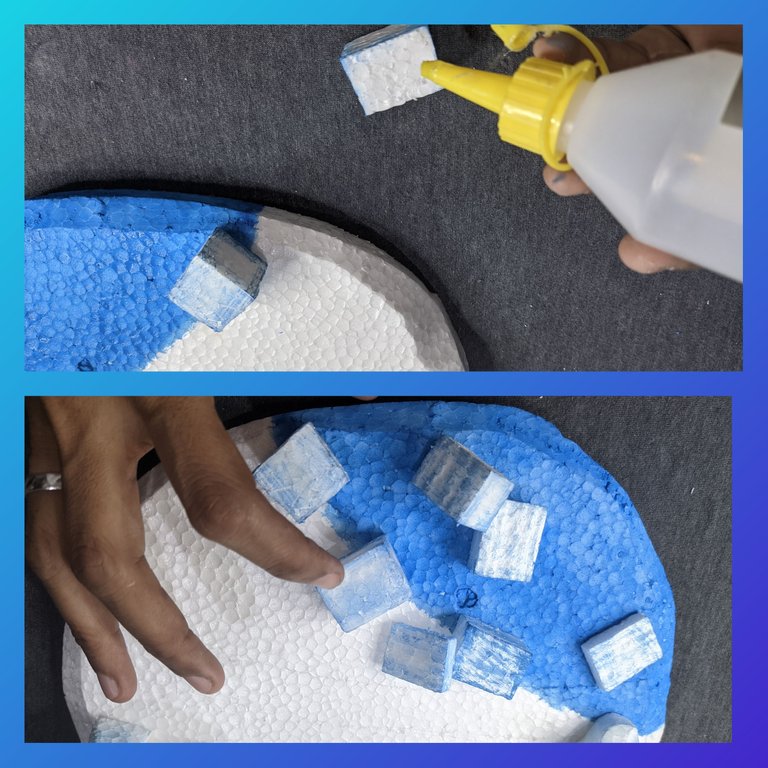
❄️ Now I took the ice cubes and I wanted to give them a little colour to enhance them, so I gave them some details with the blue paint and let them rest to dry well.
❄ ️ Take the blue paint and draw the water, just on one end of the base and dry well to continue working.
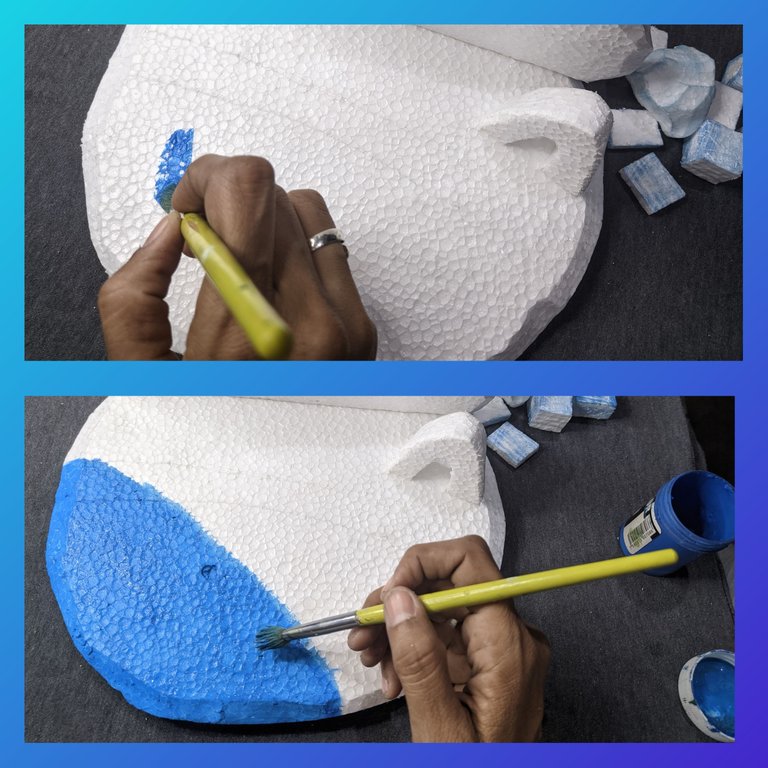
❄ ️ Now with the liquid silicone we gradually glued the ice cubes that we made earlier, I placed some on top of others, and I think it gave a very nice touch.
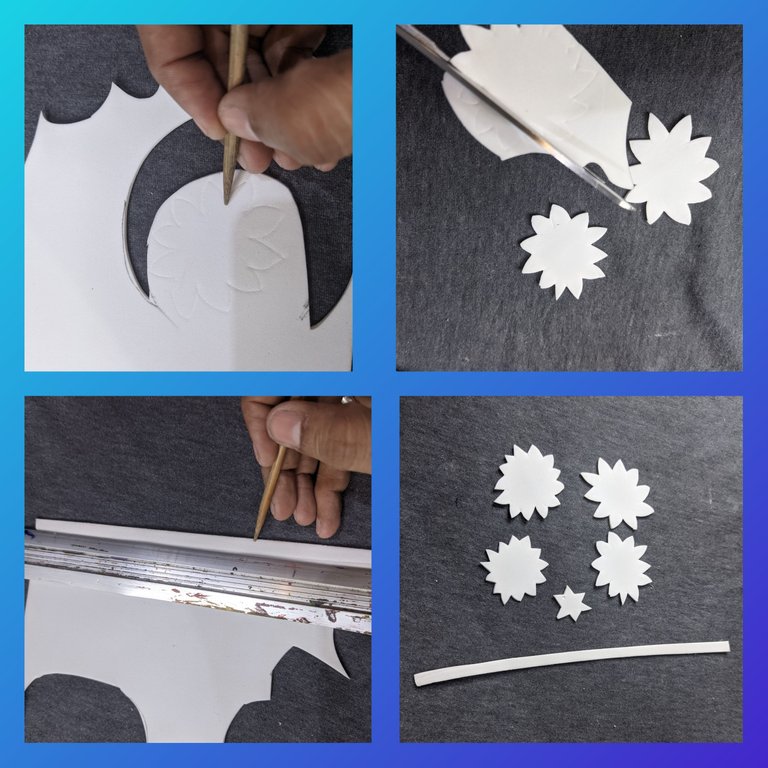
❄ ️ On the white foami I drew the shape I will work with for the pine tree I will place on the model, in total 6 pieces, each one smaller than the previous one, and I also cut out a strip about 22 cm long by one cm wide.
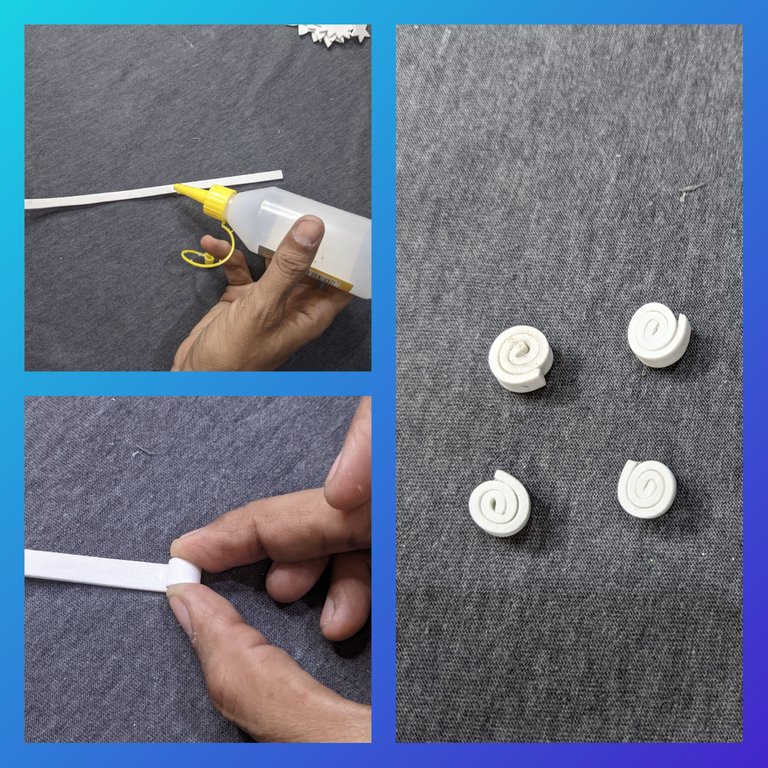
❄ ️ I took the strip and applied liquid silicone and started to roll it up, I worked like this, first roll it up and cut one piece, until I had 5 pieces, which will become our pine tree dividers.
Then I cut a strip of about 7 cm long by 1.5 cm wide and we also rolled it up.
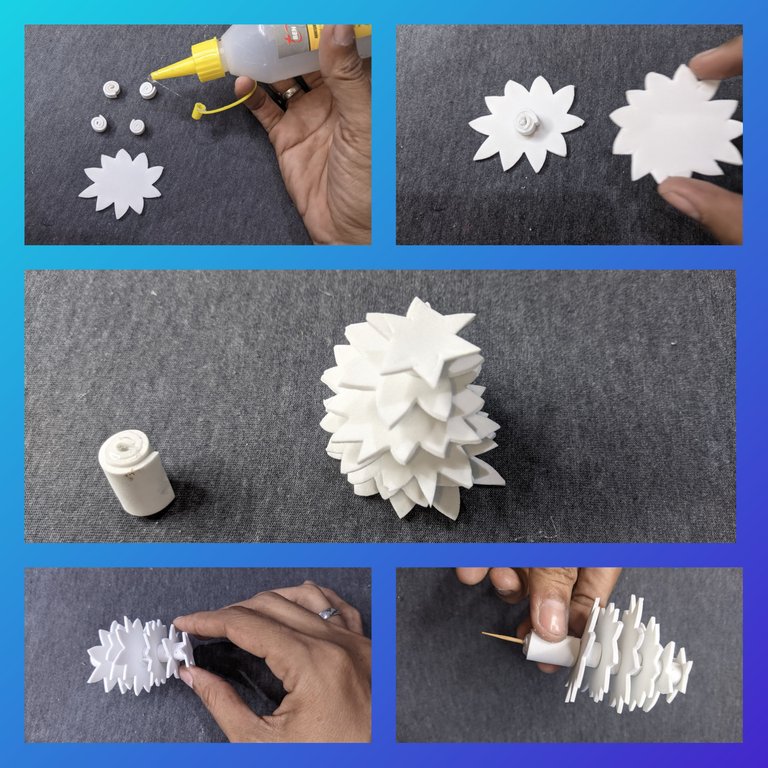
❄️ As we already have all the pieces ready and dry, I proceeded to assemble the tree, I took the largest piece, applied silicone and glued the piece that we formed rolled up, on top I placed another smaller piece, and so I repeated the process until the last one and let it dry well, when it is ready I inserted a stick to which I applied liquid silicone and glued the larger piece rolled up and let it dry.
❄ ️ He applied liquid silicone to the tree and glued it to the model.
❄ ️ From the foami traces I cut out some seaweed silhouettes and also some rays, to which I glued a toothpick.
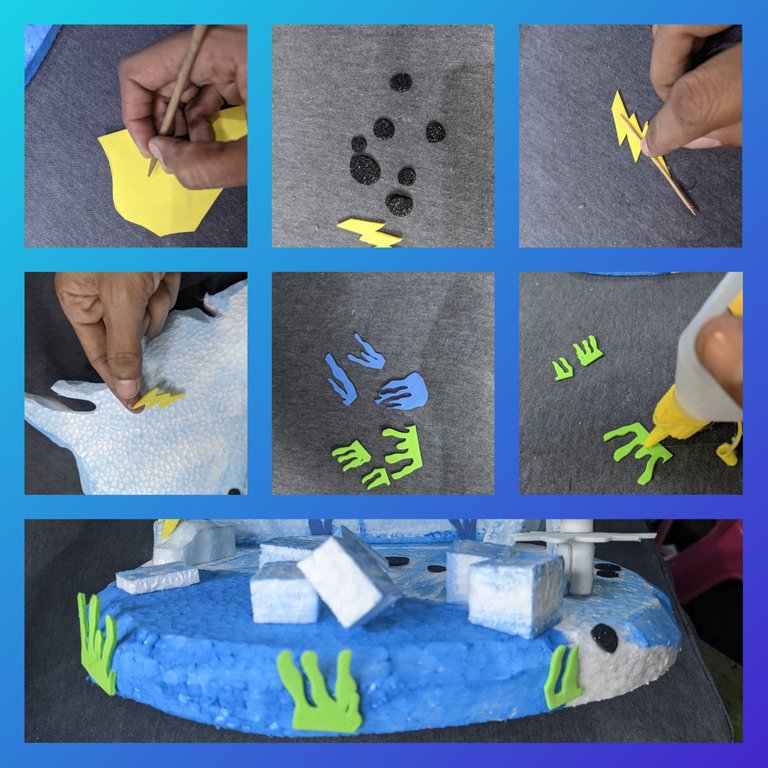
❄ ️ Now I drew and cut out the pieces that helped me put together our Zingu character.
Then we glued the algae, the rays and our main character inside the model and that's it, we're done.

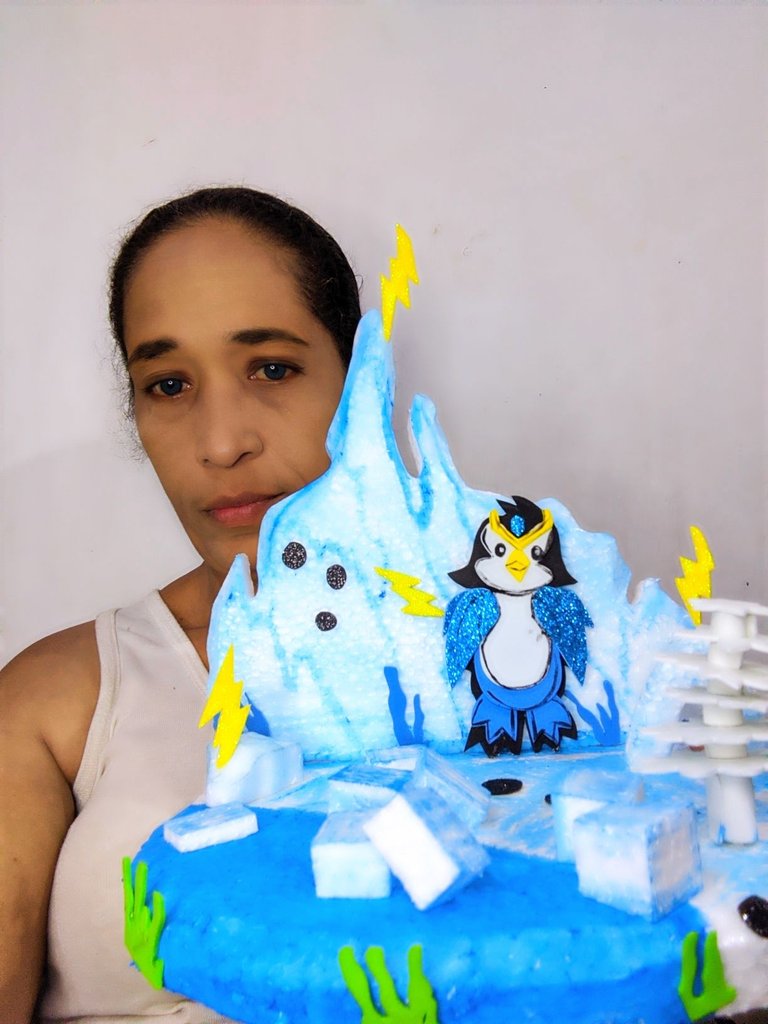
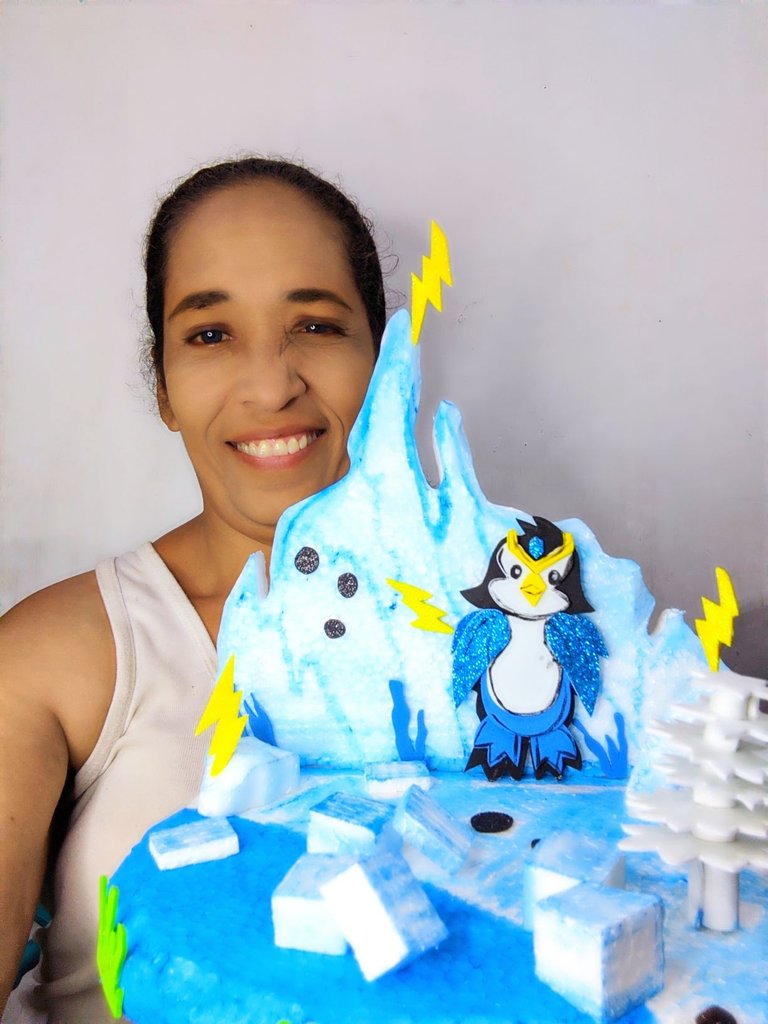
❄️ Final Photographs 🧊
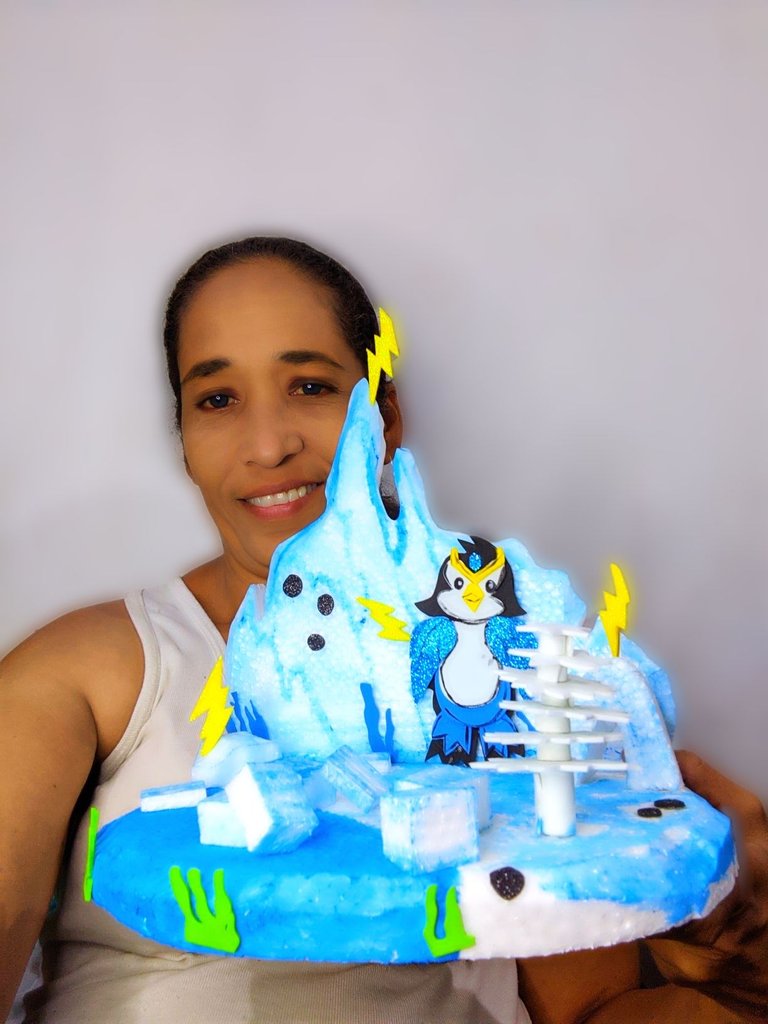
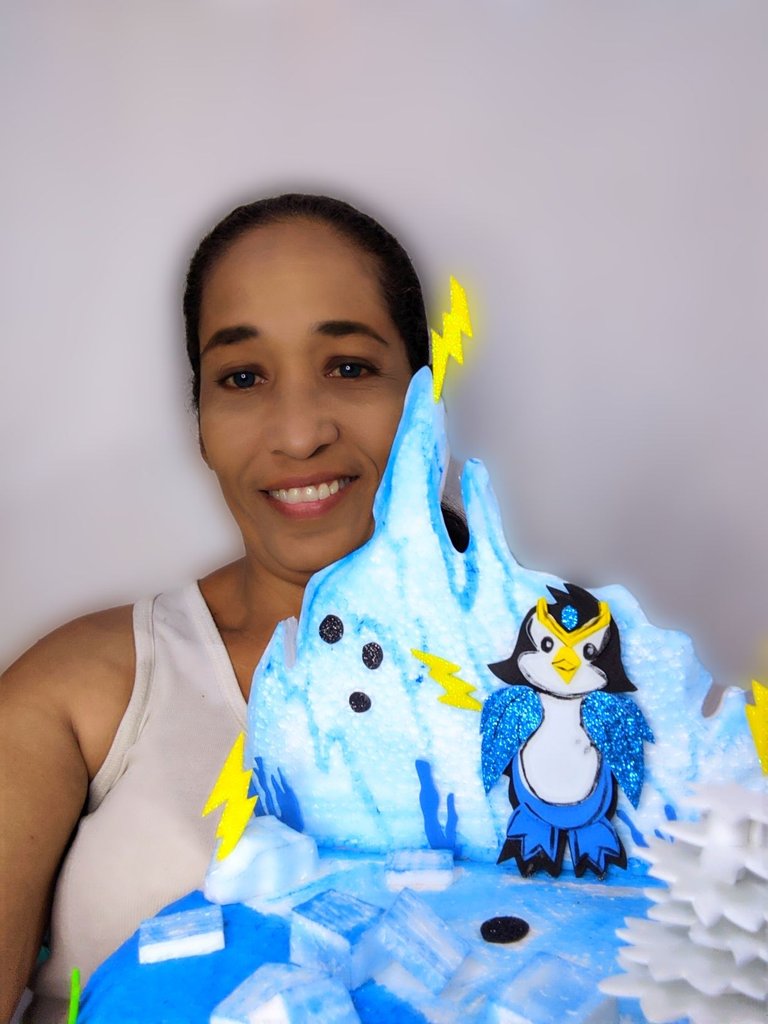
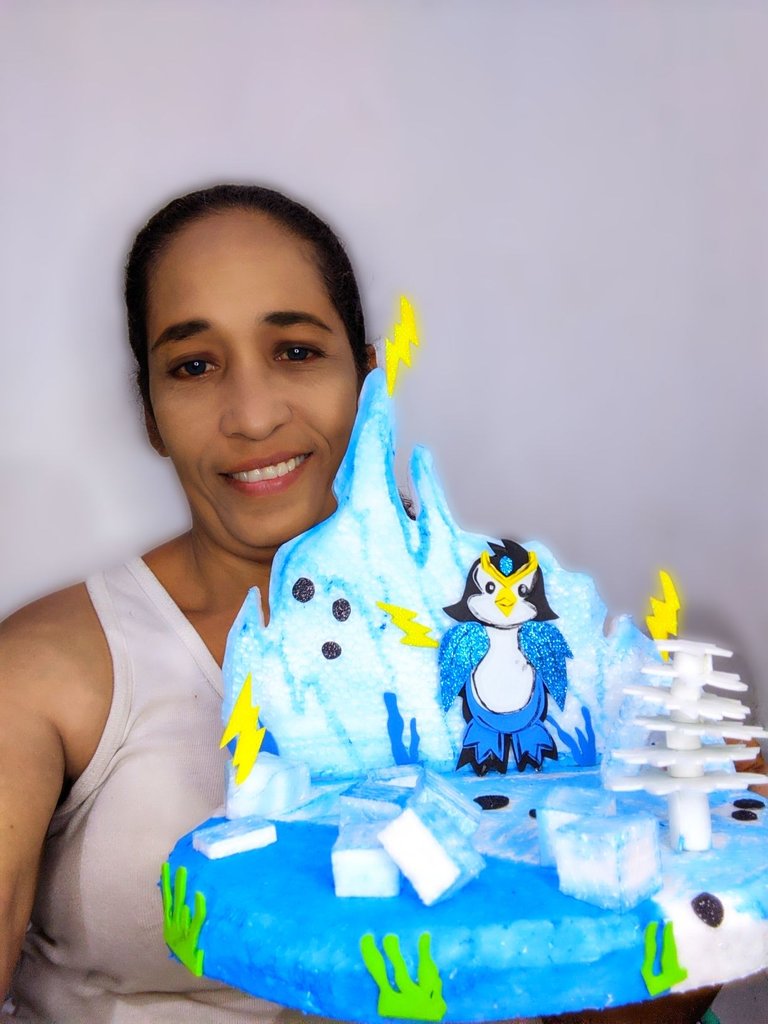
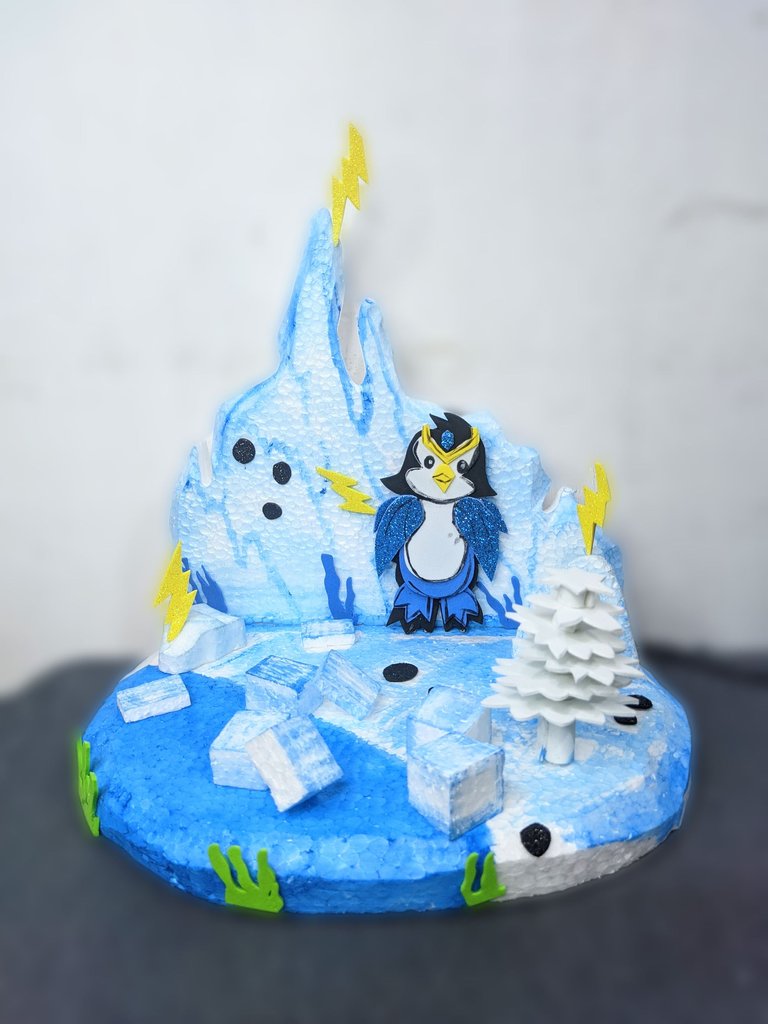
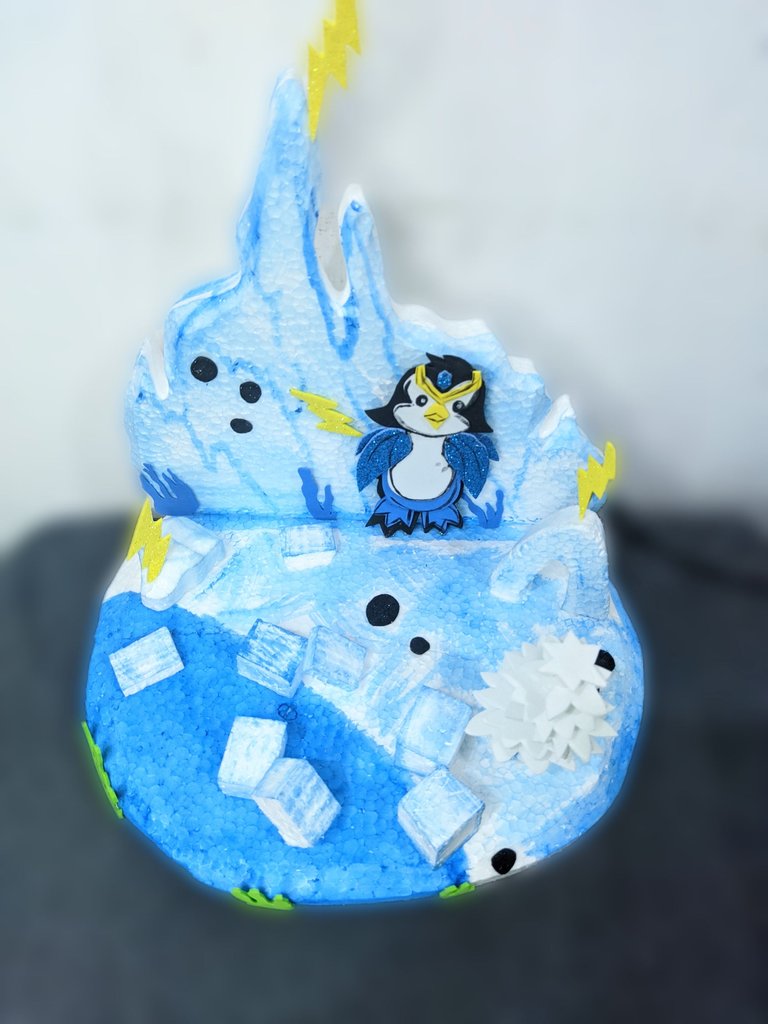
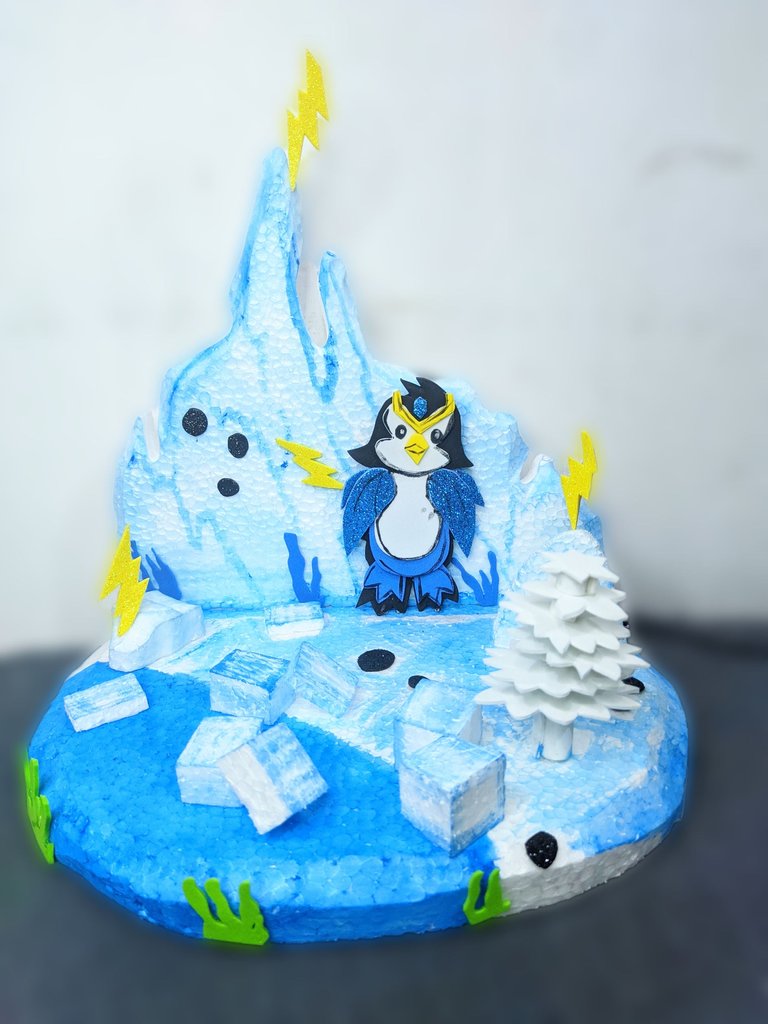
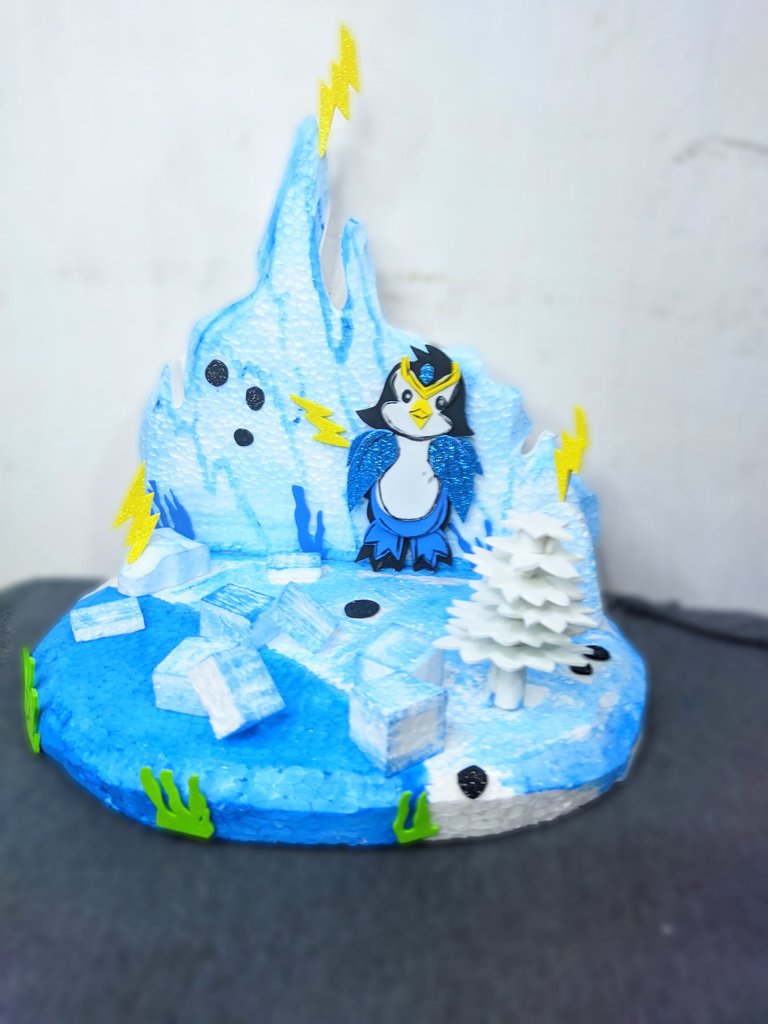
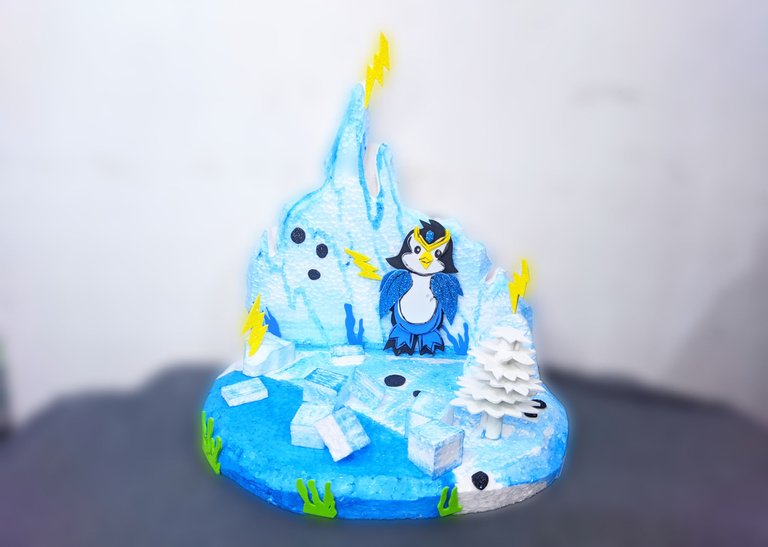
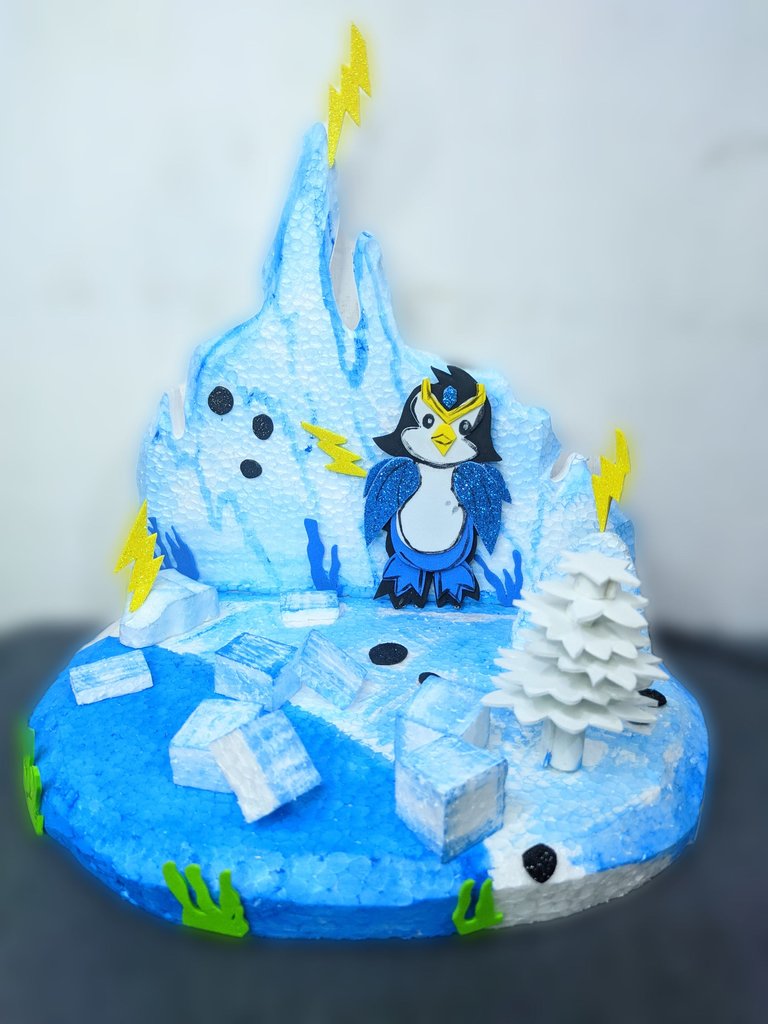
Tell me what you thought, I enjoyed the whole process even though it was a bit extensive, and not to mention the final result, I was delighted, for now I say goodbye hoping you like the work done.
🧊 CREDITS ❄️
All the pictures were taken with my Xiaomi redmi 9T phone and are my property, for editing I used the polish program and also used the translator Deepl.

Feliz y bendecido día tengan todos, hoy estoy bien emocionada porque quiero mostrarles mi arte creado especialmente para holozing, desde el momento que salió este nuevo personaje, me encantó y quería hacer algo con él, así sin pensarlo mucho, entre en mi taller y sin riendas sueltas a mi imaginación.
Zingu es un hermoso personaje creado para el juego
#holozing bien lindo, su aspecto refleja ternura, pero cuidado no te confíes detrás de este rostro angelical y tierno está un personaje fuerte y con grandes sorpresas a la hora de la batalla, y más cuando se trata de enfrentar criaturas voladoras, criaturas de hierbas y las de tierra, por lo que su aspecto sirve para hacer confiar a sus contrincantes dándole una ventaja significativa.
Yo quise recrear a Zingu en su elemento, el hielo, así que realicé una maqueta de un escenario que representa en todo su esplendor todo lo que encierra este tierno y carismático personaje, acá les muestro como fue el paso a paso.
🧊 MATERIALES ❄️
❄ ️ Anime o icopor.
🧊 Silicón líquido.
❄ ️ Foami de colores: negro, blanco, amarillo, azul y verde.
🧊 Pinturas al frío: azul, negra y blanca.
❄ ️ Palillos de dientes.
🧊 Cortador de anime.
❄️ Tijeras
🧊 lápiz.
🧊PROCESO CREATIVO ❄️
❄️ Iniciamos trabajando con el animé, para eso trabajé con el cortador de electrónico, y recorte la base de mi maqueta, y la parte de fondo, la corte de manera que quedará poco uniforme, buscando darle mayor realismo a los témpanos de hielo.
Luego recorté pequeñas figuras que serán nuestros cubos de hielos, también algunos témpanos de hielo, recordando que debe ser sin definición.
❄ ️ Tome la parte trasera que recorté y le coloque tres palillos y luego con el silicón líquido pegamos a la base, fijamos bien y dejamos secar bien.
❄ ️ Repetí el mismo procedimiento con uno de los témpanos y pegamos.
❄️ Ahora tome los cubos de hielos y les quise dar un poco de color para darle realce, así que le dí algunos detalles con la pintura azul y dejamos que repose para que seque bien.
❄ ️ Tome la pintura azul y dibuje el agua, solo en un extremo de la basé y secamos bien para seguir trabajando.
❄ ️ Ahora con el silicón líquido fuimos pegando poco a poco los cubos de hielos que realizamos anteriormente, yo coloque algunos encima de otros, y creo que le dió un toque muy bonito.
❄ ️ En el foami blanco dibuje la forma con la que trabajaré el pino que colocaré en la maqueta, en total 6 piezas, cada una más pequeña que la anterior, y también recorté una tira de unos 22 cm de largo por uno de ancho.
❄ ️ Agarre la tira y le aplique silicón líquido y comencé a enrollar, yo trabajé así, primero enrolle y corte una pieza, así hasta lograr tener 5 piezas, que vendrán a ser nuestros separadores del pino.
Luego recorté una tira de unos 7 cm de largo por 1.5 cm de ancho y también enrollamos.
❄️ Cómo ya tenemos todas la piezas listas y secas, procedi armar el árbol, tome la pieza más grande, aplicó silicón y pegamos la pieza que formamos enrollada, encima le coloque otra pieza más pequeña, y así fui repitiendo en proceso hasta llegar a la última y dejo secar bien, cuando está lista le inserte un palillo al que le aplicó silicón líquido y pegamos la pieza más grande enrollada y dejó secar.
❄ ️ Le aplicó silicón líquido al árbol y lo pegó en la maqueta.
❄ ️ De los trazos de foami recorte algunas siluetas de algas y también unos rayos, a los que le pegamos un palillo.
❄ ️ Ahora dibujé y recorté las piezas que me ayudaron a armar a nuestro personaje Zingu.
Luego pegamos las algas, los rayos y a nuestro personaje principal dentro de la maqueta y listo hemos terminado.
❄️ Fotografías finales 🧊
Díganme ¿qué les pareció?, yo disfruté todo el proceso a pesar de ser un poco extenso, y ni hablar del resultado final, quedé encantada, por ahora me despido esperando que les guste el trabajo realizado.
🧊 CRÉDITOS ❄️
Todas las fotografías fueron tomadas con mi teléfono Xiaomi redmi 9T y son de mi propiedad, para su edición utilice el programa polish y además utilice el traductor Deepl.
https://twitter.com/Mayelin2021/status/1774502685628043552?t=ES5tkMI265VHyY6K8d4Mfg&s=19
Te quedó muy hermoso, ese Zingu se ve tierno 💞
Muchísimas gracias amiga, si bueno es que el es un personaje muy tierno, a mí me encanta porque así oculta sus poderes, saludos
Hola amiga, siempre he considerado que eres una artista muy talentosa, desde tus maquillajes llamativos hasta tus manualidades y esta manualidad es prueba de ello, me encantó, felicidades y saludos desde Maturín.
Me halagan tus palabras, siempre he tratado de hacer las cosas bien y con amor, me alegran que gusten, no sabía que eras de Maturin yo soy de Monagas de temblador aunque llevo años en Cumaná Estado Sucre-Venezuela
gracias por visitar mi blog y apoyar.
Está buenisimooo! QUEDÓ ESPECTACULAAAR!😱 Yo lo haría pero mis manos no dan para eso jajaja, no llego ni siquiera a una cuarta parte 🤣
Lo mio fue preescolar con puro papel crepe😂
Jajajaja que gracioso,no te creas es cuestión de atreverse, nadie nace aprendido, saludos
Wow... This is not just beautiful but very creative. I love what you did here.
This post has been selected to be curated by hive learners community. Kindly click on the banner to visit our community and check out our discord channel here.
Oh thank you so much for your support, I am so grateful with all my heart.
Me parece muy creativa tu idea de hacer el escenario de batalla, excelente 👌 👍🏻 Saludos
Mil gracias amiga, estoy preparando uno más grande y mejor ya pronto lo verán, me encanta hacerlos, me ayuda a calmar la ansiedad, gracias por el apoyo
Bonito trabajo el que compartes amiga... Saludos Bonita noche 😌🌃
Muchas gracias amiga por tus palabras 🥀💖🥀
Que lindo el escenario que creaste para el pequeño y tierno Zingu. Me gusto mucho tu creatividad cariño.
Que tengas un hermoso día...
!DIY
Muchísimas gracias amiga
You can query your personal balance by
!DIYSTATSGracias
Espectacular ese trabajo de manualidades, realmente una creación gélida, con su gracioso pinguino
Así mismo es mi apreciado amigo, gracias por el apoyo saludos