[Esp/Eng] DIY: BOLSITAS EN PAPEL KRATF 💞🌷

Hola, hola, gente bonita de Hive, paso por aquí nuevamente para mostrarles está bolsita de papel Kraft, ideal para regalos o entregar pedidos.
_Hello, hello, beautiful people of Hive, I'm stopping by again to show you this little Kraft paper bag, ideal for gifts or delivering orders.
Desde que emprendí, el nombre el, eslogan o los colores de mi marca estaban muy claros, pero siempre he tenido problemas con el empaque, lo he cambiado varias veces, es hasta ahora de las decisiones más difíciles. Esta fue la idea principal, aunque sinceramente no era tan rentable comprar las bolsas de kratf, pero comprar el papel y hacerlas cambia un poco el panorama.
Since I started, the name, slogan or colors of my brand were very clear, but I have always had problems with the packaging, I have changed it several times, It is so far one of the most difficult decisions. This was the main idea, although honestly it was not that profitable to buy the Kratf bags,but buying the paper and making them changes the picture a little
.
Obviamente tengo que seguir practicando hasta que las bolsas queden parejas y perfectas. Pero quise compartir la primera que hice con ustedes.
Obviously I have to keep practicing until the bags are even and perfect. But I wanted to share the first one I made with you.
DIY:
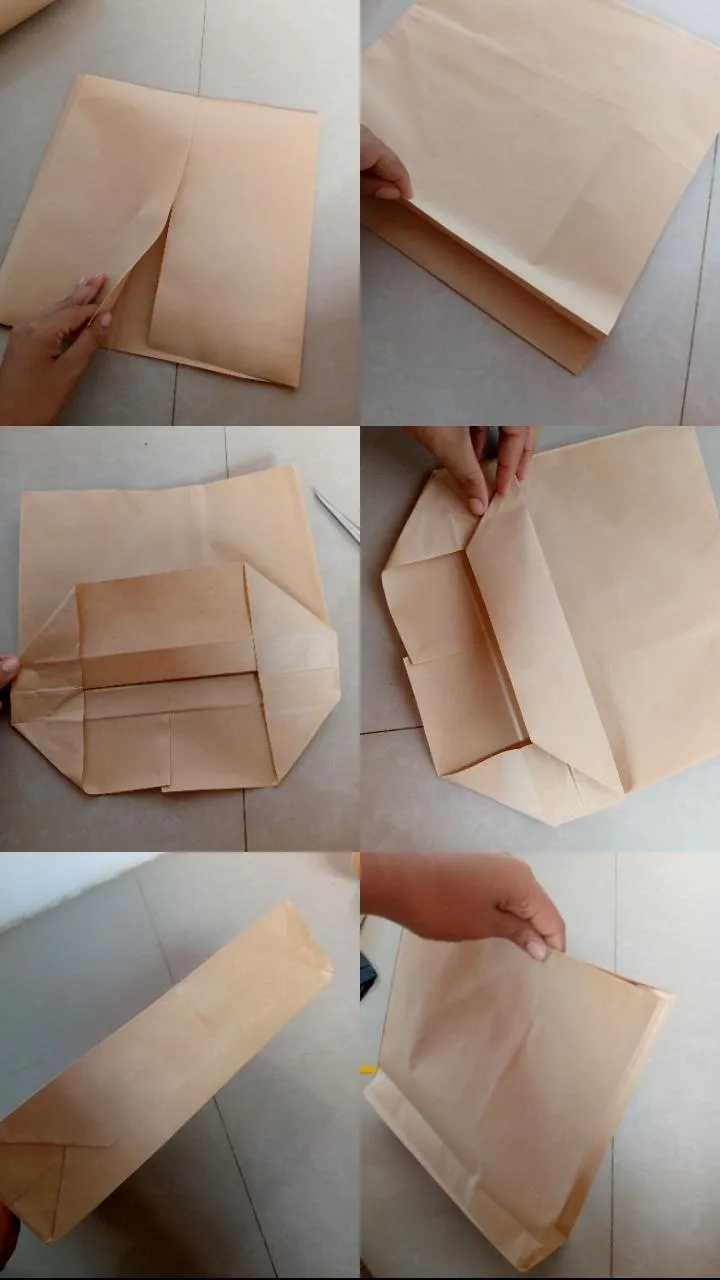
•Primero será cortar una pieza de papel Kratf de 60cm de ancho, por 30 de alto.
•Esta pieza debe ser doblada en partes iguales dejando la abertura en el centro.
•Después pegar con pegamento y doblar los laterales un cm de cada lado para dar forma, tal cual muestra en la imágen.
•La parte posterior debe ser doblada para hacer el fondo. Luego emparejar bien, doblar los dos lados hacia el centro y pegar lo restante.
First you will need to cut a piece of Kraft paper 60cm wide by 30cm high.

•This piece must be folded in equal parts, leaving the opening in the center.

•Then glue with glue and fold the sides one cm on each side to give it shape, as shown in the image.

•The back part must be folded to make the bottom. Then match it well, fold the two sides towards the center and glue the rest.
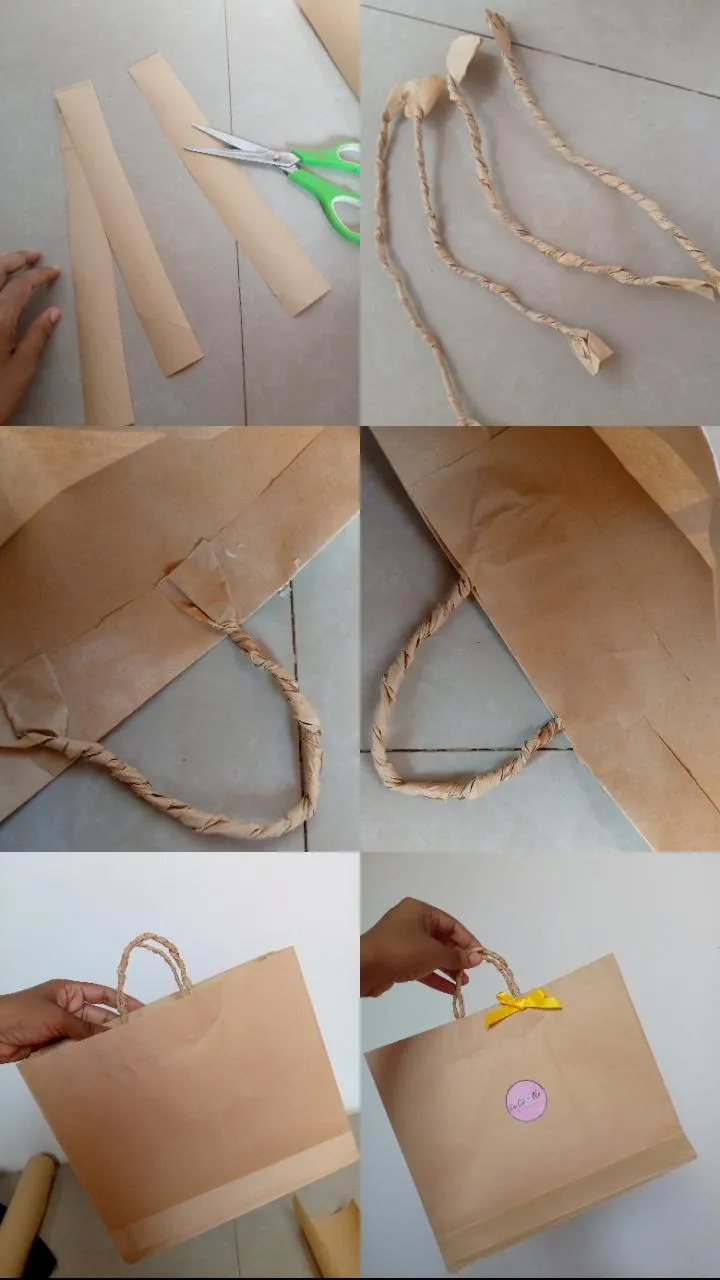
Por último hay que hacer las asas, para eso tomamos tiras de papel y enrollamos. Pegamos al principio de la bolsa, midiendo que estén parejos y reforzamos con otro pedazo de papel.
Finally you have to make the handles, for that we take strips of paper and roll them up. We glue to the beginning of the bag, measuring that they are even and we reinforce it with another piece of paper.
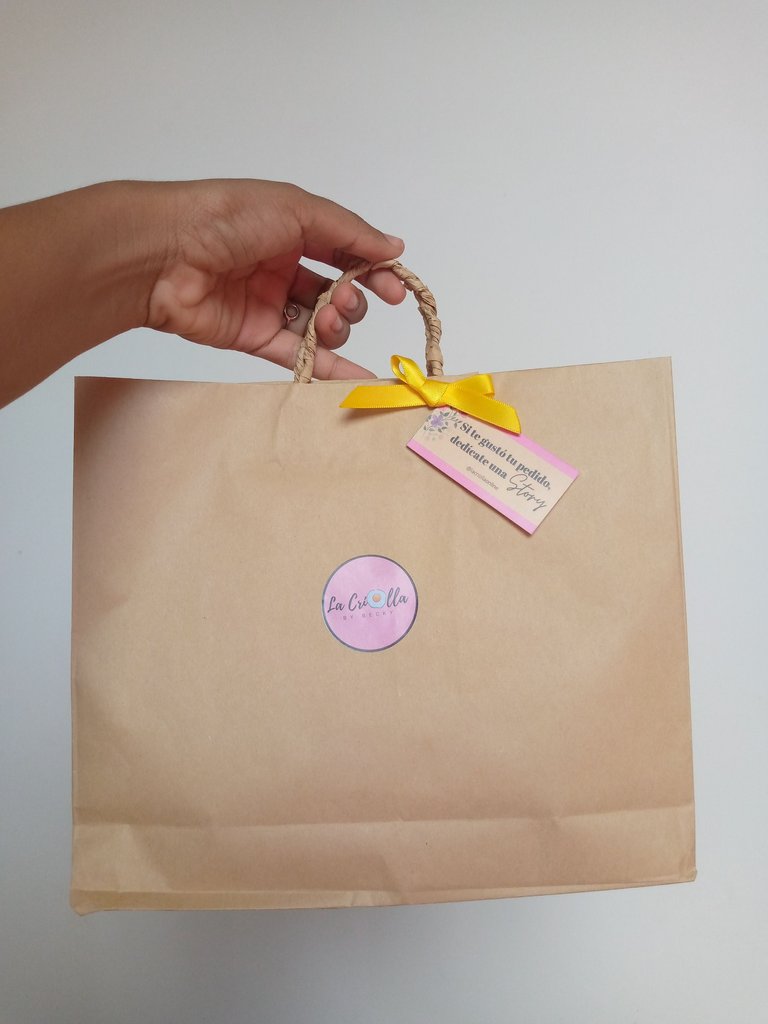
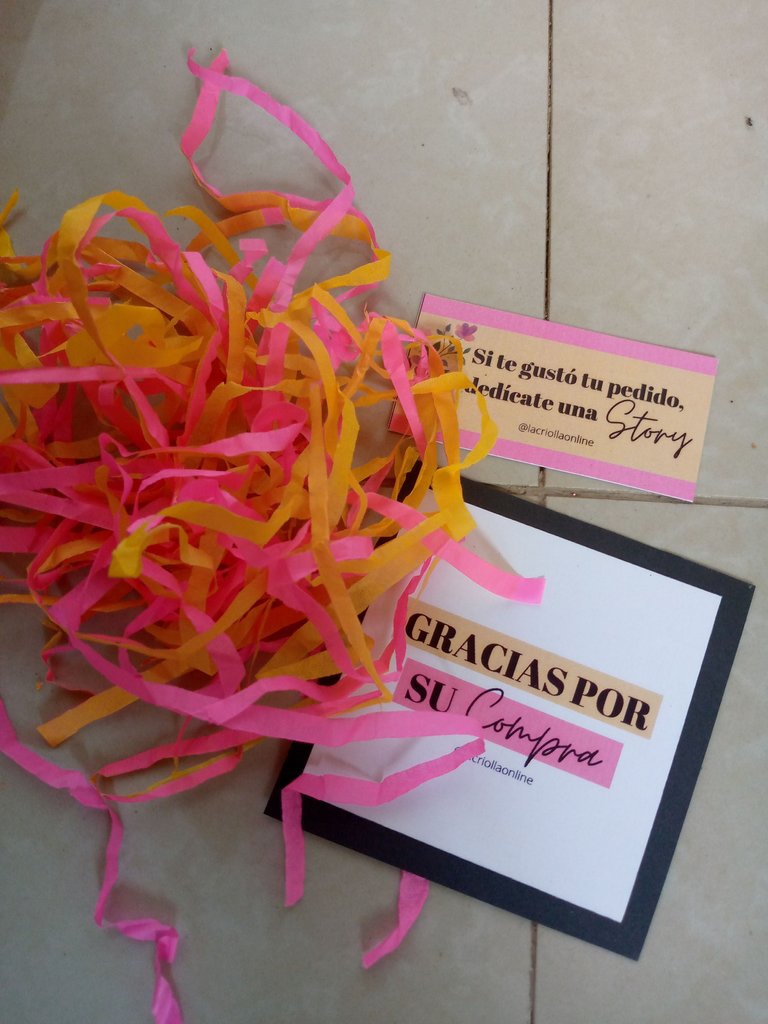
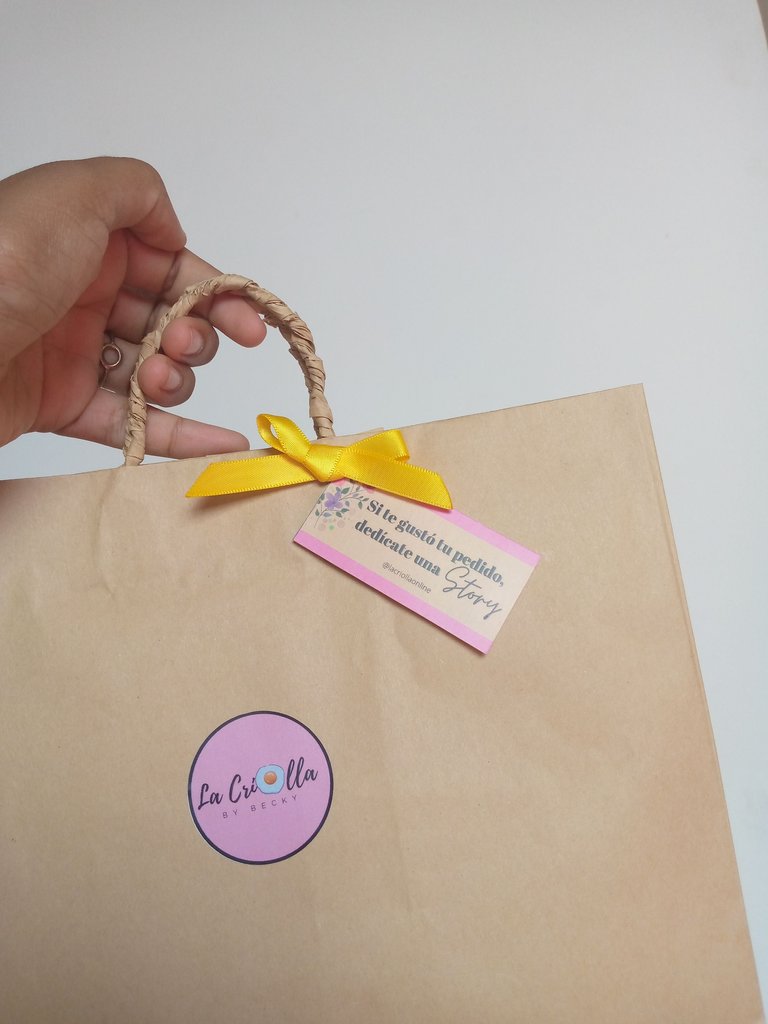
Ahora ya está lista solo faltan detalles, una tarjeta si es un regalo en mi caso, yo agrego tiras finas de papel de seda, tarjetas y el logo de mi emprendimiento.
Now it is ready, only details are missing, a card if it is a gift in my case, I add thin strips of tissue paper, cards and the logo of my business
Así quedan estás bonitas bolsitas, echas a mano con papel Kratf, estoy segura que pueden sacarte de un apuro, incluso en cartulina, si quieres agregar color quedan perfectas.
This is how these pretty little bags look, made by hand with Kraft paper, I'm sure they can get you out of a bind, even on cardboard, if you want to add color they look perfect.
Si llegaste hasta aquí, gracias por leerme. Les envío la mejor vibra creativa, nos vemos en un próximo post✨🌷
If you made it this far, thank you for reading me. I send you the best creative vibes, see you in the next post

Estas bolsas son super fáciles de hacer y muy prácticas para todo, desde regalos hasta para guardar cosas. Tu tutorial es perfecto porque muestra el paso a paso muy sencillo para crearlas, buen trabajo 😊
Gracias a tí por tomarte el tiempo de leer el post, feliz de que te haya gustado el tutorial. Saludos Mary💞🌷
Estas bolsas son muy útiles y sencillas de hacer, gracias por compartir el paso a paso muy bien explicado.
!DIY
You can query your personal balance by
!DIYSTATSCongratulations @medicenbecky! You have completed the following achievement on the Hive blockchain And have been rewarded with New badge(s)
Your next target is to reach 700 replies.
You can view your badges on your board and compare yourself to others in the Ranking
If you no longer want to receive notifications, reply to this comment with the word
STOPCheck out our last posts:
Están hermosas tus bolsitas. Yo tengo unas fascinación especial por las bolsas de regalos. Saludos
You've made a very nice bag.
Te quedó genial 😊 yo también hago mis bolsitas de papel Kraft 😁👍