CONTINUING WITH ANOTHER SIMPLE MASONRY WORK.

ENGLISH:
My dear hivers here I am again to show you step by step a masonry work, after having done in its initial stage a built-in kitchen design. Continuing with this type of work in this opportunity I had to make some shelves of reinforced concrete, resistant and durable.
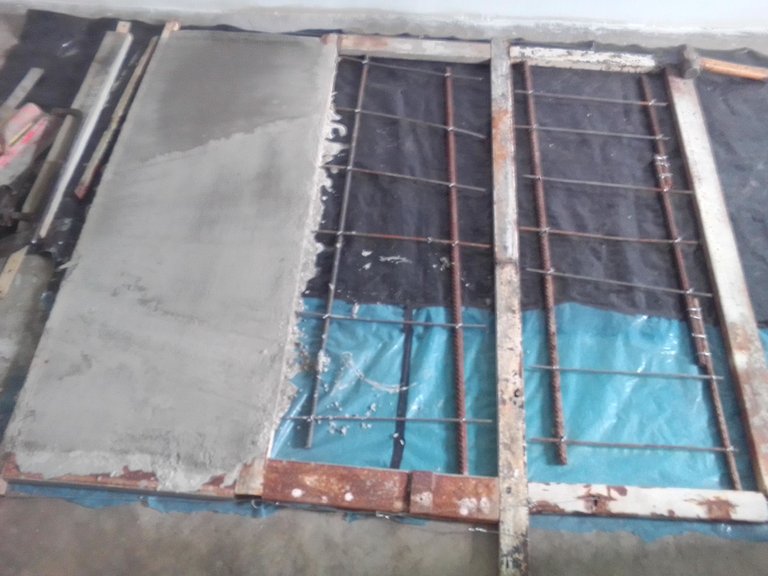
For the realization of this work I started by preparing the formwork with 1" wide tubes, that is 2.5 centimeters, obtaining a good presentation of the plates. Continuing with the fabrication, I used ½ inch stiffeners and wire rod to make the grating, placing the stiffeners at each end of the plates lengthwise.
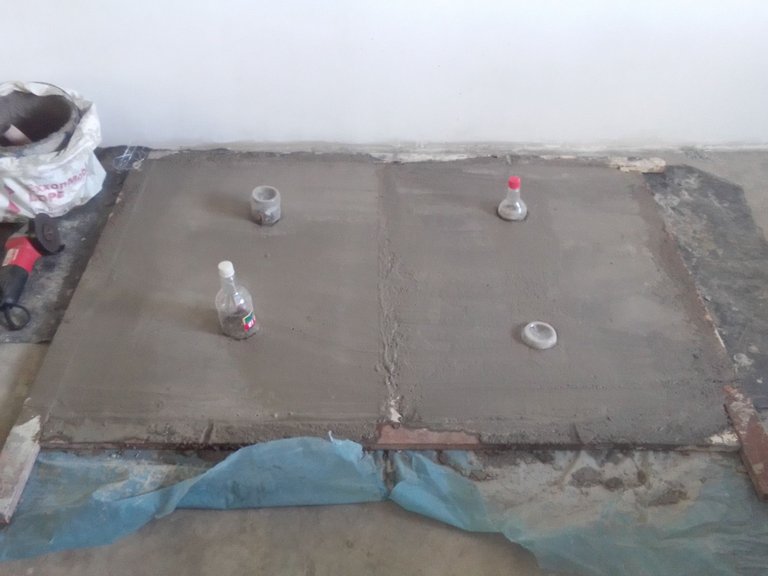
To make the 120 centimeter long and 40 centimeter wide plates, two stiffeners were used for each plate, while the 80 centimeter long and 60 centimeter wide plates were reinforced with three stiffeners to make them more compact and prevent them from fracturing. We proceeded to pour the mixture with a good amount of cement and sifted sand to achieve a smooth surface, we also placed some molds on the plates momentarily where the lights (Ojo de Buey) will go, to give clarity and better presentation to these shelves.

Using a "Level of Hose" I marked the area where the wall will be broken to embed the plates, leaving a depth of approximately 5 centimeters so that the moment of coupling will be easier.
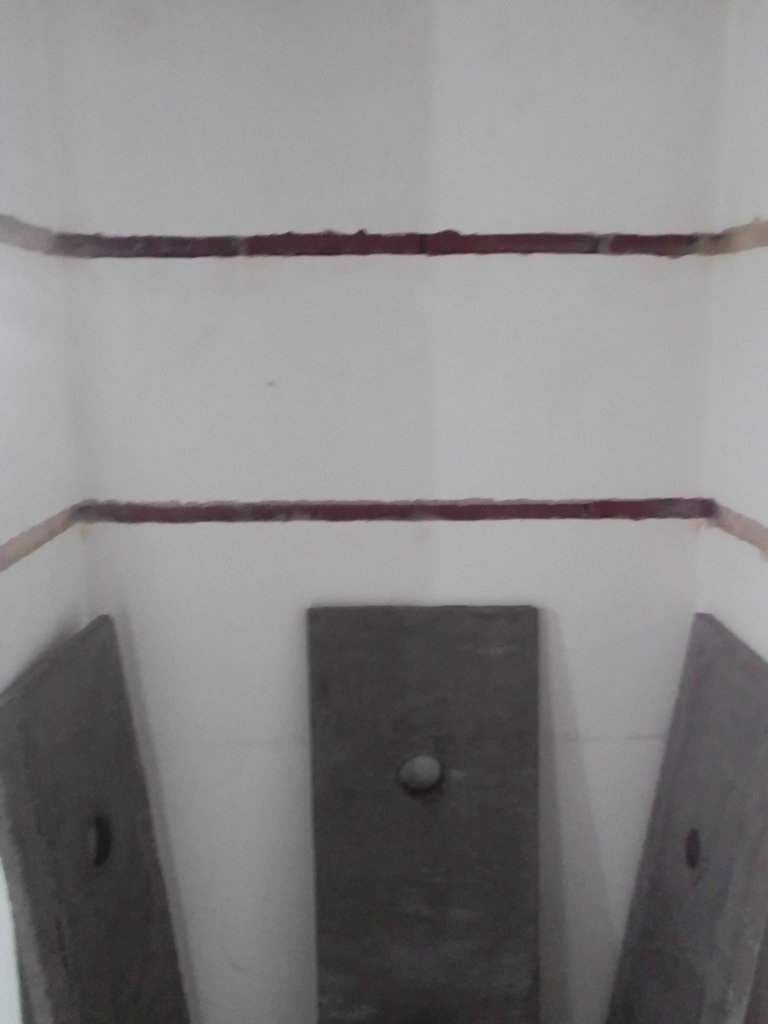
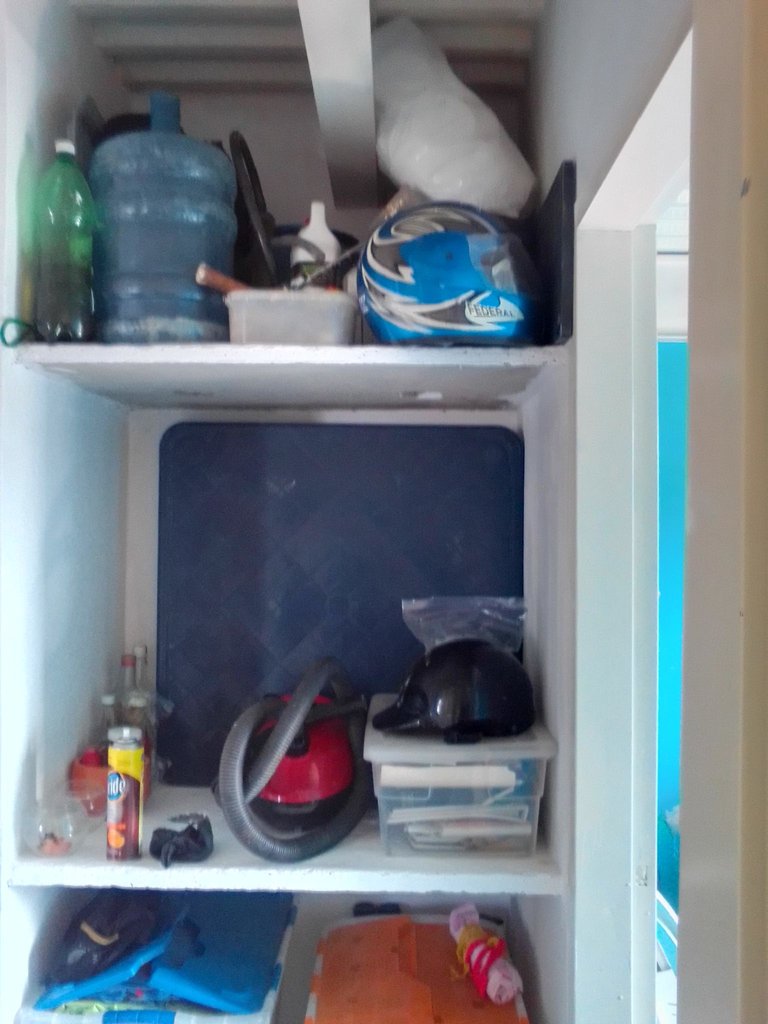
After 24 hours of hardening, the plates were mounted on the wall, leaving a separation of about 40 centimeters of height between them. Then the grooves between the plates and the wall were covered, giving it a finish with "Pasta Profesional", to correct any irregularities in the wall. to correct any irregularities in the surface.
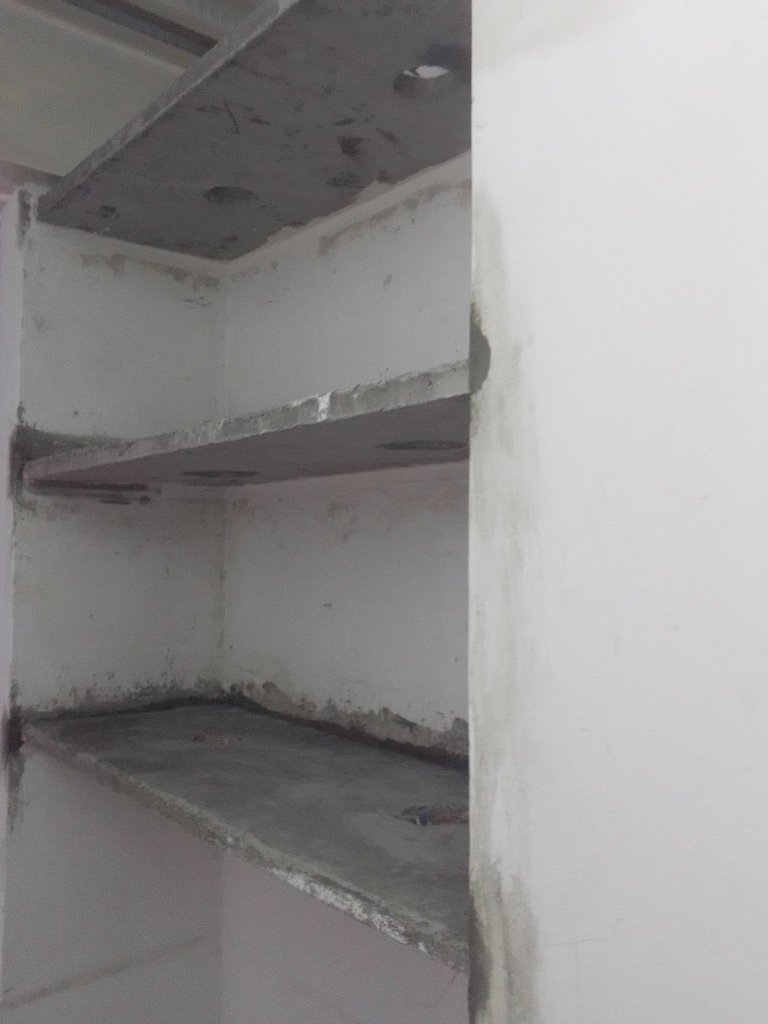
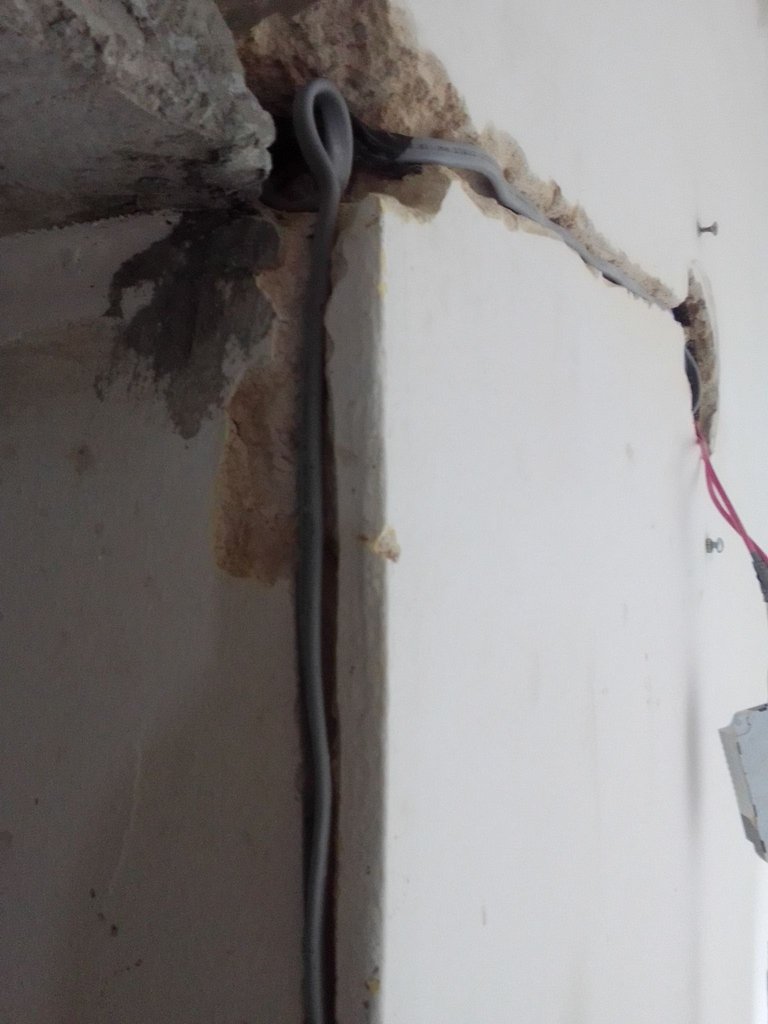
To finish with the work and with the help of an emery, I made a groove where the cable would pass to make the electrical installation to the lights that go in the divisions of the shelves. Using "Lead wire" designed to cover it with a mixture, being completely covered. It is necessary to emphasize that this cable brings double covering to protect of the corrosion.
Well I hope it has been of your interest and of benefit at the time of doing this type of work, being something easy to manufacture and much more durable. It would only be pending if you want to cover the plates with a ceramic of your preference. Without more than wishing you many blessings and that the supreme being takes care of us of many natural phenomena that have brought havoc worldwide, I say goodbye until next time.
ESPAÑOL:
CONTINUANDO CON OTRO SENCILLO TRABAJO DE MAMPOSTERÍA
Estimados Hivers aquí estoy de nuevo para mostrarles paso a paso un trabajo de albañilería, habiendo realizado las etapas iniciales del diseño de una cocina empotrada. Siguiendo con este tipo de trabajos en esta ocasión tengo que hacer unas estanterías de hormigón armado, resistentes y duraderas.
Para realizar este trabajo, empecé preparando el encofrado con tubos de 1" de ancho, es decir, 2,5 centímetros, para obtener una buena presentación de la losa. Siguiendo con la fabricación, utilicé varillas de ½" y varillas de alambre para hacer el enrejado, colocando las varillas en cada extremo de la losa a lo largo.
Para fabricar placas de 120 centímetros de largo y 40 centímetros de ancho, se utilizaron dos rigidizadores para cada placa, mientras que las placas de 80 centímetros de largo y 60 centímetros de ancho tenían tres rigidizadores para reforzarlas y así hacerlas más densas, evitando que se agrieten. Procedimos a verter la mezcla con una buena cantidad de cemento y arena tamizada para lograr una superficie lisa, también colocamos unos moldes donde irán las lámparas (Ojo de Buey), para dar mayor claridad y presentación a estos estantes.
Con el "Nivel de la manguera", marqué las zonas donde se rompería la pared para empotrar las placas, dejando una profundidad de unos 5 centímetros para que cuando se instalaran fuera más fácil.
Tras 24 horas de endurecimiento, las placas se fijaron a la pared, con unos 40 centímetros de espacio entre ellas. A continuación, la ranura entre el panel y la pared se cubre con "Pasta Profesional", para corregir cualquier irregularidad de la superficie.
Para completar este trabajo y con la ayuda de una lija, hice las ranuras por donde pasarán los cables para hacer la instalación eléctrica de las luces que van dentro de las divisiones de las estanterías. Utilizando el "cable de plomo" diseñado para cubrirlo con la mezcla, se cubrió por completo. Cabe destacar que este cable tiene un doble revestimiento para protegerlo de la corrosión.
Espero que haya sido de su interés y de gran útilidad a la hora de hacer este tipo de trabajos, siendo algo fácil de hacer y mucho más duradero. Me despido no sin dejar de desearles muchas bendiciones y que el see supremo nos protejan de tantos fenómenos naturales que han causado estragos en todo el mundo, me despido hasta la próxima.
Dear @medicenchuchi. Please be reminded to follow our community rules. Thank you.
Congratulations @medicenchuchi! You have completed the following achievement on the Hive blockchain and have been rewarded with new badge(s):
Your next target is to reach 30 posts.
You can view your badges on your board and compare yourself to others in the Ranking
If you no longer want to receive notifications, reply to this comment with the word
STOPTo support your work, I also upvoted your post!
Support the HiveBuzz project. Vote for our proposal!
Dear @medicenchuchi, sorry to jump in a bit off-topic.
May I ask you to review and support the new proposal (https://peakd.com/me/proposals/240) so I can continue to improve and maintain this service?
You can support the new proposal (#240) on Peakd, Ecency, Hive.blog or using HiveSigner.
Thank you!