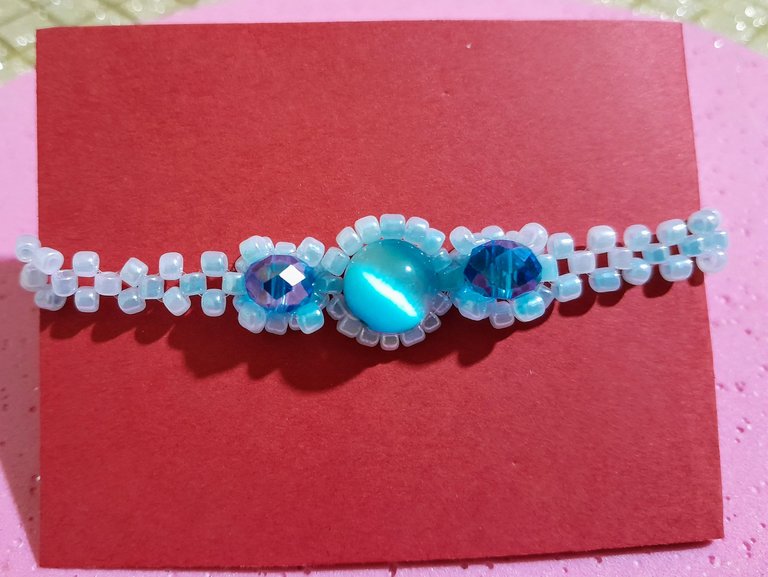
Beautiful blue bracelet elaborated with beads and crystals [Esp-Eng].
💙 Bienvenido 💙
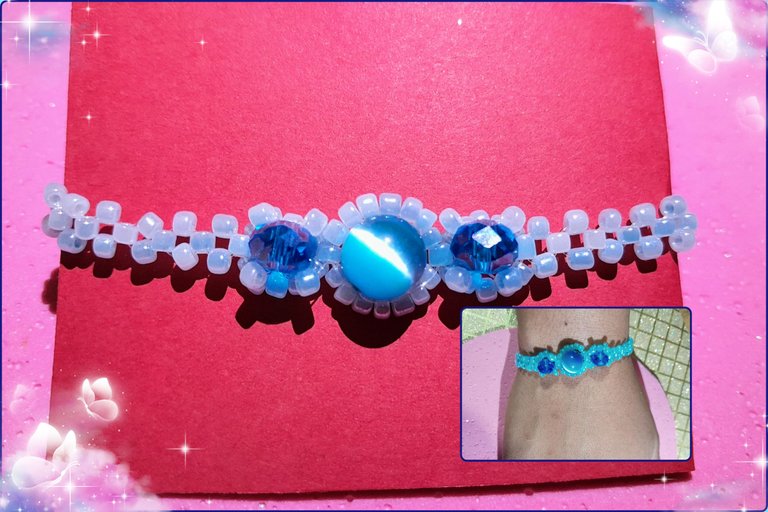
Hola amigos de Jewelry 💎, un cordial saludo para esta linda comunidad llena de creatividad y talento, me alegra compartir nuevamente con ustedes, hoy les traigo la elaboración de una hermosa pulsera en tonos azules, uno de mis colores favoritos, sencilla, elegante y podemos utilizar la pedrería de nuestra preferencia, esta pulsera tendrá como decoración central una piedra azul con destellos y cristales.
Es hermoso lo que podemos hacer con pocos materiales y creatividad, adore el resultado de esta pulsera, podemos combinar con cualquier atuendo y quedara genial, sin más preámbulos, aquí les muestro el paso a paso.
💙 Welcome 💙
Hello friends of Jewelry 💎, a warm greeting for this nice community full of creativity and talent, I am happy to share again with you, today I bring you the elaboration of a beautiful bracelet in blue tones, one of my favorite colors, simple, elegant and we can use the rhinestones of our preference, this bracelet will have as central decoration a blue stone with sparkles and crystals.
It is beautiful what we can do with few materials and creativity, love the result of this bracelet, we can combine it with any outfit and it will look great, without further ado, here I show you the step by step.
💙 Materiales| Materials 💙
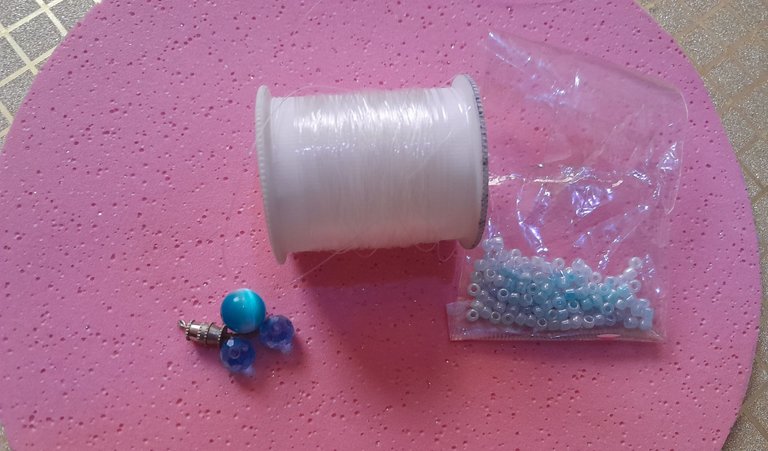
Para este proyecto necesitaremos los siguientes materiales:
Cristales azules.
Piedra azul.
Mostacillas azules de 4 milímetros.
Nailon transparente, número 0.30.
Cerrador.
For this project we will need the following materials:
Blue crystals.
Blue stone.
Blue beads of 4 millimeters.
Transparent nylon, number 0.30.
Closer.
Esta pulsera tiene pocos materiales, para esta elaboración podemos jugar un poco con la pedrería, en este caso la hice con el azul, pero también puede ir de varios colores y otros tipos de piedras.
This bracelet has few materials, for this elaboration we can play a little with the rhinestones, in this case I made it with blue, but it can also go with various colors and other types of stones.
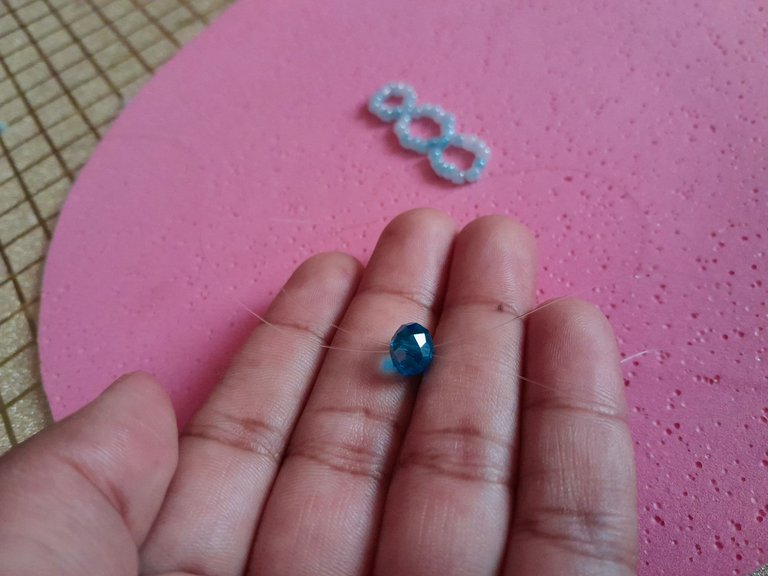
💙 Paso 1| Step 1 💙
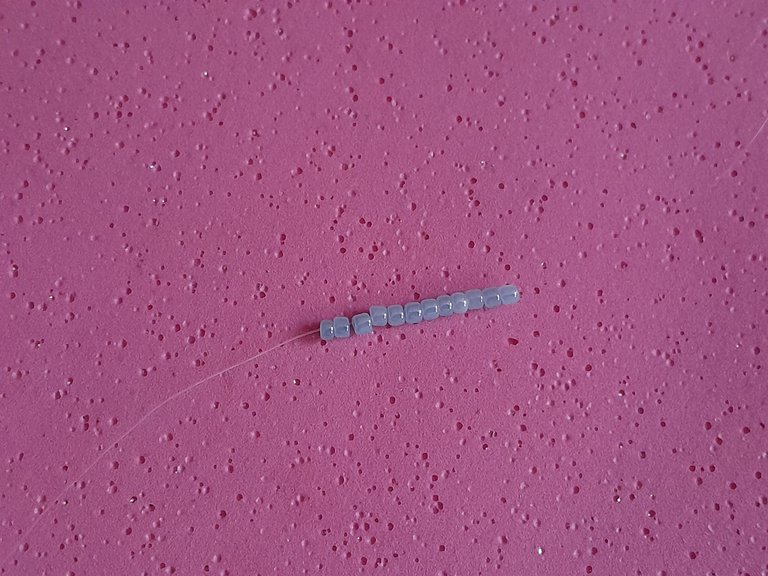
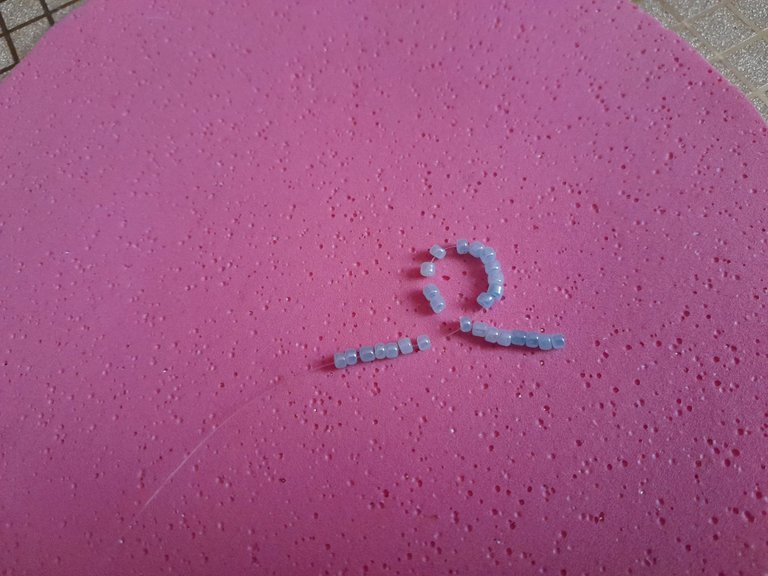
Iniciamos con 40 centímetros de nailon, introducimos doce mostacillas y cruzamos las dos partes del nailon por la última mostacilla, formando un círculo, ahora introducimos siete mostacillas en cada nailon y cruzamos el nailon por una mostacilla más, repetimos el mismo procedimiento con la diferencia que ahora son seis mostacillas de cada lado, ahora tendremos tres círculos, el del medio será más grande para la piedra principal.
We start with 40 centimeters of nylon, we introduce twelve beads and cross the two parts of the nylon by the last bead, forming a circle, now we introduce seven beads in each nylon and cross the nylon by one more bead, we repeat the same procedure with the difference that now there are six beads on each side, now we will have three circles, the middle one will be bigger for the main stone.
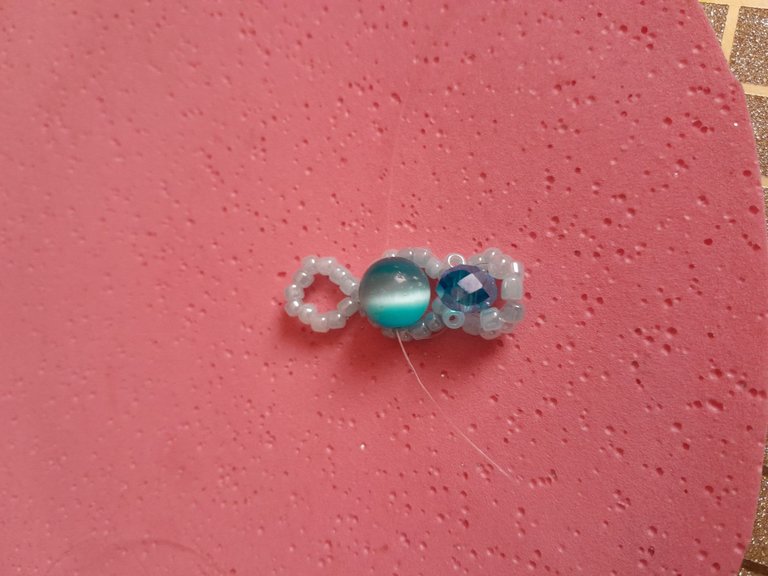
💙 Paso 2| Step 2 💙
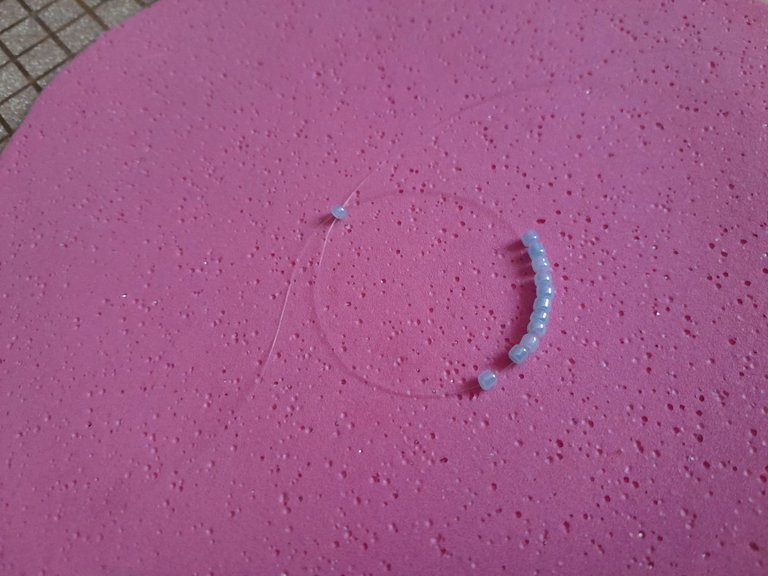
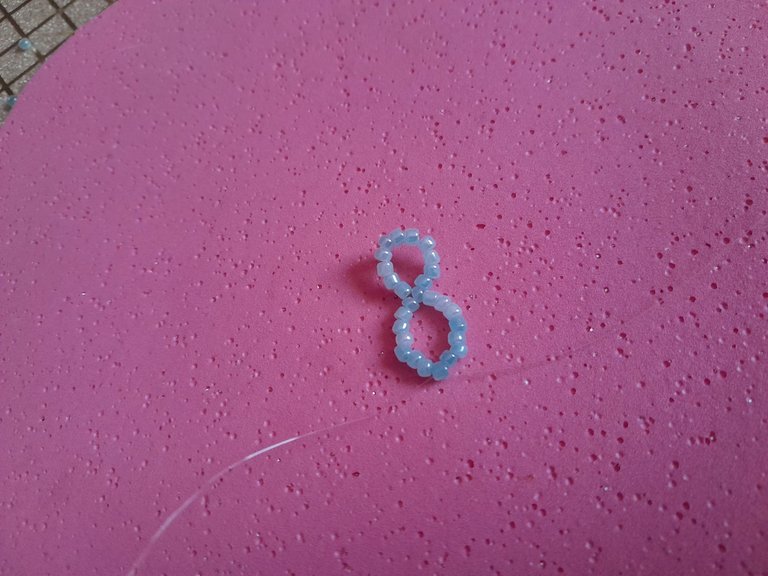
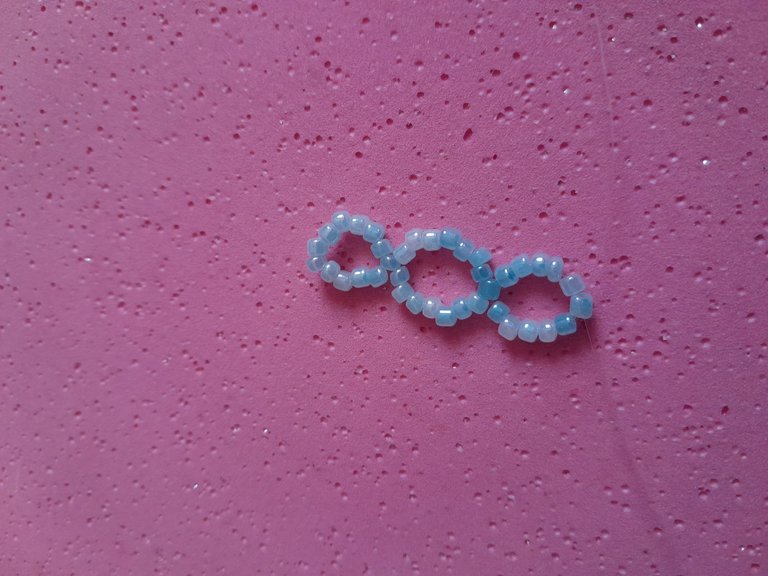
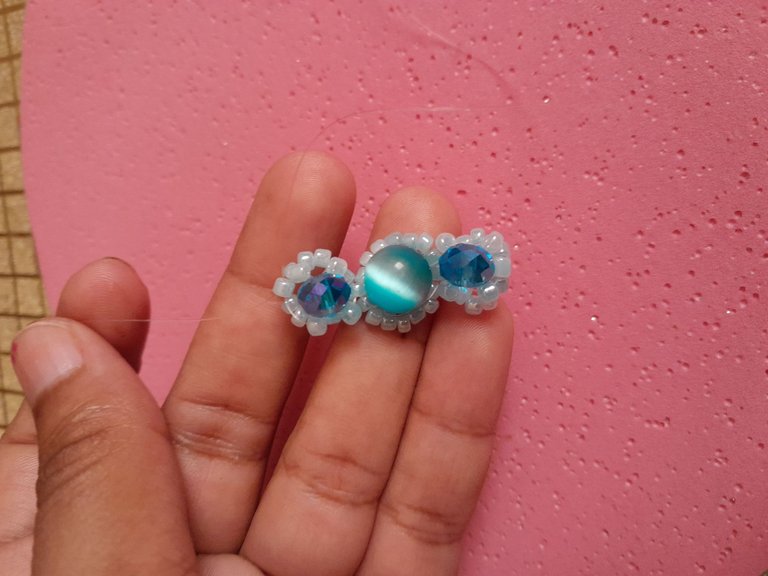
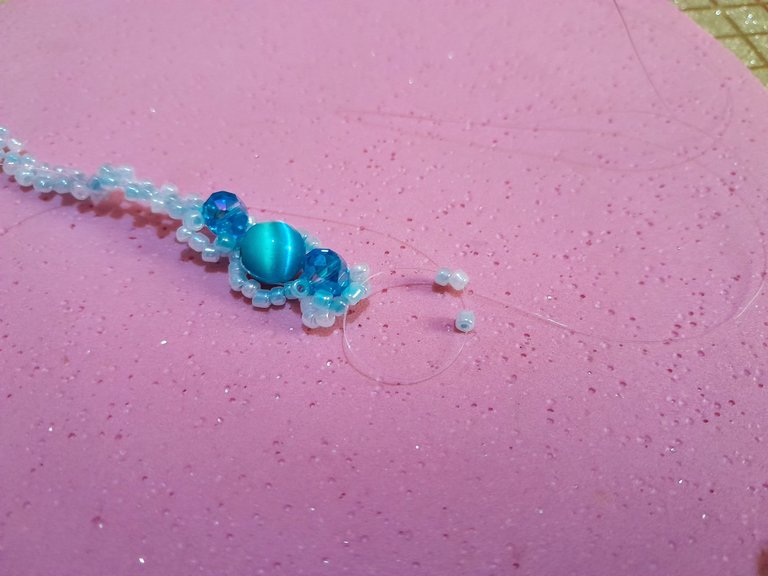
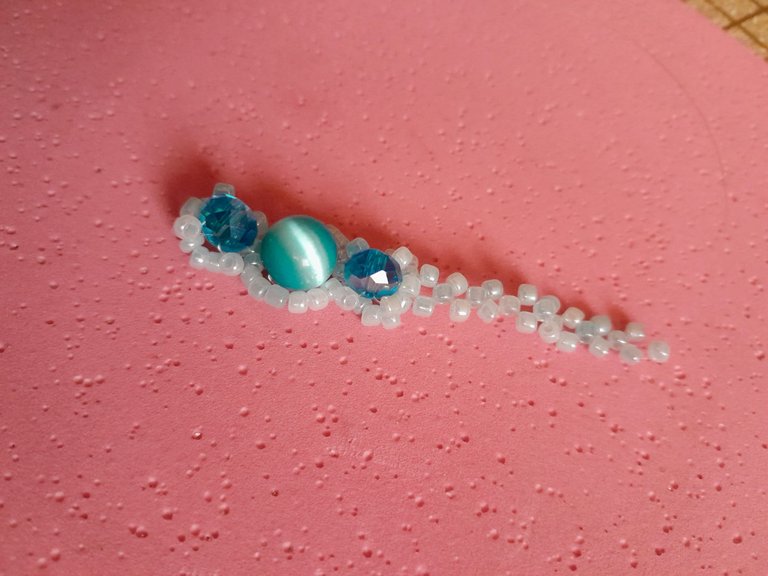
Introducimos una mostacilla en cada nailon y cruzamos los hilos por el cristal, volvemos a introducir una mostacilla en cada lado y cruzamos por la mostacilla central del primer círculo.
Ahora introducimos la piedra y cruzamos para ajustar, pasamos los hilos por la mostacilla central del segundo círculo, repetimos el mismo procedimiento que hicimos con el primer cristal, introducimos una mostacilla en cada nailon y cruzamos por el cristal, pasamos dos mostacillas de cada lado y cruzamos por la mostacilla central del último círculo como se muestra en la imagen, ya tenemos la decoración central de la pulsera.
We introduce a bead in each nylon and cross the threads through the crystal, we introduce again a bead in each side and cross through the central bead of the first circle.
Now we introduce the stone and cross to adjust, we pass the threads through the central bead of the second circle, we repeat the same procedure that we did with the first crystal, we introduce a bead in each nylon and cross through the crystal, we pass two beads on each side and cross through the central bead of the last circle as shown in the image, we have the central decoration of the bracelet.
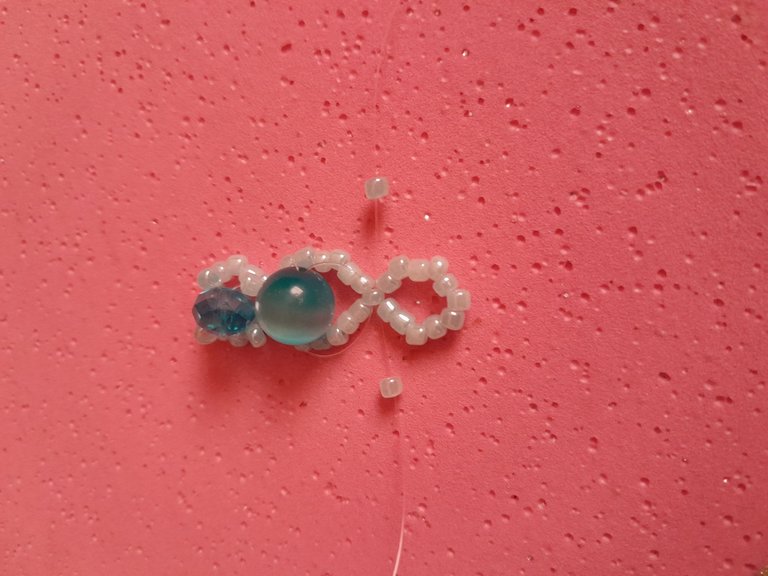

💙 Paso 3| Step 3 💙
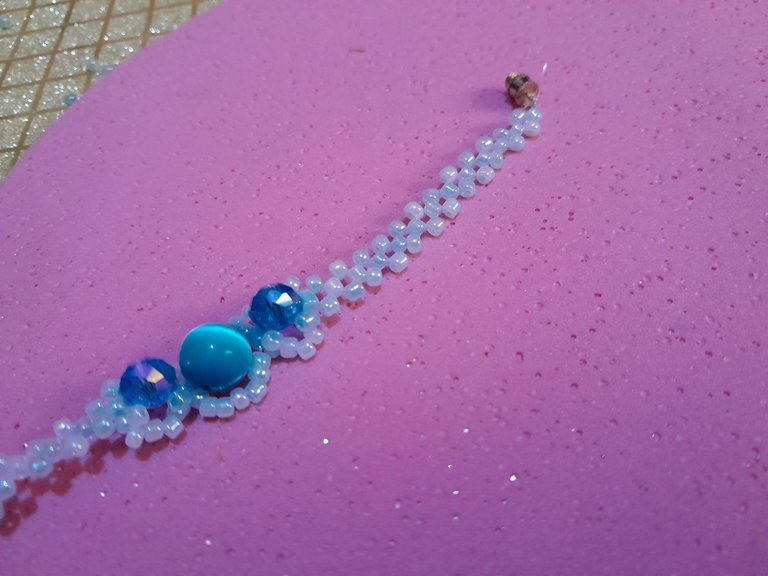
Introducimos una mostacilla de cada lado y cruzamos por una tercera mostacilla, introducimos nuevamente una mostacilla de cada lado y cruzamos por una tercera mostacilla, repetimos el mismo procedimiento hasta formal doce secuencias con el mismo tejido.
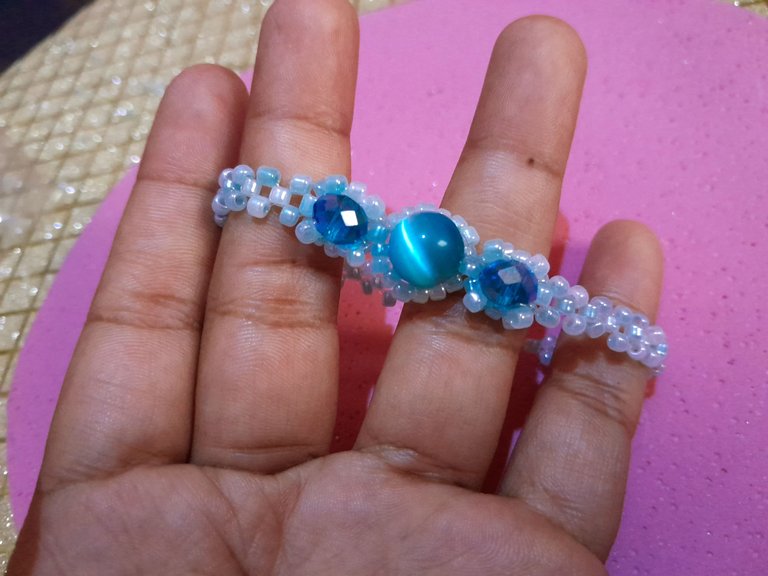
Como solo tenemos hilo de un solo lado de la pulsera, vamos a tomar 20 centímetros de nailon y lo pasamos por el lado de la pulsera sin hilo, introducimos una mostacilla de cada lado y cerramos con una tercera mostacilla, al igual que el otro lado hacemos una secuencia de doce. Introducimos el cerrador, amarramos bien el nailon y cortamos, con un yesquero quemamos un poco las puntas para evitar que se deshaga.
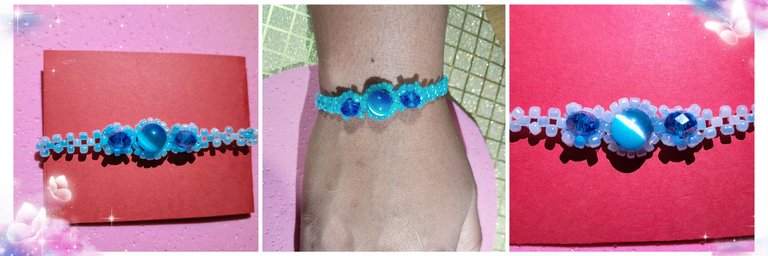
Espero les haya gustado este nuevo trabajo, a mí me encanto especialmente por el color y la decoración central.
We introduce a bead on each side and cross through a third bead, we introduce again a bead on each side and cross through a third bead, we repeat the same procedure until we form twelve sequences with the same weave.
As we only have thread on one side of the bracelet, we will take 20 centimeters of nylon and pass it through the side of the bracelet without thread, we introduce a bead on each side and close with a third bead, like the other side we make a sequence of twelve. We introduce the clasp, tie the nylon well and cut, with a tinder we burn a little the ends to prevent it from unraveling.
I hope you liked this new work, I especially loved the color and the central decoration.

💙 Final presentation 💙
Muchas gracias por este lindo espacio, espero les haya gustado mi elaboración de hoy, mis mejores deseos, nos vemos pronto, saludos ☺️.
Thank you very much for this nice space, I hope you liked my elaboration today, best wishes, see you soon, greetings ☺️.
Fotos propias tomadas con mi teléfono Samsung A13, 50 mp. Edición de portada con Picsart collage en Gridart. Contenido exclusivo para hive.
Traducción -->deepl
Own photos taken with my Samsung A13 phone, 50 mp. Cover editing with Picsart collage in Gridart.
Exclusive content for hive.
Translation -->deepl
https://twitter.com/828970814/status/1636938273258872832
The rewards earned on this comment will go directly to the people( @meivys ) sharing the post on Twitter as long as they are registered with @poshtoken. Sign up at https://hiveposh.com.
Congratulations @meivys! You have completed the following achievement on the Hive blockchain And have been rewarded with New badge(s)
Your next target is to reach 150 posts.
You can view your badges on your board and compare yourself to others in the Ranking
If you no longer want to receive notifications, reply to this comment with the word
STOPTo support your work, I also upvoted your post!
Check out our last posts:
Support the HiveBuzz project. Vote for our proposal!
Hermoso diseño y color 😍😍😍😍😍
!discovery 35
Muchas gracias por el apoyo 🥰
This post was shared and voted inside the discord by the curators team of discovery-it
Join our Community and follow our Curation Trail
Discovery-it is also a Witness, vote for us here
Delegate to us for passive income. Check our 80% fee-back Program
Muy linda y clásica no pasan de moda
Gracias amiga @leidys01
Gracias por el apoyo 🥰
Mi hija ama ese tono de azul y no sé a tí pero se me recuerda a Frozen,así que definitivamente sería una prenda muy especial para ella.
Se ve súper tierno y delicado
Si es muy lindo el azul de mis preferidos, ahora que la veo si se tiene ese toque, especialmente por los tonos, muchas gracias por tu linda visita.
Mi hija ama ese tono de azul y no sé a tí pero se me recuerda a Frozen,así que definitivamente sería una prenda muy especial para ella.
Se ve súper tierno y delicado