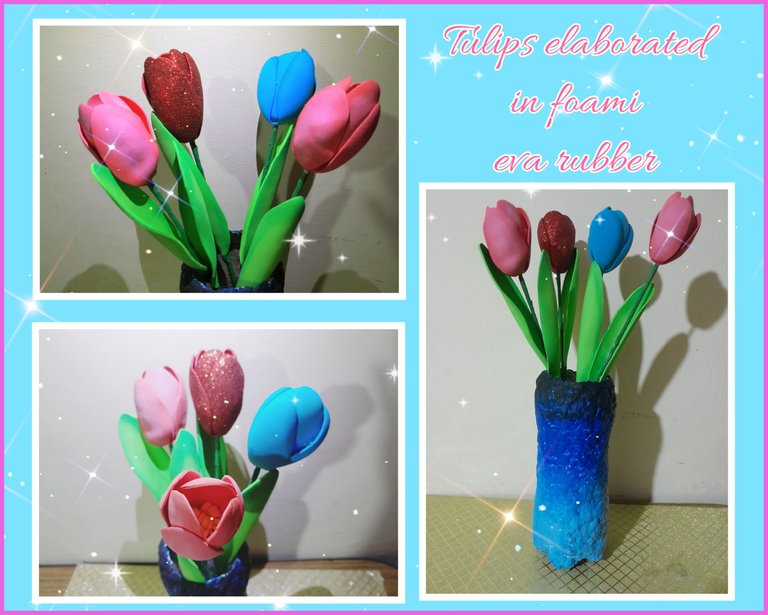
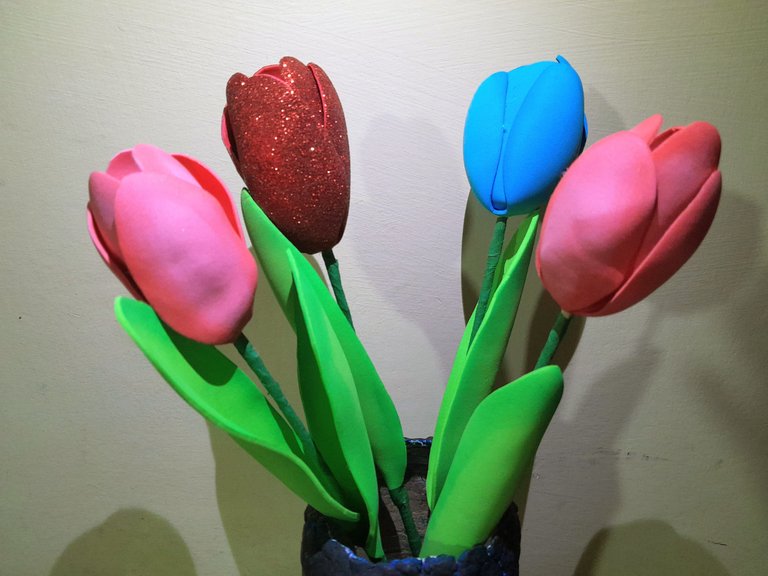
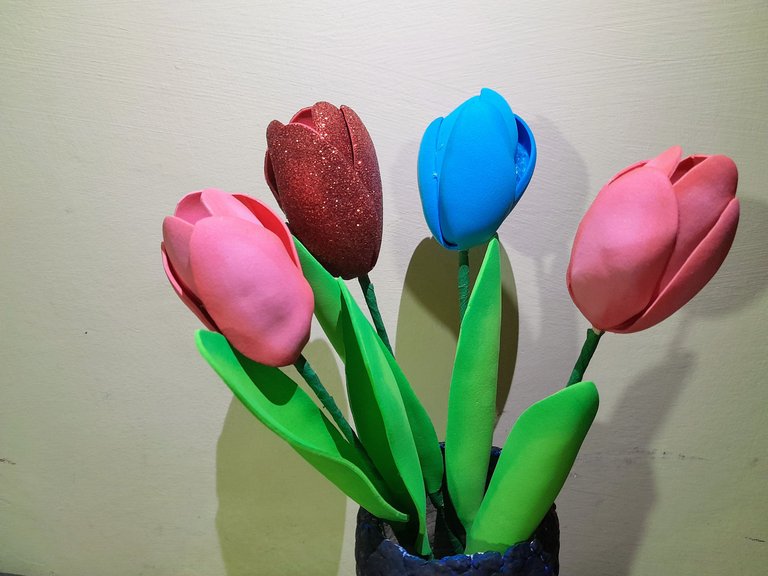
Beautiful tulips made in foami eva gum [Eng-Eng]
🌷🌷 Welcome 🌷🌷
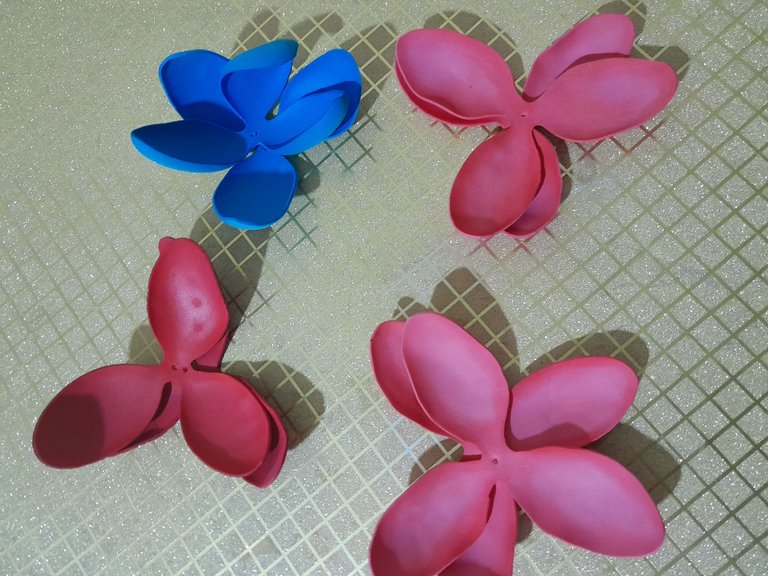
Hello friends of DIYHub, it is a pleasure to share with you, today I bring you the elaboration of some nice tulips made in foami, for my participation in the monthly contest of the community, these pretty flowers are ideal to give a touch of beauty to any space, as a centerpiece, decoration of our workspace, here I show you the step by step, I hope you like it.
Hola amigos de DIYHub, es un placer compartir con ustedes, hoy les traigo la elaboración de unos lindos tulipanes elaborados en foami, para mi participación en el concurso mensual de la comunidad, estas lindas flores son ideal para darle un toque de belleza cualquier espacio, como centro de mesa, decoración de nuestro espacio de trabajo, aquí les muestro el paso a paso, espero sea de su agrado.
🌷🌷 Materials| Materiales 🌷🌷
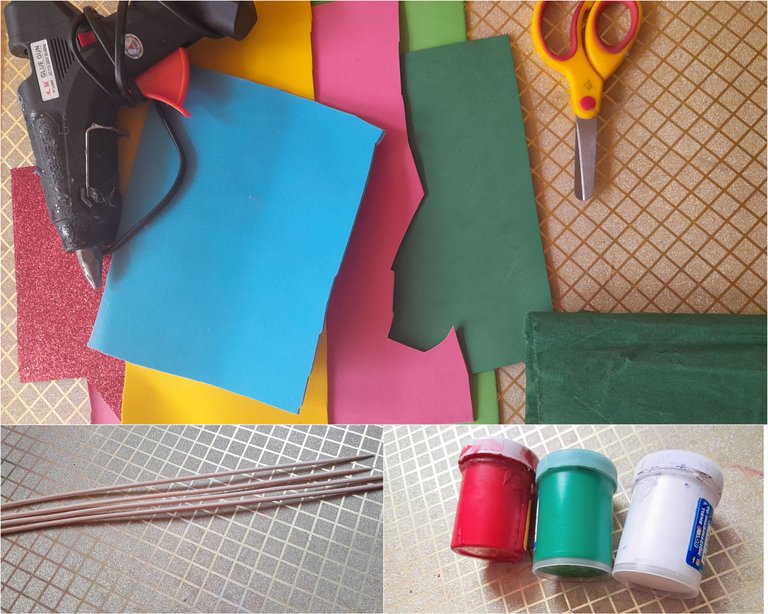
For this work we will need the following materials 👇:
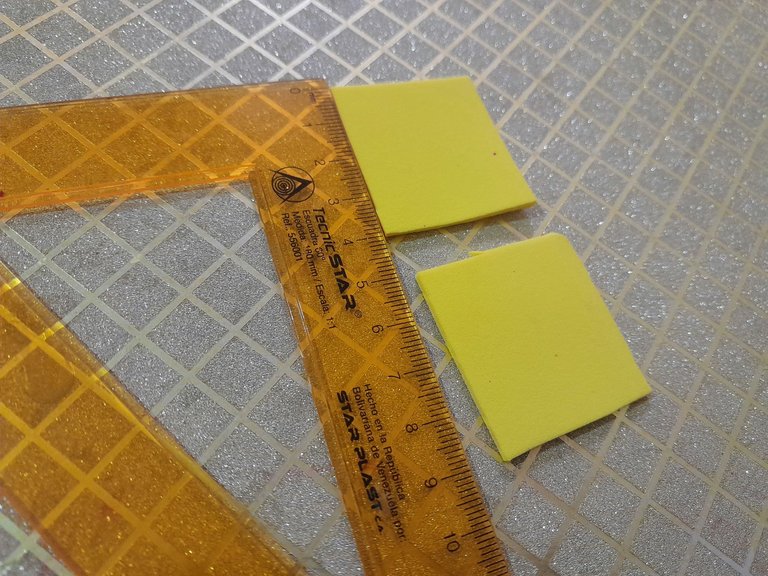
Foami, pink, blue, yellow, green and red frosted.
Green crepe paper
Cold paints, red, green and blue.
Silicon stick.
Chopsticks.
Scissors
Para este trabajo necesitaremos los siguientes materiales 👇:
Foami, rosado, azul, amarillo. verde y rojo escarchado.
Papel crepe verde
Pinturas al frío, roja, verde y azul.
Silicon en barra.
Palillos.
Tijera
🌷🌷 Step 1| Paso 1 🌷🌷
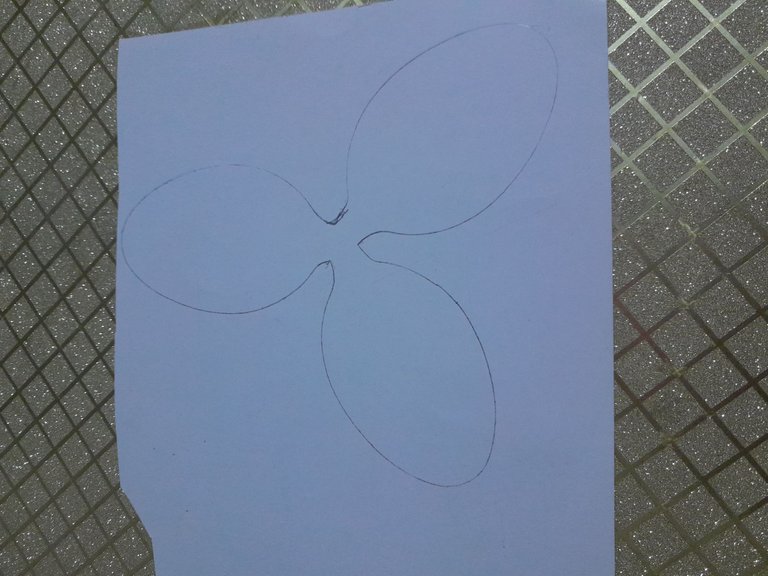
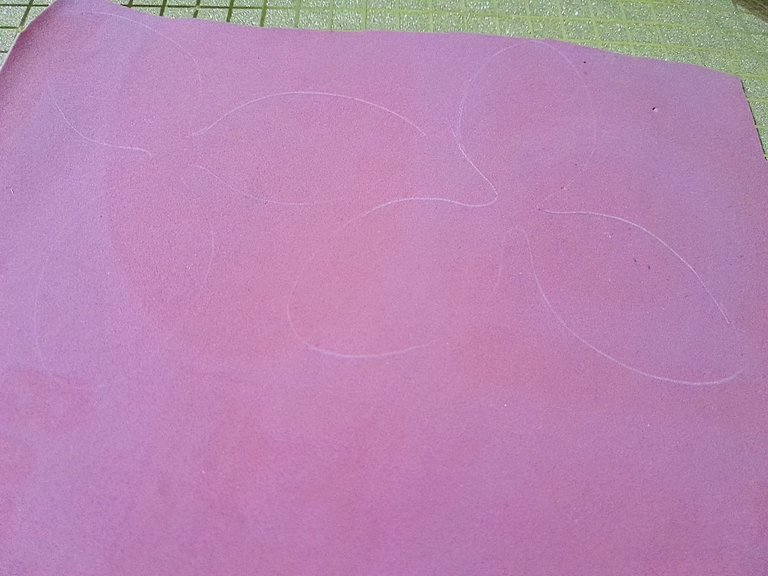
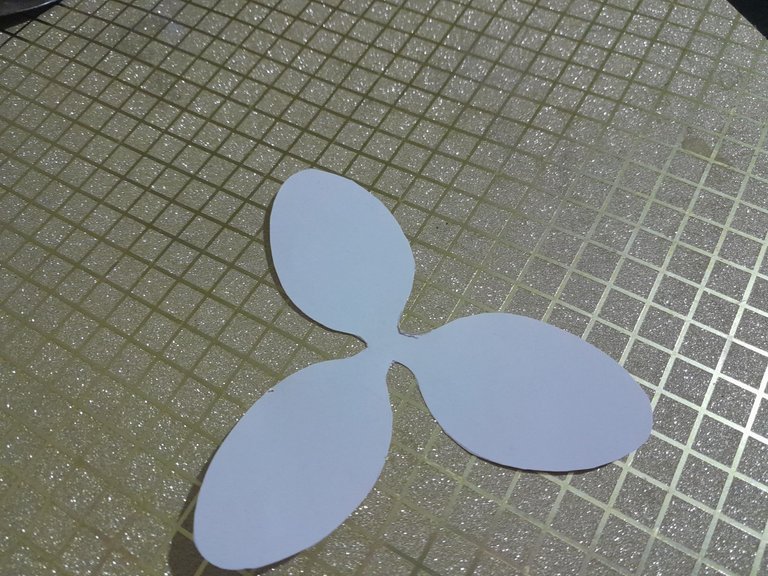
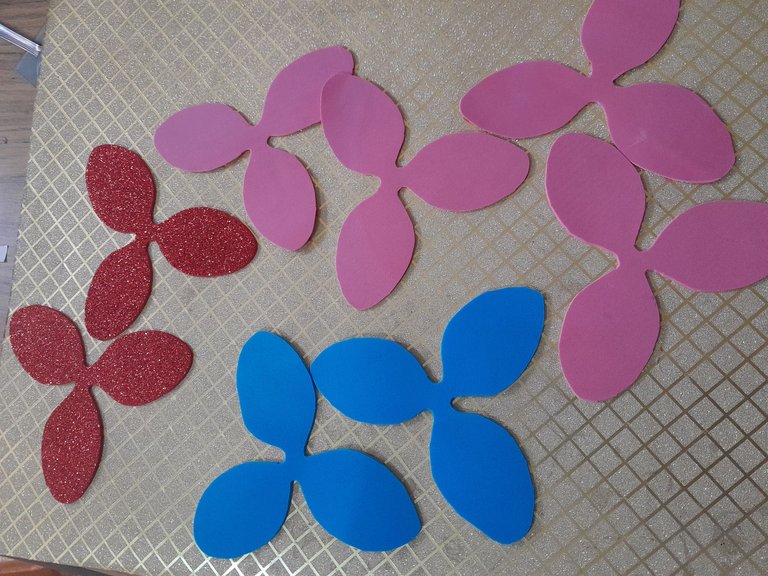
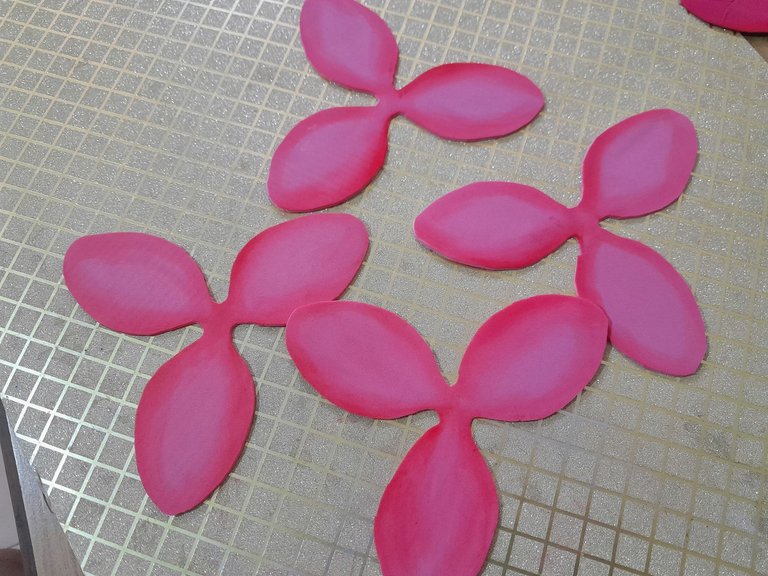
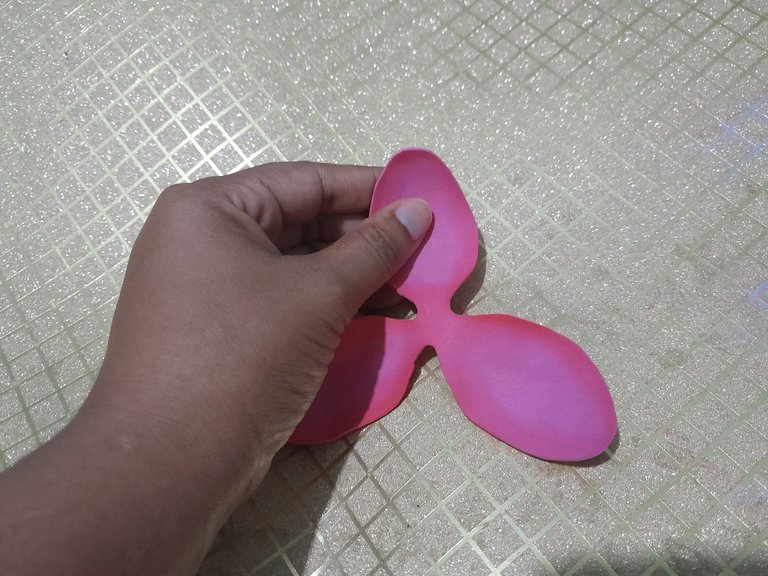
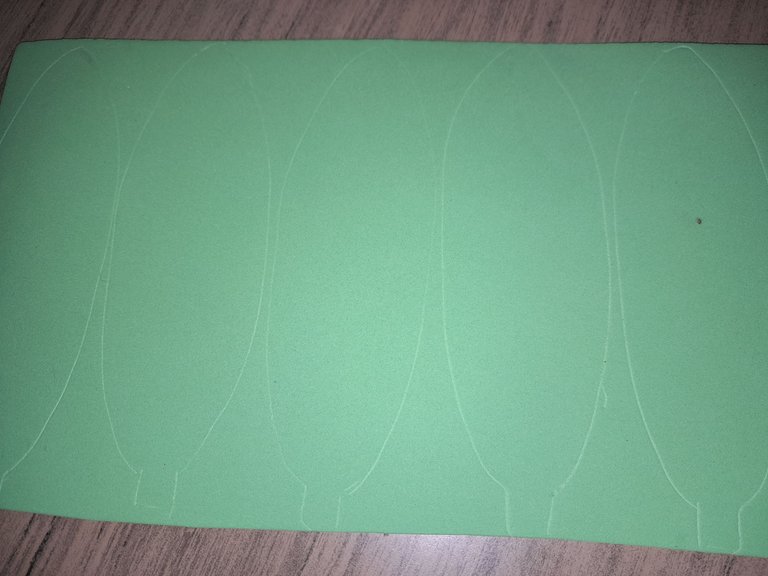
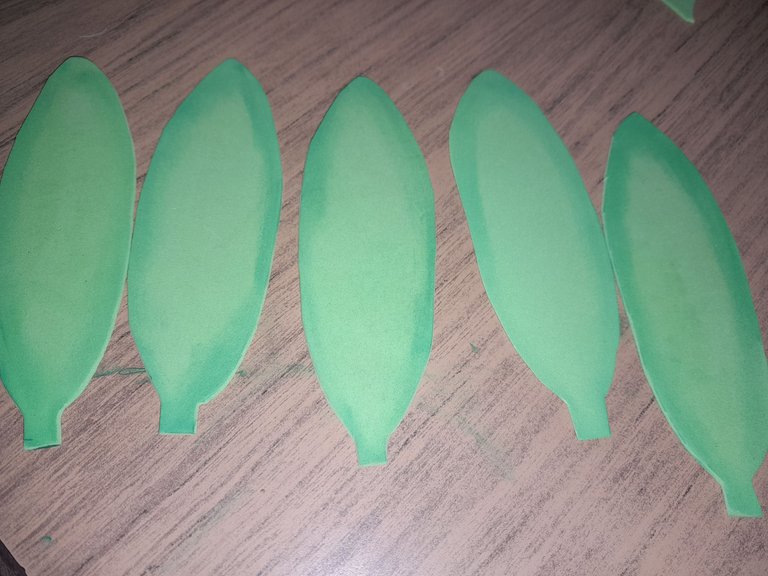
The first thing I did is the pattern of the flowers, I made three oval shaped petals, I cut the template and start tracing my pattern on the foami. Of each color are two figures to form a flower.
Lo primero que hice es el patrón de las flores, hice tres pétalos de forma ovalada, corto la plantilla y comienzo a trazar mi patrón en los foami. De cada color son dos figuras para formar una flor.
🌷🌷Step 2| Paso 2 🌷🌷
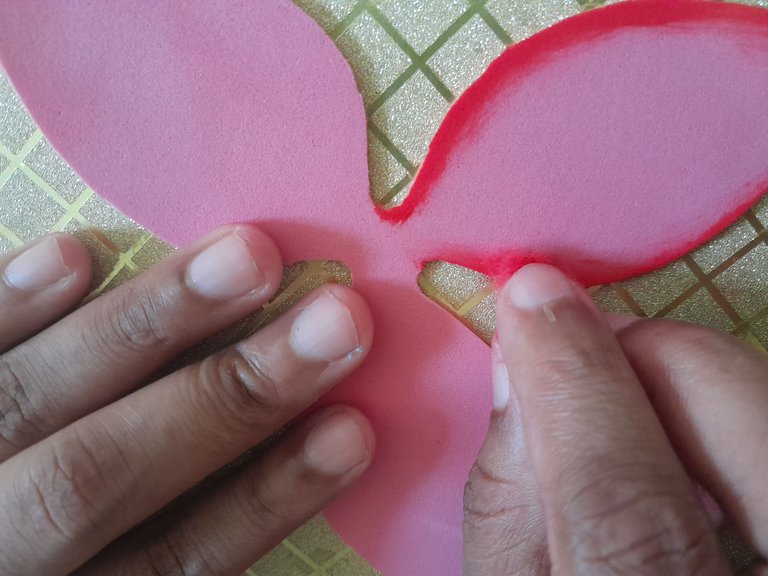
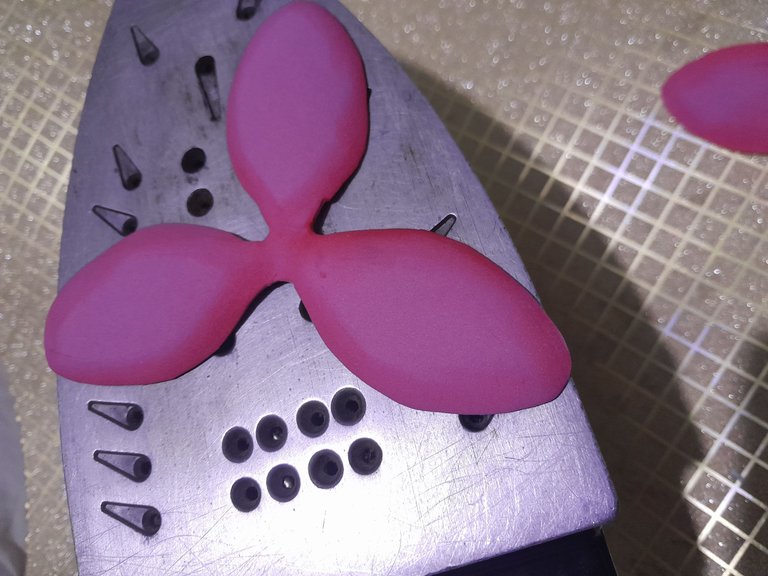
Once the pattern is ready on the foami, with cold paint I will blur the edges, for the pink I used red with the help of a cotton swab to go around the edge of each petal, this will give a nice contrast of colors. Then I put the petals on the clothes iron, with my finger I give it shape so that it is a little sunken in the center and looks more like a real petal. After passing them through the iron, with the help of a toothpick I make a hole in the center of each flower.
Ya con el patrón listo en el foami, con pintura al frío voy difuminando los bordes, para el rosa utilice rojo para con ayuda de un algodón pase por la orilla de cada pétalo, esto le dará un lindo contraste de colores. Luego pongo los pétalos en la plancha de ropa, con el dedo le voy dando forma para que quede un poco hundido en el centro y parezca más un pétalo real. Después de pasarlas por la plancha, con la ayuda de un palillo le hago un agujero en el centro de cada flor.
🌷🌷 Step 3| Paso 3 🌷🌷
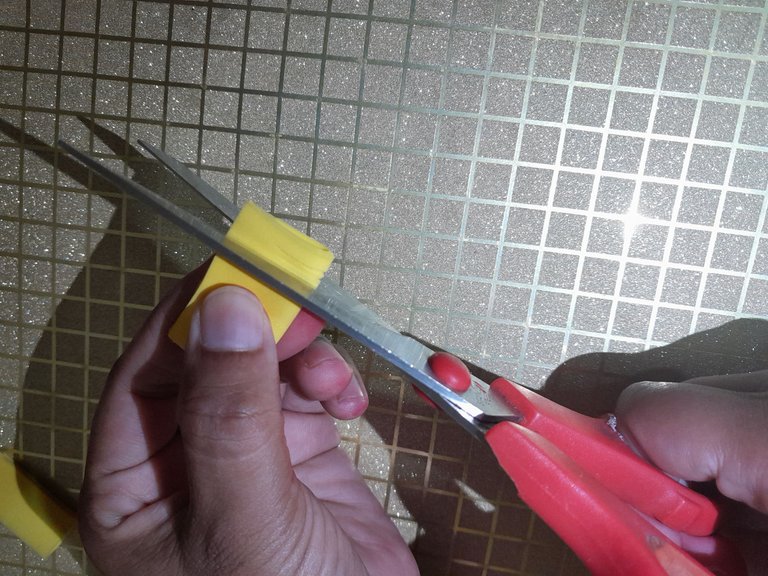
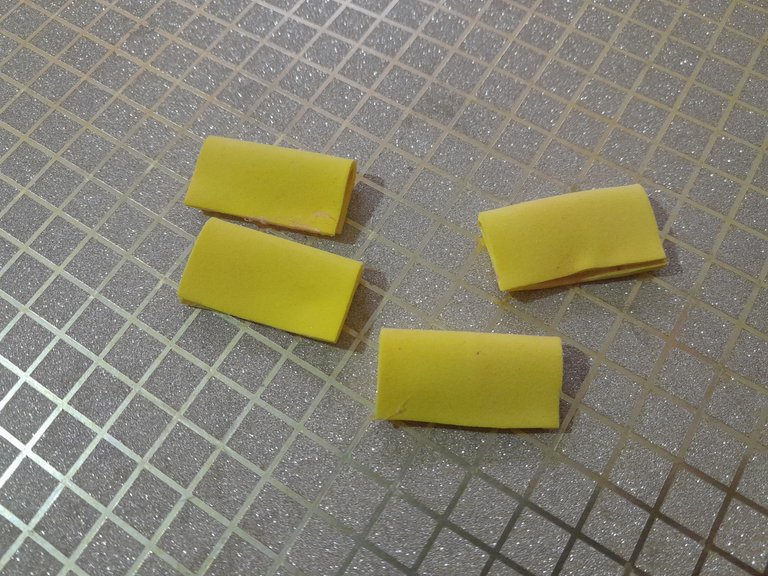
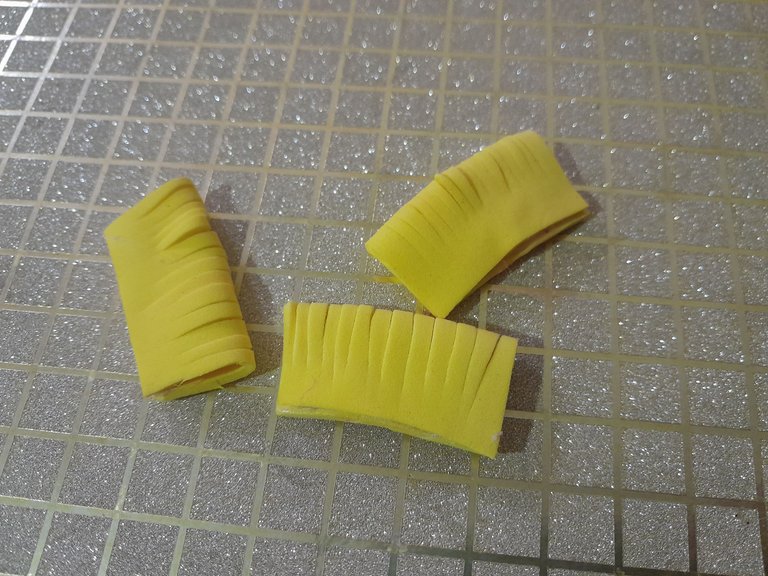
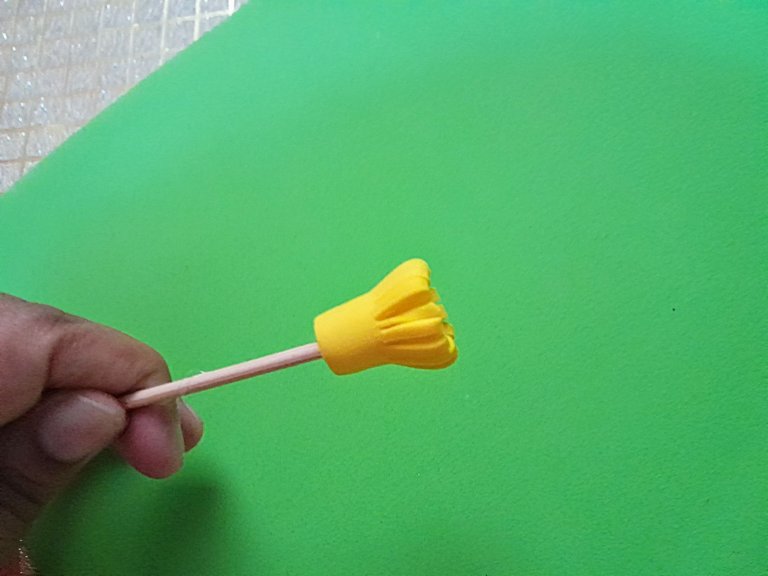
For the center of the flower, cut squares of yellow foami 4x4 cm, then fold and glue on the edge, with the scissors I made some diagonal cuts on the part that I did not glue, as shown in the image. Then I glued it to the stick and rolled it up, this way I will have the pistils of the flower.
Para el centro de la flor, corte cuadrados del foami amarillo 4x4 cm, luego doble y pegue en la orilla, con la tijera le hice unos cortes diagonales por la parte que no pegue, como se muestra en la imagen. luego lo pegue al palillo y fui enrollando de esta manera tendré los pistilos de la flor.
🌷🌷Step 4| Paso 4 🌷🌷
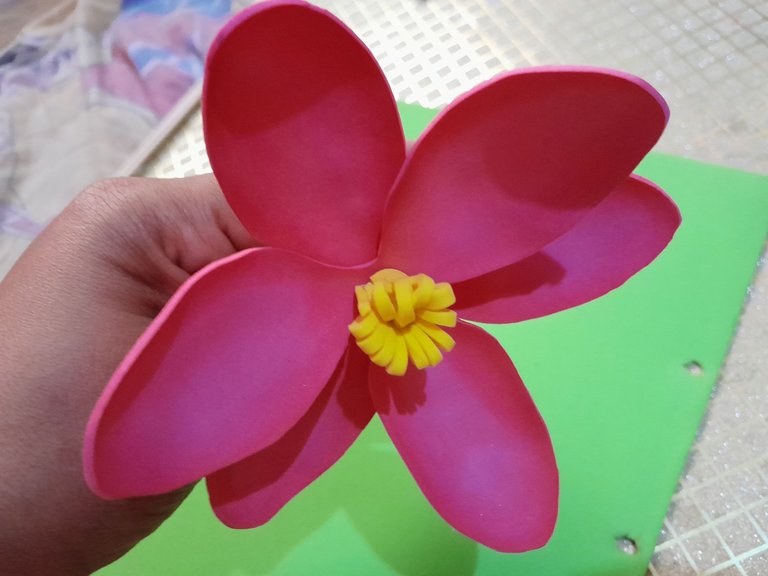
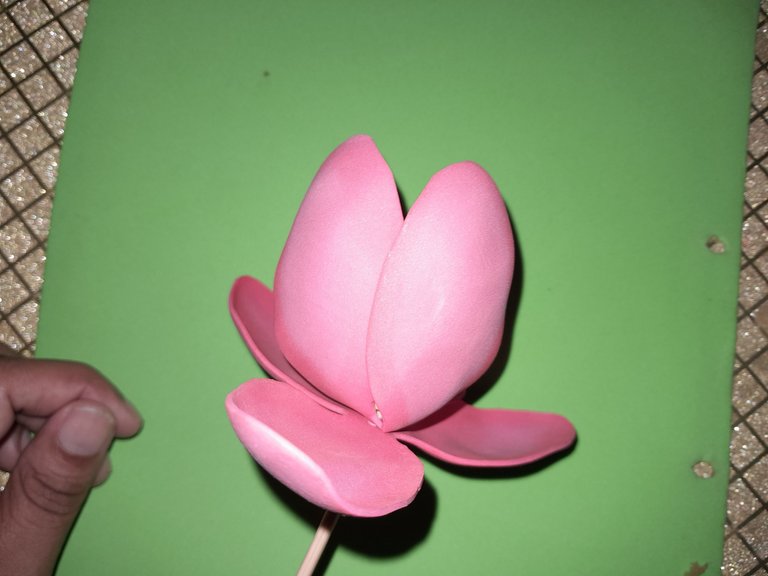
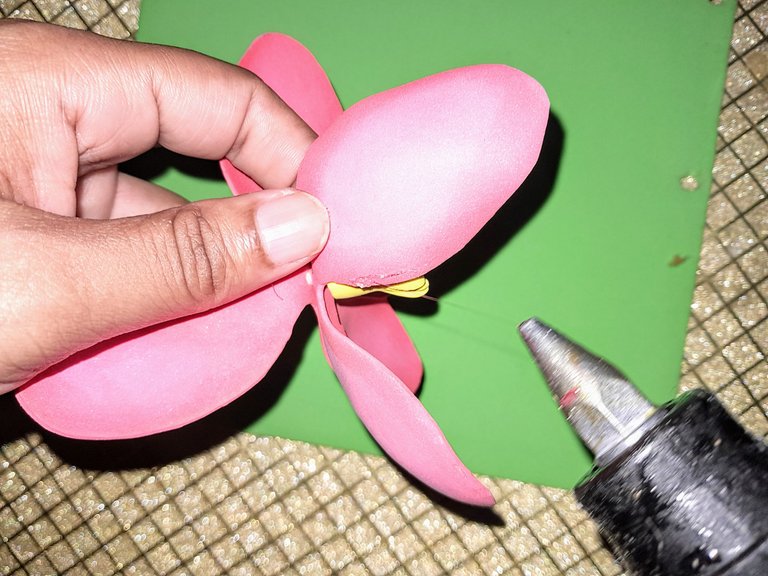
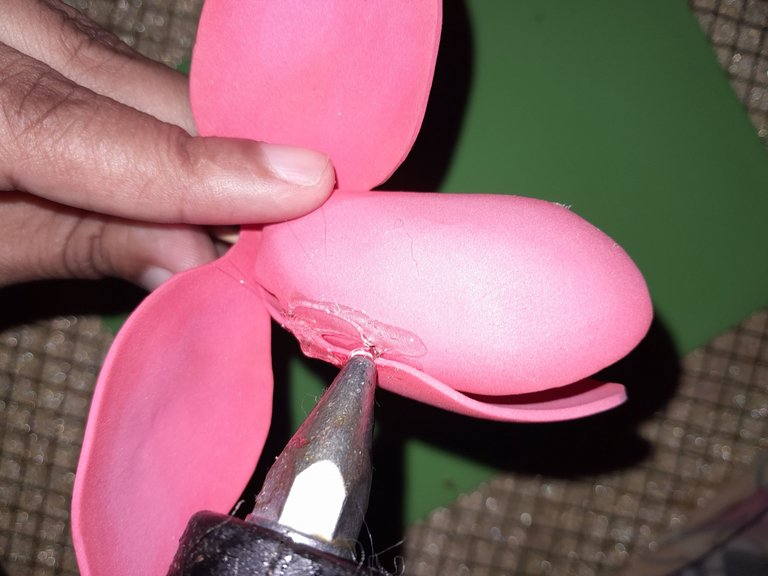
After making the pistil, I pass the two parts of the flower through the toothpick so that the pistil is in the center. You will see petals, the three top petals I glue them on each side so that the three are joined together in a chapel shape, then the three bottom ones I glue them on each line where I glue the first petals, as we can see in the image.
Después de elaborar el pistilo, paso las dos partes de la flor por el palillo que el pistilo quede en el centro. Se verán pétalos, los tres pétalos de arriba los voy pegando en cada lado de manera que los tres quede unidos en forma de capilla, luego los tres de abajo los pego en cada línea donde pegue los primeros pétalos, como podemos observar en la imagen.
🌷🌷Step 5| Paso 5 🌷🌷
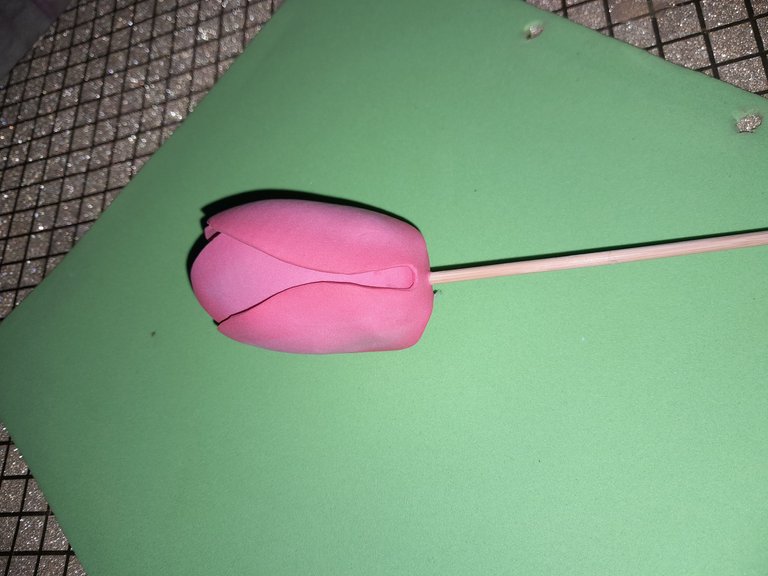
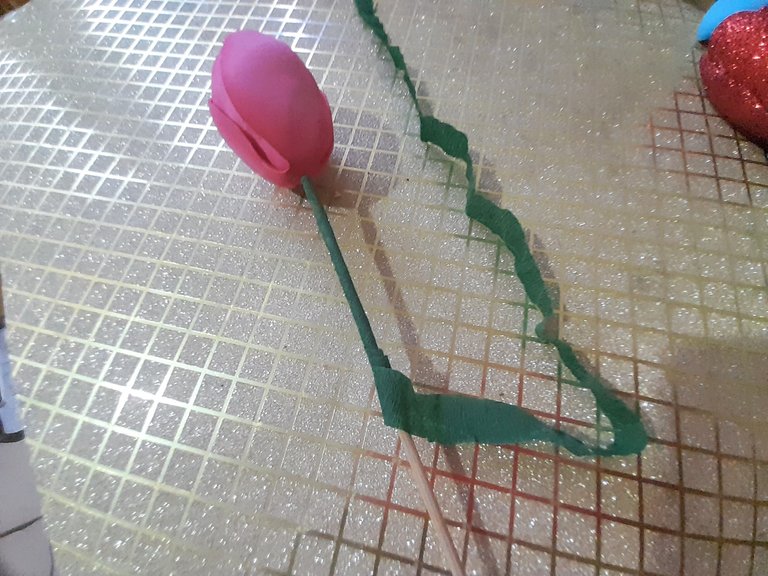
I cut strips of green crepe paper 1.5 cm wide, I glue the strip at the beginning of the stem of my flower, then I roll it around the stick and glue it to prevent it from unraveling, when I get to the end I cut the rest of the crepe paper and I have my nice green stem ready.
Corto tiras de papel crepe verde de 1.5 cm de ancho, pego la tira en el inicio del tallo de mi flor, luego voy enrollando por todo el palillo y pegando para evitar que se deshaga, al llegar al final corto lo restante del papel crepe y ya tengo listo mi lindo tallo verde.
🌷🌷Step 6| Paso 6 🌷🌷
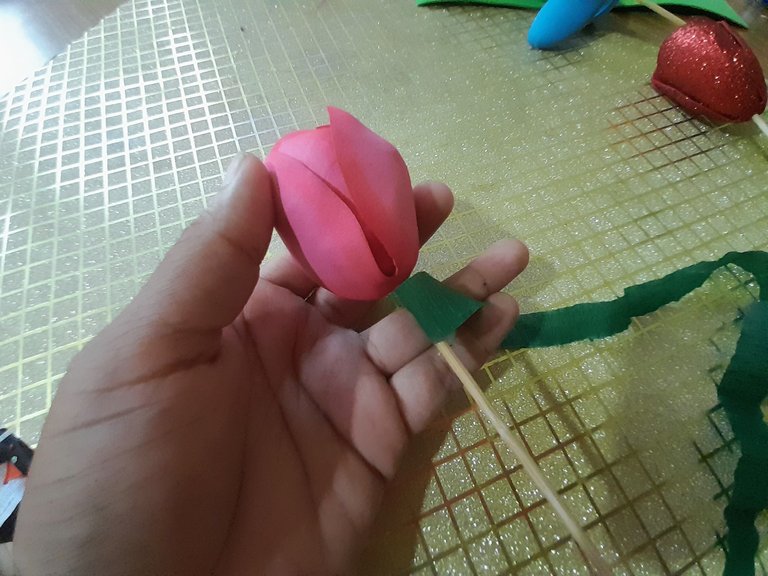
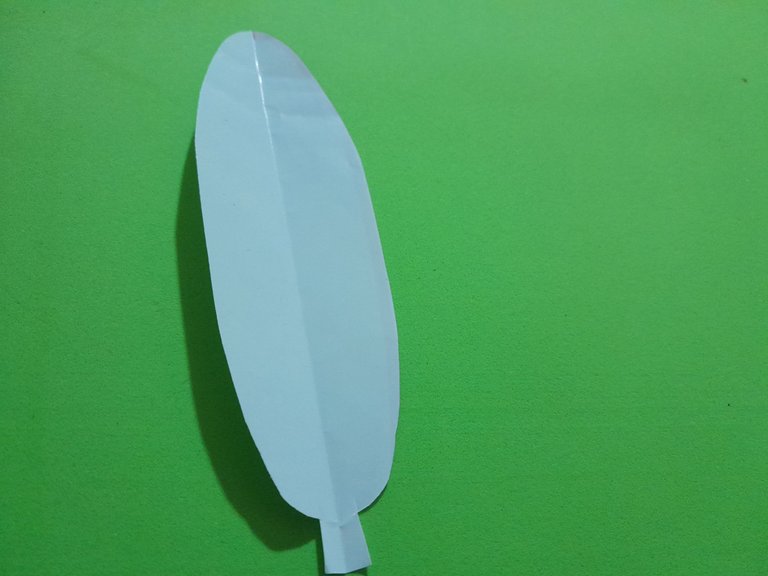
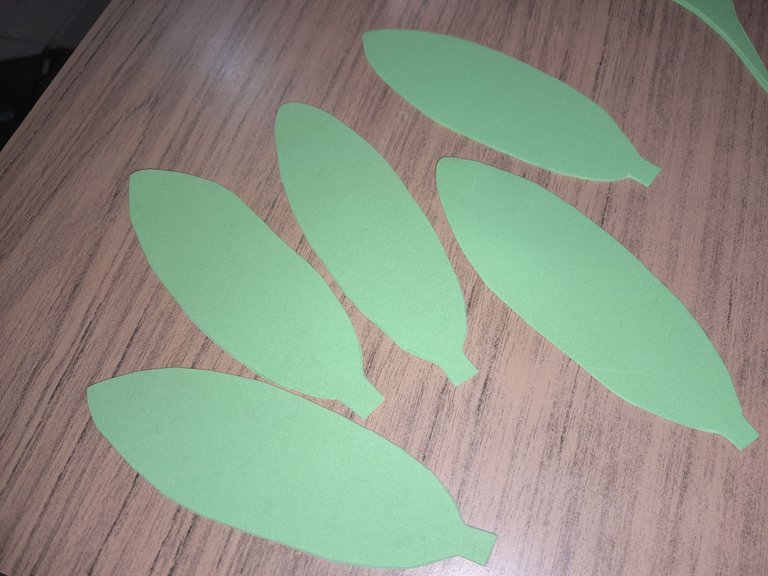
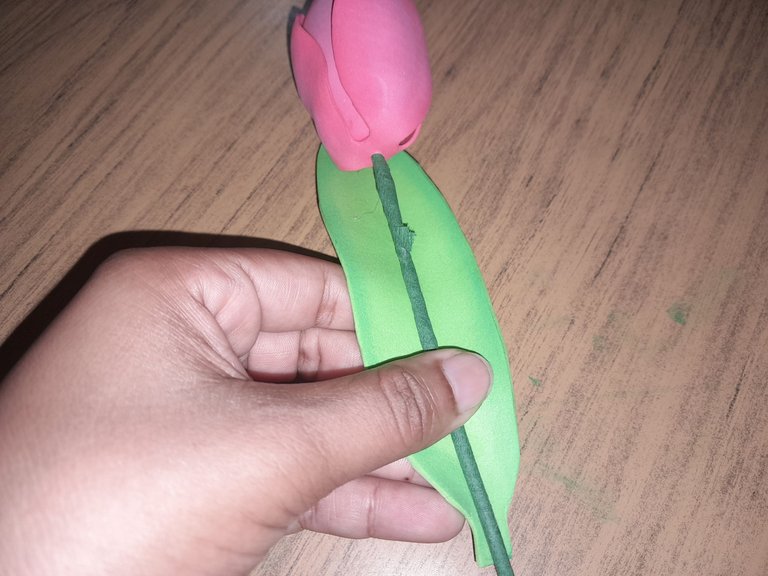
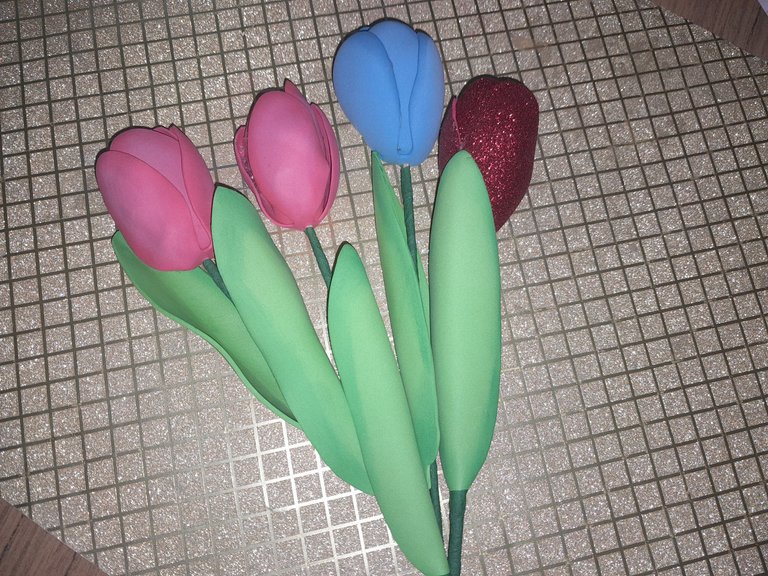
It's time to make the leaves, I make my pattern on cardboard, I cut it out and transfer it to the foami, I cut the leaves, as well as the flowers I blur with a more intense green than that of the leaf, then I put them on the plate, I fold them a little in the middle, then I glue them on the stem of the flowers and with crepe paper I close a little the beginning of the leaves. Now I have my beautiful tulips ready
Es hora de hacer las hojas, realizo mi patrón en cartulina, lo recorto y lo paso al foami, recorto las hojas, al igual que las flores difumino con un verde más intenso que el de la hoja, luego las pongo en la plancha, las Doblo un poco por el medio, luego pego en el tallo de las flores y con papel crepe cierro un poco el inicio de las hojas. Ya tengo listo mis lindos tulipanes.
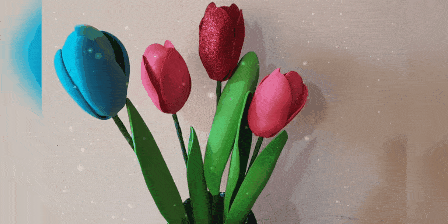
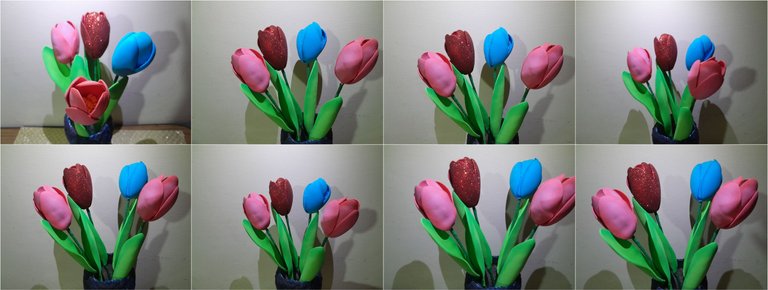
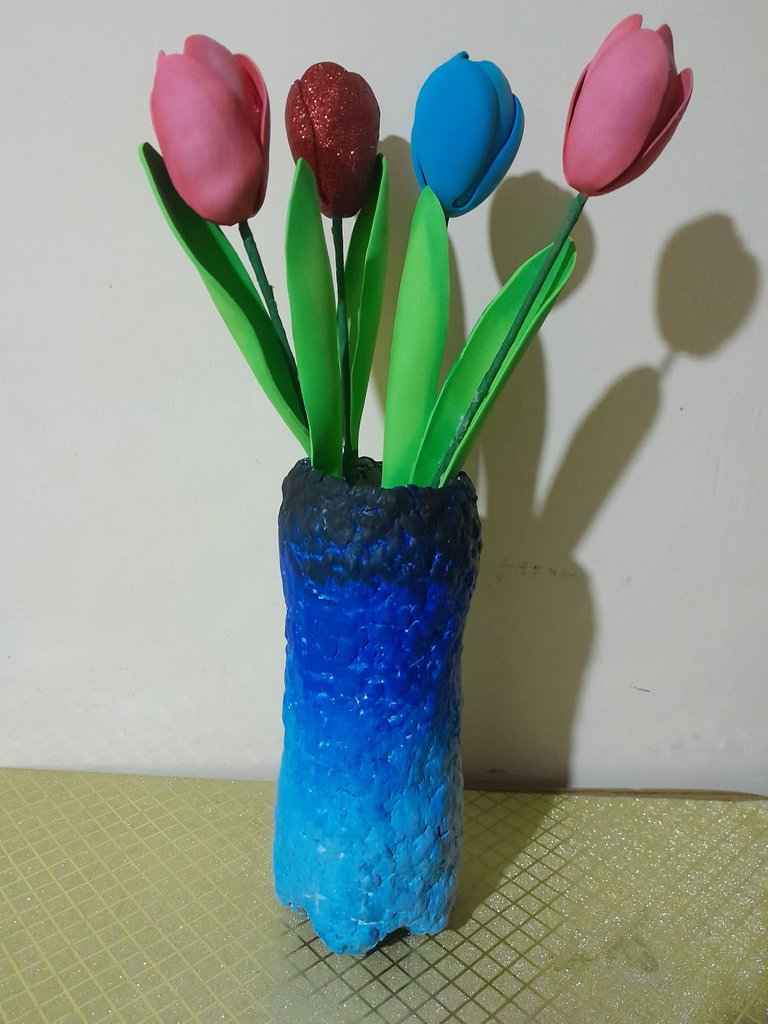
🌷🌷 Final presentation 🌷🌷
Muchas gracias por este lindo espacio, espero les haya gustado mi elaboración de hoy, mis mejores deseos, nos vemos pronto, saludos ☺️.
Thank you very much for this nice space, I hope you liked my elaboration today, best wishes, see you soon, greetings ☺️.
Fotos propias tomadas con mi teléfono Samsung A13, 50 mp. Edición de portada con Picsart collage en Gridart.
Contenido exclusivo para hive.
Traducción--->deepl
Own photos taken with my Samsung A13 phone, 50 mp. Cover editing with Picsart collage in Gridart.
Exclusive content for hive.
Translation --->deepl
https://twitter.com/828970814/status/1615832492363206656
The rewards earned on this comment will go directly to the people( @meivys ) sharing the post on Twitter as long as they are registered with @poshtoken. Sign up at https://hiveposh.com.
Thank you for your support 😊😊
Me encantan estos tulipanes amiga, te quedaron increíbles felicidades 👏
Muchas gracias amiga, me alegra que te gustaron.
Thank you for sharing this post in the DIYHUB Community!
Your content got selected by our fellow curator desro & you just received a little thank you upvote from us for your great work! Your post will be featured in one of our recurring compilations which are aiming to offer you a stage to widen your audience within the DIY scene of Hive. Stay creative & HIVE ON!
Please vote for our hive witness <3
Congratulations @meivys! You have completed the following achievement on the Hive blockchain And have been rewarded with New badge(s)
Your next target is to reach 500 comments.
You can view your badges on your board and compare yourself to others in the Ranking
If you no longer want to receive notifications, reply to this comment with the word
STOPTo support your work, I also upvoted your post!
Check out our last posts:
Support the HiveBuzz project. Vote for our proposal!
Lovely 🌹
Very beautiful flower.
Lovely 🌹
🥰🥰🥰
💕
You are so creative; I will be happier to follow the procedures and can make this elegant flower.