Contest Creating With Love, Necklace made of swaroski [Esp-Eng].
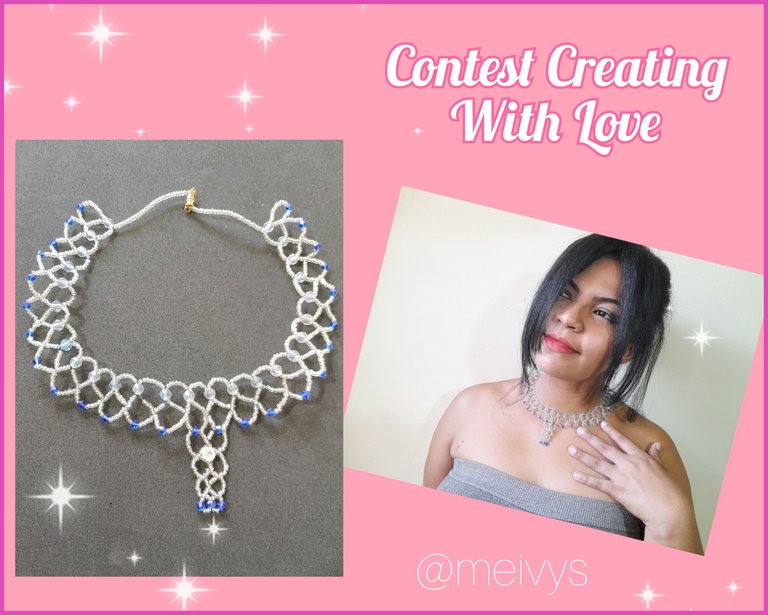
Necklace made of swaroski and beads ✨️ 📿.
Hola amigos de Jewelry 💎, un cordial saludo para esta linda comunidad llena de creatividad y talento, es un placer poder compartir con ustedes nuevamente, esta es mi participación para el concurso Creating With Love, en esta oportunidad les traigo un collar elaborado en Mostacillas Y Swaroski azul, sin duda unos de mis materiales favoritos para la elaboración de bisutería, sin mas preámbulos les dejo el paso a paso de esta elaboración.
Hello friends of Jewelry 💎, a warm greeting for this beautiful community full of creativity and talent, it is a pleasure to share with you again, this is my participation for the Creating With Love contest, this time I bring you a necklace made in blue Swaroski and beads, undoubtedly one of my favorite materials for making jewelry, without further ado I leave you the step by step of this elaboration.
Materiales| Materials
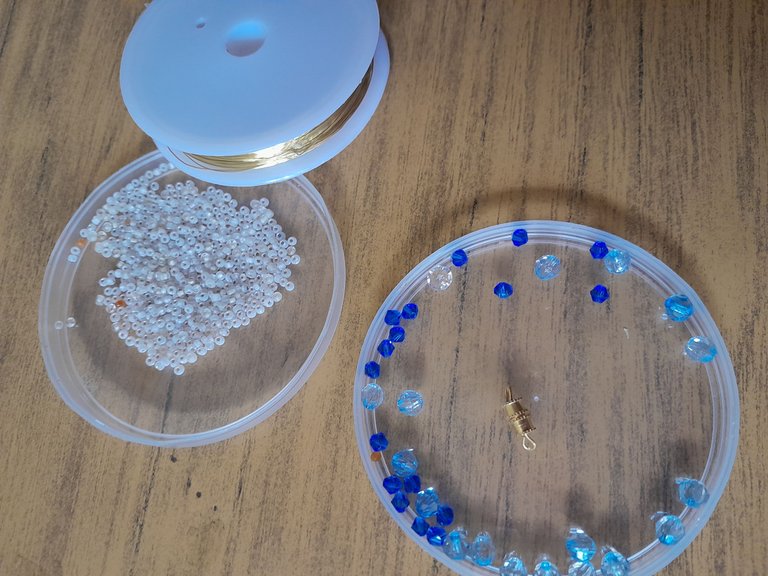
- Mostacillas transparente.
- Swaroski Azul.
- Piedras de cristal azul.
- Alambre dorado 0.3.
- Cerrador.
- Transparent beads.
- Blue Swaroski.
- Blue crystal stones.
- Gold-plated wire 0.3.
- Clasp
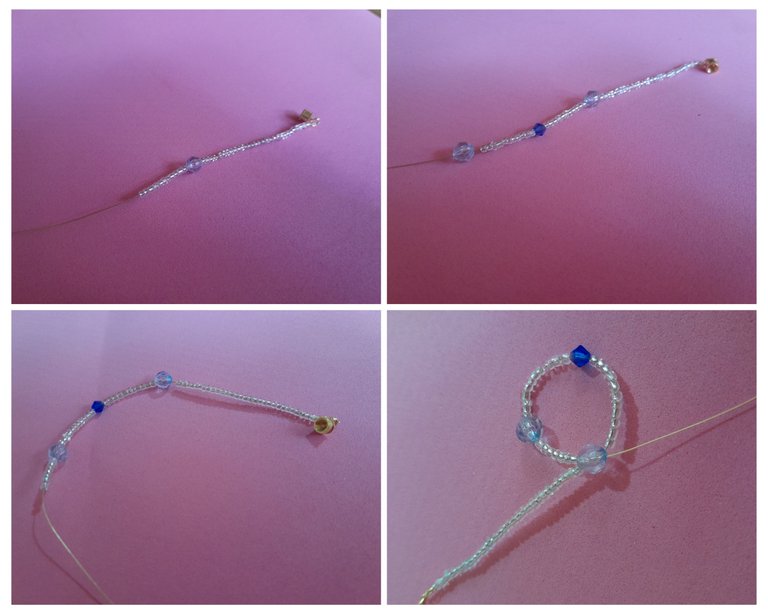
Paso 1| Step 1
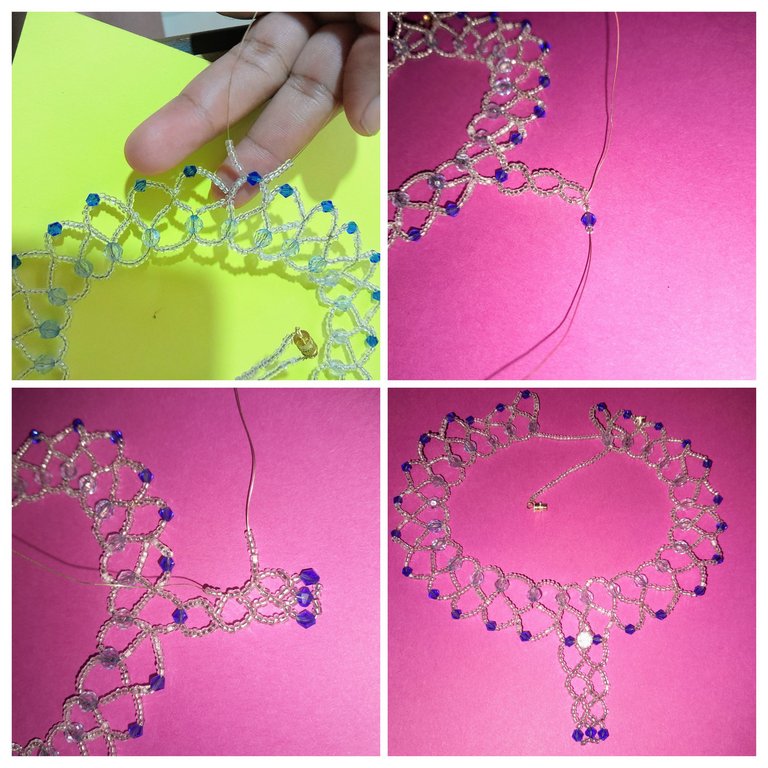
Para la elaboración de este collar se puede usar Alambre 0.3 o nailon, en este caso utilice Alambre, se me hace más práctico para trabajar con las Mostacillas.
Puse el cerrador como no tenía grampa, con el mismo Alambre le di varias vueltas hasta que quede bien ajustado, luego metí 30 Mostacillas.
To make this necklace you can use 0.3 wire or nylon, in this case I used wire, it is more practical to work with the beads.
I put the clasp as I had no clamp, with the same wire I made several turns until it was well adjusted, then I put 30 beads.

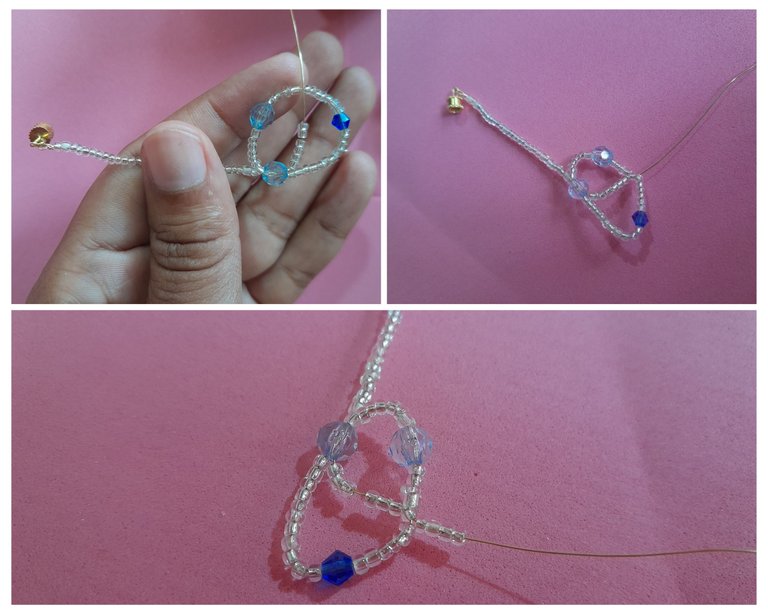
Paso 2| Step 2
Para iniciar con el collar introduje un cristal azul, luego 11 Mostacillas, una piedra de swaroski, 11 Mostacillas, luego un cristal y 7 Mostacillas, cierro con el cristal que metí en un inicio formando un círculo, como se ve en la imagen.
To start with the necklace I introduced a blue crystal, then 11 beads, a swaroski stone, 11 beads, then a crystal and 7 beads, I close with the crystal that I put in at the beginning forming a circle, as shown in the picture.
Paso 3| Step 3
Después de pasar el Alambre por el primer cristal, meto 6 Mostacillas y paso el Alambre por la 5 Mostacillas que está debajo del segundo cristal.
After passing the Wire through the first crystal, I put 6 Beads and pass the Wire through the 5 Beads under the second crystal.
Paso 4| Step 4
Introduzco 4 Mostacillas y una piedra de swaroski, luego 11 Mostacillas y un cristal azul, como en el paso dos introducimos 7 Mostacillas y luego cerramos con el cristal anterior, introducimos 6 mostacilla, que cruzaran por el centro y pasando por la quinta Mostacilla del lado derecho.
I introduce 4 beads and a swaroski stone, then 11 beads and a blue crystal, as in step two we introduce 7 beads and then close with the previous crystal, we introduce 6 beads, crossing through the center and passing through the fifth bead on the right side.
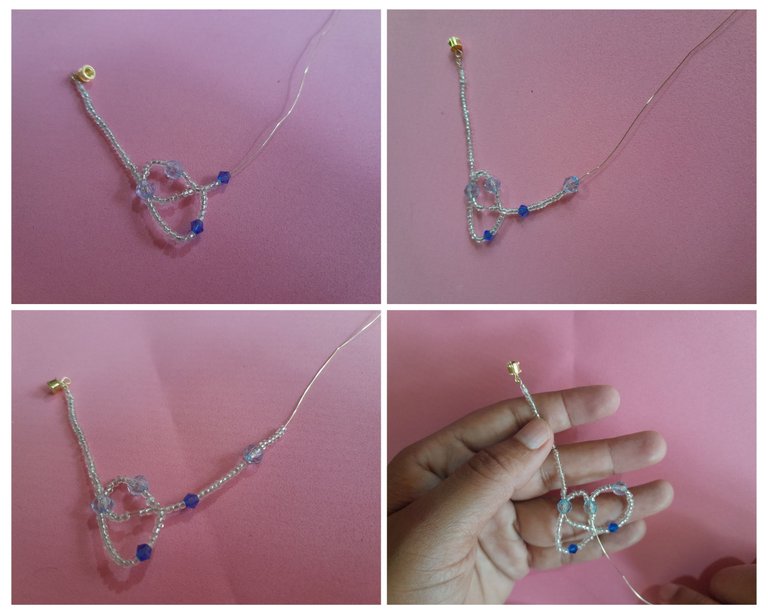
Paso 5| Step 5
Seguimos con el mismo procedimiento anterior, Introduzco 4 Mostacillas, un swaroski, 11 Mostacillas, un cristal, 7 Mostacillas e Introduzco Alambre por el cristal anterior, luego las 6 Mostacillas y cruzo por la quinta Mostacilla debajo del cristal derecho, repito el mismo procedimiento una y otra vez hasta lograr el tamaño que quiero.
We continue with the same procedure as before, I introduce 4 beads, a swaroski, 11 beads, a crystal, 7 beads and I introduce wire through the previous crystal, then the 6 beads and cross through the fifth bead under the right crystal, I repeat the same procedure over and over again until I get the size I want.
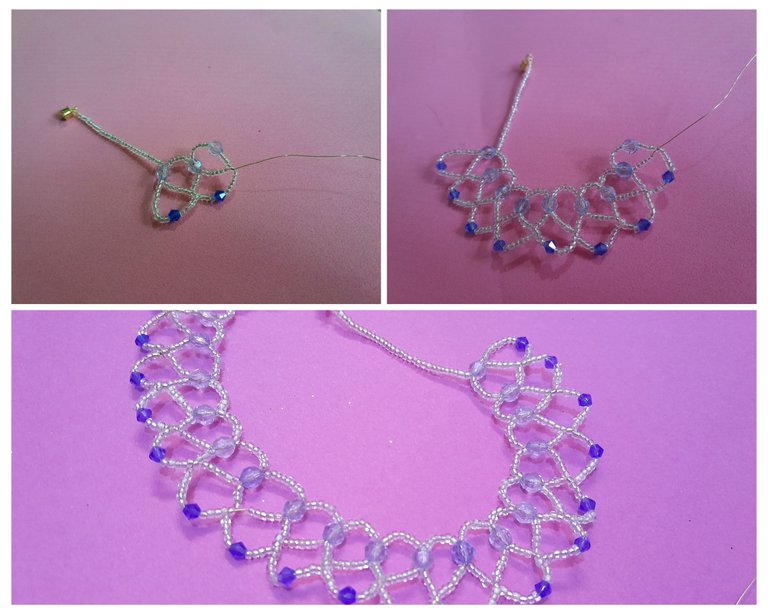
Paso 6| Step 6
Una vez logrado el tamaño ideal, introducimos 4 Mostacillas, un swaroski, 11 Mostacillas y a diferencia de los pasos anteriores, esta vez pasó el Alambre por el último cristal, para finalizar, introduzco 30 Mostacillas y hago lo mismo que en el principio con el trancado, corto el Alambre y lo que sobra lo meto dentro de las Mostacillas.
Once the ideal size is achieved, we introduce 4 beads, a swaroski, 11 beads and unlike the previous steps, this time I put the wire through the last crystal, to finish, I introduce 30 beads and I do the same as in the beginning with the locking, I cut the wire and I put what is left over inside the beads.
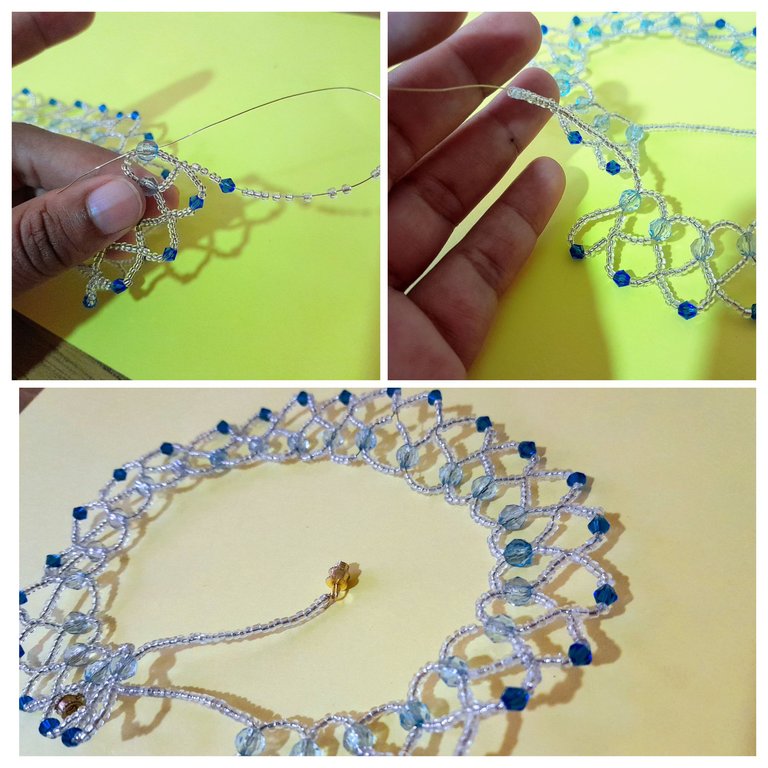
Paso 7| Step 7
Por el swaroski central paso Alambre, de modo que quede dos puntas, en cada lado meto 7 Mostacilla, y cierro con una Mostacilla cruzando ambos Alambres por el medio de la Mostacilla, luego hago otro círculo de Mostacilla, el tercero lo hago con 5 Mostacillas de cada lado, para la parte final Introduzco una Mostacilla, un swaroski 2 Mostacillas, en el otro Alambre una Mostacilla y cruzo los dos Alambres por el swaroski, y continuo con el otro lado, de igual mera solo que cruzo el Alambre por las Mostacillas del medio, de los círculos anteriores.
For the central swaroski I pass Wire, so that it is two points, on each side I put 7 beads, and close with a bead crossing both wires through the middle of the bead, then I make another circle of beads, the third one I make with 5 beads on each side, for the final part I introduce a bead, a swaroski 2 beads, in the other wire a bead and cross the two wires by the swaroski, and continue with the other side, in the same way only that I cross the wire by the beads in the middle of the previous circles.
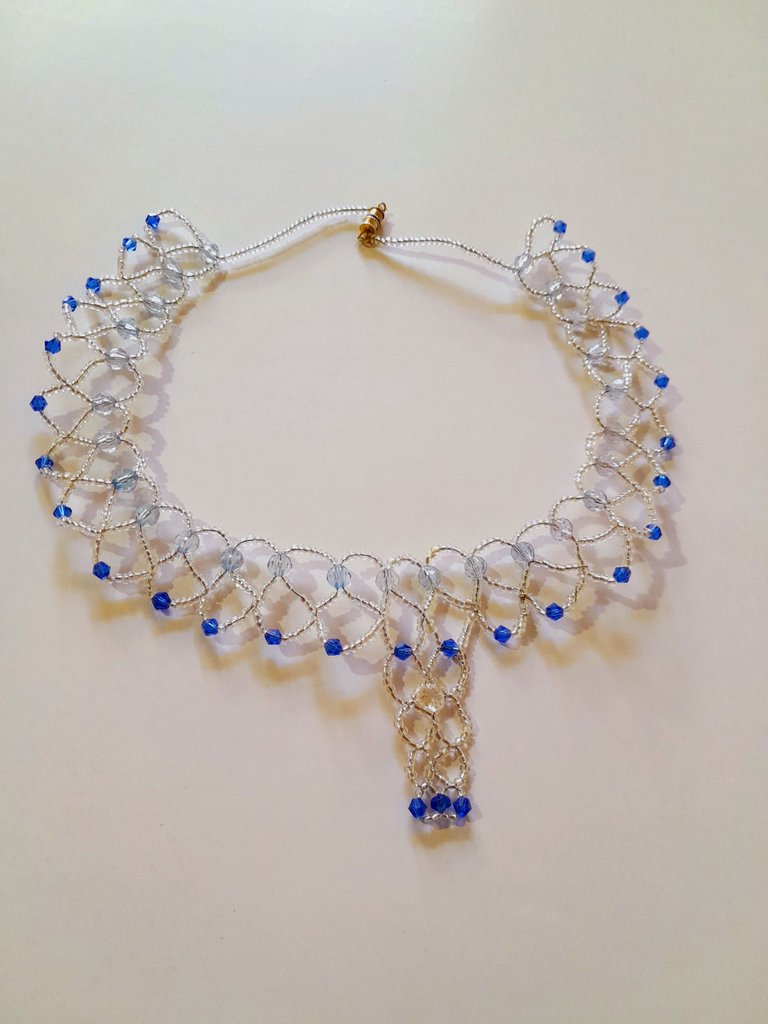
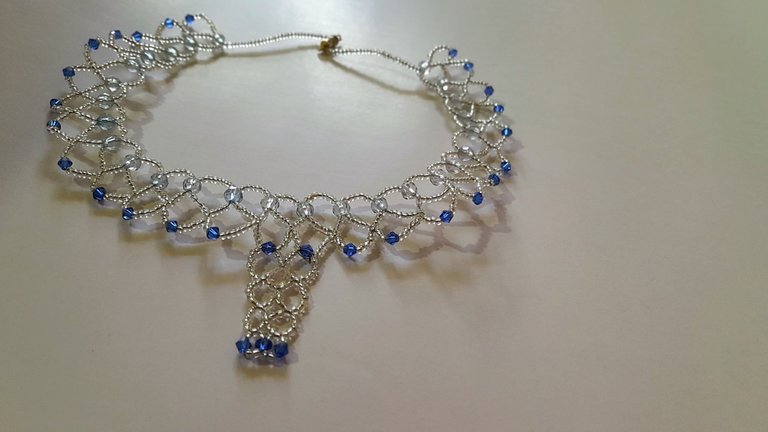
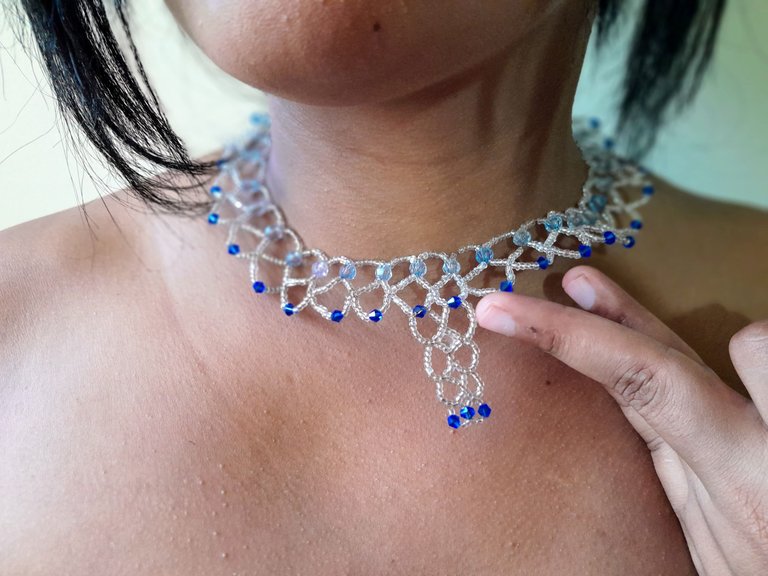
Presentación final/Final presentation 📿


Muchas gracias por este lindo espacio, espero les haya gustado mi participación, invito @crisvera, @marcelys1 y @marilegny espero se animen a participar, mis mejores deseos, nos vemos pronto.
Thank you very much for this nice space, I hope you liked my participation, I invite @crisvera, @marcelys1 and @marilegny I hope they are encouraged to participate, my best wishes, see you soon.
Fotos propias tomadas con mi teléfono Samsung A13, 50 mp. Edición de portada con Picsart collage en Gridart.
Own photos taken with my Samsung A13 phone, 50 mp. Cover editing with Picsart collage in Gridart.
Contenido exclusivo para hive. / Exclusive content for hive.
Traducción/ translation --->deepl
https://twitter.com/MeivysGoherds/status/1561119944510771200
The rewards earned on this comment will go directly to the people sharing the post on Twitter as long as they are registered with @poshtoken. Sign up at https://hiveposh.com.
Congratulations @meivys! You have completed the following achievement on the Hive blockchain and have been rewarded with new badge(s):
Your next target is to reach 200 replies.
You can view your badges on your board and compare yourself to others in the Ranking
If you no longer want to receive notifications, reply to this comment with the word
STOPCheck out the last post from @hivebuzz:
Support the HiveBuzz project. Vote for our proposal!
Wow está muy hermoso amiga! Felicidades eres muy talentosa y el paso a paso está súper detallado. Muy buen post! Felicidades 💞
Muchas gracias amiga, tan linda 🥰🥰
Sin duda amiga @meivys has traído un collar especial y más de hermoso para este concurso, este collar esta digno para una gran noche, realmente se nota que fue hecho con amor 💘 😍
Te deseamos mucho éxito en el concurso, gracias por tu excelente participación y explicación de una gran artista.
Muchas gracias por tan lindas palabras, son de motivación 🥰🥰.
Hola amiga, que hermosa creación, tu paso a paso está bien detallado.
Quedó bello y elegante.
Saludos
Muchas gracias amiga querida 🥰
Hermoso amiga se ve muy elegante, me encanta.
Muchas gracias 😊😊
Hermoso amiga, gran trabajo felicidades..
Muchas gracias amiga 🤗
Felicidades amiga este collar te quedó muy hermoso 😍 me super encantó 😊!
Muchas gracias cariño, que linda visita, saludos.
Esta bellisimo, se ve que es laborioso! quedaría excelente con un vestido de noche y los hombros descubiertos! Gracias por tu participación y una explicación maravillosa!
Mucho exito!
Hola amiga mucha gracias 🥰🥰, si es ideal para un look elegante, saludos.