[ESP-ENG] Restaurando mi colador de café. | Restoring my coffee colander.
Veamos el paso a paso.
Happy afternoon to all my beautiful people of Hive, this time I want to show you how I restored my coffee strainer that was already old, it is very simple to make. I hope you like it and find it useful, who wouldn't like a freshly brewed coffee with a new strainer.
Let's see the step by step.
Español
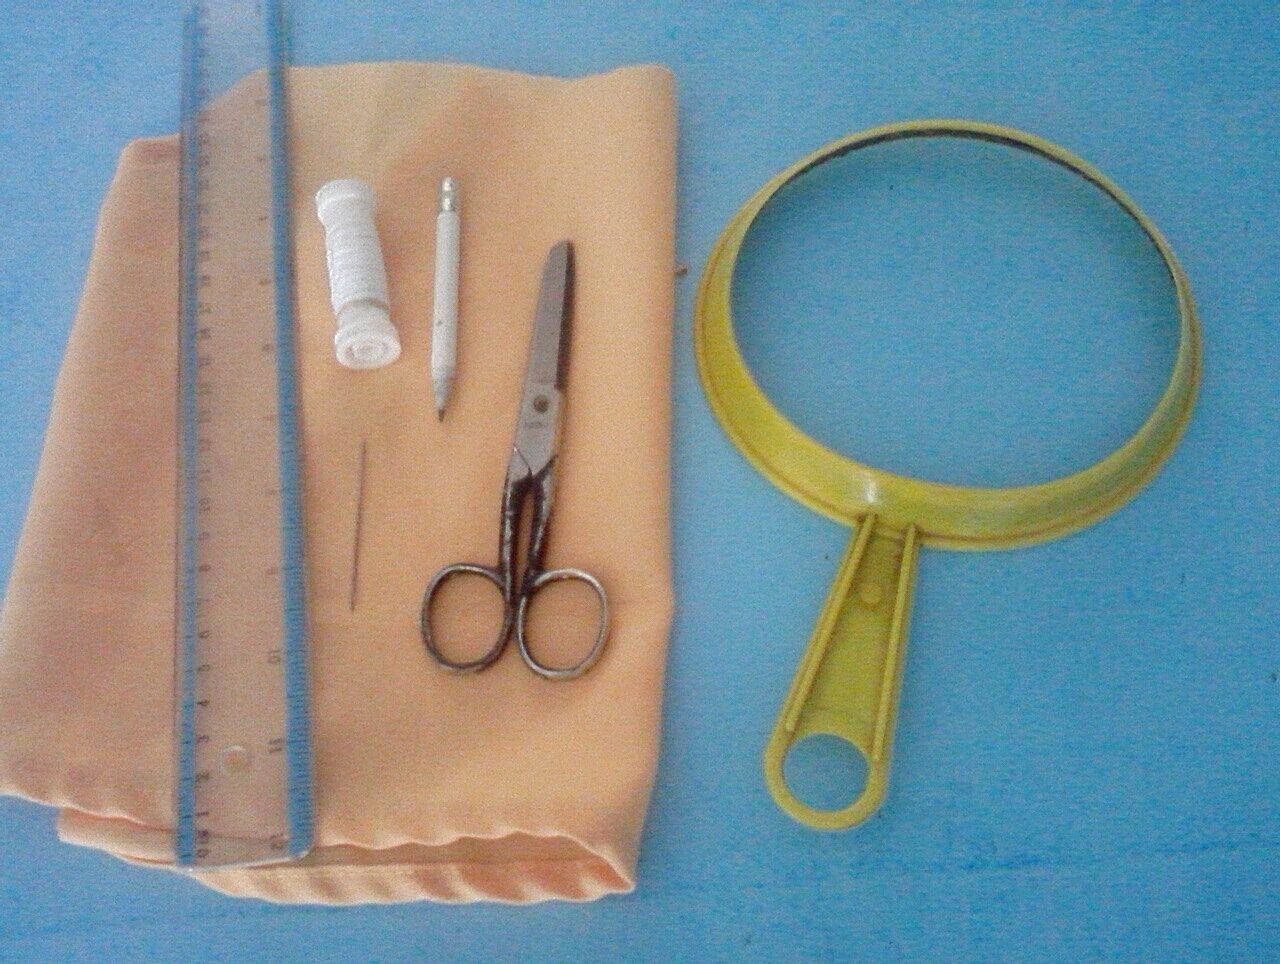
Materiales
- La horma del colador viejo.
- Tijera.
- Un retazo de tela.
- Hilo.
- Aguja.
- Lápiz.
- Regla.
English
Materials
- The last of the old strainer.
- Scissors.
- A piece of cloth.
- Thread.
- Needle.
- Pencil.
- Ruler.

Español
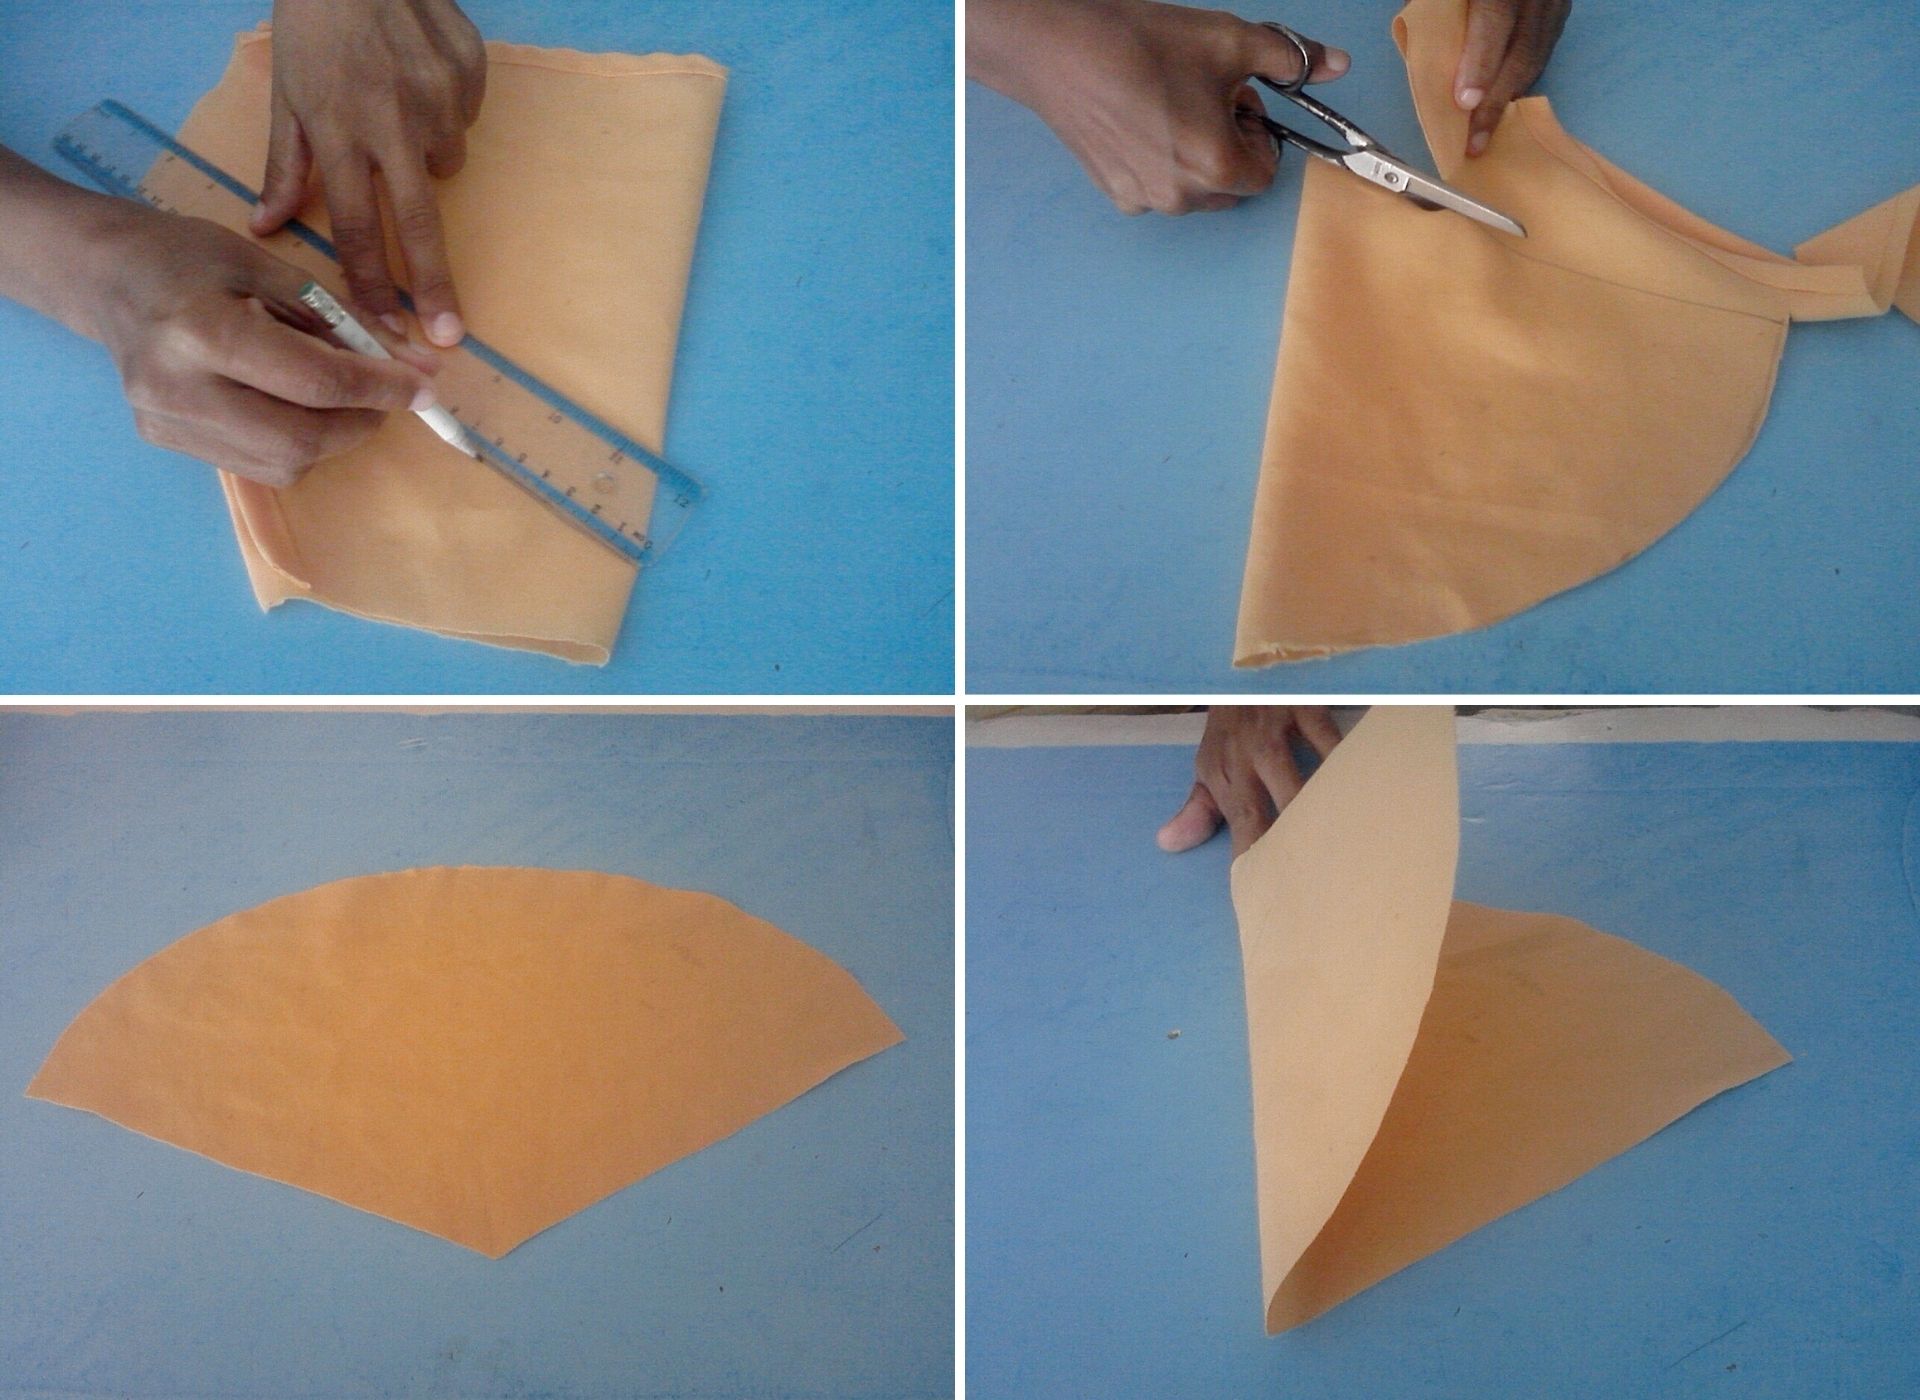
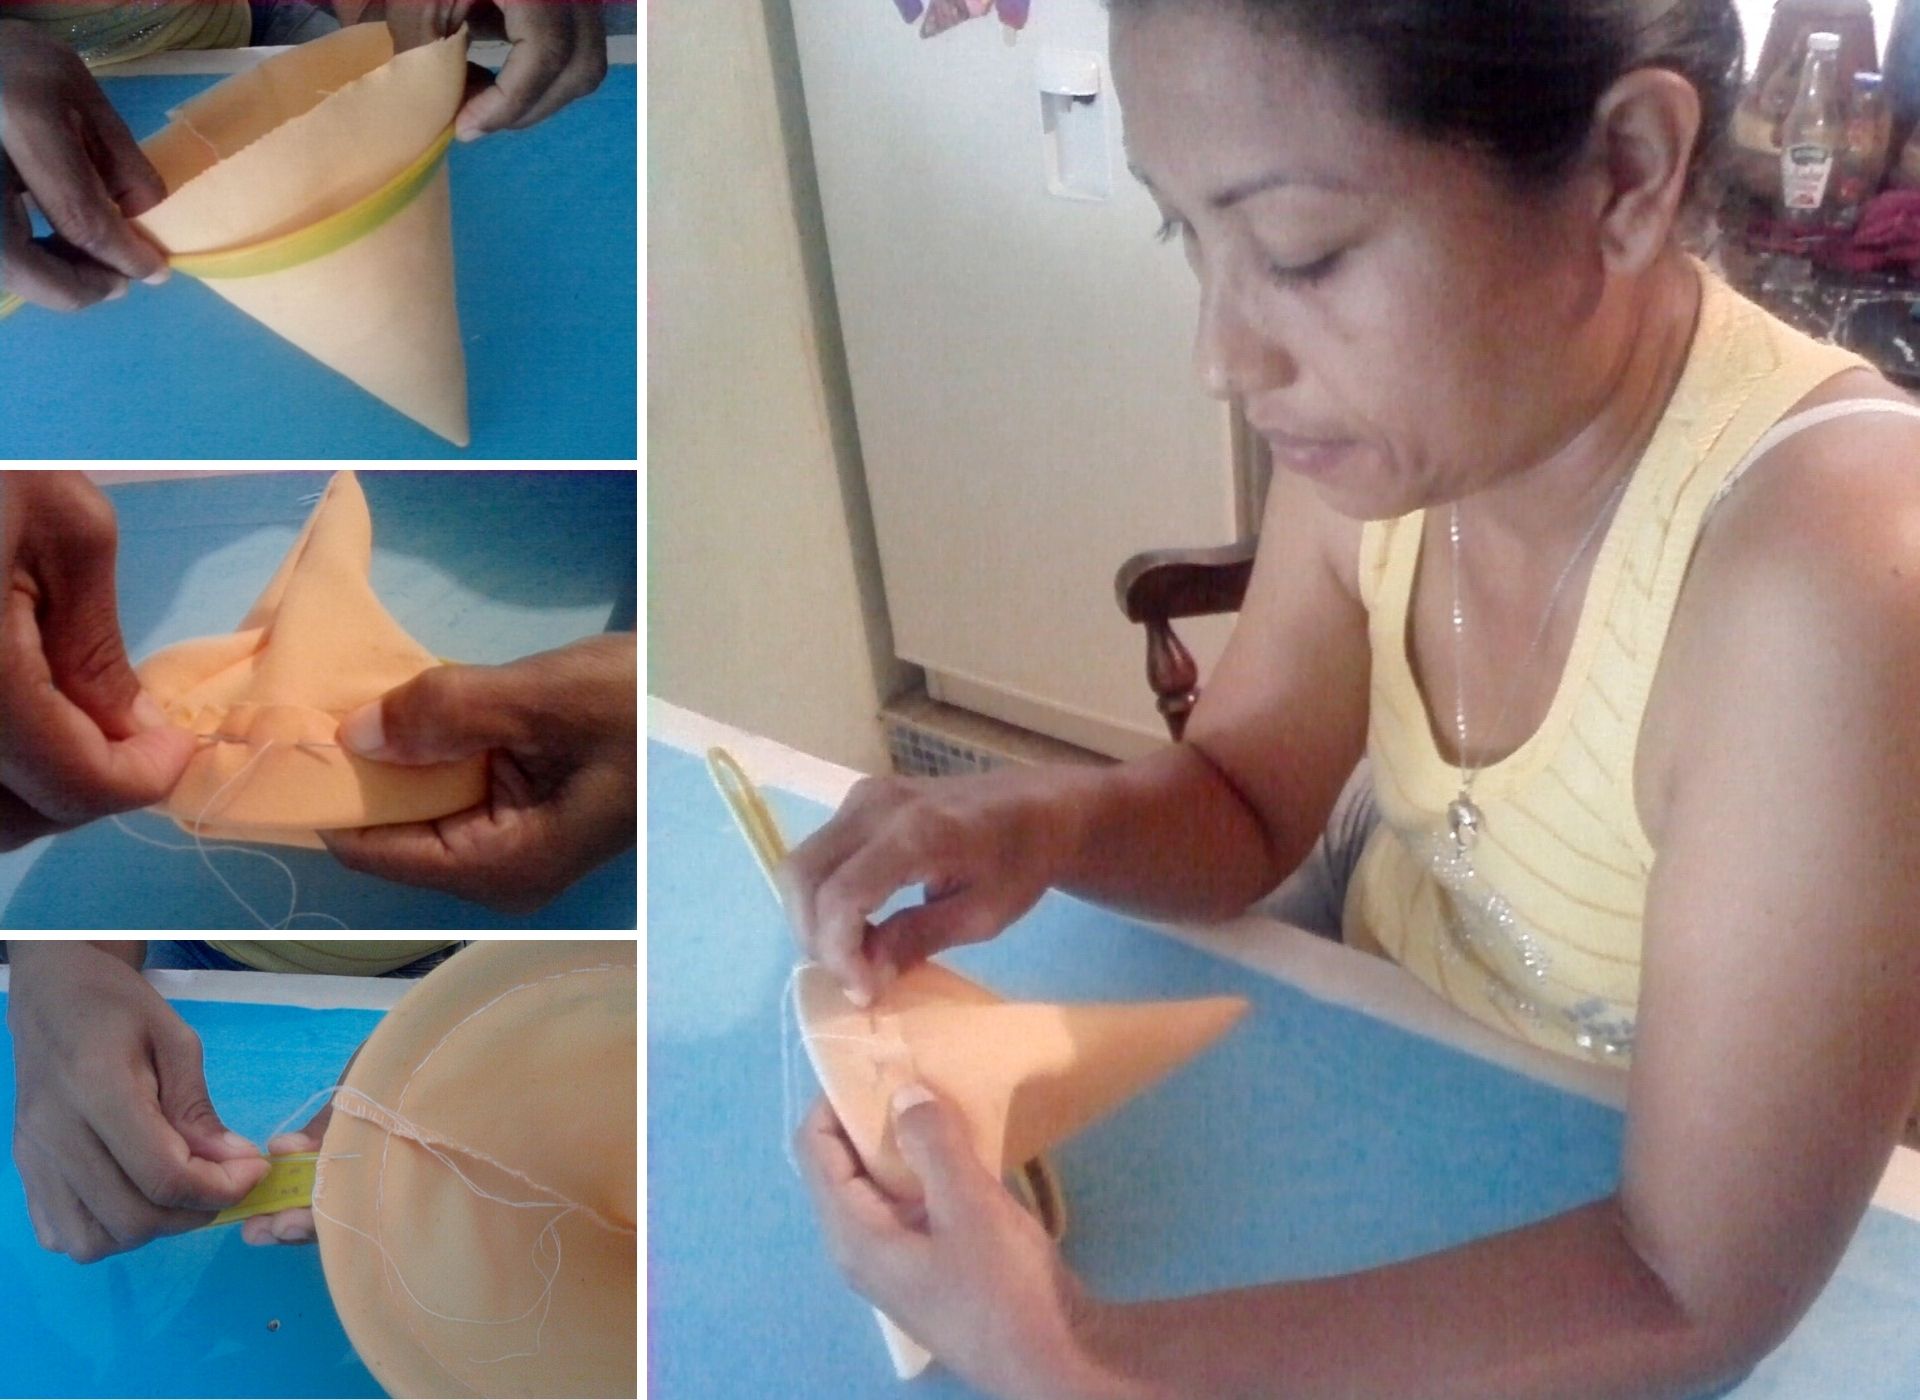
Paso 1:
- Tomamos el retazo de tela lo doblamos en dos, medimos y marcamos una linea de 22 cm en ambos lados en forma de cono, cuando la abrimos da forma de abanico, luego la doblamos en forma triangular.
English
Step 1:
- We take the piece of fabric, fold it in two, measure and mark a line of 22 cm on both sides in the shape of a cone, when we open it, it gives a fan shape, then we fold it in a triangular shape.
Español
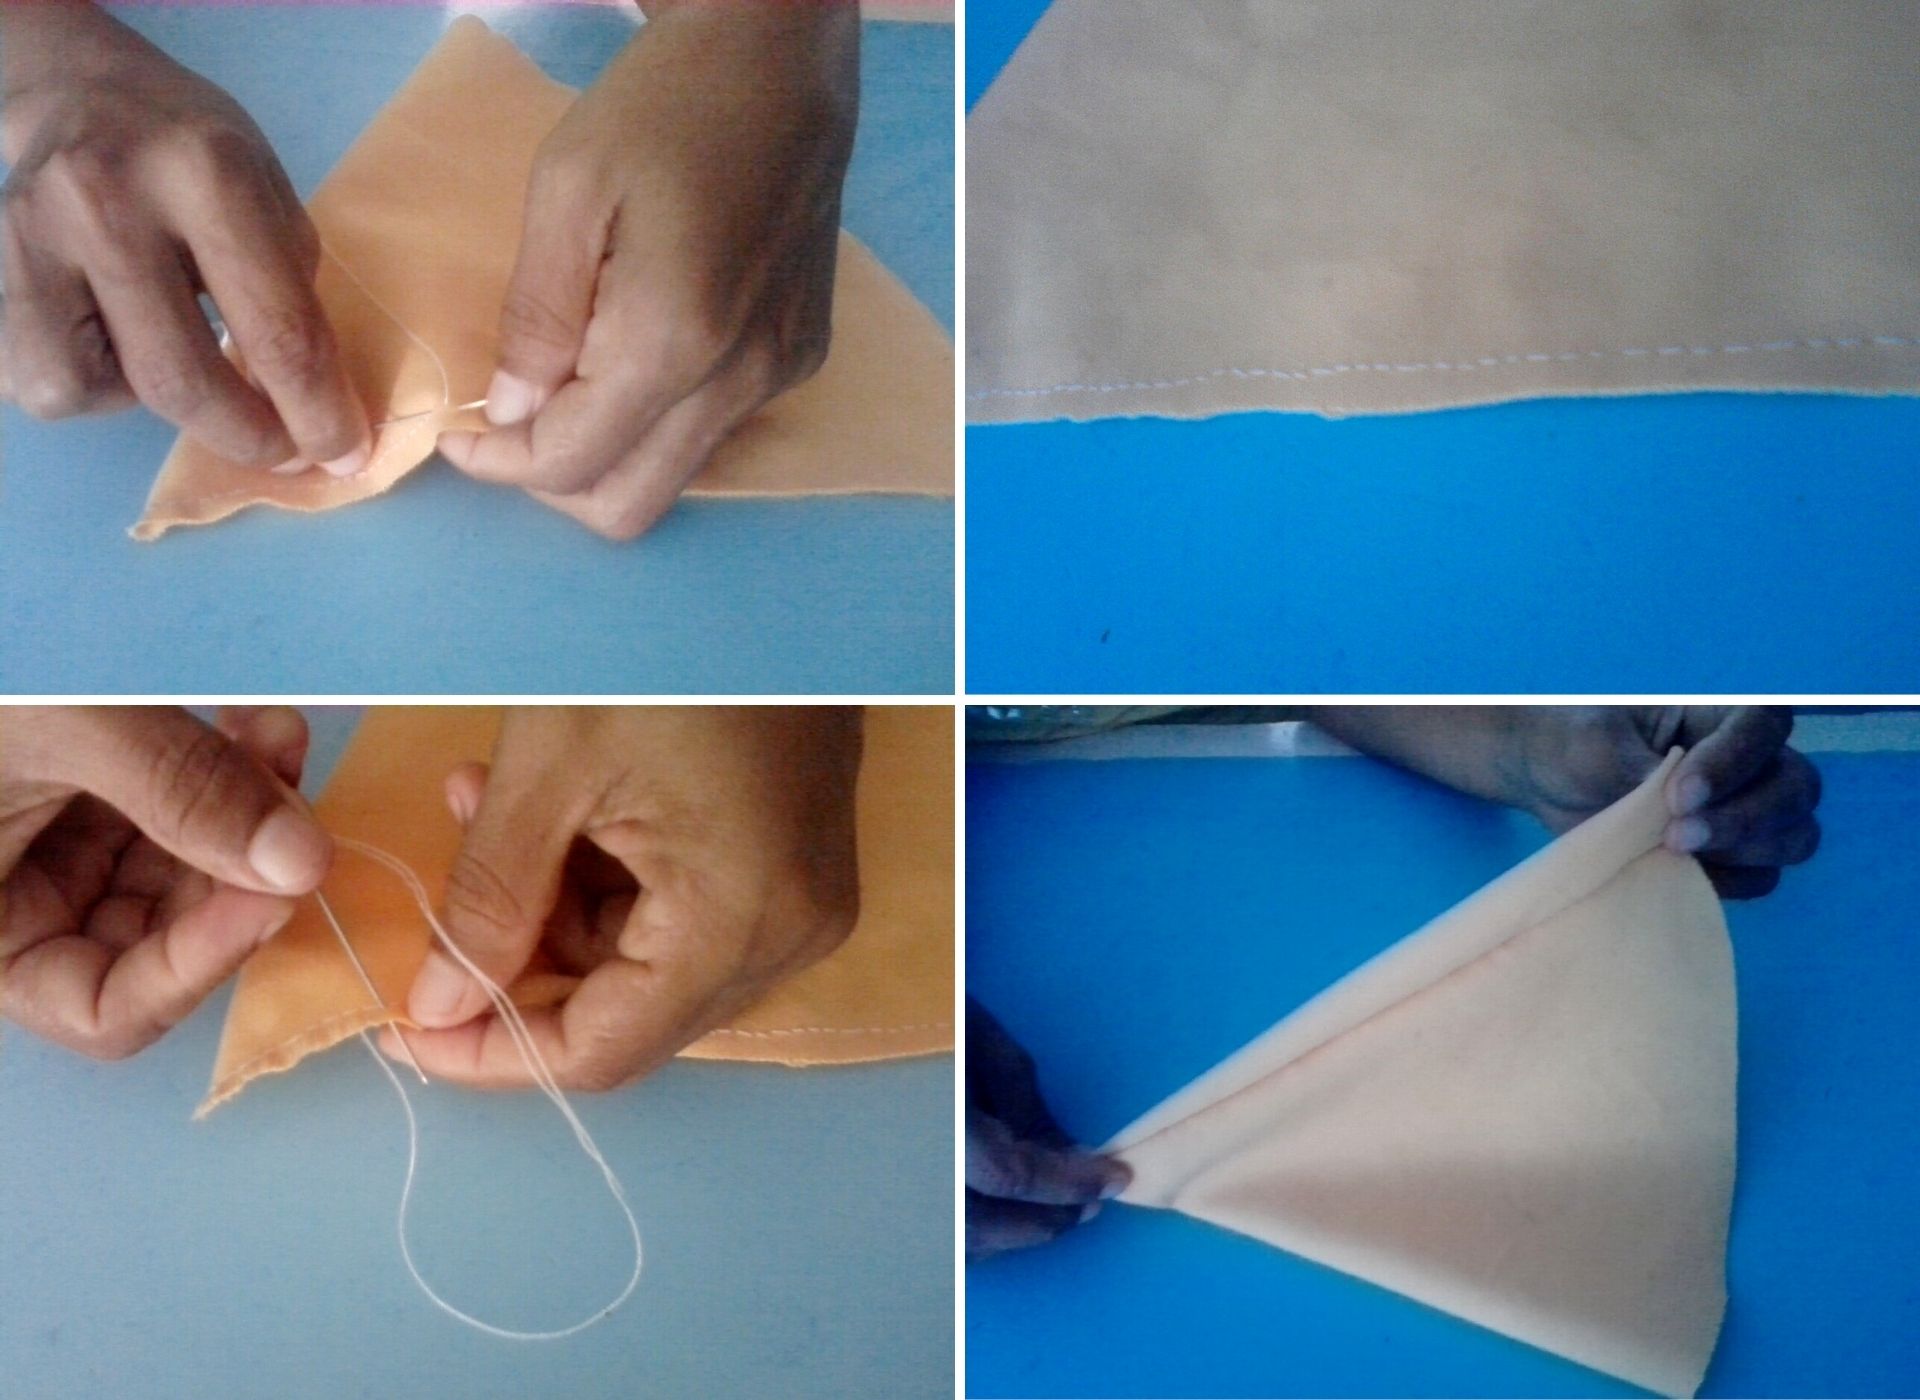
Paso 2:
- Ahora cosemos los dos bordes que están sueltos, lo volvemos a realizar otra costura de manera que no le queden flecos al borde sobrante de la costura, y procedemos a voltear al lado derecho.
English
Step 2:
- Now we sew the two edges that are loose, sew another seam so that there are no bangs left on the seam allowance, and proceed to turn it right side out.
Español
Paso 3:
- Procedemos a introducir el cono ya cosido en la horma del colador, lo doblamos hacia fuera quedando la horma dentro de la tela y comenzamos a coser por todo el borde.
English
Step 3:
- We proceed to introduce the cone already sewn in the last of the strainer, we fold it outwards, leaving the last inside the fabric and we start sewing all around the edge.
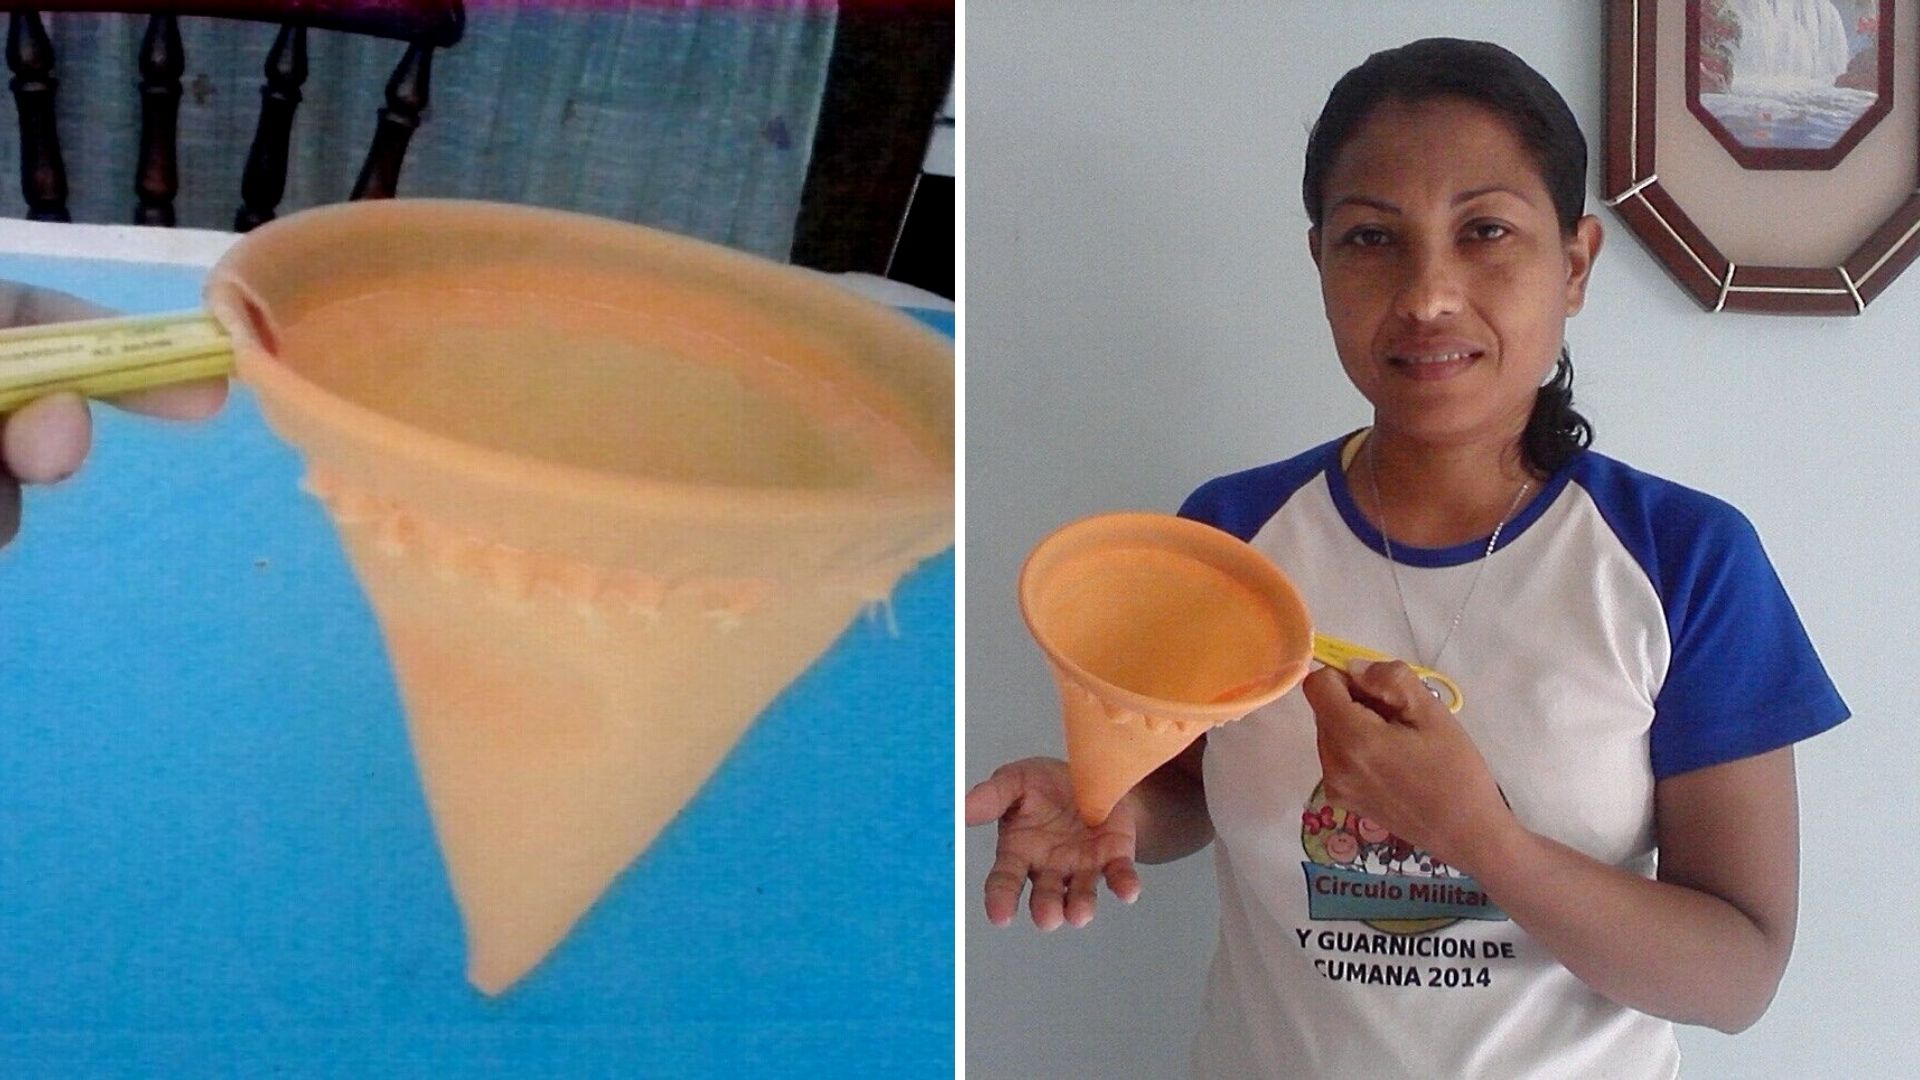
Así quedo mi resultado final.
This is my final result.
.jpg)
.jpg)
.jpg)
.jpg)
Todas las fotos son de mi autoria y editadas con Canva.
All photos are my own and edited with Canva.

0
0
0.000
Hola Meurys, gracias por compartirnos tu paso a paso para restaurar este colador ❤️. Personalmente no me gusta que esa tela este sucia asi que esto es muy útil 😃.
hola amiga, para mi fue una excelente idea, gracias por tu comentario.
Muy buena idea par restaurar algo viejo y colocarlo totalmente funcional sin l necesidad de comprar otro
hola mariana, en realidad fue una buena idea, y así no tuve que comprar uno nuevo. gracias bella saludos.
Saludos @meurys80 está genial la idea para reparar el colador, creo que uno de los utensilios que más uso tiene en la cocina y que mejor manera para mantenerlo operativo.
Congratulations @meurys80! You have completed the following achievement on the Hive blockchain and have been rewarded with new badge(s) :
Your next target is to reach 3750 upvotes.
You can view your badges on your board and compare yourself to others in the Ranking
If you no longer want to receive notifications, reply to this comment with the word
STOPOh what a good idea! I have a French press top that I have paired with a mug that is the closest fit but it isn't precise, so I am always running it through a mesh strainer, which isn't precise either and I end up pouring back and forth a few times. I should make one of these, thank you for the inspiration! :)
¡Oh, qué buena idea! Tengo una tapa de prensa francesa que combiné con una taza que es el más ajustado pero no es precisa, por lo que siempre la paso por un colador de malla, que tampoco es preciso y termino vertiendo de un lado a otro unas pocas veces. Debería hacer uno de estos, ¡gracias por la inspiración! :)
Hola @meurys80, me gustó mucho tu publicación. El paso a paso es muy útil y lo tendré en cuenta cuando me toque restaurar el mío, ya que aquí en Perú no venden este tipo de coladores, el que tengo actualmente me lo envió mi madre desde Venezuela y yo adoro el café recién colado.
Me gusto tu idea amiga... hay que ponerla en practica, no dejar que nuestros colador se pongan feos de tanto uso:)