¡No dejes que se pierda! mira como restauro la tapa de un libro. /Don't let it go to waste! See how I restore a book cover.
Versión En Español.
Saludos a todos comunidad de DIYHub, espero que se encuentren bien, El próximo 23 de abril será el día del libro y algunos de ustedes saben que tengo gusto y habito por la literatura, a su vez soy muy amigo de los libros, de su promoción en cuanto al fomento de lectura se trata, aunque no soy ortodoxo en cuanto al libro físico se trata, trato que mis libros siempre se encuentren en buen estado, razón por la cual he aprendido a lo largo de mi vida en poder reparar libros.
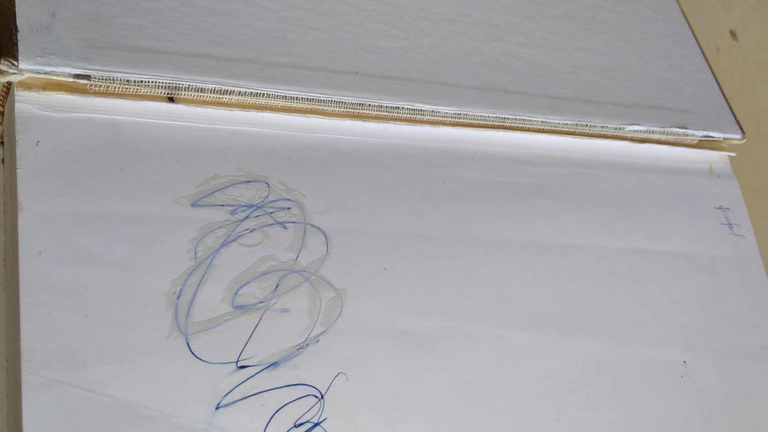
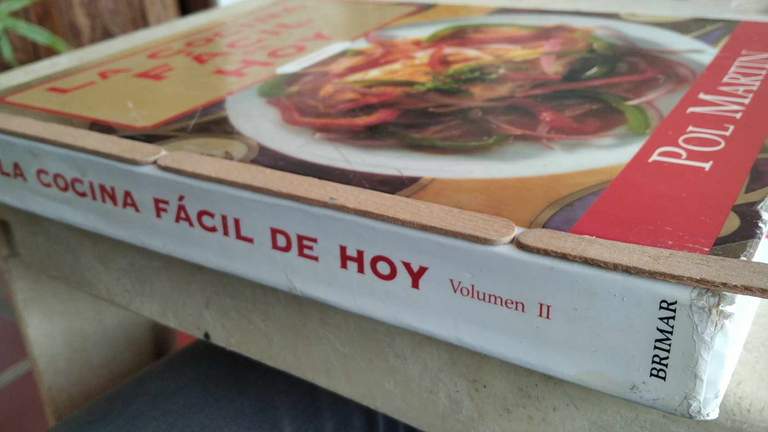
En este caso, este libro de recetas de cocina fue un obsequio de una vecina, regalo que recibí con mucho agrado, al abrir el libro me di cuenta que tenía un daño en la zona que une el lomo de la cubierta, aquí se puede apreciar un poco, este un trabajo de mantenimiento en el evito que su condición empeore y quede inutilizable.
Para llevar a cabo esta tarea reuní los siguientes materiales:
-Palitos de madera.
-Pega de carpintería.
-Prensas.
-Cutter.

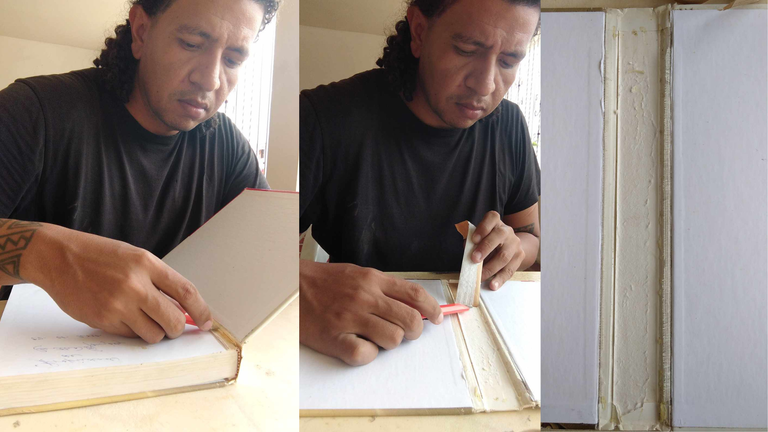
Etapa 1: Desarmado.
Este libro tiene la ventada que su cubierta es dura, por tanto sus martes están más integradas, con la ayuda de un cutter, separé las solapas del cuerpo del libro, realicé un corte vertical por la zona donde estaba debilitada, realicé lo mismo tanto en la parte posterior como en la inferior, con la portada y el cuerpo del libro separados me cercioré si podía tener otros daños a lo interno, afortunadamente estaba en buenas condiciones salvo un recubrimiento a lo interno del lomo había perdido su pega.
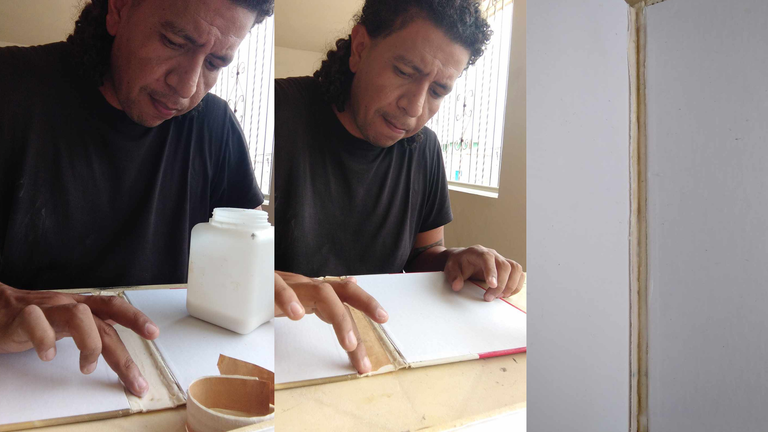
Etapa 2: Ensamblado.
En esa parte solo quedaba pegar las partes, empecé adhiriendo con la pega de carpintería el recubrimiento nuevamente al lomo, esperé cerca de una hora para poder seguir, momento en el cual unté de pega el lomo y su contraparte ubicada en el cuerpo del libro y procedí a unirlas, con mucho cuidado cuadrando las partes incluyendo la unión de la solapa.
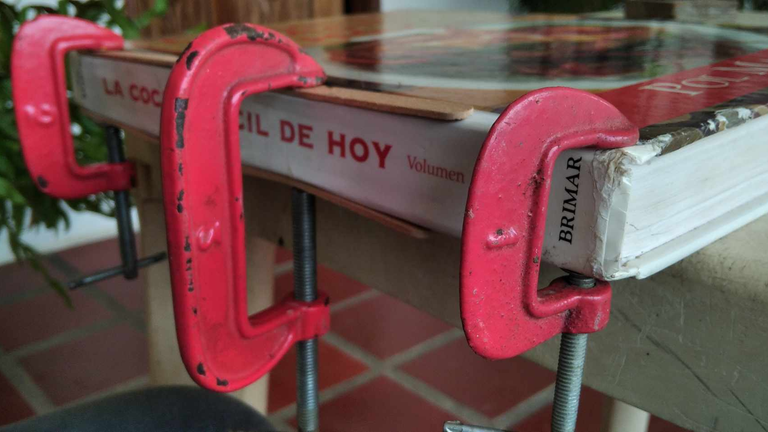
Etapa 3: Prensado.
Igual que en la etapa 2 se debe trabajar con mucha paciencia de tal manera que nada se descuadre, es importante en el prensado ya que este ayudará a darle la forma final al libro, para este tipo de cuerpo me valí de unas prensas y unos palillos de madera, esto con el fin de ayudar a extender la presión en la mayor cantidad del libro, puesta la prensa, me valí de un apoyo que fue hacer de manera improvisada un apoyo para que hiciera presión, de esta manera lograr firmeza en la unión de las piezas.

Resultado:

Si has llegado a este punto del post, quiero agradecerte tomar un tiempo de tu vida, espero haya sido de su agrado y utilidad, hasta una próxima.
English Version.
Greetings to all DIYHub community, I hope you are well, next April 23 will be the book day and some of you know that I have taste and habit for literature, in turn I am very fond of books, its promotion in terms of promoting reading is about, although I am not orthodox in terms of the physical book is about, I try that my books are always in good condition, which is why I have learned throughout my life in being able to repair books.
In this case, this cookbook was a gift from a neighbor, a gift that I received with great pleasure, when I opened the book I realized that it had a damage in the area that joins the spine of the cover, here you can see a little, this maintenance work on it prevents its condition to worsen and become unusable.
To carry out this task I gathered the following materials:
- Wooden sticks.
- Carpentry glue.
- Presses.
- Cutter.
Stage 1: Disassembly.
With the help of a cutter, I separated the flaps from the body of the book, I made a vertical cut in the area where it was weakened, I did the same in the back and in the lower part, with the cover and the body of the book separated I checked if it could have other internal damages, fortunately it was in good condition except for a coating on the inside of the spine that had lost its glue.
Stage 2: Assembly.
In this part, the only thing left to do was to glue the parts together, I started by adhering the cover to the spine again with carpentry glue, I waited about an hour to continue, at which time I spread glue on the spine and its counterpart located in the body of the book and proceeded to join them, carefully squaring the parts, including the flap joint.
Stage 3: Pressing.
The same as in stage 2 must work with great patience so that nothing is out of place, it is important in the pressing as this will help to give the final shape to the book, for this type of body I used some presses and some wooden sticks, this in order to help extend the pressure on the largest amount of the book, put the press, I used a support that was to make an improvised way a support to make pressure, thus achieving firmness in the union of the pieces.
Result:
If you have reached this point of the post, I want to thank you for taking time out of your life, I hope you have enjoyed it and found it useful, until the next one.
Excelente trabajo, también he tenido ese problema con algunos tomos de enciclopedias que les tengo mucho cariño,gracias por mostrar como repararlas. Saludos ☺️
Si, tengo años reparando libros, hay otros que he hecho milagros, esto es un gusto, me relaja hacerlo.
You got it perfect, very good way to restore excellent techniques, thanks for sharing.
Muchas gracias por tu apreciación, espero pronto mostrar libros que su estado precario me demanden ingenio y desafíos.
me alegra mucho que te haya gustado.
Me gustó mucho como quedó profe , que agusticidad edaa?
Claaro, quedó como nuevo, le extendí la vida.
Congratulations @miguelc88! You have completed the following achievement on the Hive blockchain And have been rewarded with New badge(s)
Your next target is to reach 600 replies.
You can view your badges on your board and compare yourself to others in the Ranking
If you no longer want to receive notifications, reply to this comment with the word
STOPCheck out our last posts: