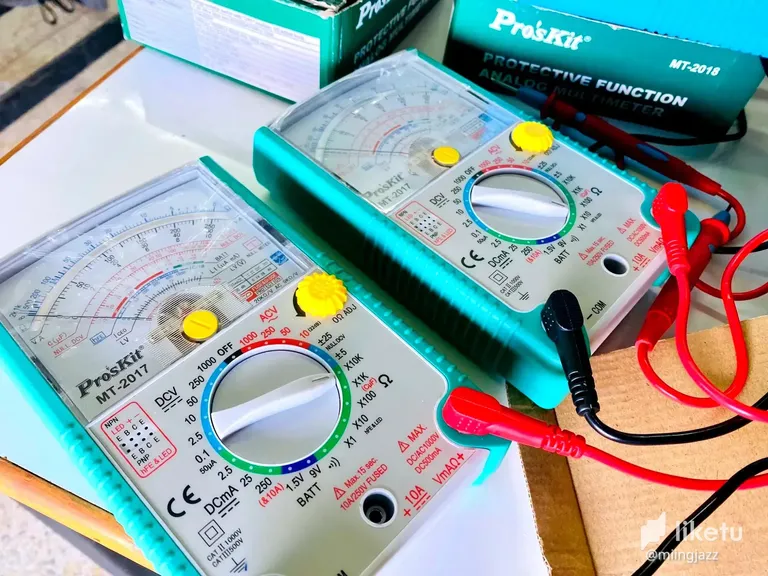
Analog multimeter repair

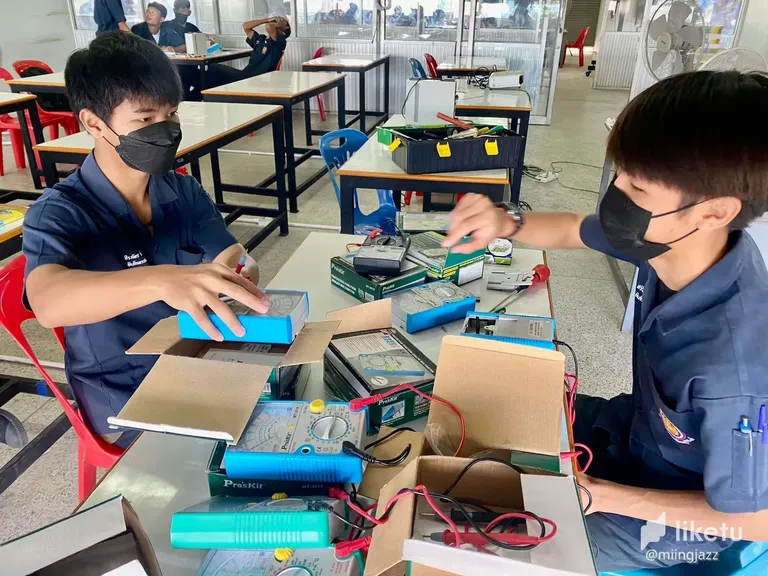

In the class each period of the day, some days have practice worksheets. And each time, there will be equipment and equipment in the study broken, damaged, must be repaired in the part that can be repaired by yourself. And like today too We come to repair an "Analog Multimeter"
There are many things that cause damage to the multimeter. This makes the multimeter unusable. This may be because the voltage has been entered beyond the size of the measured area. Blow the fuse or turning on the multimeter without turning it off to the power button drains the battery. Or frequent use can drain the battery as well. when the multimeter damaged in mild symptoms can bring the multimeter to repair itself. The principle of preliminary repair is as follows.
🔧⚙️Inspection and repair procedures🔧⚙️
🔧 1. Prepare materials for repairing by using a multimeter as the main one to check for breakdowns, screwdrivers, batteries and screwdrivers.
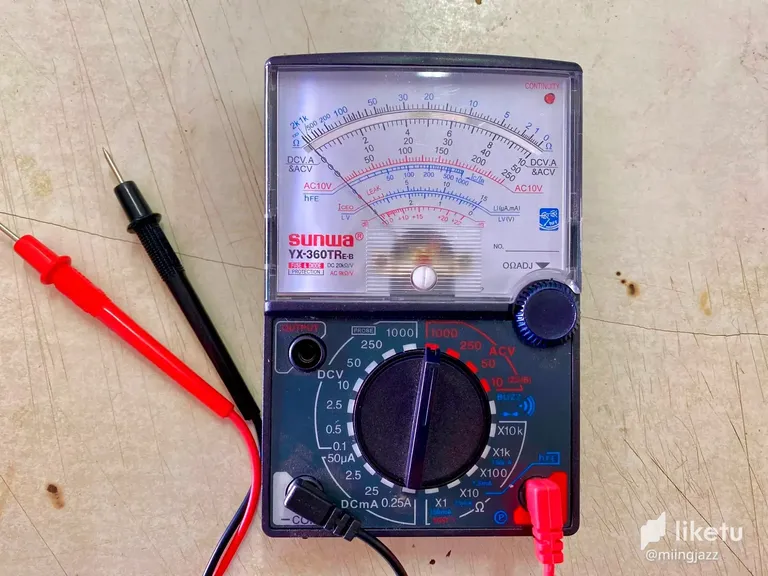
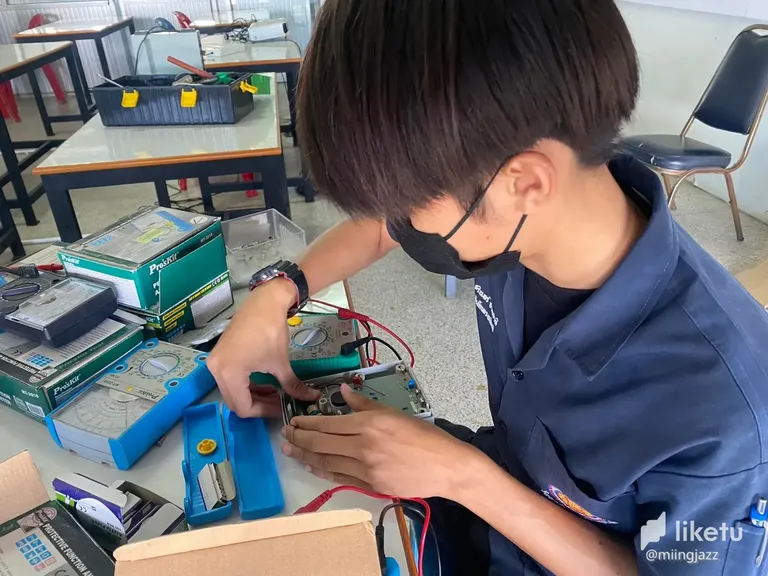
🔧 2. Preliminary check is to adjust the knob to the ohmmeter area and touch the needle when the needle doesn't move, indicating that the multimeter has a problem.
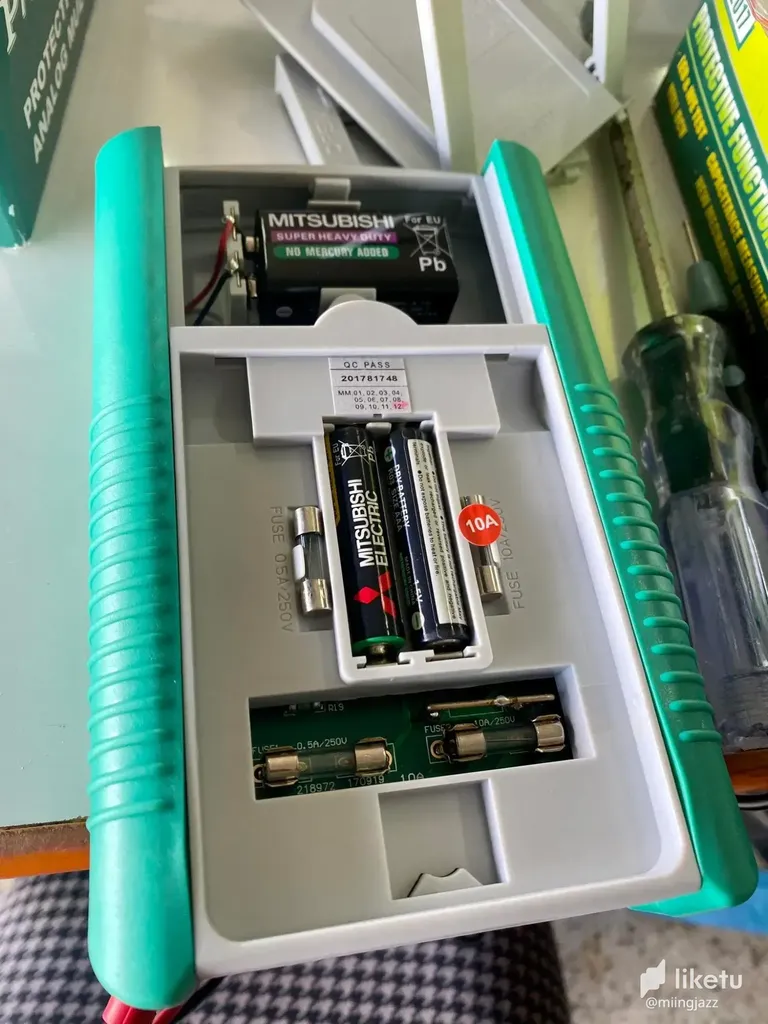
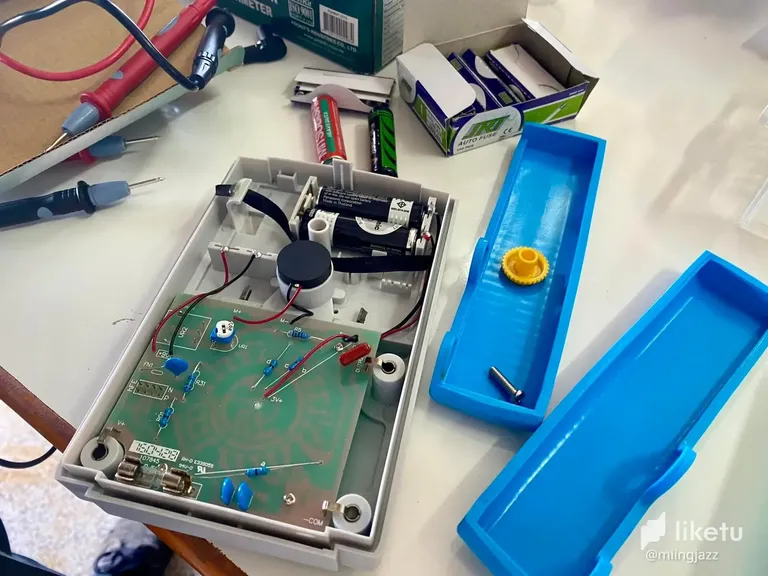
🔧 3. Use a screwdriver to look inside the multimeter. and check the battery and fuse
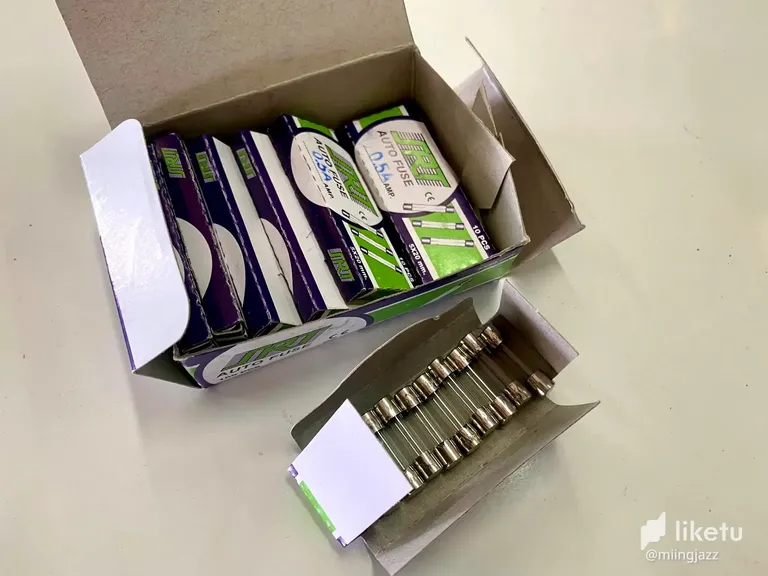
🔧4. If the fuse is blown, then replace the fuse with a new one. Checking the fuse can be seen with the naked eye or make a check with a multimeter by adjusting the area to the Buzz. If it is broken, you will not hear a sound.
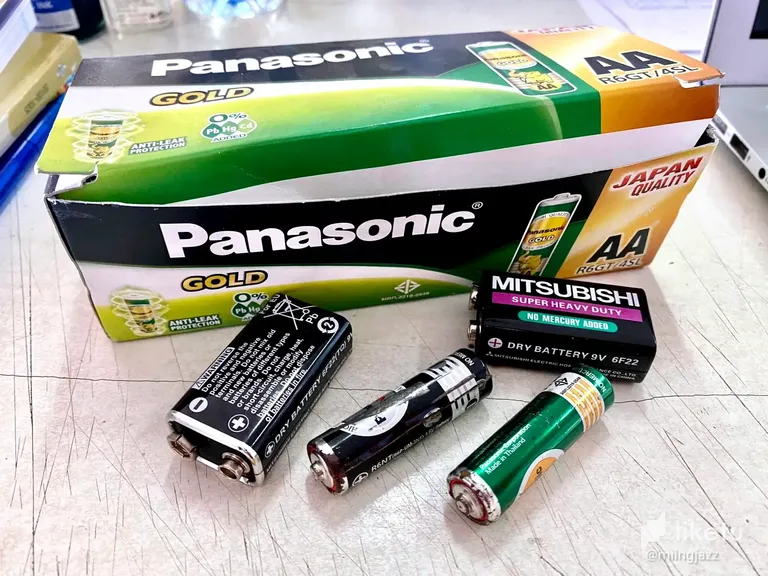
🔧5. If it is found that the problem is not with the fuse, check the battery by adjusting the range to DCV, DC voltage. When measuring, it was found that the battery was weak or had to replace a new battery.
🔧6. When the replacement of the device is complete, take measurements, test the use, see, then assemble it back.
ในการเรียนการสอนเเต่ละคาบของวันบางวันก็มีใบงานปฏิบัติ เเละเเต่ละครั้งก็ย่อมมีเครื่องใช้อุปกรณ์ในการเรียนพัง เสียหาย ต้องมีการซ่อมเเซมในส่วนที่สามารถซ่อมเองได้ เเละอย่างวันนี้ก็เช่นกัน พวกเรามาซ่อม "มัลติมิเตอร์เเบบอนาล๊อค"
การที่ทำให้มัลติมเตอร์พังเสียหายก็มีหลากหลายอย่าง ทำให้มัลติมิเตอร์ไม่สามารถใช้งานได้ อาจเป็นเพราะมีการป้อนเเรงดันไฟฟ้าเกินขนาดที่ตั้งย่านวัดไว้ ทำให้ฟิวส์ขาด หรือการที่เปิดเครื่องมัลติมิเตอร์ไว้โดยไม่ปิดไปที่ปุ่มปิดทำให้เเบตเตอรี่หมด หรือการใช้งานบ่อยๆก็ทำให้เเบตเตอรี่หมดได้เช่นเดียวกัน เมื่อเครื่องมัลติมเตอร์ เกิดการเสียหายในอาการที่ไม่รุนเเรงก็สามารถนำเอามัลติมเตอร์มาซ่อมเอง โดยหลักการซ่อมในเบื้องต้นดังนี้
⚙️🔧ขั้นตอนการตรวจเช็คเเละซ่อม 🔧⚙️
  ⚙️1.  เตรียมวัสดุอุปกรณ์ในการซ่อมโดยใช้เครื่องมัลติมิเตอร์ที่เป็นตัวหลักในการเช็คอาการเสีย ไขขวง เเบตเตอรี่ เเละไขควง

  ⚙️2. การตรวจเช็คในเบื้องต้นคือปรับปุ่มไปที่ย่านโอห์มมิเตอร์เเล้วเอาเข็มเเตะกันเมื่อเข็มไม่เคลื่อนที่เเสดงว่ามัลติมเตอร์มีปัญหา

  ⚙️3. ใช้ไขควงเปิดดูข้างในมัลติมเตอร์ เเละทำการเช็คเเบตเตอรี่เเละฟิวส์

  ⚙️4. หากพบว่าฟิวส์ขาดก็ให้ทำการเปลี่ยนฟิวส์ใหม่ การเช็คฟิวส์สามารถมองด้วยตาเปล่าหรือทำให้เช็คกับมัลติมิเตอร์โดยปรับย่านไปที่ Buzz ได้หากขาดจะไม่ได้ยินเสียง

  ⚙️5. ถ้าพบว่าปัญหาไม่ได้อยู่ที่ฟิวส์ก็ให้ทำการเช็คเเบตเตอรี่โดยปรับย่านไปที่ DCV เเรงดันไฟฟ้ากระเเสตรง เมื่อทำการวัดเเล้วพบว่าถ่านอ่อนหรือให้เปลี่ยนถ่านก้อนใหม่

  ⚙️6. เมื่อเปลี่ยนอุปกรณ์เสร็จเเล้วก็ให้ทำการวัดทดสอบการใช้งานดูค่อยประกอบเข้าคืน
For the best experience view this post on Liketu
You're so cool! 😄
Thank you. ^^