Nuevo concurso : Cintillo de arbolito navideño | New contest : Christmas tree headband


Buenas noches amigos creadores de contenido , un saludo y abrazo fraternal , en esta preciosa noche les quiero compartir un post que prepare especialmente para formar parte del nuevo concurso de la comunidad jewelry , una decoración inspirado en un arbolito navideño , ideal para nuestras pequeñas
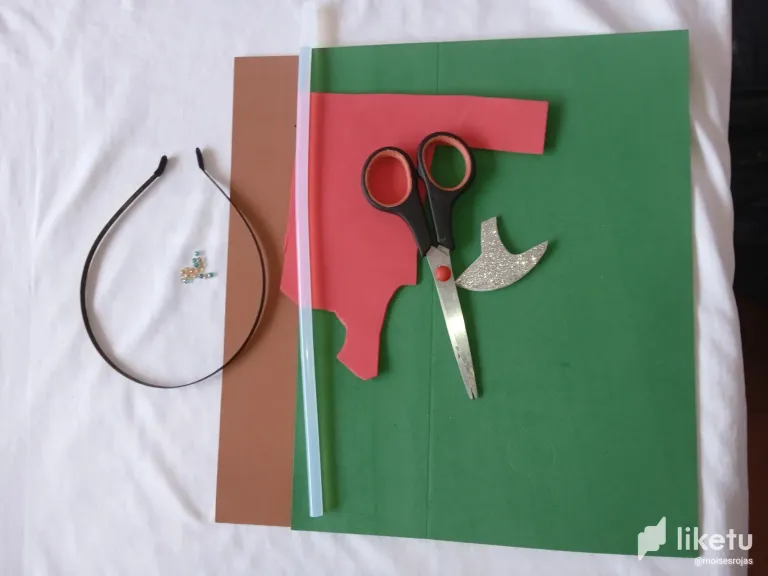
Materiales para restaurar nuestro cintillo :
-Foamis
-Perla plastica
-Cintillo
-Tijera
-Silicon
Pasos para realizar nuestra restauración :
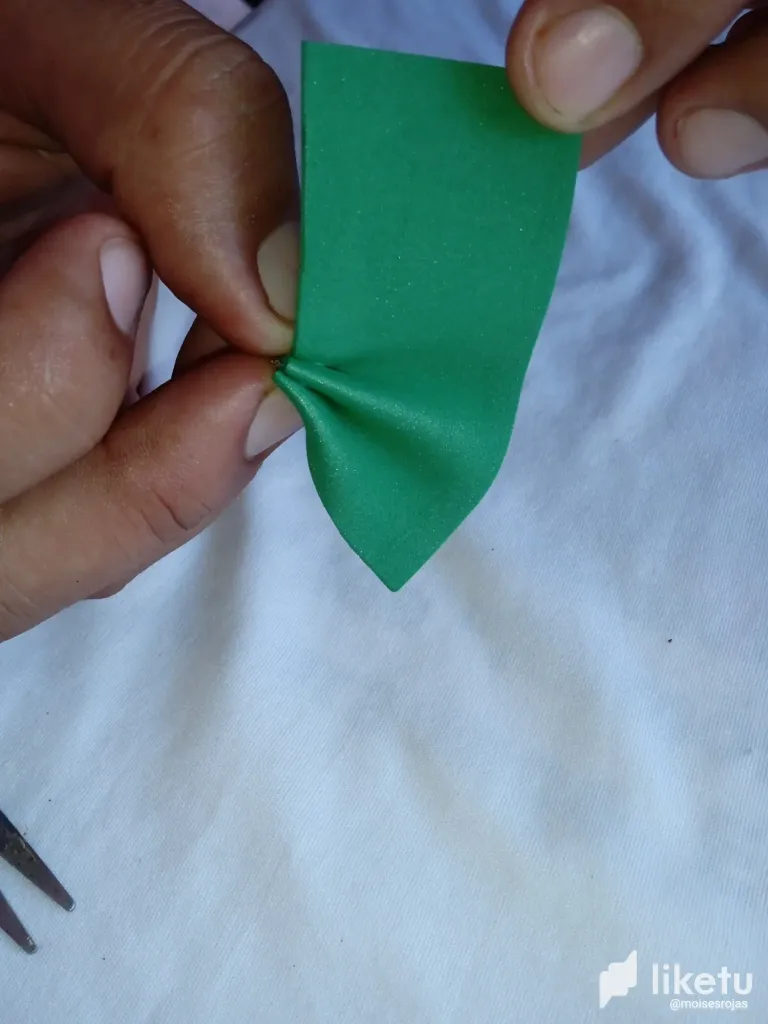
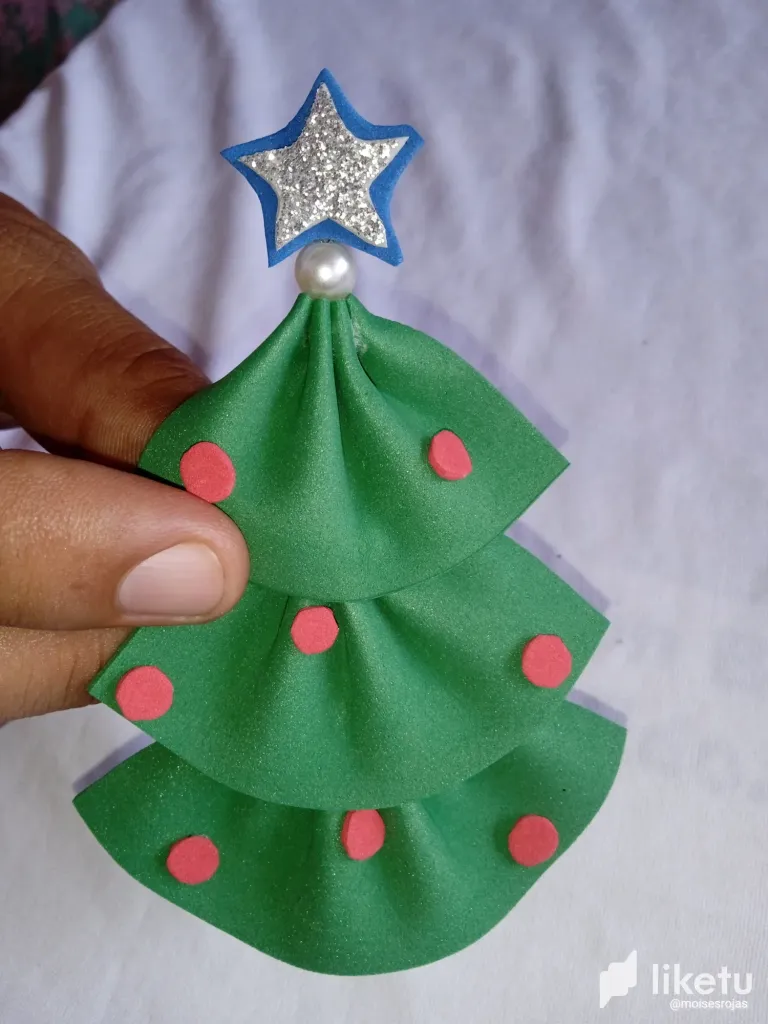
Paso número 1: comenzaremos recortando tres pequeños cuadros para más adelante realizar el arbolito navideño , como pueden ver en forma de pirámide , uno pequeño ,mediano y grande , el pequeño mide 4 cm de altura y 6 de ancho , el mediano 4 cm de altura y 8 de ancho por último el grande 4 de altura y 10 de ancho
Paso número 2: luego vamos a continuar pegando y formando una figura similar a un abanico ,vamos a tomar el borde y pegamos una parte adelante y la otra hacia atrás así sucesivamente hasta que quede arruchado o acanelado como lo pueden ver ,como recortamos tres medidas diferentes van a quedar uno más grande que el otro
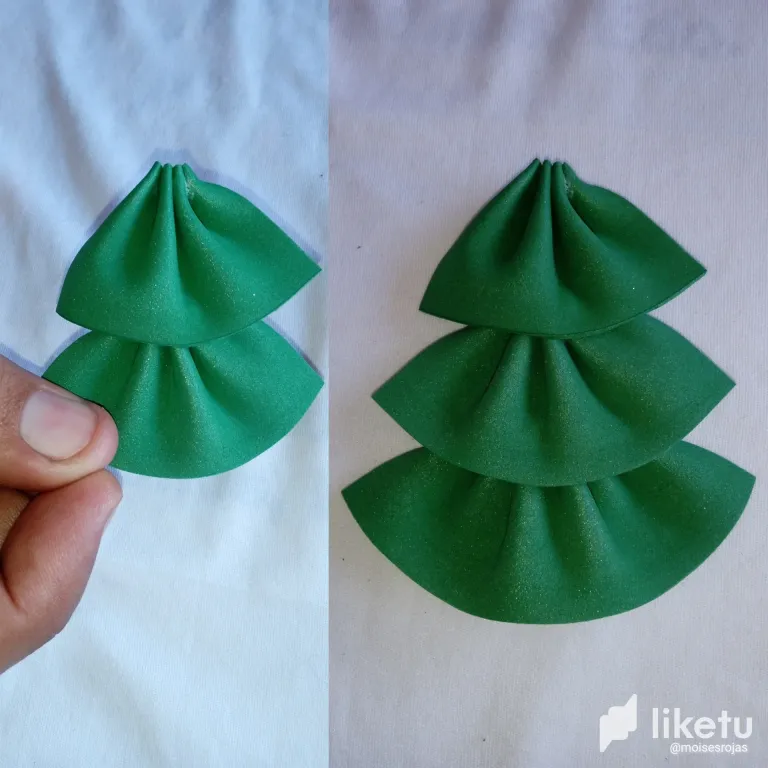
Paso número 3: Luego continuaremos tomando nuestras tres piezas en forma de abanico , comenzaremos a pegar uno arriba de el otro primero pegaremos el de arriba que es el más pequeño en el mediano para que quede el más chico arriba que será el copo del árbol , luego vamos a continuar pegando en la parte de abajo la última pieza para que nuestro arbolito quede en forma de pino
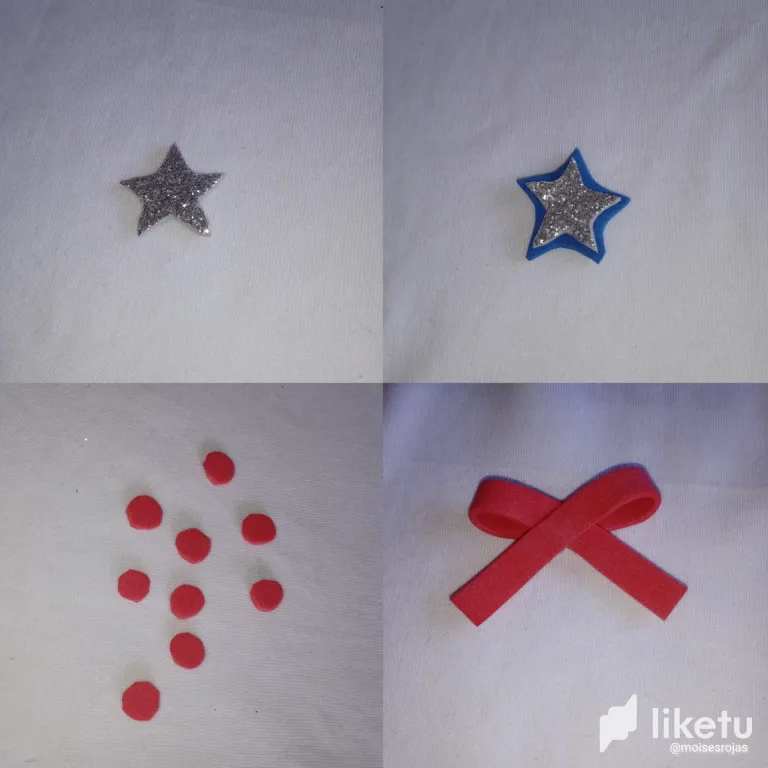
Paso número 4: para la decoración de el arbolito recorte una estrella plateada escarchada y una azul la cual es más grande que la escarchada , ambas las pegaremos para que se note doble , también recorte unos lunares los cuales serán las luces y un lazo que irá ubicado en la parte de abajo
Paso número 5 : luego continúe pegando en forma separada los lunares rojos los cuales serán las luces o adorno del arbolito , por último tomaremos la perla plástica la pegaremos en el copo del arbolito y finalmente la estrella doble
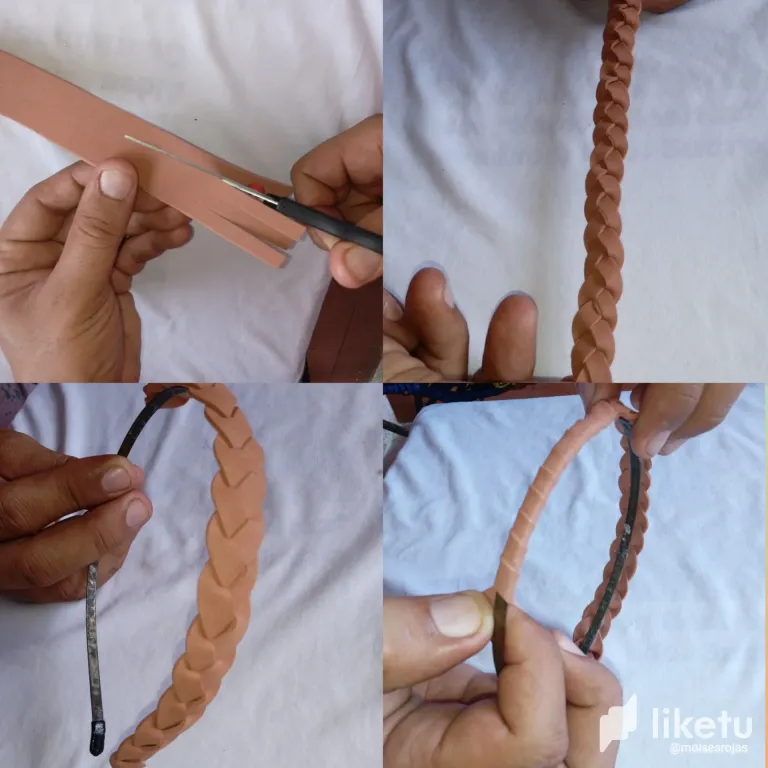
Paso número 6: en nuestro sexto paso vamos a restaurar el cintillo , para esto utilice un tejido el cual lo pegue a mitad del cintillo , luego el otro lado lo decore en forma enrollada , para que tenga dos modelos obviamente que el lado tejido no tendrá el diseño del arbolito , también debemos decorar con una tira por la parte de abajo del cintillo
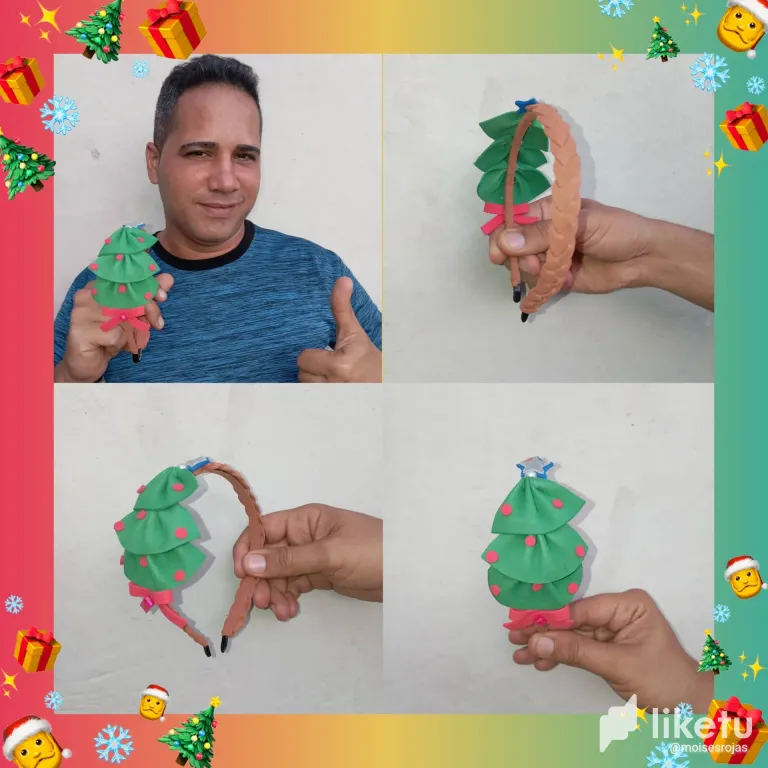
Paso número 7 : por último vamos a tomar nuestro lindo arbolito y lo pegaremos en una esquina del cintillo , preferiblemente el lado enrollado para que se note del otro lado el tejido
Este es el resultado de mi cintillo
Créditos : los collages los realice con la aplicación GridArt , textos traducido con la aplicación deepl, invito a mis amigas que participen y muestren su gran talento @egaryvs y @rameuris
Ingles
Good evening friends content creators, greetings and fraternal embrace, on this beautiful night I want to share a post that I prepared especially to be part of the new contest of the jewelry community, a decoration inspired by a Christmas tree, ideal for our little ones.
Materials to restore our headband :
-Foamis
-Plastic pearl
-Headband
-Scissors
-Silicon
Steps to make our restoration:
Step number 1: we will begin by cutting out three small squares to later make the Christmas tree, as you can see in the shape of a pyramid, one small, medium and large, the small one is 4 cm high and 6 cm wide, the medium 4 cm high and 8 cm wide and finally the large one is 4 cm high and 10 cm wide.
Step number 2: then we will continue gluing and forming a figure similar to a fan, we will take the edge and glue one part forward and the other backward and so on until it is wrinkled or fan-shaped as you can see, as we cut three different measures will be one larger than the other.
Step number 3: Then we will continue taking our three pieces in the shape of a fan, we will begin to paste one on top of the other, first we will paste the top one which is the smallest in the medium so that the smallest is on top which will be the flake of the tree, then we will continue pasting the last piece at the bottom so that our tree is in the shape of a pine tree.
Step number 4: to decorate the tree cut out a silver frosted star and a blue one which is bigger than the frosted one, both will be glued to be noticed double, also cut out some polka dots which will be the lights and a bow that will be located at the bottom.
Step number 5: then continue gluing separately the red polka dots which will be the lights or ornament of the tree, finally we will take the plastic pearl and glue it on the flake of the tree and finally the double star.
Step number 6: in our sixth step we will restore the headband, for this we will use a fabric which we will glue in the middle of the headband, then the other side we will decorate it in a rolled way, so that it has two models obviously that the woven side will not have the design of the tree, we must also decorate with a strip at the bottom of the headband.
Step number 7: finally we are going to take our cute little tree and glue it on one corner of the headband, preferably the rolled side so that the weaving is visible on the other side.
This is the result of my headband
Credits: I made the collages with the GridArt application, translated texts with the deepl application, I invite my friends to participate and show their great talent @egaryvs and @rameuris.
For the best experience view this post on Liketu
Está muy lindo. Gracias por la invitación
De nada ,y gracias