Upholstery of a two front seat of a mini bus
hello engineers
How are you all enjoying you weekend? I hope is moving smooth. I am very happy to be here again to share a post with you guys all about how i upholstery of a two minu bus seat.
Here in my country, mini bus is used for public transportation and those guys, don't like keeping the interior of their car neat. The do complain that the don't have money to work on their seat, but is not everyone. Some of them are trying. Like this very one, he is my friend, he has been pleading me to work on his seat since last year but i was occupied with much work.
The reason i was not fixing him last year was because he will not pay me, he is driving the car for someone and the Amount he return to the owner is too high. He is my friend i don't have options, i have to help him because he has also been helping me.

I choose to fixed him up on Saturday, he complains to me that when passenger break his car and seat the seat, the refuse to enter inside but rather ask him to pass, that is why i try all way possible to fix it up for him.
Sewing mini bus is simple because it doesn't have too much pattern, sewing it is just straight forward something.
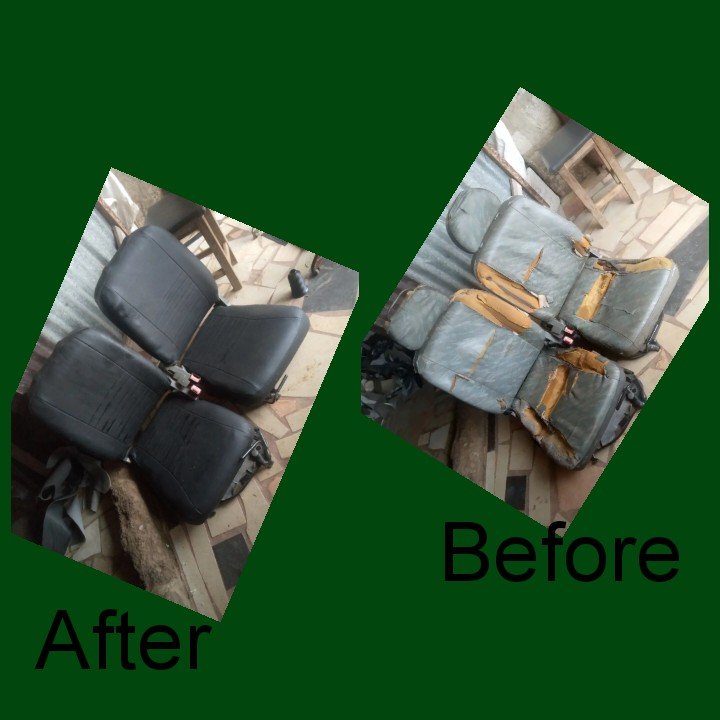
Here is the finish work.

If you confirm the seat before and after you will see i am doing amazing job here. This took me about 4 hours to fix the seat back to him. This very seat need on 3 yards of leather.
Here is leather i used

After getting the leather ready, i then proceed to the cutting and sewing of the seat cover
To get the work done, i first of all loose the seat separately, for easy measurements and upholstery.
After that, i then use sewing tape to measure out the length and the width of each pattern of the seat.

After getting all the measurements ready, i then mark out the measurements on the new leather with the help of chalk, long ruler and sewing tape.

After that i then cut it out, and then place it on it possition on the old seat and then shape it out to get the pattern i am going to work with.

I then place the pattern on a sewing roof and then gum them together.

After that, i then use scissors to cut them out and them place it in one place.

After getting my pattern ready, i then use sewing machine to sew those patterns together.

After sewing it, i then get my new seat cover ready.

I then use foam to fill those space that was cut off to bring back the original shaped of the seat, after doing that, i then cover the seat with the new seat cover and here is the finish look of the seat.
My friend was very happy to see the finish work, he really appreciate me, saying that he will not believe this seat can turn out this beautiful. He even said i will not take time to do it neat since he did not pay me but i supprice him.
Guys how do you see the finish work? Please i need your support. Thanks
Good job, you managed to save those seats, the client must be very grateful, they turned out very well.
Ya sure, he is so happy about the finish work. Thanks for stopping by
Congratulations @mosupholstery! You have completed the following achievement on the Hive blockchain And have been rewarded with New badge(s)
You can view your badges on your board and compare yourself to others in the Ranking
If you no longer want to receive notifications, reply to this comment with the word
STOPAlways the aesthetic part of a car when it is improved is very noticeable excellent result.
Pretty Nice job You have done they're, it's really good the post with all the stages of the repair
Excellent work my friend, you can really see the difference.