Designing and Making a Simple Climbing Wall
I had a quiet week online last week as I went down to Samui to do a little work on the wife's clinic. We aim to have it opened by the beginning of next year and are doing things a bit at a time as we we carefully follow the complex and expensive list of licensing requirements.
'Stuff' needs buying and building and so a daily stream of parcels are constantly arriving and one of the things she really wanted for her sensory playroom was a mini climbing wall.
We needed to get this installed first as someone was coming to measure up for all the wall and floor padding and so needed to measure around the climbing wall.
The padding is a very strict rule of needing to be 50mm thick and must cover the entire floor and 80cm minimum up the bare walls.
The dimensions of the playroom was also defined as being a minimum of 20 sq. m which we'd drawn into the original architect's plans but by the time the house was built and magically reduced in size to 19 sq.m due to the incompetence of the original builders. This then had to be remedied by an extension being built on the back which gives us about 23 sq.m .
This was a really easy little project that anyone could do. Like all projects, prepare materials and tools in advance and everything will go smoothly!
So we started out with a sheet of 8 x 4, 20mm thick pine board.
As a side note, this is the last time I'll mention inches as I work in metric. This is an endless nightmare in Thailand as they use both imperial and metric systems.
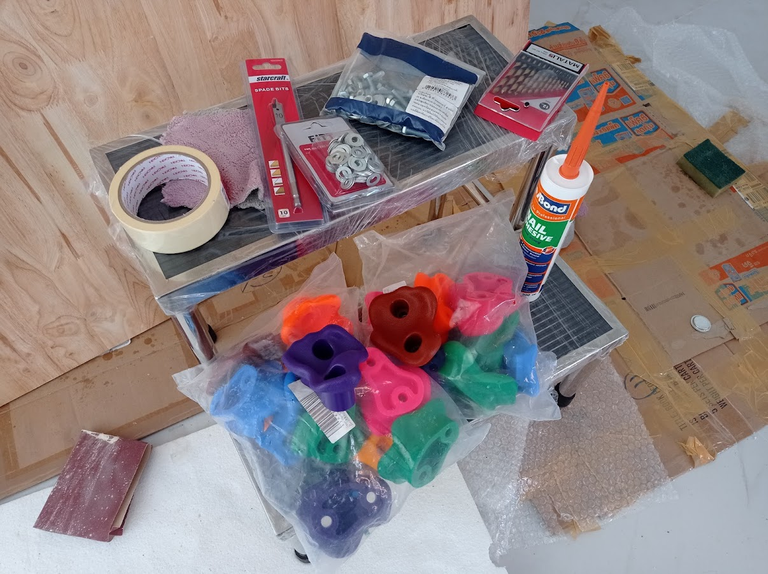
We also needed :-
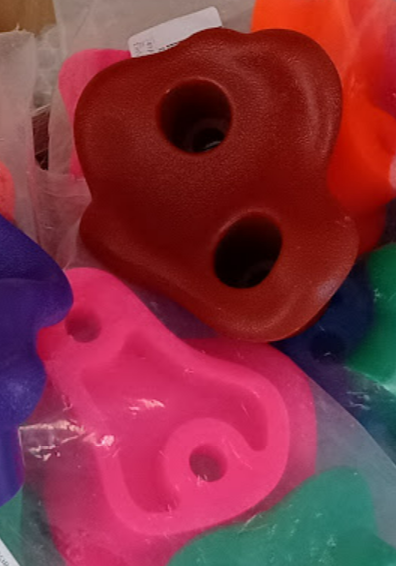
20 - Plastic climbing wall rocks
40 - 35mm x 8 Nuts and Bolts
120 - 18mm x 8 Washers
Varnish and Thinners
12 - Plugs and Screws for the wall mounting
1 Tube of No nails Glue
Only the minimum basic tools were required :-
Drill with both wood and masonry 8mm drill bits
18mm Spade bit
10mm and 9mm Spanners
Screwdriver
Medium and Fine Sandpaper
Paintbrush
So the first thing we need to do is prepare the board...
Neither of us are very artistic so painting some nice mountains and meadows as we'd seen others do was off the cards so we went for a simple clear varnished (lacquered) finish.
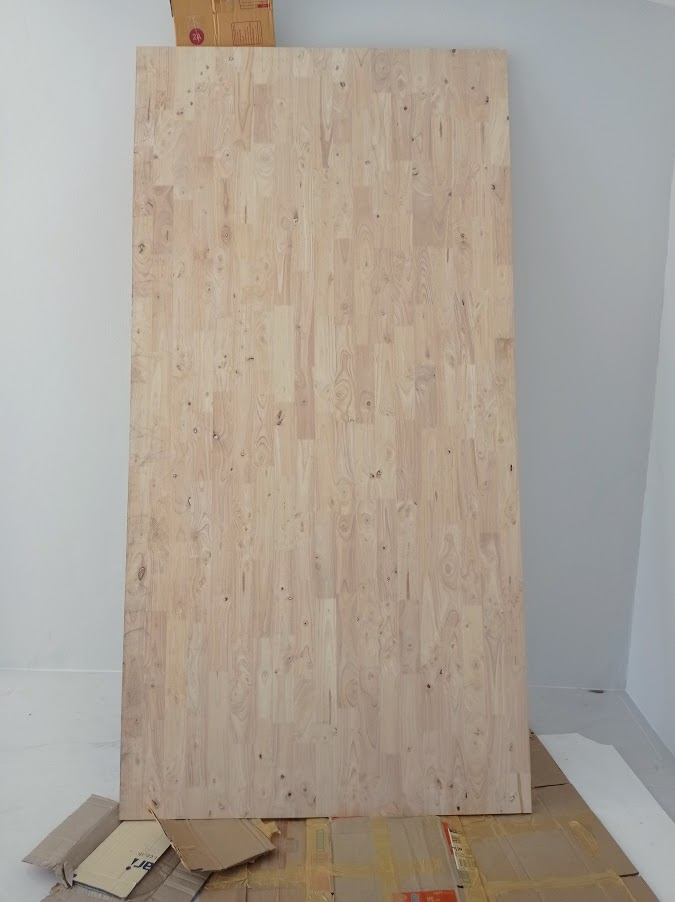
The board needs a finish as it will need protection from both scuff marks and from termites which are a huge problem here.
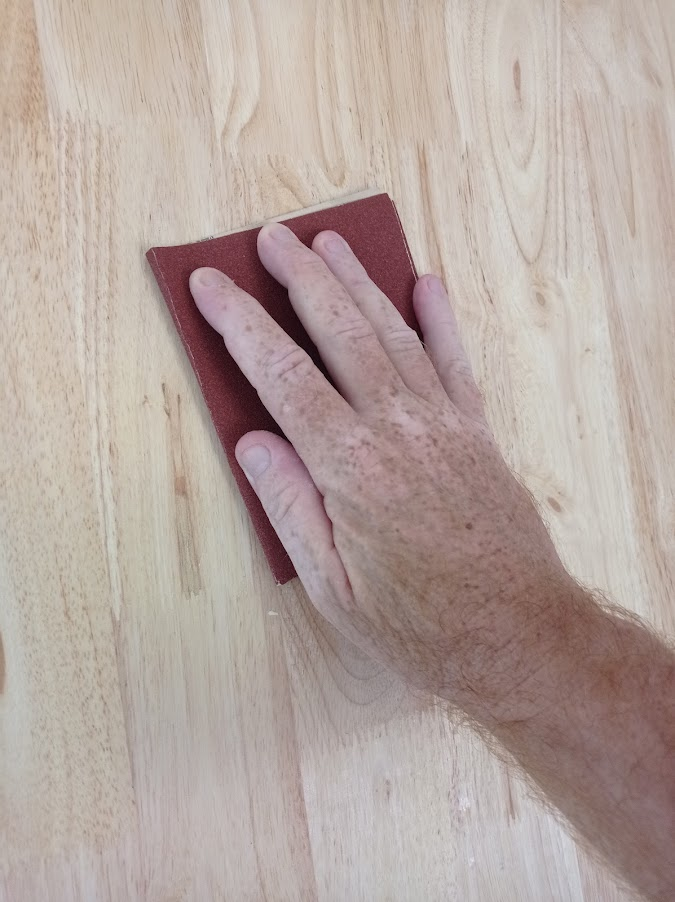
Firstly, I started by giving it a rubdown with a very slightly damp cloth just to get rid of the dust. Not too wet as the surface is already smooth and didn't want to lift the grain.
Secondly, I went around the quite sharp edges with the sandpaper to smooth off the corners slightly.
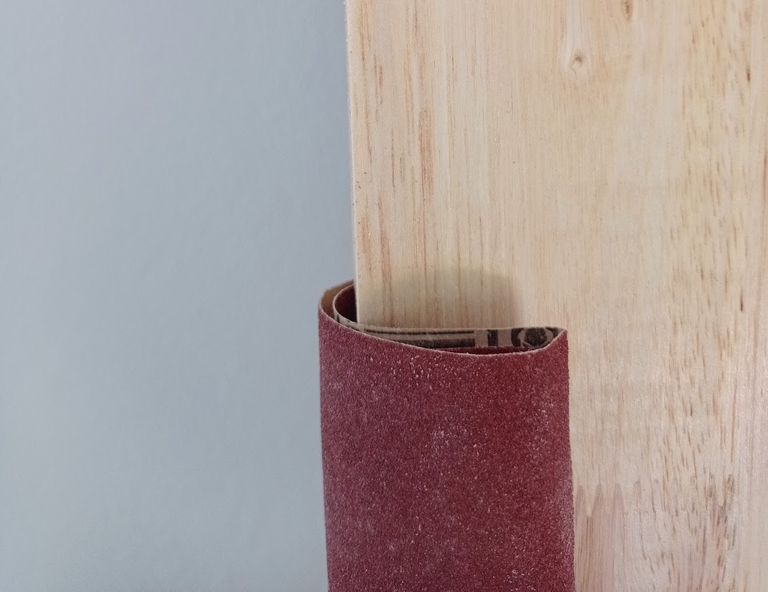
A really quick up and down with the rough followed by the smoother sandpaper and you will get a nice rounded and safe edge.
Next, it's time to get out the varnish!
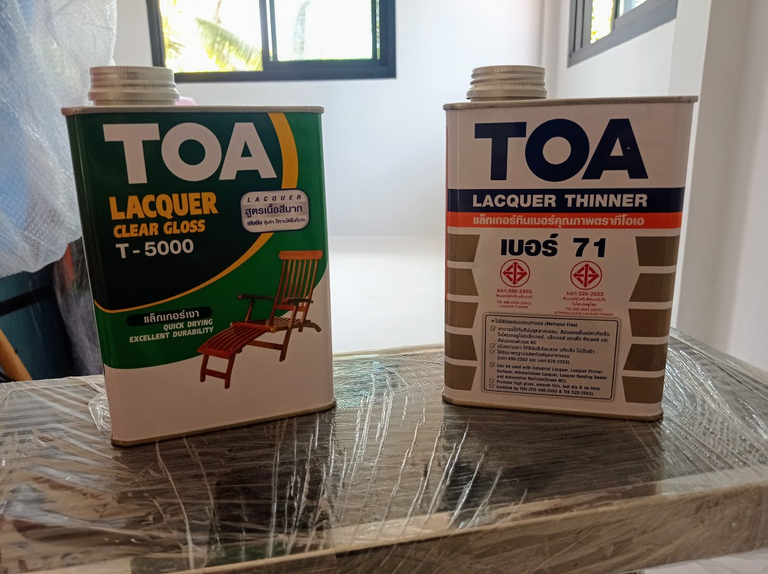
Now it's important to build up the finish with multiple coats to get the very hard-wearing finish that we needed so I started off easy with a 1:2 ratio mix of varnish to thinners to get a nice light coat on that would absorb into the wood and seal the grain.
After the first coat had dried, a quick once over with the sandpaper and slightly damp cloth before a 1:1.5 mix this time and a further two coats.
When the varnish had thoroughly dried, then it's time to get out the drill!
I'd measured all the depths and hole sizes of the 'rocks' and made a little plan before I went out to buy the nuts and bolts...
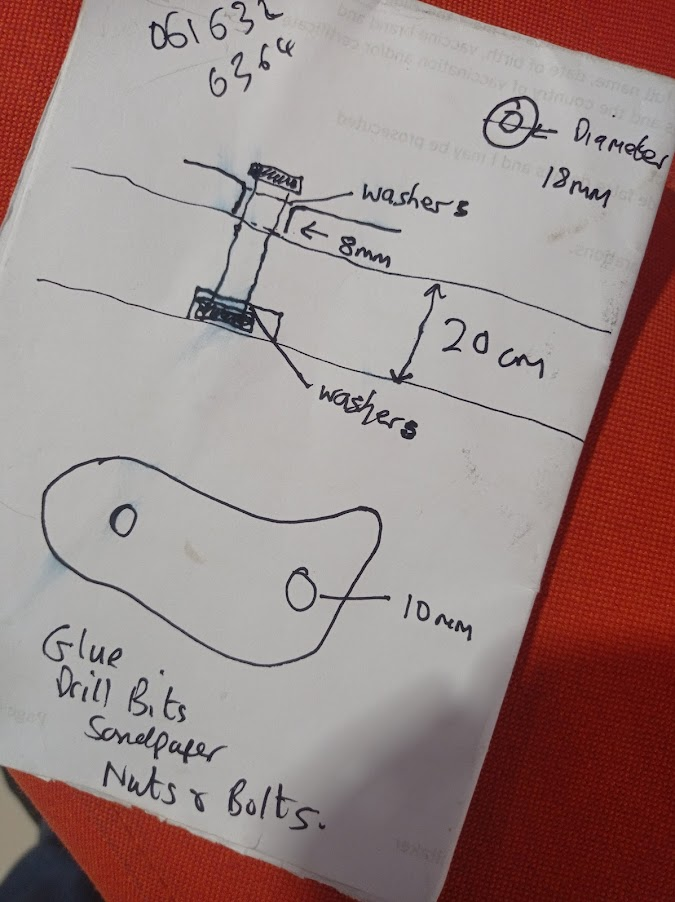
I'm not big on making neat plans but I do jot doodles and numbers on scraps of paper. It works for me!
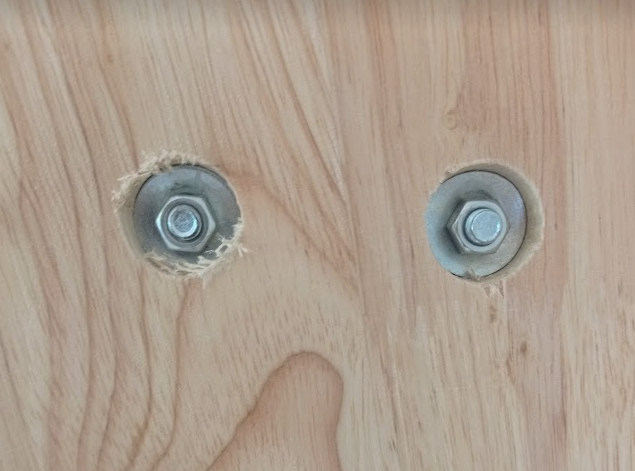
The eagle eyed amongst you will see that 35mm bolts would leave the nut lightly protruding so to take out an extra mil, I used an extra washer under the bolt head on the climbing rock.
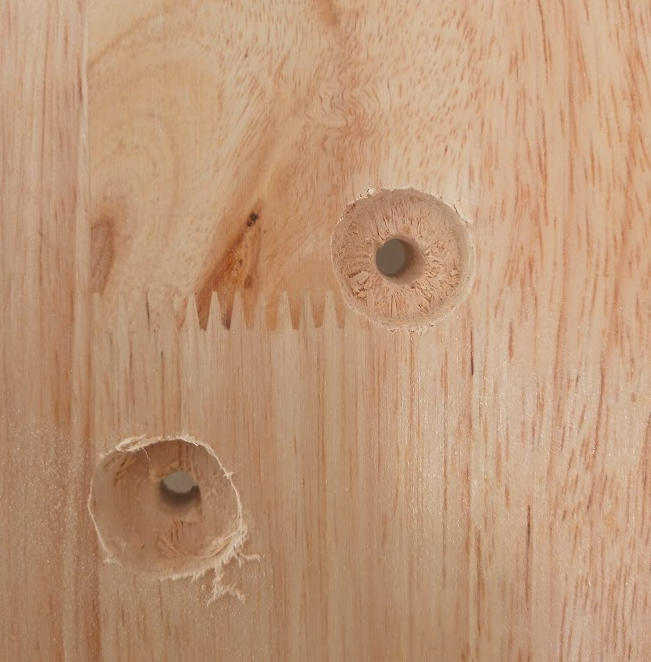
The back of the board, of course needed to be flush so after drilling the bolt holes, I then created holes to the depth of the bolt through the board to in effect, countersink the bolt heads.
To get the required depth i.e. the depth of the bolt, I simply wrapped some masking tape around the spade bit.
Confession time! You might notice that this is a 10mm spade bit as I'd originally planned to use a slightly larger hole than the bolt but in doing so, forgot I needed a washer on AND would have had no way of getting a spanner on to tighten the bolts up. What an idiot!
After drilling a small pilot hole, followed by the 8mm hole for the bolt and then the hole at the back for the countersink, we get this!
The next step is very important. After all the holes are drilled, sand off the edges and then get some varnish in there! Termites can get where water can't so I can't afford to give them even a sniff of bare wood!
Next, we move onto bolting the plastic 'rocks' in place and with nicely square and well drilled holes (which mine weren't!) the washers will just slip nicely and firmly into place and hold there until you slip in the bolts and nuts and tighten the whole thing up.
This was just a dry run hence I hadn't yet sanded off the edges.
After bolting all 20 rocks into place, it looked like this and the only thing left was to mount it onto the wall.
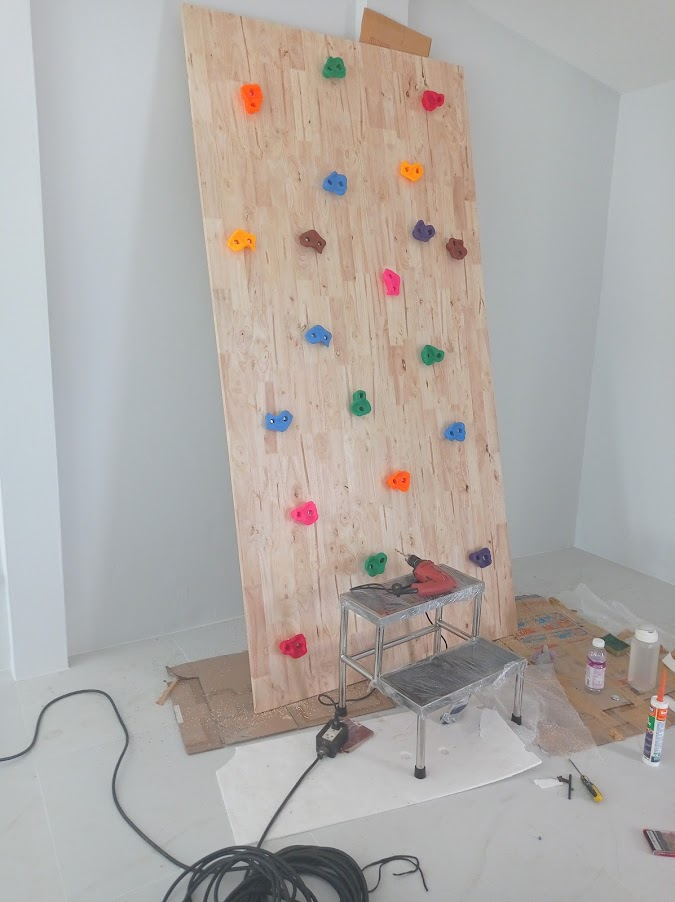
At this point, its was getting late in the day and in my haste, forgot to take photos of the plugs and screws. It didn't help that I was doing all this alone and throwing around heavy 8x4 sheets isn't as easy as it once was!
Anyway, I used heavy duty nylon, 8mm 'Rawlplugs' and screws which I drilled in after I'd glued the whole back of the board and pressed it into place.
Because there was a slight bow in the board from mean leaning it against the wall, I did 4 rows of 3 screws and started with the centre two rows to pull it in, flat to the wall before drilling and screwing in the the top and bottom rows.
Finished!
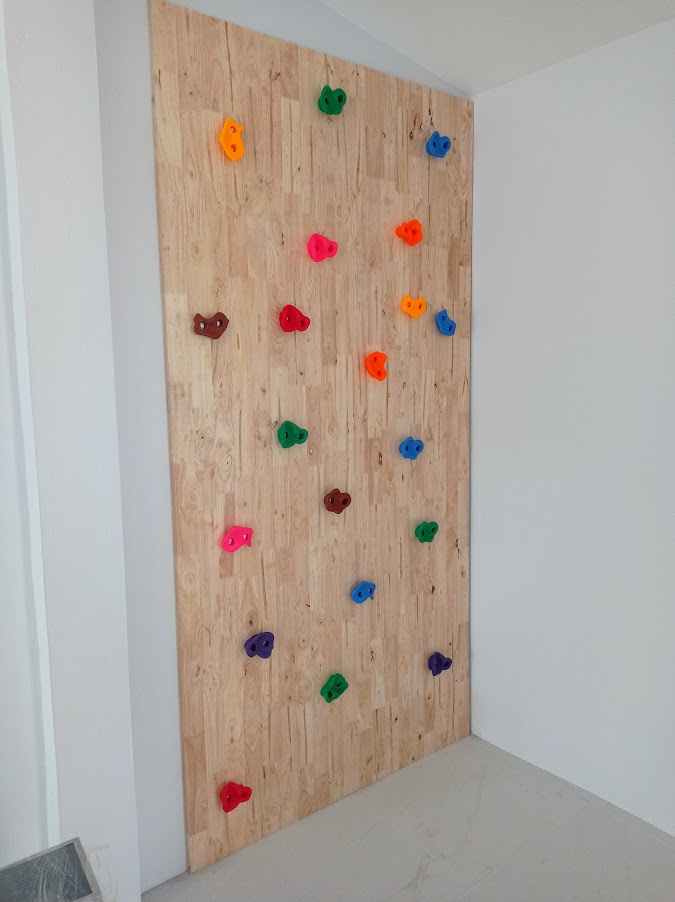
See how tight I got it pulled into the wall. 12 screws and whole tube of glue says it ain't going anywhere!
Now of course, there isn't a lot of headroom and I need to add a piece of padding on the ceiling but the kids who will be using this will range in age from toddler to about 8 years old so its enough. It's not going to fall down and if the kids fall off the floors and walls are padded and safe.
To test it out, I thought I'd get in my wife's 6 year-old niece...
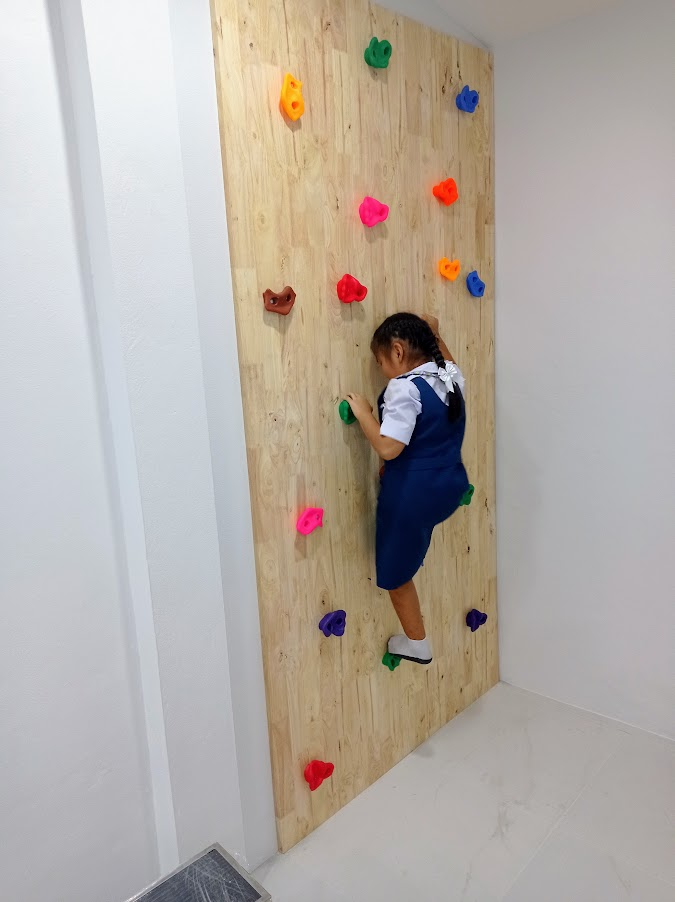
She loved it and Uncle Nathen's legendary status rises even further!
That's another job ticked off and I then could get back to the rather more mundane tasks of mounting fire extinguishers to the wall and sticking 'No Smoking' signs up!
HAhah! That is bloody awesome mate! I had never thought of thinning the varnish down a bit. I always find varnish to be too thick as well but didn't know it was a thing!
At least in my defense I do the old masking tape trick with the drill for depth! It does look good though and I like the practical photo at the end!
Thank you! DIY is a bit difficult here. We have HomePro which is the local B&Q but the products are all different and I have to use Google and MS Lens to work out the labels.
Its funny because Thais aren't big on DIY and if you go into a branch during the week, most of the people are bemused foreigners with blank expressions on their faces as they try to work out what they need.
The biggest issue is everything is measured in a mix of Imperial and Metric and paint uses US imperial to add an extra layer of difficulty.
All good fun! More projects to come around the house which I love but a nice, fairly easy reintroduction as I build up the tools again.
Man, I hate it when Imperial and metric gets mixed up. Over here even it still happens. In the timber yard, careful to give my measurements and they are like 6 b'inch? I am like, aye fucking whatever. You are doing a grand job though
Cool! I think this has been added to my list of clubhouse craziness! Well done! #pizza #wine #pimp
Thanks mate and cheers for dropping by :-)
That’s so cool @nathen007 😎 well done. That board doesn’t go anywhere.
It sounds a lot of work to getting it just right especially with tight regulations. And faulty builds from the room 😣
But you will get there.
Great to hear the wife’s niece loved it. 😁😎
One step at a time. Thai-time cannot be forced lol
Fully understand… some things do take time. Here in Spain too, the bureaucracy… everything related to it takes time. Hehe
Have a great day @nathen007 👋🏻
Yay! 🤗
Your content has been boosted with Ecency Points, by @leedsunited.
Use Ecency daily to boost your growth on platform!
Support Ecency
Vote for new Proposal
Delegate HP and earn more