Tutorial: Choker Made with Wooden Beads in the Wire Technique.// [Esp-Eng]
Saluditos Artistas Creativos de las Manualidades y la Joyería; como se encuentran todos? Imagino que disfrutando del inicio de un fin de semana largo, estos días estan demasiado calurosos así que aprovechemos para refrescarnos en la playa, la piscina, el río el pozo donde quiera que el agua, la brisa, los árboles nos cobijen con su sombra y nos protejan de la furia del calor.
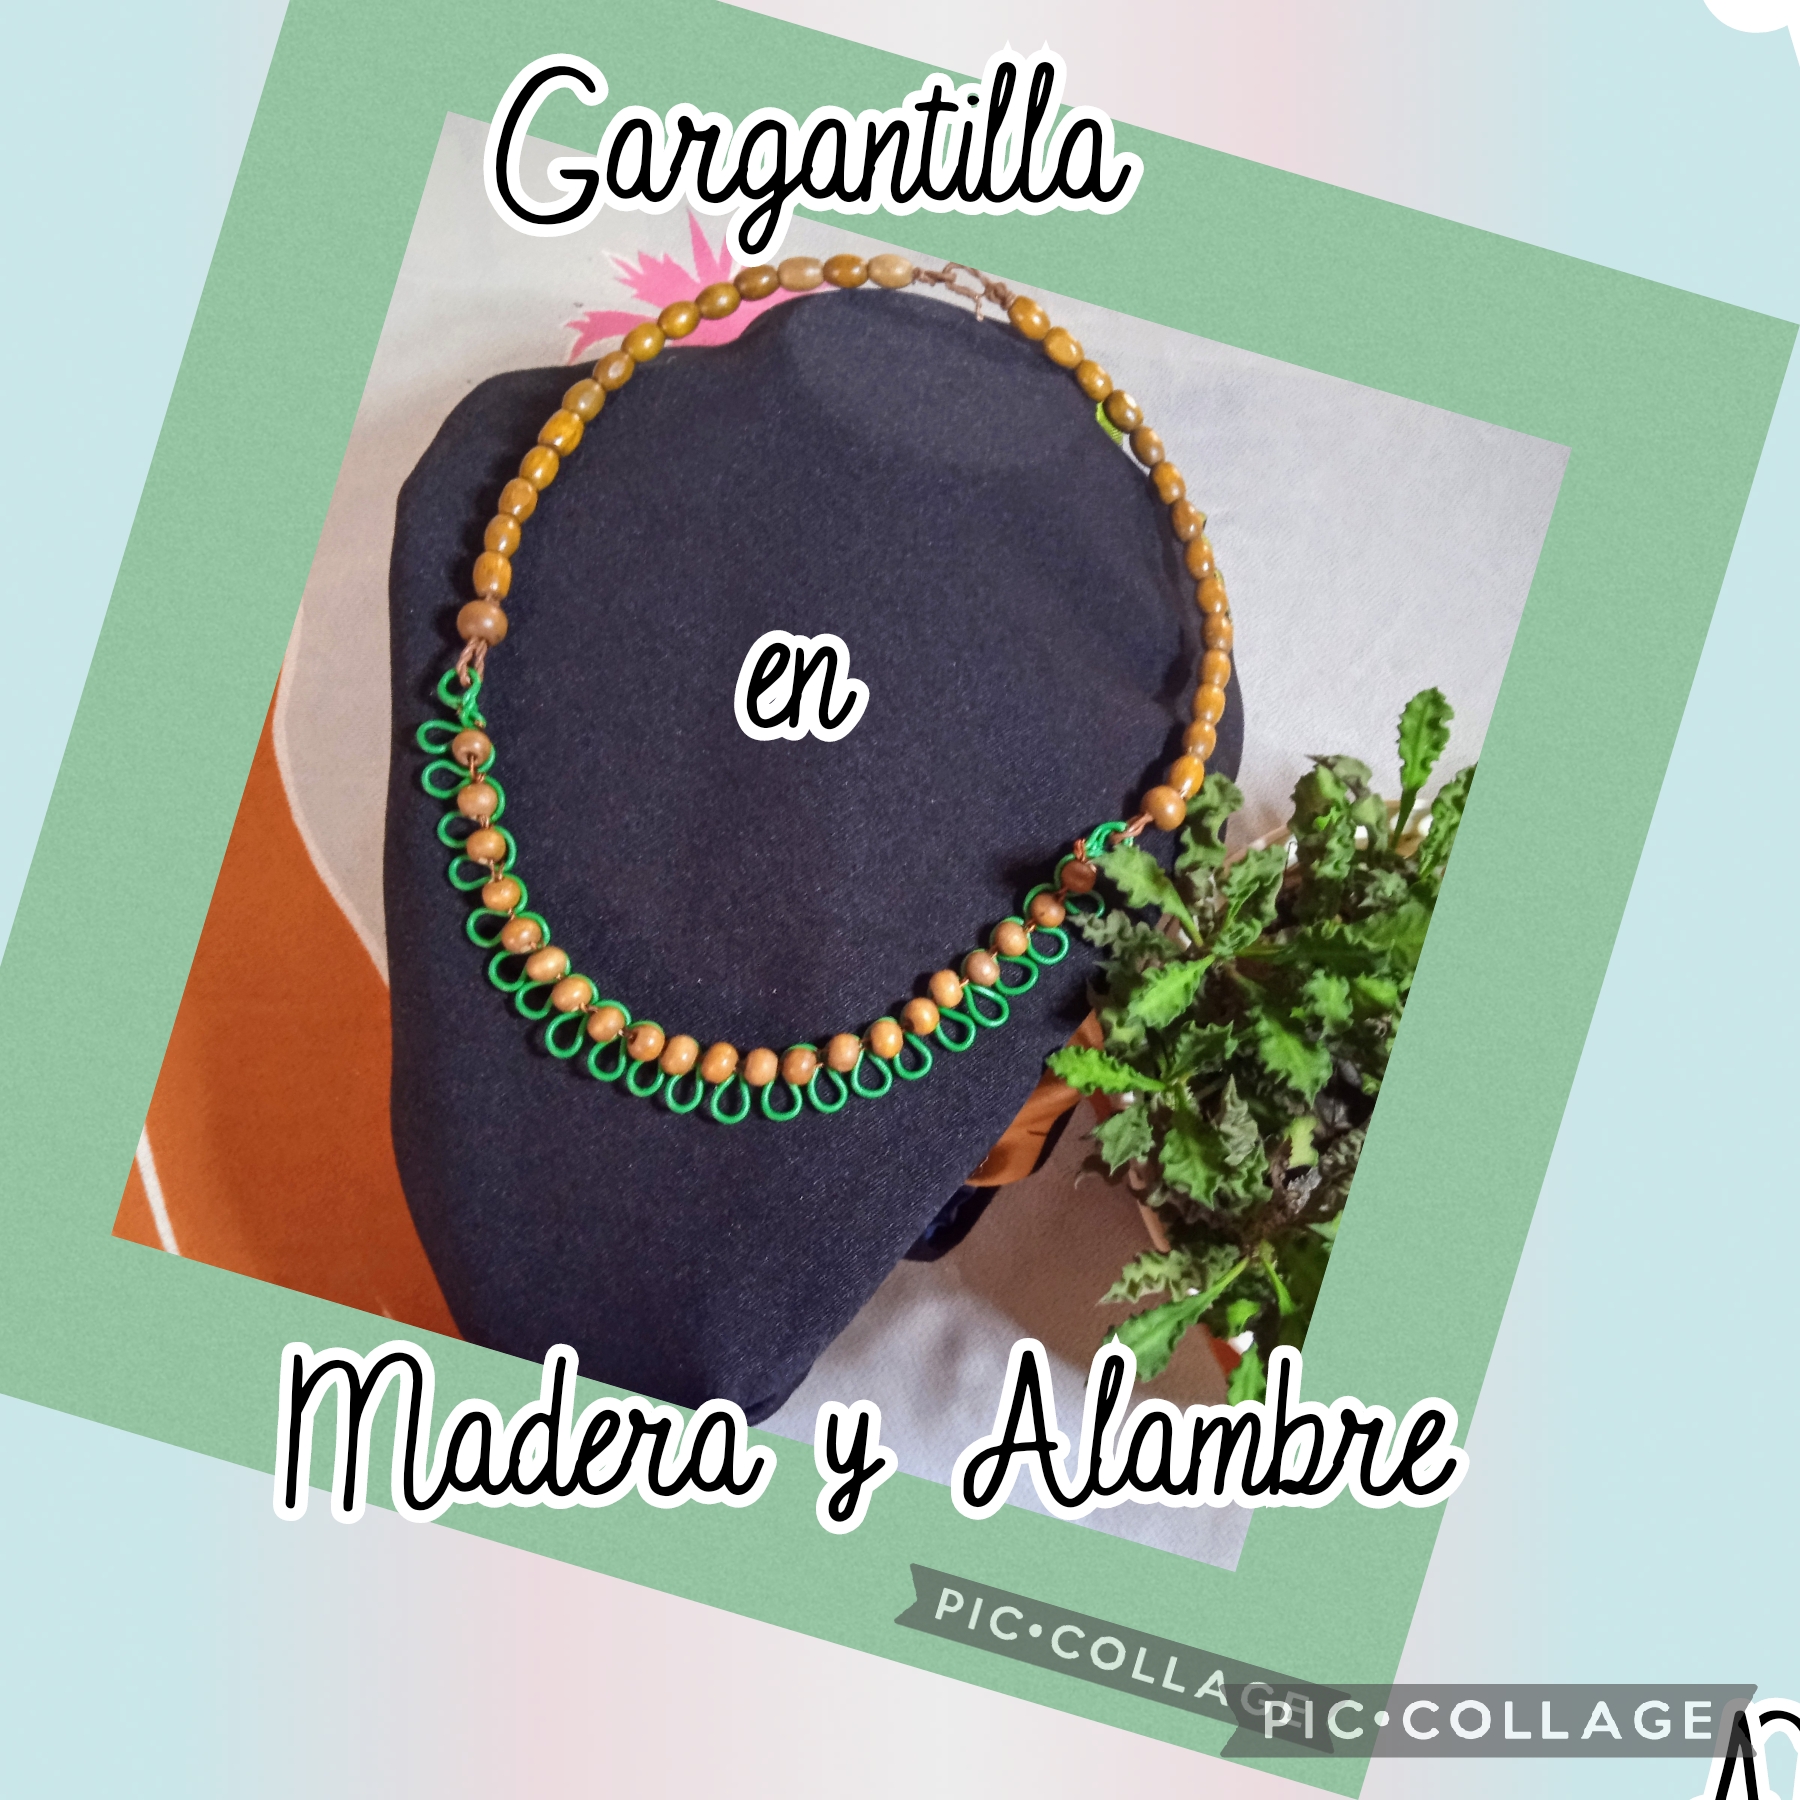
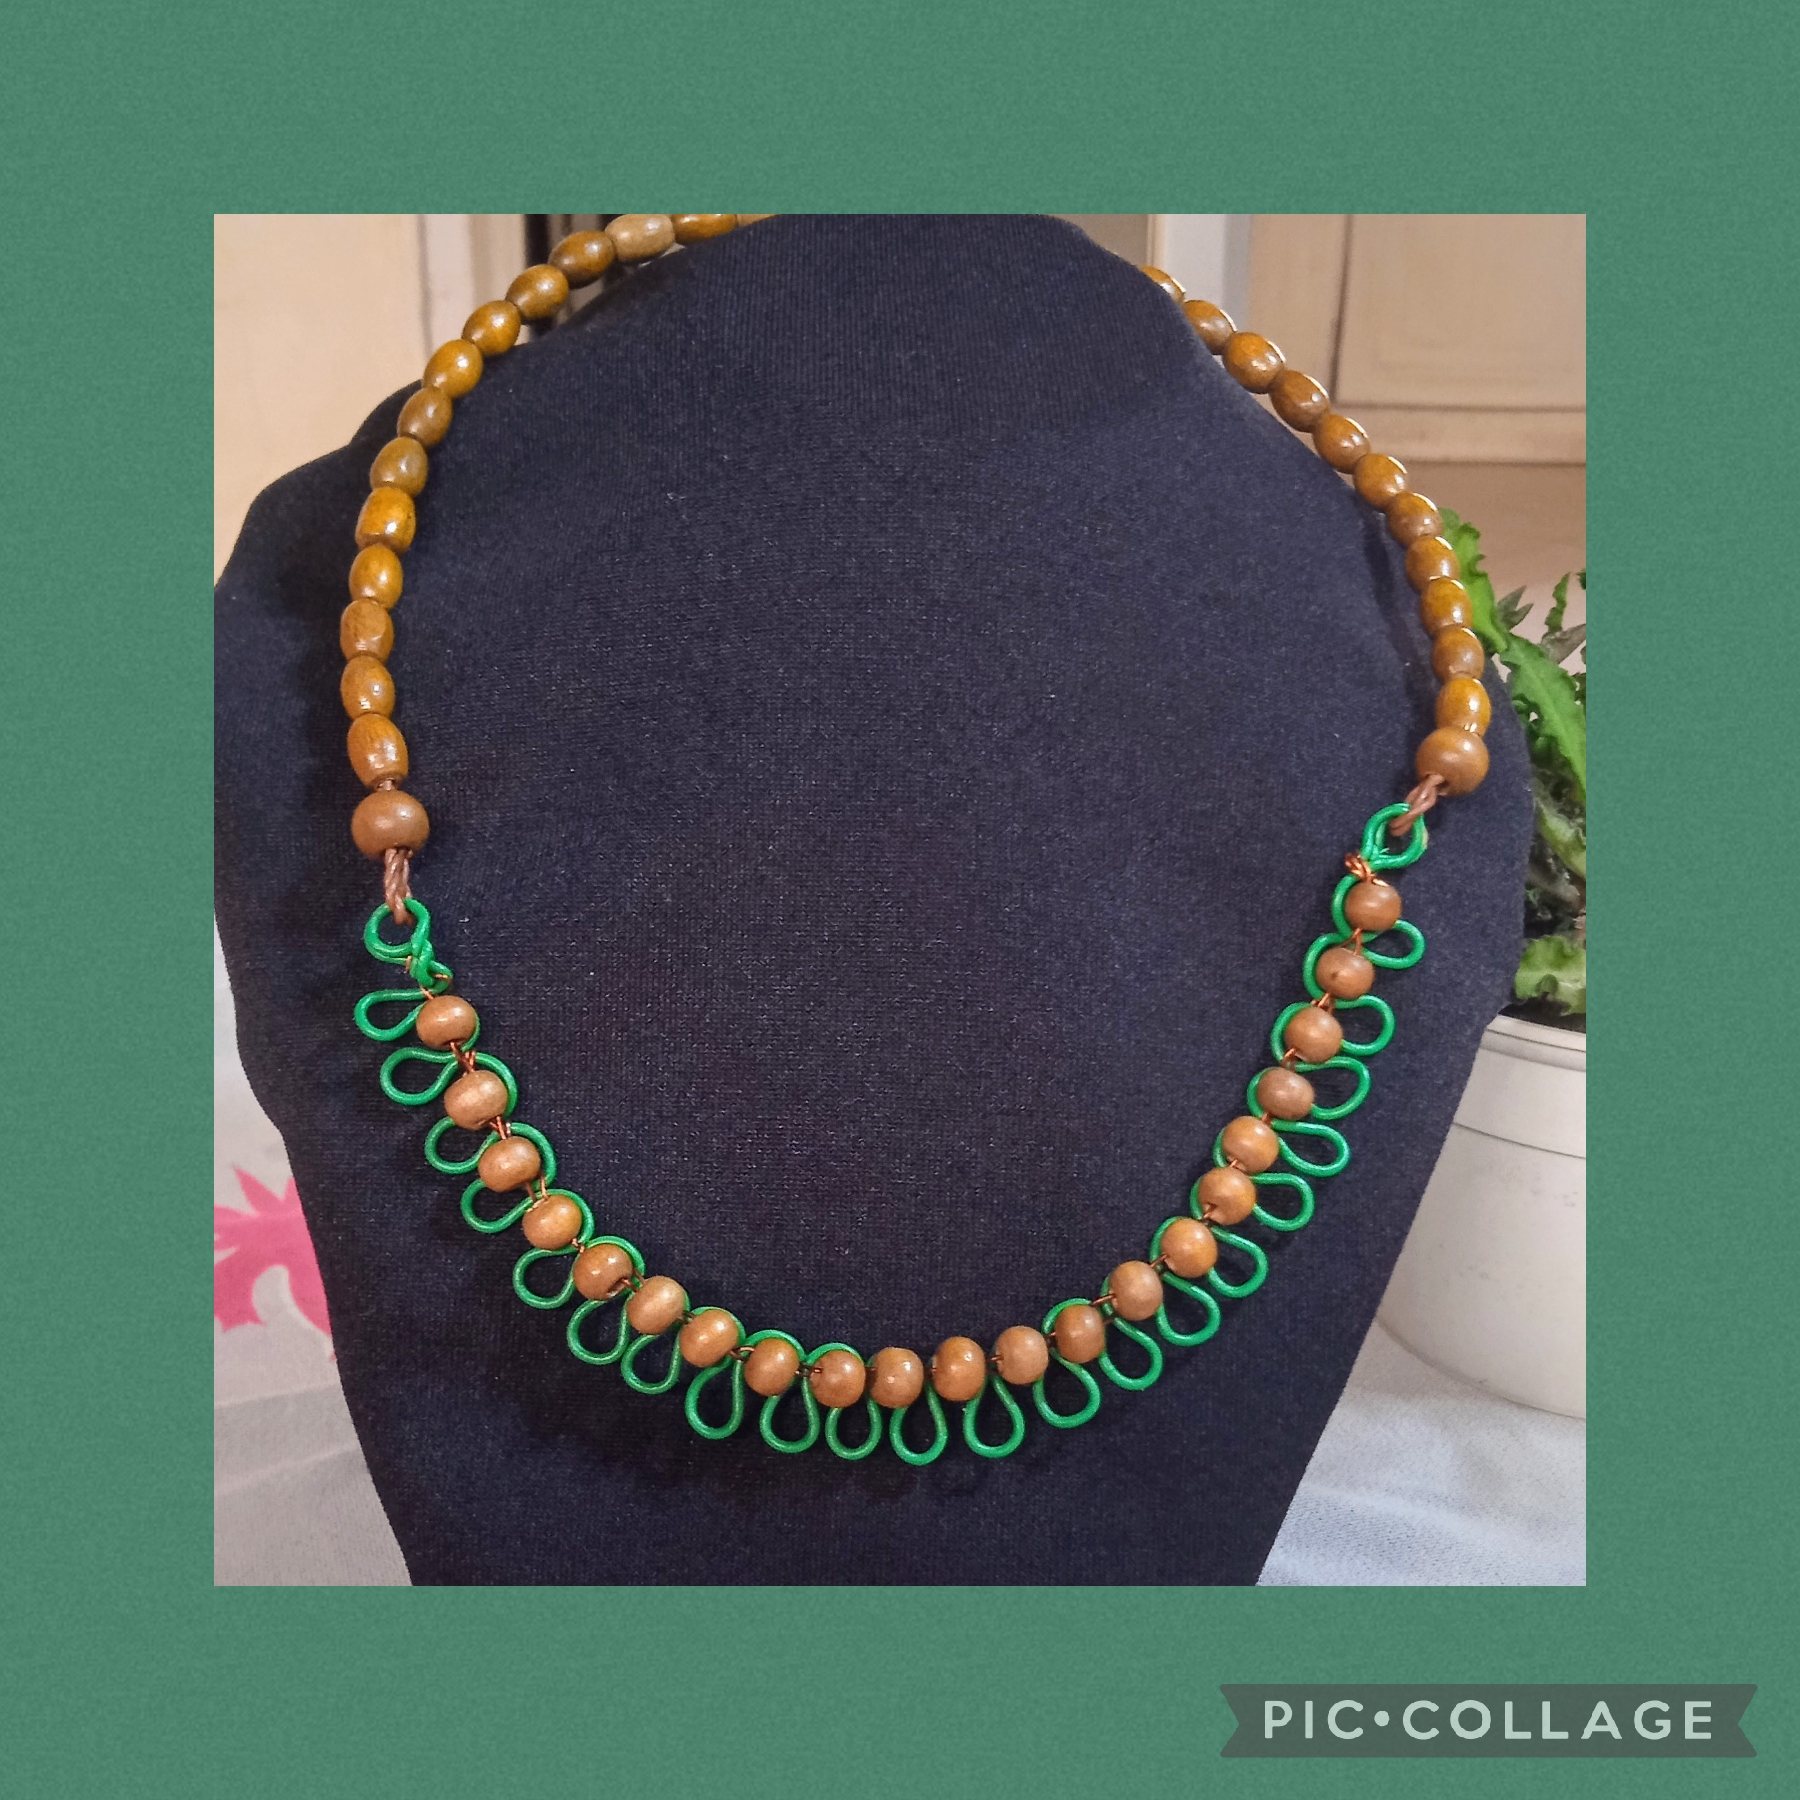
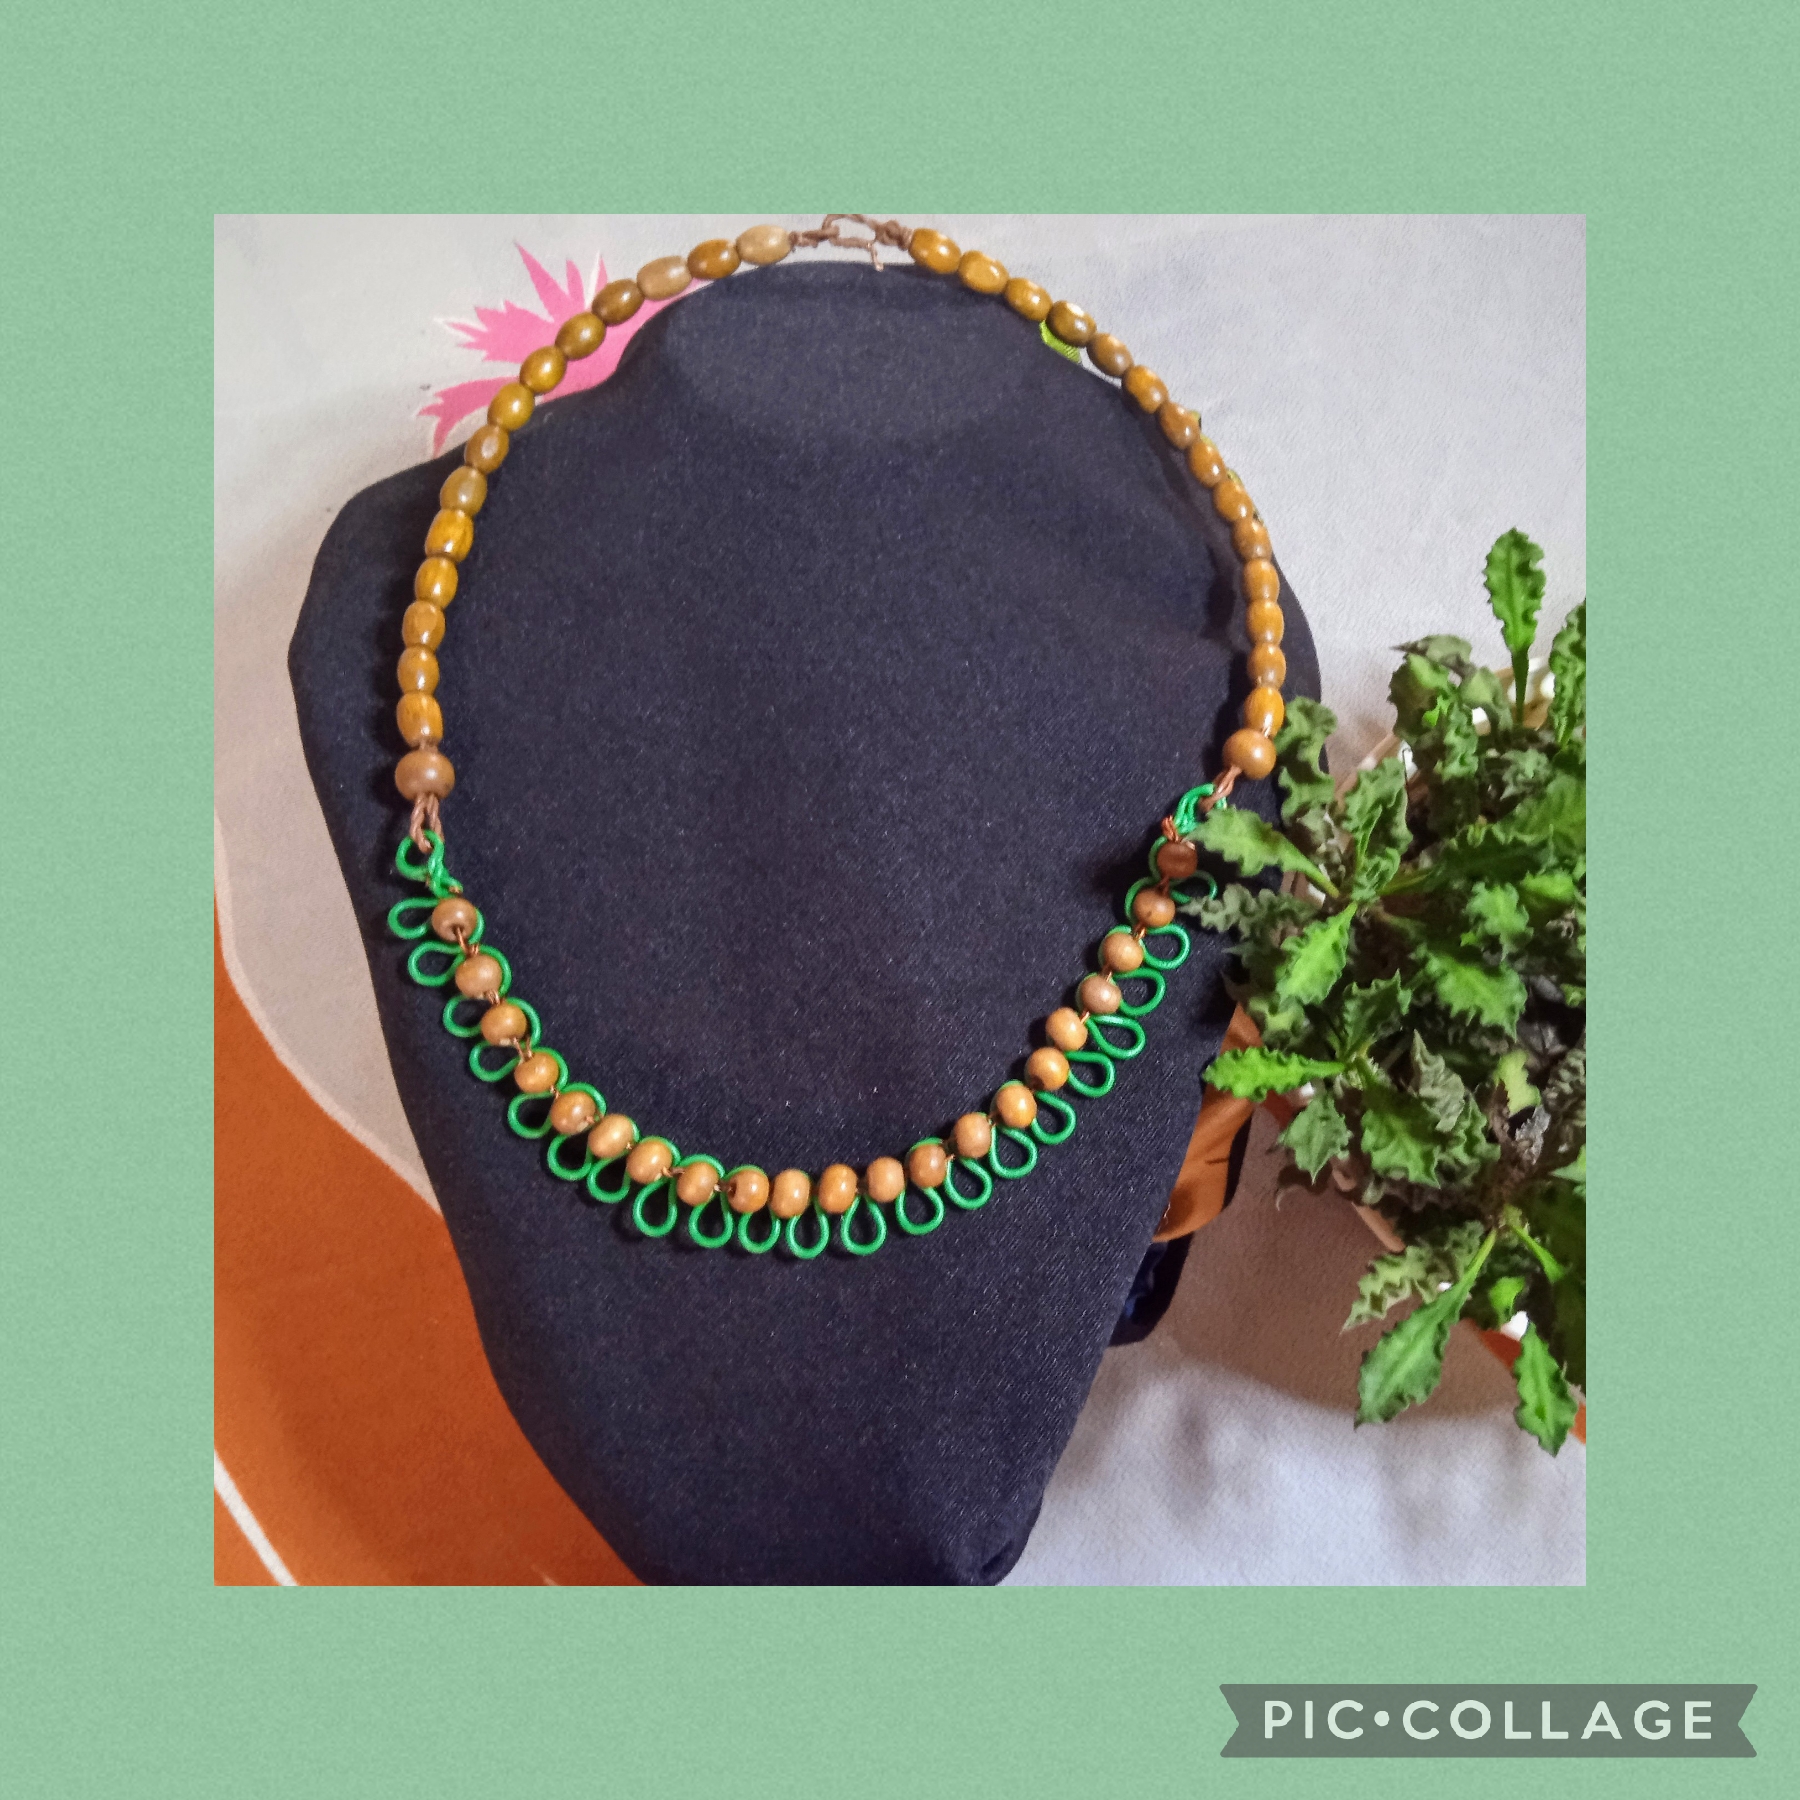
Bueno les comento que está semana la tuve muy ocupada, pues para mí fue de cuatro días, empezando el propio lunes fue mi cumpleaños y ya pueden imaginarse, no es que me enoje pero ya soy una señora que pase de la tercera edad voy como por la sexta para ese tipo de mandarrión, casi había una torta 🎂por cada diez años, que si chinguirito, canelita, ponche crema, de todo los que esos bárbaros elaboran para las clases y por si fuera poco había que bailar: " que me amarraron, que me vendaron y que hasta el viernes no me soltaron" 🤭seguro no me creen pero asi pasó y como les digo ya no estoy para esas cosas pero que puedo hacer, resignación menos mal que es solo una vez al año. Así que está semana solo pude hacer una sola clase, escogí unas cuentas de Madera y alambre reciclado de fibra óptica, este lo tomé en color verde pues es el color de la esperanza uno de mis colores preferidos y elaboré una sencilla y elegante Gargantilla que me regalaré a mi misma 🤣.
Sigan leyendo para que vean el paso a paso de como la hice :
Greetings Creative Artists of Crafts and Jewelry; How are you all? I imagine that enjoying the beginning of a long weekend, these days are too hot so let's take the opportunity to cool off on the beach, the pool, the river, the well wherever the water, the breeze, the trees shelter us with their shade and protect us from the fury of the heat.
Well, I'll tell you that I had a very busy week this week, because for me it was four days, starting on Monday itself it was my birthday and you can imagine, it's not that I'm angry but I'm already a woman who's past seniority and I'm going like the sixth for that type of mandarrión, there was almost a cake 🎂 for every ten years, which yes chinguirito, canelita, cream punch, everything those barbarians make for classes and if that were not enough you had to dance: "they tied me up , that they bandaged me and that they didn't let me go until Friday" 🤭I'm sure you don't believe me but that's how it happened and as I tell you I'm not up to those things anymore but what can I do, resignation thank goodness it's only once a year. So this week I was only able to do a single class, I chose some wooden beads and recycled fiber optic wire, I took this one in green because it is the color of hope, one of my favorite colors, and I made a simple and elegant Choker that I I will give myself away 🤣.
Keep reading to see the step by step of how I made it:
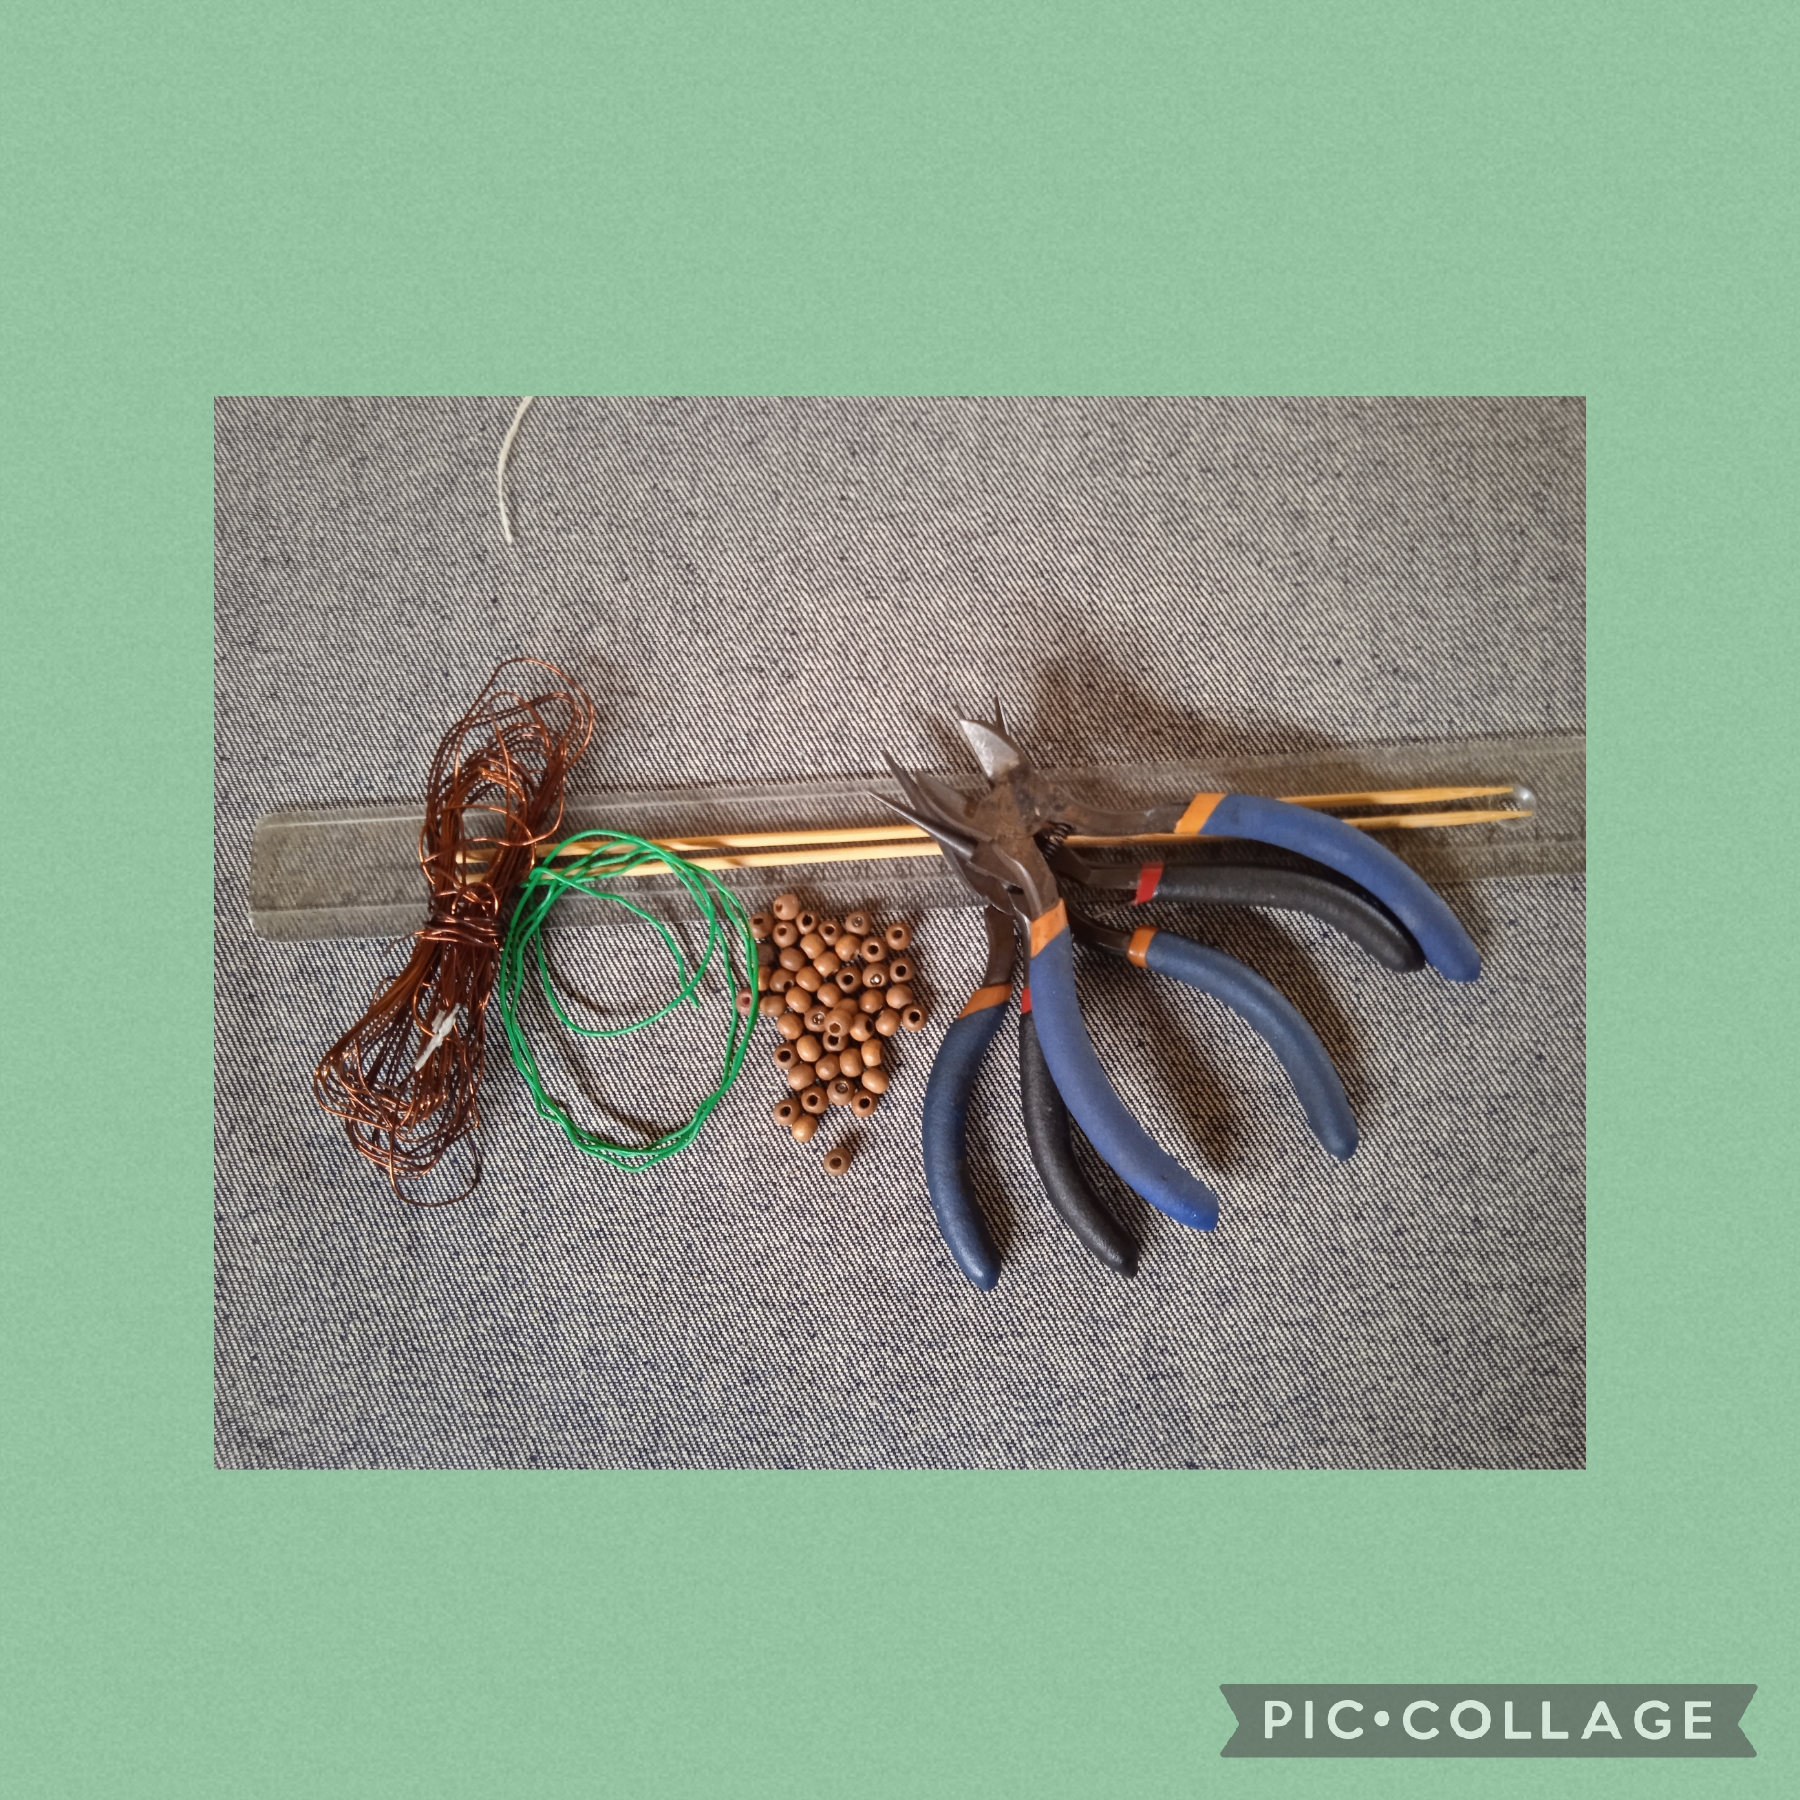
MATERIALES USADOS EN LA ELABORACIÓN DE ESTA HERMOSA GARGANTILLA:
✓ Cuentas de madera redondas pequeñas.
✓ Cuentas de madera ovaladas.
✓ Dos cuentas de Madera medianas.
✓ Un metro y medio de alambre reciclado
de cable de fibra óptica color verde.
✓ Cuarenta centímetros de alambre.
marrón reciclado de cable de fibra
óptica.
✓ Pinza plana.
✓ Pinza punta redonda.
✓ Pinza de corte.
✓ Regla.
MATERIALS USED IN THE PREPARATION OF THIS BEAUTIFUL CHOKER:
✓ Small round wooden beads.
✓ Oval wooden beads.
✓ Two medium wooden beads.
✓ One and a half meters of recycled wire
green fiber optic cable.
✓ Forty centimeters of wire.
brown recycled fiber cable
optics.
✓ Flat clamp.
✓ Round tip tweezers.
✓ Cutting clamp.
✓ Rule.
PASOS QUE USE PARA REALIZAR ÉSTA HERMOSA GARGANTILLA:
PRIMER PASO:
Voy a comenzar con la elaboración de este proyecto ocupando el metro y medio de alambre color verde de cable reciclado de fibra óptica, reafirmo la medida con la regla; ahora voy a usar dos palitos de altura para elaborar el diseño del tejido con el que hare la Gargantilla; Yo, use los palitos pero ustedes pueden usar cualquier tipo de material cilíndrico de acuerdo al grosor que deseen para su manualidad; empiezo alineando los palitos de altura y coloco el alambre en el centro como muestro en la imagen, paso el alambre abrazando el palito de arriba y lo paso de nuevo por el centro, ahora abrazo el palito de abajo y lo paso de nuevo por el centro, este procedimiento lo voy a realizar tantas veces hasta lograr el largo deseado así:
STEPS I USED TO MAKE THIS BEAUTIFUL CHOKER:
FIRST STEP:
I am going to begin the elaboration of this project by occupying the meter and a half of green wire of recycled fiber optic cable, I reaffirm the measurement with the ruler; Now I am going to use two sticks in height to make the design of the fabric with which I will make the Choker; I used the sticks but you can use any type of cylindrical material according to the thickness you want for your craft; I start by aligning the sticks in height and place the wire in the center as shown in the image, I pass the wire hugging the stick above and pass it again through the center, now I hug the stick below and pass it again through the center , I will do this procedure as many times as possible until I achieve the desired length like this:
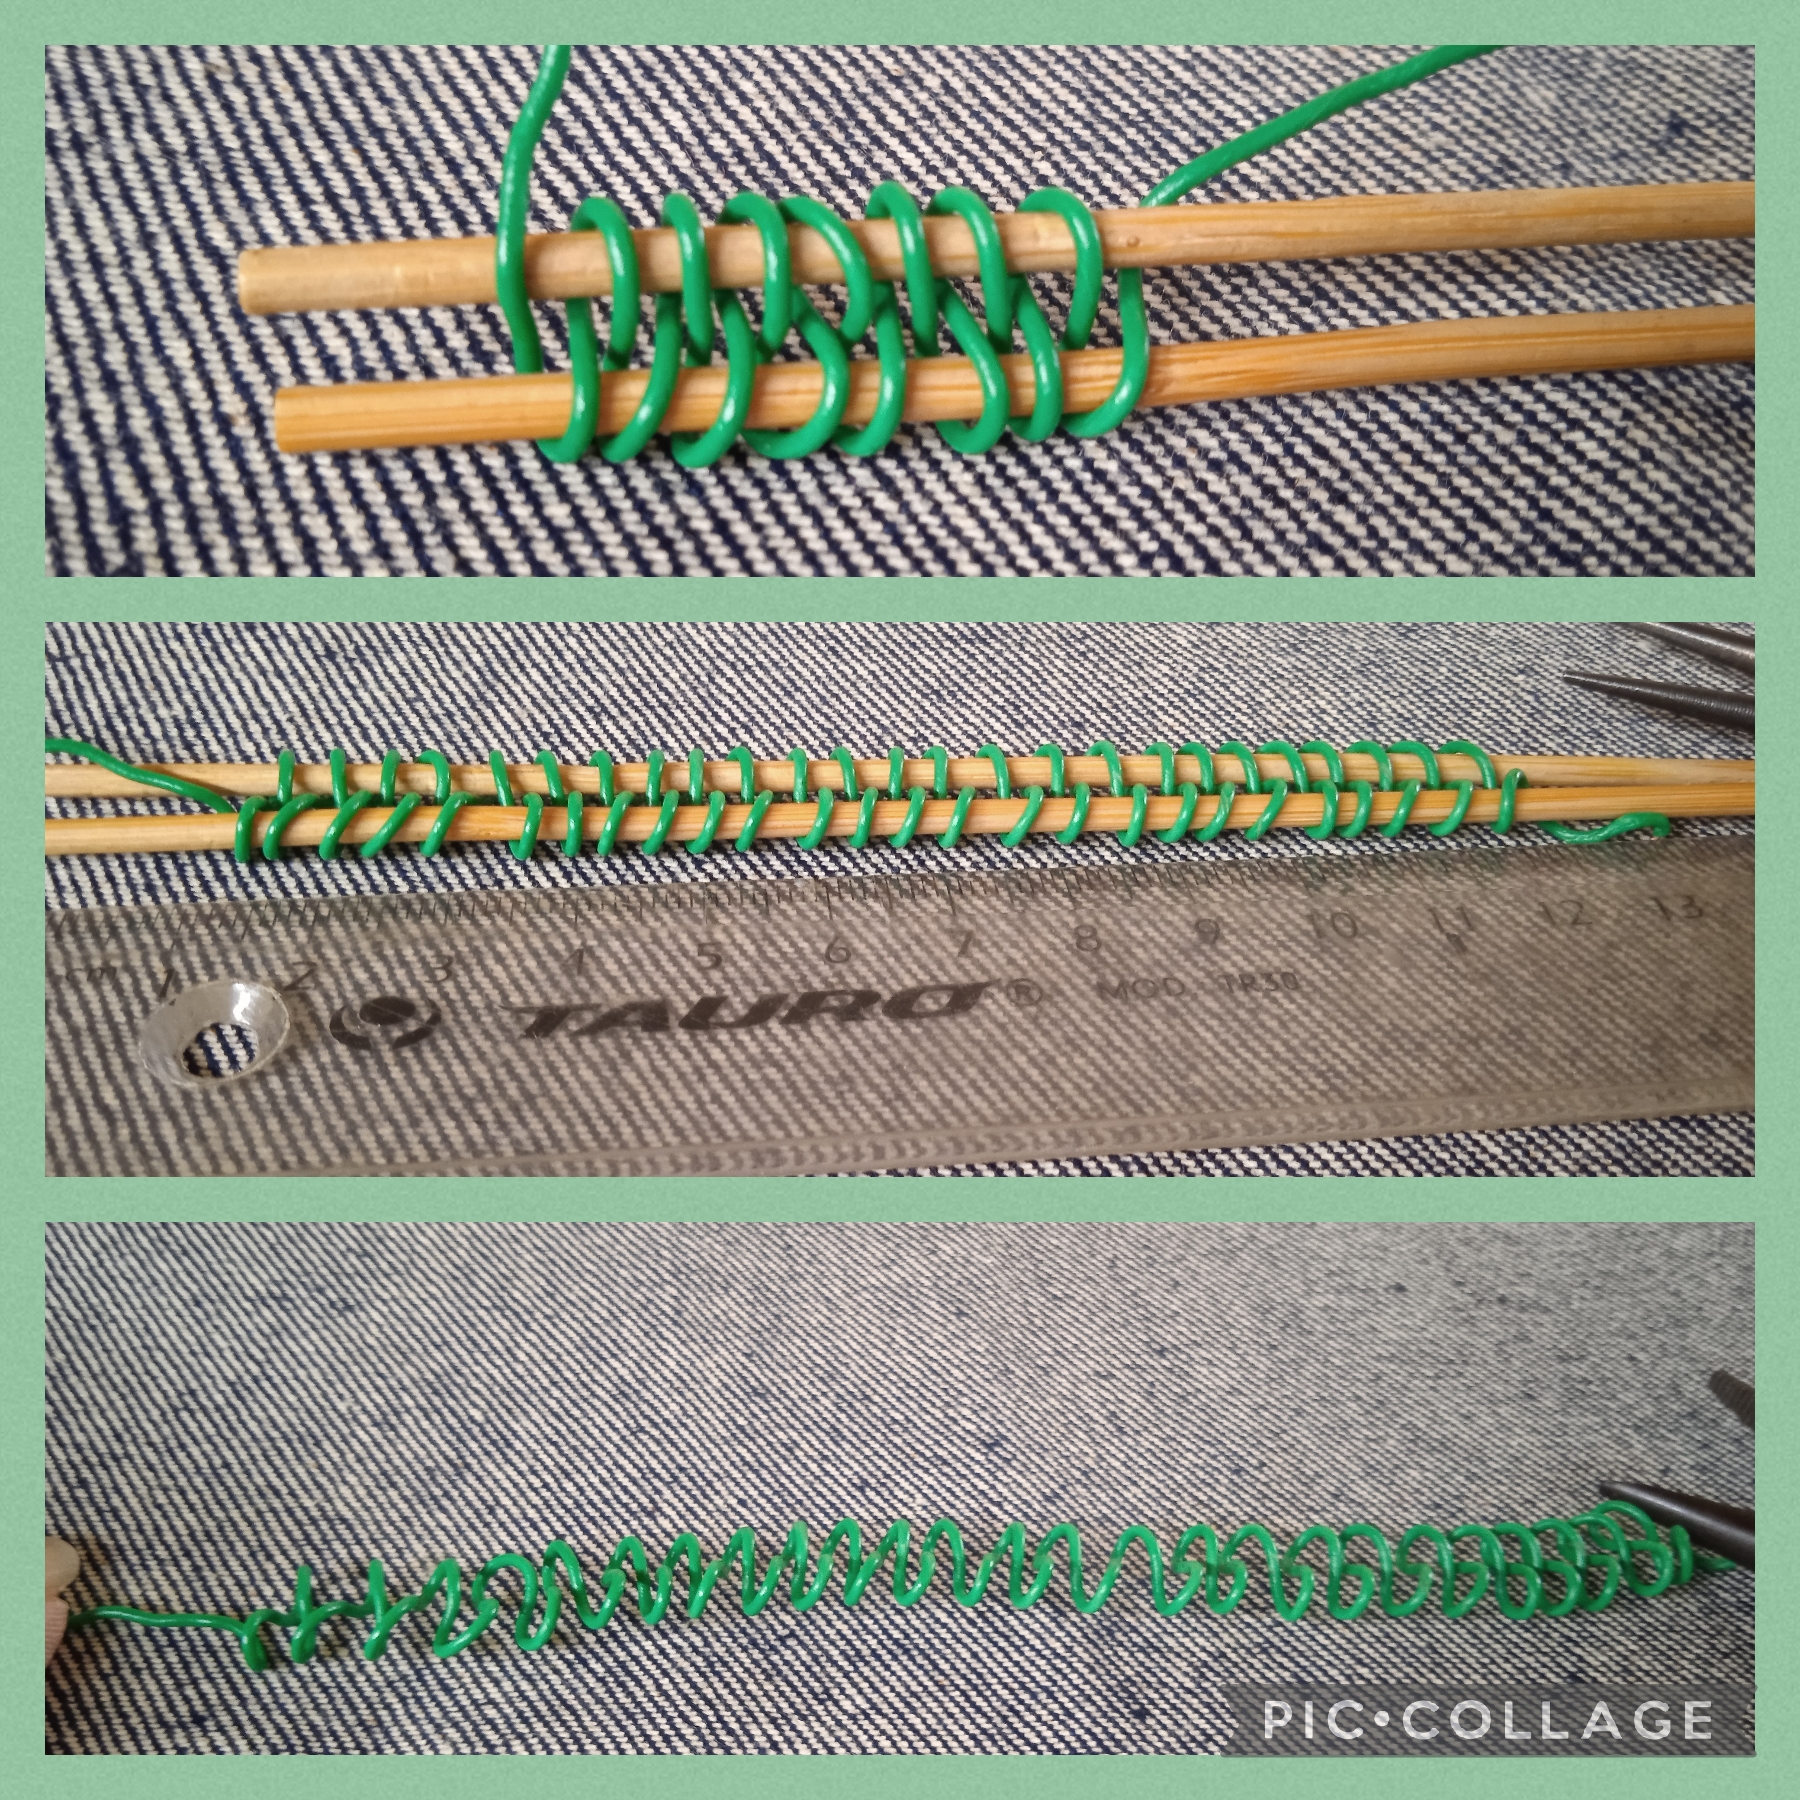
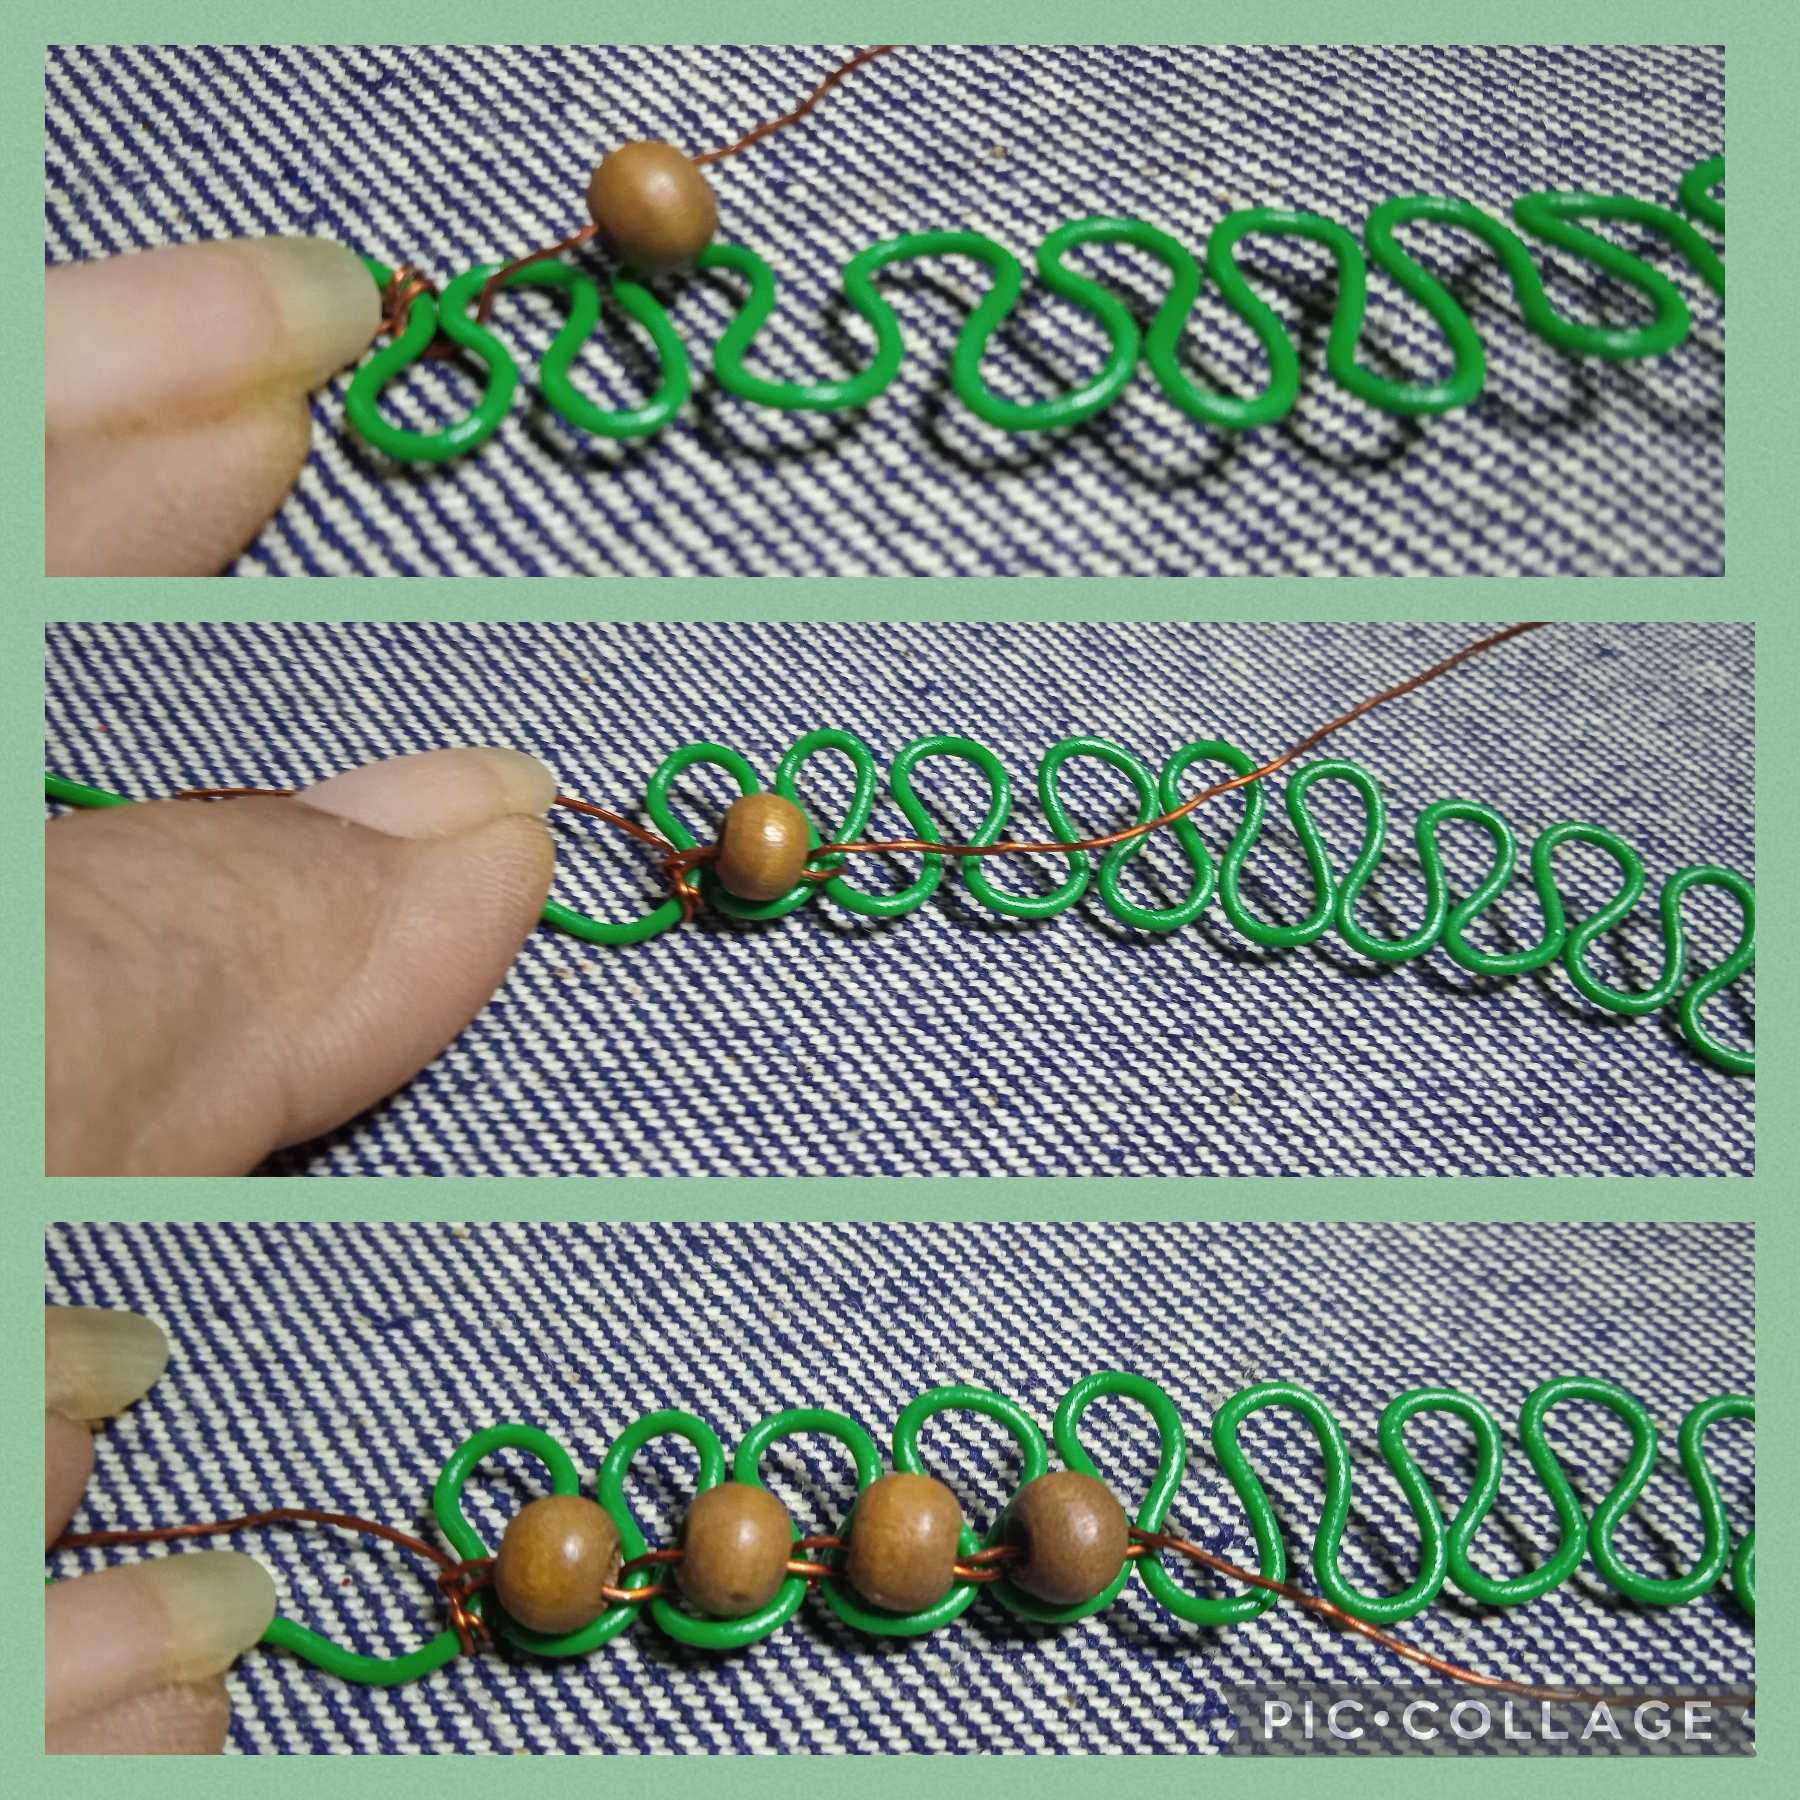
PASO DOS:
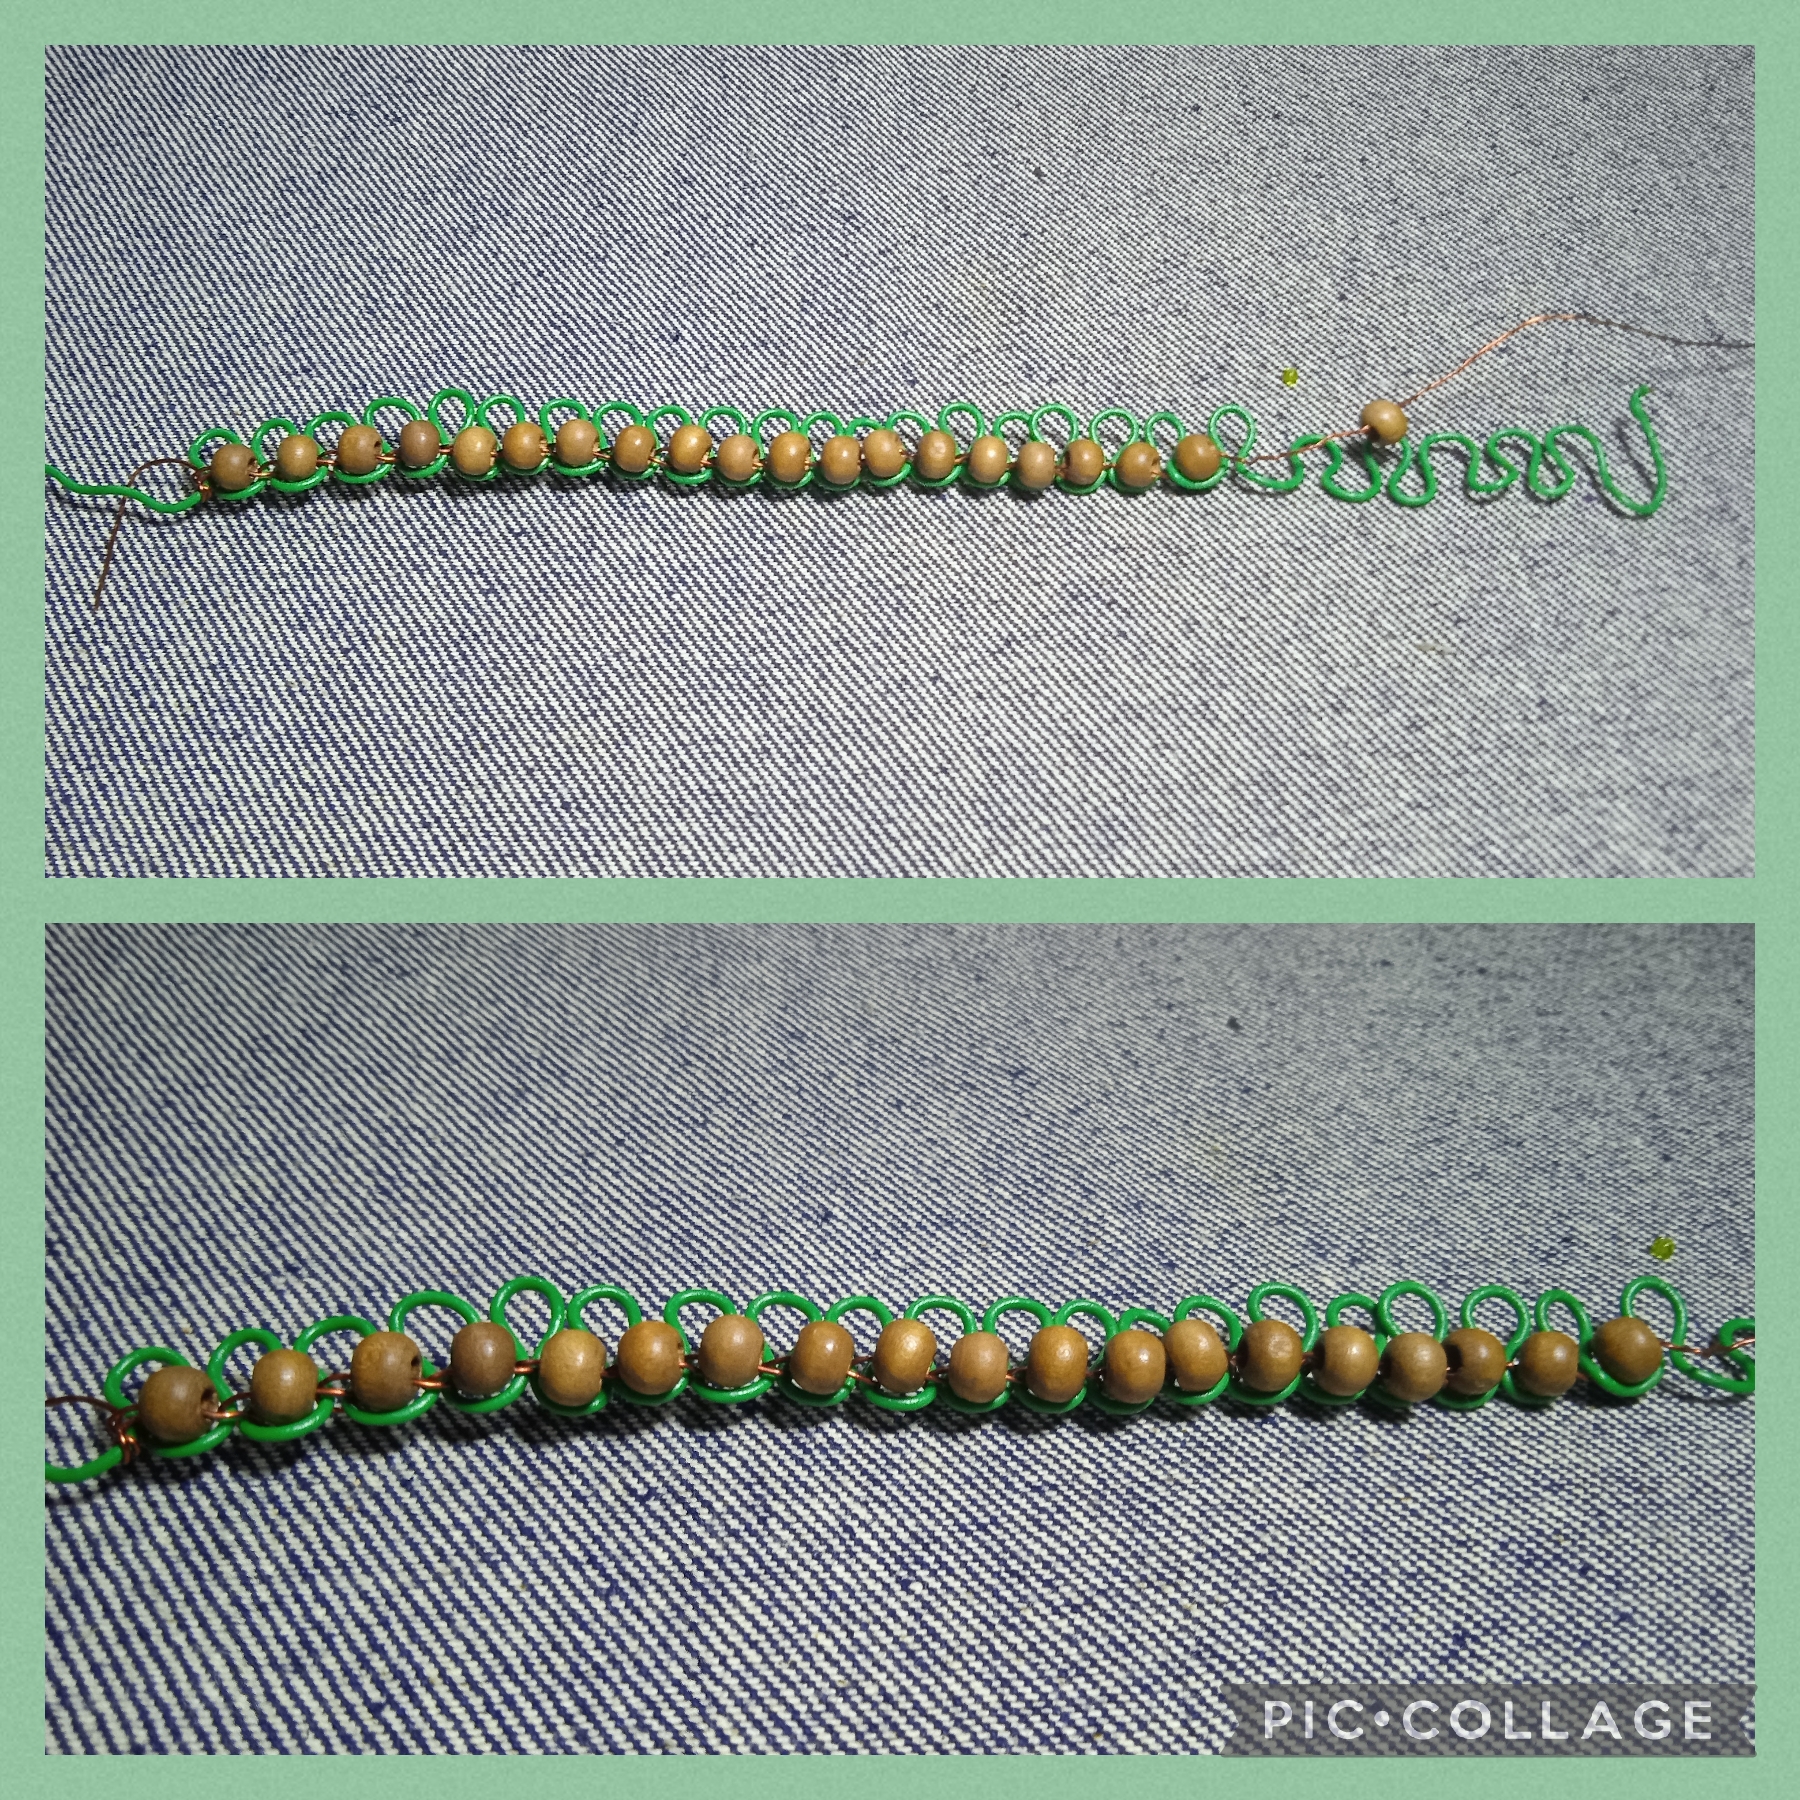
Una vez que retiro los palitos de altura me queda un zigzag en forma de gota que moldeo con las manos para seguir adelante con el diseño, uso un metro de alambre calibre 28" y comienzo a integrar las cuentas de Madera pequeñas, como se ve en la figura inserto una de las cuentas en el alambre y la coloco en la parte de arriba del zigzag en la abertura, ahora con el alambre uno la abertura del próximo zigzag con una vuelta, inserto otra cuenta la coloco en la siguiente abertura ato de nuevo con el alambre y así va hasta llenar el zigzag, en este punto entorcho dos veces el alambre y lo paso por la última cuenta para que no se note.
✓STEP TWO:
Once I remove the height sticks, I am left with a drop-shaped zigzag that I mold with my hands to continue with the design. I use a meter of 28" gauge wire and begin to integrate the small wooden beads, as seen in The figure inserts one of the beads into the wire and places it at the top of the zigzag in the opening, now with the wire one turns the opening of the next zigzag, I insert another bead, place it in the next opening and tie it again. with the wire and it goes like this until the zigzag is filled, at this point I twist the wire twice and pass it through the last bead so that it is not noticeable.
PASO TRES:
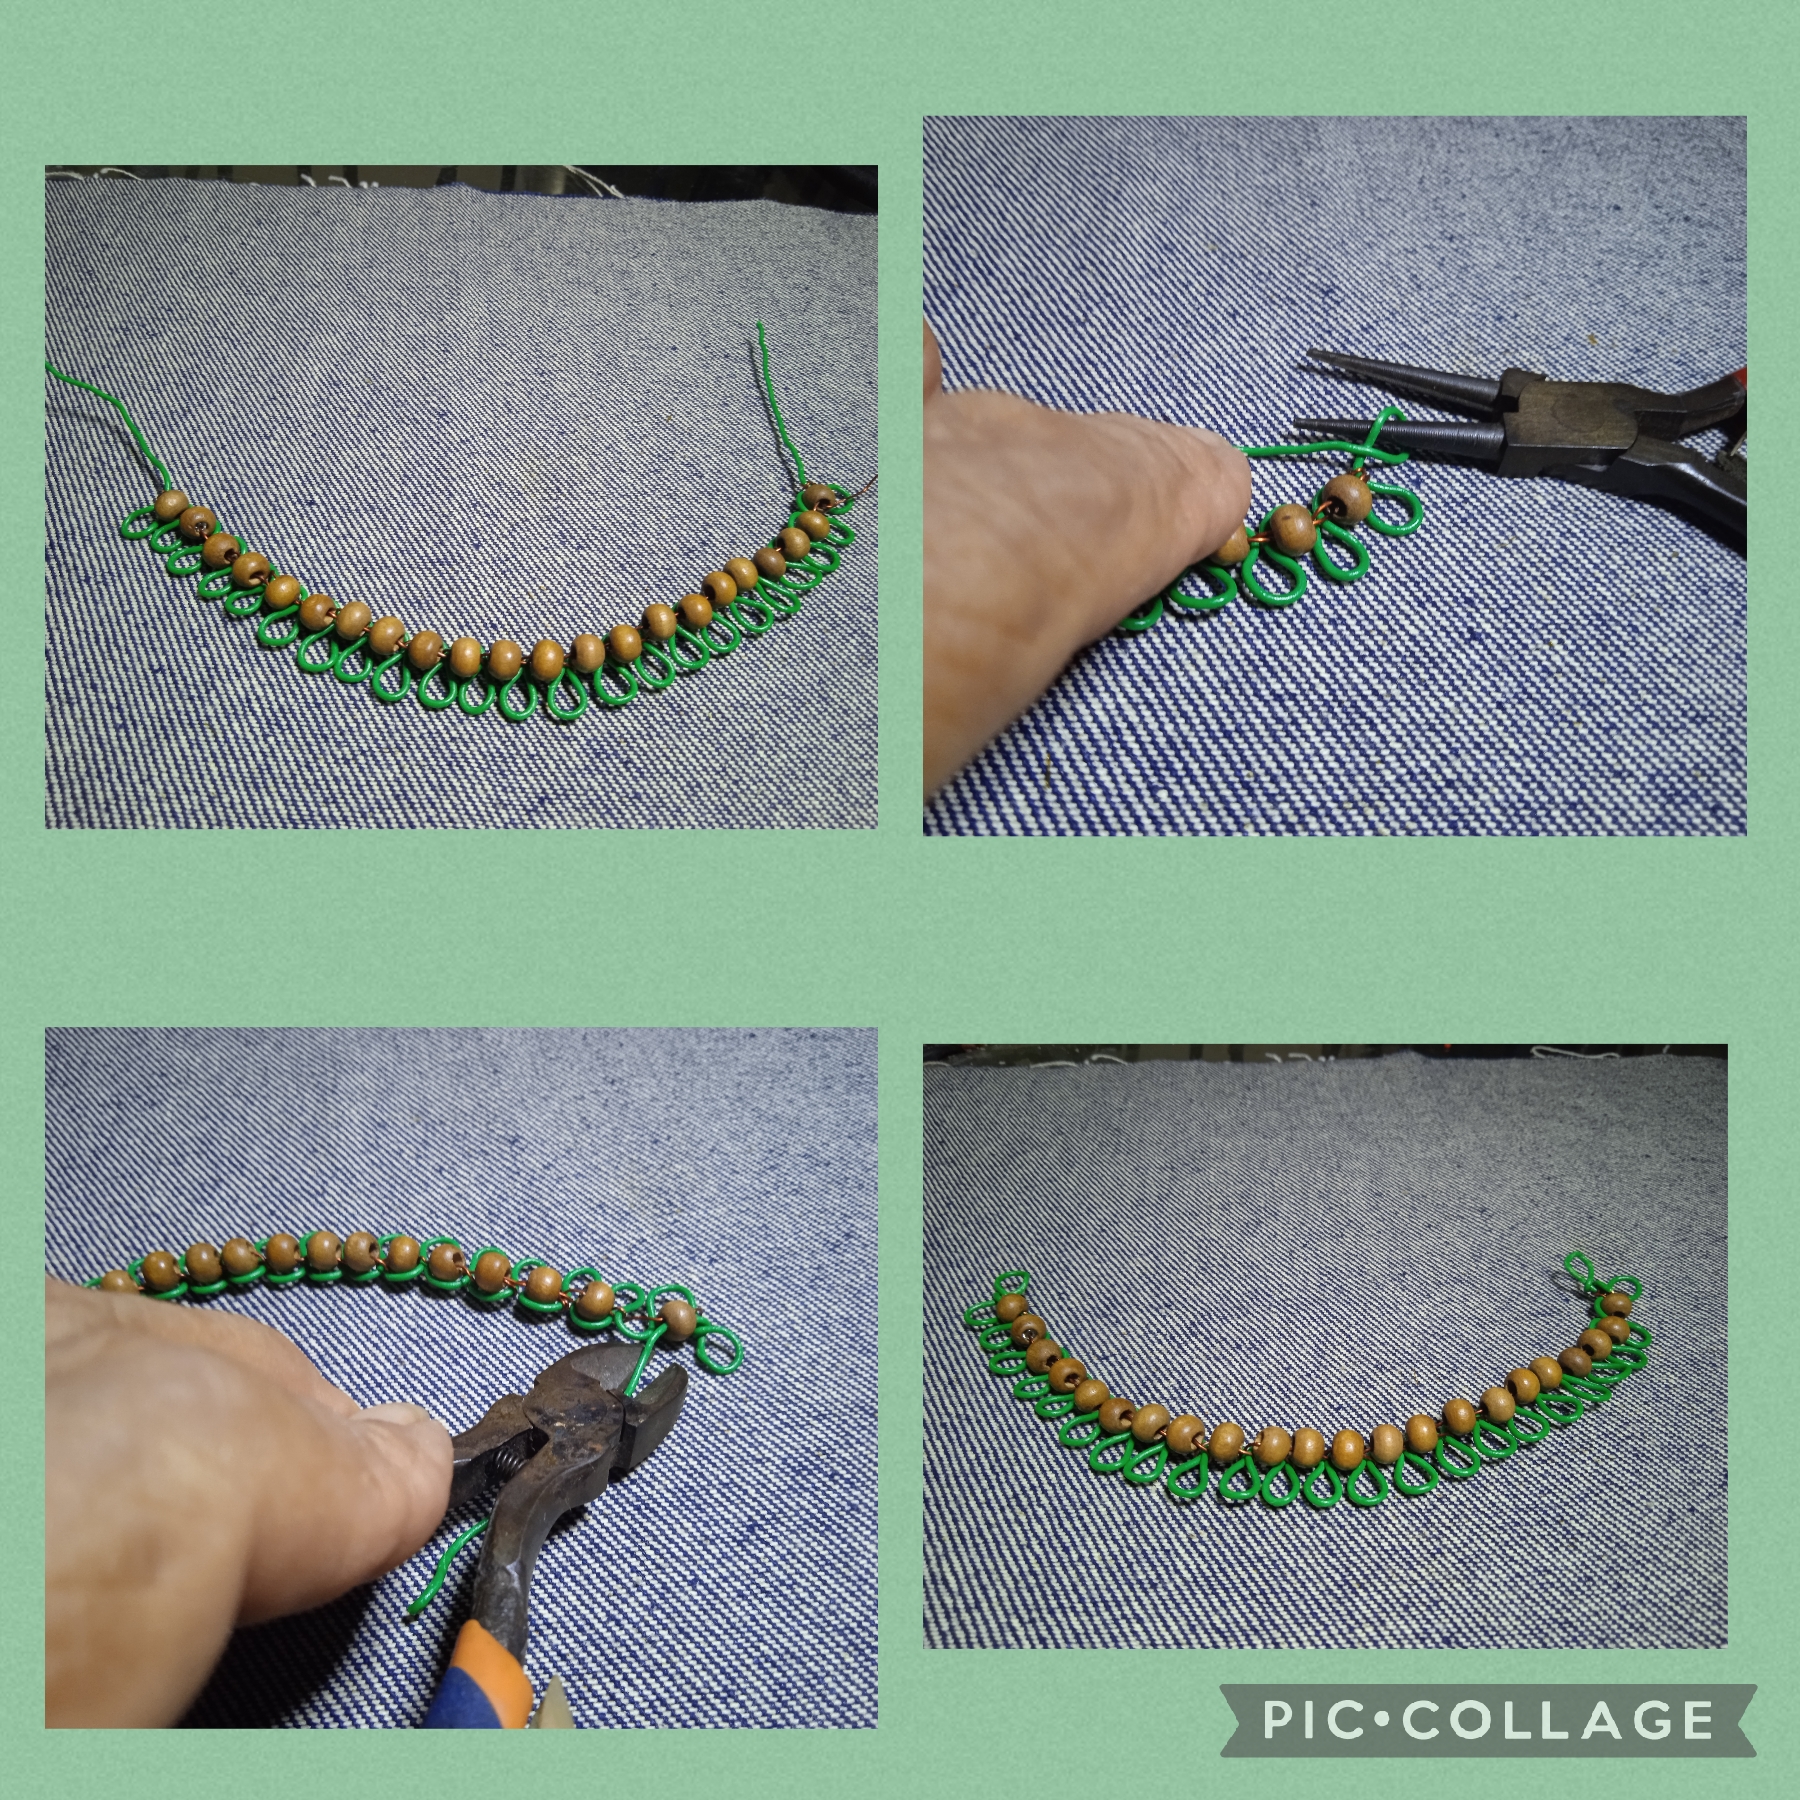
Ahora voy a usar la pinza de punta redonda, uno el último zigzag colocando uno encima del otro y hago un anillo doble, con la pinza plana hago presión y ajusto bien, hago el mismo procedimiento del otro lado y ver las imágenes.
STEP THREE:
Now I am going to use the round nose pliers, I join the last zigzag placing one on top of the other and make a double ring, with the flat pliers I apply pressure and adjust well, do the same procedure on the other side and see the images.
PASO CUATRO:
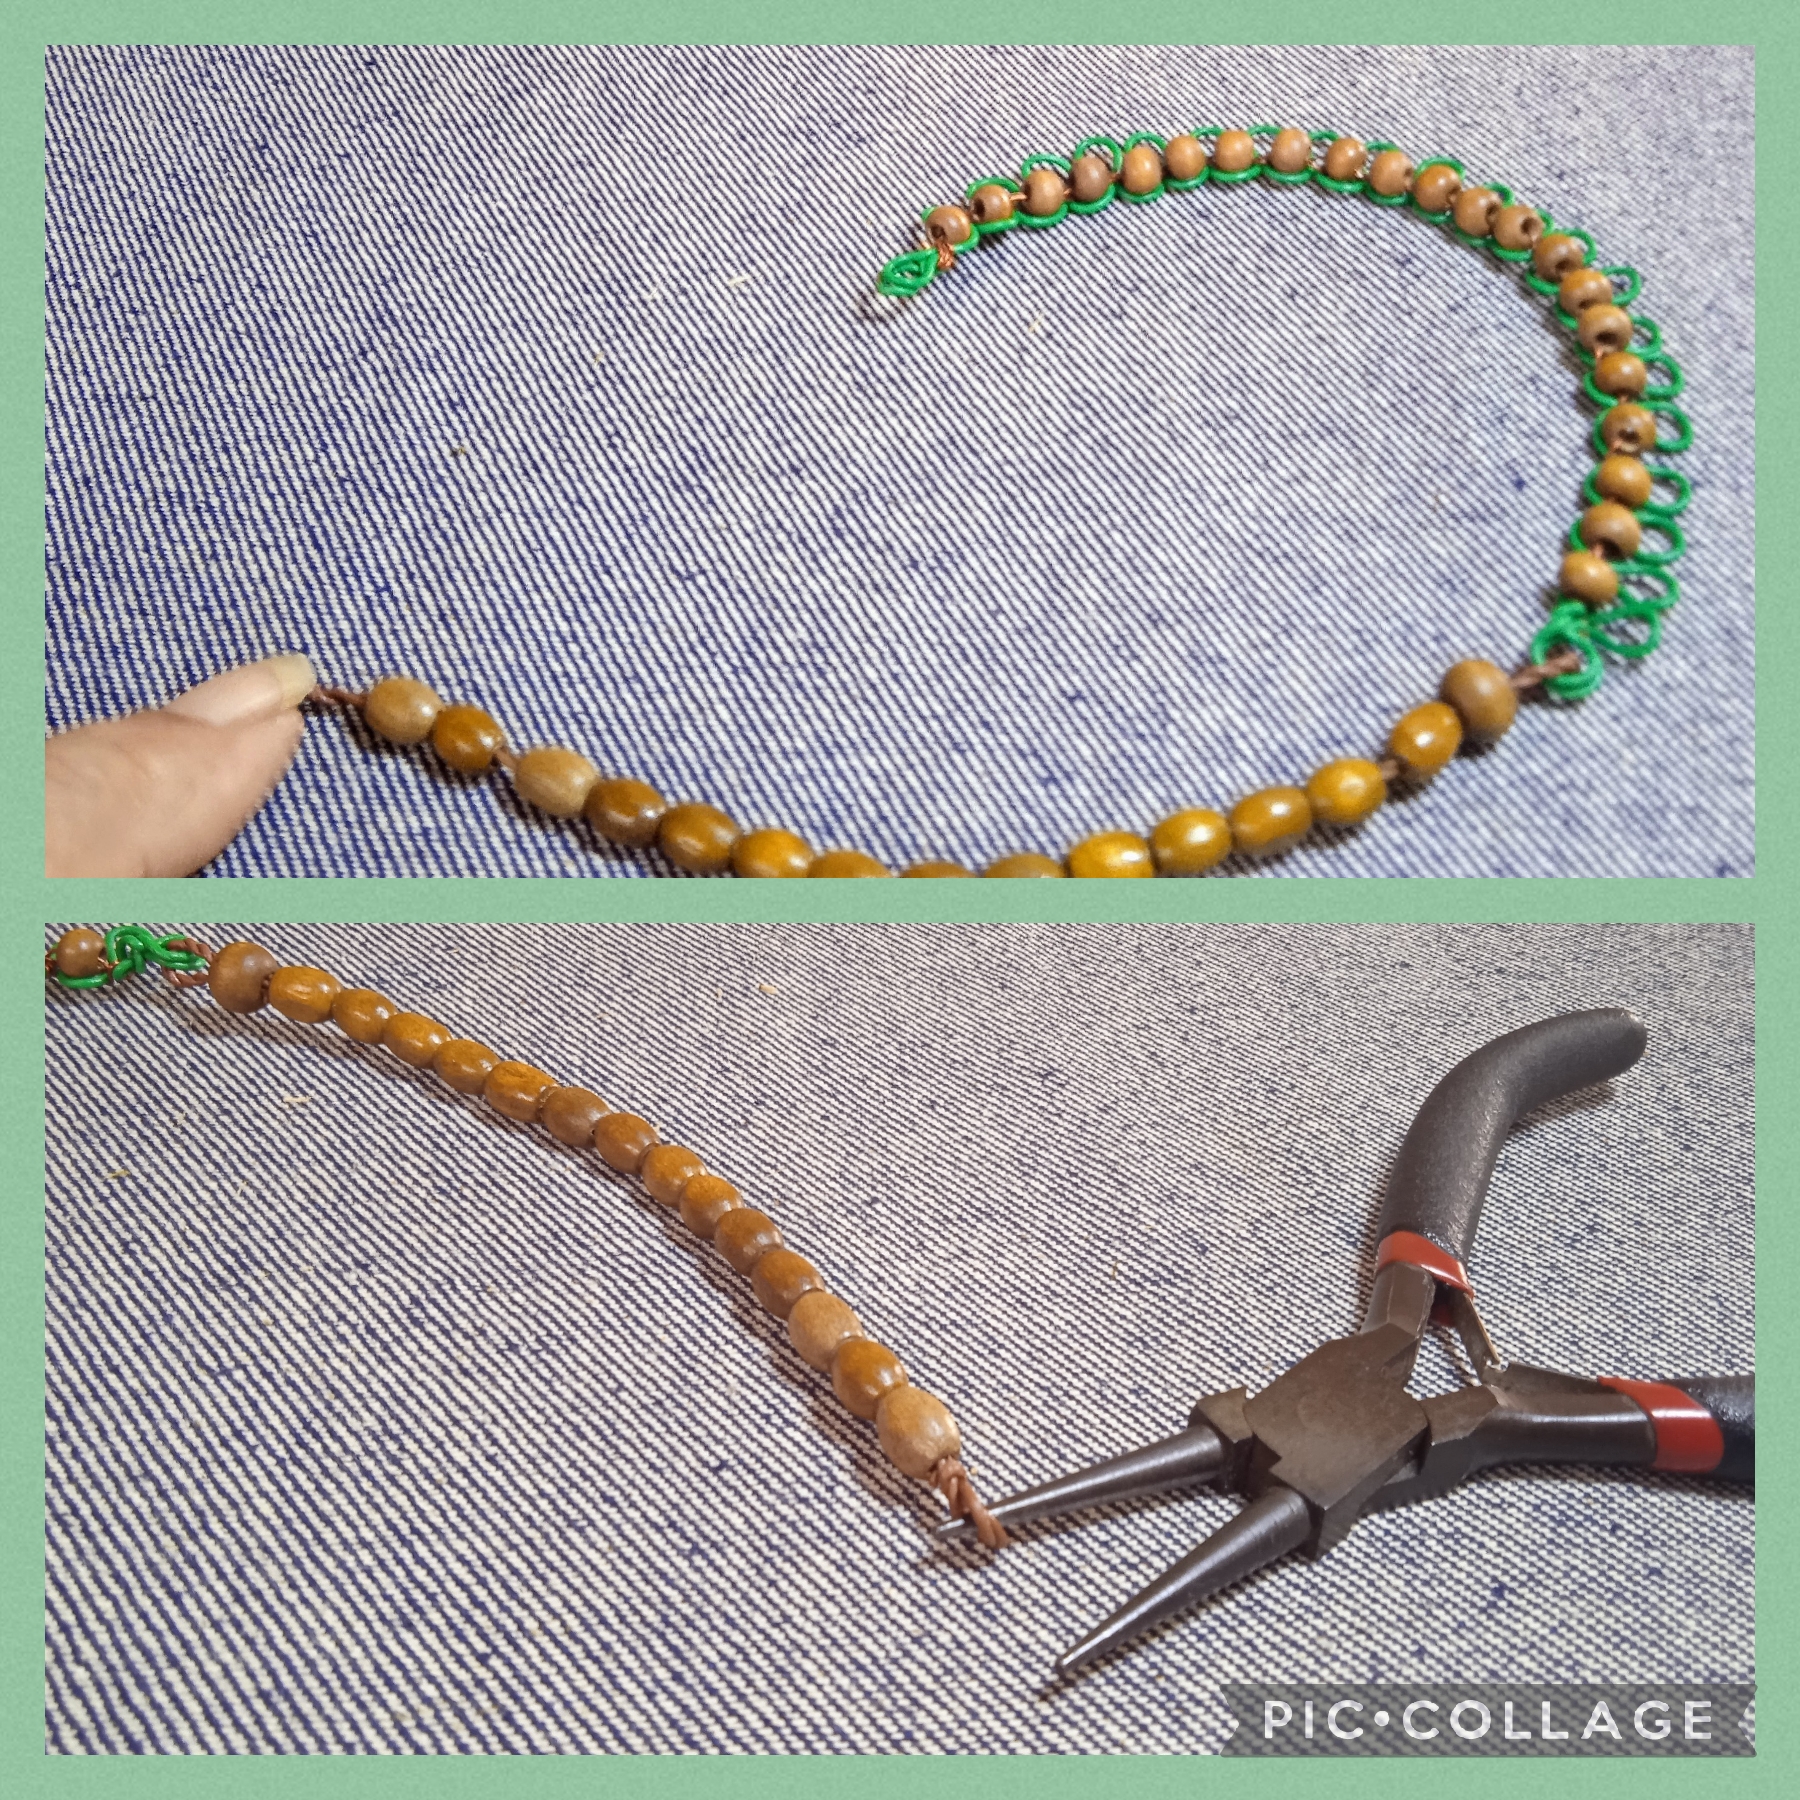
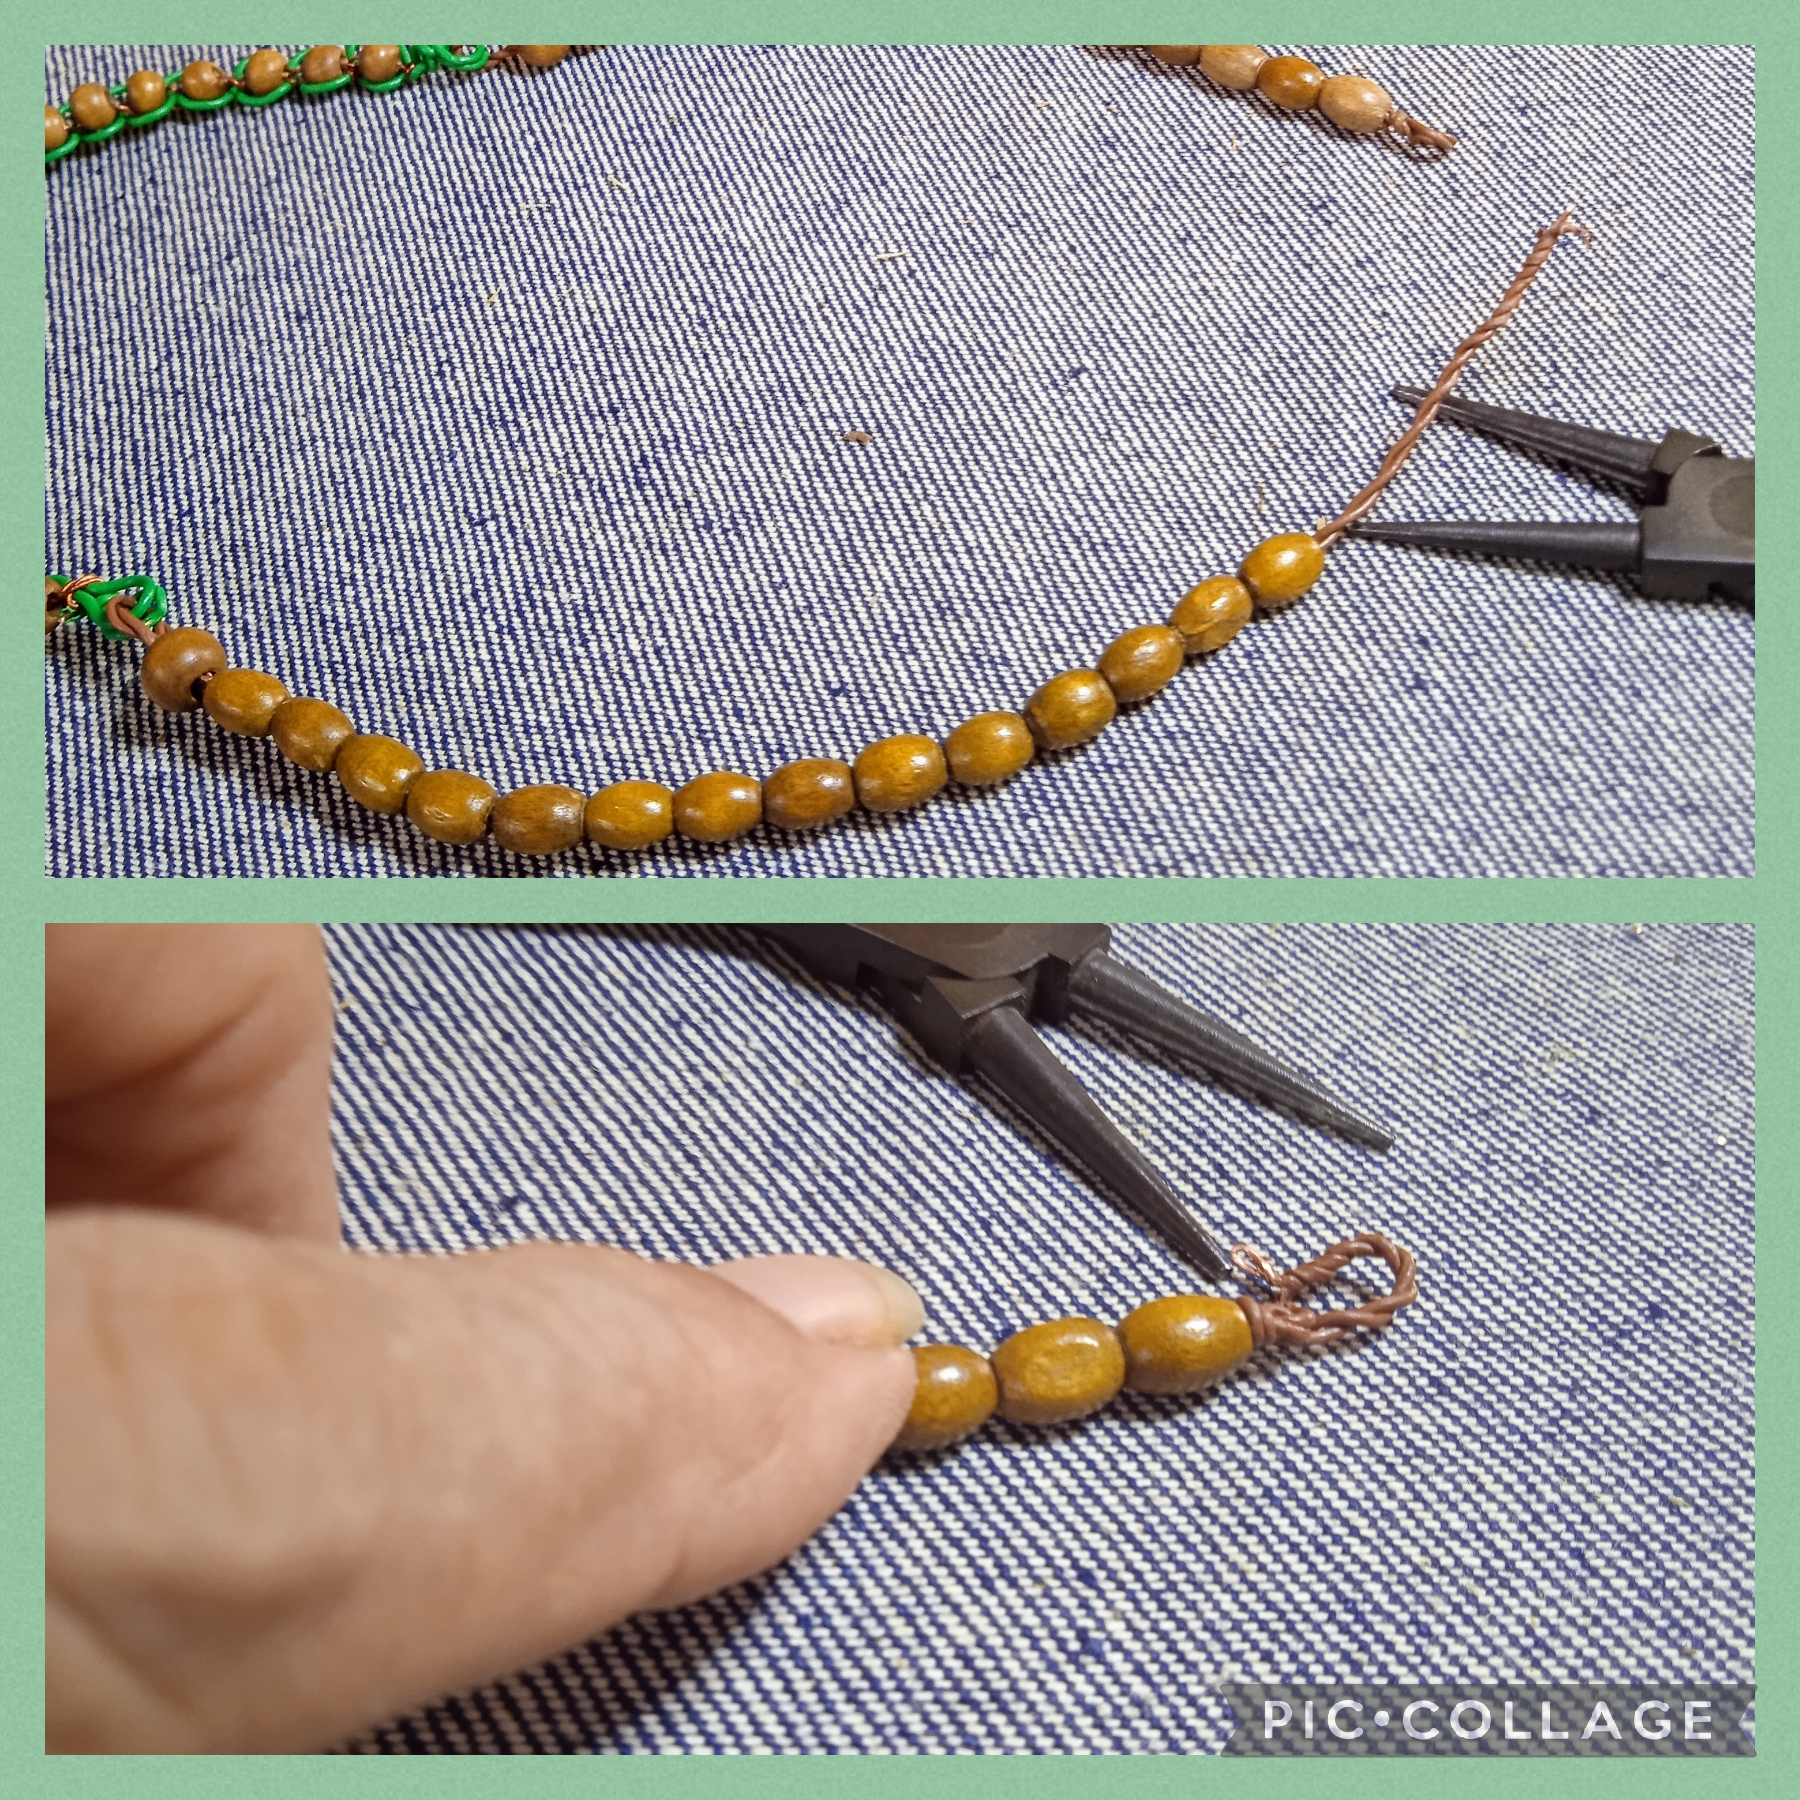
Una vez que tengo elaborado el cuerpo de la Gargantilla, tomo el alambre marrón y corto dos trozos de veinte centímetros cada uno los doblo a la mitad y hago un entorchado suave, ahora confirmo las medidas y verifico diez centímetros en cada uno, inserto la punta del alambre marrón por el anillo verde del cuerpo de la Gargantilla doblo un centímetro para hacer un ojal, inserto una cuenta mediana como separador y uso la pinza plana para ajustar, inserto catorce cuentas ovaladas pequeñas y con la pinza de punta redonda hago un anillo que será uno de los terminales de cierre, hago lo mismo del otro lado pero remato con terminal langosta, y así queda.
STEP FOUR:
Once I have made the body of the Choker, I take the brown wire and cut two pieces of twenty centimeters each, fold them in half and make a gentle twist, now I confirm the measurements and verify ten centimeters in each one, insert the tip of the brown wire through the green ring of the body of the Choker, I bend a centimeter to make an eyelet, I insert a medium bead as a spacer and use the flat clamp to adjust, I insert fourteen small oval beads and with the round tip clamp I make a ring that It will be one of the closing terminals, I do the same on the other side but finish with a lobster terminal, and this is how it looks.

Artistas Creativos de las Manualidades y la Joyería, este es el resultado final de mi hermosa creación, me quedo preciosa como para mí, espero que les guste como me gustó a mi, esta técnica del alambrismo es muy relativa podemos hacer accesorios maravillosos., solo hay que dejar flotar la imaginación, y aquí les dejo está idea ustedes le ponen su toque personal.
Agradecida por todo el apoyo que le brindan a mis contenidos así como por ver y leer mis publicaciones, bye, bye, nos vemos en la próxima manualidad.
Creative Artists of Crafts and Jewelry, this is the final result of my beautiful creation, it looks beautiful to me, I hope you like it as I did, this wire technique is very relative, we can make wonderful accessories., just You have to let your imagination float, and here I leave you with this idea, you can put your personal touch on it.
Grateful for all the support you give to my content as well as for seeing and reading my publications, bye, bye, see you in the next craft.
Las imágenes y redacción de este tutorial son de mi propiedad, las fotos fueron tomadas con mi teléfono celular redmi 9 y las edité con una aplicación gratis del mismo.
Para traducir texto use Google traductor.
The images and writing in this tutorial are my property, the photos were taken with my Redmi 9 cell phone and I edited them with a free application.
To translate text use Google translator

!discovery 37
This post was shared and voted inside the discord by the curators team of discovery-it
Join our Community and follow our Curation Trail
Discovery-it is also a Witness, vote for us here
Delegate to us for passive income. Check our 80% fee-back Program
Hermoso trabajo. Exitos en tu post.
Gracias amiga, saluditos 🌹
Muy linda amiga, y pues que bueno que Todavía tienes la dicha de que te amarren, te secuestren y te devuelvan el viernes jejeje.. Disfruta cada cumpleaños recuerda que solo es una vez al año y dale gracias a Dios por lo menos tienes personas cerca que lo hacen diferente.. saludos amiga, felicidades 🤗🫂🎉
Saluditos @bayondalways, que linda, cierto amiga tengo un grupo muy afectuoso y divertido siempre estan muy pendiente para formar la pachanga🤣 muchísimas gracias por tus felicitaciones y buenos deseos, qué tengas un excelente día. 🤗🌹
Bendiciones para ti y tu hermosa familia,saludos 🤗❤️❤️
🤗
Amiga te ha quedado muy linda, me gusta el diseño 🤗
Me encantó que te haya gustado @marile21, muchísimas gracias saluditos 🌹
Wooden beads usually go along with traditional attire thereby seeing it to be outstanding.
Cierto @agbogo con la madera se combinan bellísimas piezas de bisutería una verdadera joya, saludos 🤗
I will love to try this out dear