Drawing with colored pencils | The elegance of sensuality // Dibujo con lápices de colores | La elegancia de la sensualidad
English version
I have been drawing a lot, I told you about it the other day and here is another proof of it.
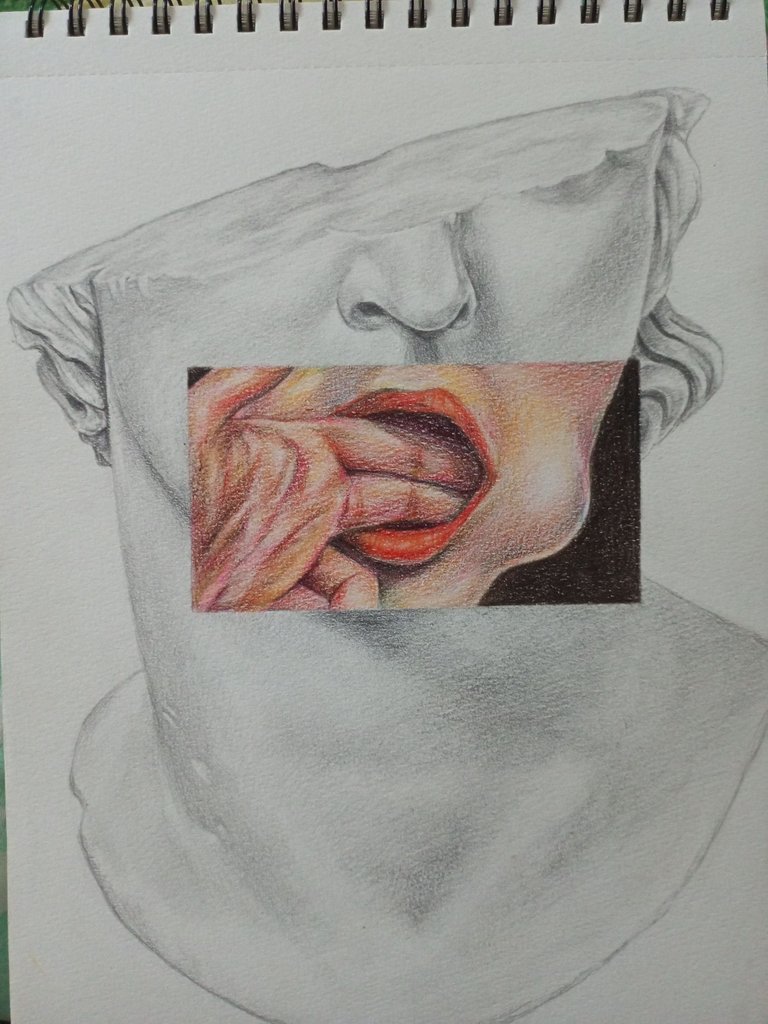
I worked for about 2 weeks on this drawing, it all started because I liked an edit on Pinterest of an old sculpture and I wanted to recreate it. Which leads me to share this drawing here today is that I really liked the technical result with graphite pencils and colored pencils.
Previously I didn't like to draw with colored pencils because I didn't like the blank spaces they left on the paper, but recently I acquired a new drawing pad with 160g sheets and naturally the drawings with pencils will have a better finish than those made on sheets of lower quality, so I decided to try using them again.
Process:
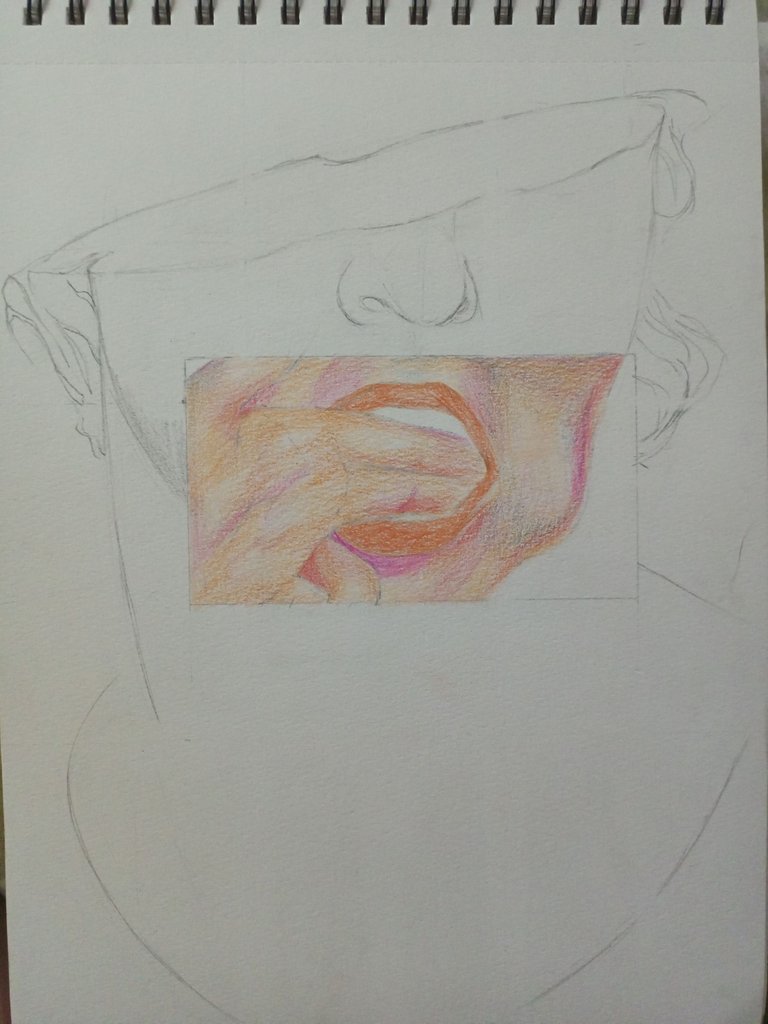
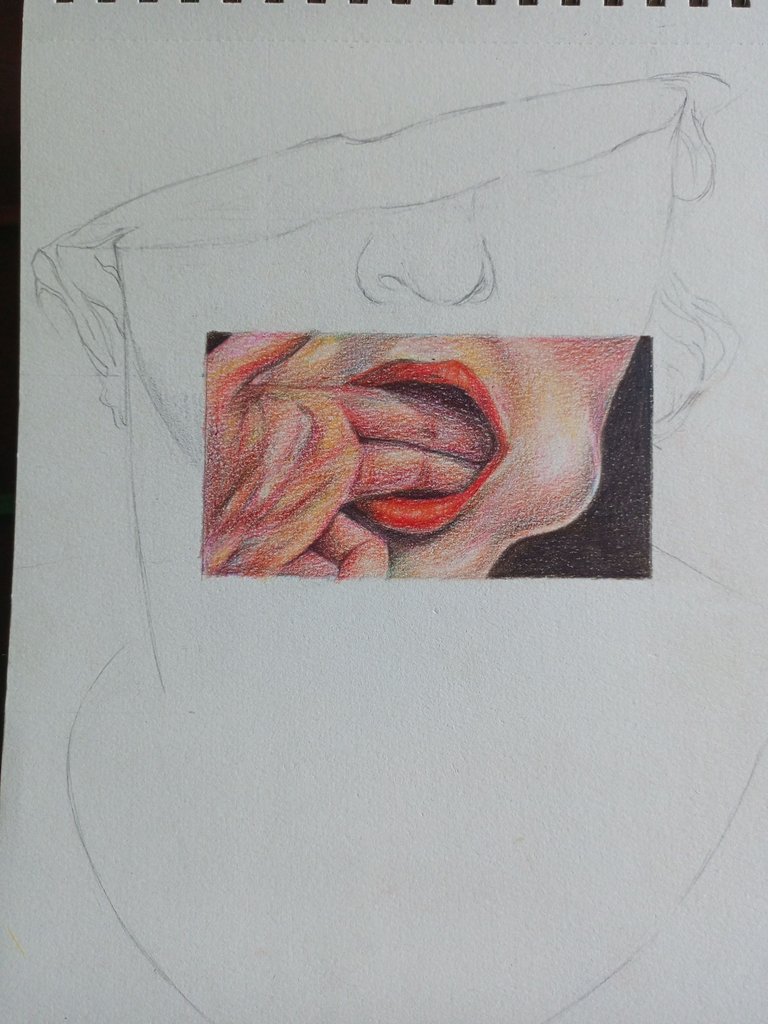
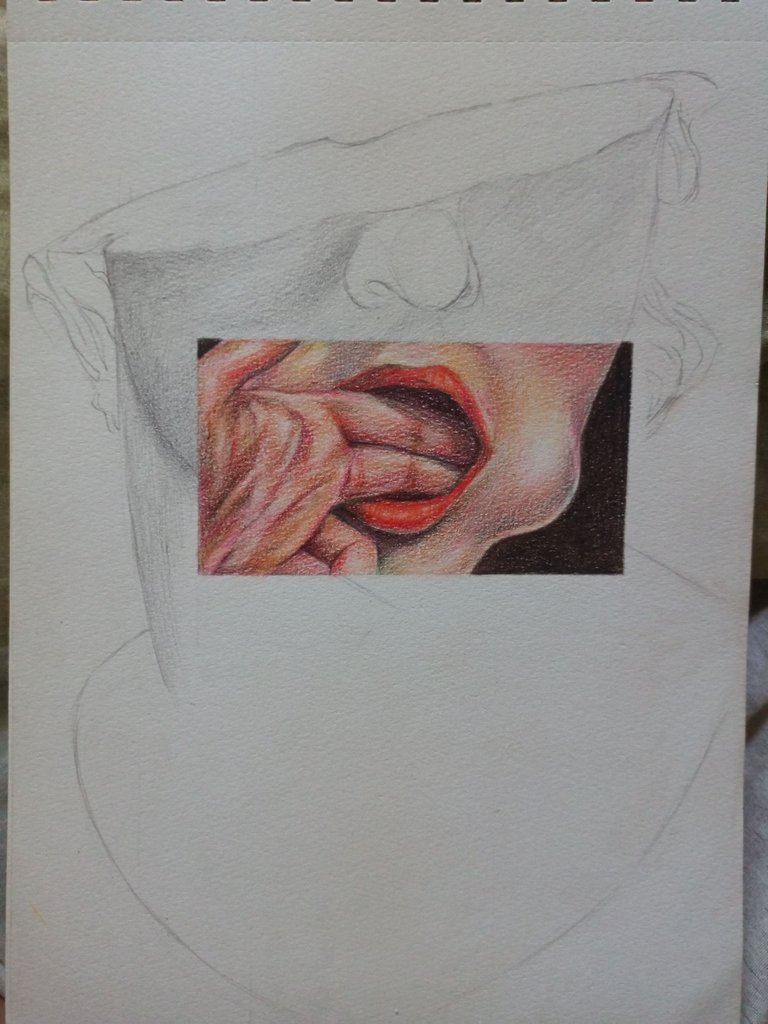
I thought it would be smart to start working on the area that would go with color because it is smaller and there would be less risk of messing up the space around it. I must admit that I had to watch a few video tutorials on how to draw with colored pencils because I had a long time without using this material and I wanted the finish to look realistic.
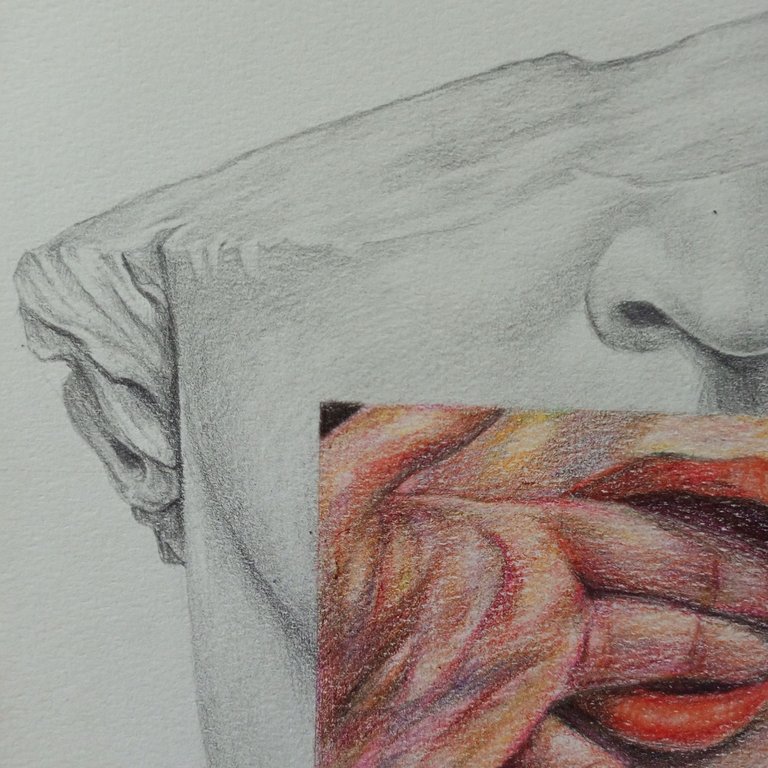
Once I finished this part, I cleaned the edges to make it look uniform and the next day I continued with the head of the sculpture.
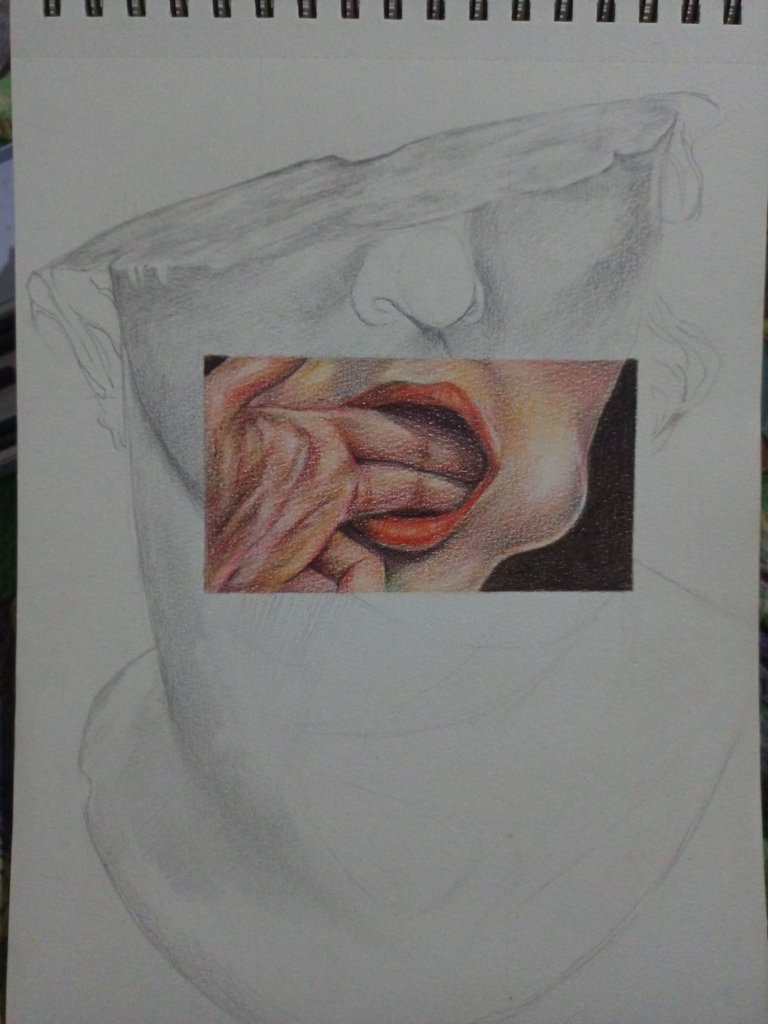
This was a work of many days, I worked on it without pressure, I took the notebook when I wanted to clear my mind and I wanted to relax. I have always liked to draw sculptures, I like the contrast between the shadows and the lights and the texture of the marble, of course, I tried to recreate every detail with the support of different drawing pencils, I used especially the H, 2B and 4B.
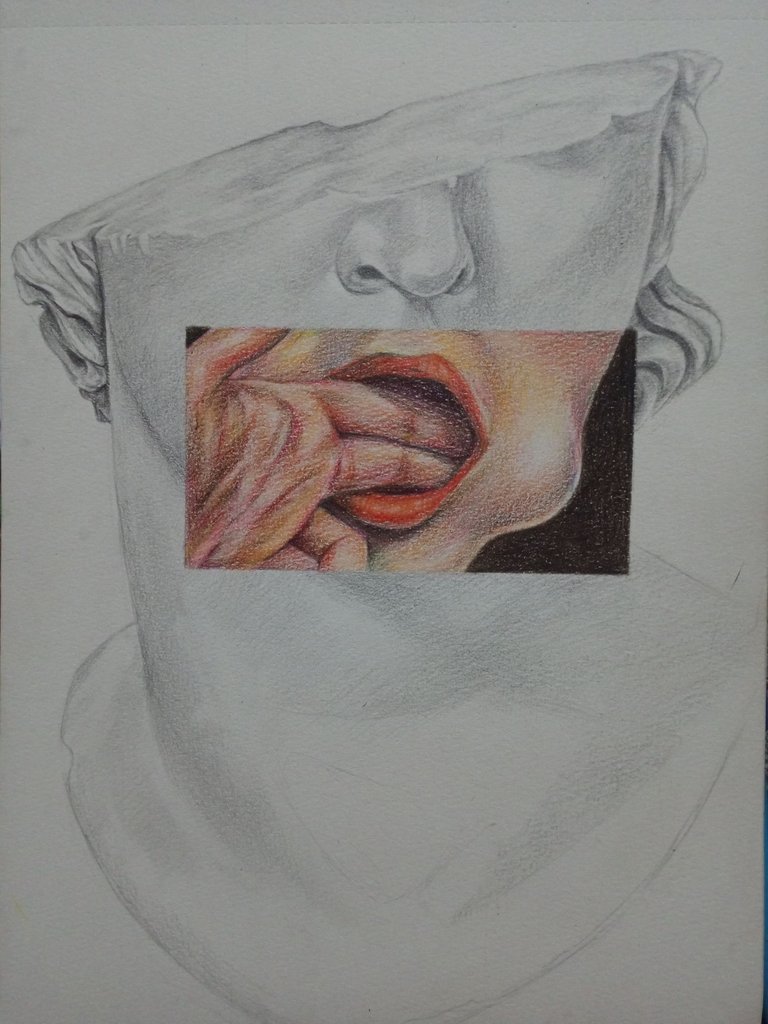
I think the spaces that took me more time to draw until I got a good finish were the top of the head (it is not so easy to draw a rocky texture) and the neck. One thing I did during the whole process was to take many pictures and compare them with the reference image to see what things I could improve, somehow this allows me to have a better view of what I'm doing, because after several minutes the view gets used to the angle or position in which we draw.
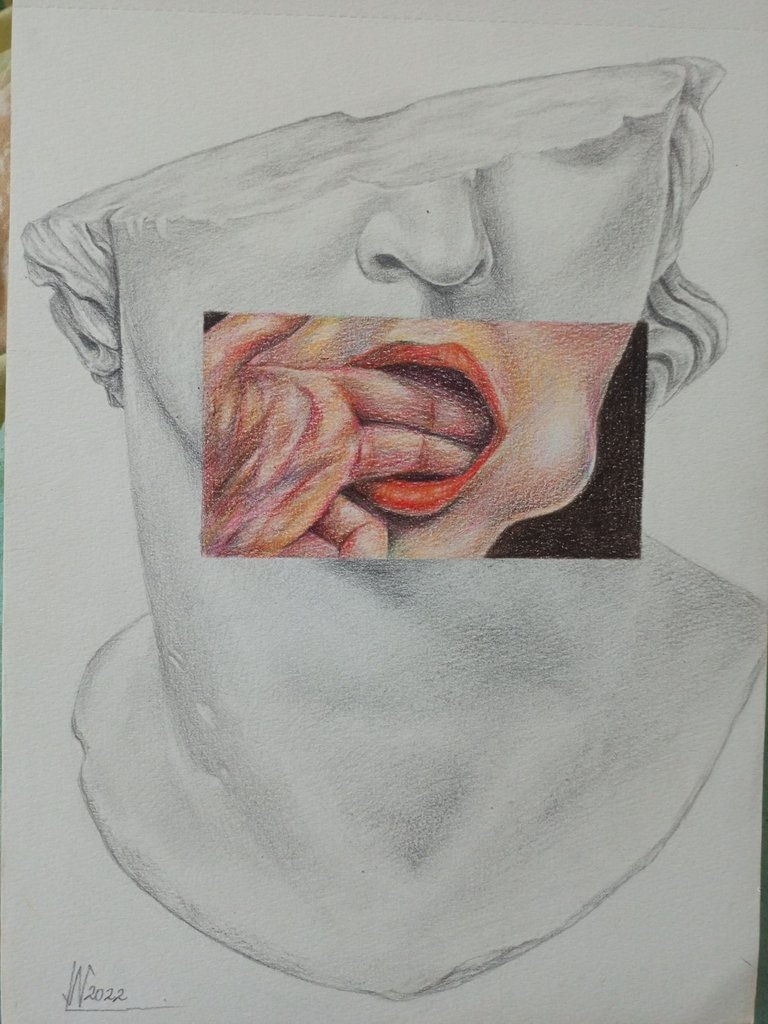
And that was the final result, what do you think? I hope very soon to start a new drawing with the same technique because I loved working this way and I feel that I can improve a lot more.
See you next time, thanks for reading to the end.
Reference image
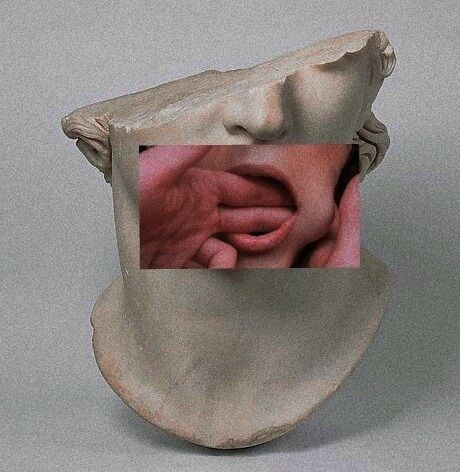
source

Versión en Español
He estado dibujando mucho, se los comenté el otro día y acá les dejo otra prueba de ello.
Trabajé 2 semanas aproximadamente en este dibujo, todo empezó porque me gustó un edit en Pinterest de una escultura antigua y quise recrearla. Lo que me animó a compartirlo hoy acá es que me gustó mucho el resultado técnico con los lápices de grafito y lápices de colores.
Anteriormente no me gustaba dibujar con lápices de colores porque no me gustaba los espacios en blanco que dejaban en el papel, pero hace poco adquirí un nuevo block de dibujo con hojas de 160g y naturalmente los dibujos con lápices tendrán un mejor acabado que los realizados en hojas de menor calidad, así que por eso decidí intentar usarlos nuevamente.
Proceso:
Pensé que lo más inteligente sería empezar a trabajar la zona que iría con color porque es más pequeña y habría menor riesgo de ensuciar el espacio al rededor. Debo admitir que tuve que ver unos cuantos videos tutoriales sobre como dibujar con lápices de colores porque tenía mucho tiempo sin usar este material y quería que el acabado se viera realista.
Una vez di por terminada esta parte, limpié los bordes para que se viera uniforme y al día siguiente continué con la cabeza de la escultura.
Este fue un trabajo de muchos días, trabajé en él sin presiones, tomaba el cuaderno cuando quería despejar la mente y me quería relajar. Siempre me ha gustado dibujar esculturas, me gusta el contraste que hay entre las sombras y las luces y la textura del mármol, por supuesto, traté de recrear cada detalle con apoyo de distintos lápices de dibujo, usé especialmente el H, 2B Y 4B.
Creo que los espacios que más tiempo me tomaron dibujar hasta lograr un buen acabado fueron la parte superior de la cabeza (no es tan fácil dibujar una textura rocosa) y el cuello. Una cosa que hice durante todo el proceso fue tomar muchas fotografías y compararlas con la imagen de referencia para ver qué cosas podía mejorar, de alguna manera esto me permite tener una mejor visión de lo que estoy haciendo, ya que después de varios minutos la vista se acostumbra al ángulo o la posición en que dibujamos.
Y ese fue el resultado final, ¿a ustedes qué les parece? Espero muy pronto empezar un nuevo dibujo con la misma técnica porque me encantó trabajar de este modo y siento que puedo mejorar mucho más.
Nos vemos en una próxima ocasión, gracias por leer hasta el final.
Imagen de referencia
Fuente