Creating a pattern and adding it to clothes/ Creando un patrón y agregándolo a la ropa

Hello Hivers!, today I come to tell you about something that catches my attention, which is to create a pattern and insert the pattern in a garment such as a shirt, this is quite used for design, I think it's called mock-up, there are also people who like to simply edit photos of themselves or others by adding details like these, so i will show you my process of creating a geometric pattern and how i added it to a shirt in a photo.
¡Hola Hivers!, hoy les vengo a hablar de algo que me llama la atención, que es crear un patrón e insertar el patrón en una prenda como una camisa, esto es bastante usado para el diseño, creo que se llama mock-up, también hay personas a las que simplemente les gusta editar fotos de ellos mismos o de otros agregando detalles como estos, así que les mostraré mi proceso de creación de un patrón geométrico y cómo lo agregué a una camiseta en una foto.
| Used programs |
|---|
| Adobe Illustrator |
| Adobe Photoshop |
| Programas usados |
|---|
| Adobe Illustrator |
| Adobe Photoshop |
I took the photos of the models from www.pexels.com
Las fotos de los modelos las saqué de www.pexels.com
Links: https://www.pexels.com/photo/man-in-white-crew-neck-t-shirt-wearing-black-fedora-hat-9558724/
https://www.pexels.com/photo/woman-in-white-crew-neck-t-shirt-and-brown-shorts-9558928/
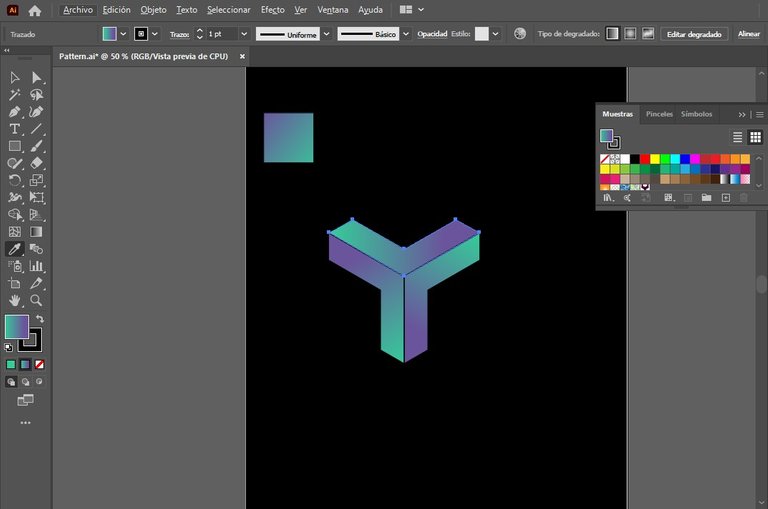
- The first thing we need to do is select our rectangle tool (it's shortcut is by push "M"), It should be noted that before I had already put a black rectangle as a background but I did it for personal preference, continuing with the explanation, we switch to the polygon tool, we create our polygon and give it where it says transform at the top, we put it at an angle of 30°.
- Lo primero que necesitamos hacer es seleccionar nuestra herramienta rectángulo (su atajo es presionando "M"), cabe a destacar que antes ya había puesto un rectángulo negro como fondo pero lo hice por preferencia personal, continuando con la explicación, cambiamos a la herramienta polígono, creamos nuestro polígono y le damos donde dice transformar en la parte superior, lo ponemos en un ángulo de 30°.
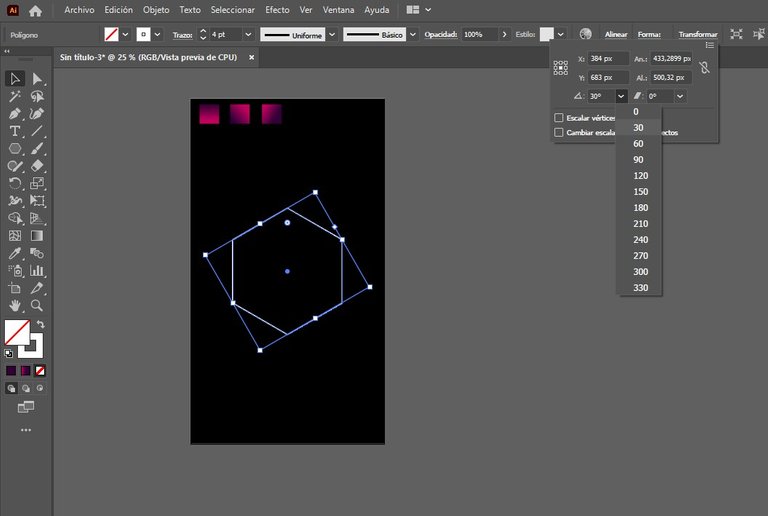
- And then using ALT and left click we duplicate our polygon, we have to do this twice, and that they are aligned as in the next photo.
- Y luego usando ALT y clic izquierdo duplicamos nuestro polígono, tenemos que hacer esto dos veces, y que queden alineados como en la siguiente foto.

- Then we go in the shape creator tool (excuse me, I think it is said like that in English, I use Illustrator in spanish), let ALT pressed and it will be in its mode to remove shapes.
- Luego vamos a la herramienta de creación de formas, dejamos presionada la tecla ALT y estará en su modo para eliminar formas.
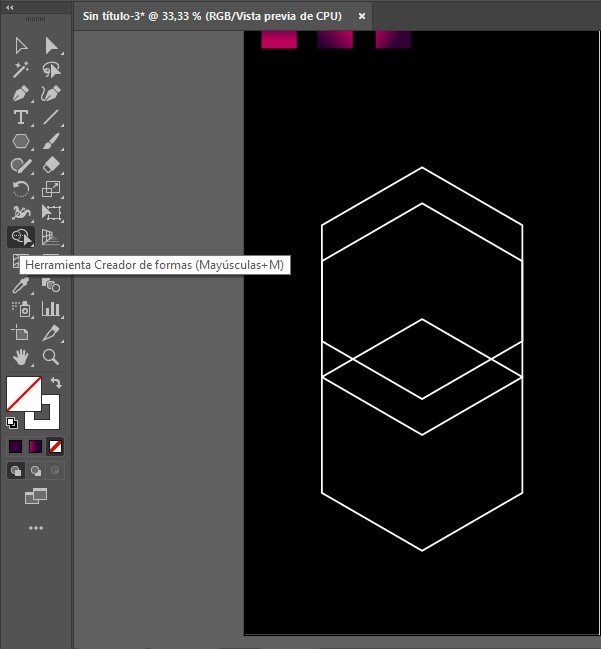
- We will cut out the extra shapes until it looks like the next image.
- Nosotros cortamos las formas extras hasta que se vea como en la siguiente imagen.
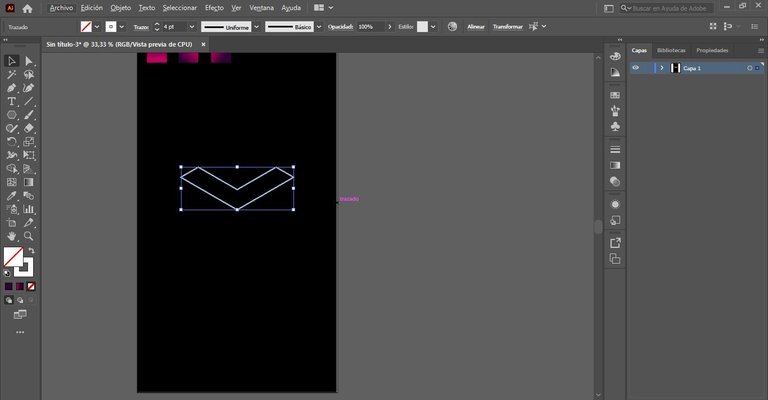
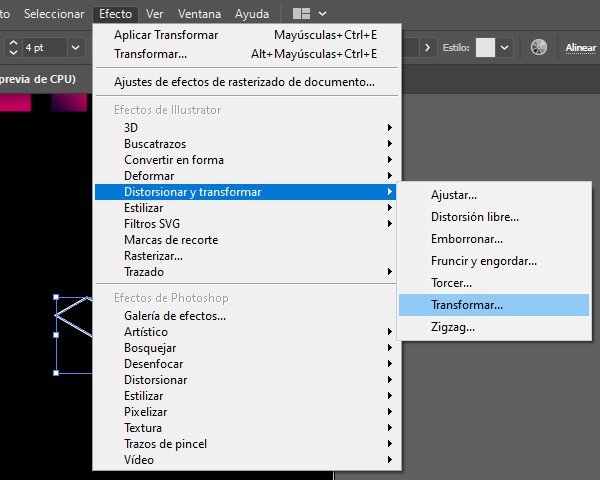
- Then we go up to our bar and we click in effect, distort and transform, we click on transform.
- Después, nosotros vamos arriba en nuestra barra y damos clic en efecto, distorsionar y transformar, le damos clic en transformar.
- We put an angle of 120 °, we leave the boxes to transform objects and transform patterns checked, we mark the small box that comes out below that is the direction of our shapes in the box, and we put in copies "2".
- Ponemos un ángulo de 120°, dejamos marcadas las casillas para transformar objetos y transformar patrones, marcamos la casilla pequeña que sale debajo que es la dirección de nuestras formas en la casilla, y ponemos en copias "2".
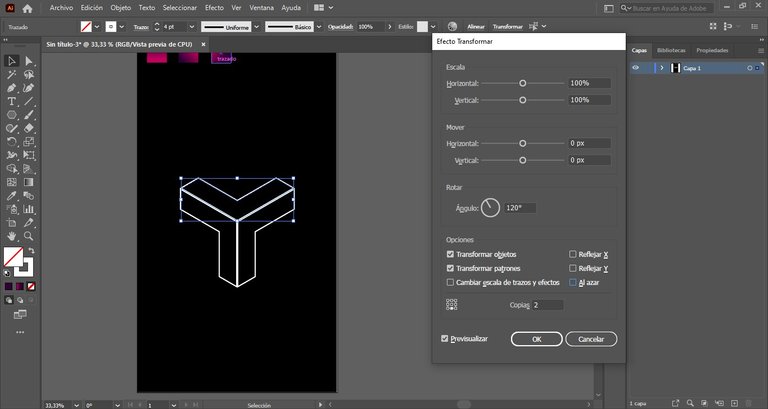
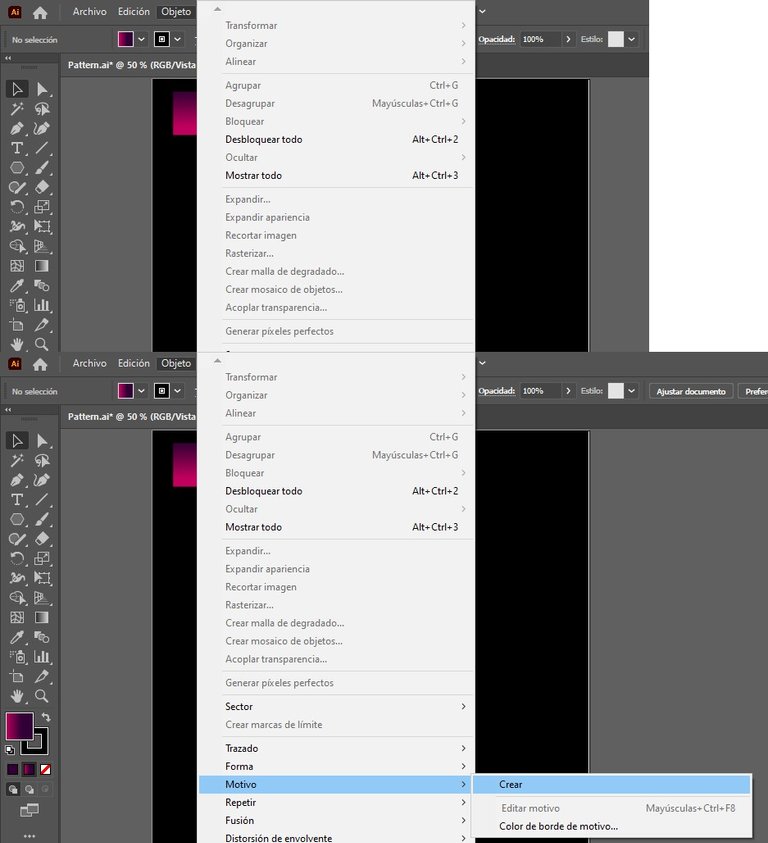
- As you can see, above the form I left 3 boxes with gradient, that's my personal touch to choose a color combination for our pattern, I chose the 3 box, select our pattern and press "I", select the eyedropper tool, and take the color that you have chosen, so the pattern will have the selected color, then go to object, pattern, click on make.
- Como pueden ver, arriba de la forma, dejé 3 casillas con degradado, ese es mi toque personal para elegir una combinación de colores para nuestro patrón, elegí la casilla 3, seleccioné nuestro patrón y presionando "I", seleccioné la herramienta cuentagotas, y tomé el color que haya elegido, por lo que el patrón tendrá el color seleccionado, entonces van a objeto, motivo, dan clic en crear.
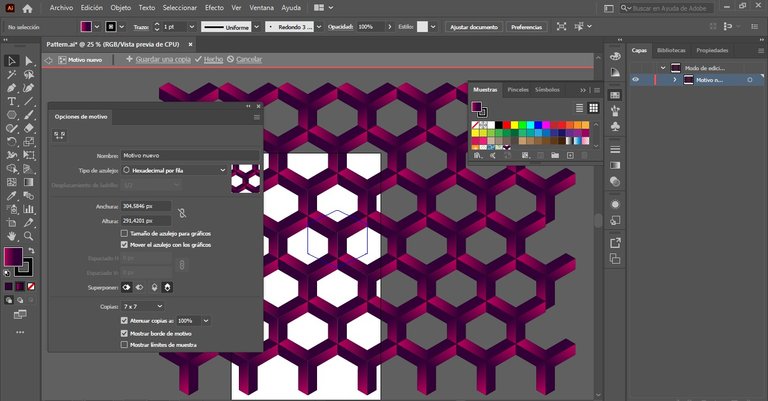
- Now we see the pattern options, In this image that you are going to see, with the same shape, I made two patterns, in this one i left the tiles in hex per row option, I left the box to move the tile with the graphics checked, I adjusted height and width, I changed the options where it says "overlay", I placed the number of copies that I thought necessary, in this case by 7x7 and I left the first two boxes almost marked that are at the end.
Note: In the option to dim copies, you can choose the percentage that you create just, I use 100%
- Ahora vemos las opciones de patrón, en esta imagen que van a ver, con la misma forma, hice dos patrones, en este dejé los azulejos la opción hexadecimal por fila, activé el cuadro para mover el azulejo con los gráficos, ajusté alto y ancho, cambié las opciones donde dice "superponer", coloqué la cantidad de copias que creí necesarias, en este caso por 7x7 y dejé marcadas las dos primeras casillas que están al final.
Nota: En la opción de atenuar copias, pueden elegir el porcentaje que crean justo, yo uso el 100%
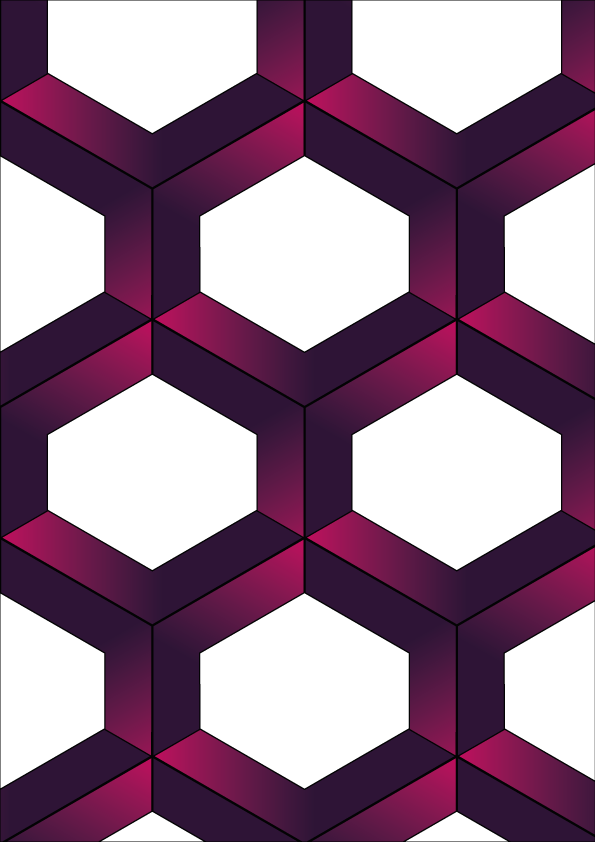
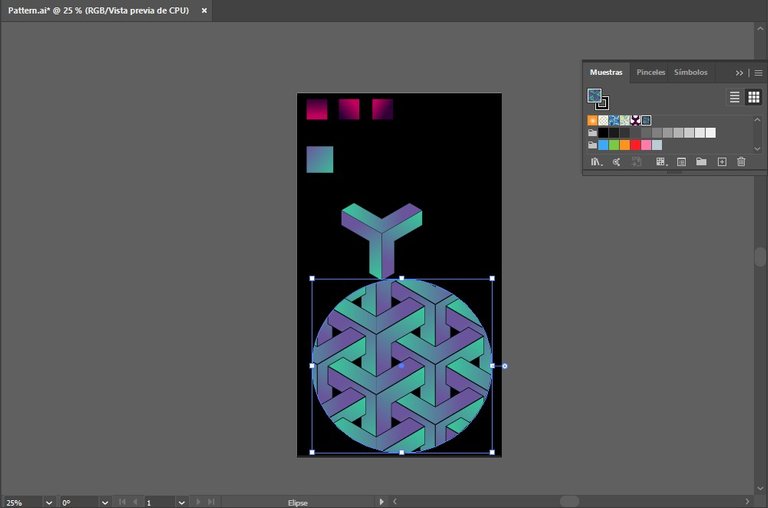
- And that's it! we finished our pattern that has the shape of a honeycomb (I left it with the transparent background because it could be used as a decoration).
- ¡Y ya está!, hemos terminado nuestro patrón que tiene forma de panal de abejas (dejé el fondo transparente porque pensé que podría usarlo como decoración).
Now, here is another example with the same shape but using other options
Ahora, aquí está otro ejemplo con la misma forma pero usando otras opciones
- Going back a few steps, I changed the color with the eyedropper.
- Volviendo unos pasos atrás, cambié el color con el cuentagotas.
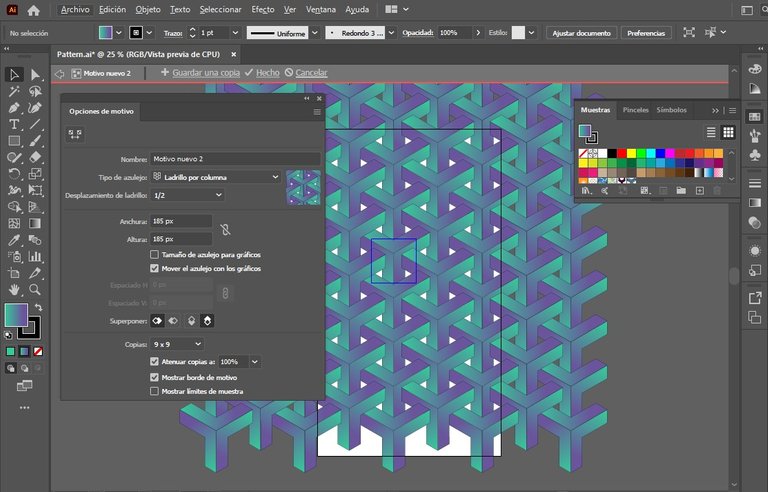
- I went back to where it says object, pattern, make, I changed the options for brick per column, with a 1/2 offset, I changed width and height, I left the options the same except in copies that I marked in 9x9.
- Volví donde dice objeto, motivo, crear, cambié las opciones por ladrillo por columna, desplazamiento 1/2, cambié altura y anchura, dejé las opciones iguales excepto en copias que las marqué en 9x9.
- And that's it, you can now use the new pattern we created using the same shape.
- Y ya está listo, ahora ya pueden usar el nuevo patrón que hemos creado usando la misma forma.
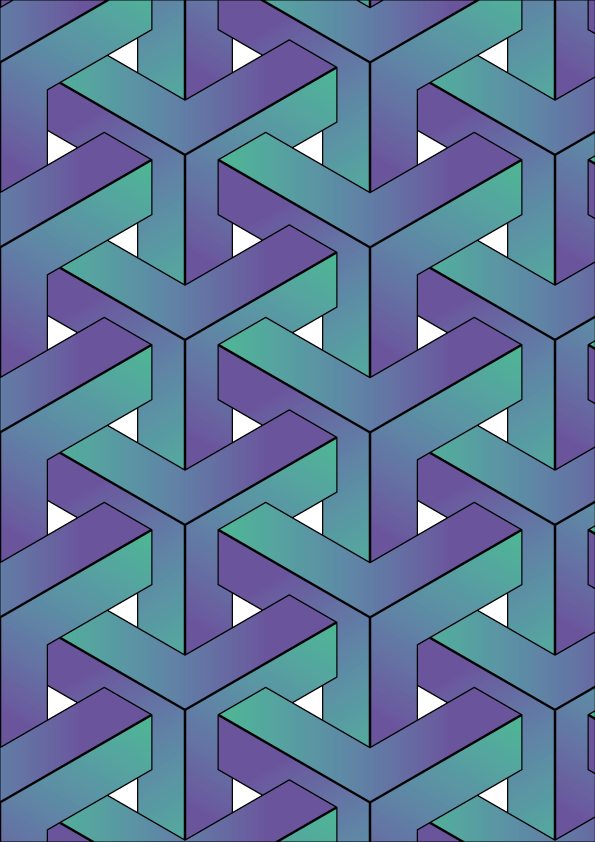
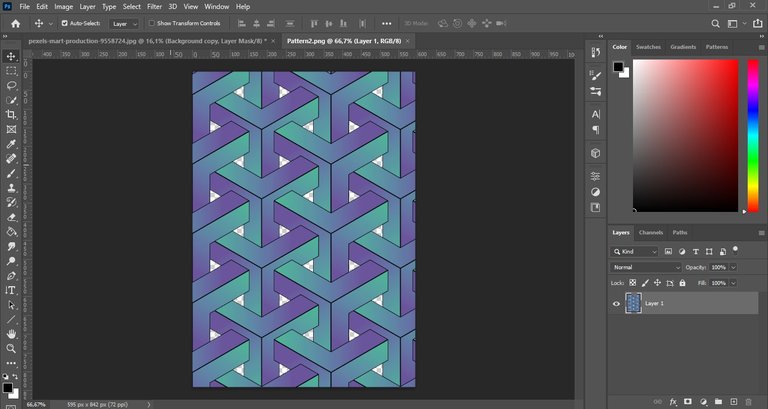
Pattern:
Patrón:
We are done with the part of the geometric patterns, now comes the step that in my opinion is faster, which is to add the pattern to a shirt.
Terminamos con la parte de los patrones geométricos, ahora viene el paso que en mi opinión es más rápido, que es agregar el patrón a una camisa.
Agregando el patrón a la ropa
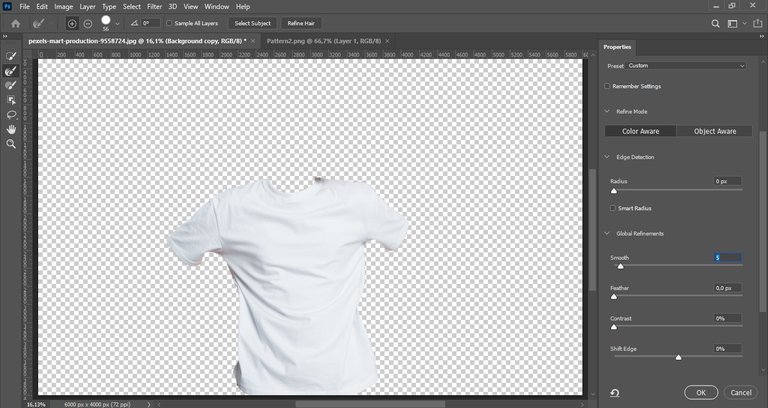
- The steps are shorter here, first we go to quick select and select the entire area of the shirt.
- Los pasos son más cortos aquí, primero vamos a selección rápida y seleccionamos toda el área de la camisa.

- We have to duplicate the layer since one will be deleted except the shirt, once we have the shirt selected, we go up where it says "select and mask", I usually smooth it out a bit.
- Tenemos que duplicar la capa ya que se borrará una menos la camiseta, una vez que tenemos la camiseta seleccionada subimos donde dice "seleccionar y enmascarar", yo suelo suavizarlo un poco.
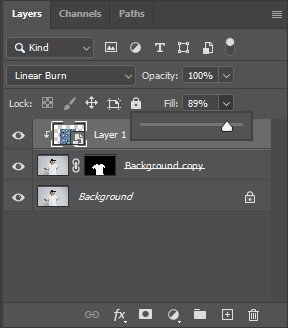
- Then we click "Ok", go to the panel and create a clipping mask on the copy.
- Entonces damos clic en "Ok", vamos al panel y creamos una máscara de recorte en la copia.

- We open the pattern that we want to put on the shirt and drag it into the window where the photo is.
- Abrimos el patrón que queremos poner en la camisa y lo arrastramos dentro de la ventana donde está la foto.
- We are going to right click and turn it into a smart object, press CTRL + T, and adjust the size of the image.
- Vamos a hacer clic derecho y convertirlo en un objeto inteligente, presionar CTRL + T y ajustamos el tamaño de la imagen.
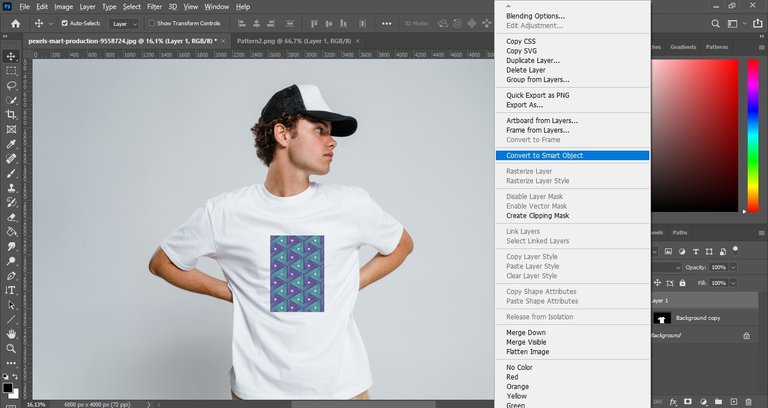
- Once we have done this, we right click on the layer again, and select create clipping mask.
- Una vez que hayamos hecho esto, hacemos clic derecho sobre la capa nuevamente, y seleccionamos crear máscara de recorte.
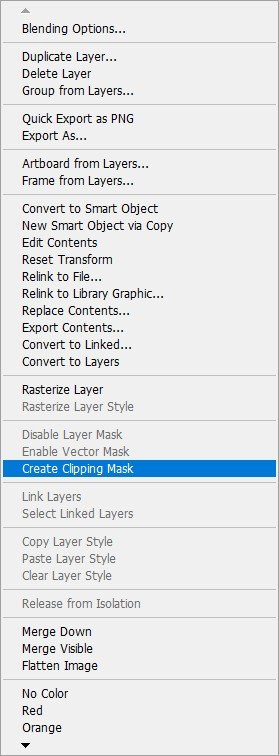
- Finally we go to the layer options and we click on linear burn and thus the pattern will be attached to the shirt.
- Finalmente vamos a las opciones de capa y le damos a subexposición lineal (creo que es así en español) y así el patrón quedará pegado a la camiseta.
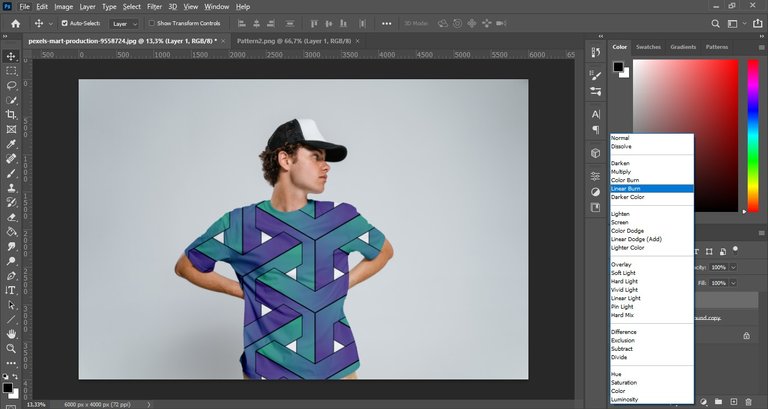
Note: I lowered the fill a bit to give it a more real touch
Nota: Le bajé un poco al relleno para darle un toque más real
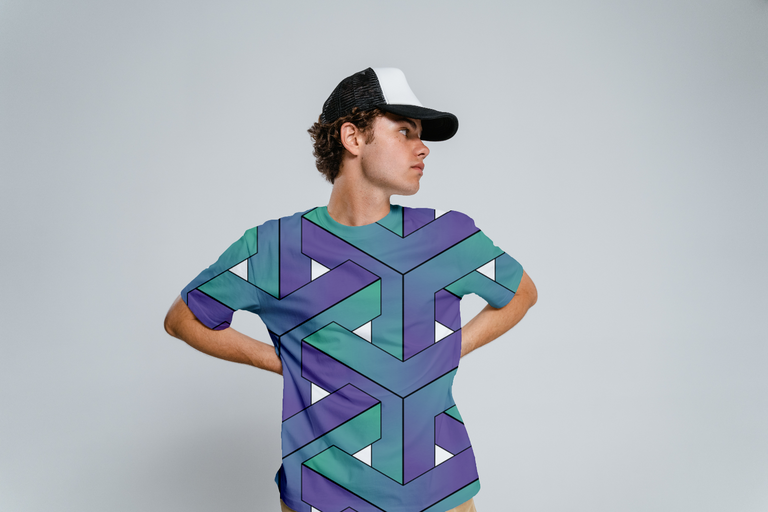
In the end it was like this:
Al final quedó así:
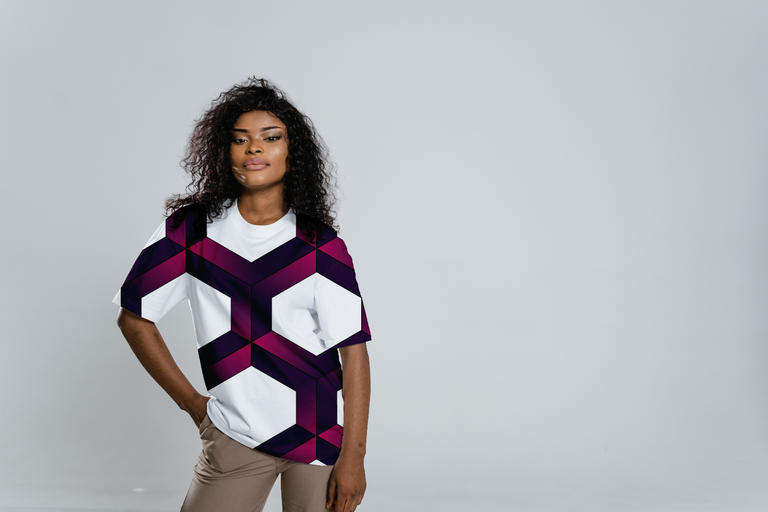
Here is another example with the pattern we made first:
Aquí otro ejemplo con el patrón que hicimos primero:
It was a somewhat long explanation but it was worth it, thank you very much for your attention!
Fue una explicación algo larga pero valió la pena, ¡Muchas gracias por su atención!
Good job.
Thank you so much!
Congratulations @noctav! You have completed the following achievement on the Hive blockchain and have been rewarded with new badge(s):
Your next target is to reach 2500 upvotes.
You can view your badges on your board and compare yourself to others in the Ranking
If you no longer want to receive notifications, reply to this comment with the word
STOPCheck out the last post from @hivebuzz:
El patrón es genial, realmente me gustó ^^~ además el tutorial te quedó súper bien 💜 hiciste un trabajo excelente!!!
¡Styyttttchhh! Gracias, gracias :'3 me esforcé mucho nwn, fue la primera vez que hice un patrón como tal 😎👌🏻 hay cosas en estos programas que pienso que ayudarían a muchos (ya que en el diseño gráfico, es importante saber esto, puedes vender diseños para ropa o puedes trabajar haciendo mock-up n.n) así que quién sabe si hay algún estudiante o persona que quisiera aprender y bueno, aquí está una forma corta para explicar uwu, gracias por tu comentario ❤️ ¡me animas! Justamente estoy enferma y por eso no he publicado 😔 fkdkxkf ten un buen día 👌🏻😎
No hay problema ^^~ es un gusto 💜 lo puedo imaginar, lo que me sorprende es que sea el primer patrón que haces 🤍 no lo parece, al ir viendo el post parecía que sabías perfectamente lo que hacías 😉 como si fuera algo que sueles hacer.
Coincido~ realmente son muchas las cosas que se pueden hacer ^^ además explicaste y mostraste todo de forma tan sencilla que dan ganas de intentarlo ♡︎ o al menos así me pasó a mí 💜 me alegra que aprecies mi comentario, también que te sientas animada de alguna manera 🥺 Ellie y yo también estamos enfermas 😔 espero que mejores pronto 🤍 gracias e igualmente.
¿Están bien Ellie y tú? 😔, espero que se recuperen pronto u.u <3, hoy mi padre me ha traído medicinas y ahorita ando bastante bien, gracias por preocuparte y gracias por decirme que iba segura 😂, la verdad estaba segura porque me sabía la teoría (pero como siempre, la práctica es otra) así que apliqué la ley de la confianza, en términos balurdos pero que me encanta usar de ejemplo, me refiero a esto:
Ellie ha mejorado mucho, ya dejó de vomitar y está comiendo 😌 yo sigo mal pero me alivia saber que ella se siente mejor 💕 gracias ^^~ también espero nuestra pronta recuperación, eso te incluye a ti ♡︎ por supuesto 😉
Eso fue lo que logré percibir (me refiero a la seguridad) 💜 conocer la teoría puede ser de ayuda, por más que la práctica es una historia totalmente diferente 😅 no tenía idea que existiera un vídeo así 😂 ya hablando en serio, es bien sabido que la confianza bien aplicada trate muy buenos resultados 🤍 que desde mi punto de vista, fue lo que ocurrió en tu caso ^^♡︎ seguro te mencionaré si lo hago, gracias por el tutorial~
La pequeña Ellie va mejorando, ¡eso es bueno!, ya va la miembro chiquita de la familia recuperándose uwu, espero que hoy estés mejor ❤️ poco a poco me estoy mejorando, creo que pronto haré otro tutorial n.n o lo que se me venga a la cabeza haha, últimamente he tenido ideas (ha de ser porque me estoy empezando a sentir bien), ese vídeo siempre me da risa, sobretodo la parte del baile HAHAHAHA, y gracias, nuevamente por todo ❤️
Si ^^~ ¡Muchas gracias! ♡︎ ya volvió casi por completo a ser la misma de siempre 💗 yo me siento mucho mejor, gracias 🌸💕 me alegra saber que también tu salud también está mejorando, eso es genial.
Si, puede ser ^^ qué bueno que tengas nuevas ideas~ estaré esperando próximos tutoriales 😉 gracias a ti 💜