Errores que tuve al hacer uñas en POLYGEL | Mistakes I made when doing nails in POLYGEL [ ESP - ENG ] @odedgran.art
SPANISH
Hola a toda la comunidad de Hivers! Tenía muchas ganas de publicar algo que fuera de utilidad para todas las personas que apuestan a la estetica desde casa y no había encontrado de que hablar hasta ayer... que hice mis primeras uñas en polygel (Afortunadamente para mi misma) Así que decidí venir a contarles mi experiencia y a hablarles un poco acerca de esos errores de novatos que podemos cometer las primeras veces que empezamos a trabajar con este material... Espero que lo disfruten y que si apuestan en algún momento por probar esta técnica me dejen sus bellos diseños en los comentarios <3
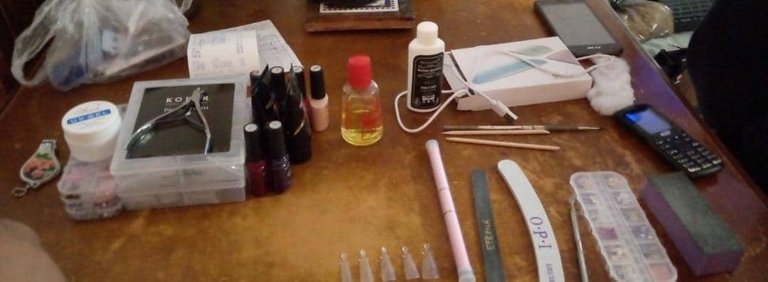
Antes de empezar, quiero contarles que la inversión inicial de los materiales, sin tener en cuenta la acetona, la lampara led, el top, la base y 3 pinturas que ya tenía para semipermanencia, fue de 25$ USD Arme mi kit con lo siguiente:
- 2 estuches que traen las uñas molde de polygel, yo compre cuadrada y ovalada
- 4 paquetes de predería
- 2 pinturas semipermanentes
- 1 Slip solution para modelar
- 1 pincel con pala para polygel
- 4 limas
- 6frascos de gel de construcción
- corta cuticula
- 2 potecitos de Polygel
Cosas que ya tenía en casa:
- Lampara Led
- Acetona
- Frasco para Slip Solution
-3 Pinturas semipermanentes
-Base y Top
Bien, con los materiales ya descritos, procedo a hablar acerca de toooodos esos errores que tuve en el proceso de crear mi primera experiencia con polygel y de como eso afectaron los resultados de mi manicura.

Antes de hacerme las uñas, pensaba que solo existian 2 tipos de estilos: redondo y cuadrado. Y lo que quise hacer desde un principio fue todas las uñas ovaladas, como si se tratara de una vampireza jsjsj lo cúal fue una expectativa muy alta, considerando que fue mi primera vez con este material.
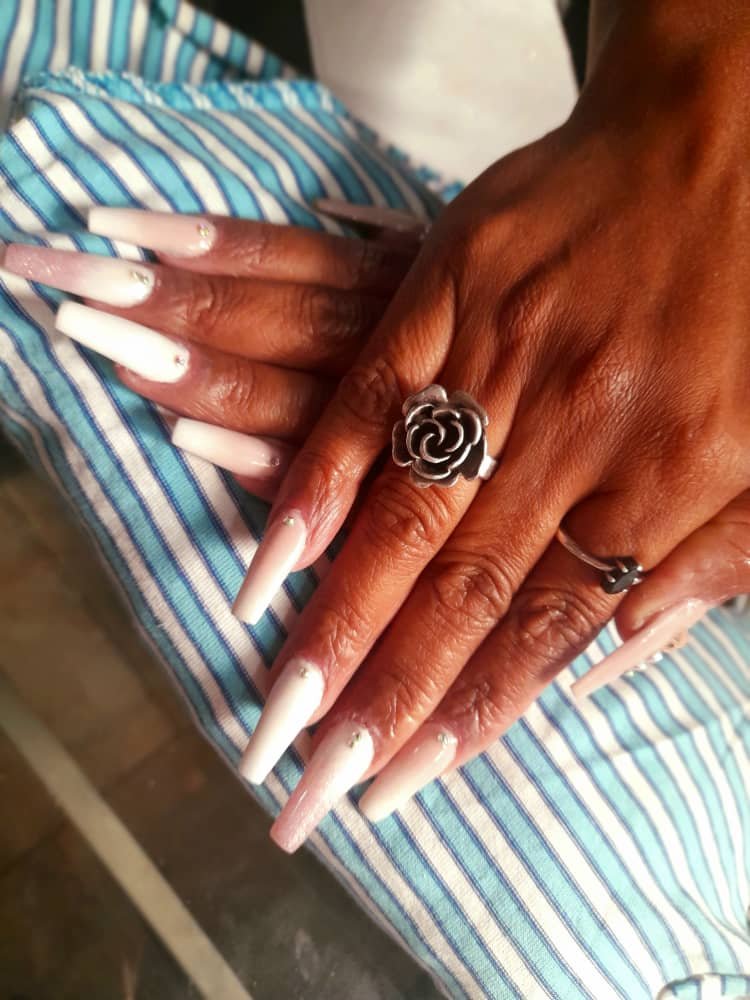
Luego de hacermelas descubrí que existian todos estos estilos que muestro en la imagen de arriba y lamenté mucho no haber investigado un poco más antes, por que quizá sabiendo esto habria podido definir que estilo quería que se pareciese más a esas uñas de vampireza que yo deseaba... y habría buscado un tutorial más especifico por lo menos para que me quedaran como esto:
Wow, yo creo que esto es un super mito que nadie explica cuando emiezas en este mundo. Literalmente todos los tutoriales te dirán "Hazlas gruesas, coloca suficiente polygel, no dejes espacios" y esto cuando estás empezando puede ser confuso e incluso frustante.
Ya que al colocar demasiado polygel (Por ejemplo, más de una gota) te ves obligada a usar más Slip Slution para modelarla - ojo - tieniendo en cuenta que es un producto de uso rapido por que es volatil y se evapora con demasiada rapidez. obligandote a usar más producto y haciendote luchar con el pincel que se endurece de nada si entre sus cerdas queda este material.
Mencionando además que si agregas mucho polygel, no aplicas un buen modelado y de paso presinas demasiado, pueden ocurrir tres cosas que experimenté tratando de mantener toda la paciencia del mundo:
1- Tarda más en secar y puede llegar a despegarse
2- Puede que cuando retires el molde te hayas dado cuenta de que no cubriste por completo la uña, pero ya se secó el polygel y tienes que repetir el proceso de modelar, etc.
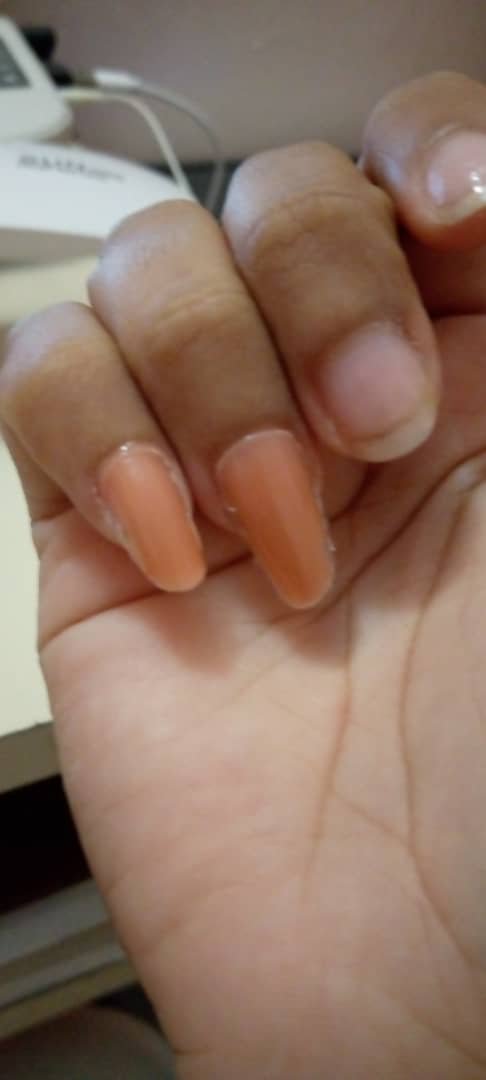
3- Puede pasarte que te quede como un pegoste, como si hubieses puesto una uña postiza de las que quedaban mal pegadas y casi siempre es dificil arreglarlo, incluso con la lima.
Sí, algo que me ocurrió es que me confié y pensé que si limaba en cualquier dirección obtendría los resultados que deseaba y evidentemente esta no fue una buena decisión. Por eso es tan importante definir que estilo quieres recrear... Algo que se nota muchisimo al final del proceso, a parte del tratamiento con polygel es el limado.
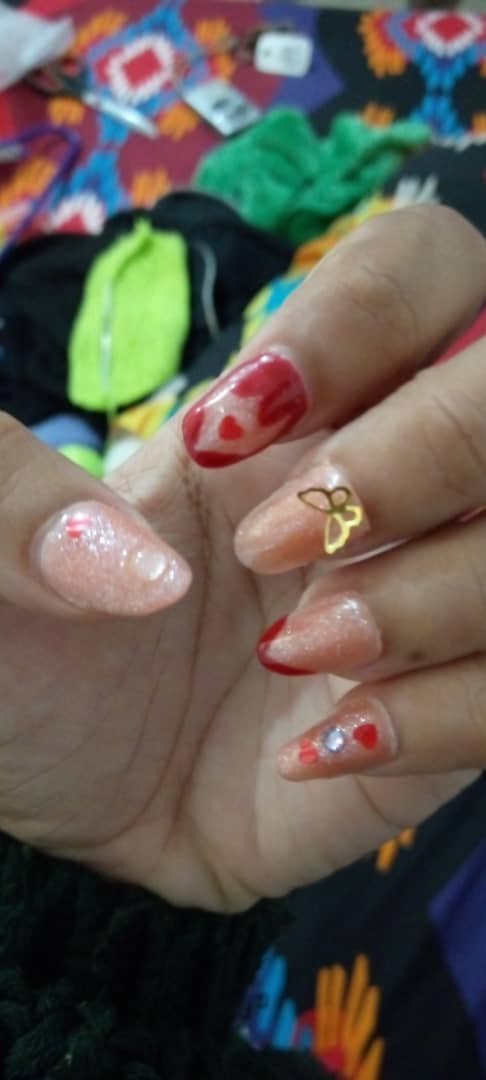
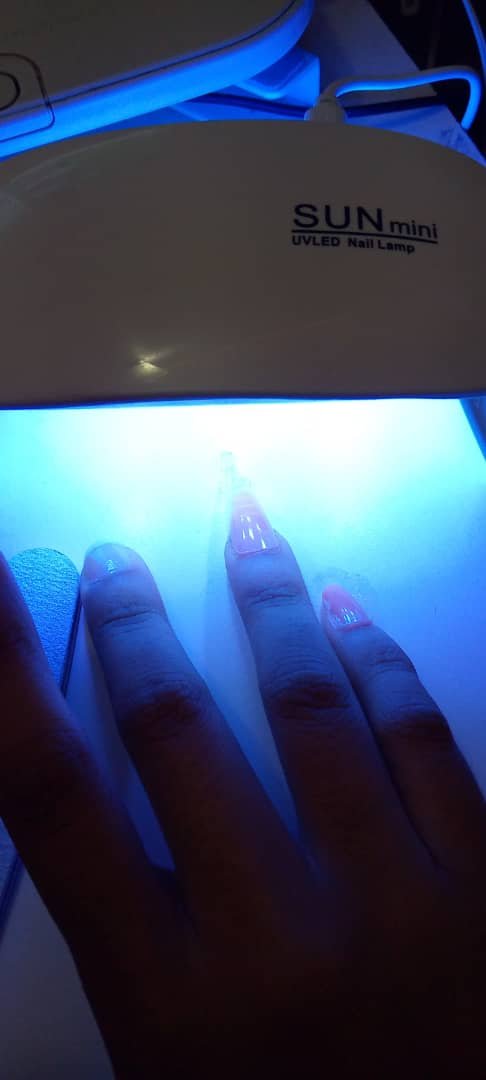
De hecho en la foto de portada en este post puede verse que en una sola mano tengo tres estilos completamente diferentes y para una persona como yo que está comenzando, esto puede ser un error gracioso... donde la idea es irlo perfeccionando poco a poco, hasta que llegue un momento en el que cada uña te quede exactamente como lo pensabas.
Esto me dijo mi papá cuando le mostré las uñas, además agregó que "menos mal metí la pata conmigo y no con un cliente de verdad" jsjsjsj aúnque no aguantaba la risa y la vergüenza, le di la razón... ya que si más adelante quiero dedicarme a esto no puedo cometer estos errores en clientas que buscan un alivio estetico... pero en eso ya pensaré en el futuro.
Aunque tuve muchos errores técnicos al comenzar y me frustre en varias ocasiones del proceso, no me arrepiento de haber invertido en los materiales y en la experiencia. Seguro seguiré cometiendo errores en el futuro aunque cada vez más pequeños hasta hacerlos casi imperceptibles.
De esto aprendí que la paciencia es primordial, que investigar es clave y que alicar polygel en uno mismo es más complejo que en otras personas, pero sobre todo que no debo ser tan exigente con algo que aún estoy descubriendo. Quedé con ganas de practicar más y por eso le pedí a mi hermana y a mis amigas que sean mis modelos en cualquier momento que puedan... ya que la practica hace al maestro
Amaría que si conocen a alguien que esté incursionando en este mundo maravilloso de la belleza, le hablen de estos posibles errores para que se informen y su camino esté menos lleno de trabas. Igual como me dice mi madre @geronimamunoz tambien que puedan hacer un curso para profesionalizarse y lo mejor, que aprendan de alguien que ya sabe de todo esto.
Cuando me quite las uñas de polygel les haré un tutorial y aprovecharé de contarles mi experiencia y mis posibles errores quitandomelas <3

ENGLISH
Hello to all the Hivers community! I really wanted to publish something useful for all the people who bet on aesthetics from home and I had not found what to talk about until yesterday... I did my first nails in polygel (Fortunately for myself) So I decided to come to tell you my experience and to talk a little about those rookie mistakes that we can make the first times we start working with this material... I hope you enjoy it and if you bet at some point to try this technique leave me your beautiful designs in the comments <3
Before I start, I want to tell you that the initial investment of the materials, without taking into account the acetone, the led lamp, the top, the base and 3 paints that I already had for semi-permanence, was 25$ USD I put together my kit with the following:
- 2 cases that bring the polygel nail molds, I bought square and oval.
- 4 packs of prepermanent nail polish
- 2 semi-permanent paints
- 1 Slip solution for modeling
- 1 brush with shovel
- 4 files
- 1 polygel brush with paddle
- 4- 4 files
- 6 bottles of building gel
- cuticle cutter
- 2- Polygel cutter
- 2 small pots of Polygel
Things I already had at home:
- Led lamp
- Acetone
- Slip Solution bottle
-3 Semi-permanent paints
-Base and Top
Well, with the materials already described, I proceed to talk about all those mistakes I had in the process of creating my first polygel experience and how that affected the results of my manicure.
Before I did my nails, I thought there were only 2 types of styles: round and square. And what I wanted to do from the beginning was all oval nails, as if it was a vamp jsjsj which was a very high expectation, considering it was my first time with this material.
After doing them I discovered that there were all these styles that I show in the image above and I regretted a lot not having researched a little more before, because maybe knowing this I would have been able to define what style I wanted that looked more like those vampire nails I wanted... and I would have looked for a more specific tutorial at least to get them like this:
Wow, I think this is a super myth that no one explains when you start in this world. Literally every tutorial will tell you "Make them thick, lay down enough polygel, don't leave gaps" and this when you're just starting out can be confusing and even frustrating.
Because if you put too much polygel (i.e. more than a drop) you are forced to use more Slip Slution to model it - mind you - keeping in mind that it is a quick use product because it is volatile and evaporates too quickly, forcing you to use more product and making you struggle with the brush that hardens for nothing if this material remains between its bristles.
Also mentioning that if you add too much polygel, don't apply a good modeling and in the process you press too much, three things can happen that I experienced trying to keep all the patience in the world:
1- It takes longer to dry and it may peel off.
2- When you remove the mold you may realize that you didn't cover the nail completely, but the polygel has already dried and you have to repeat the modeling process, etc.
3- It can happen to you that you have a sticky look, as if you had put a false nail, and it is almost always difficult to fix it, even with the file.
Yes, something that happened to me is that I got overconfident and thought that if I filed in any direction I would get the results I wanted and evidently this was not a good decision. That's why it's so important to define what style you want to recreate... Something that is very noticeable at the end of the process, apart from the polygel treatment is the filing.
In fact in the cover photo in this post you can see that in one hand I have three completely different styles and for a person like me who is just starting out, this can be a funny mistake... where the idea is to perfect it little by little, until you get to a point where each nail looks exactly as you thought it would.
This is what my dad told me when I showed him my nails, he also added that "thank goodness I messed up with me and not with a real client" jsjsjsj even though he couldn't stand the laughter and embarrassment, I agreed with him... because if I want to do this in the future I can't make these mistakes with clients who are looking for aesthetic relief... but I'll think about that in the future.
Although I had many technical mistakes when starting out and got frustrated at various times in the process, I don't regret investing in the materials and experience. I'm sure I will continue to make mistakes in the future although smaller and smaller until they become almost imperceptible.
From this I learned that patience is paramount, that research is key and that polygel laminating on oneself is more complex than on other people, but above all that I should not be so demanding with something that I am still discovering. I wanted to practice more and that's why I asked my sister and my friends to be my models any time they can? since practice makes perfect
I would love that if you know someone who is venturing into this wonderful world of beauty, tell them about these possible mistakes so they can inform themselves and their path will be less full of obstacles. Just as my mother @geronimamunoz tells me, I would also like them to take a course to become more professional and the best thing is to learn from someone who already knows about all this.
When I remove my polygel nails I will do a tutorial and I will take the opportunity to tell you my experience and my possible mistakes removing them <3
YouTube: https://www.youtube.com/channel/UCKW8nmaHaRfnUNJ0o6buTGQ
TikTok: @oded_gran.art
Discord: Oded Granado #2075
PARA DONAR:
Zinli: [email protected]
PayPal/ [email protected]
CREDITOS:
Foto: Edición por mi en Canva
Estilo de uñas: Pinterest
Uñas de referencia: Me la pasaron por whatsapp especialmente para este post
Paso a paso se anda lejos... sigue adelante, practica más y más. Que sigas en éxitos @odedgran.art
Amén! Así es!
A true nail art class, thanks for sharing with us and choosing the Hive Nails community!
!PGM !PIZZA !CTP !LUV !PIMP !WINE
You must be killin' it out here!
@shiftrox just slapped you with 1.000 PIMP, @odedgran.art.
You earned 1.000 PIMP for the strong hand.
They're getting a workout and slapped 1/1 possible people today.
Read about some PIMP Shit or Look for the PIMP District
BUY AND STAKE THE PGM TO SEND A LOT OF TOKENS!
The tokens that the command sends are: 0.1 PGM-0.1 LVL-0.1 THGAMING-0.05 DEC-15 SBT-1 STARBITS-[0.00000001 BTC (SWAP.BTC) only if you have 2500 PGM in stake or more ]
5000 PGM IN STAKE = 2x rewards!
Discord
Support the curation account @ pgm-curator with a delegation 10 HP - 50 HP - 100 HP - 500 HP - 1000 HP
Get potential votes from @ pgm-curator by paying in PGM, here is a guide
I'm a bot, if you want a hand ask @ zottone444
Congratulations, @shiftrox You Successfully Shared 0.100 WINEX With @odedgran.art.
You Earned 0.100 WINEX As Curation Reward.
You Utilized 1/1 Successful Calls.
Contact Us : WINEX Token Discord Channel
WINEX Current Market Price : 0.200
Swap Your Hive <=> Swap.Hive With Industry Lowest Fee (0.1%) : Click This Link
Read Latest Updates Or Contact Us
I gifted $PIZZA slices here:
@shiftrox(3/15) tipped @odedgran.art (x1)
Please vote for pizza.witness!
https://twitter.com/1884771912/status/1623127791746048000
The rewards earned on this comment will go directly to the people( @shiftrox ) sharing the post on Twitter as long as they are registered with @poshtoken. Sign up at https://hiveposh.com.