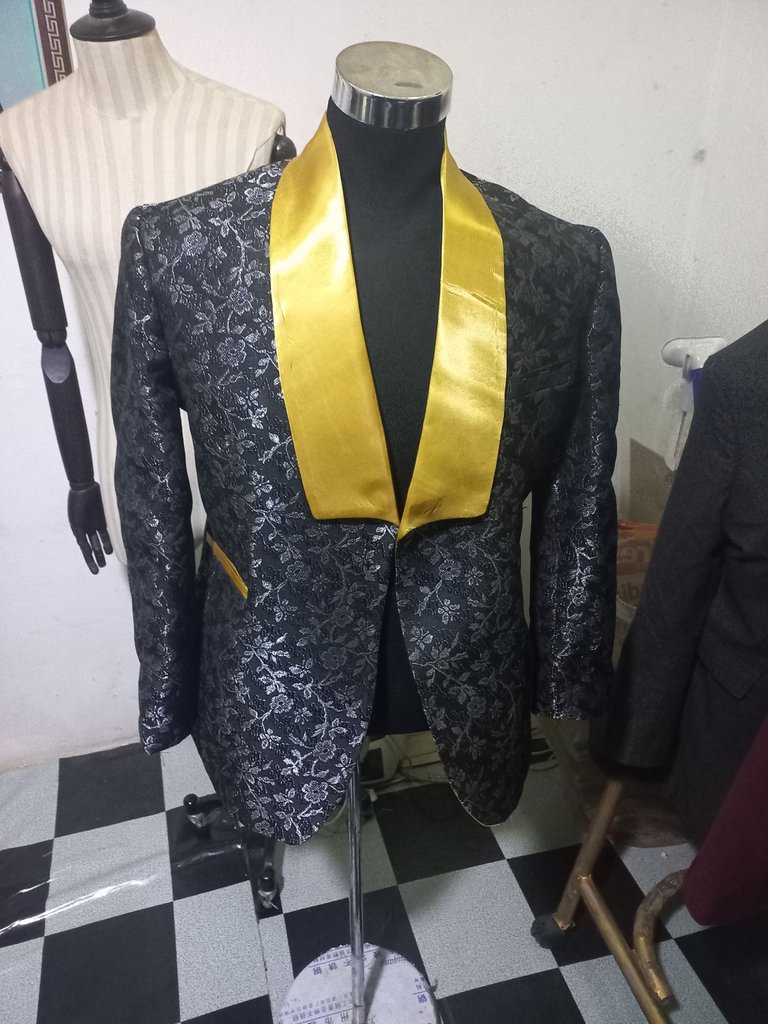
HOW I MADE A BLACK SHAW LAPEL TUXEDO WITH TOUCH OF GOLD FOR MY FRIEND FOR HIS BIRTHDAY SHOOT
Good morning everyone, its my pleasure to be here again this morning to share with you my work. Am always happy to be here, because your comments and words of encouragement has really being helpful, it builds confidence in me and make me believe in myself. Am so grateful for that.
Suit is very complex and technical, that's why we don't have much designer making suit here in my community, it's a time consuming work, I spent a whole day making this, the time I could have used in making couple of trousers and shirts. So people run away for the stress and it technicalities. So it's not an easy task but it's what I've chosen anyways and am happy doing it
So this morning I will be sharing with you how I made this shaw lapel suit using damask and gold satin as its flap and pocket.
I posted something similar some few days ago but it's a tuxedo suit and with black satin, a friend saw that and want something like that too but with little changes which is making the flap and pocket a gold colour.
I was thinking, hope gold will go well with this fabric, he insisted and eventually it came out so beautiful.
MATERIALS USED
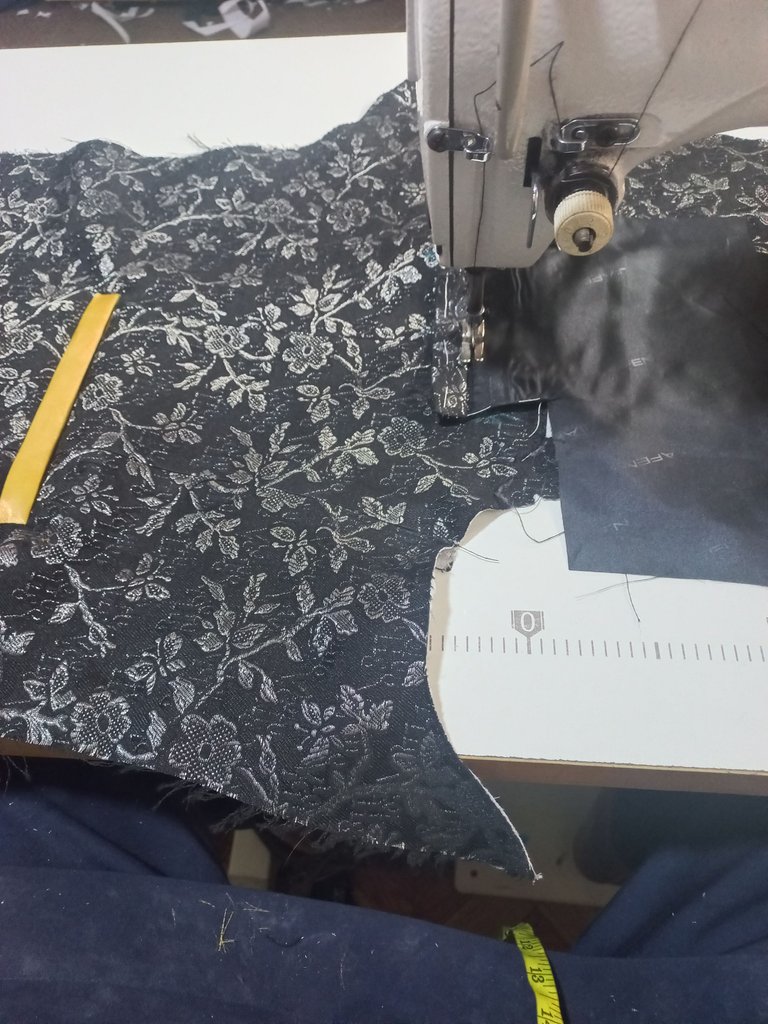
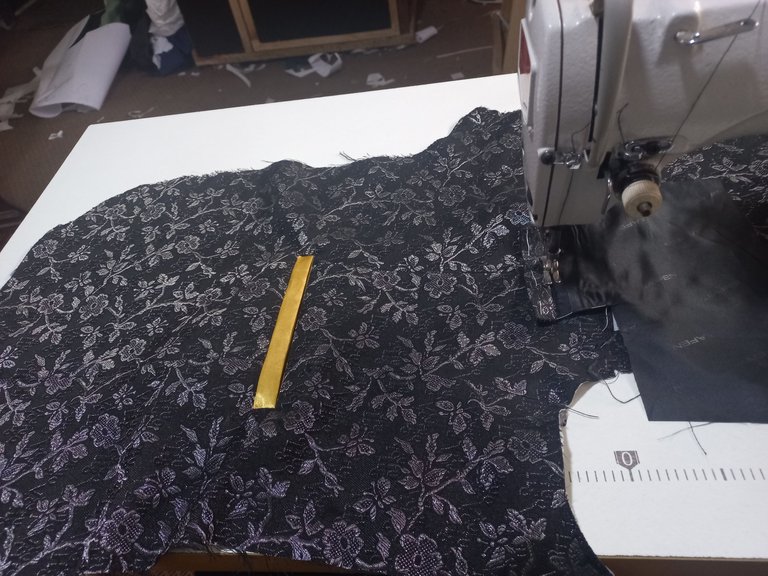
- BLACK FLOWERY DAMASK
- GOLD SATIN
- HAIR STAY
- LINEN
- COLLAR STAY
- WADEN
- SHOULDER PAD
- BUTTONS
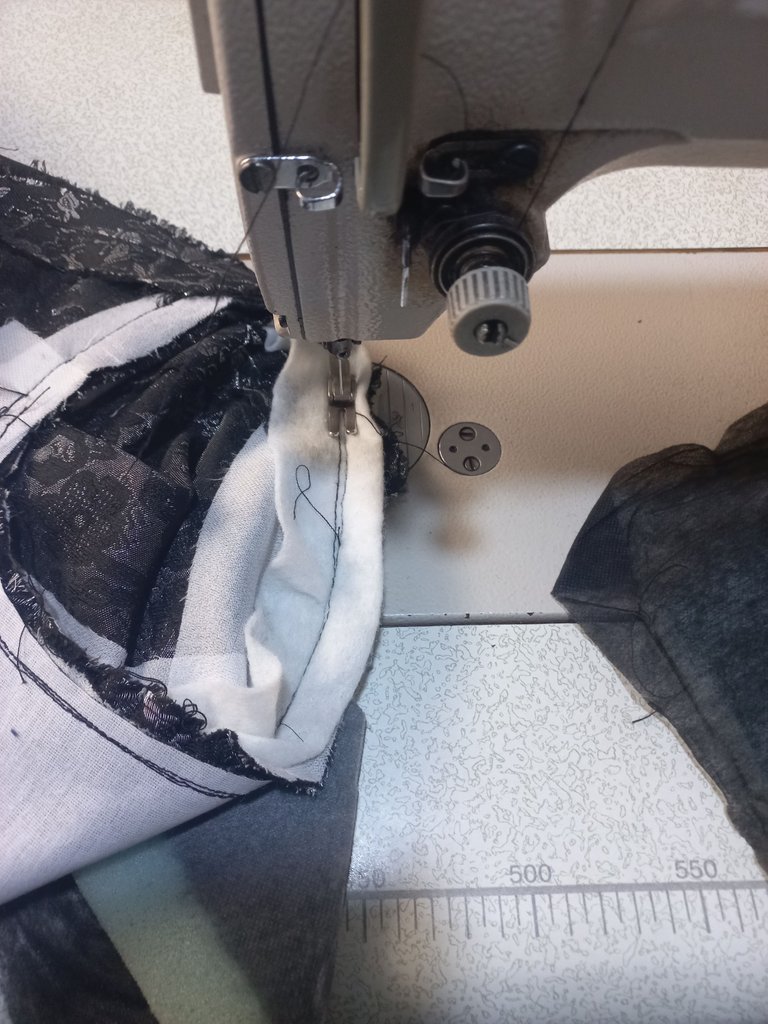
I couldn't take much pictures cause it was a rush work, though some vital pictures was taken.
CUTTING AND SEWING PROCESS
Like I explained in my previous post, how I made a tuxedo suit, the same procedure is repeated. So I won't be dwelling much on that.
I used 5 patterns in making my suit which are
- front
- back
- Side
- sleeve which comprises of 2
After cutting, making used of these patterns,then I applied hair stay and I start my sewing.
Firstly I joined the sleeves, the back, the sides to the front and iron rigorously. Then I fixed the pocket, and joined the front and side to the back, ironed again and fixed the sleeves and the flap.
After cutting the fabric into shape, this same way you replicate when cutting the linen though some inches will be taken off, like that of sleeves.
So after joining the suit then you joined the linen separately first then to the body, I mean the suit itself
After that had been done, I did the hemming and ironed to shape.
FINAL LOOK

Wow lovely @olubato my real boss not audio one ooo 😂 this suit is really pretty honestly you're doing well sir 😊 and I love the yellow or gold fabric you attached to the black to lighten up beautiful idea, thanks for sharing and I'll love to have you on WhatsApp if you don't mind giving me your WhatsApp number☺️
Thanks so much boss, @smilestitches my hands up. 08167858878 can't wait
😂 you ehhh 😂
You make it look so easy but I still see it complicated, I congratulate you for your achievements, while I will continue to practice and not get eaten by the machine hahaha.
Thank you so much @leslieq78 you will achieve the goal, just keep trying but please eat 😆
That is fabulous! My mother can tailor a man's suit jacket, but I much prefer dressmaking. Tailoring is very unforgiving of mistakes--everything has to be just perfect! With a dress, I can find ways to redeem any little mistakes. You, sir, are a master tailor. !BBH
Sincerely it has to be just perfect, thank you so much for this comment, it elevates my spirit.
Because this is such an awesome post, here is a BBH Tip for you. . Keep up the fantastic work
Thank you
Again the fabric of my dreams hahaha. I love it! That touch of yellow lapels gives it the great distinctive touch. Well done 🔥❤️.
😆 thank you so much, the client actually bring the idea of yellow lapel and its actually nice
Beautiful work, success and many blessings
Thank you so much
Que hermosa chaqueta , me encanta.