Colocando Cintas LED dentro de los faros del carro // Placement of LED strips inside the car's headlights [ESP-ENG]
Hola amigos, esta semana mi hijo y yo hemos tratado de mejorar las luces de los faros de su carro, comenzando con el pulimento de las pantallas, proceso que publiqué hace unos días, Ver más Para poder pulir las pantallas de los faros, tuve que remover las pantallas, porque la idea era pulirlas por dentro y por fuera, les cuento que esta es la primera vez que remuevo unas pantallas de faros, y de verdad este trabajo valió la pena porque logré remover toda la capa quemada, ahora las pantallas se ven transparentes.
En el post anterior no les mostré el momento de unir la pantalla con la base del foco, porque mi hijo quiso aprovechar para colocar dentro de cada faro unas luces LED tipo cinta, las cuales compró en MercadoLibre, pero todavía no habían llegado. Decidió poner estas luces con la idea de mejorar la señal de la luz de cruce. Estos LED tienen una cinta autoadhesiva para ser colocado en la parte exterior del faro, pero consideramos que ponerlas allí era un riesgo, porque lo más probable es que fueran robados, por eso preferimos ponerlos en el interior del faro.
Bueno amigos, gracias a Dios, después de esperar y esperar, por fin ayer llegaron estos led, por lo que de inmediato los colocamos en el faro y de verdad, me gustó la idea de ponerlos en la parte interna porque se ven muy bien, más que todo de noche, así que hoy compartiré con ustedes todo este proceso, que incluye la colocación de los led, la colocación de las pantallas acrílicas sobre las bases y la colocación de los faros en el carro.

GIF:
Colocando Cintas LED dentro de los faros del carro
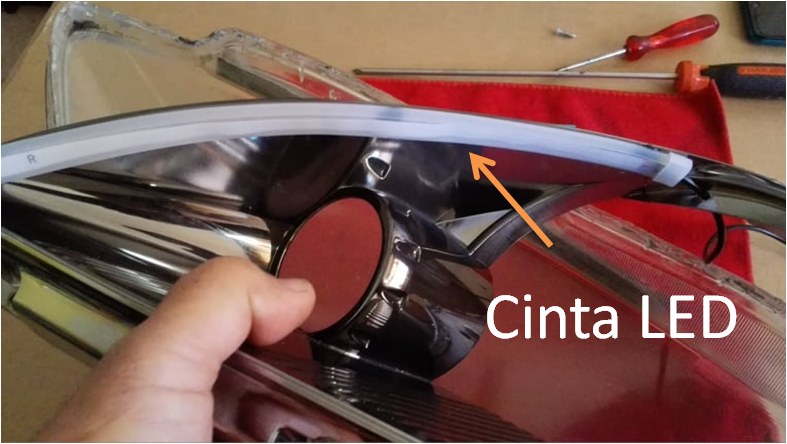
Si amigos, como les decía al comienzo, antes de colocar la pantalla sobre la base del faro, le vamos a poner unas luces LED tipo tiras flexibles, este modelo de LED posee una cinta autoadhesiva, porque vienen para ponerla en la parte externa del faro, bueno amigos con la inseguridad en que vivimos, creo que poner este LED sobre un faro es como regalárselo a los ladrones, a menos que cuando vayas de compras alguien se quede cuidando el carro, así que para evitar esto, decidimos colocar estos LED dentro del faro.
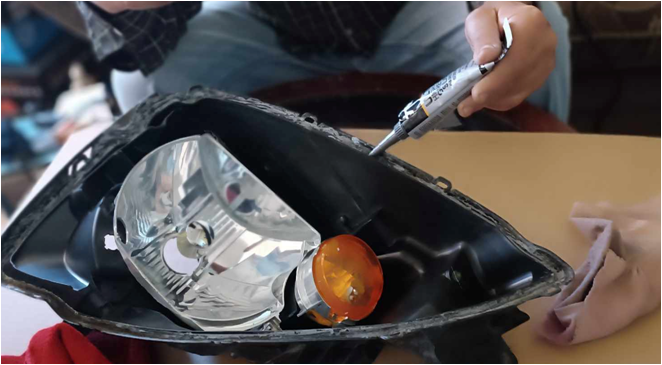
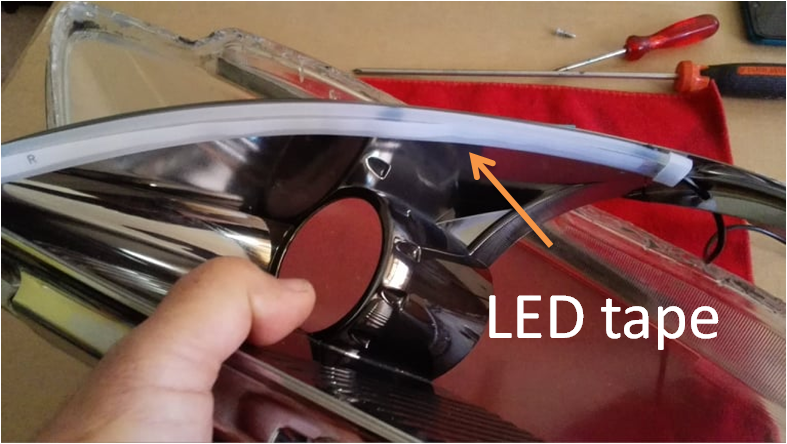
Voy a colocar la cinta LED en el borde de carcasa disipadora de luz, aunque esta cinta es autoadhesiva, le voy a poner pega epoxi, para una mayor adherencia con el faro:
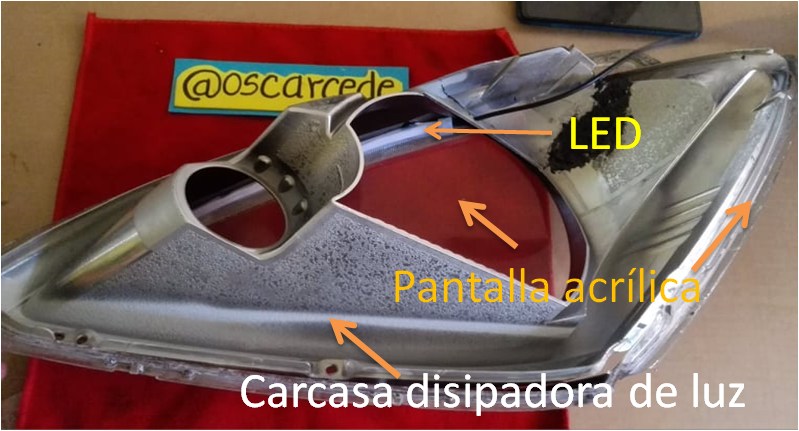
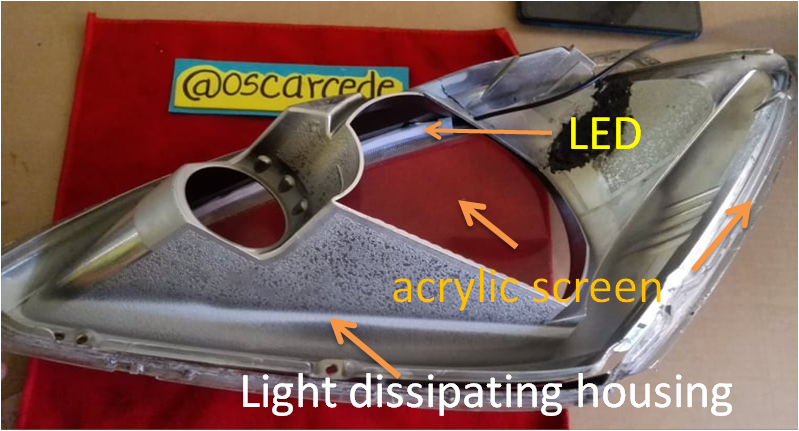
Ahora voy a colocar la carcasa disipadora de luz dentro de la pantalla acrílica del faro, estas piezas se unen mediante tornillos:
El siguiente paso será colocar la pantalla sobre la base del faro, para esto voy a utilizar sellador de silicon, voy a extender el silicon por todo el borde de la base:
Para que la pantalla acrílica quede bien adherida a la base, mientras se seca el silicon, le voy a poner una cinta adhesiva:
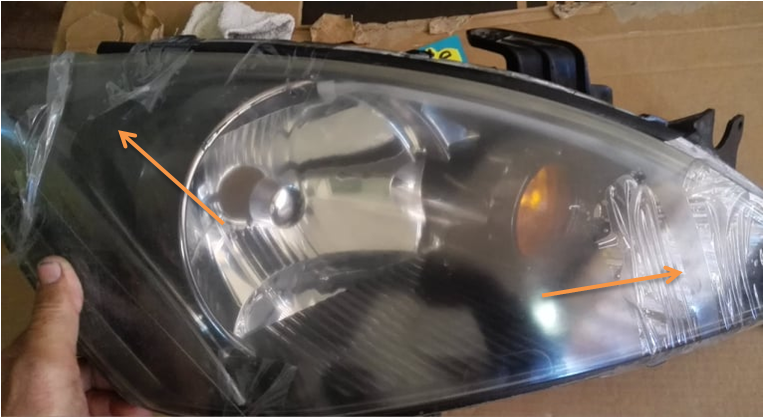
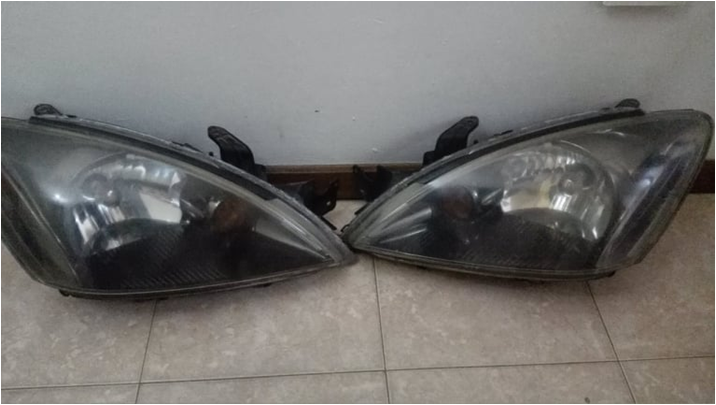
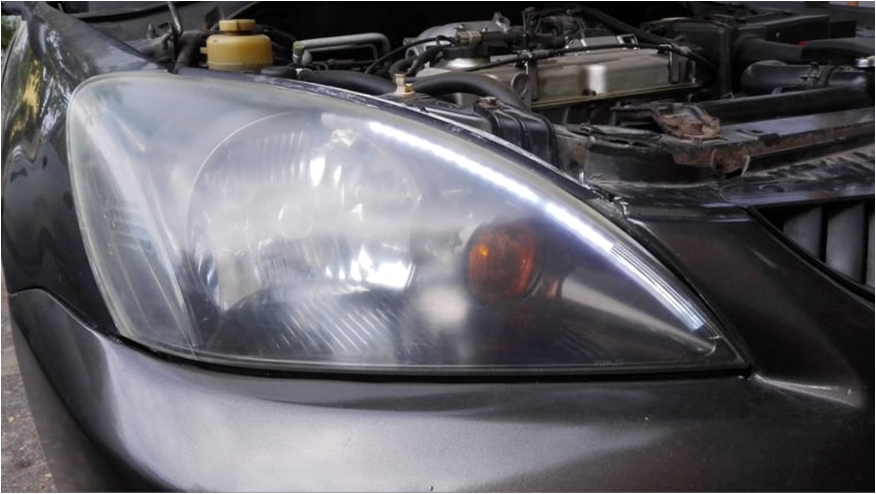
Bueno amigos, ya están listos los faros del carro:
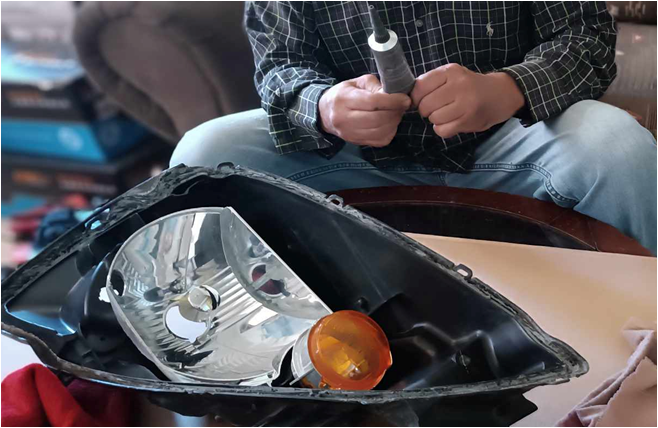
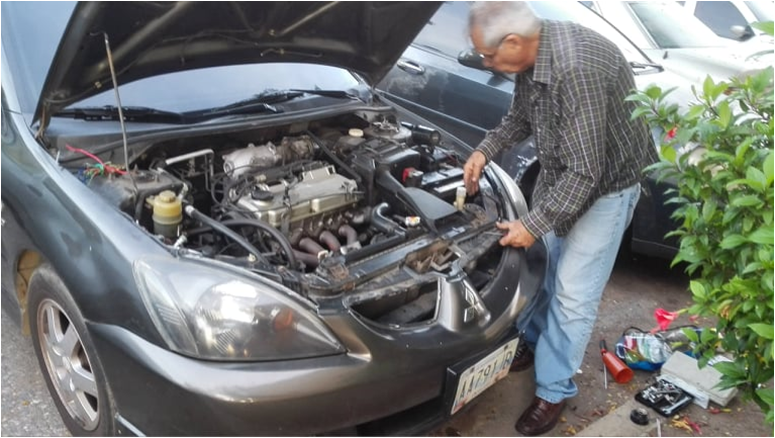
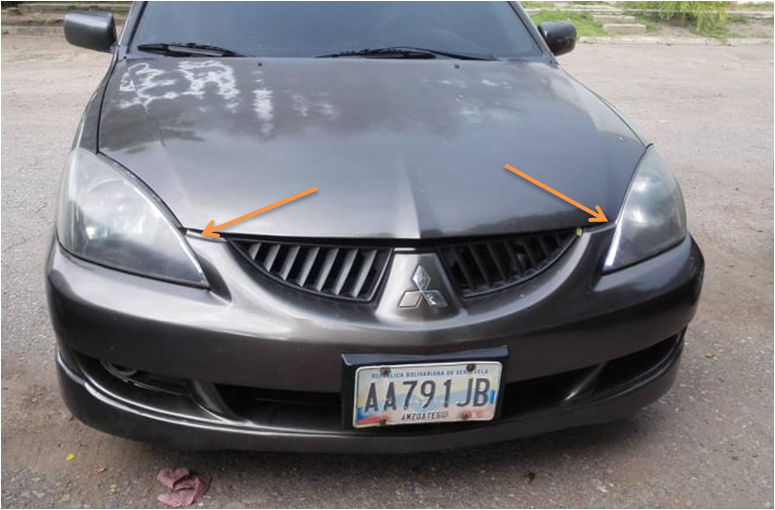
Instalando los focos en el carro:

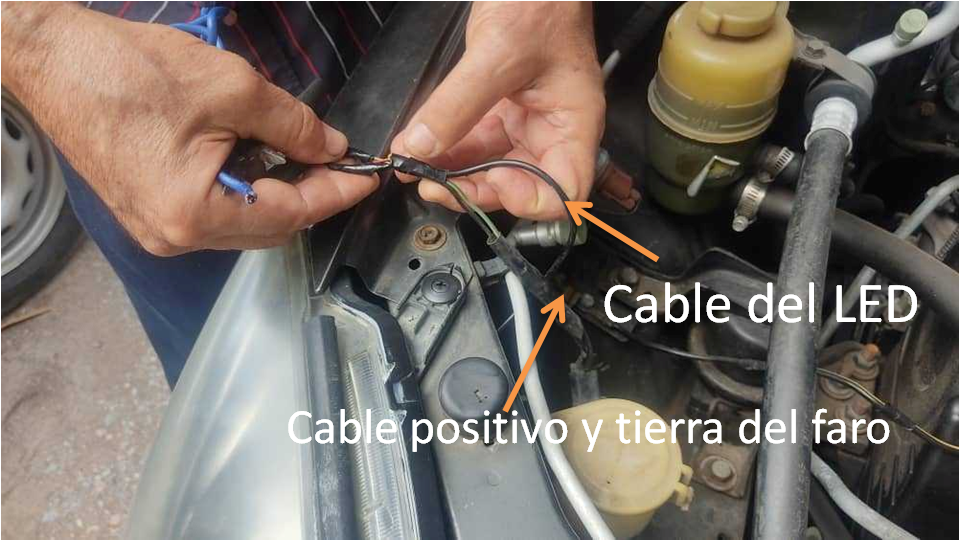
Conectando los cables de la cinta LED:
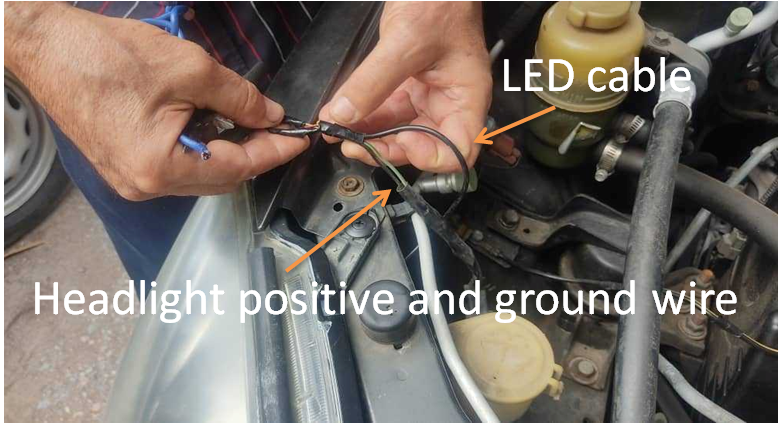
Lo siguiente será la conexión de las luces LED, estas luces tienen tres cables de color rojo, negro y amarillo. El cable negro va a tierra y el cable rojo se conecta al positivo de la bombilla de luz baja del faro, mientras que el cable amarillo se conecta al cable de la luz de cruce. En realidad, la instalación de estos LED es muy sencilla:
Después de realizar las conexiones, ahora voy a encender las luces de baja de las micas, sin encender las luces principales del faro o luces de carretera:
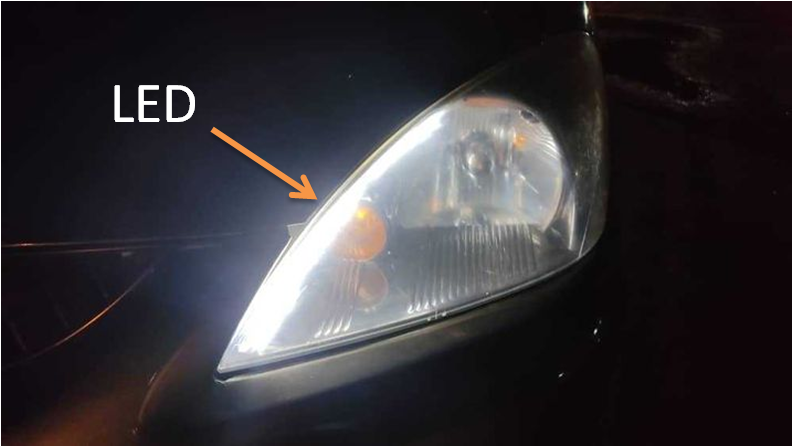
Espero que les haya gustado esta idea de poner dentro de los focos del carro las cintas LED, estas luces son secuenciales se mueven de un extremo a otro, para esta demostración, creo que ya han podido ver el "GIF" que les dejé al comienzo. Les puedo asegurar que estas luces funcionan muy bien, sobre todo de noche, de verdad, se las recomiendo.

IN ENGLISH:
Hello friends, this week my son and I have tried to improve the headlights of his car, starting by polishing the screens, a process that I published a few days ago, See more In order to polish the headlight screens, I had to remove the screens, Because the idea was to polish them inside and out, I tell you that it is the first time that I removed the headlight screens, and this work was really worth it because I managed to remove all the burnt layer, now the screens look transparent.
In the previous post I did not show you the moment of joining the screen with the base of the spotlight, because my son wanted to take the opportunity to add ribbon-type LED lights to each headlight, which he bought on the market and had not yet arrived. He decided to put these lights with the idea of improving the signal of the low beams, these LEDs have a self-adhesive tape to place on the outside of the headlight, but we considered that putting them there was a risk, because they would most likely be stolen, for That's why I preferred to put them inside the lighthouse.
Well friends, thank God, after waiting and waiting, finally yesterday these LEDs arrived, so we immediately put them in the headlight and I really liked the idea of putting them inside because they look very good, especially at night, so today I will share with you this entire process that includes the placement of the LEDs, the placement of the acrylic screens on the bases of the headlights and the placement of these headlights in the car.
GIF:
Placement of LED strips inside the car's headlights.
Yes friends, as I told you at the beginning, before placing the screen on the base of the headlight, we are going to put some flexible strip-type LED lights on it. This LED model has a self-adhesive tape, since they are to be placed on the outside of the headlight. Well friends, with the insecurity in which we live, I think that putting this LED in a headlight is like giving it to thieves, unless when you go shopping someone is watching the car, so to avoid this we decided to place these LEDs inside of the lighthouse.
I am going to place the LED tape on the edge of the light dissipating casing, although this tape is self-adhesive, I am going to put epoxy glue on it, for greater adhesion with the headlight:
Now I am going to place the light dissipating casing inside the acrylic lampshade, these pieces are joined together using screws:
The next step will be to place the screen on the base of the headlight, for this I am going to use silicone sealant, I am going to extend the silicone along the entire edge of the base:
So that the acrylic screen adheres well to the base, while the silicone dries, I am going to put an adhesive tape on it:
Well friends, the car headlights are ready:
Installation of headlights in the car:
Connecting the LED strip cables:
The next thing will be the connection of the LED lights, these lights have three cables of red, black and yellow. The black wire goes to ground and the red wire connects to the positive of the low beam headlight bulb, while the yellow wire connects to the low beam wire. In reality, the installation of these LEDs is very simple:
After making the connections, I am now going to turn on the low beams of the lenses, without turning on the main beams of the headlight or high beams:
I hope you liked this idea of putting LED strips inside the car headlights. These lights are sequential and move from one end to the other. For this demo, I think you've already seen the "GIF" I put at the beginning. I can assure you that these lights work very well, especially at night, I really recommend them.
Se han vuelto un detalle decorativo muy utilizado últimamente, yo personalmente son fan de los leds, en la universidad los utilice mucho antes de toda esta fiebre moderna.
Bueno, ustedes como jóvenes les gustan de decorar sus carros con los accesorios que están de moda, la verdad es que he estado pensando en ponerle algunos led decorativos a mi carro, más que todo en las placas, saludos, que tengas un feliz fin de semana.
Weldone boss. You are too good. I love your skill . Keep hope a good job Weldone
Thank you for your pleasant comments, good friend, as always trying to do good work, greetings.
The aesthetic changes to the car may decrease its cost by losing originality, however others see it as an added value, it depends on where you live, thank you very much for sharing, this may well be a service to offer to others and earn money.
Well, the idea of putting any accessory on a car is for personal benefit, such as improving the lights for better visibility, the idea is not to promote this accessory, it all depends on how you understand it. GREETINGS.
Hola amigo, veo que los faros han quedado muy bien, y me gustó la idea de ponerles las tiras LED por dentro, fue muy acertada esa idea , porque es como usted dice, sería trabajar para otro, en estos tiempos hasta lo más insignificante es del interés de alguien que quiere vivir a costa del esfuerzo de otros. Una vez más le digo que ha quedado muy bien el trabajo, felicitaciones y Saludos.
Hola Julio, si mi hijo tuvo una buena idea de poner estas tiras led dentro del faro, estas cintas son auto adhesiva, pero yo le puse pegamento epoxi para mayor adherencia, ya estyo pensando en ponerle estos led a mi carro, saludos
Hola, me gustó mucho como quedaron los faros con los led y lo mejor es que lo hayas podido hacer tu mismo, te felicito.
Excelente dato el que nos traes. Yo le mandé a pulir los faros de mi aveo pero la magia duró muy poco