Bird Tattoo - Neoblackwork
Hello Hive! Welcome to this new post, I hope you are very well today, and not like me that my back is dead 😅 because of what is coming next. I want to share with you a new tattoo, which I did yesterday, so I will tell you about the design process and the tattoo process.
¡Hola Hive! Bienvenidos a este nuevo post, espero que estén muy bien hoy, y no como yo que tengo la espalda muerta 😅 por lo que viene a continuación. Quiero compartir con ustedes un nuevo tatuaje, que me hice ayer, así que les contaré el proceso de diseño y el proceso de tatuaje.
Design process
Proceso de diseño
As you know I like the neo-blackwork style so that's what I based this design on.
My client wanted two swallows with a peony and had told me the area of the body where he wanted the tattoo, this was on the back of the neck (nape) and having this in mind I proceeded to develop the design.
When we are going to elaborate the design of the tattoo we must take into account that we must work based on the body and the dimensions of this, since this is not a canvas in 2d but in 3d, the muscles can affect the design of the tattoo making it look deformed. You can take a picture of the area of the body of your client to work on it, or as in my case use the 3d model of Clip Studio Paint and adapt it to the client's measurements, so you can work on it.
Como saben me gusta el estilo neo-blackwork así que en eso me basé para este diseño.
Mi cliente quería dos golondrinas con una peonía y me había dicho la zona del cuerpo donde quería el tatuaje, esta era en la parte posterior del cuello (nuca) y teniendo esto en cuenta procedí a desarrollar el diseño.
Cuando vamos a elaborar el diseño del tatuaje debemos tener en cuenta que debemos trabajar en base al cuerpo y a las dimensiones de este, ya que este no es un lienzo en 2d sino en 3d, los músculos pueden afectar el diseño del tatuaje haciendo que se vea deformado. Puedes tomar una foto de la zona del cuerpo de tu cliente para trabajar en ella, o como en mi caso utilizar el modelo 3d de Clip Studio Paint y adaptarlo a las medidas del cliente, para poder trabajar en él.

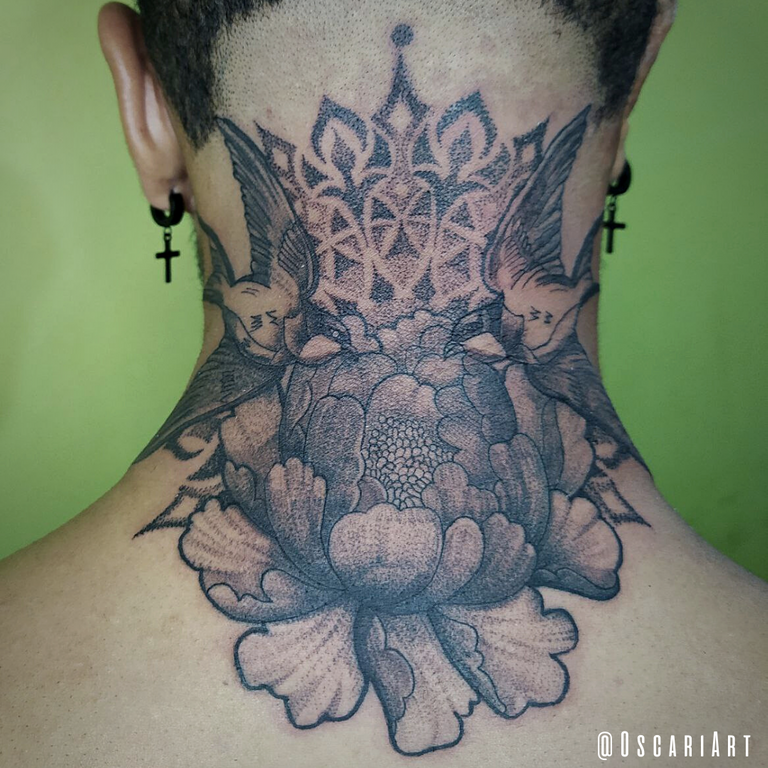
I had done what the client wanted, but as I felt that there was too much space between the upper wings, so I added a mandala in Dotwork. Finalizing the design in this way.
Hice lo que el cliente quería, pero como me pareció que había demasiado espacio entre las alas superiores, añadí un mandala en Dotwork. Finalizando el diseño de esta manera.
Tattoo Process
Proceso del Tattoo
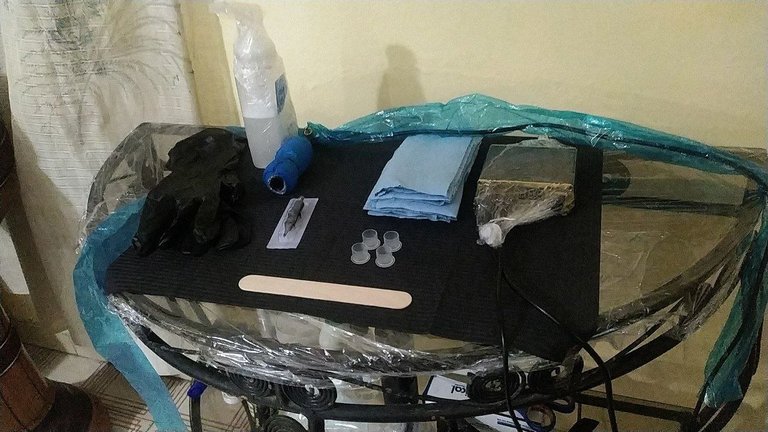
To start tattooing I set up my table, and made the design template. For the tattooing I used two machines, a pen machine with cartridges (needles) 1003rl and 1205rl, and I used a coil machine with a cane needle 1205rs.
Para empezar a tatuar preparé mi mesa, e hice la plantilla del diseño. Para el tatuaje utilicé dos máquinas, una máquina de pluma con cartuchos (agujas) 1003rl y 1205rl, y utilicé una máquina de bobina con una aguja de bastón 1205rs.
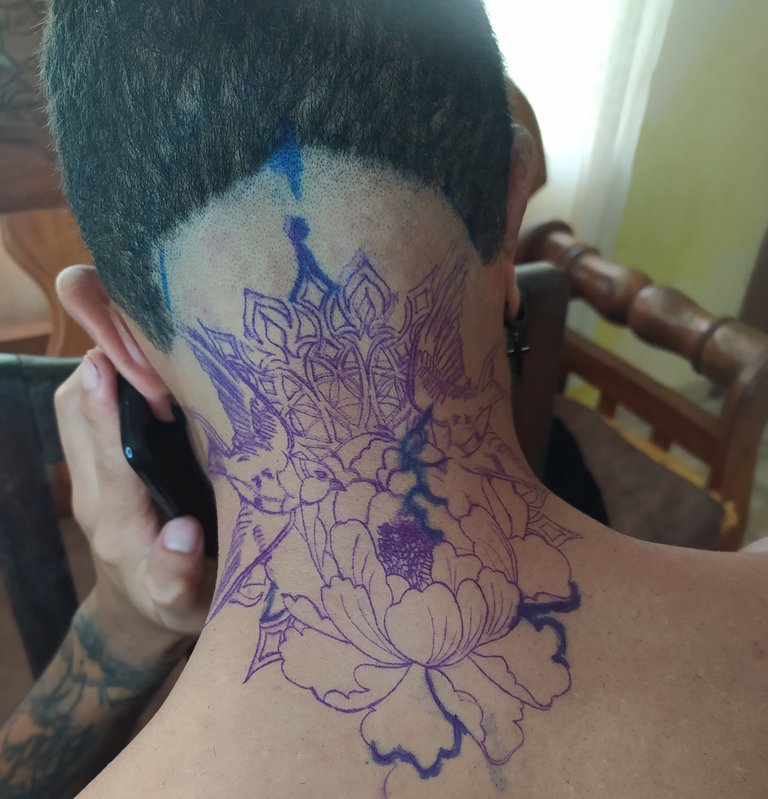
To glue the stencil I had to shave the area where I was going to tattoo (Hahahaha it's funny that I had to make a bad haircut). Then I placed the stencil.
When I started tattooing I started with all the lines and in the mandala area I had to outline it with dots so the stencil wouldn't get erased.
Para pegar el stencil tuve que afeitar la zona donde iba a tatuar (Jajajaja es gracioso que haya tenido que hacer un mal corte de cabello). Luego coloqué el stencil.
Cuando empecé a tatuar empecé con todas las líneas y en la zona del mándala tuve que perfilarlo con puntos para que no se borrara el stencil.
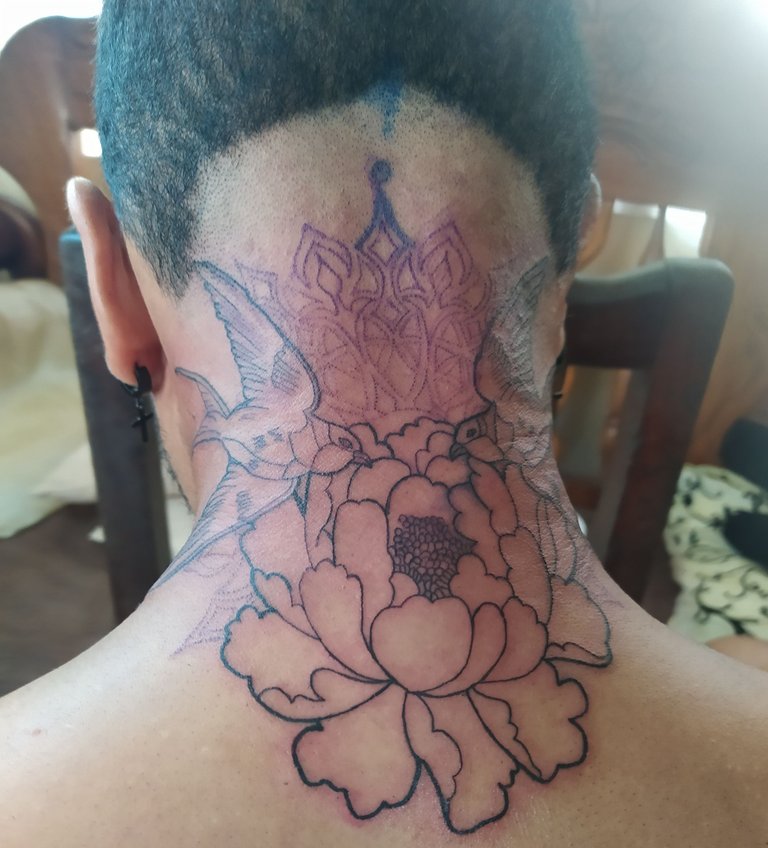
Then move on to the shadows. I made them with drag pointillism. It is a little complicated to work in this area, you have to stretch the skin a lot to inject the ink well and not hurt it. This was the first session with an estimated 8 hours.
A continuación, pase a las sombras. Las hice con puntillismo de arrastre. Es un poco complicado trabajar en esta zona, hay que estirar mucho la piel para inyectar bien la tinta y no lastimarla. Esta fue la primera sesión con un tiempo estimado de 8 horas.
Tattoo Finished
Tattoo Finalizado
This is the final result, I hope you like it and enjoyed it, see you next post! Good vibes!!! ✨🙏
¡Este es el resultado final, espero que les guste y lo hayan disfrutado, nos vemos en el próximo post! Good vibes!!!✨🙏
Instagram:
Tools - Herramientas
Photographs taken with a Xiaomi Note 8 - Fotografías tomadas con un Xiaomi Note 8
Translated in Deelp
App used | App utilizadas:
Illustration made in Clip Studio Paint - Ilustración elaborada en Clip Studio Paint
Canva
All images are my own - Todas las imágenes son de mi autoría
Wow, the tattoos are lovely and really looking for to have one like this
looks nice just glad it ain't on my skin
ok thanks
Awesome art!! I cannot believe it took over eight hours to complete this!
Congratulations @oscariart! You have completed the following achievement on the Hive blockchain and have been rewarded with new badge(s):
Your next target is to reach 10000 upvotes.
You can view your badges on your board and compare yourself to others in the Ranking
If you no longer want to receive notifications, reply to this comment with the word
STOPSupport the HiveBuzz project. Vote for our proposal!
@oscariart 👏👏👏 excellent 👌
I congratulate you on that tattoo.😀