•Como hacer un anillo | How to make a ring •

Bienvenidos | Welcome
Saludos a toda la preciosa comunidad de hive! Espero que se encuentren muy bien, que hayan pasado una feliz navidad y un feliz año nuevo✨ Hace mucho que no subo contenido acá debido a que he estado trabajando y casi no me da tiempo de nada, 😔 pero quise aprovechar que tengo unos días libres para publicar alguito y estar de vuelta con ustedes 💓. En esta ocasión les mostraré como hacer un precioso anillo súper sencillo y con pocos materiales, así que sin más preámbulos, comencemos.
Greetings to all the beautiful hive community! I hope you are doing well, I hope you had a Merry Christmas and a Happy New Year✨ It's been a long time since I've uploaded content here because I've been working and almost no time for anything, 😔 but I wanted to take advantage that I have a few days off to publish something and be back with you 💓. This time I will show you how to make a beautiful ring super simple and with few materials, so without further ado, let's get started.
Materiales | Materials:
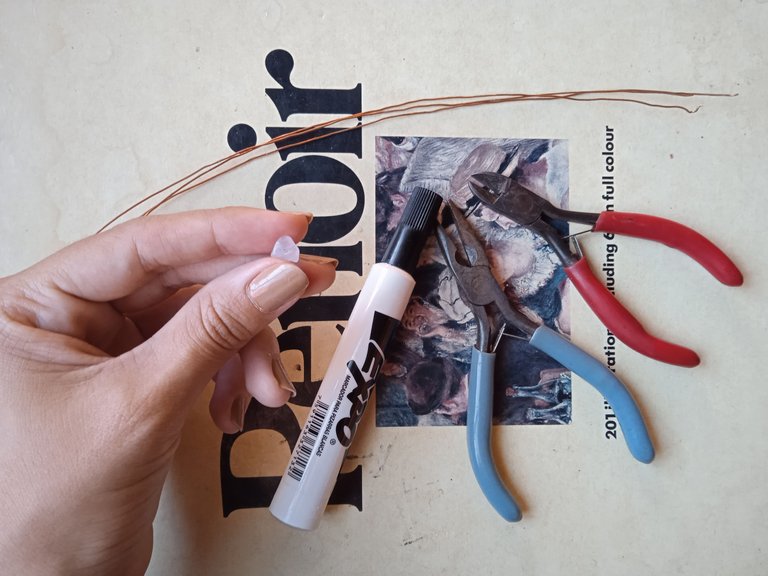
Alambre. Yo utilicé uno de cobre que vienen en cables de electricidad 😂😂
Pinzas de bisutería. La verdad es que a medida fui avanzando me di cuenta que esto es opcional, la mayor parte del trabajo lo hice con mis manitas, así que si no tienes de estas pinzas, no habrá problema, con una herramienta que corte es más que suficiente, claro, siempre y cuando el alambre que utilices sea bastante blando (cómo en mi caso)
Marcador o algún otro objeto cercano al grosor de tu dedo.
Alguna cuenta de bisutería que tengas. Yo tenía este cuarzo rosa y me pareció perfecto, pero tu puedes utilizar cualquier otra, ya que está técnica que les enseñaré, nos permitirá trabajar cualquier piedra sin importar su forma o tamaño.
✨ Eng ✨
- Wire. I used a copper one that comes in electricity cables 😂😂.
- Costume jewelry pliers. The truth is that as I progressed I realized that this is optional, most of the work I did with my little hands, so if you do not have these pliers, no problem, with a tool that cuts is more than enough, of course, as long as the wire you use is quite soft (as in my case).
- Marker or some other object close to the thickness of your finger.
- Some costume jewelry bead you have. I had this rose quartz and I found it perfect, but you can use any other, since this technique that I will teach you, will allow us to work any stone regardless of its shape or size.
Paso 1 | Step 1
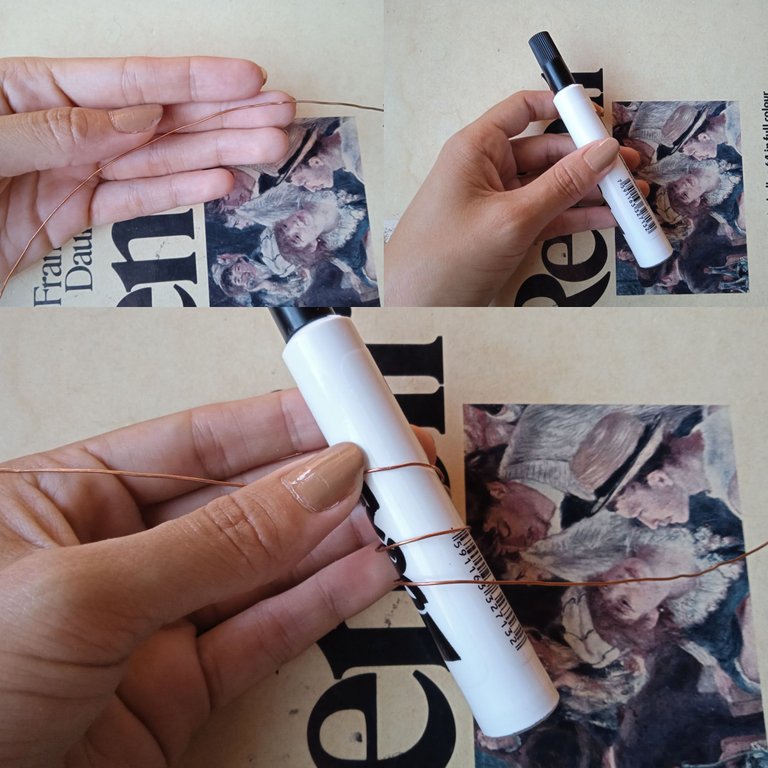
Lo primero que haremos será tomar un trozo de alambre (de aproximadamente 30cm) y le daremos 3 vueltitas a nuestro marcador.
The first thing we will do is to take a piece of wire (approximately 30cm) and give it 3 turns to our marker.
Paso 2 | Step 2
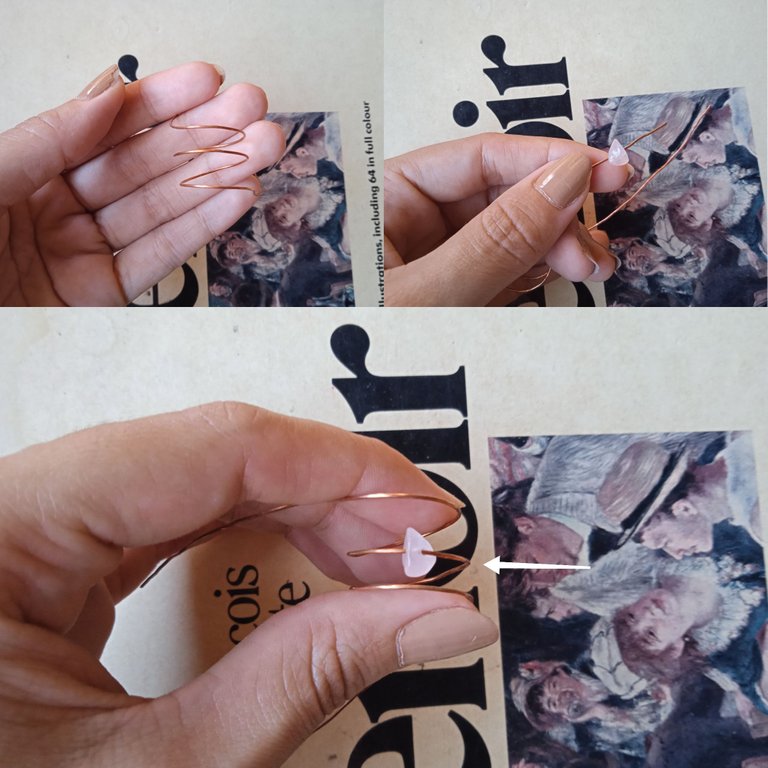
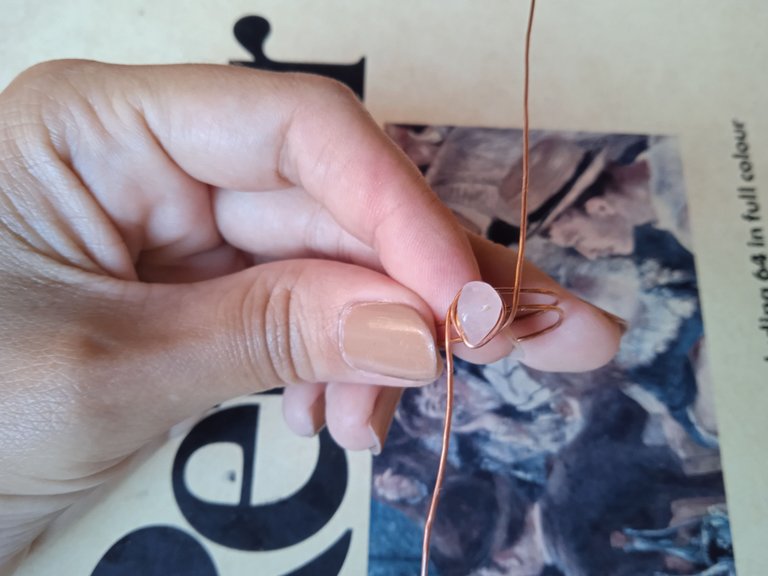
Lo siguiente será sacar el marcador del alambre para poder meter nuestra cuenta, la cuál la dejaremos en la parte del medio (cómo se está señalando en la imagen)
The next step is to remove the marker from the wire in order to insert our bead, which we will leave in the middle part (as shown in the image).
Paso 3 | Step 3
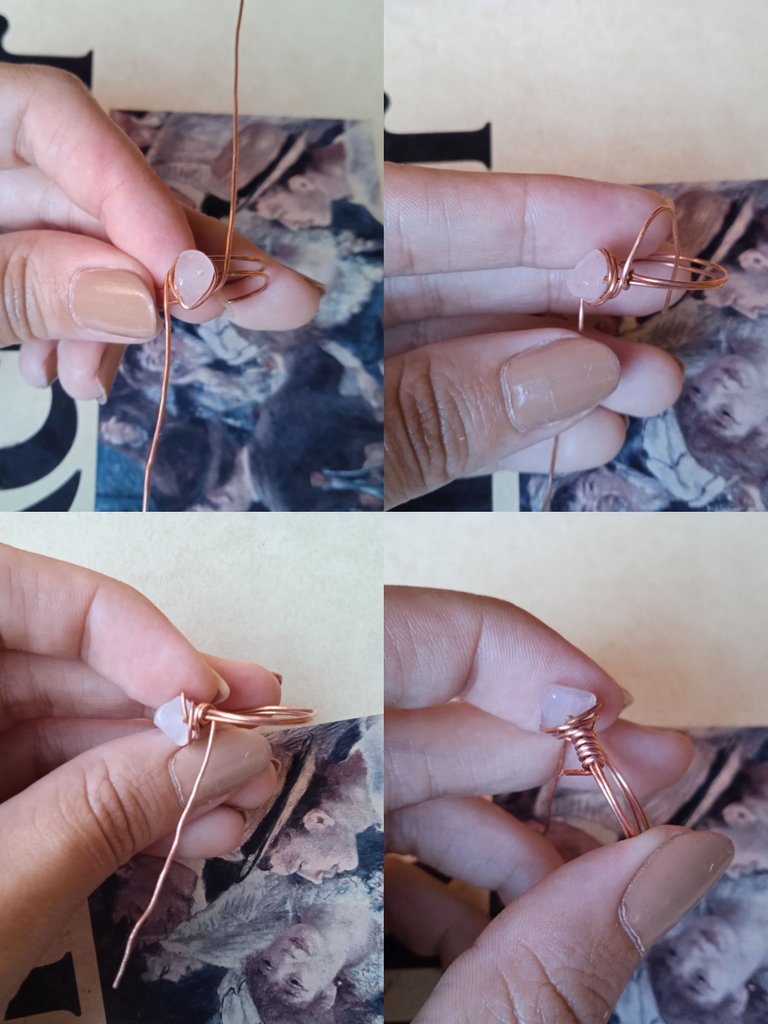
Continuamos metiendo el marcador nuevamente en el alambre y atención acá: la parte de arriba la doblaremos hacia abajo y la parte de abajo la doblaremos hacia arriba, una vez hecho esto, repetiremos este paso, tal cual se muestra en las fotos (espero se entienda bien esta parte 😸). Asegúrate de halar bien el alambre al doblar, esto es para asegurar bien nuestra cuenta.
We continue putting the marker back into the wire and pay attention here: the top part we will bend it down and the bottom part we will bend it up, once this is done, we will repeat this step, as shown in the pictures (I hope this part is well understood 😸). Make sure to pull the wire well when bending, this is to secure our bead well.
Al final nos tendrá que quedar algo así.
In the end we will have to have something like this.
Paso 4 | Step 4
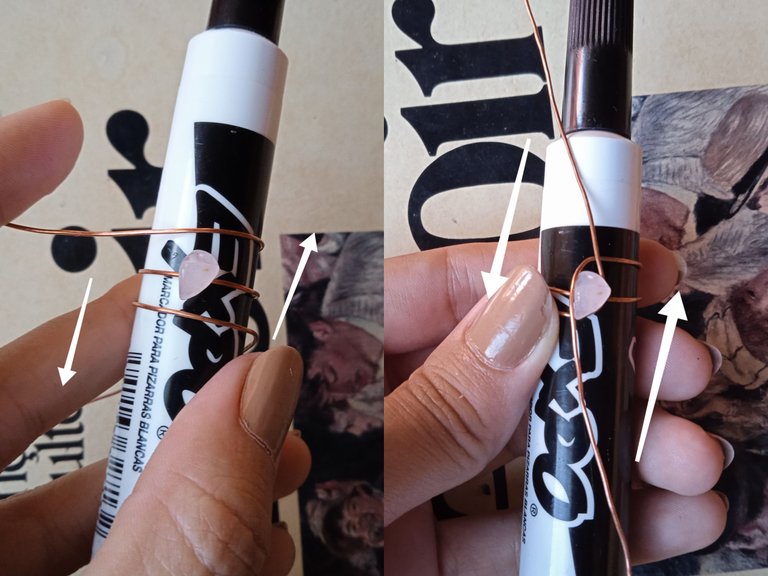
Ya para terminar, pasaremos el alambre de adentro hacia afuera, tantas veces como queramos y con cuidado para no deformar nuestro anillo, luego repetiremos este proceso del otro lado.
To finish, we will pass the wire from the inside to the outside, as many times as we want and carefully so as not to deform our ring, then we will repeat this process on the other side.
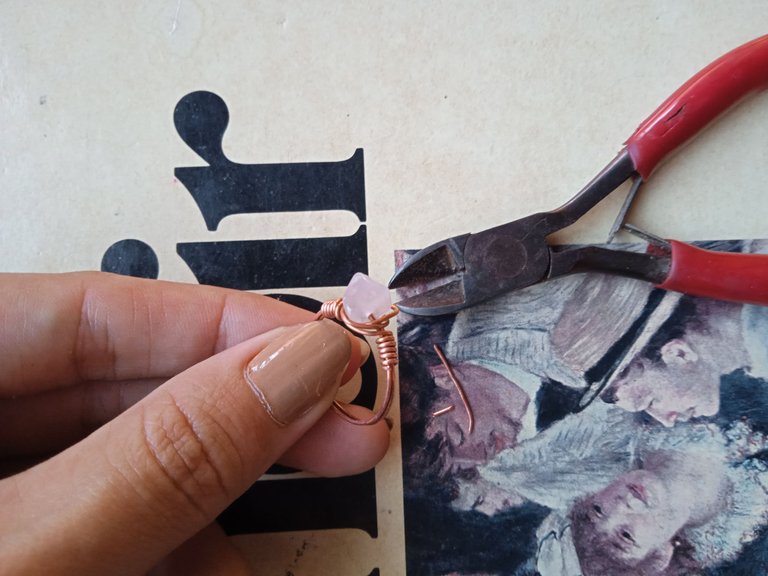
Cortamos el exceso de alambre y listo, ya está terminado nuestro anillo.
We cut the excess wire and that's it, our ring is finished.
✨ Resultado | Result ✨
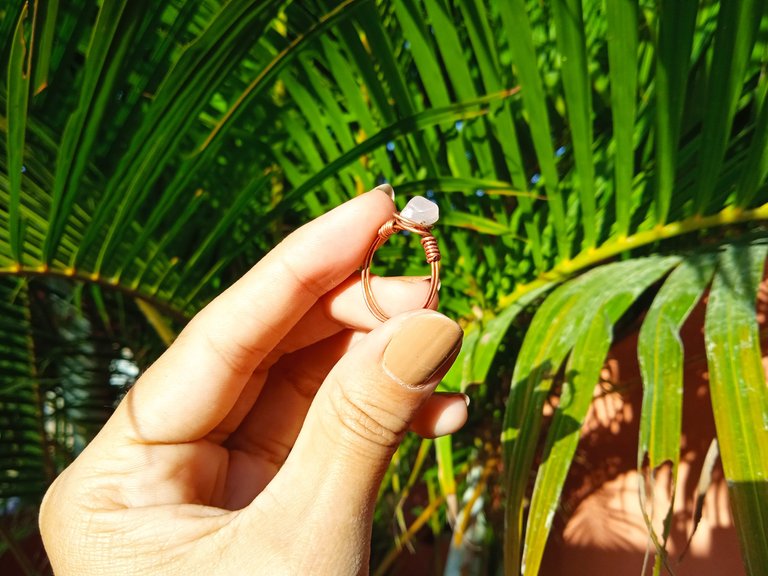
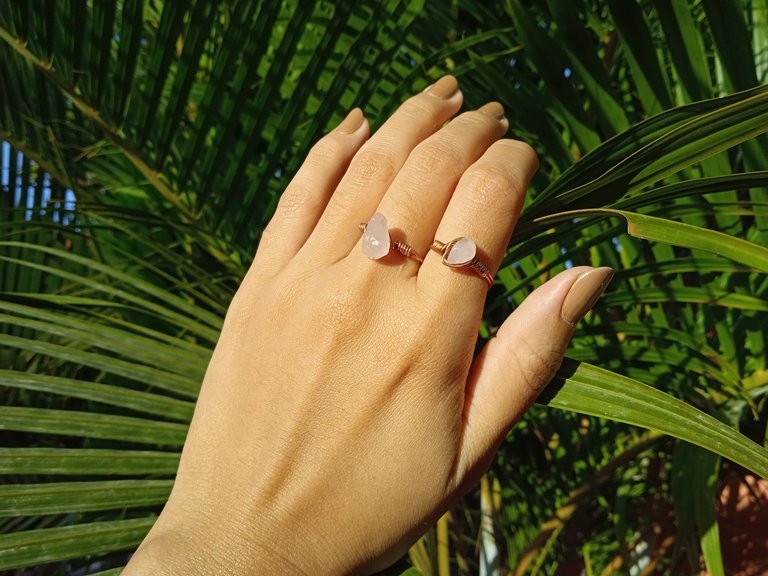
Y bueno este ha sido el resultado, la verdad es que a mí me ha encantado muchísimo, se que me haré un montón de anillos con diferentes cuentas 😂 e incluso hare unos para regalar. Espero que a ustedes también les haya gustado está idea y la pongan en práctica en sus casitas, si tienen alguna duda por favor déjenla en los comentarios que con gusto los ayudo. 🥺
Sin más que decir, me despido.
Los quiero, byee.
Posdata: chicxs, no hay excusa para no darle a su pareja un anillo de promesa 😂 este es el momento jajajaja saludos
And well this has been the result, the truth is that I have loved it very much, I know that I will make a lot of rings with different beads 😂 and even make some to give away. I hope you also liked this idea and put it into practice in your homes, if you have any questions please leave them in the comments and I'll be happy to help you. 🥺
With nothing more to add, I bid you farewell.
I love you, byee.
PS: guys, there is no excuse for not giving your partner an promise ring 😂 this is the time hahahahahaha see you later.
Lindo!
https://twitter.com/138949334/status/1611173654678720512
The rewards earned on this comment will go directly to the people( @leticiapereira ) sharing the post on Twitter as long as they are registered with @poshtoken. Sign up at https://hiveposh.com.
Thank you for sharing this post on HIVE!
Your content got selected by our fellow curator ashikstd & you just received a little thank you upvote from us for your great work! Your post will be featured in one of our recurring compilations which are aiming to offer you a stage to widen your audience within the DIY scene of Hive. Stay creative & HIVE ON!
Please vote for our hive witness <3
Congratulations @paugomez! You have completed the following achievement on the Hive blockchain And have been rewarded with New badge(s)
Your next target is to reach 4250 upvotes.
You can view your badges on your board and compare yourself to others in the Ranking
If you no longer want to receive notifications, reply to this comment with the word
STOPCheck out our last posts:
Support the HiveBuzz project. Vote for our proposal!
Dear @paugomez,
Our previous proposal expired end of December and the Hivebuzz project is not funded anymore. May we ask you to review and support our new proposal (https://peakd.com/me/proposals/248)?
Thank you for your help!