PERFECT LV.3 GRUM FLAMBLADE COUNTER IN 14 MANA
Welcome back to my blog, @queen-silvia, In this Social Media Challenge, I am going to share to all of you an epic strategy on how to counter Lv.3 Grum Flameblade in reverse speed ruleset and 14 mana. As we all knew already that monsters with 1 speed is so powerful in reverse speed ruleset since they will attack first and their attack has very high probability to hit the enemy. Grum has 1 speed, 4 Melee attack, 5 shield and 14 health points so he is the real beast in reverse speed ruleset, but in Splinterlands, there will always a way to counter very strong monster. and the strategy will be given in this article, so check it out :

Alright, in this article I will share my ideas about the following topics :
- Lv.3 Grum Flameblade Review
- Battle Link
- Battle Preview
- Battle Analysis
- Battle Strategy Explanation

- LV.3 GRUM FLAMEBLADE REVIEW -
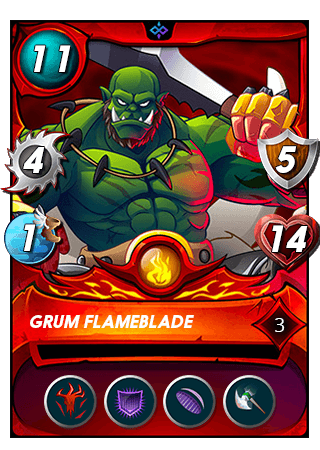
Alright, The league I am playing currently is gold, so the maximum level of legendary card the player can use is 3, hence my opponent used Lv.3 Grum Flameblade. In that level, He has 4 abilities; Bloodlust, Void armor, Void and Giant Killer.
The Bloodlust ability will increase all of his stats whenever he killed the opponent's monster. The Void armor will make the opponent's magic attack hits his armor first instead of his health and the Void ability will reduce the magic attack of opponent monster, so we can say that he is a very great tank monster against magic user. The last ability in Lv.3 is Giant killer, which allow him to do double damage against monster who cost 10 or more mana. the reverse speed ruleset will make him even much more stronger. This article will describe how to beat him in the reverse speed ruleset.

- BATTLE LINK -
Alright, Here is the battle link where we can see how to counter Lv.3 Grum Flameblade in reverse speed ruleset. I will explain the battle strategy as well as tips and tricks in the following sections. This link is intended for those who want to see the full preview of the battle. Check this out :
- BATTLE PREVIEW -

This battle costs 14 mana and has reverse speed ruleset. Almost all of splinters are available except water splinter.
| Icon | Ruleset | Explanation |
|---|---|---|
 | Reverse Speed | Monsters with the lowest Speed attack first and have the highest chance of evading attacks. Try to pick monsters with 1 speed because they have the best chance of evading Melee and Ranged attacks. |
Line Up
- Summoner -
 Malric Inferno
I used this summoner because he gives additional 1 melee attack to all of friendly monster. There are 2 summoners that I have rented for fire focus, the first one is Pyre and the second one is Malric. Pyre doesn't suit the ruleset since he will make monsters slower so Malric is the best option. He is the best summoner combined with Living Lava or Antoid Platoon in small mana and reverse speed ruleset.
- Monster -
 Living lava
He is the key monster to defeat Lv.3 Grum Flameblade. His main ability, shield, helps to reduce Grum attack from 5 melee damage into 3 damage only. Whenever monster with shield ability was targeted by melee or ranged attack monster, the damage taken will be halved and rounded up, such a very amazing skill to hold melee and ranged attack. This is the reason why monster with shield ability is always being used as a tank monster. Some other monsters who often used as tank monster are Harklaw, Mycelic Infantry, Serpentine Soldier, etc.
 Beetle Queen
She has a very important role to keep Living Lava alive. The Tank Heal ability makes Living Lava become immortal as the ability will recover 1/3 of the Living Lava's total health. So as long as the total damage taken by Living lava is equal or lower than the health points provided by Beetle Queen, He will never die in the battlefield. The counter of tank heal ability is affliction which negates the tank heal ability effect unless the tank monster get cleansed.
 Furious Chicken
The next monster that I want to share is Furious Chicken. This monster has no attack so the main purpose of this monster is just to protect Beetle queen from sneak monster, so instead of attacking Beetle Queen, the sneak monster will kill Furious Chicken first. If we found out that there are some empty slots, it's like an obligation to fill it with 0 mana monster. This is very important to hold snipe or sneak attack,
 Scorch Fiend
The last monster that I am going to explain has the same mana as Furious chicken. 0 mana monster. His main purpose is also the same as furious chicken. The difference is position, I used to set Furious chicken in the second position in order to absorb snipe monster for 1 turn while I used Scorch Fiend to absorb sneak attack. Thing to remember is snipe monsters only attack monster with no attack, magic and ranged attack monster in the back line, so if there are two option between chicken and scorch fiend, they will attack furious chicken.
- BATTLE ANALYSIS -
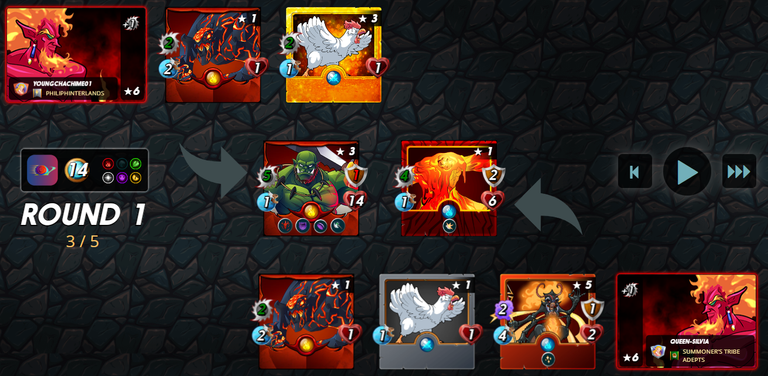
Round 1
In the first round, we can see both team are using Malric Inferno as their summoners to increase melee attack by +1. Only 3 monsters could attack in the battle, Living lava, Grum Flameblade and Beetle Queen. In this round Grum Melee was destroyed as Living lava has 4 melee attack and Beetle Queen has 2 magic attack. the magic attack was reduced to 1 since Grum has void ability. Living lava's armor was also destroyed by Grum.
Round 2

In the second round, the shield ability halved Grum's attack from 5 into 3 (rounded up). Every round, Beetle Queen restored Living Lava's health by 2. The total damage of Living lava team is 5, while Grum Team is 3 only. Each round, Living Lava get additional 2 health points which makes Living lava's health point only reduced by 1.
Round 3
In the end of round 3, Grum Flameblade's health point is just 4. The same as Living lava but The Grum has no tank heal ability monster in the backline. He will be killed in the next round. Both tank monster has 1 speed which makes them pretty good in attacking their enemy. every attack will most likely hit the enemy.
Round 4
In this round, Grum Flameblade and Scorch Fiend are killed. Only Furious Chicken left. Beetle Queen will keep restoring Living lava's health point until it's full (back to it's original health point, 6).
Round 5
The Furious Chicken is killed. Living lava's health point is back to normal (6). and Living lava team won the match.
- BATTLE STRATEGY EXPLANATION -
In the splinterlands world, there are 3 kinds of game mode :
- Attacking mode
- Defending mode
- Counter attack mode
In this battle, I have given the example of how to implement attacking mode and defensive mode at the same time. So, basically, defensive mode is also take very important role in order to keep the tank monster alive, so that the attacking mode could last for a long time. The Counter attack mode is usually being done with monster who have Thorn, Magic reflect and return fire plus amplify ability to increase the damage. This is pretty cool mode which we will discuss it in the next article.
- CLOSING -
Alright, that's the end of this article guys, Thank you for visiting my blog. See you in the next article.
If you haven't got any Splinterlands account, you can get it here. Take Care~

0
0
0.000
0 comments