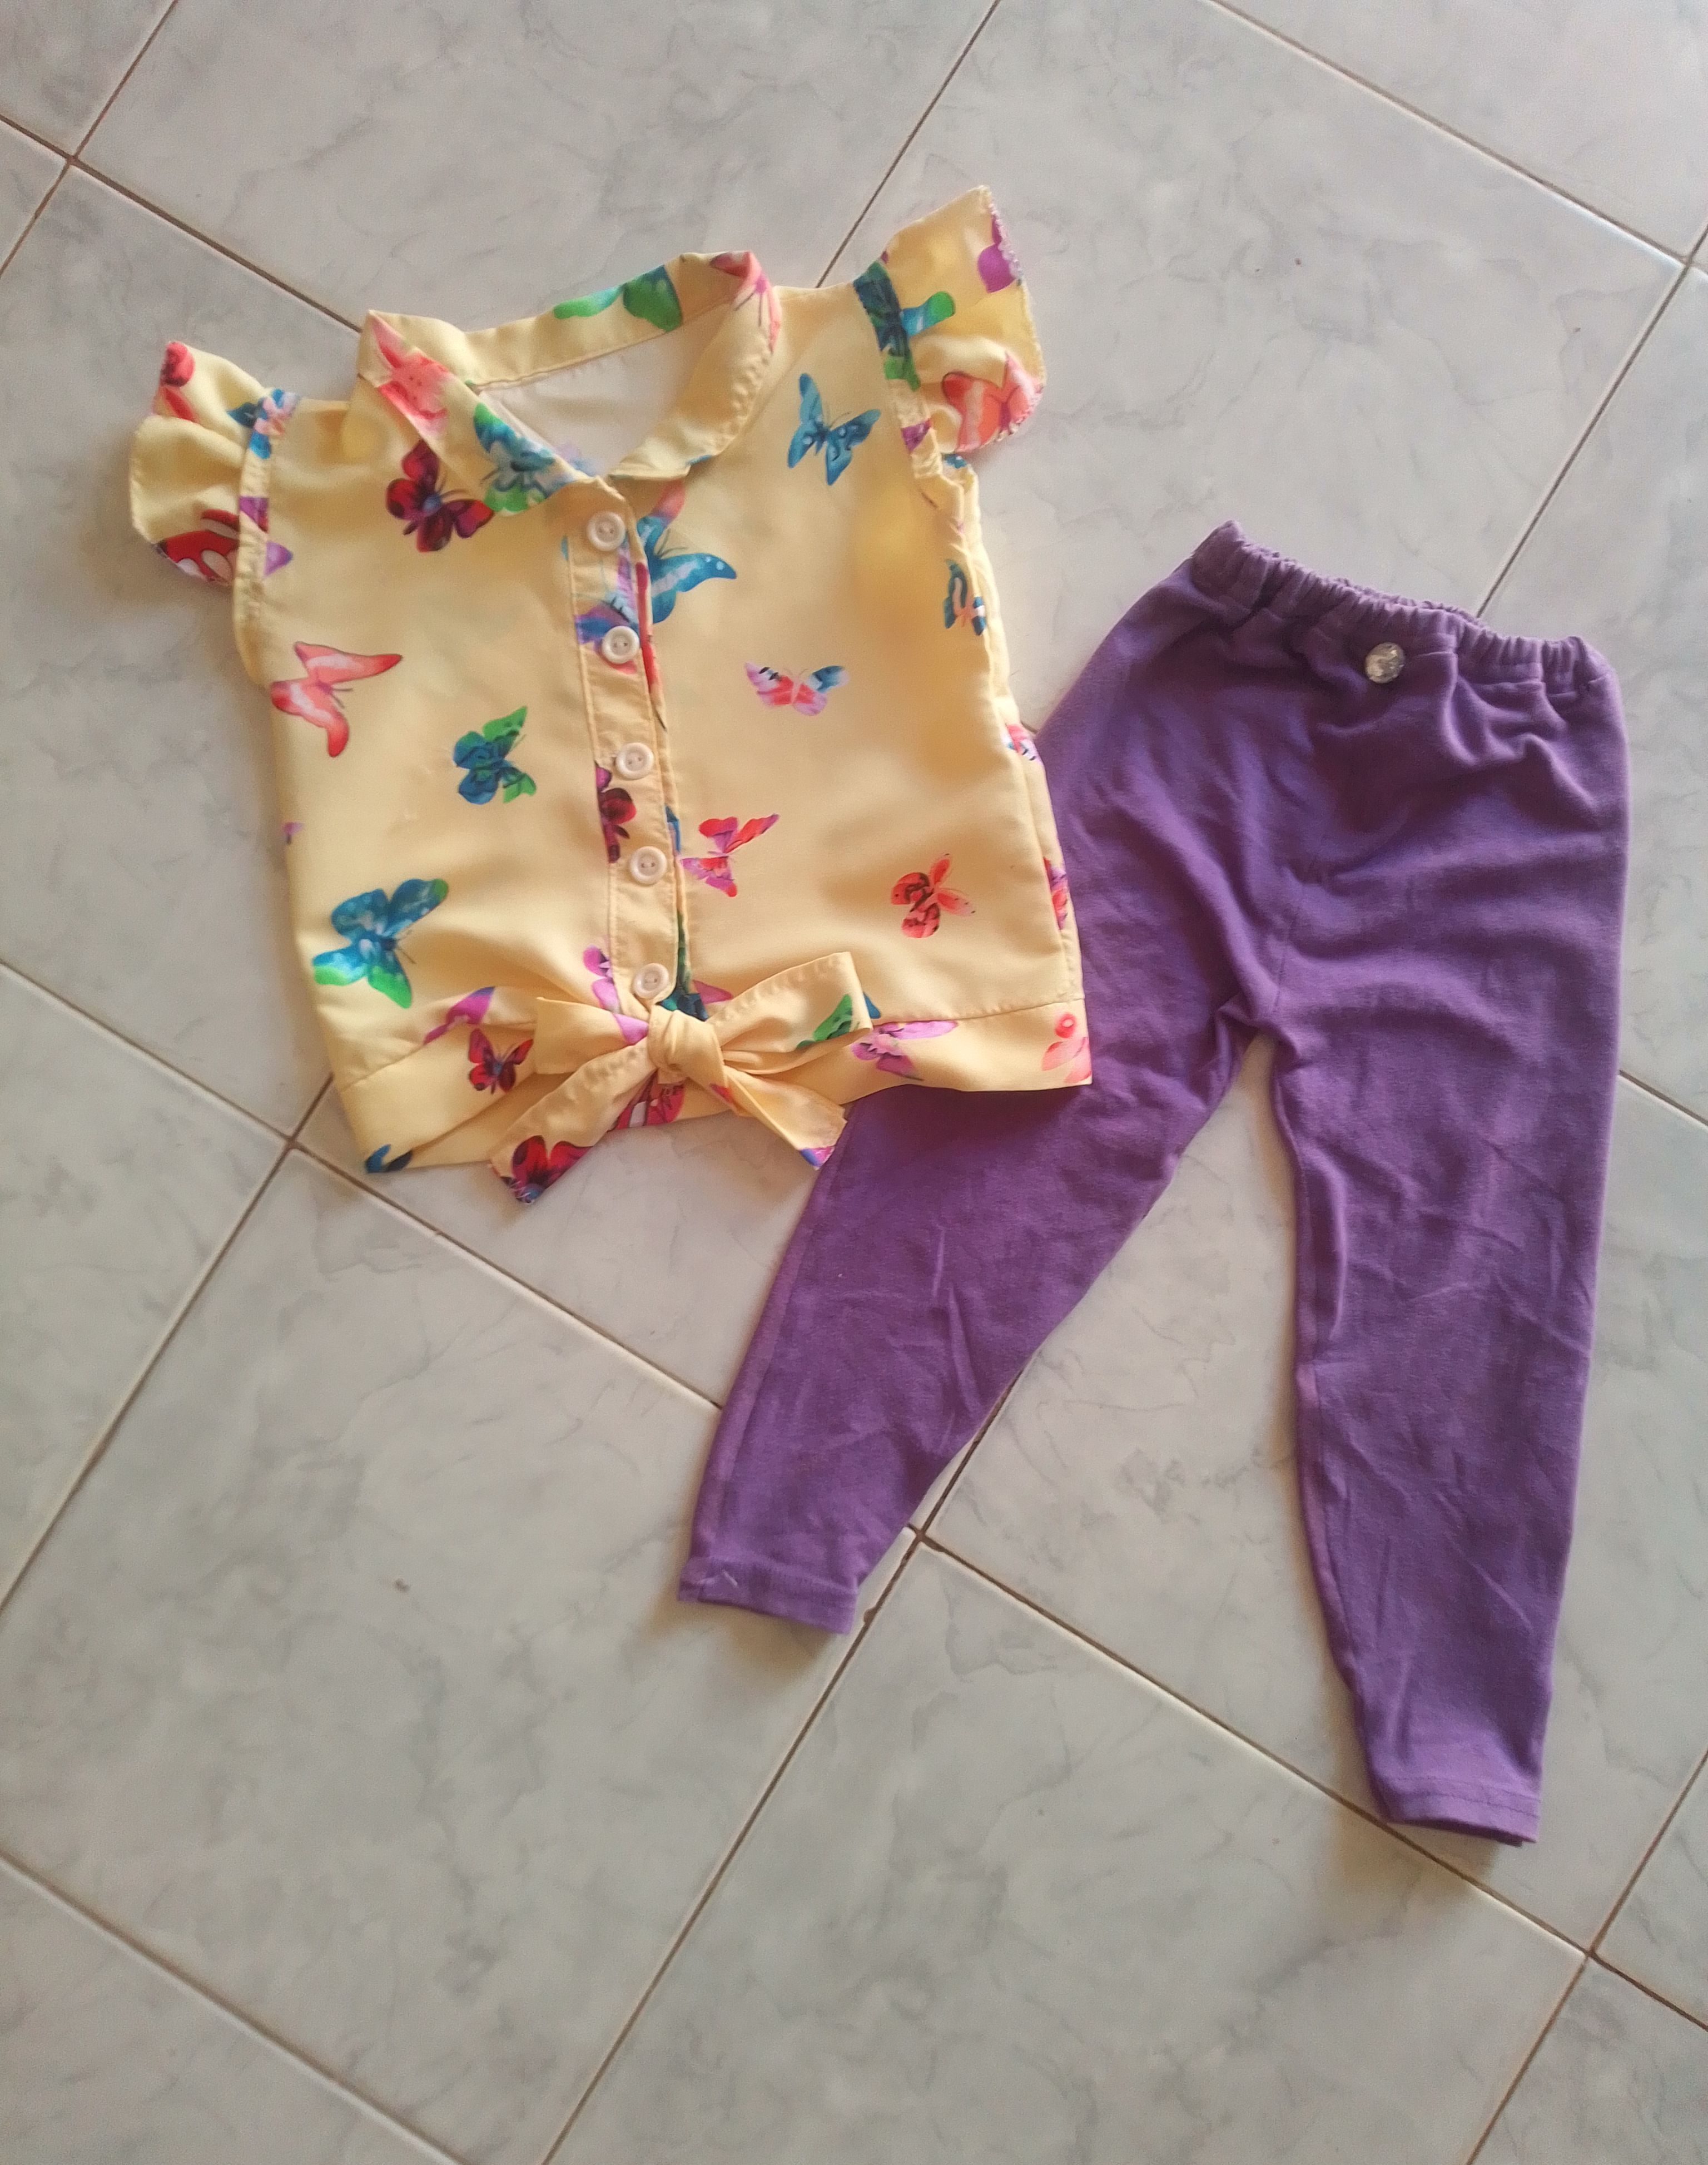
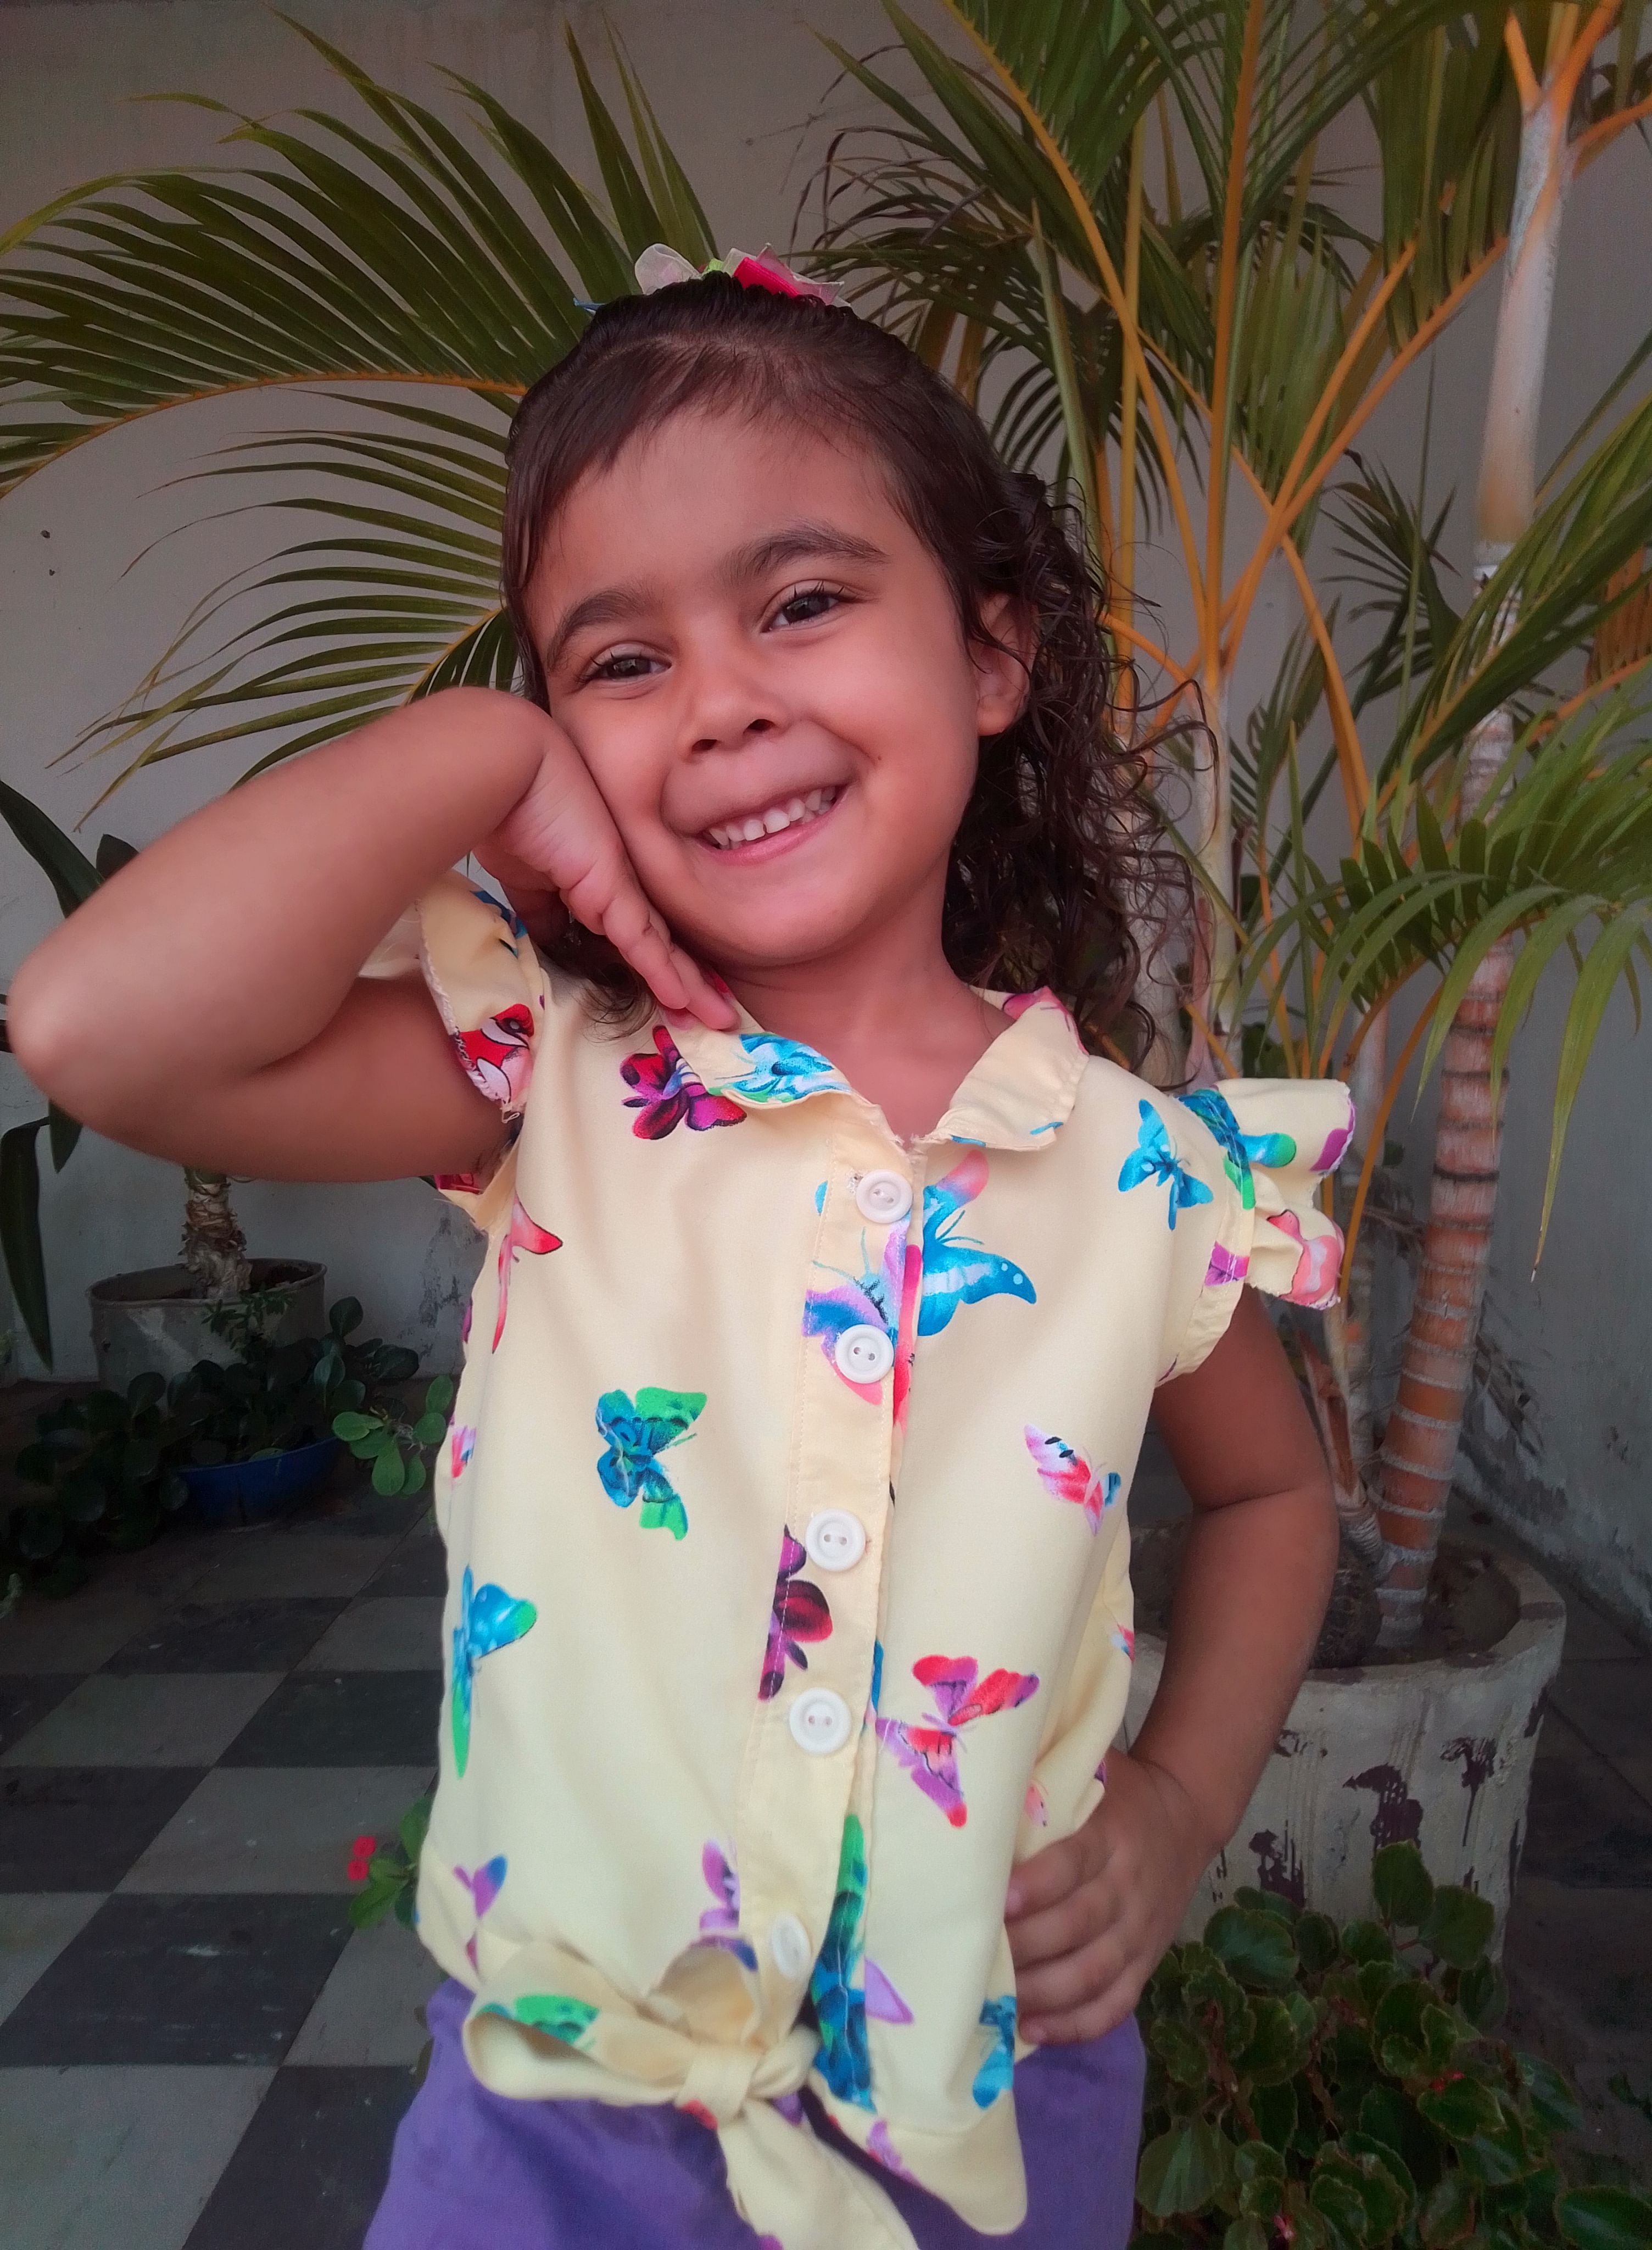
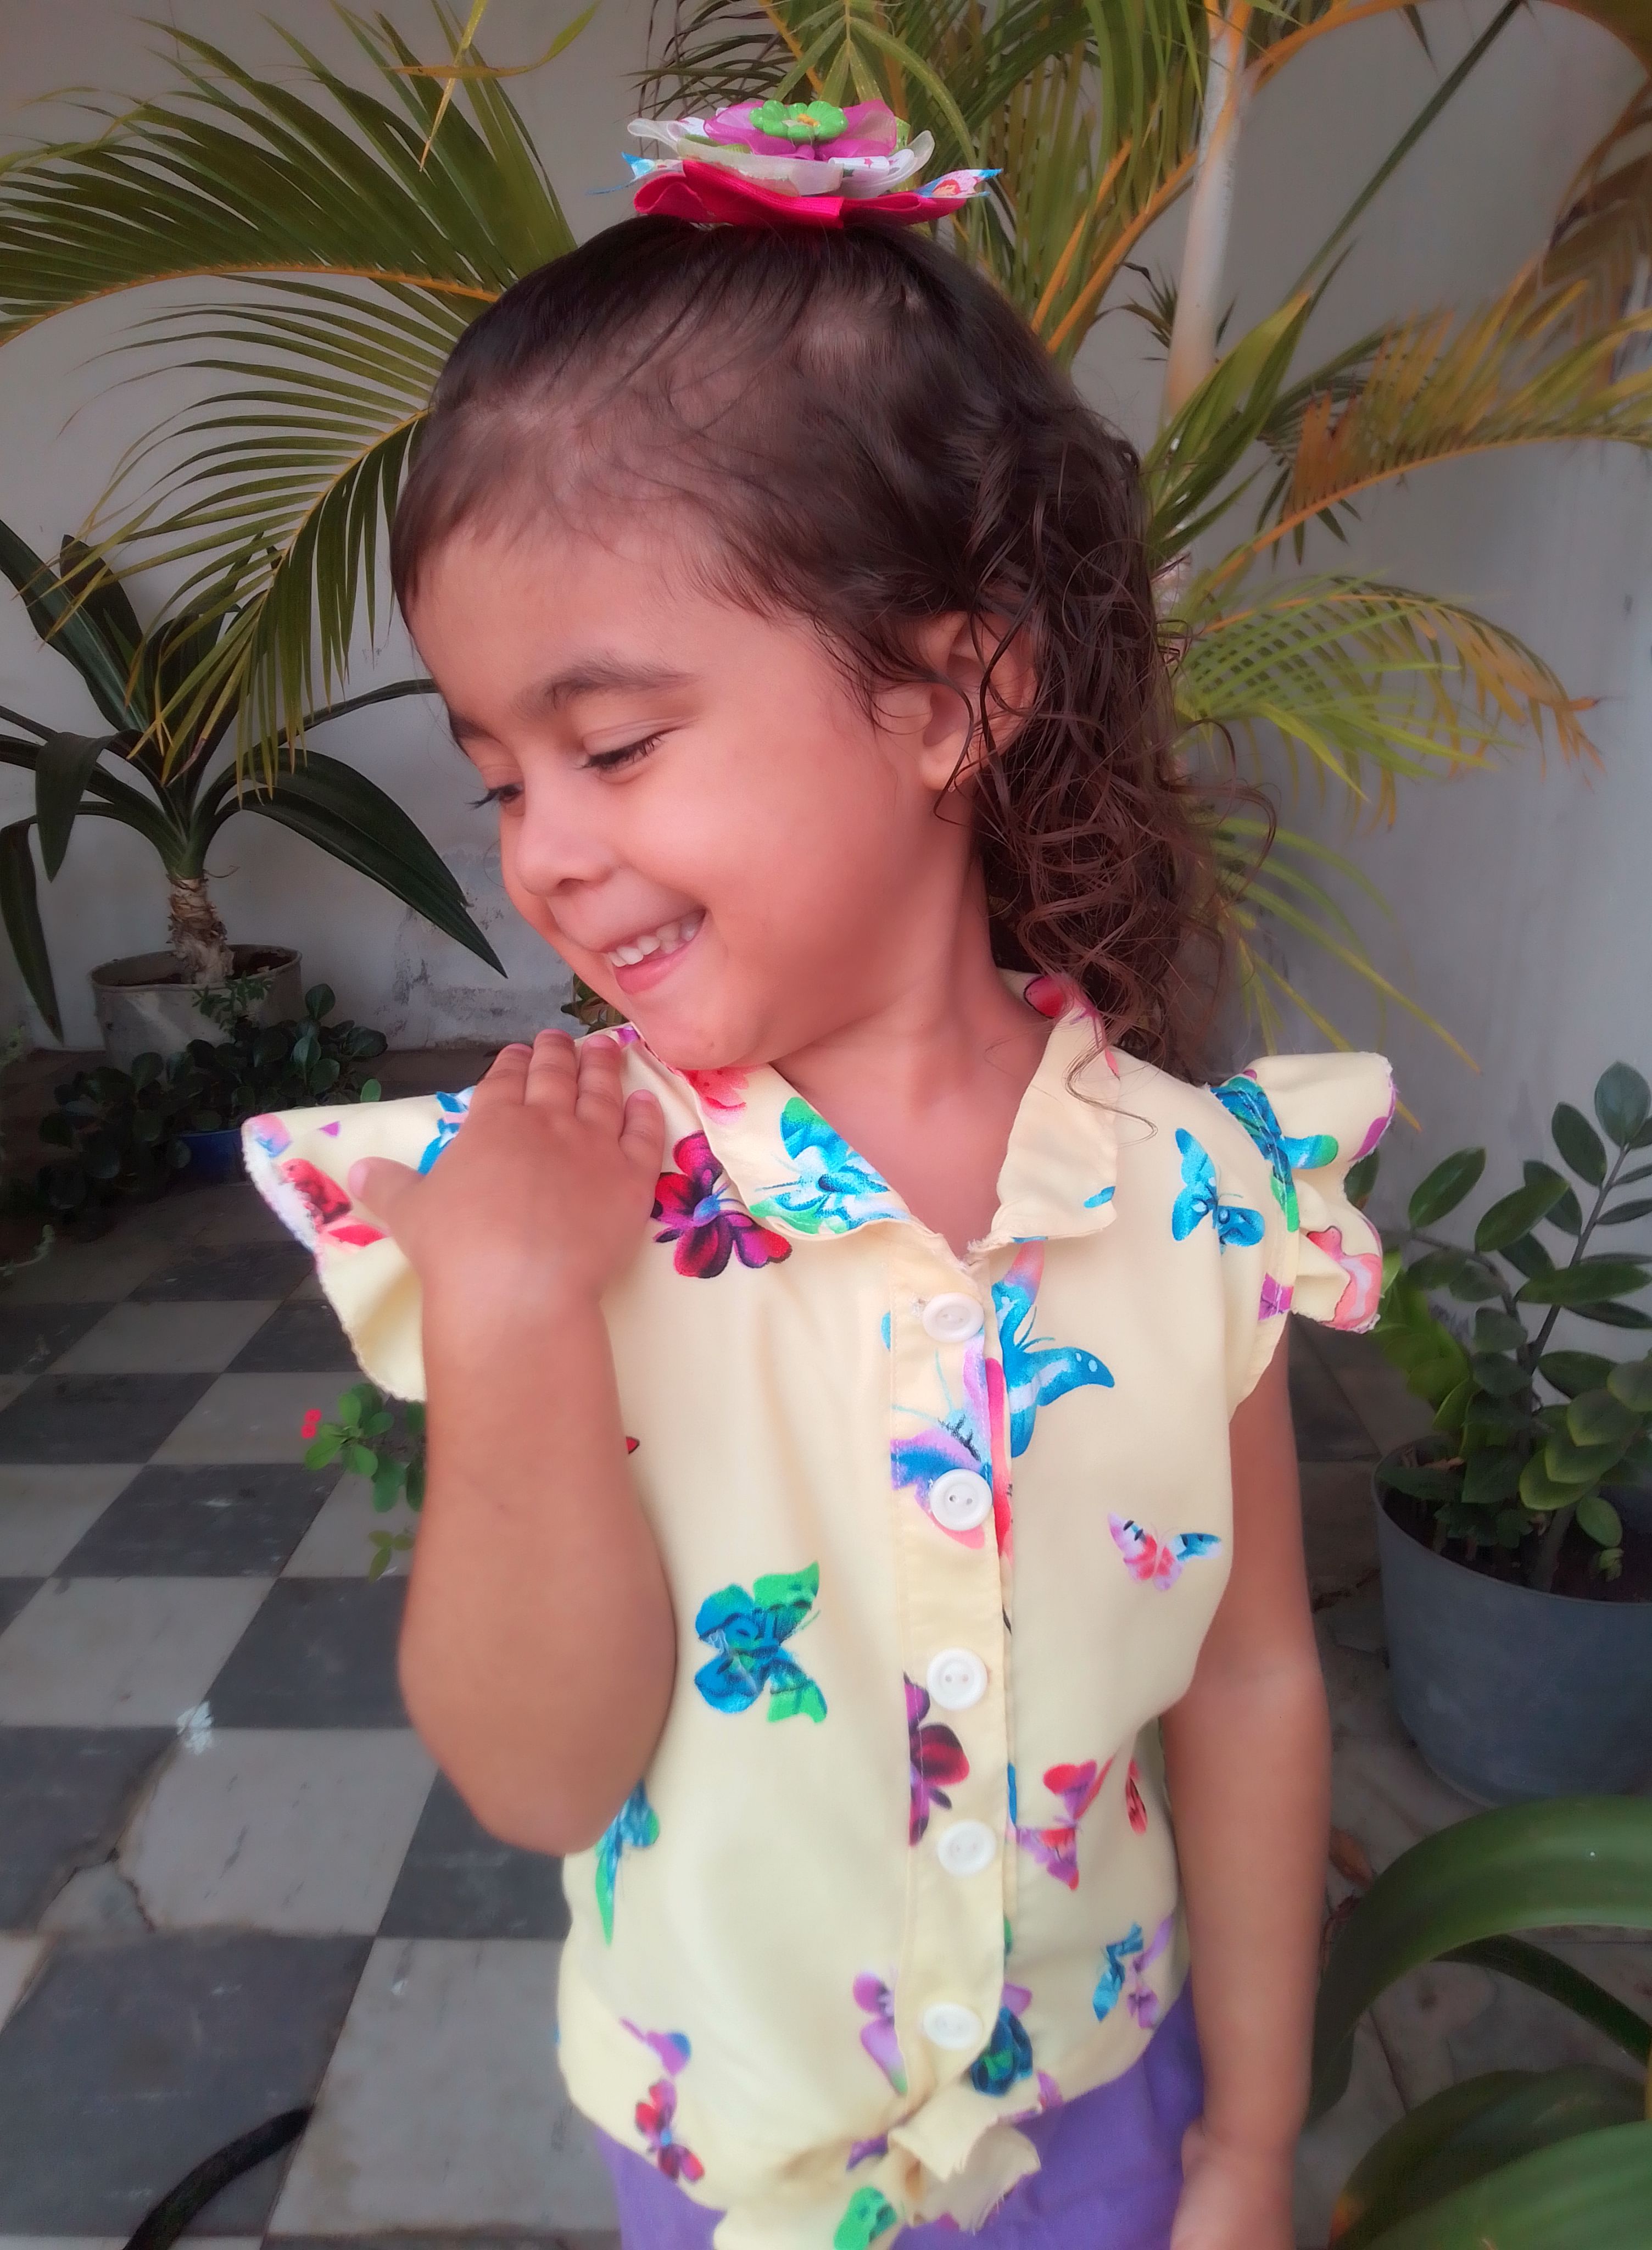
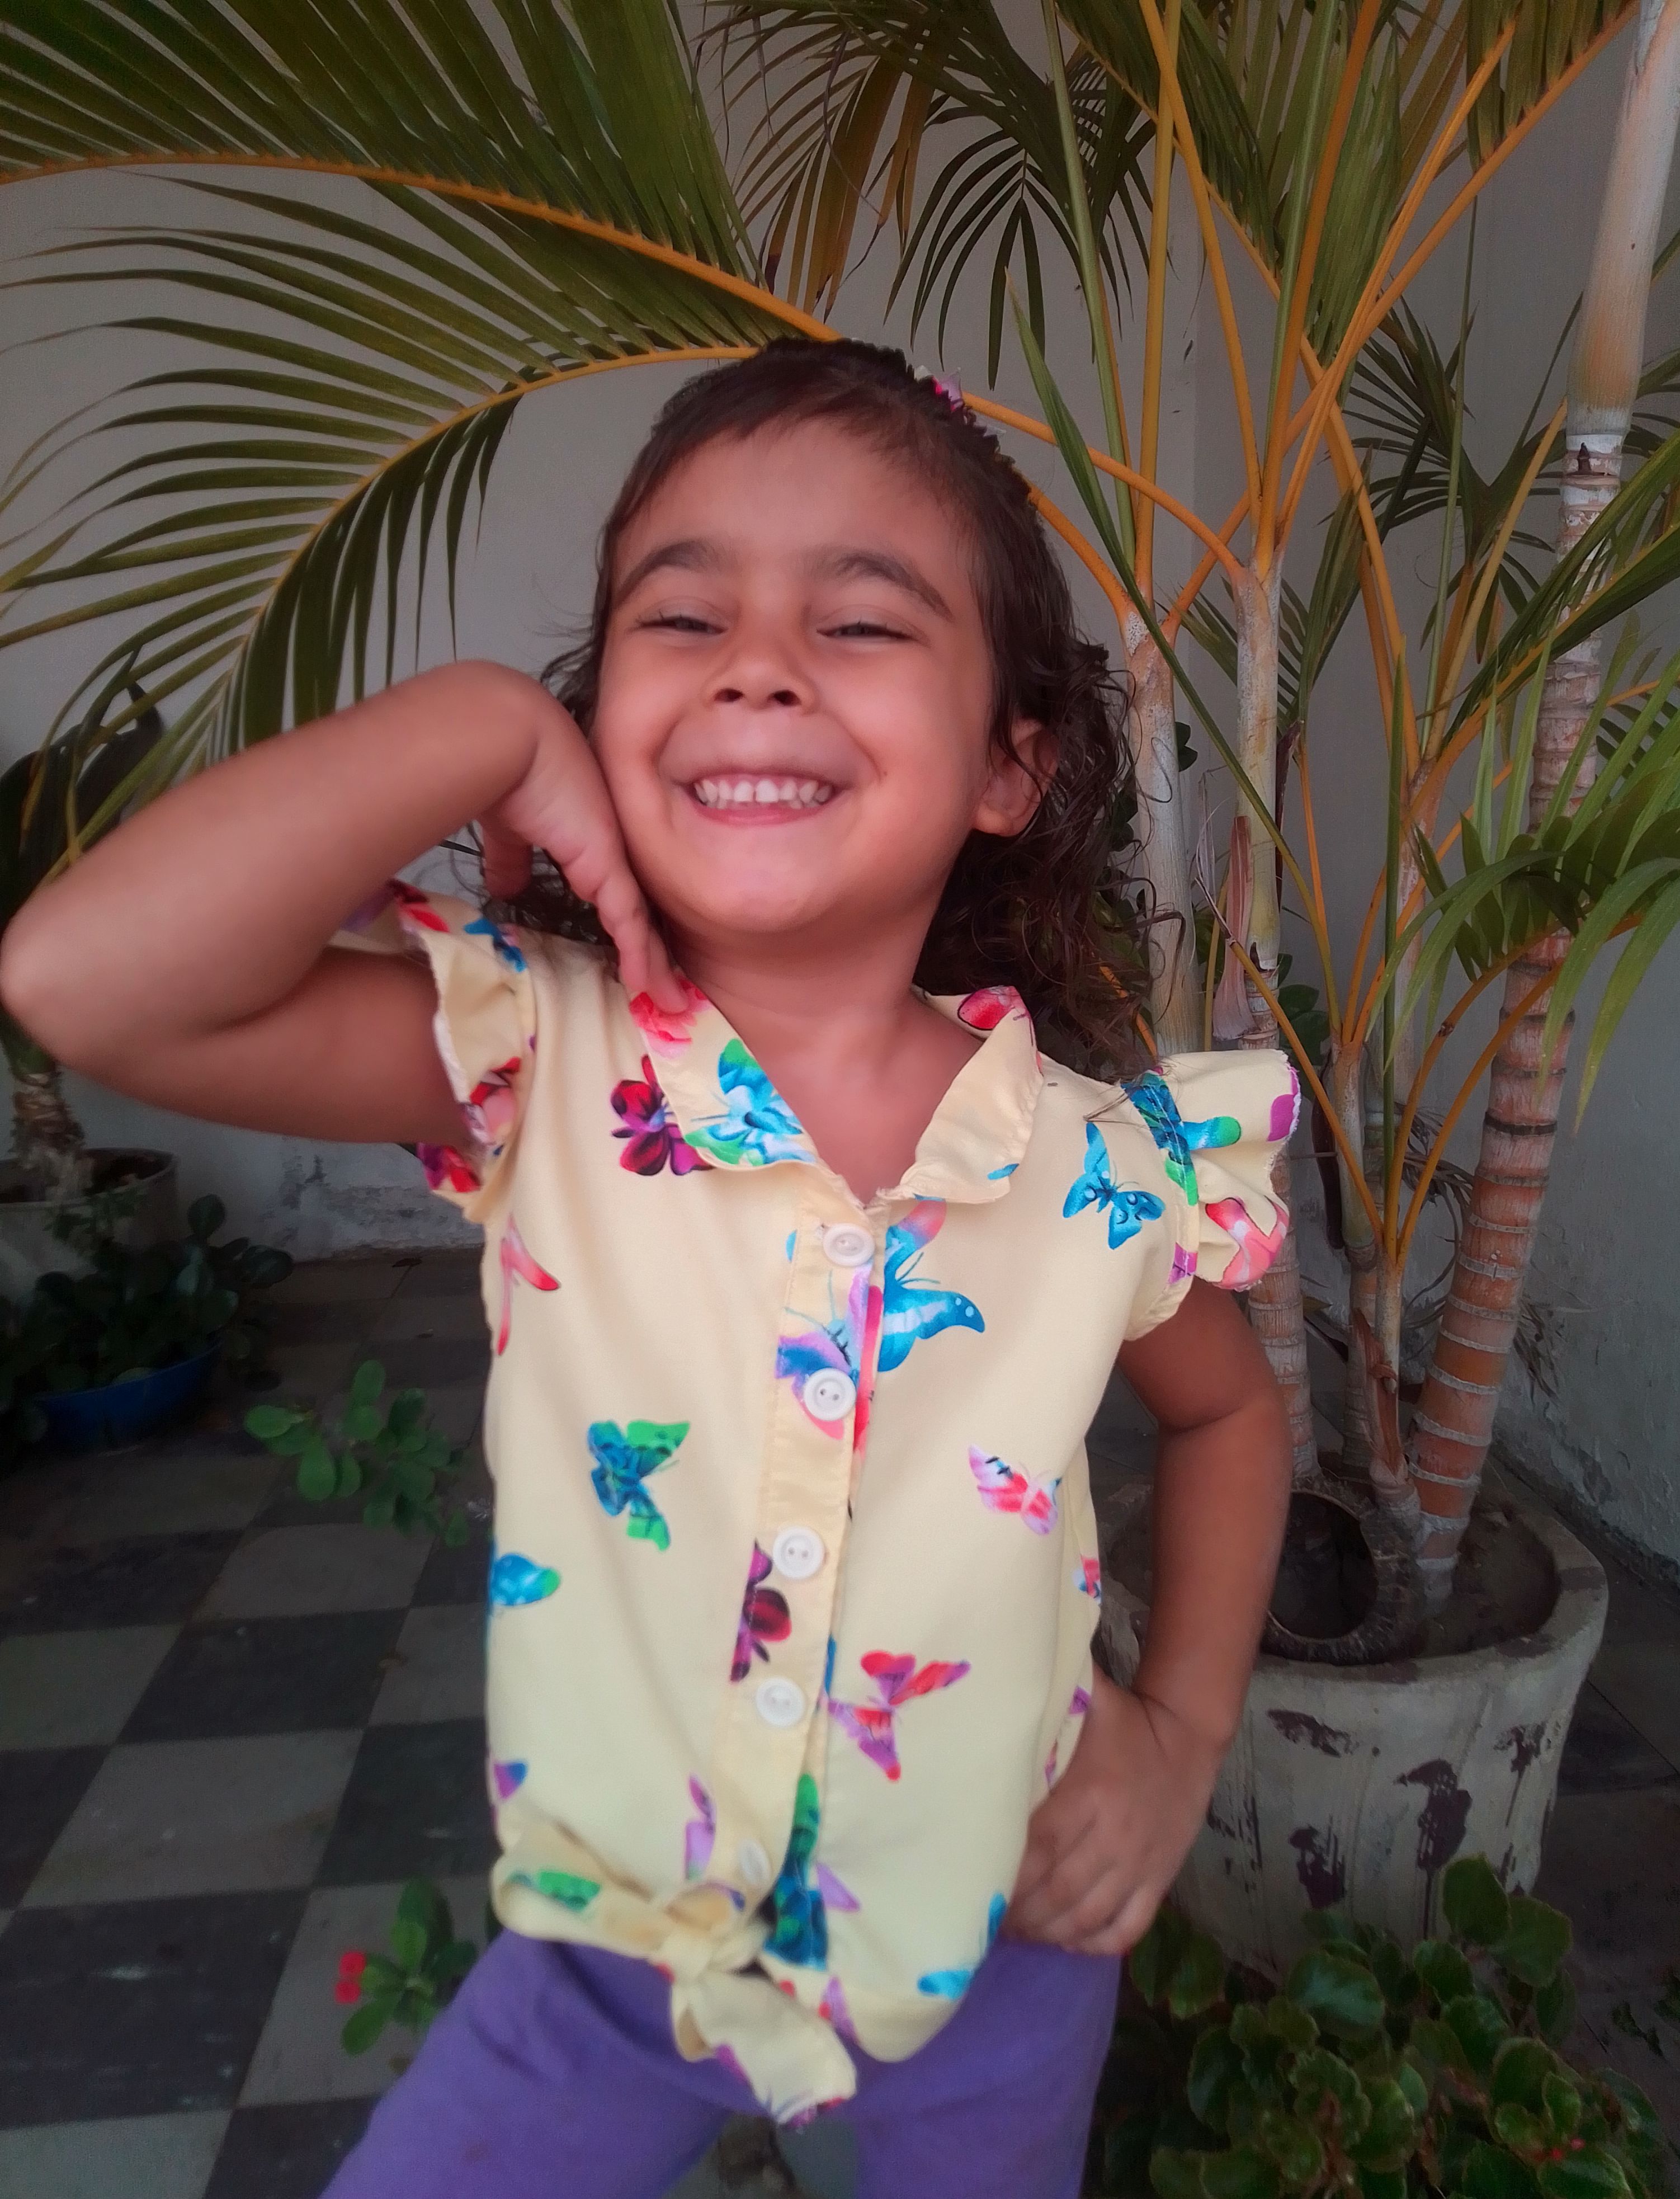
🦋Confección de camisa con cuello, botones y alas de mariposa para niñas//Making a shirt with collar, buttons and butterfly wings for girls🦋
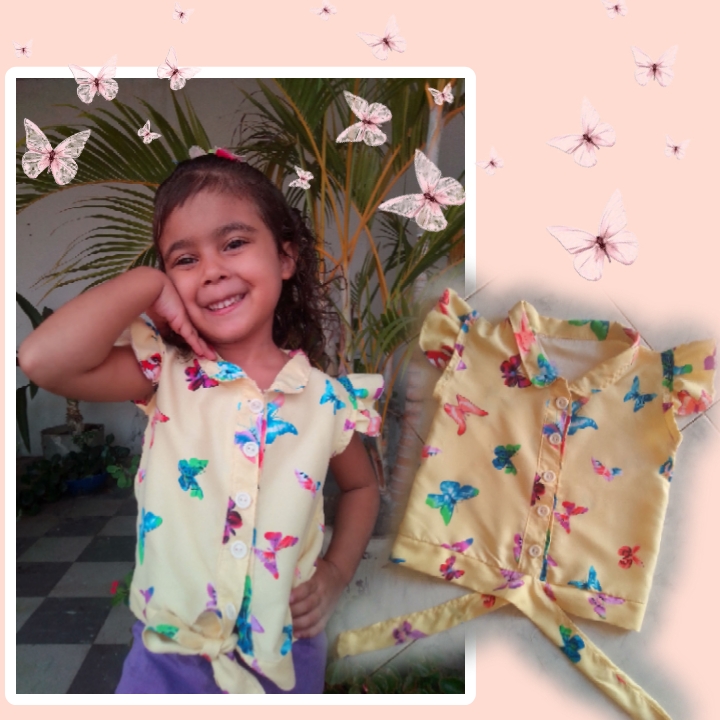
Feliz jueves mis queridos hivers costureros, espero la estén pasando muy bien este día!! Hoy me gustaría aprovechar la oportunidad que se encuentra en mi blog, para enviarles un fuerte abrazo, agradecimiento por todo el apoyo y para mostrarle la confeccion de una extrovertida pieza de vestir con muchos detalles para niñas, se trata de una bonita camisa hecha con tela estampada en mariposas, con cuello y botones, cuenta además con lindas mangas de mariposa por su apariencia holgada y fruncida y un amarre en la parte de adelante muy moderno al estilo coquette... Acompañame a ver este lindo tutorial, donde te diré que necesitas y cada paso que debes seguir para llevar a cabo este tierno proyecto.
Happy Thursday my dear sewing hivers, I hope you are having a great time this day!! Today I would like to take advantage of the opportunity that is on my blog, to send you a big hug, thank you for all the support and to show you the making of an extroverted piece of clothing with many details for girls, it is a beautiful shirt made with fabric printed in butterflies, with a collar and buttons, it also has cute butterfly sleeves for its loose and gathered appearance and a very modern tie in the front in the coquette style... Come with me to see this cute tutorial, where I will tell you what you need and each step you must follow to carry out this tender project.
La suavidad, textura y estampados que nos ofrece la tela Micromed me encanta a la hora de realizar la ropa para mí niña, aunque se trata de una tela poco flexible, tiene cualidades que hacen que este tipo de piezas queden perfectas, es súper facil de coser y moldear, por este motivo, fue la que escogí oara este proyecto.
I love the softness, texture and prints that the Micromed fabric offers us when making clothes for my girl, although it is a not very flexible fabric, it has qualities that make it type of pieces are perfect, it is super easy to sew and shape, for this reason, it was the one I chose for this project.
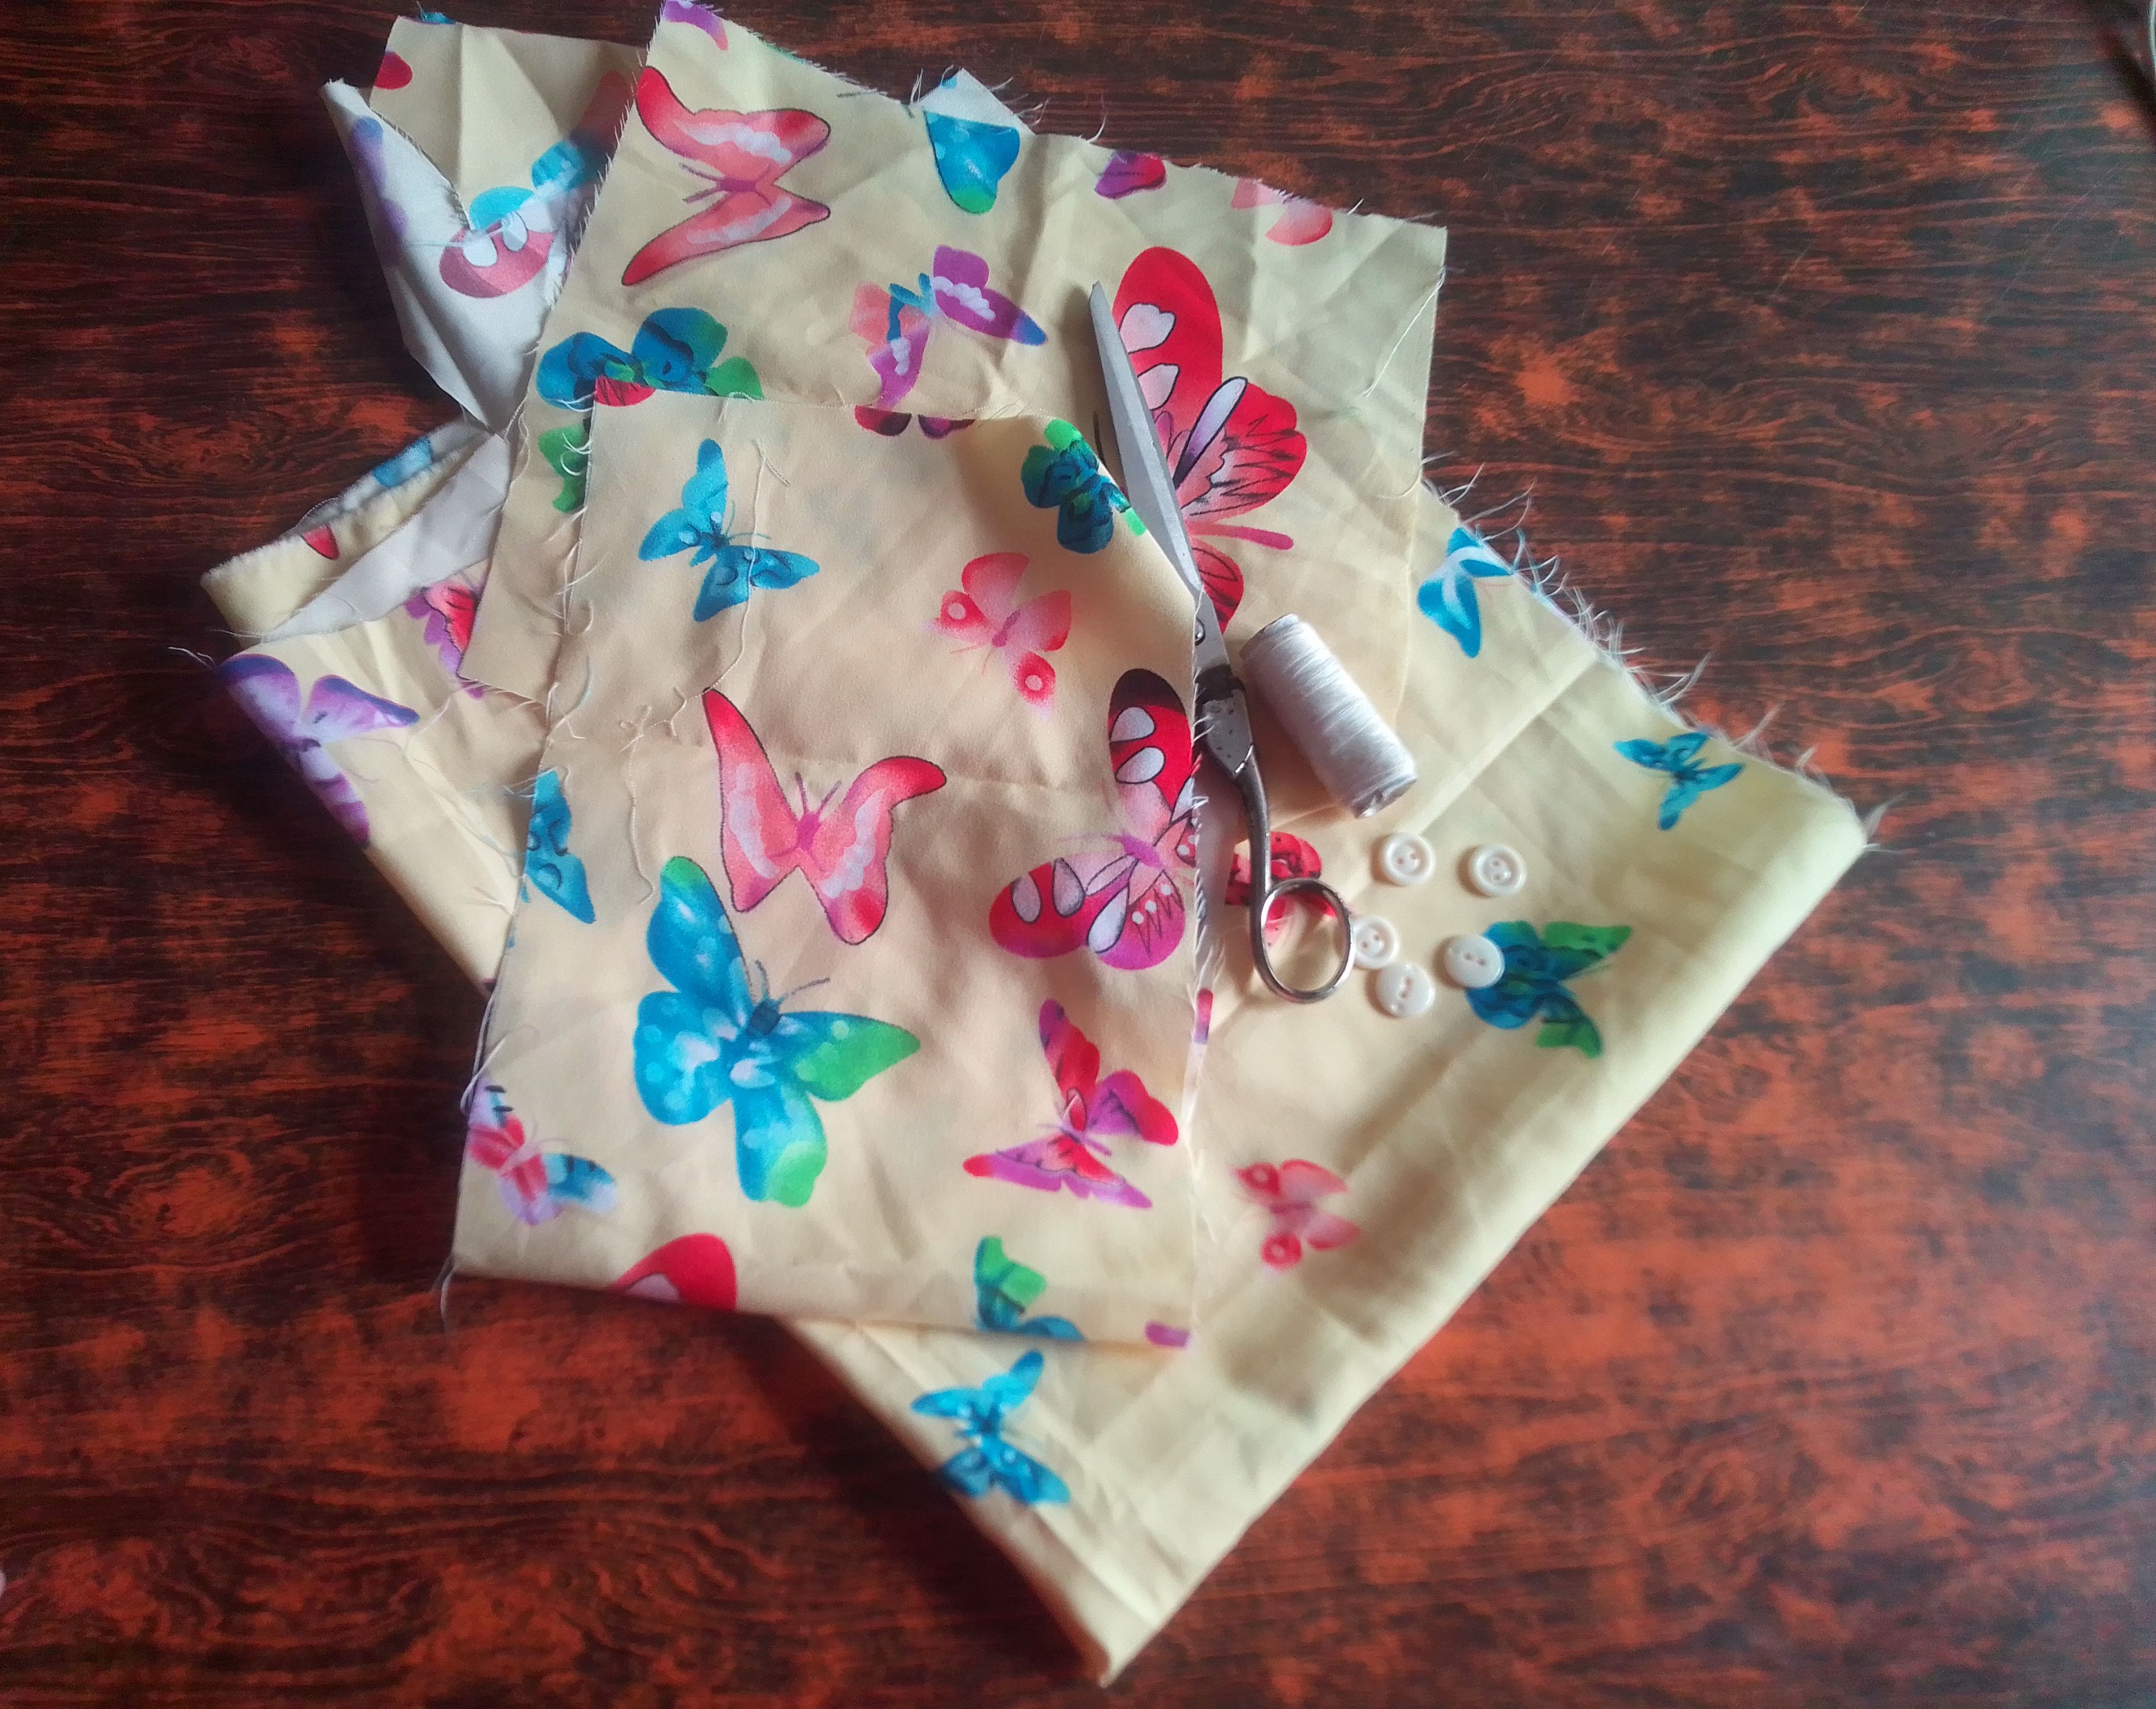
Materiales que necesitas:
- Tela.
- Hilo y aguja.
- Tijeras.
- Botones.
- Máquina de coser.
- Fabric.
- Thread and needle.
- Scissors.
- Buttons.
- Sewing machine.
(PROCEDIMIENTO)
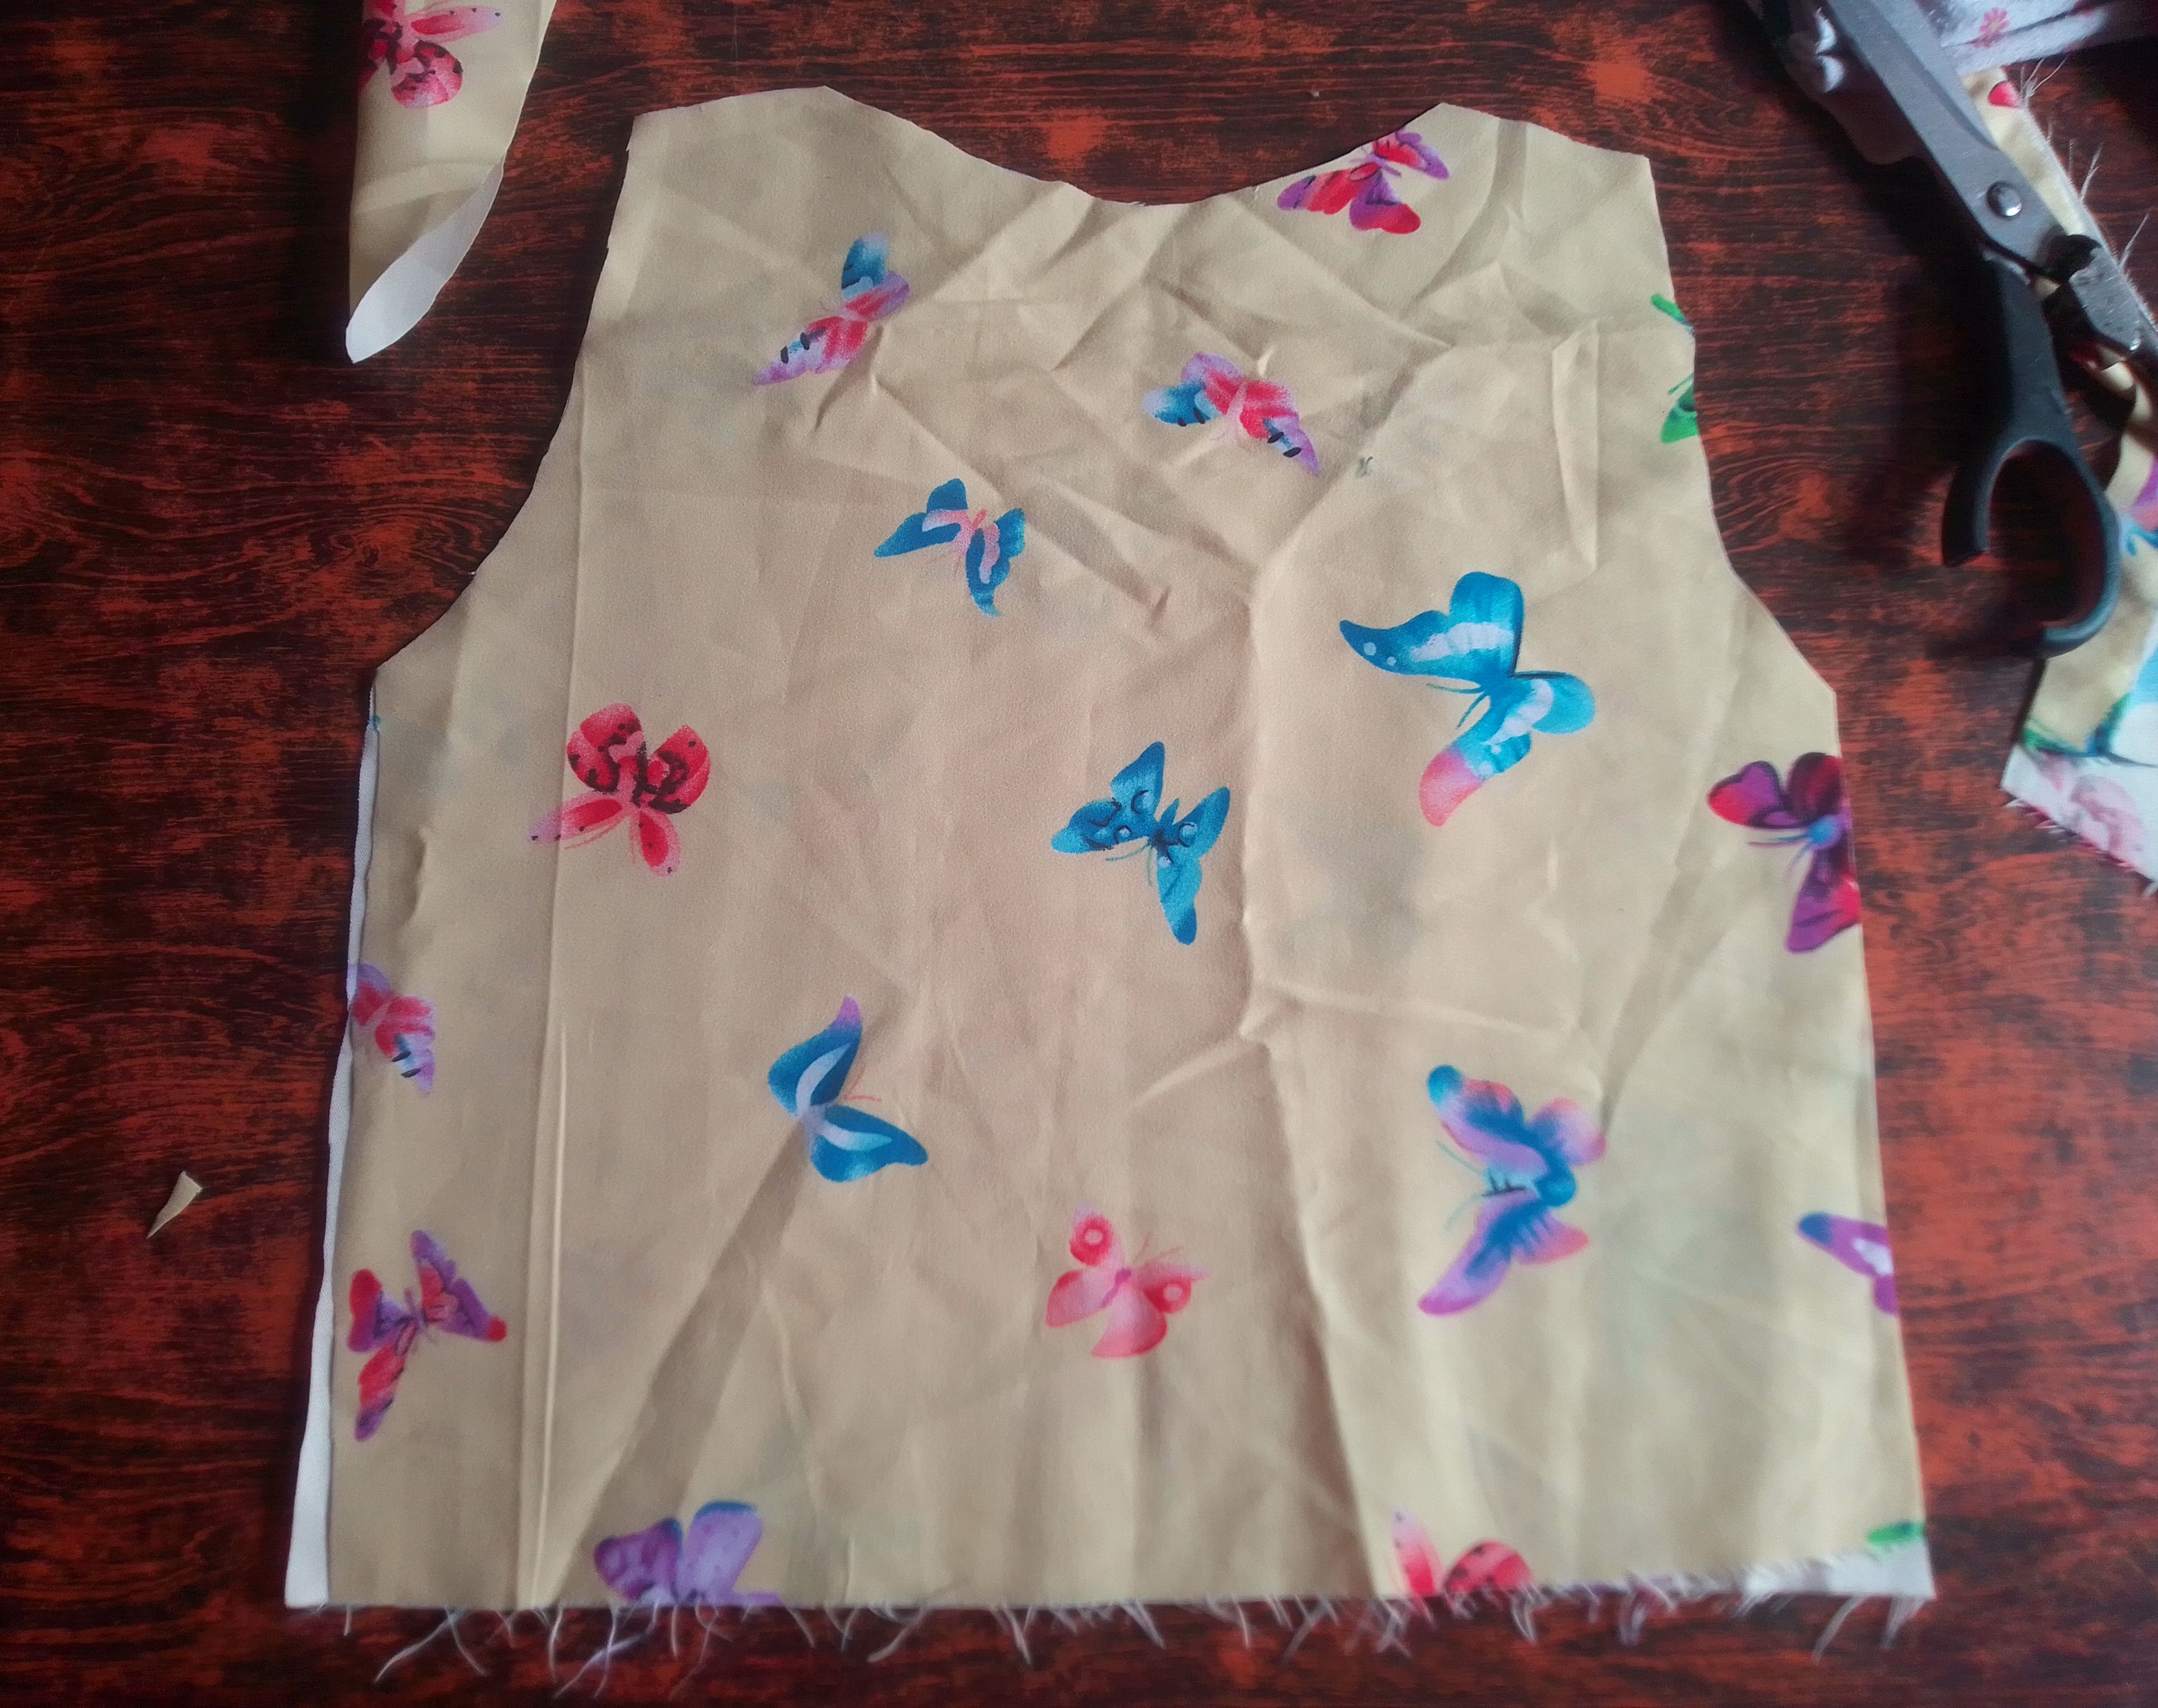
Paso 01
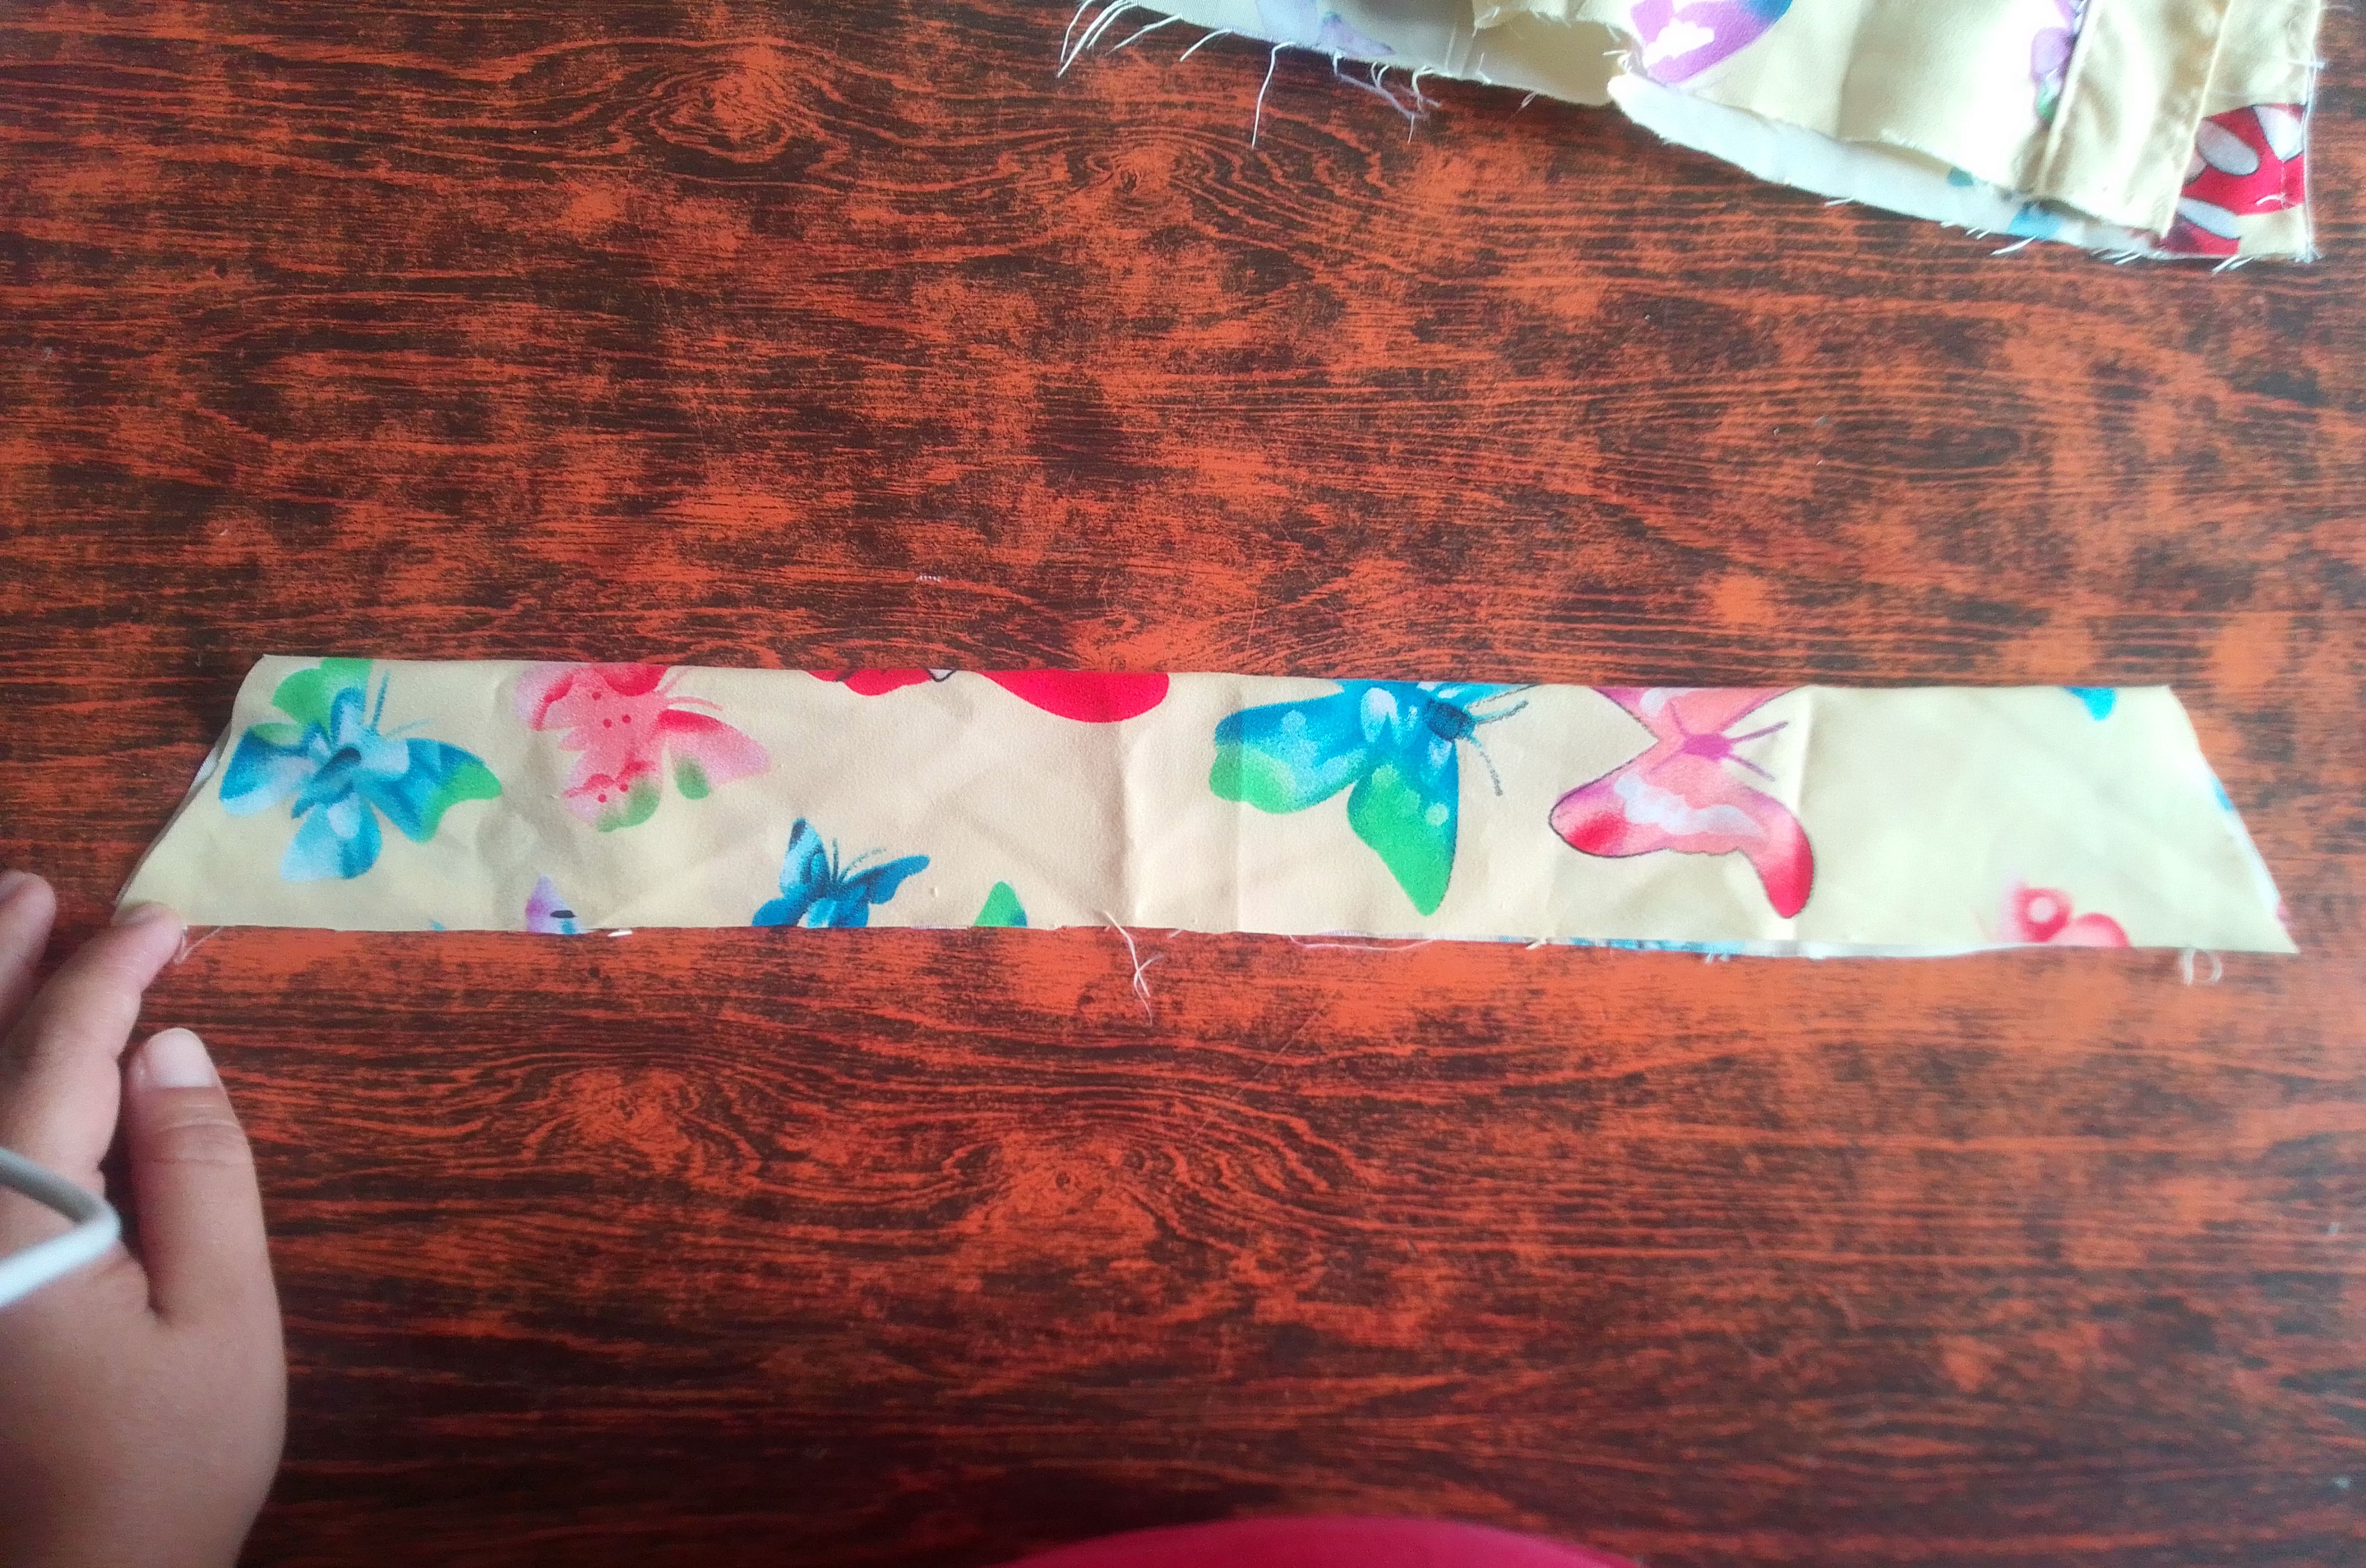
Para la confección de está prenda, necesitamos cortar las partes que la conforman que son, dos piezas delantera, dos tiras para los dobladillos frontales( dónde iran los botones), una pieza trasera, una tira gruesa para el cuello, una larga para la parte inferior y dos tiras curvas semigruesas para las mangas.
Step 01
To make this garment, we need to cut the parts that make it up, which are two front pieces, two strips for the front hems (where the buttons will go), a back piece, a strip thick for the neck, a long one for the bottom and two semi-thick curved strips for the sleeves.
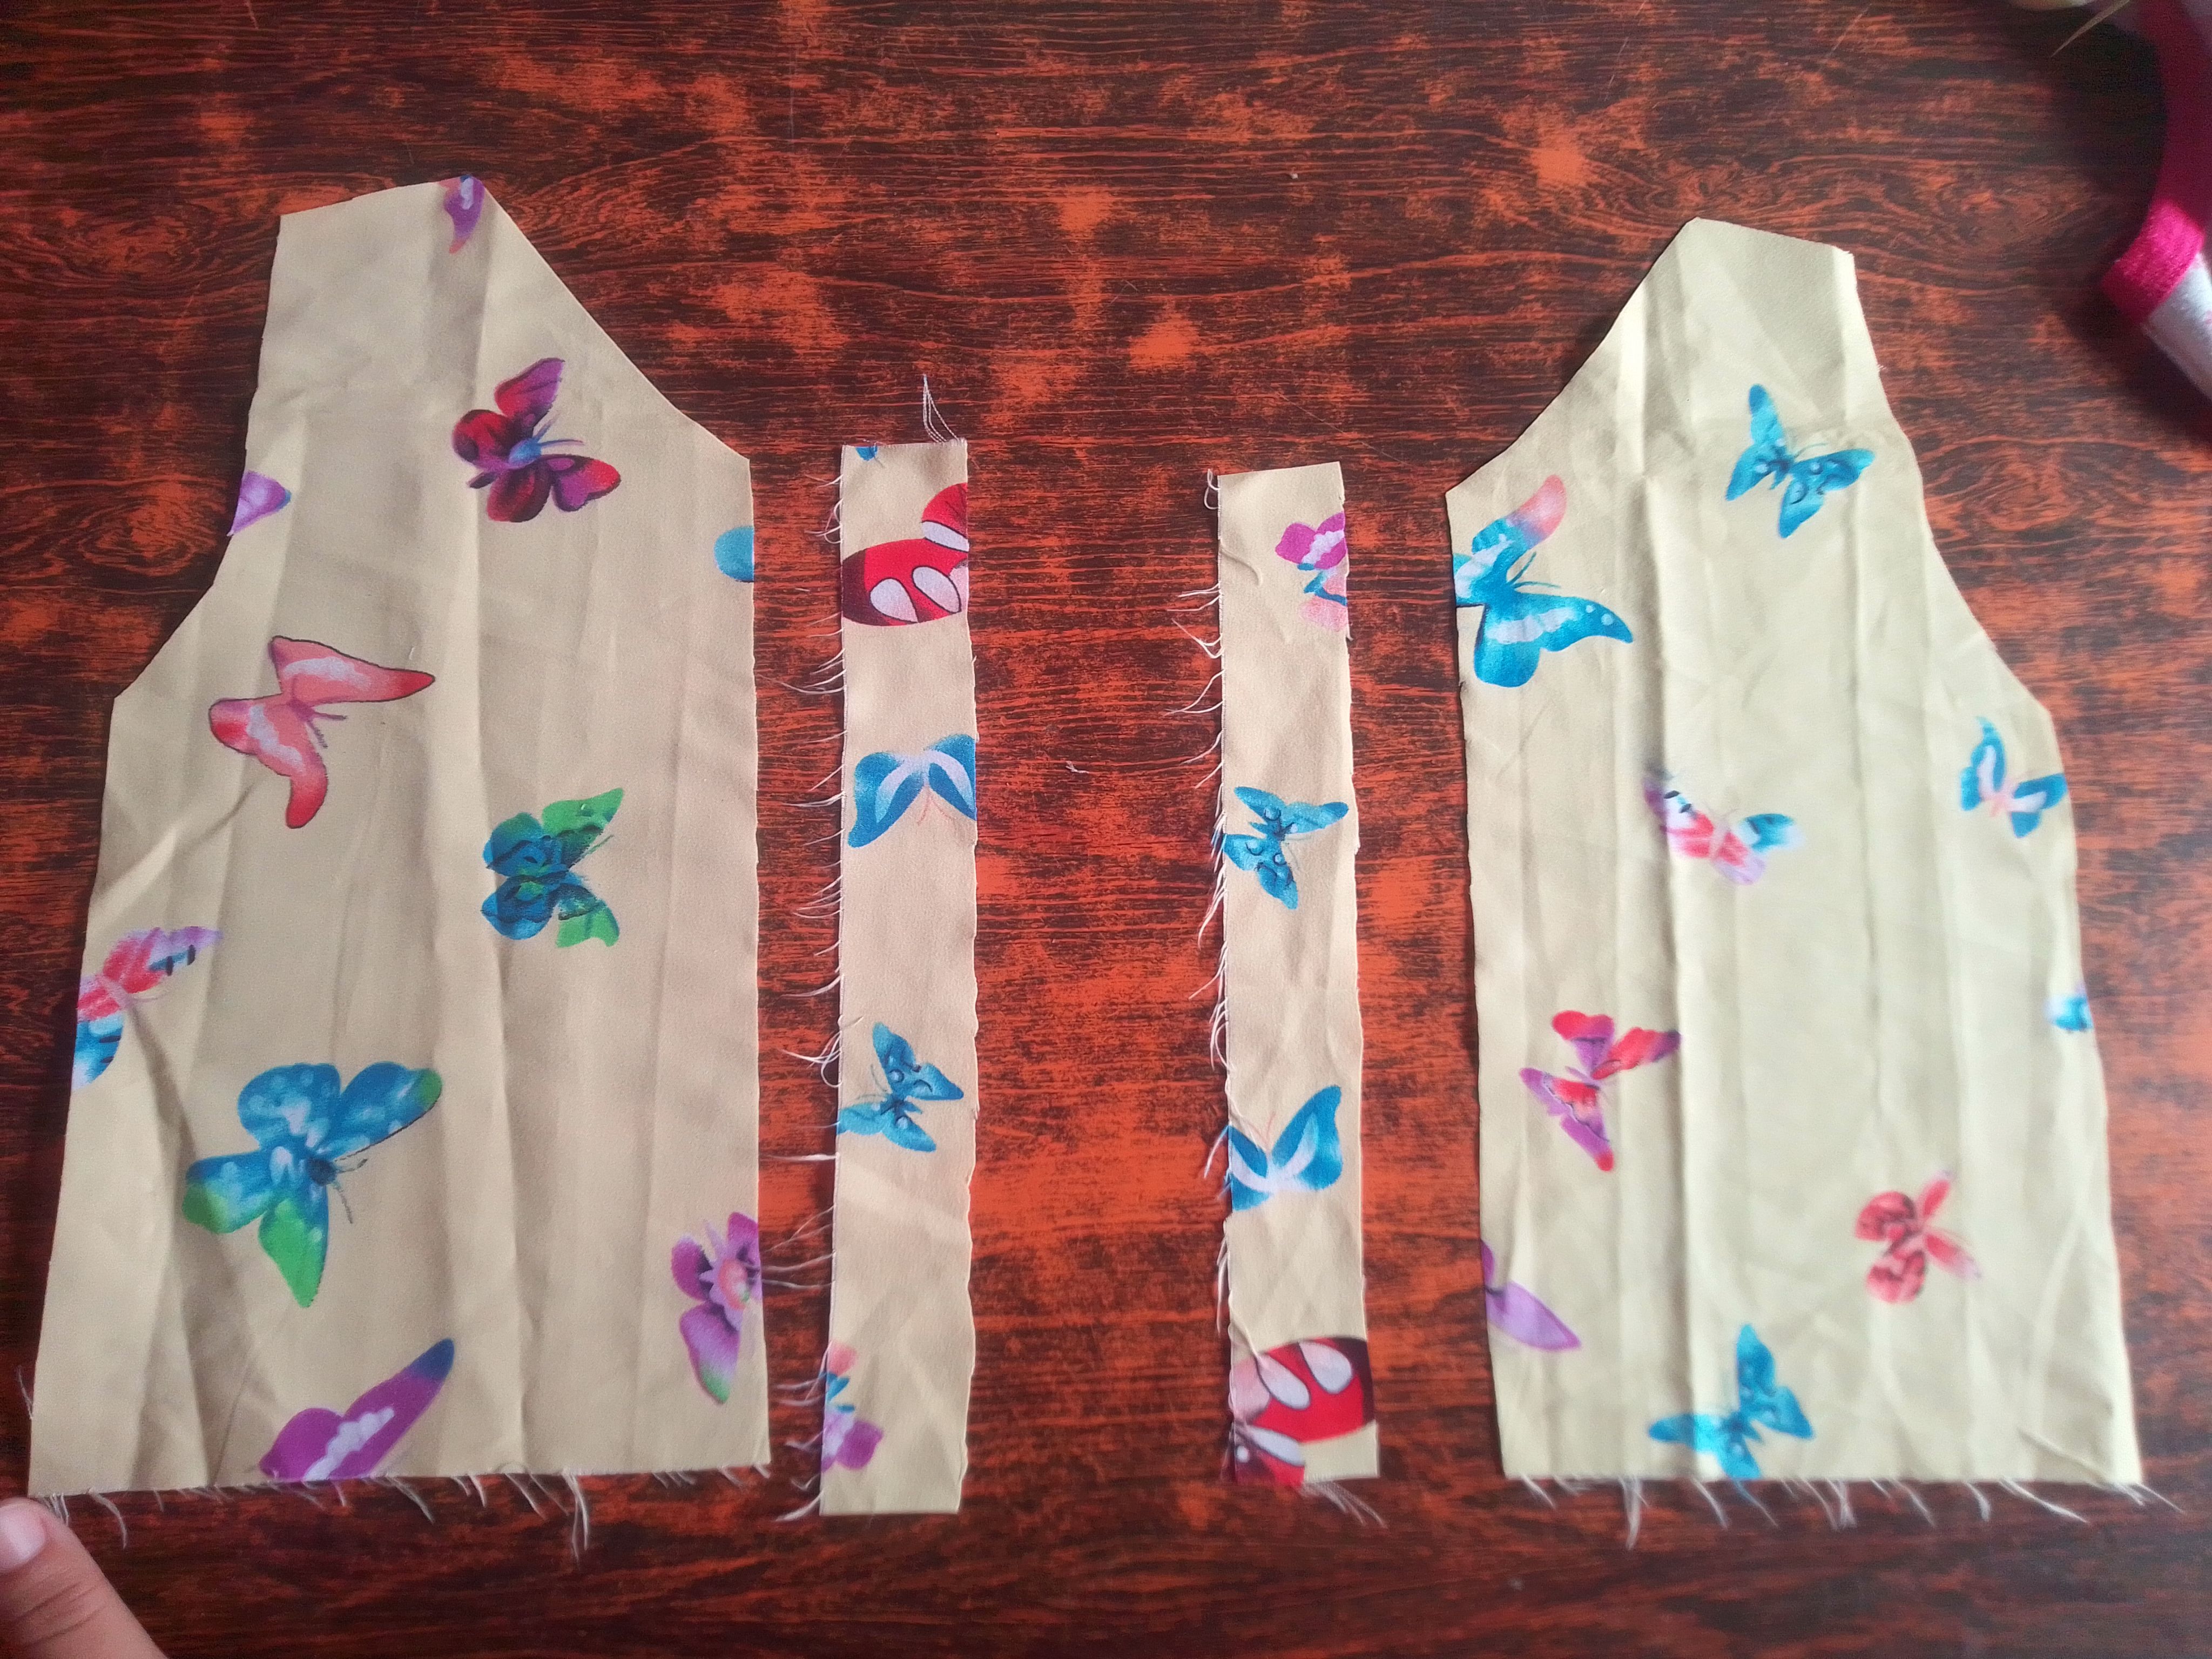
Paso 02
Literalmente podemos cortar una parte delantera entera y luego separarlas. Luego con costura recta unimos las tiras que vas desde el cuello hasta la parte inferior y hago un pespunte o costura superficial.
Step 02
We can literally cut off an entire front part and then separate them. Then with a straight seam we join the strips that go from the neck to the bottom and I make a topstitch or superficial seam.
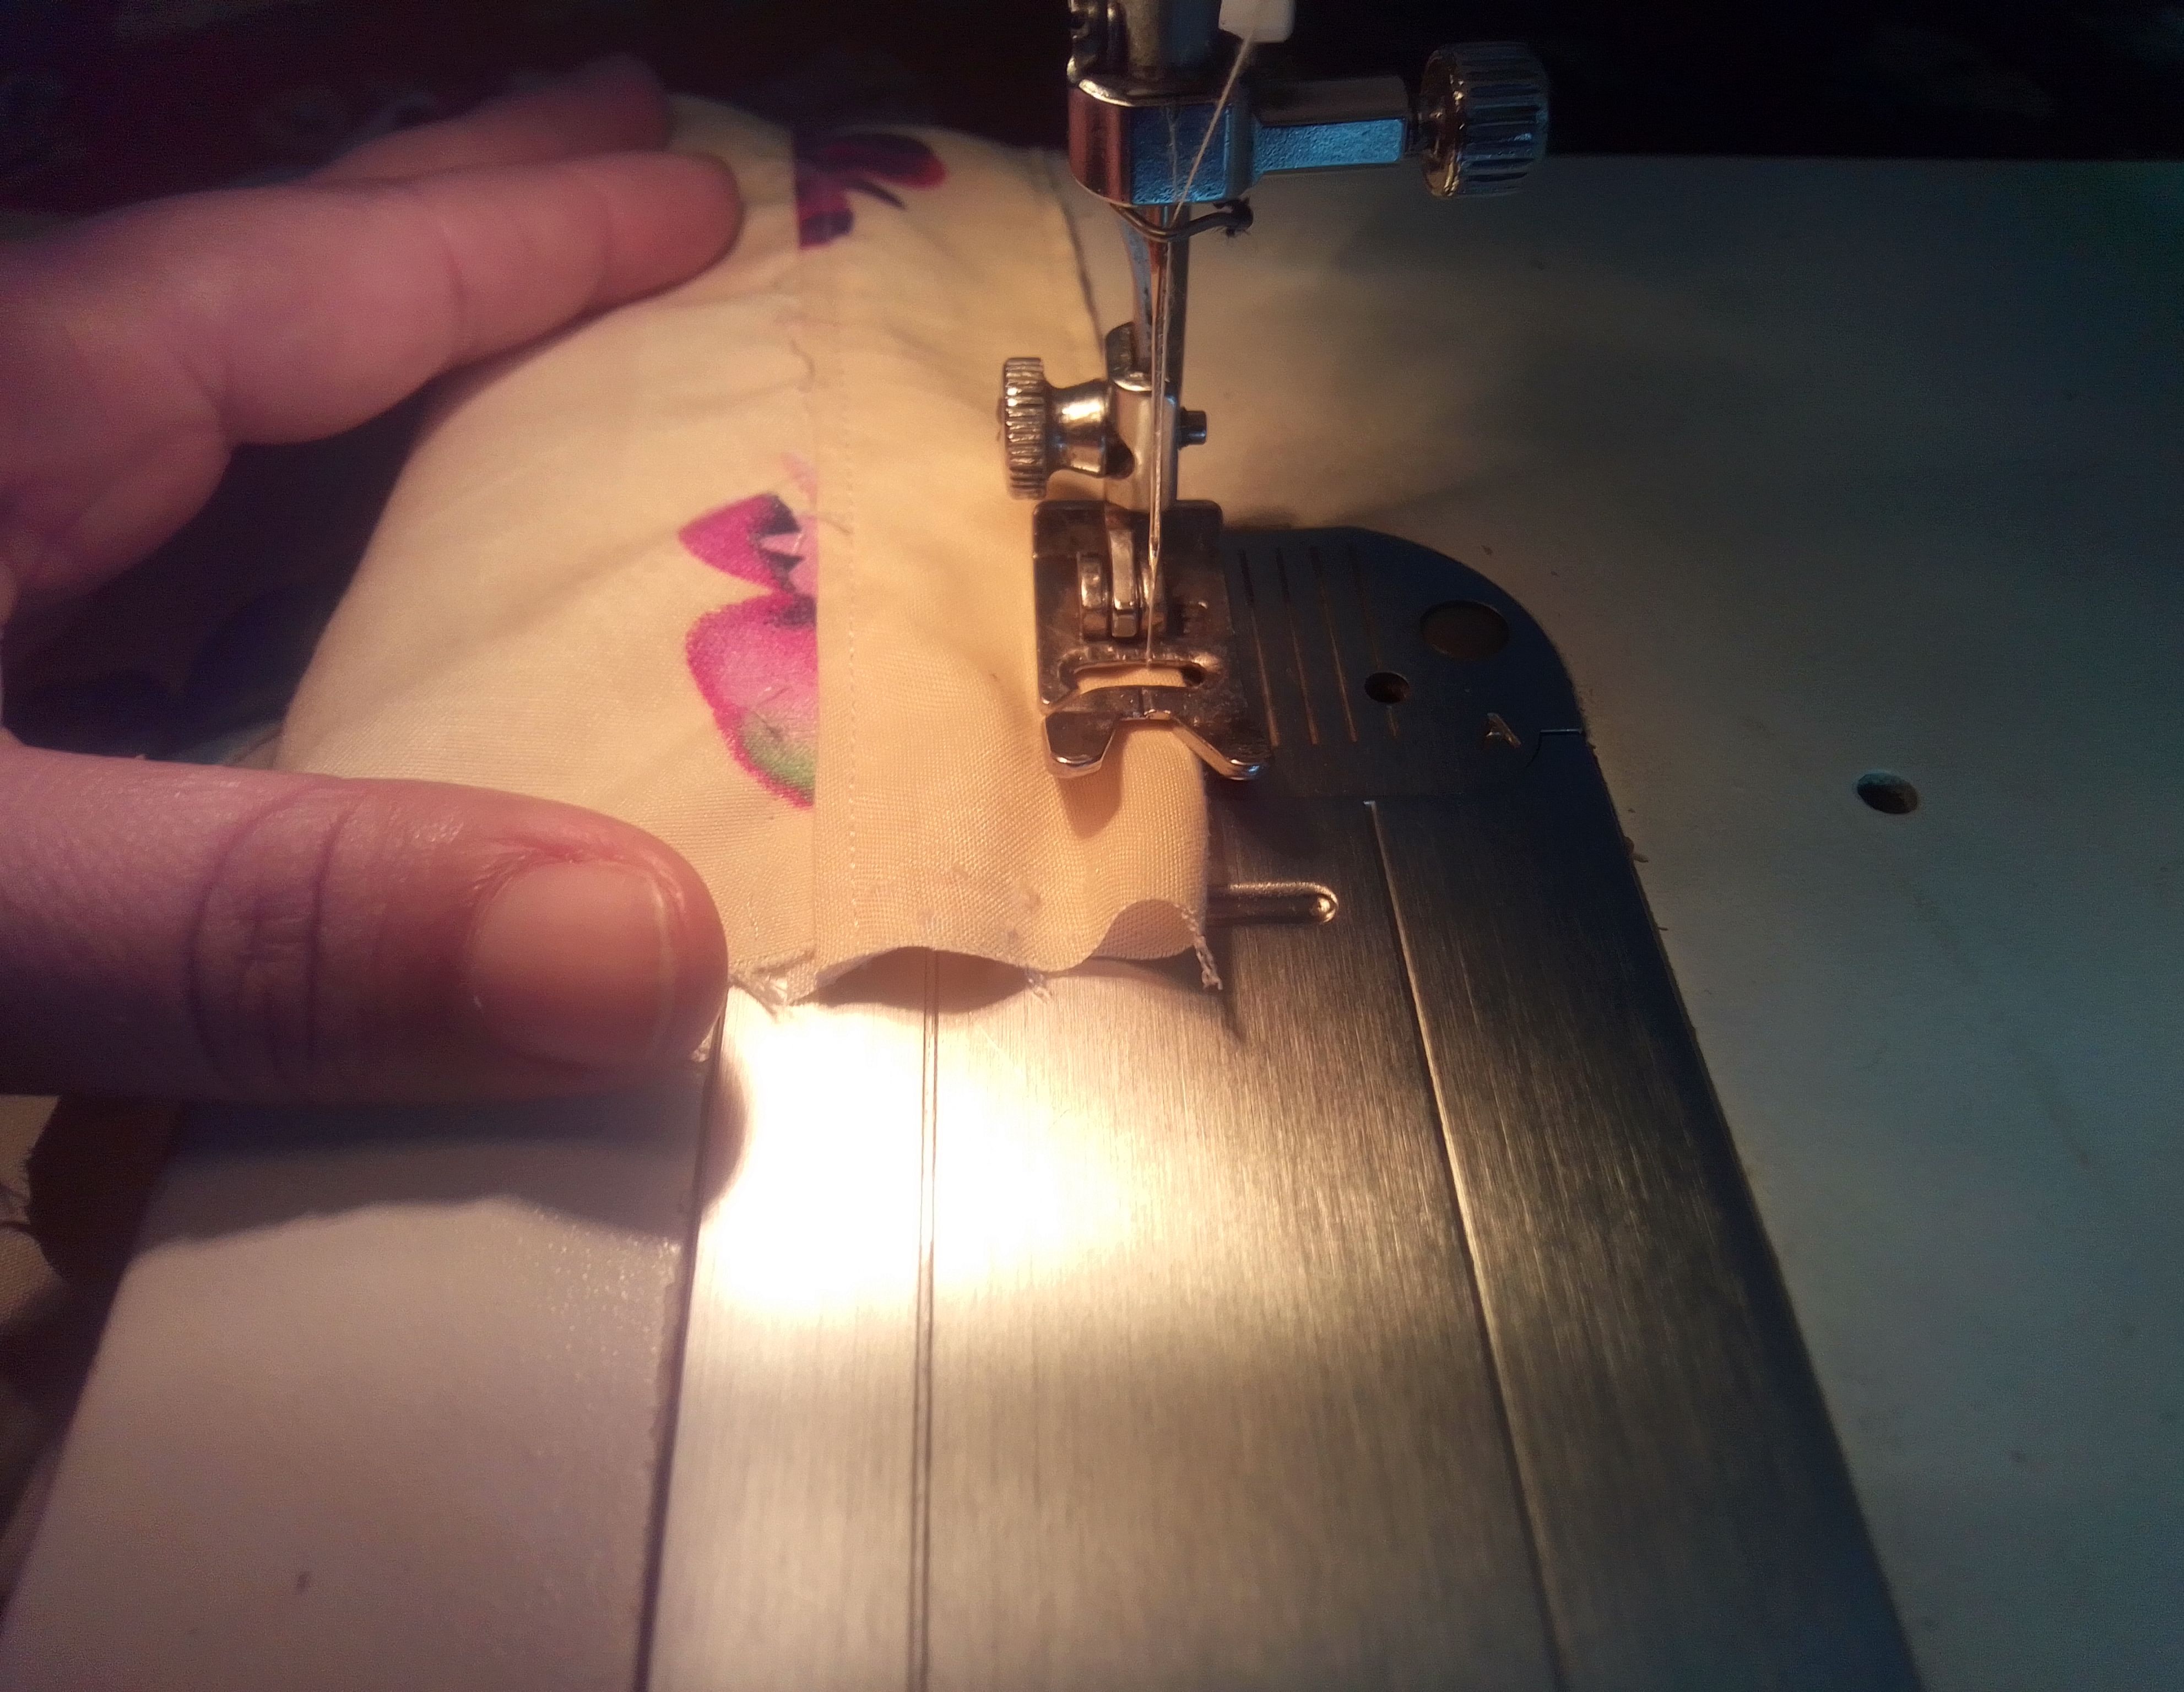
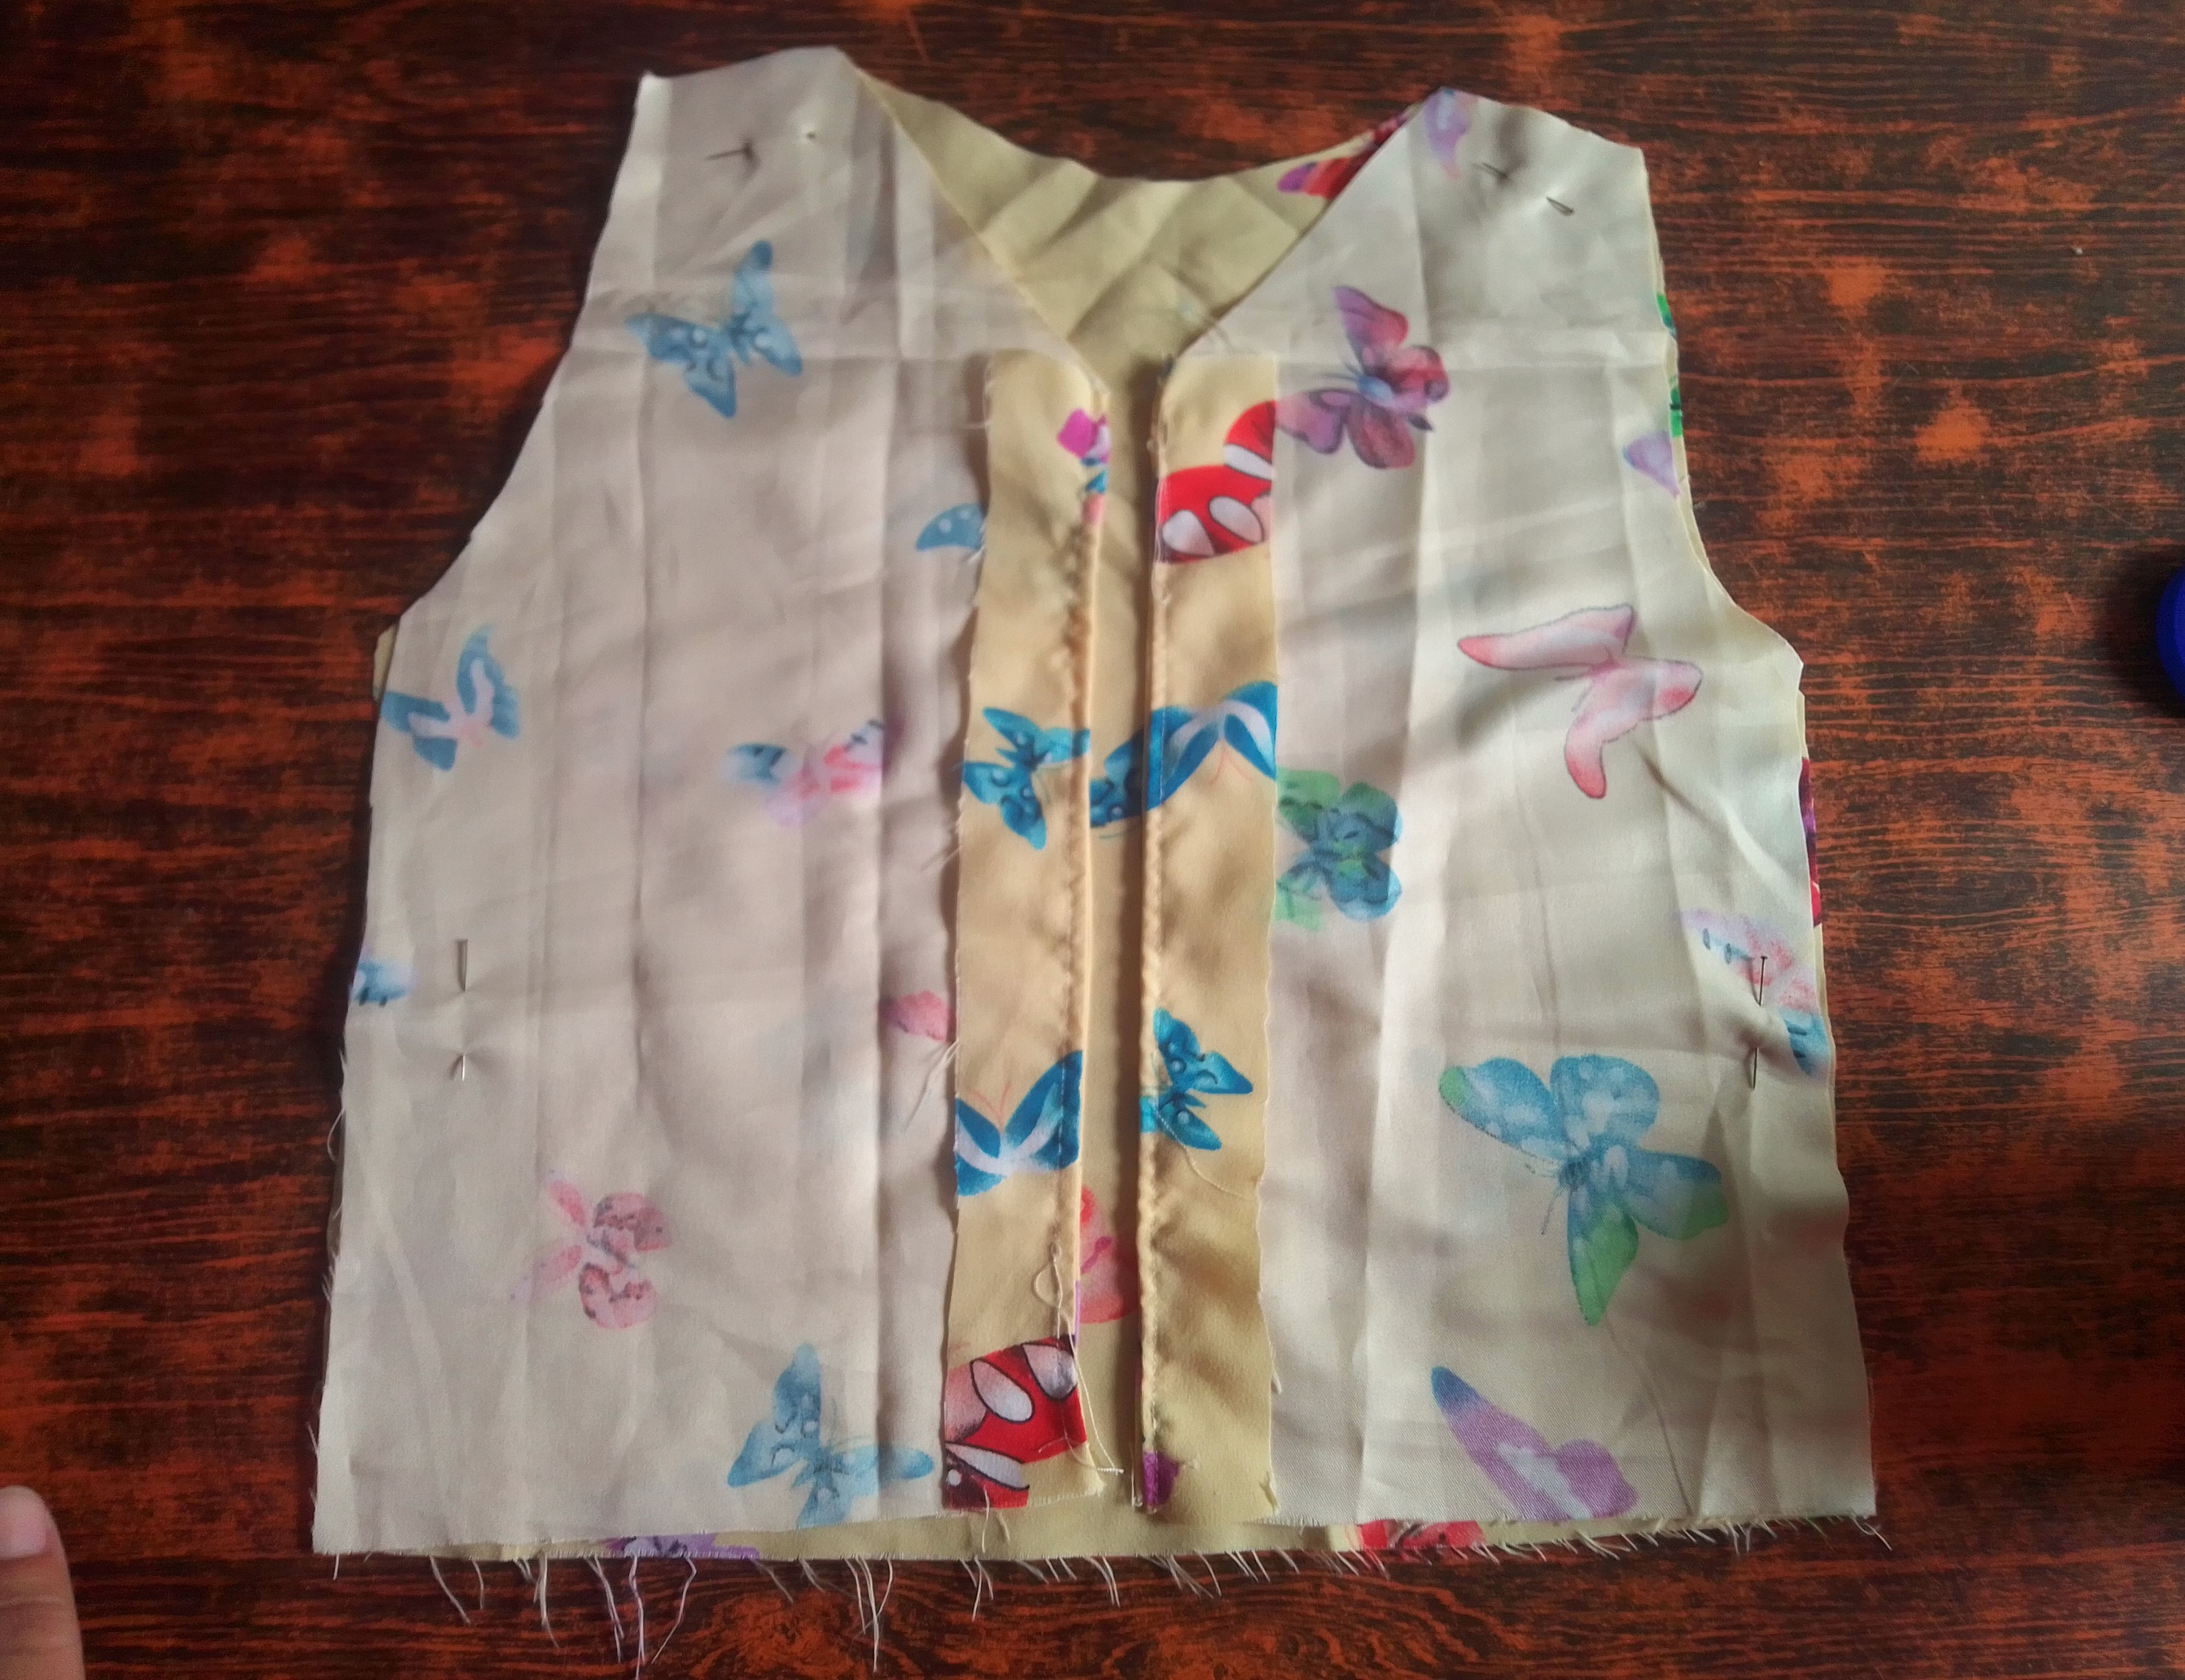
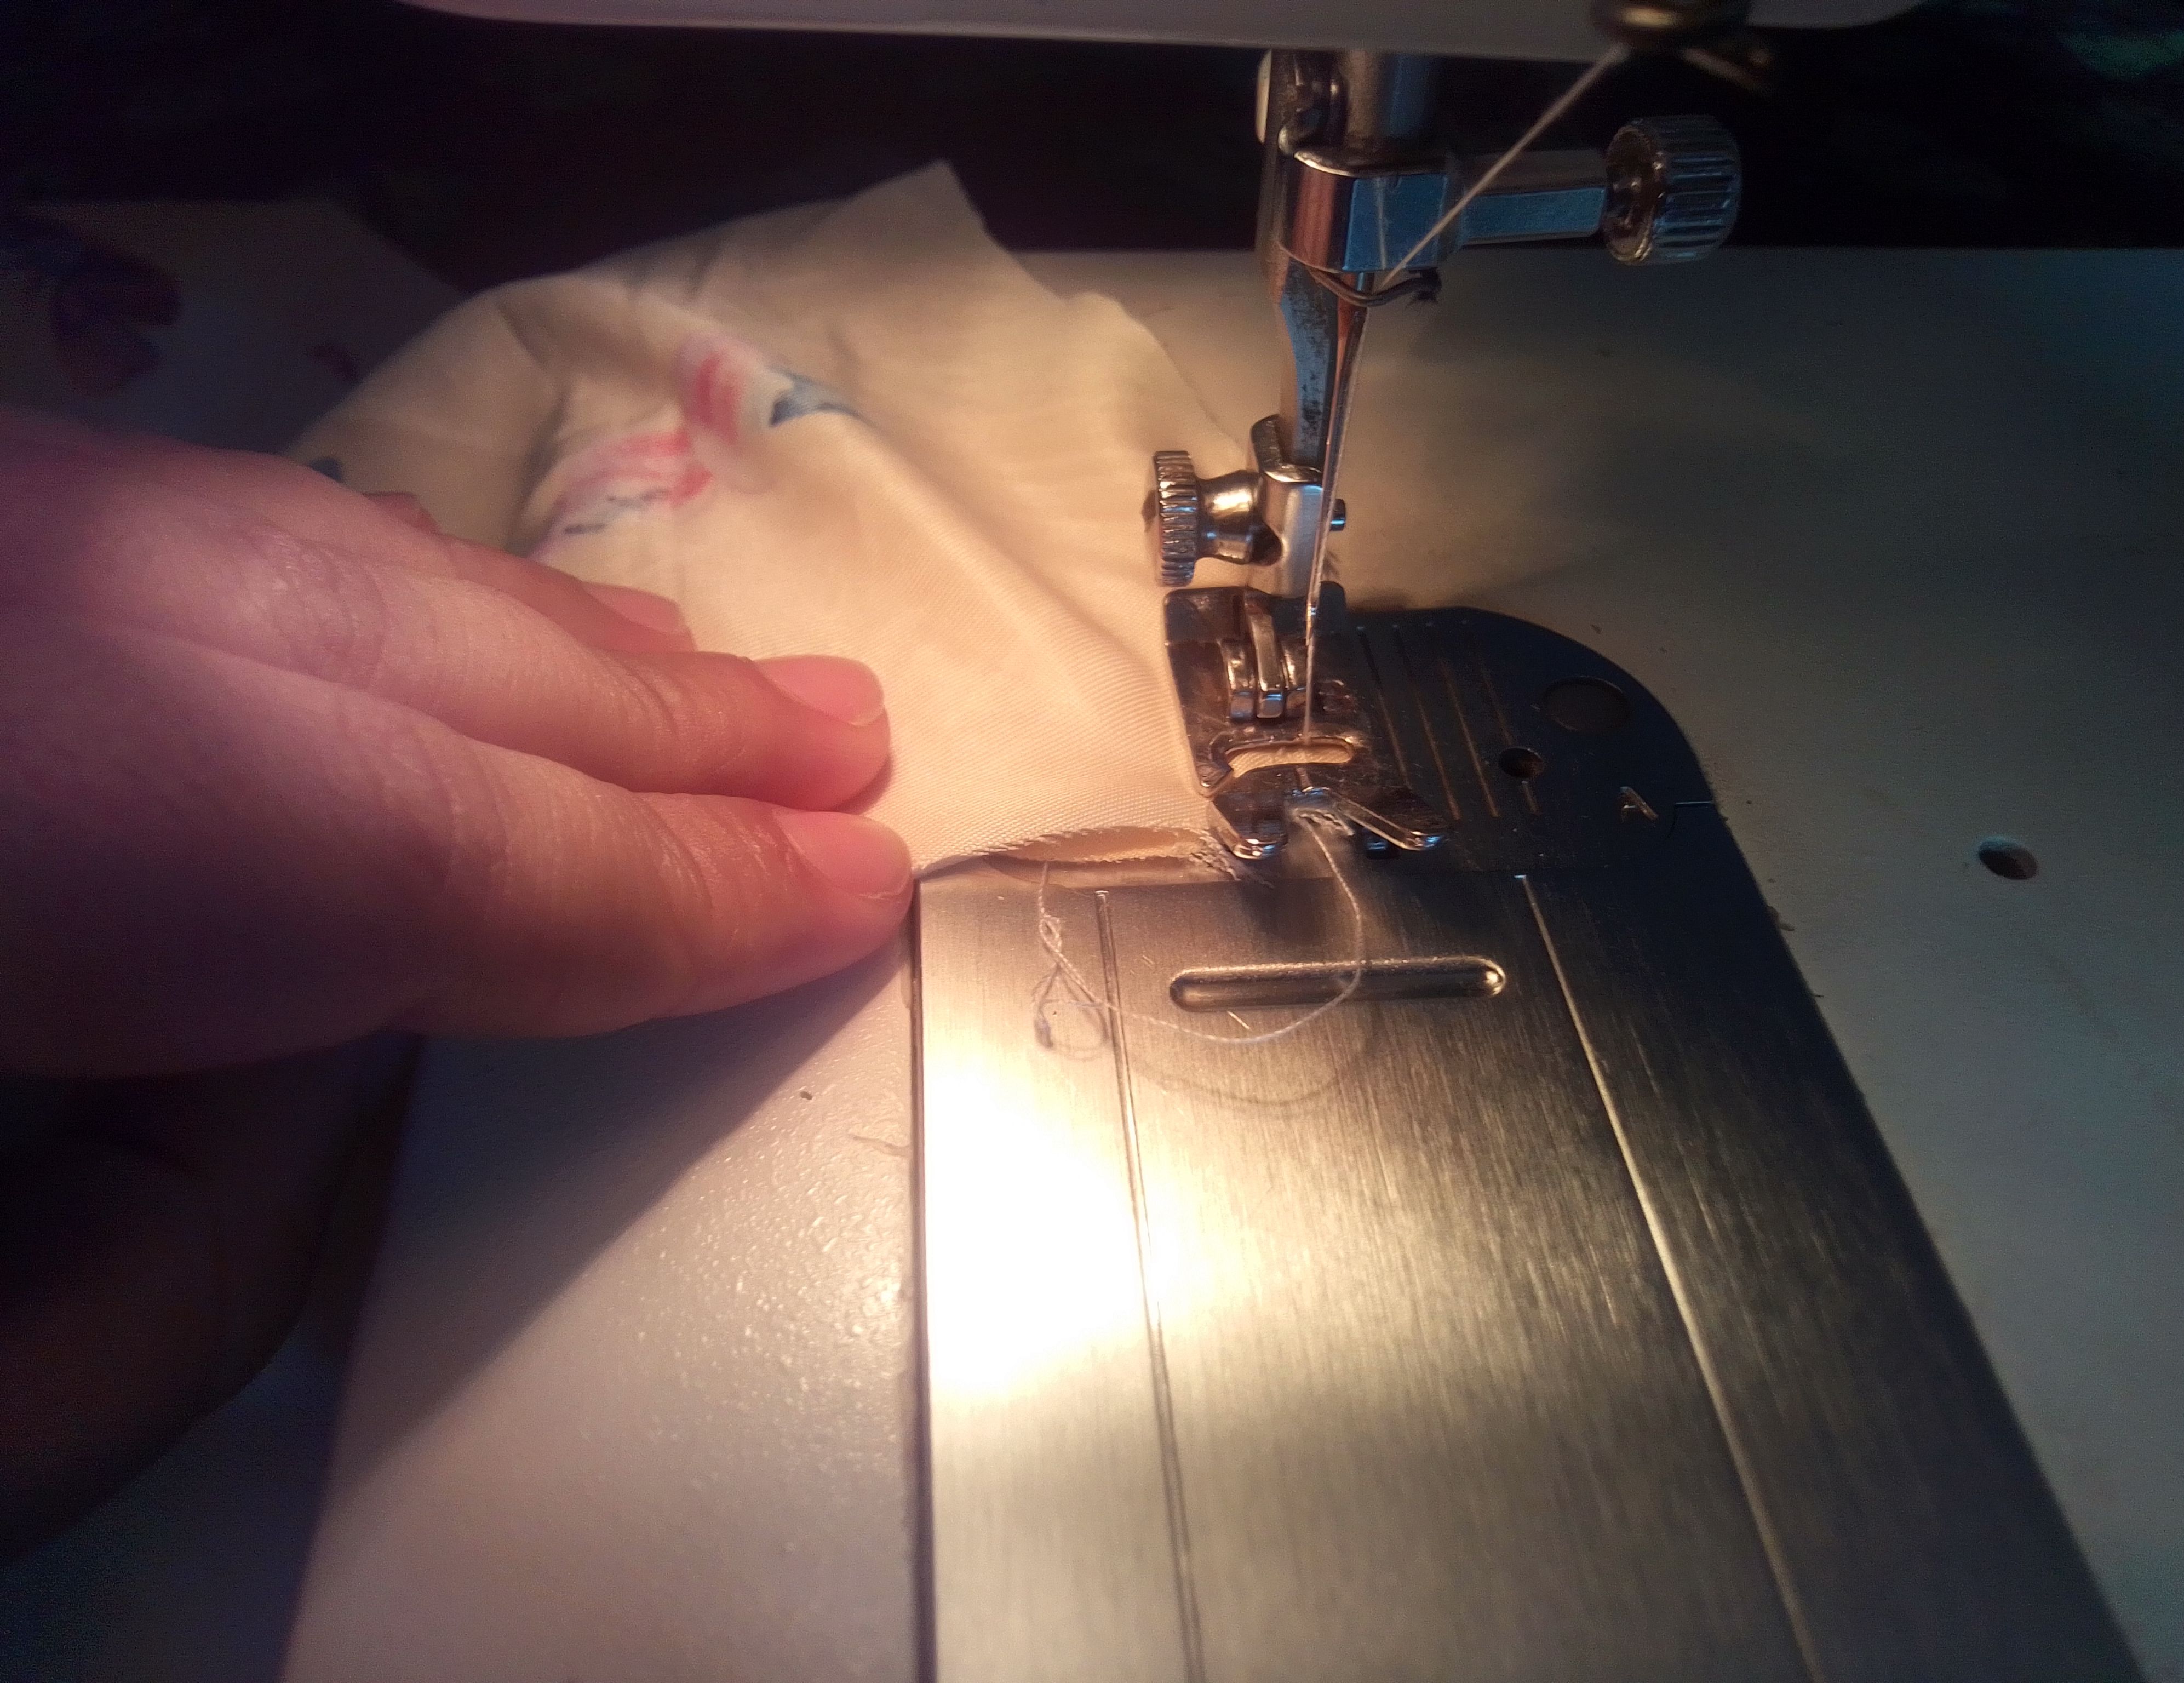
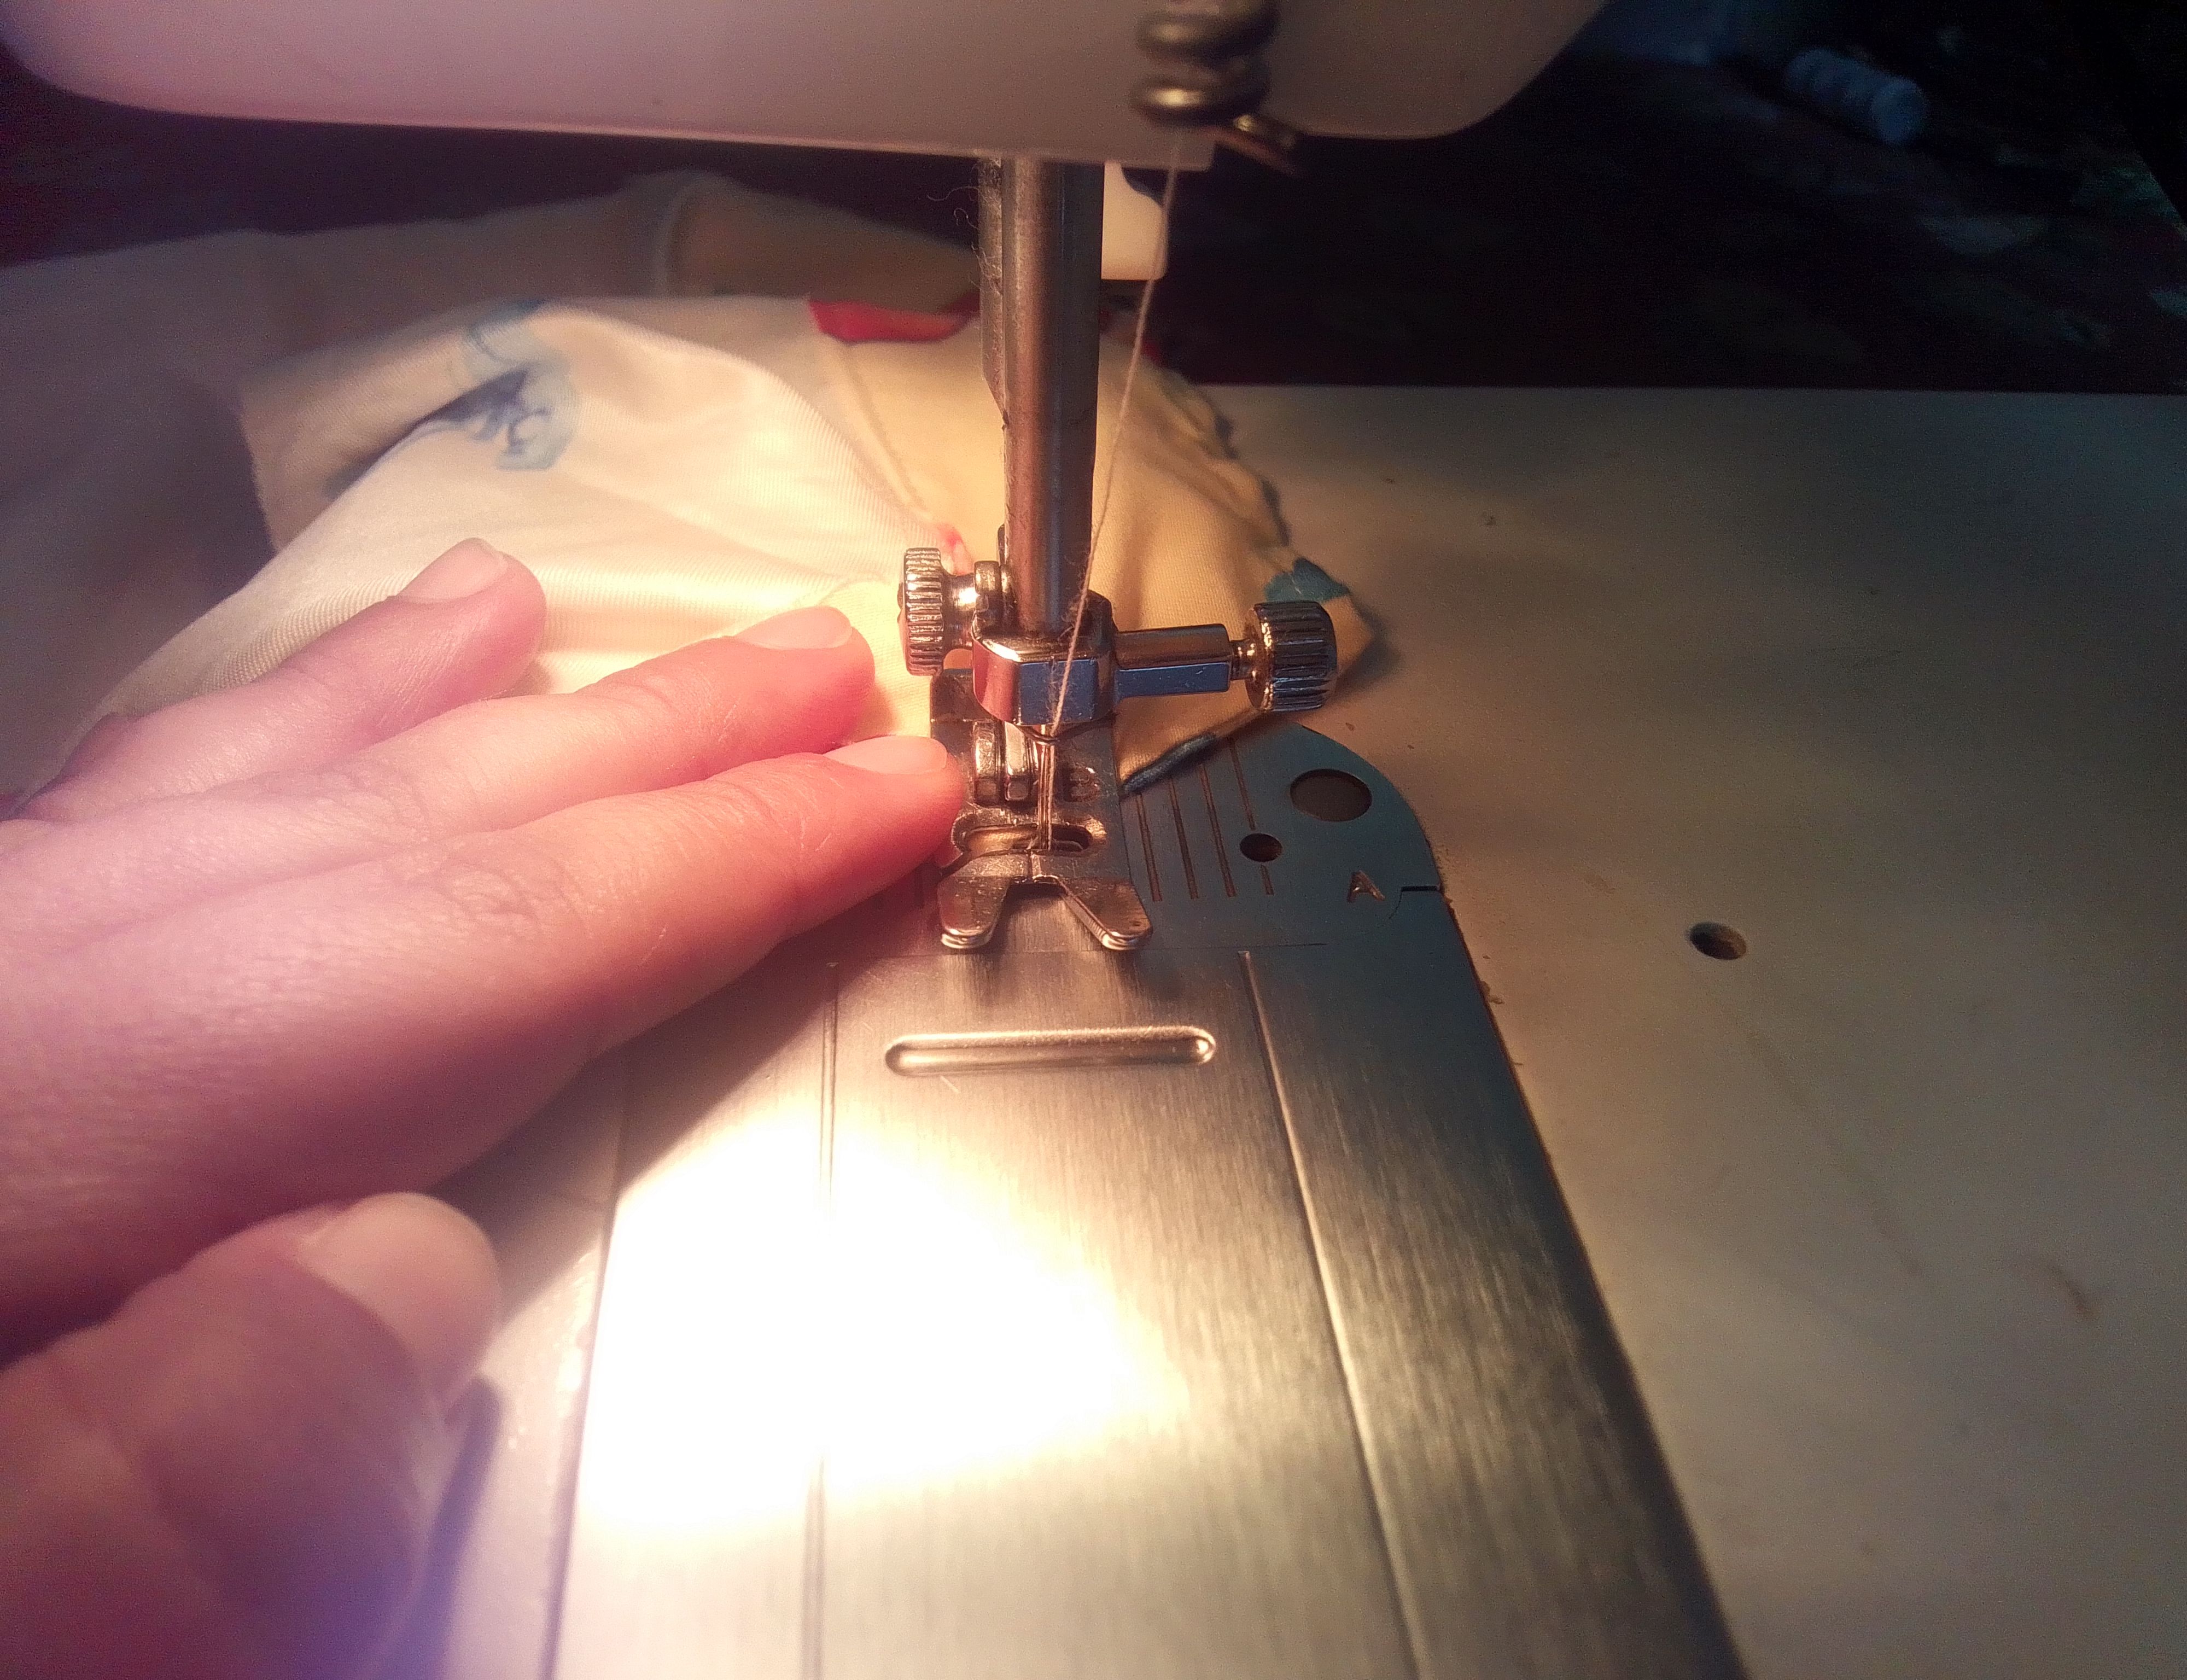
Paso 03
Coso la parte de los hombros y ambos laterales, hacemos una costura zig zag en las orillas para un mejor acabado.
Step 03
I sew the shoulder part and both sides, we make a zig zag seam on the edges for a better finish.---
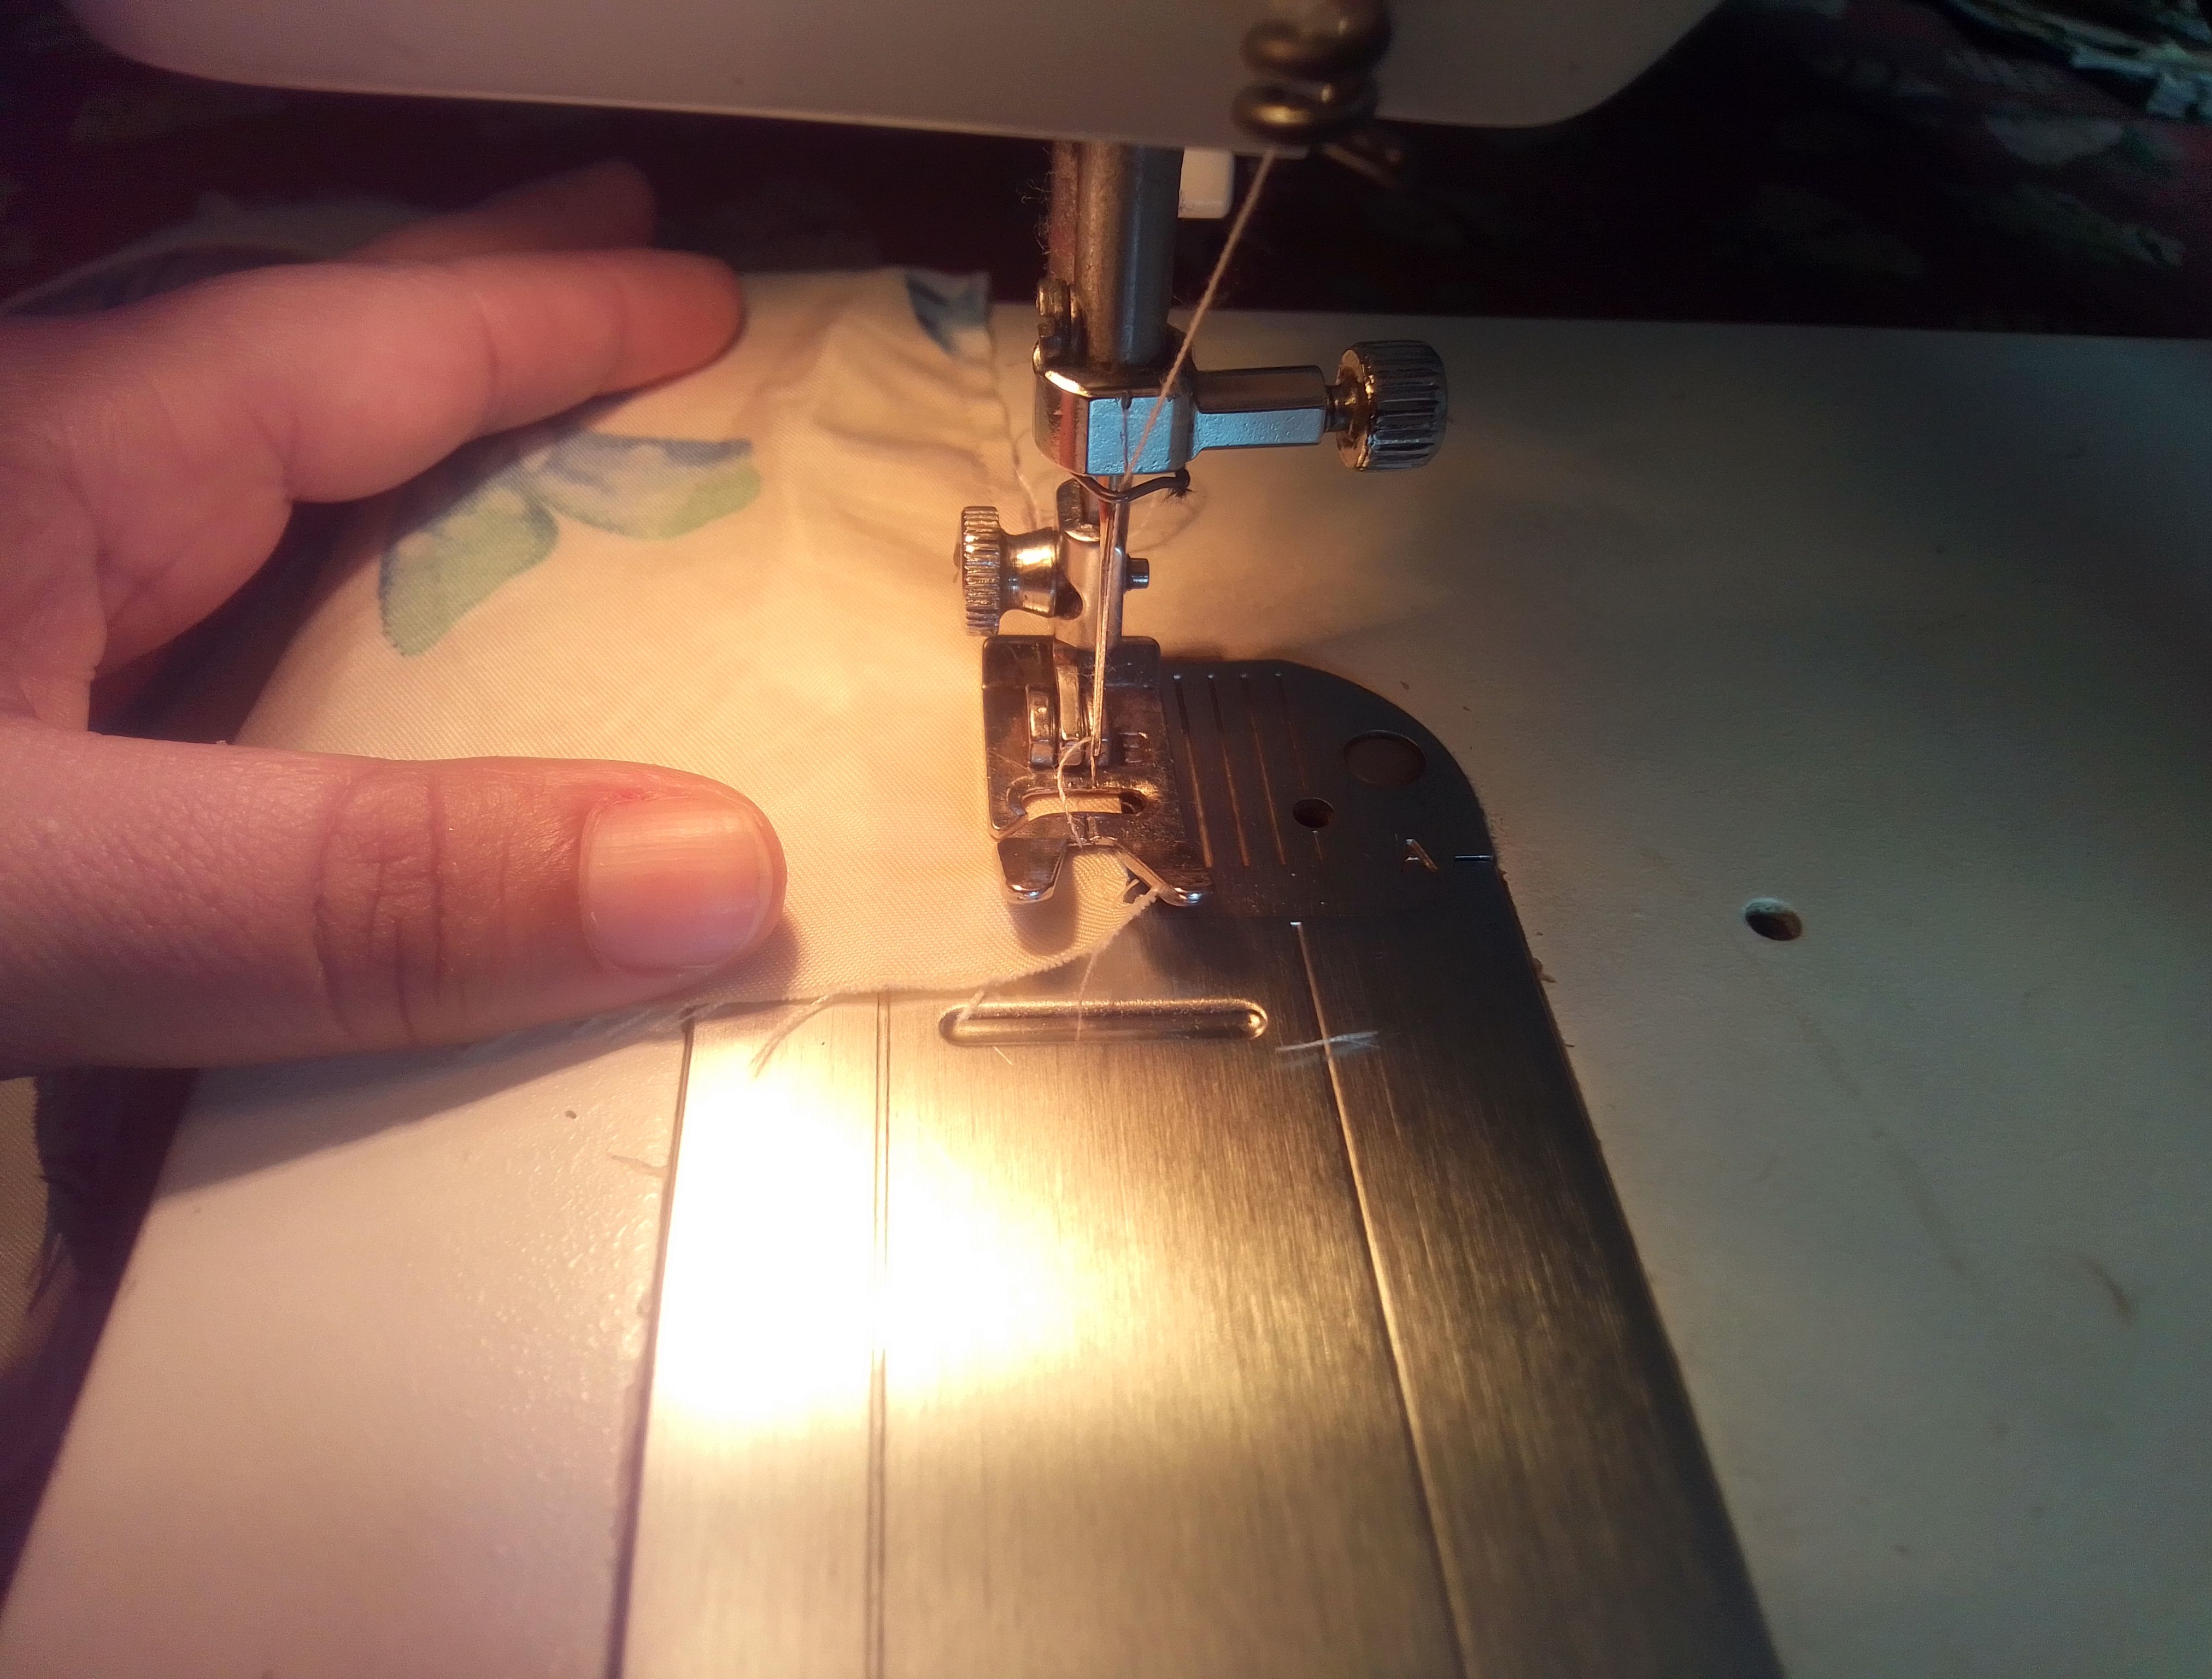
Paso 04
Medimos la tira el cuello de extremo a extremo, doblamos y corto en forma diagonal los lados. En sentido contrario de la tela cosemos estos cortes y volteo para hacer un pespunte en toda esta pieza.
Step 04
We measure the neck strip from end to end, fold it and cut the sides diagonally. In the opposite direction of the fabric we sew these cuts and turn to make a backstitch throughout this piece.
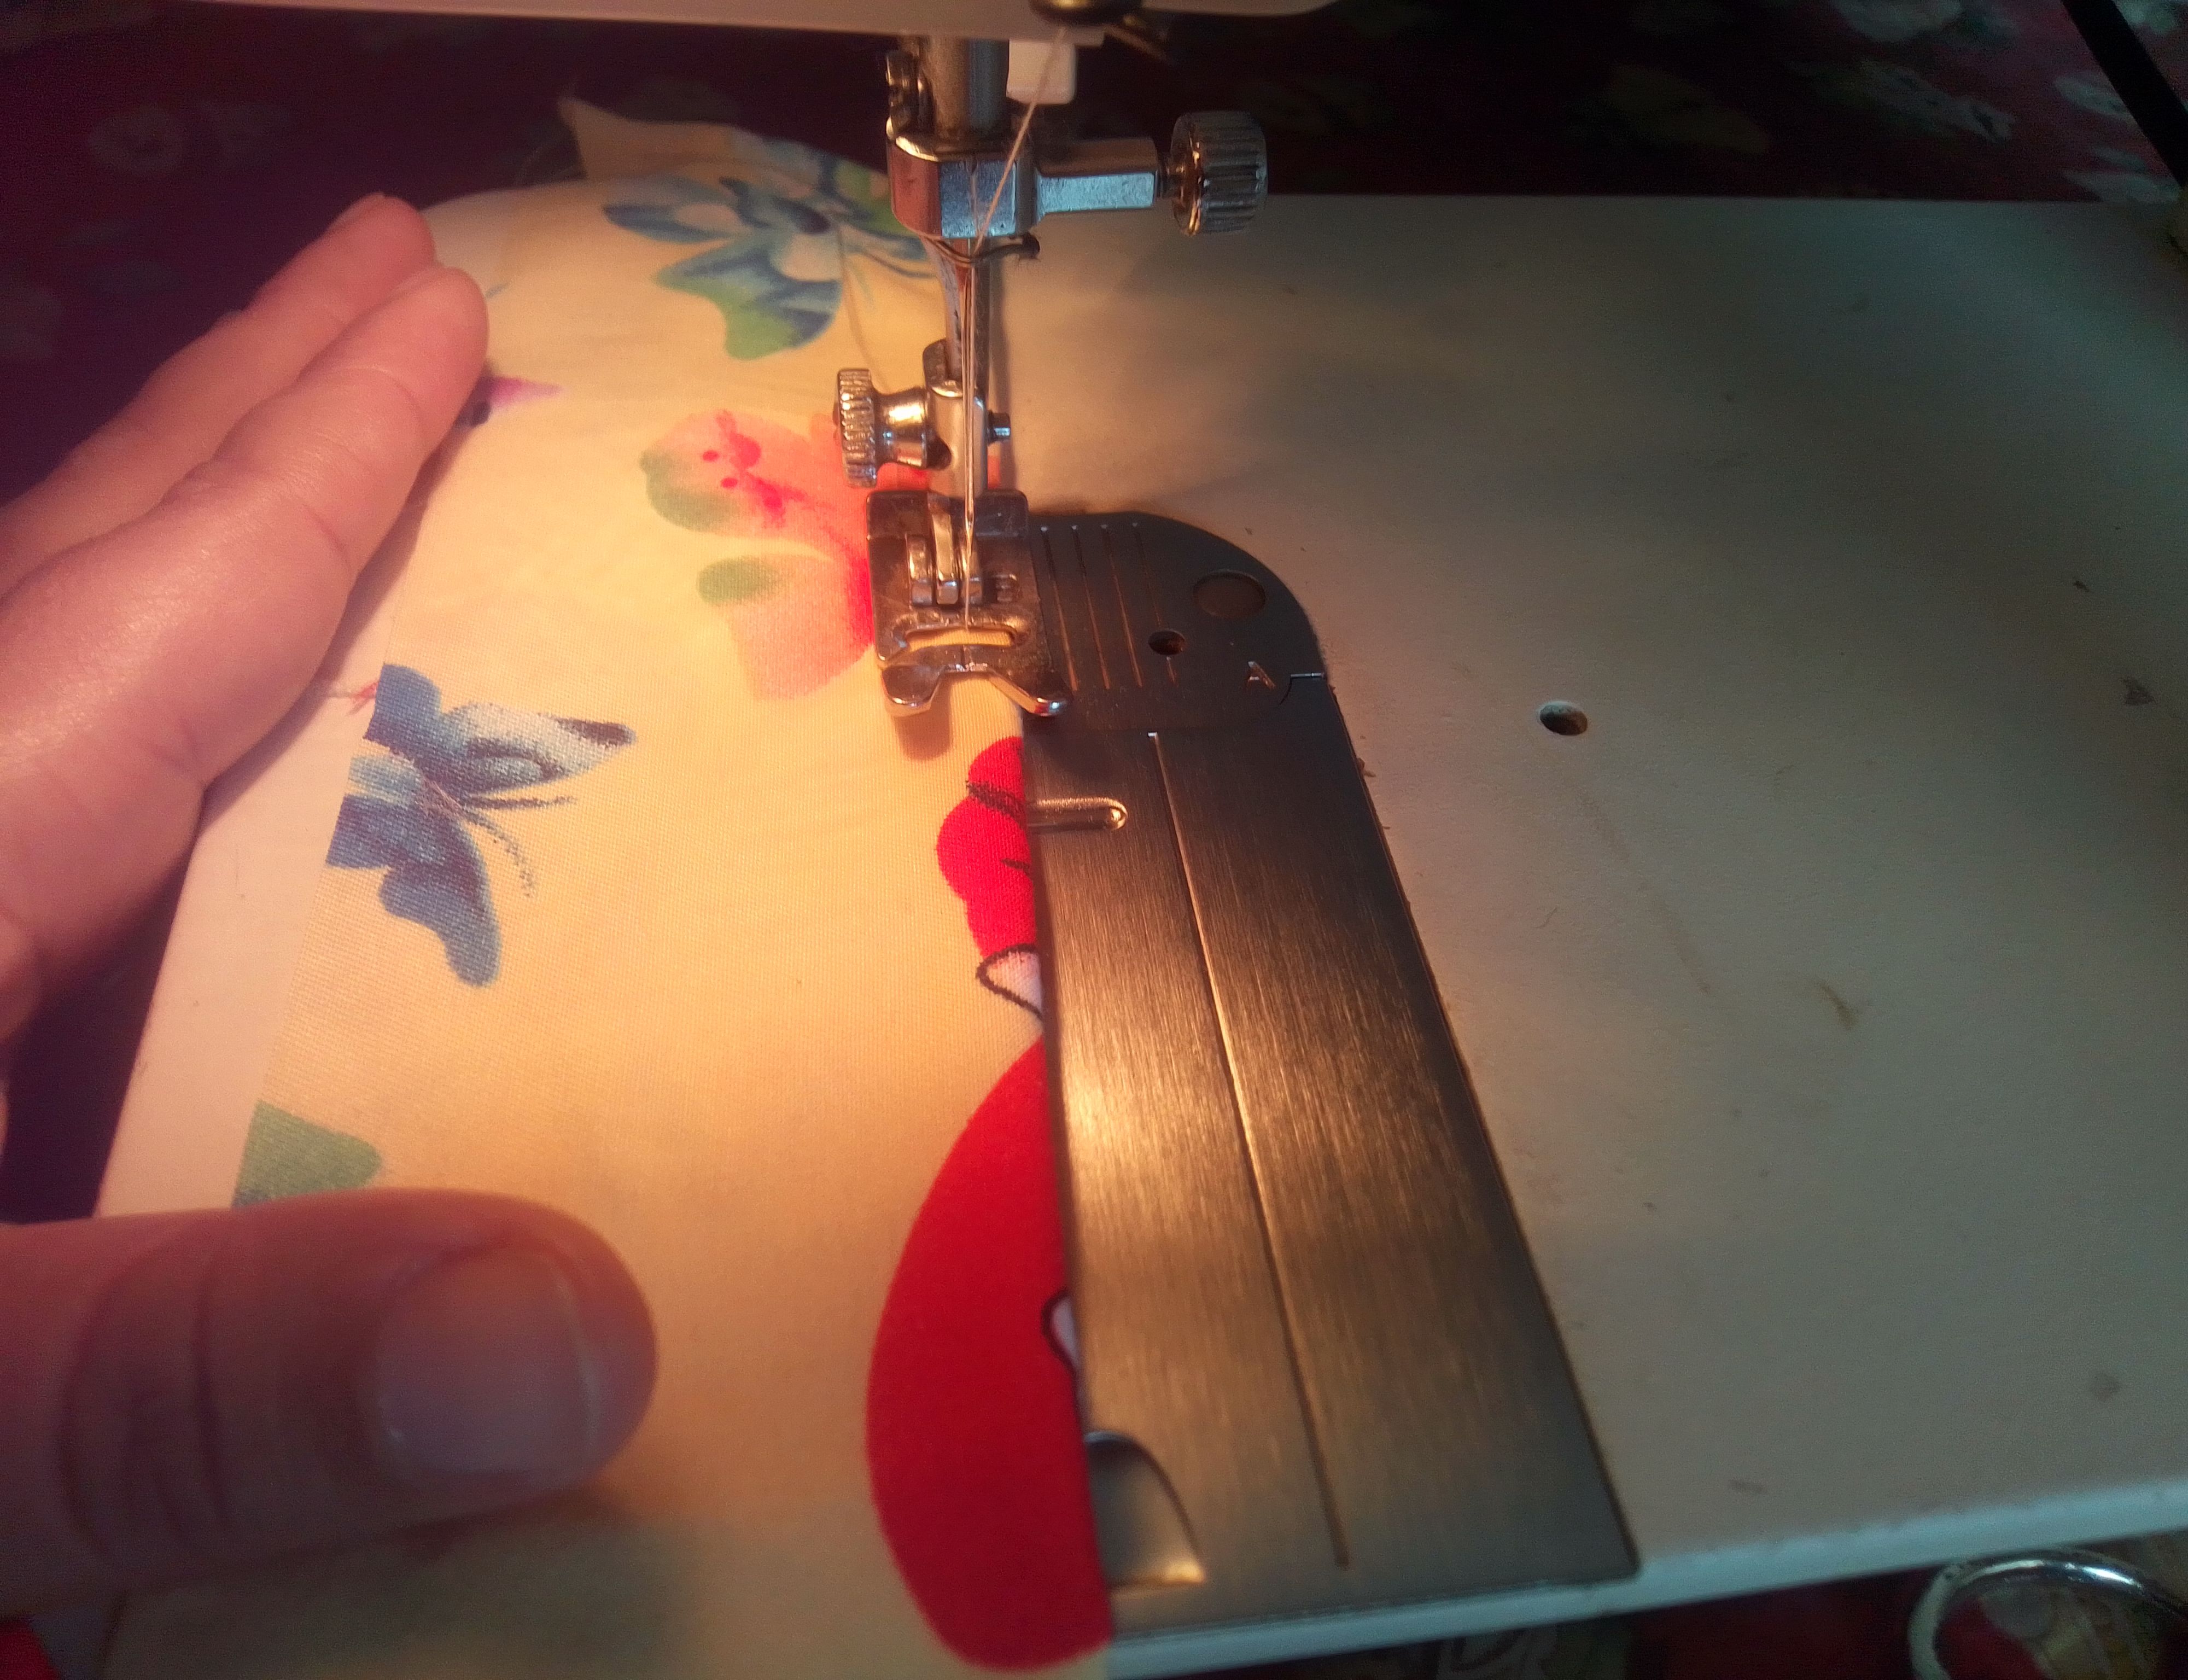
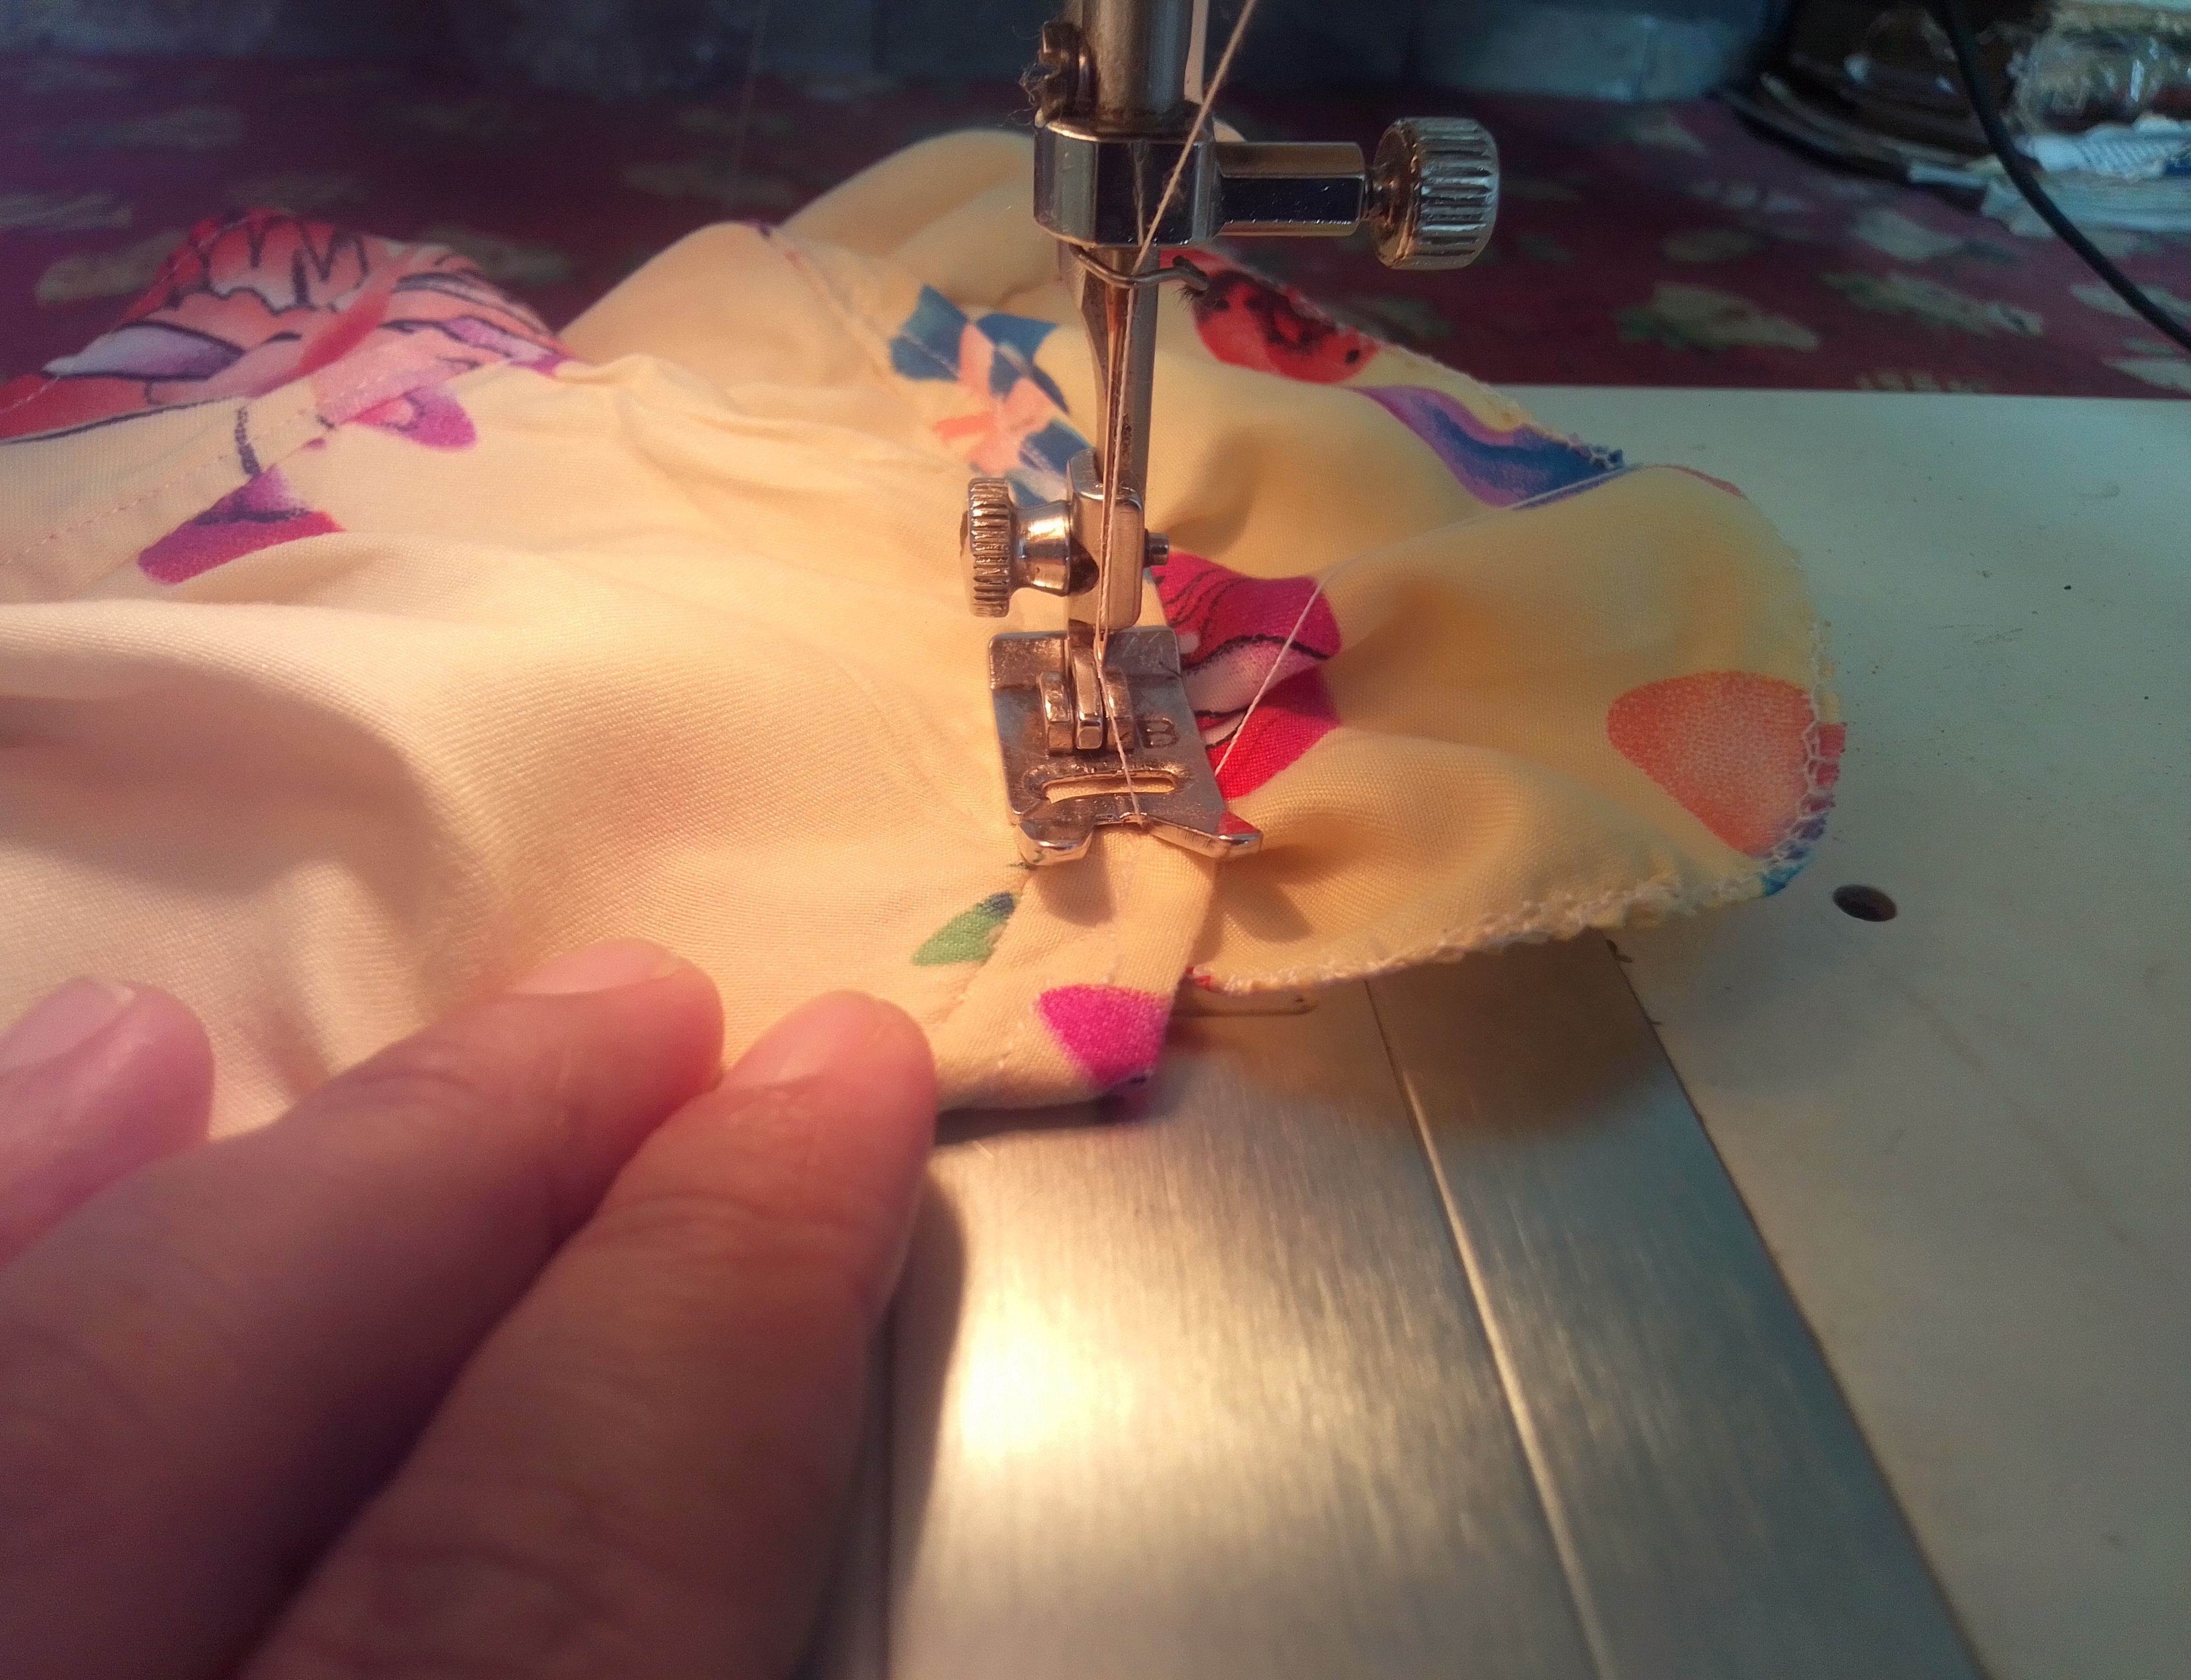
Paso 05
Fijamos con alfileres al cuello y cosemos. Luego fruncimos las piezas de las mangas y cosemos a cada lado.Luego voy a coser la tira del amarre en la parte inferior.
Step 05
We pin the collar and sew. Then we gather the sleeve pieces and sew on each side. Then I am going to sew the tie strip at the bottom
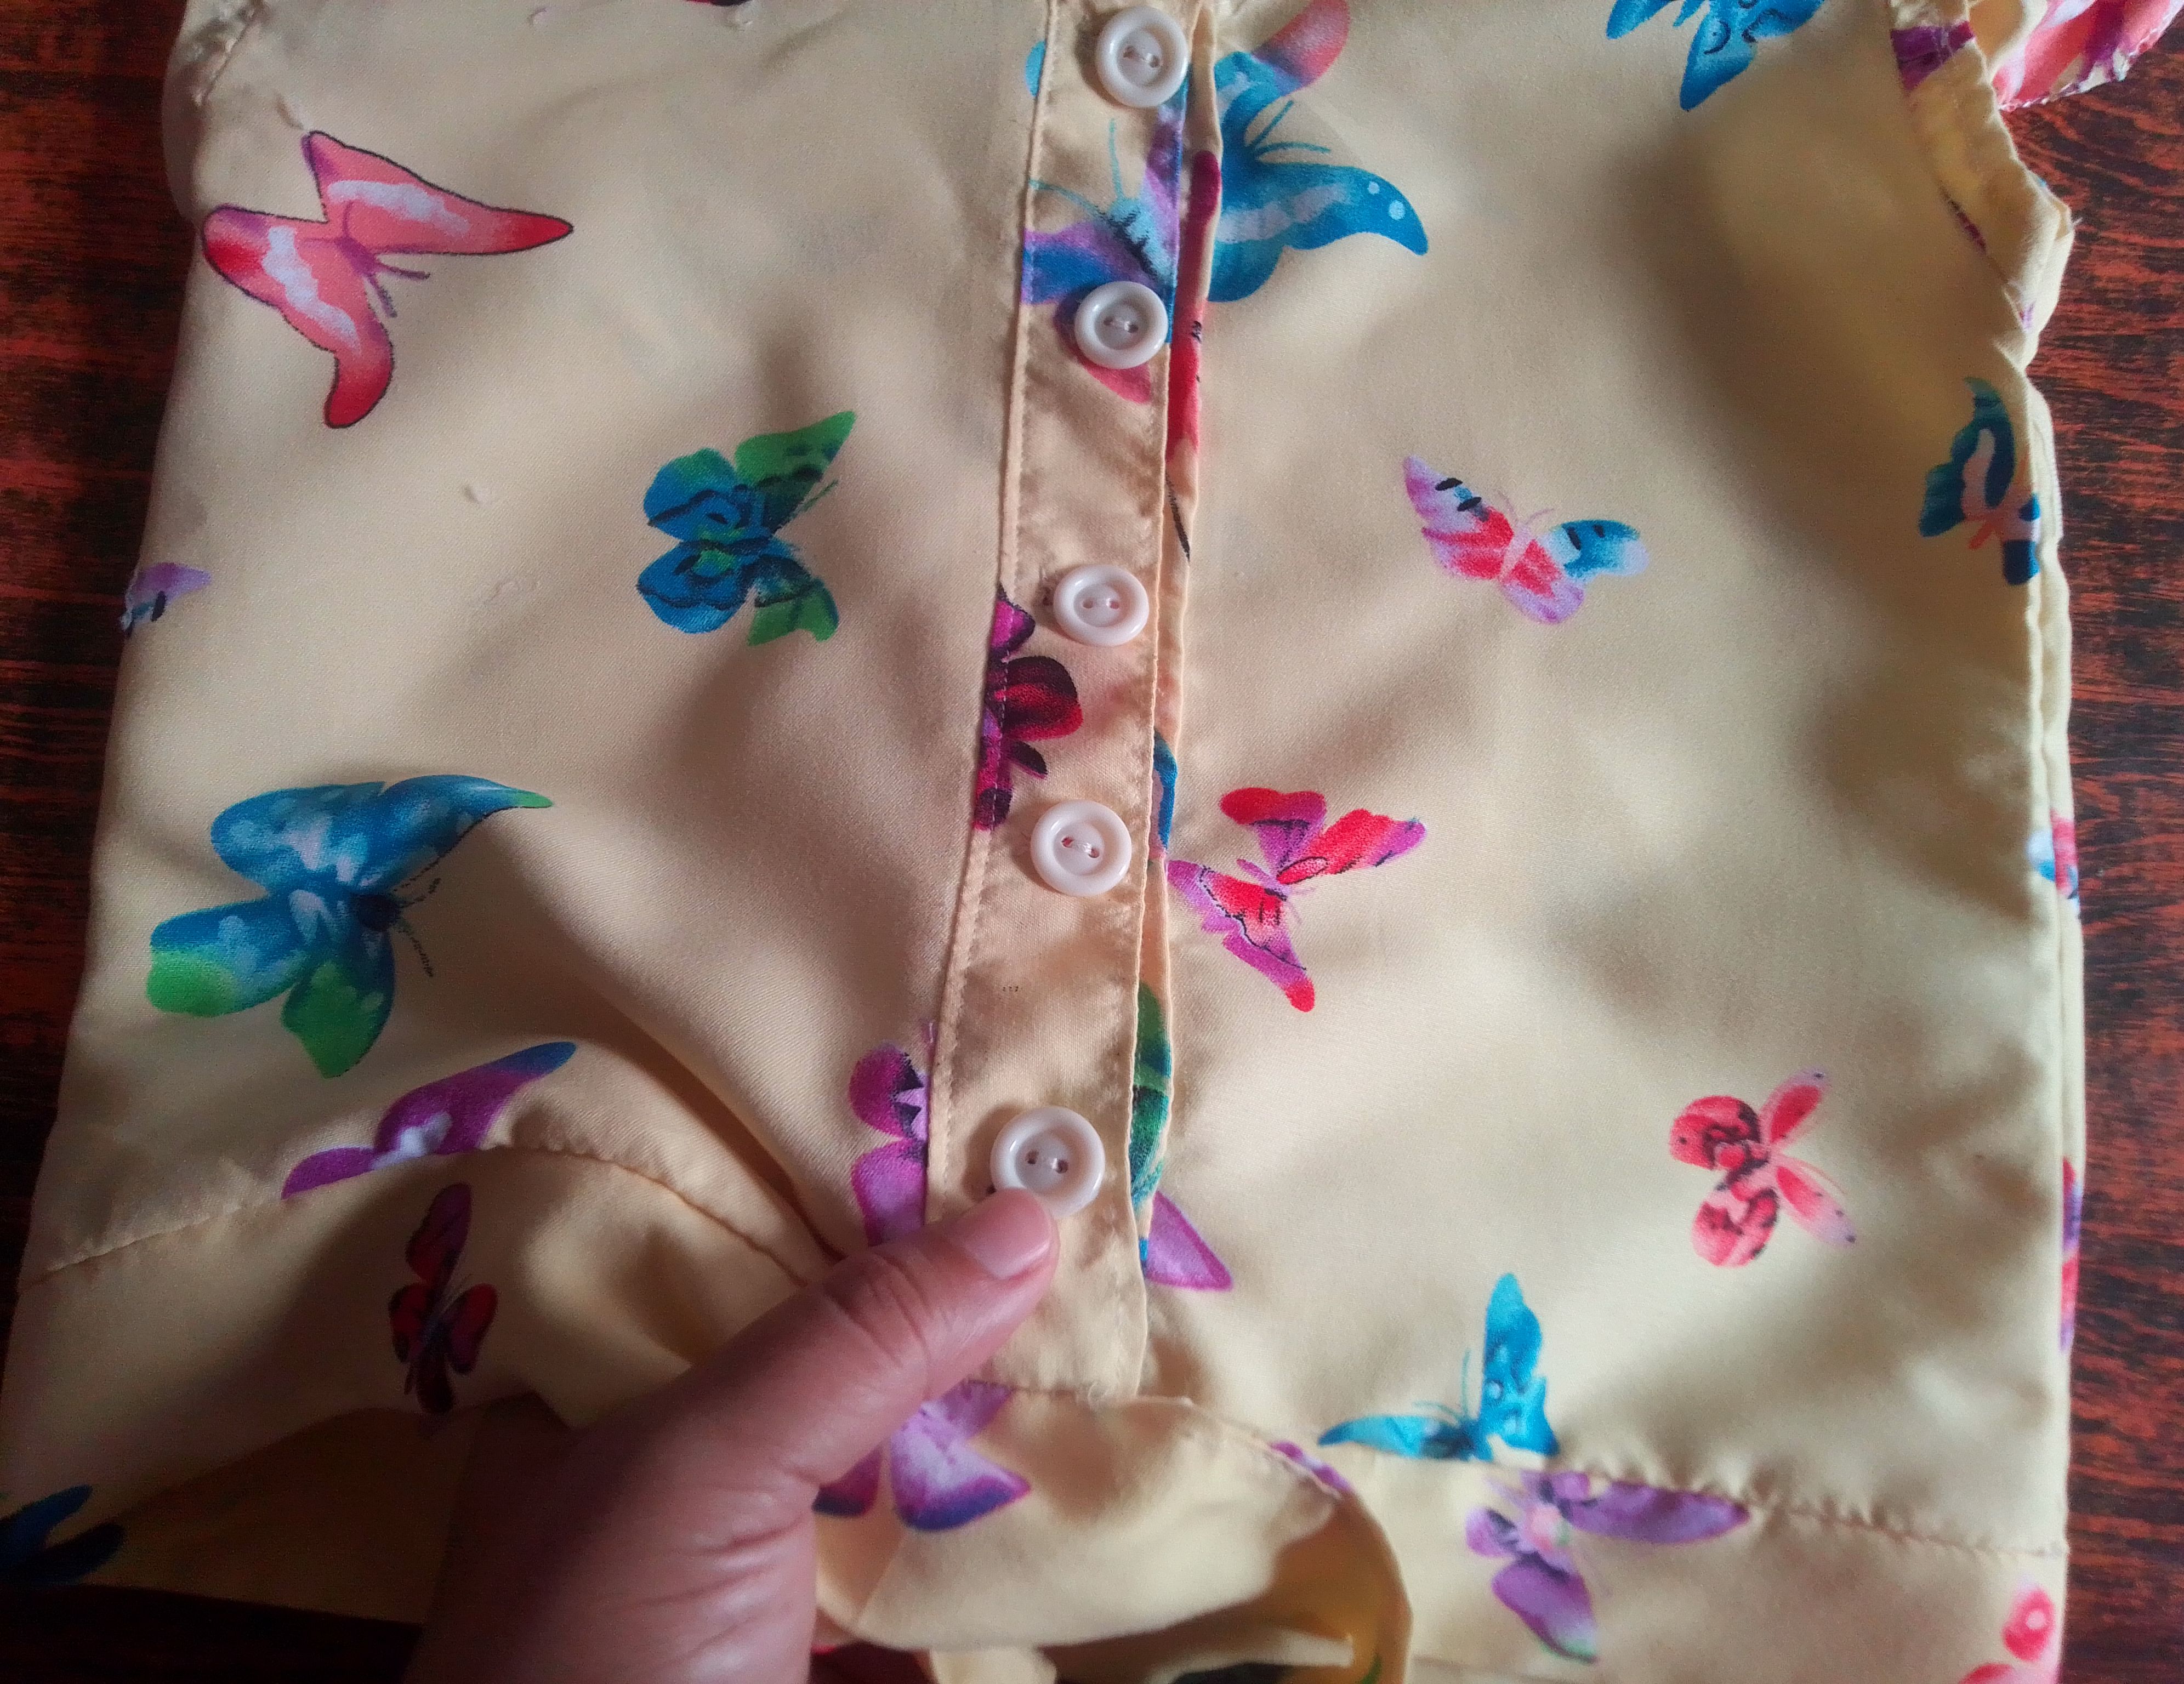
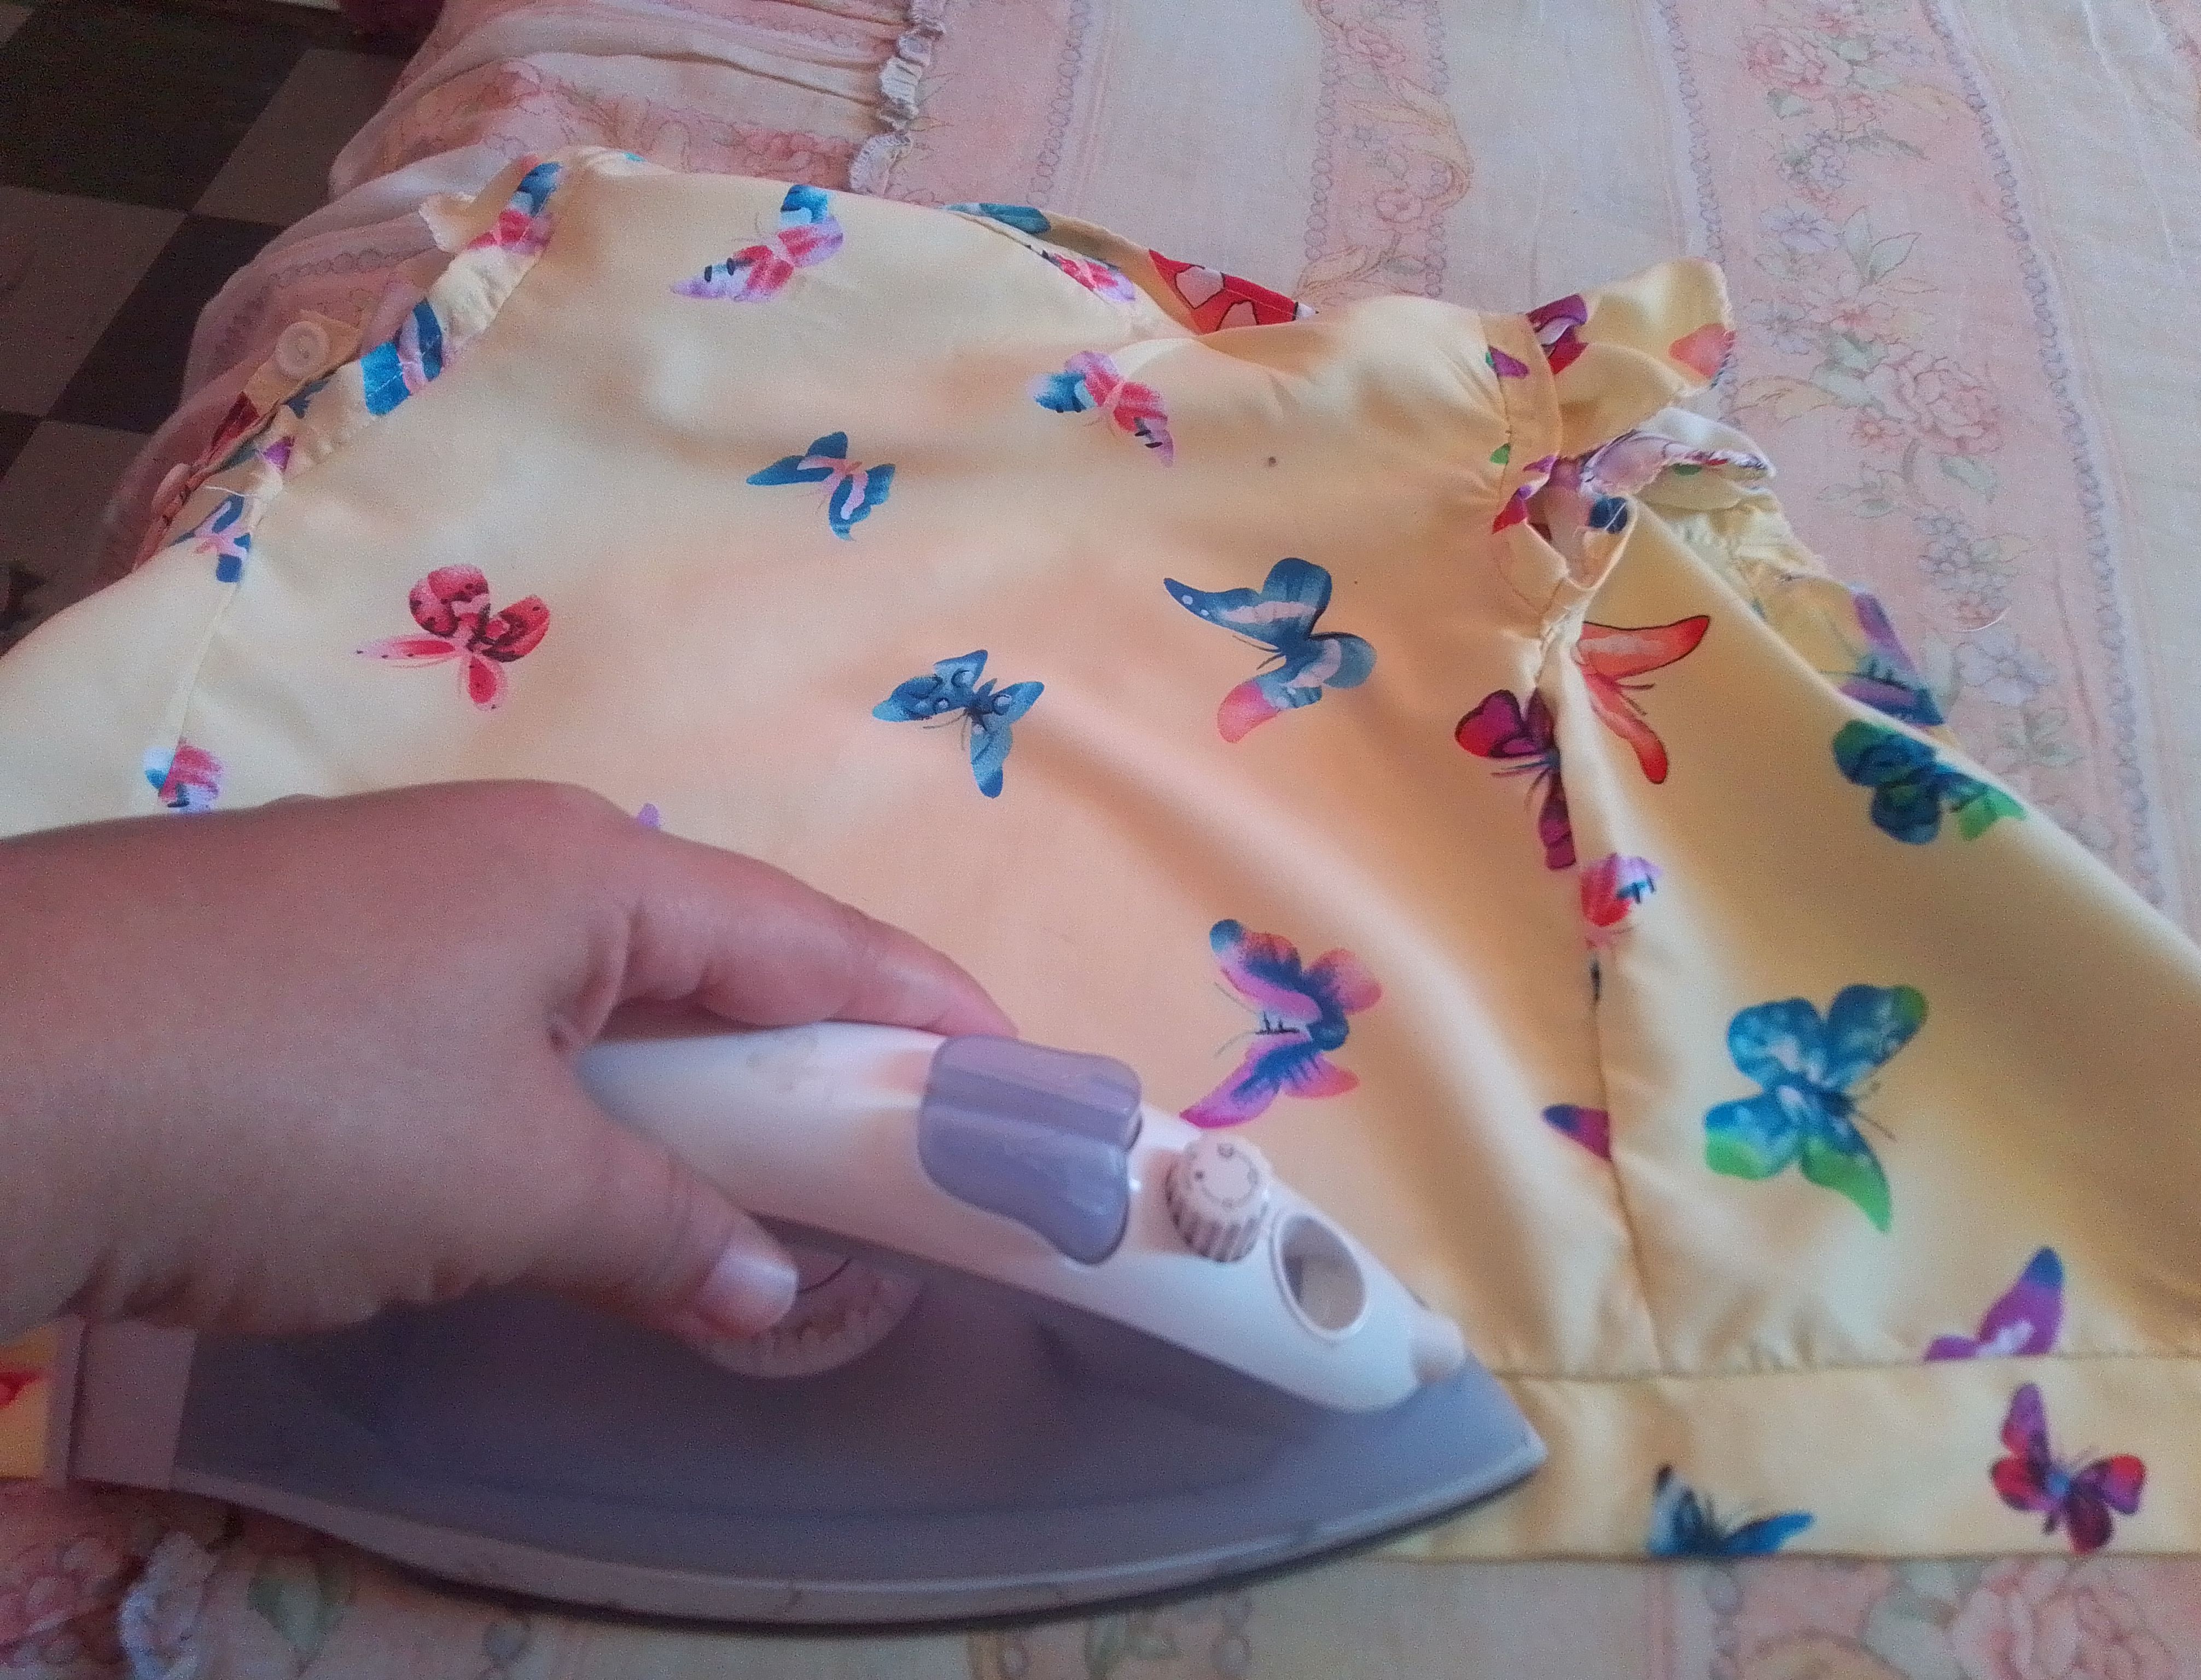
Paso 06
Pasos realizar los ojales en la parte delantera y coser sus respectivos botones. Pasamos una plancha para sacar todos los filos de la camisa y listo.
Step 06
Steps make the buttonholes on the front and sew their respective buttons. We use an iron to make all the edges of the shirt and that's it.
🦋Resultado!🦋
Me gustó mucho confeccionar este diseño, aprendí a hacer un cuello, que no sabía cómo hacerlo 🤭, me sirvió mucho la práctica para que me quedara así.. A pesar de todo fue una prenda que logre hacer en poco tiempo y estoy muy contenta con el resultado. Cada detalle tiene algo especial.
I really liked making this design, I learned how to make a shirt collar, which I didn't know how to do 🤭, the practice helped me a lot to make it look like this... Despite everything, it was a garment which I managed to do in a short time and I am very happy with the result. Every detail has something special.
Agradezco mucho tu visita, déjame saber que te pareció, espero te sea útil este contenido.. Te deseo una linda noche, Dios le bendiga.. Hasta la próxima!
I really appreciate your visit, let me know what you thought, I hope this content is useful to you. I wish you a nice night, God bless you. Until next time!.
It looks so beautiful and lovely. Good to see how you made this. Nice work! Thanks!
Thank you very much for all the love and support with each comment. It motivates me a lot. It is a pleasure!
This is a cute and beautiful little set. I love that your baby looks happy in them, she is so sweet like an angel.
Sending you love and kisses 😘
Greetings friend! How pretty you are, I know how much I appreciate your comment... I'm glad you like it... A hug!
It’s always nice to see our little model smile in her dress
It’s good to know you enjoyed making the shirt, it’s beautiful and guess what you also learned how to make a collar
Great job
I learned a lot in this preparation that's why I really liked the result...! I really appreciate your words of support! Blessings..
You’re welcome
Hermosa camisita, Raziel. Y siempre me encanta ver a la modelo feliz con sus nuevos oufits jaja. Espero que esten muy bien. ¡Saludos para ambas ❤️!
Hola mi bella amiga Laura..! Gracias a Dios no encontramos bien.. reactivandonos con la plataforma con lindas ideas.. Mi nena esta feliz.. Aprecio siempre todo su cariño y apoyo!! Feliz fin de semana. Un abrazo grande!