🏵️Hermoso maquillaje con corte de cuenca en tonos cobrizos🏵️/Beautiful make-up with a basin cut in copper tones🏵️
Saludos hermosas!!🏵️
Feliz noche, espero hayan tenido un precioso día y estén pasando un bella noche; les doy la bienvenida una vez más a este espacio donde compartiré una nueva idea de belleza.
Happy night, I hope you had a beautiful day and are having a beautiful night; I welcome you once again to this space where I will share a new idea of beauty.
Hoy me siento muy entusiasmada porque siento que cada mejor más las técnicas que decido poner en práctica en este mundo del maquillaje, sin embargo sigo considerándome una aprendiz. En esta ocasión les traigo un elegante maquillaje cut crease, en un tono demasiado bonito como lo es el color cobre que en combinación con el negro favorece mucho a todos los tipos de ojos y hacen que tu mirada se vea espectacular. Te invito a tomar nota del paso a paso de este impactante maquillaje.
Today I feel very enthusiastic because I feel that the techniques that I decide to put into practice in this world of makeup improve more and more, however I still consider myself an apprentice. On this occasion I bring you an elegant cut crease makeup, in a tone that is too beautiful, such as the copper color that, in combination with black, favors all types of eyes and makes your look look spectacular. I invite you to take note of the step by step of this impressive makeup.
Materiales que necesitás:
- Pomada de cejas marrón.
- Corrector.
- Sombras color cobre, negra y marron.
- Base.
- Polvo compacto.
- Lápiz negro de ojos.
- Máscara de pestañas.
- Rubor
- Lápiz labial rojo.
Materials you need:
- Brown eyebrow pomade.
- Checker.
- Copper, black and brown shadows.
- Base.
- Compact dust.
- Black eye pencil.
- Mascara.
- Blush
- Red lipstick.
Pasos:
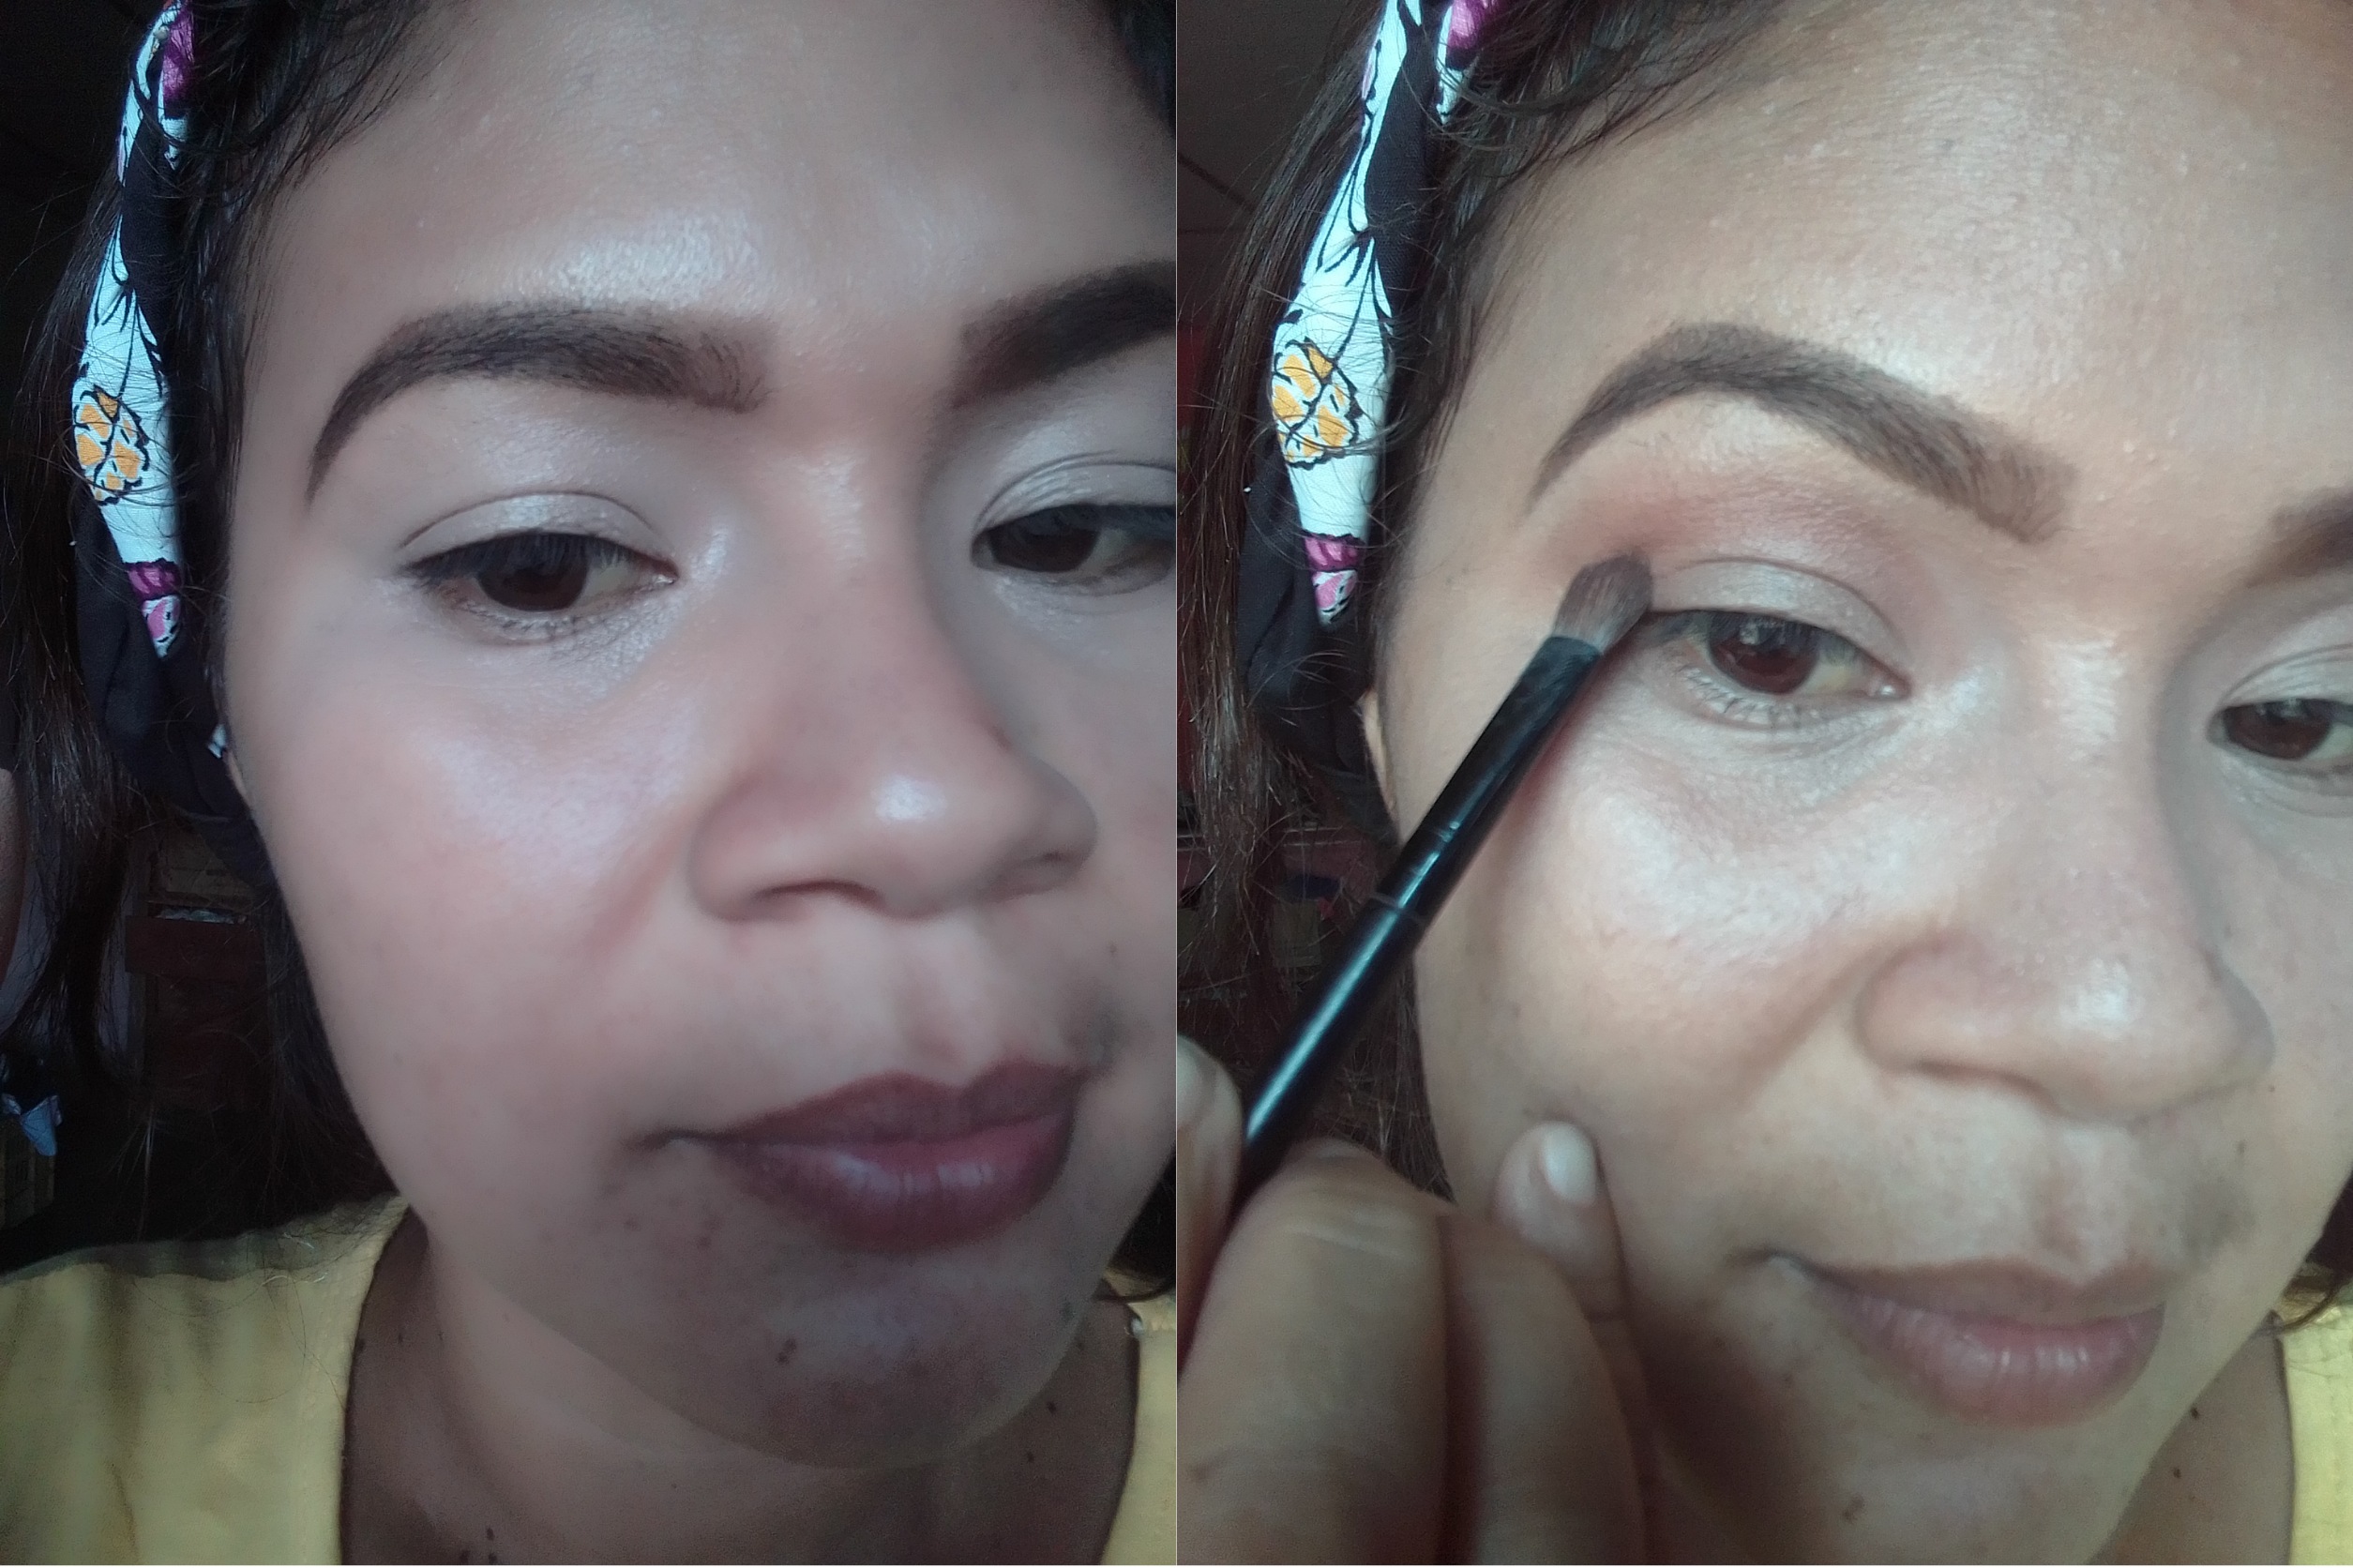
Paso 01.
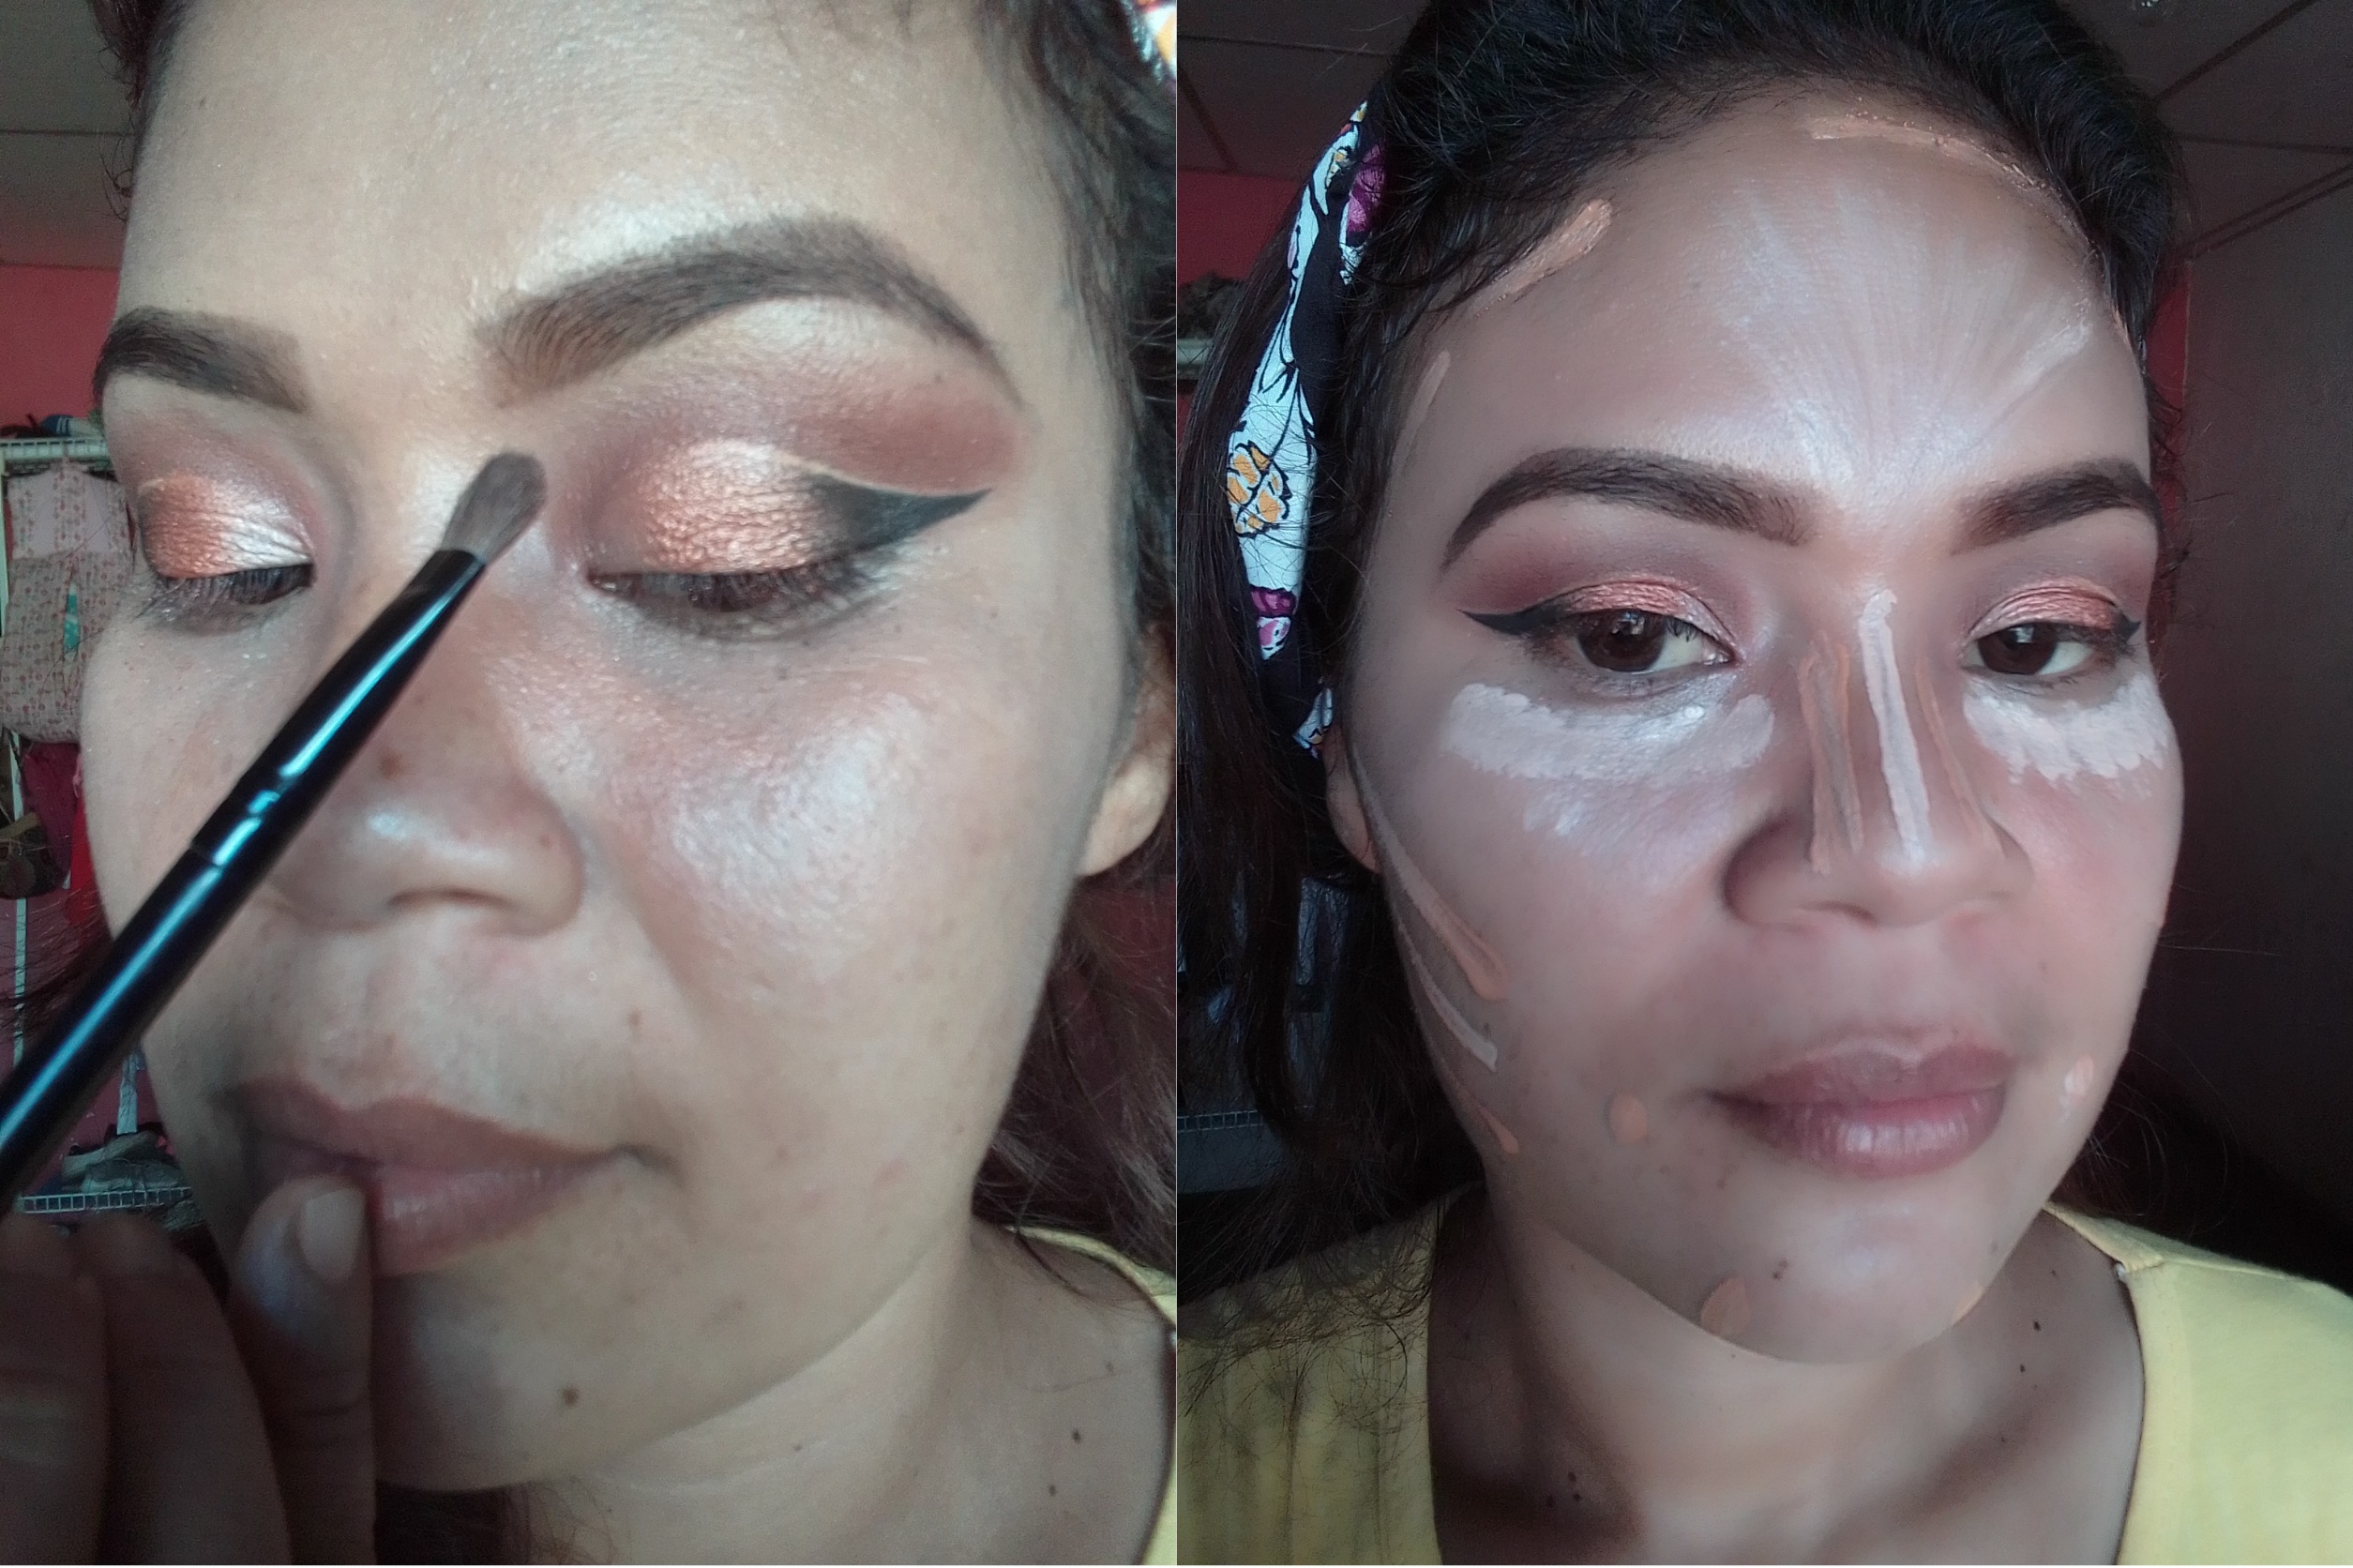
Basimacemente ya tengo mi rostro limpio y realizadas mi cejas con pomada color marrón oscuro y realzadas con el corrector difuminado al rededor. Entonces lo que hacemos será colocar un corrector muy muy claro en todo el parpado y sellamos con plovo compacto; colocamos de forma ovalada la primera sombra de transición que será un marrón clarito y difuminamos con movimiento s circulares.
Step 01.
Basically I already have my face clean and my eyebrows have been done with dark brown pomade and enhanced with the concealer blurred around them. So what we do is place a very, very clear concealer on the entire eyelid and seal it with compact powder; We place the first transition shadow in an oval shape, which will be a light brown, and we blur it with circular movements.
Paso 02.
Ahora me coloco una línea de sombra marrón oscuro y ligeramente vamos a difuminar todo el color en la cuenca del ojo.
Step 02.
Now I put on a line of dark brown eyeshadow and we're going to slightly blur all the color in the eye socket.
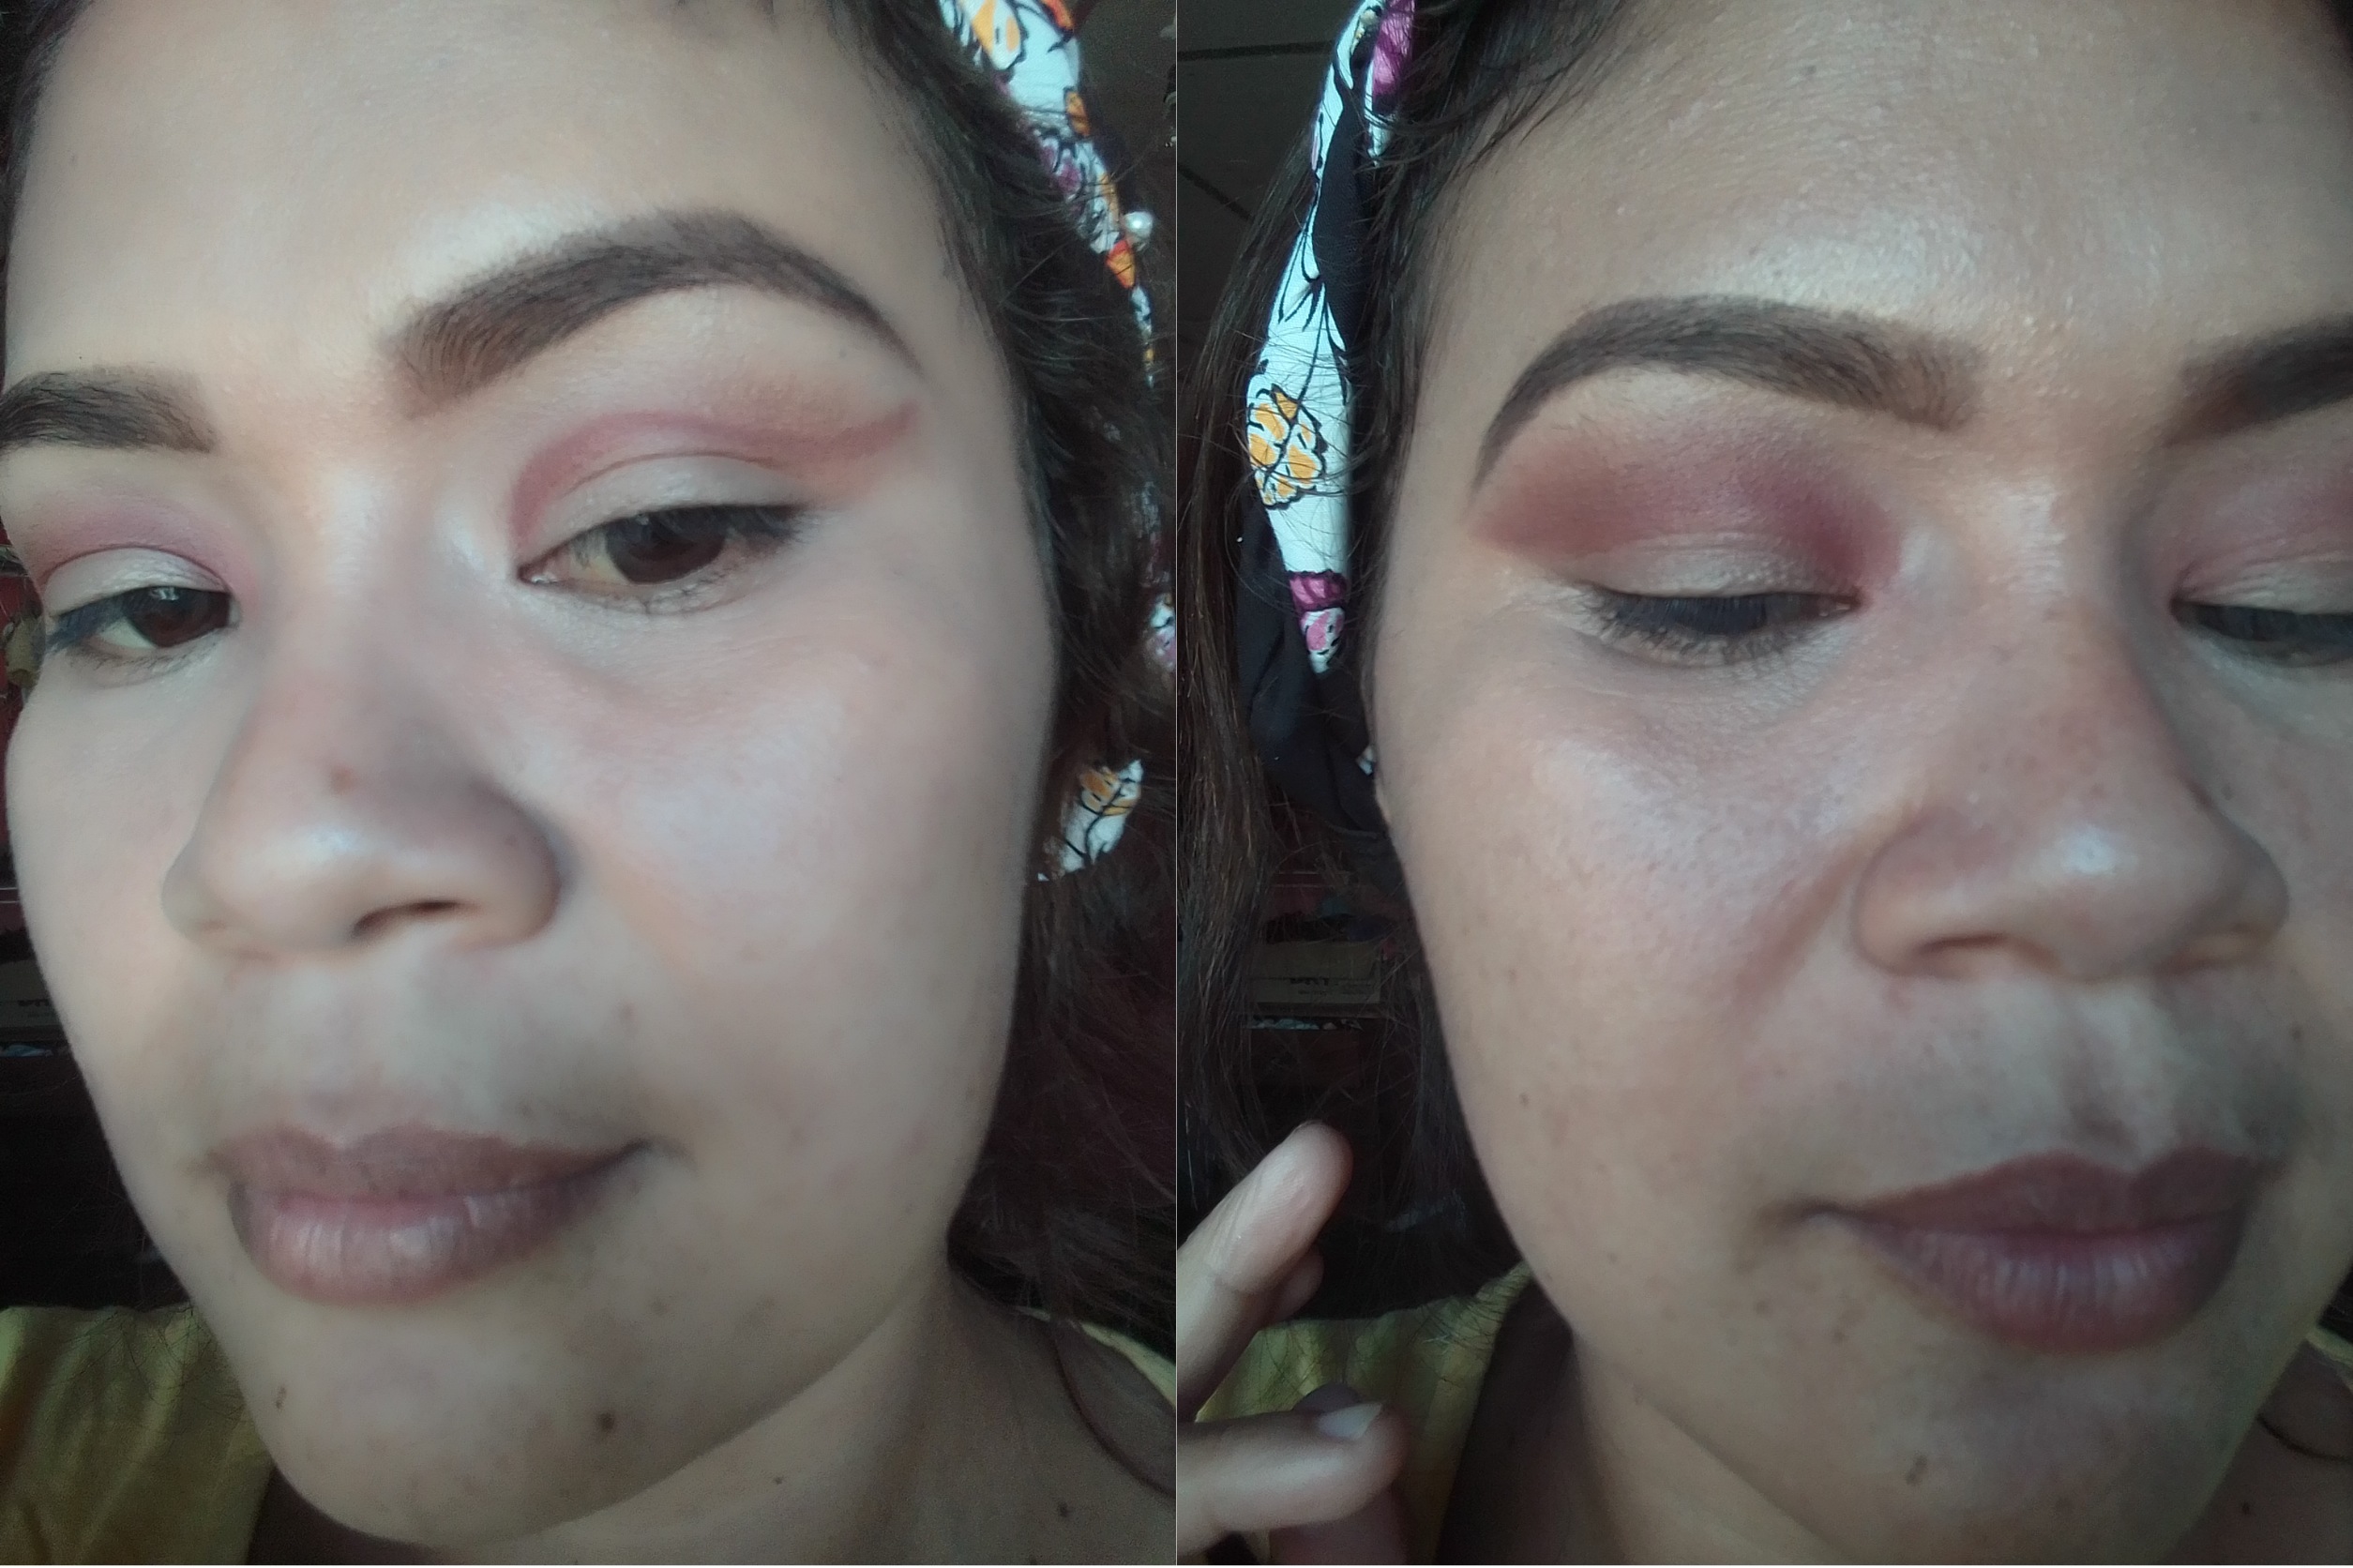
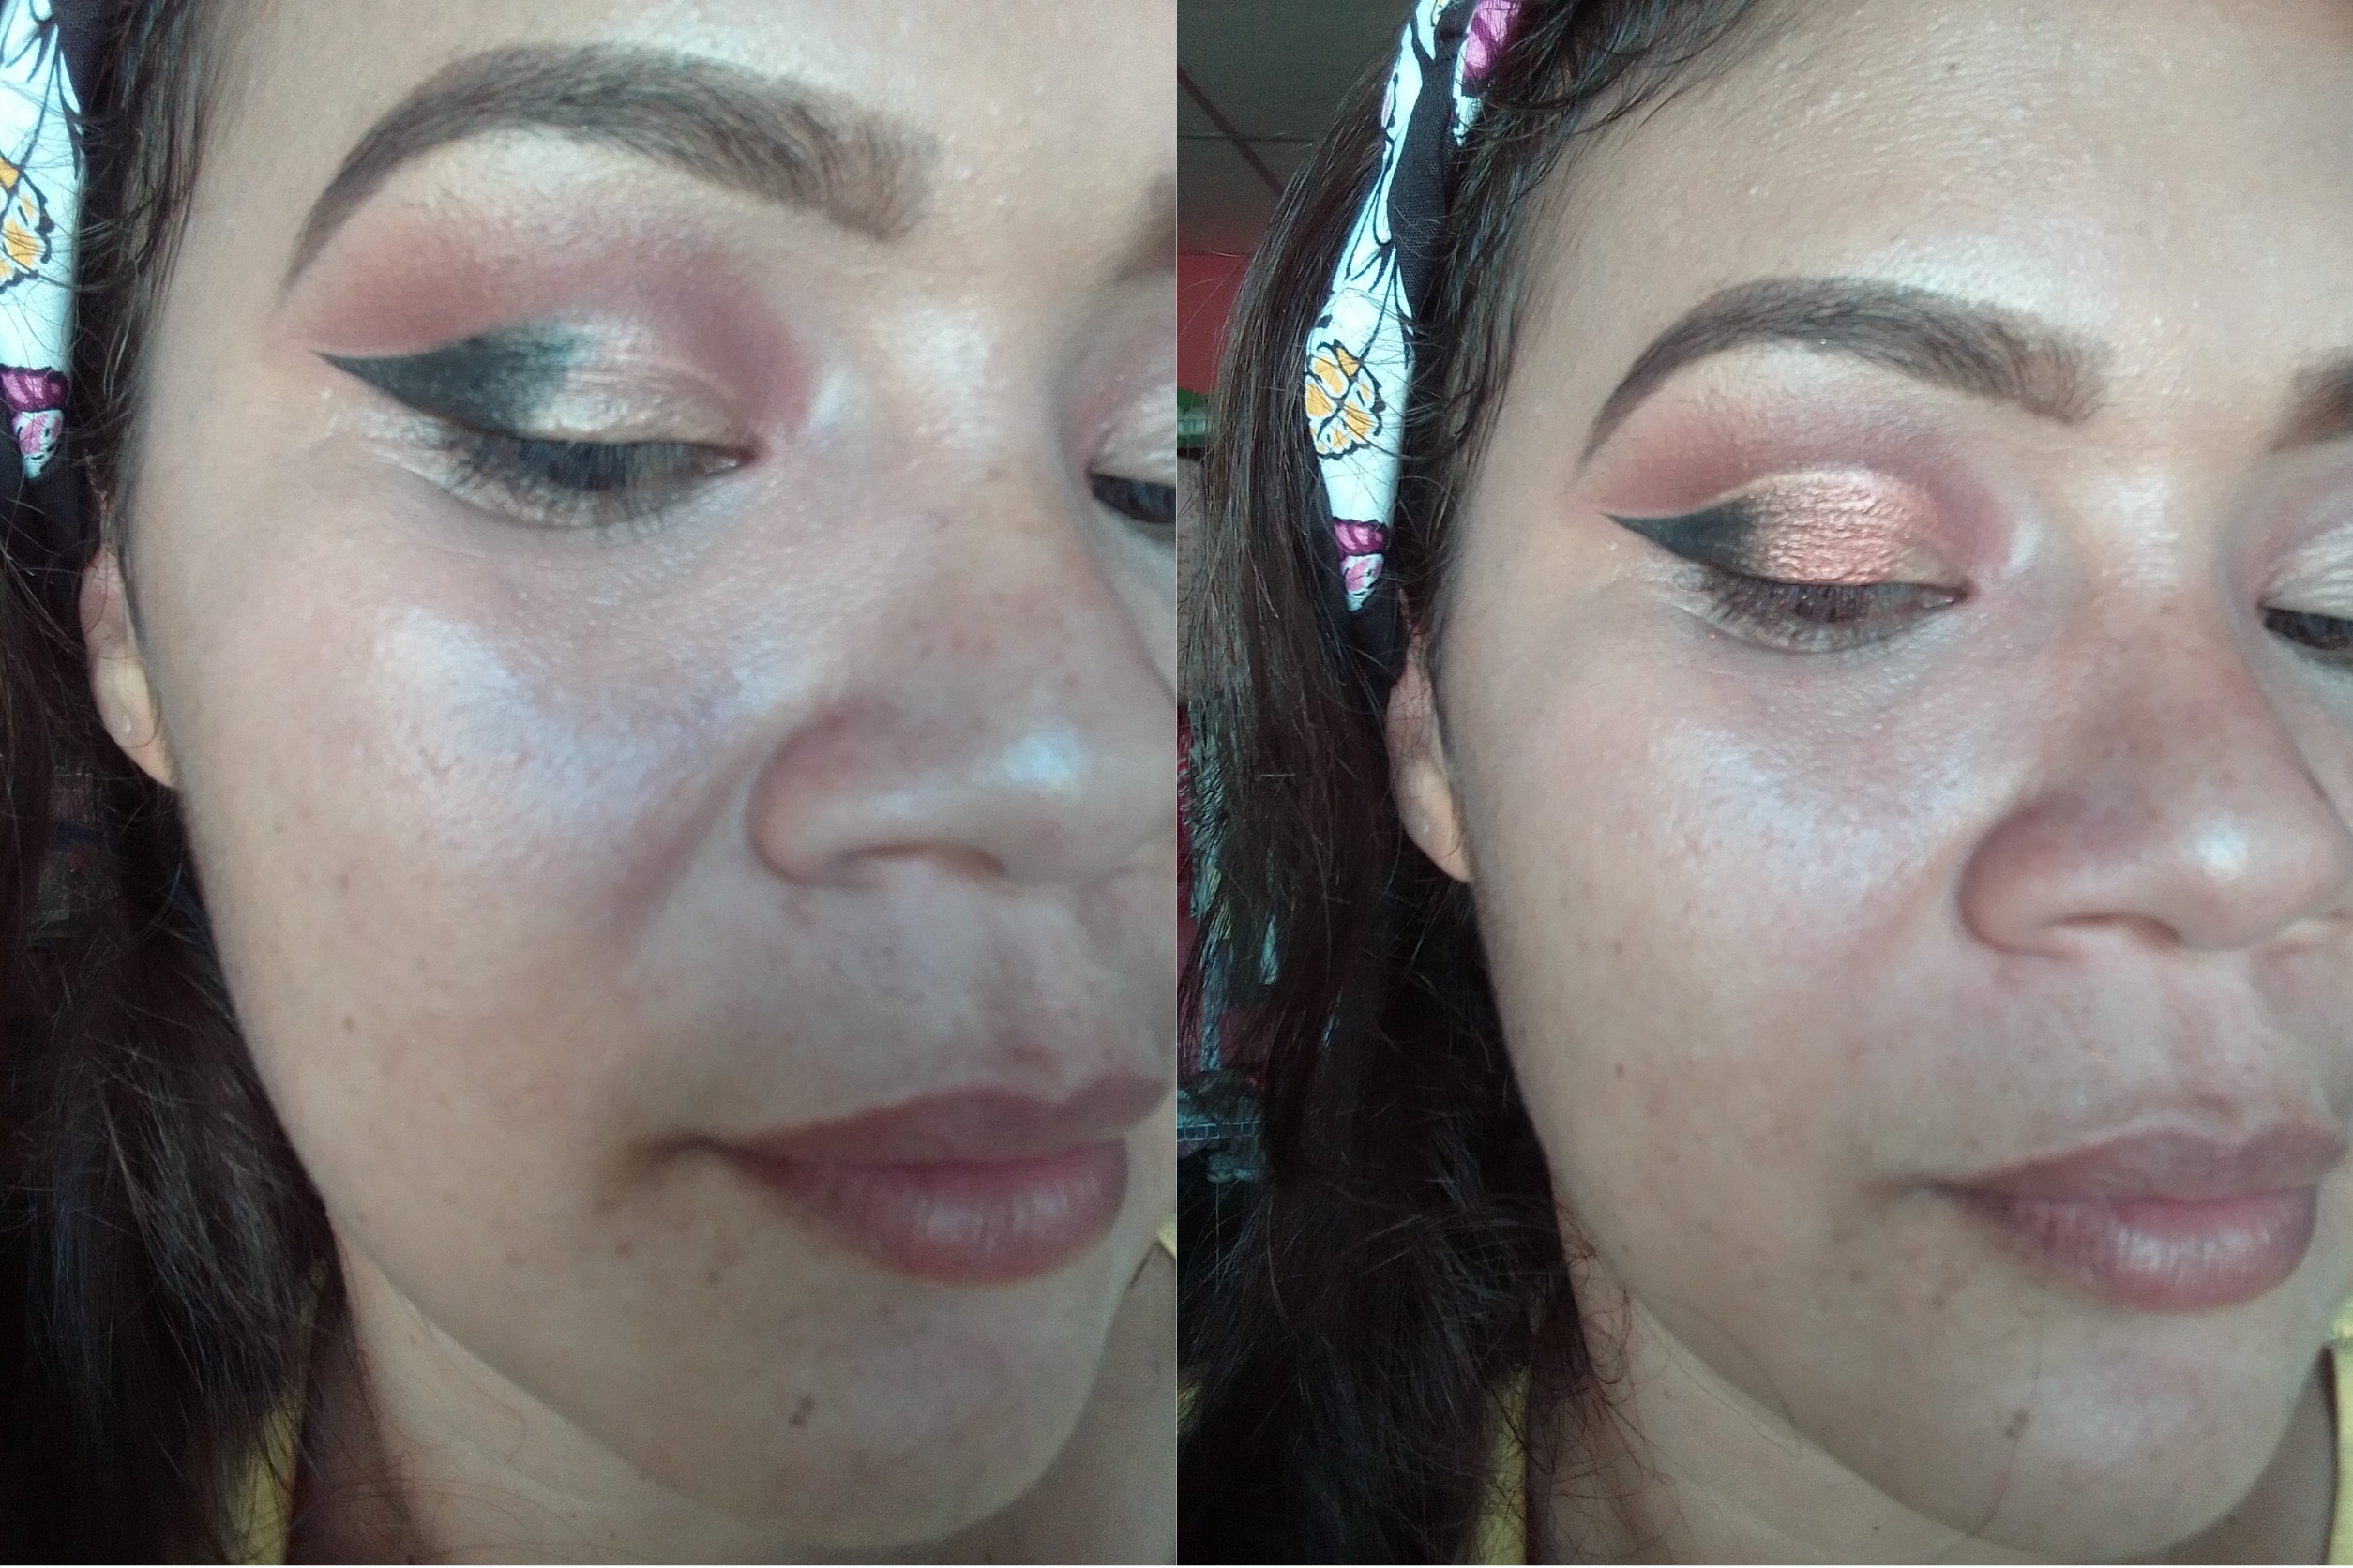
Paso 03.
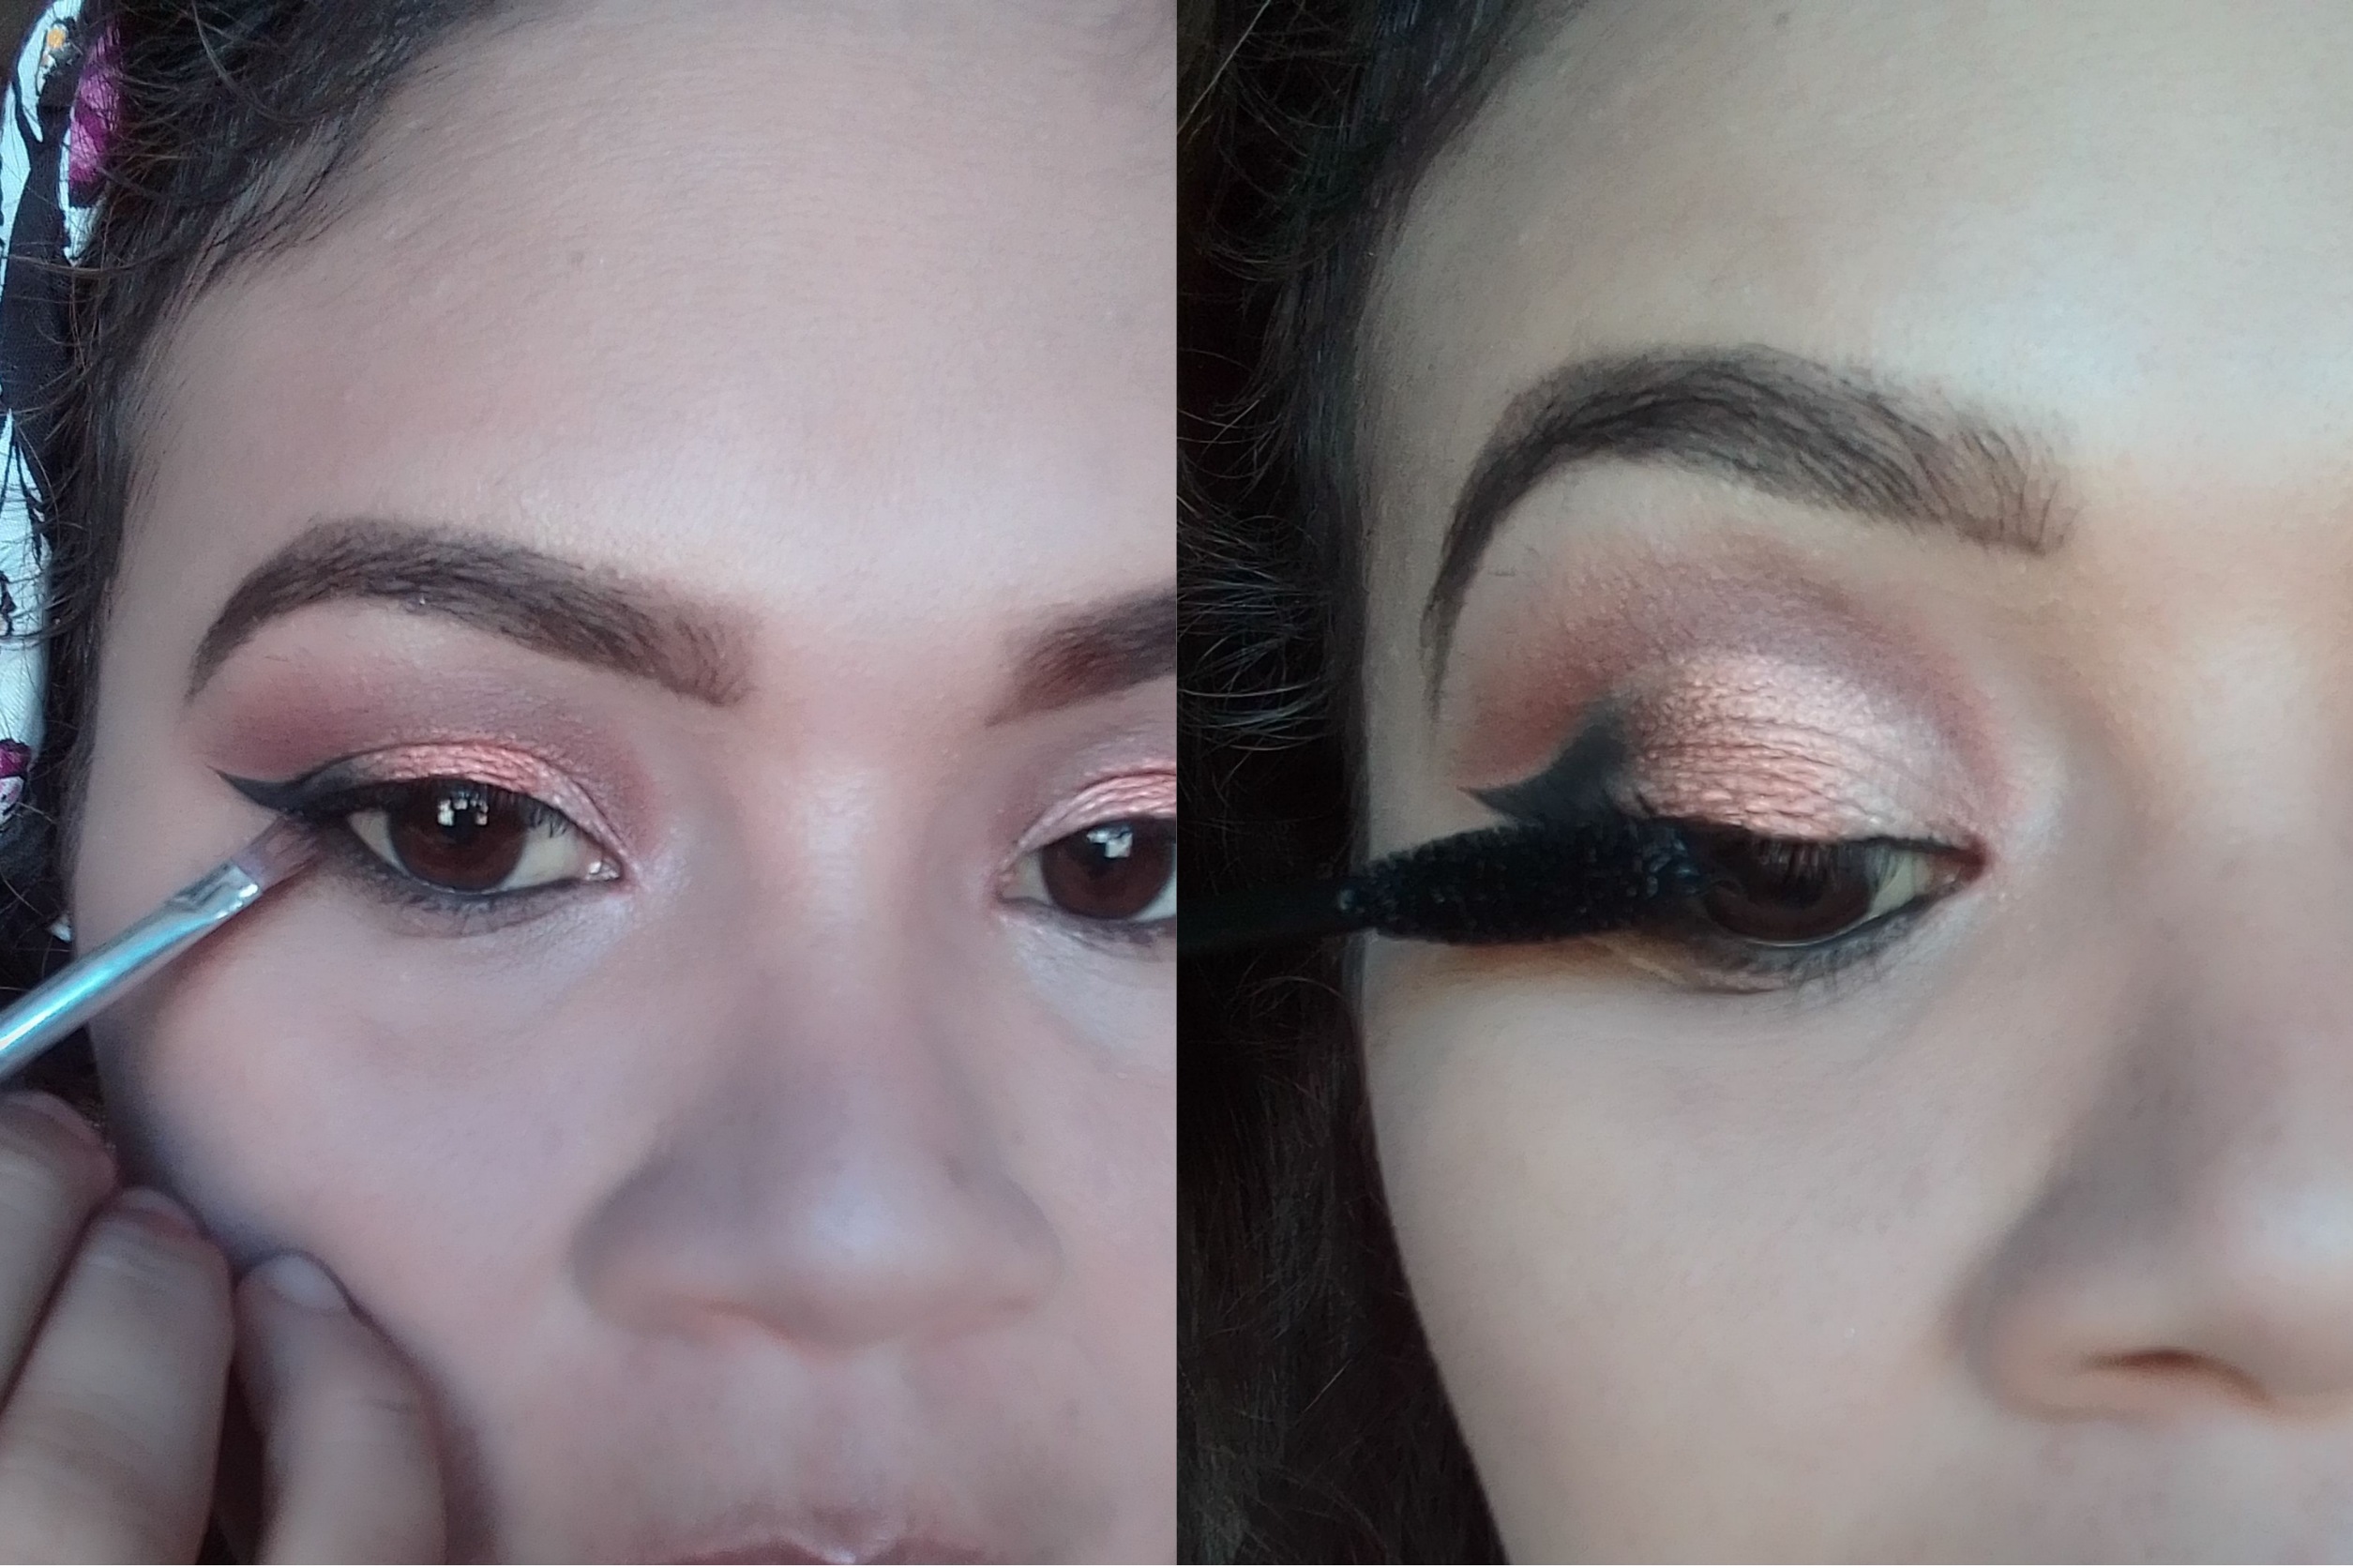
Seguidamente haremos un corte cuenca abierto con el corrector y con el lápiz negro procedo a realizarme cuidadosamente el delineado abierto en la "V" externa de mi cuenca dejando una fina línea del color del corrector. Deposito un sombra negra al final de ojo y difumino hacia la parte central de mi cuenca; aplico una sombra satinada color cobre en el centro del parpado móvil y voy difuminando con un pincel plano hacia atrás, de esta manera hacemos una conexión en las sombras y se verá un mejor acabado.
Step 03.
Next we will make an open basin cut with the corrector and with the black pencil I proceed to carefully make the open outline in the external "V" of my basin leaving a fine line of the color of the corrector. I deposit a black shadow at the end of the eye and blend towards the central part of my eye socket; I apply a copper-colored satin eyeshadow in the center of the mobile eyelid and blend it with a flat brush backwards, in this way we make a connection in the shadows and a better finish is seen.
Paso 04.
Continuo aplicando sombra blanca en el lagrimal para dar un poco más brillo y
voy difuminando con un pincel plano hacia atrás para tener un degrado de color más bonito. Continuó aplicando una base luminosa por la zona central de mi cara y un tono más oscuro en mis pómulos y parte de mi frente, la extiendo por mi rostro con un esponja húmeda para un acabado y sellamos con polvo compacto
Step 04.
I continue applying white shadow in the tear duct to give a little more shine and I am blurring with a flat brush backwards to have a more beautiful color gradient. She continued by applying a luminous foundation to the center of my face and a darker shade to my cheekbones and part of my forehead, which I spread across my face with a damp sponge for a finish and seal with pressed powder
Paso 05.
Marcamos la línea de agua inferior con lápiz negro, tomaré una sombra marrón oscuro para el parpado inferior y difuminamos ambos colores. Aplico rímel en mis pestañas.
Step 05.
We mark the lower water line with a black pencil, I will take a dark brown shadow for the lower eyelid and blend both colors. I apply mascara to my lashes.
Paso 06.
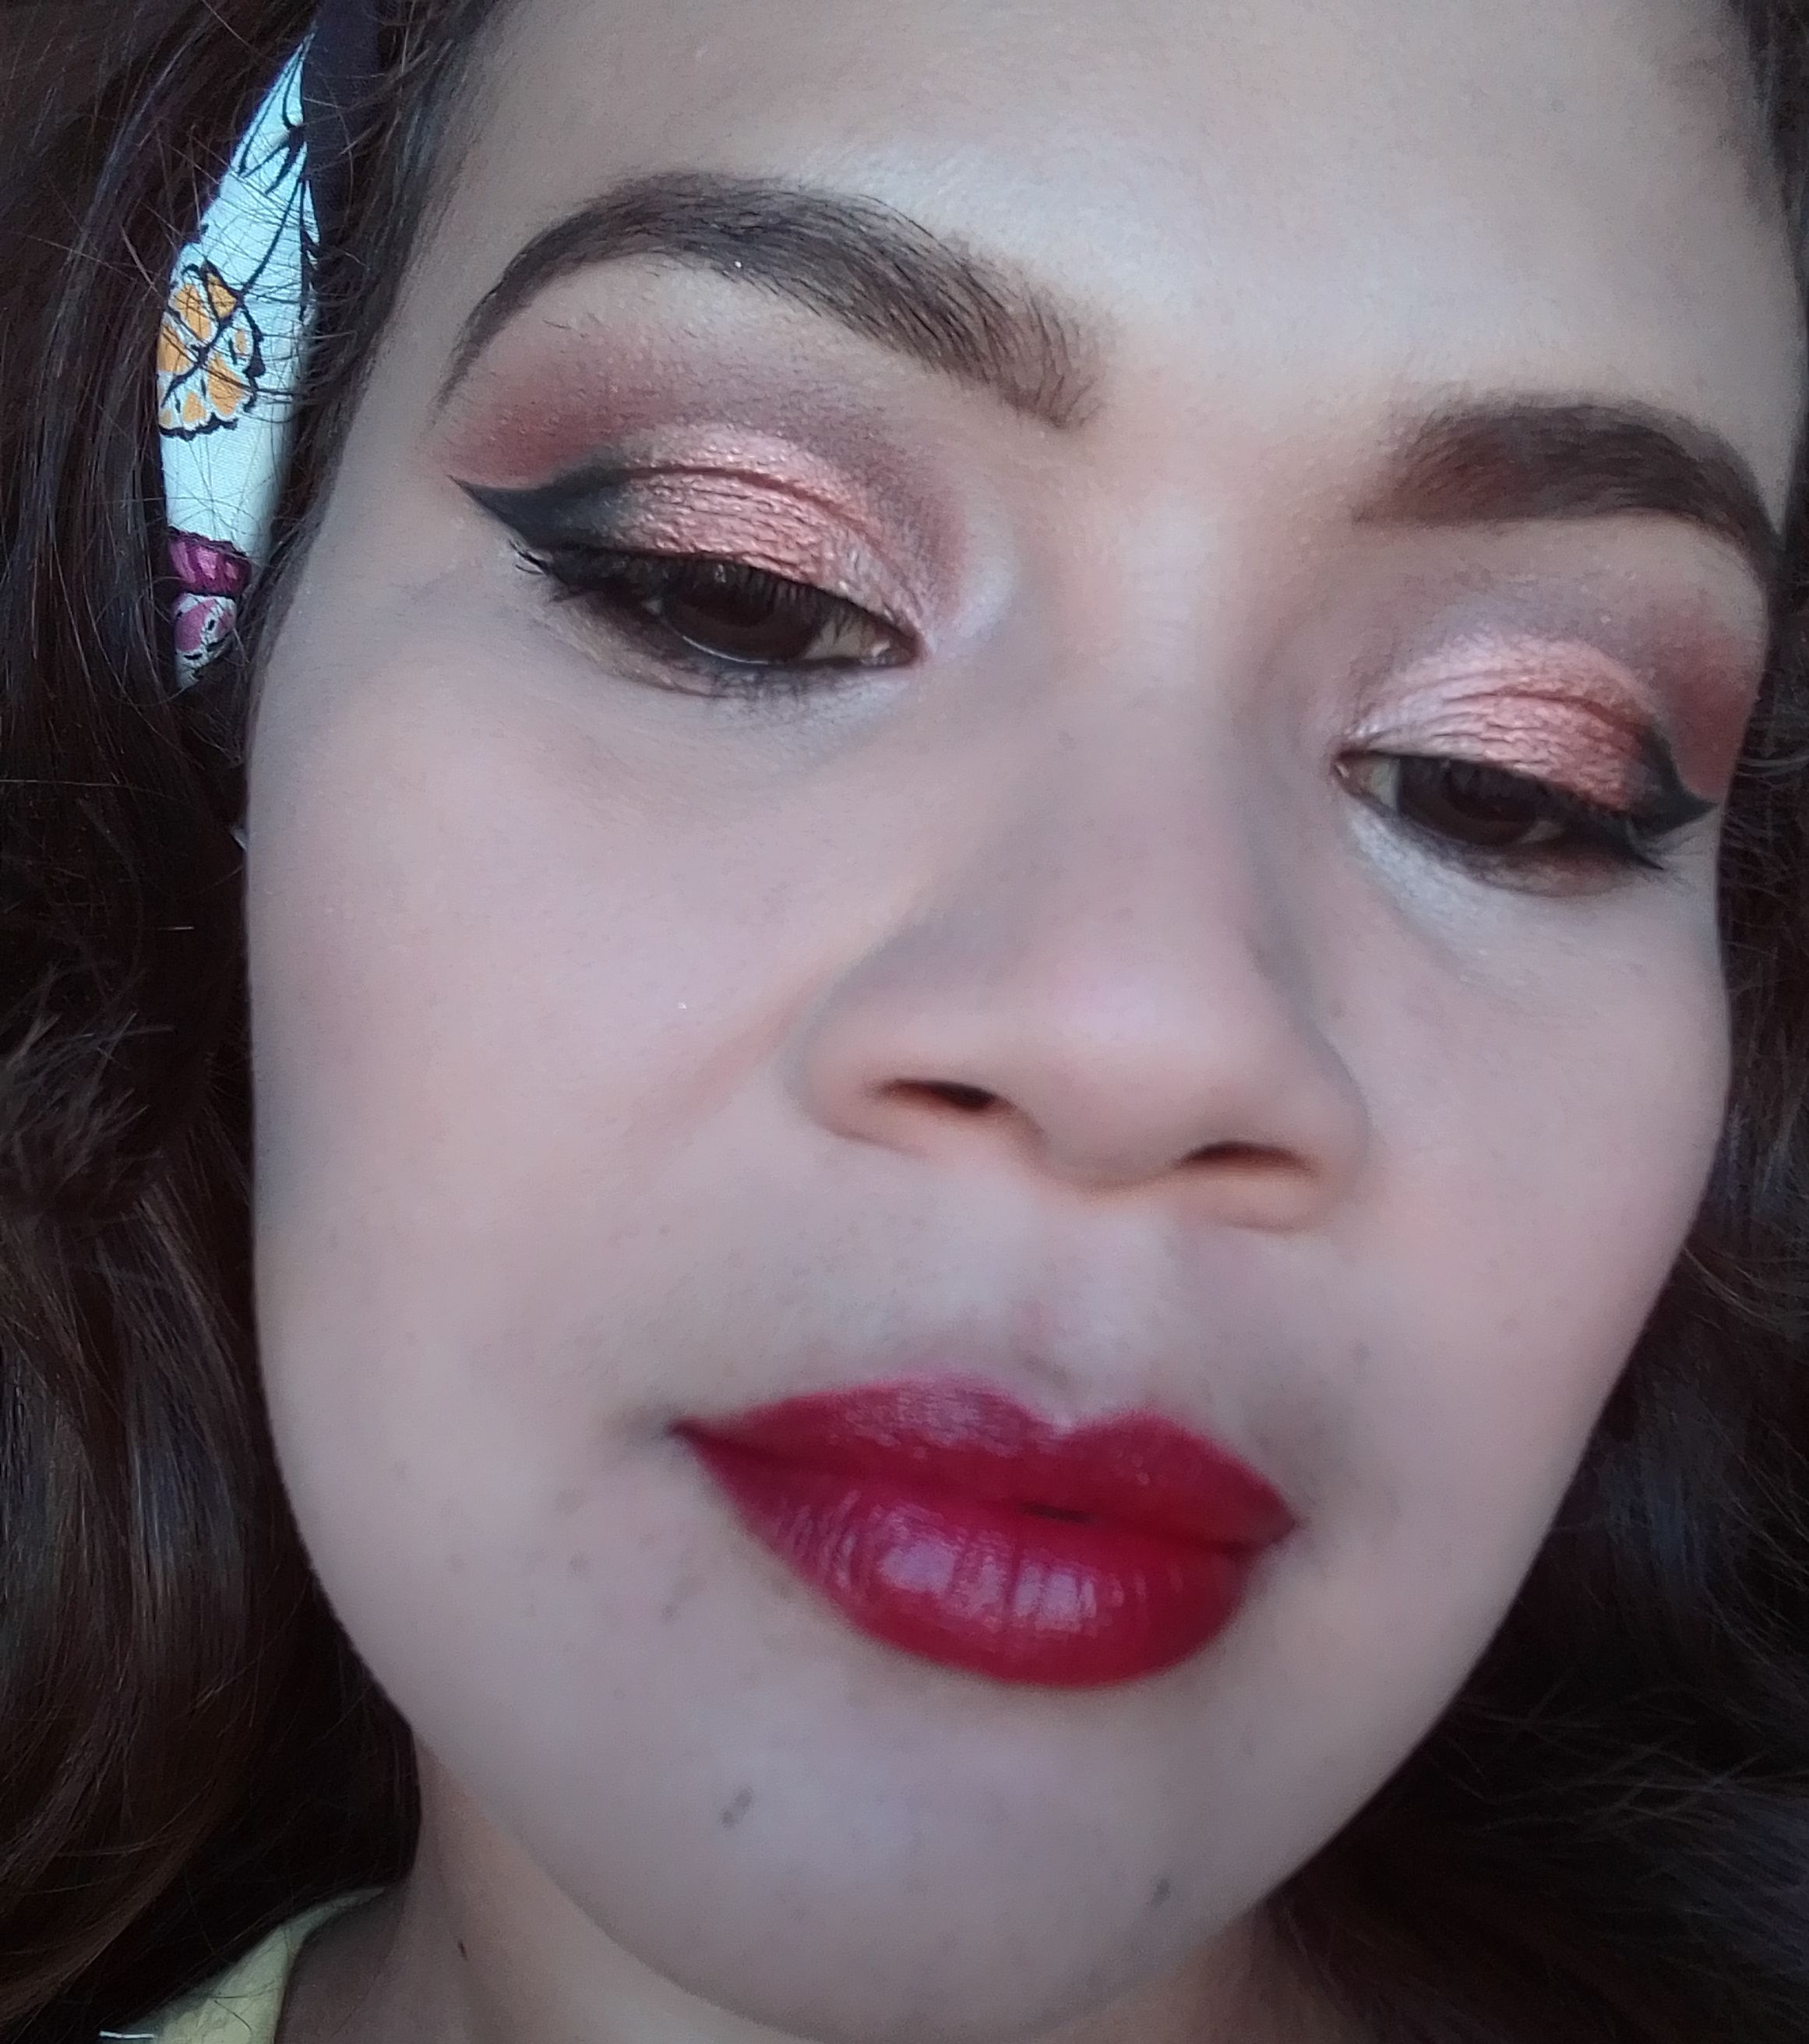
Finalizo colocando un poco de rubor en mis mejillas y el lápiz labial que en esta ocasión se trata de un color rojo muy intenso.
Step 06.
I finish by putting a little blush on my cheeks and lipstick, which this time is a very intense red color.
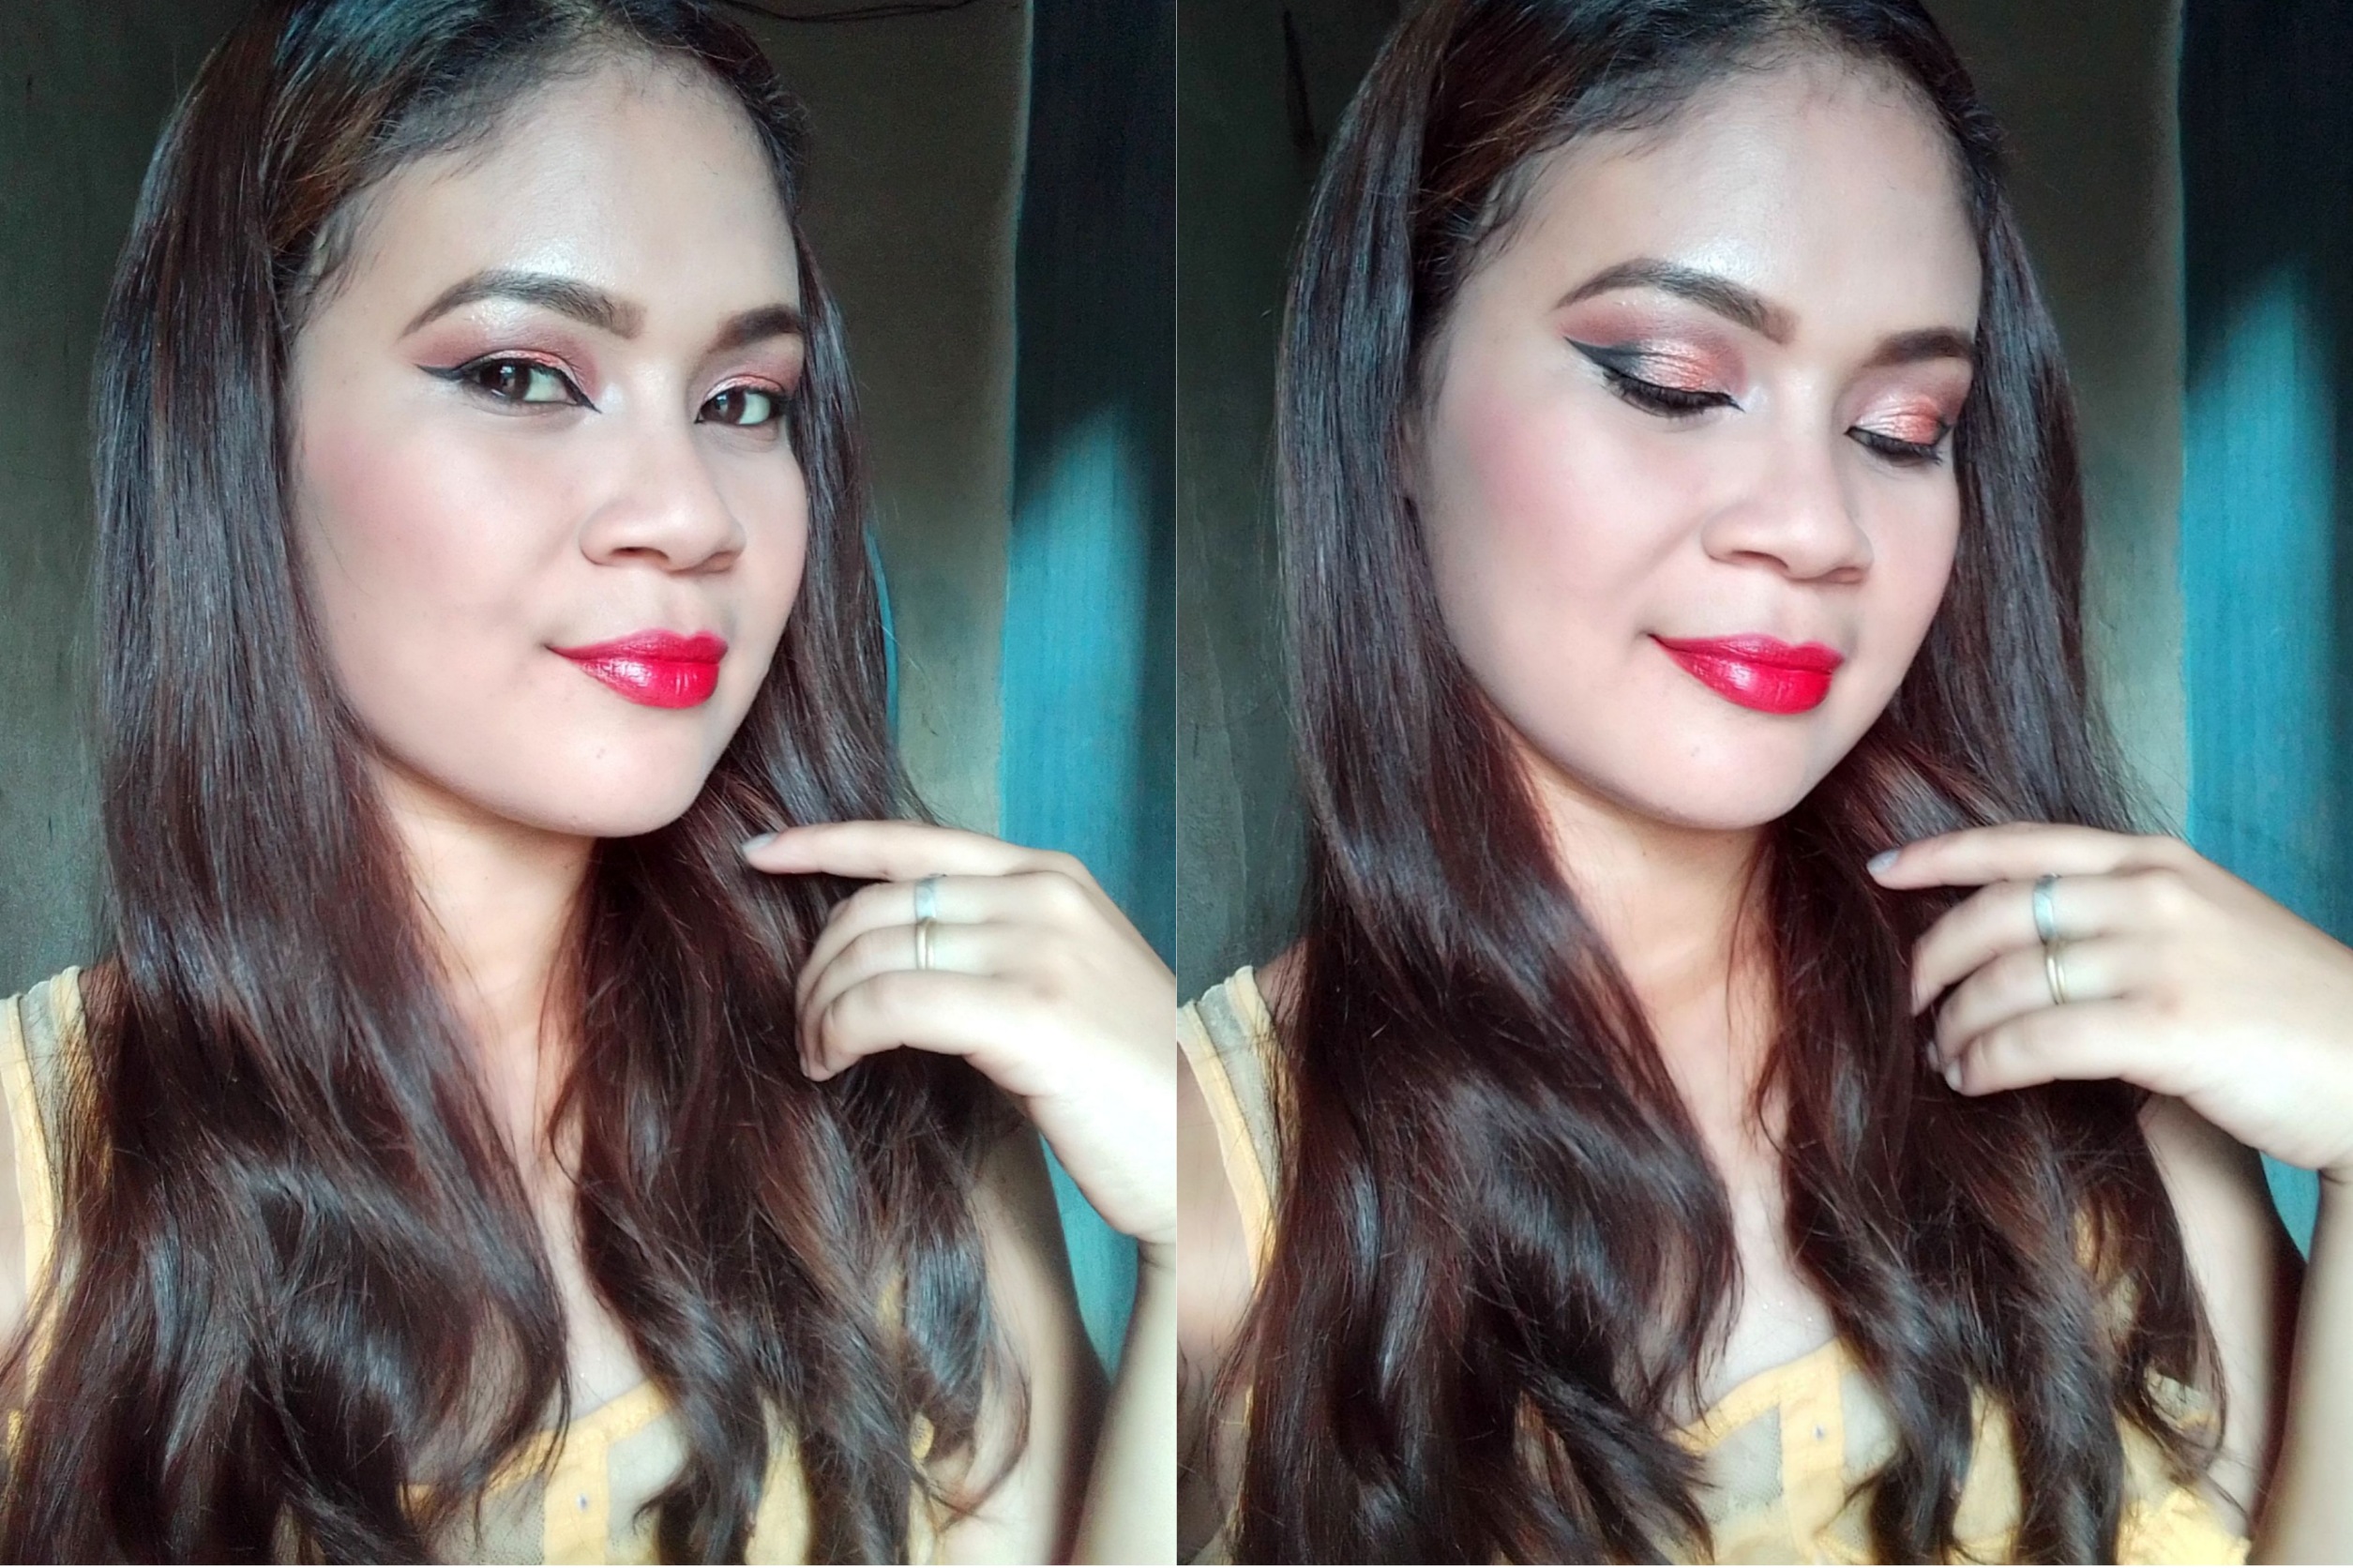
Resultado.🥰
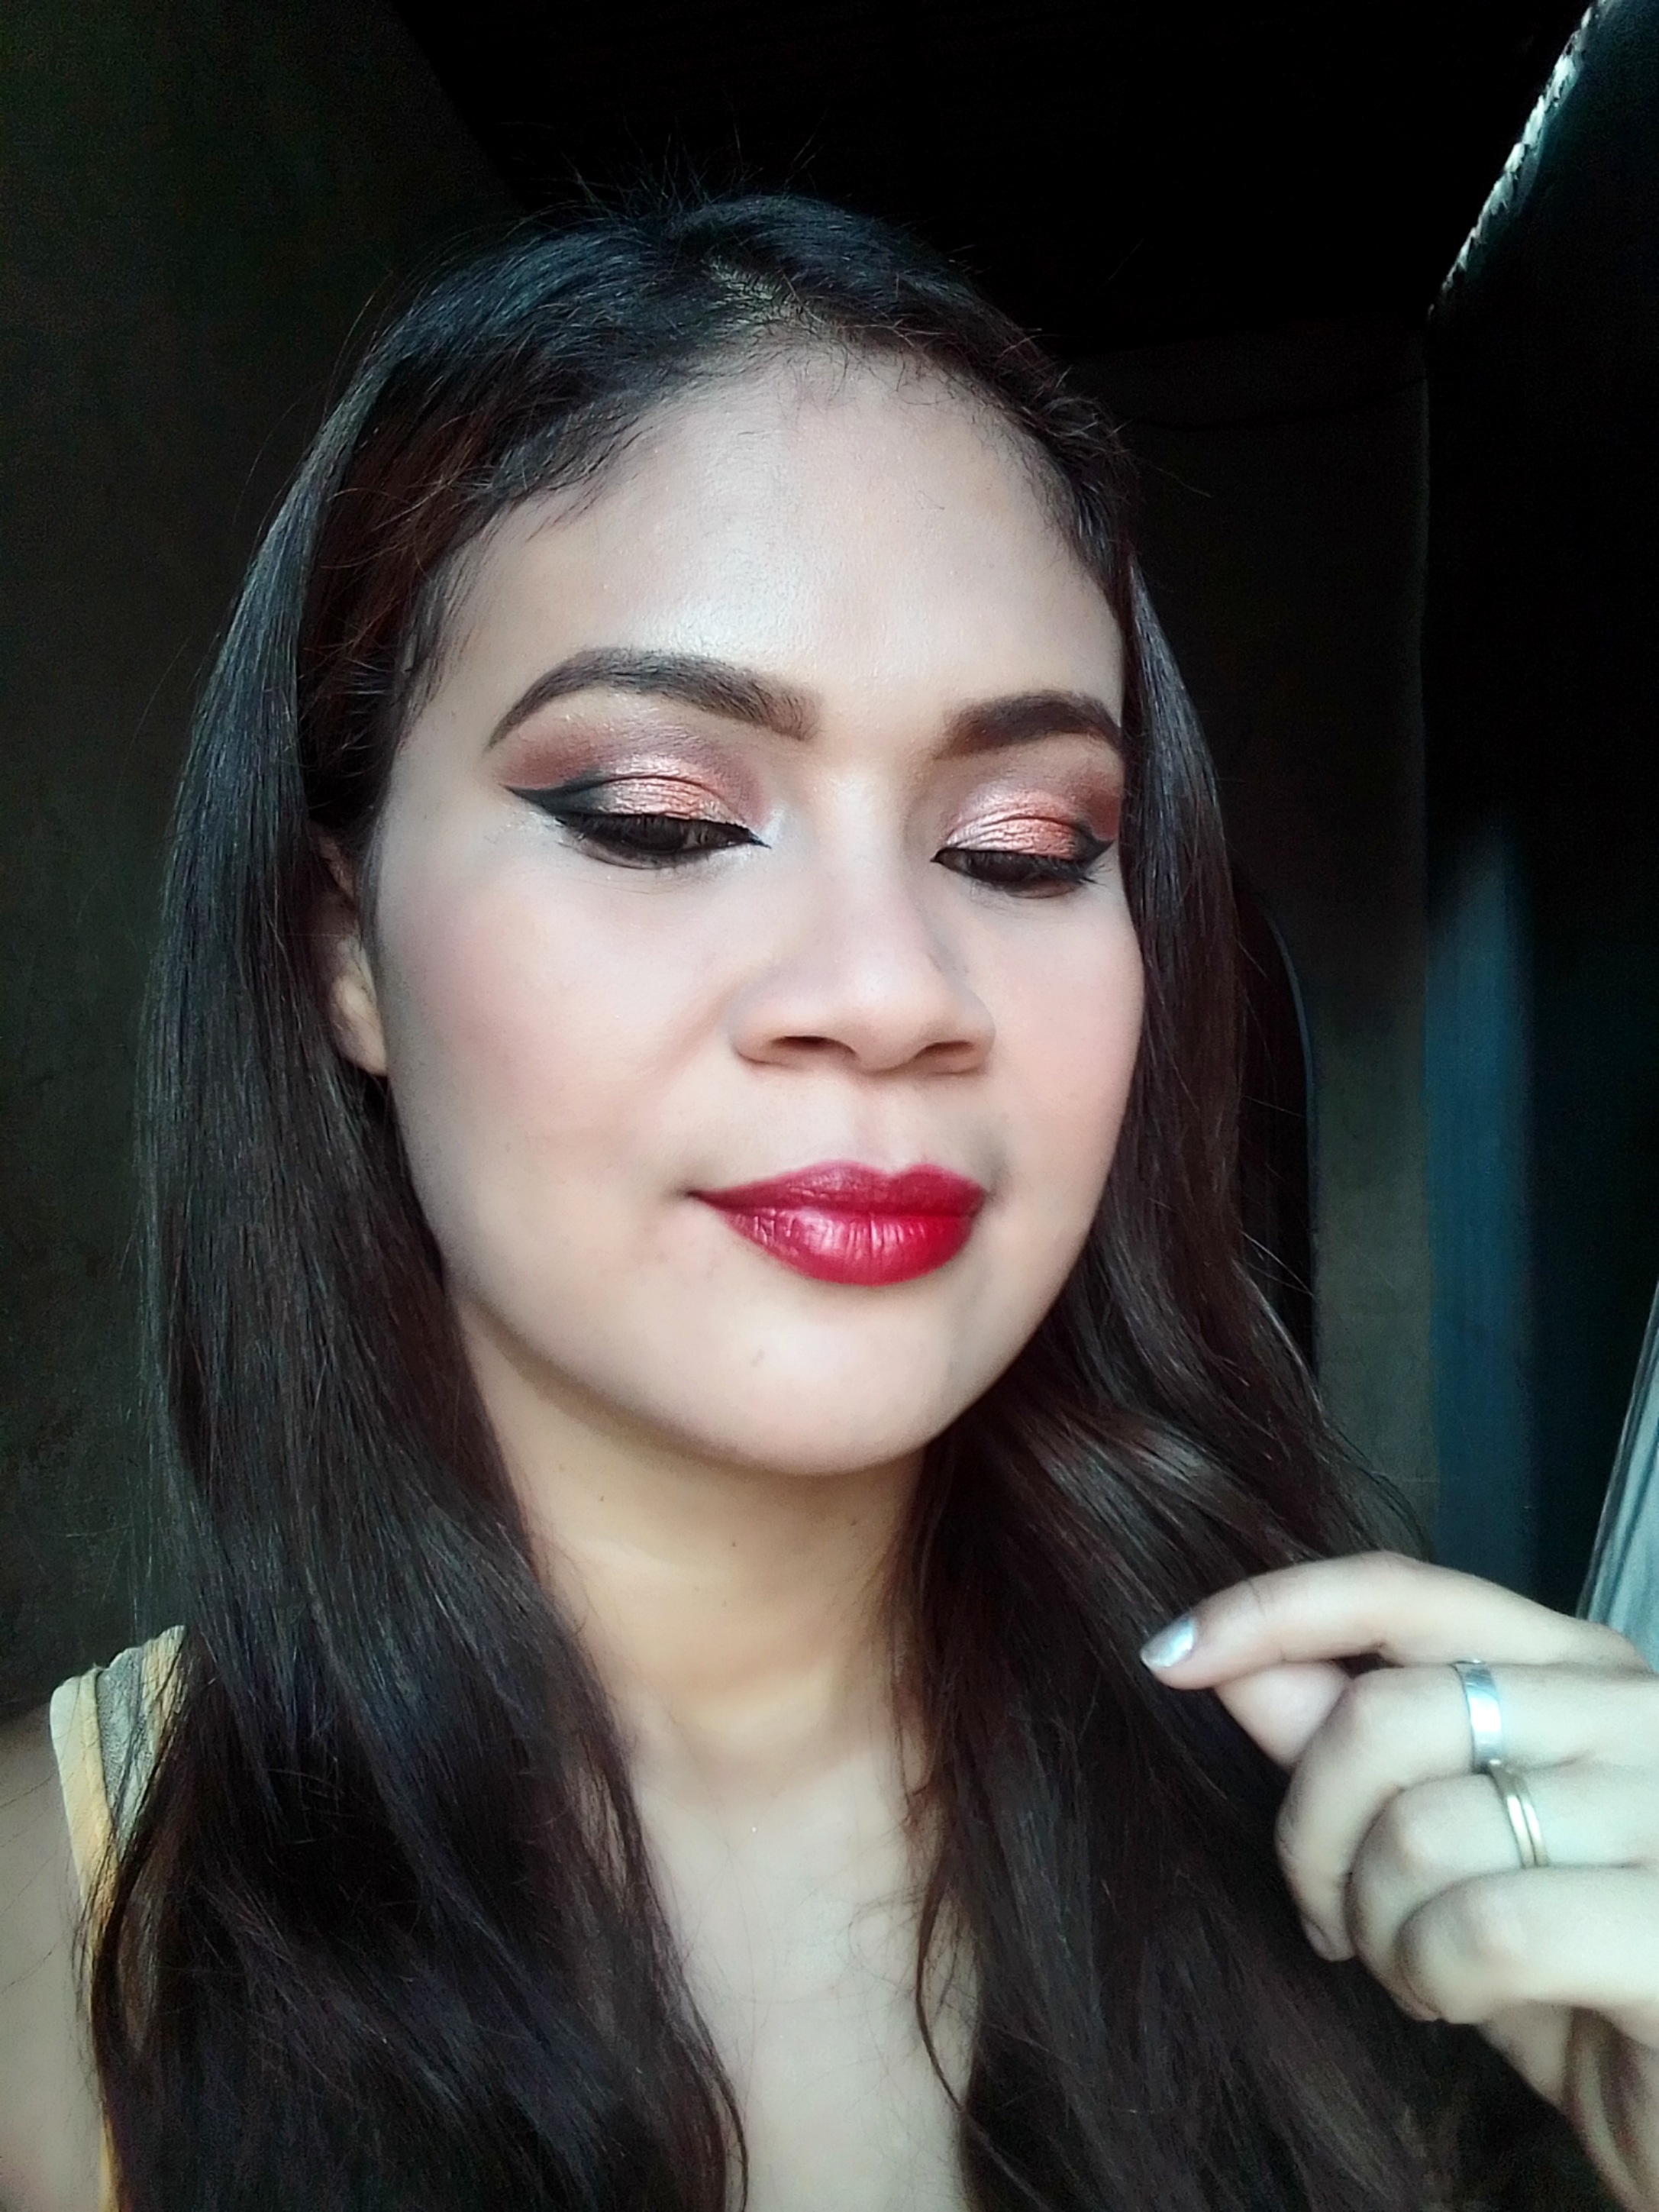
Y así es como termina mi maquillaje de hoy, que podrás utilizar en una cita muy especial, espero a todas ustedes le haya gustado y hayan disfrutado de cada paso.
And this is how my makeup today ends, which you can use on a very special date, I hope all of you liked it and enjoyed each step.


Gracias por tu visita a mi publicación!🤗
Me despido deseándoles buena suerte, que Dios los bendiga grandemente. Hasta una próxima idea!
I leave wishing you good luck, may God bless you greatly. Until next idea!
Texto traducido en el traductor Google.
Translated text in Google translator.
0
0
0.000
Congratulations @razielmorales! You have completed the following achievement on the Hive blockchain and have been rewarded with new badge(s):
Your next target is to reach 550 posts.
You can view your badges on your board and compare yourself to others in the Ranking
If you no longer want to receive notifications, reply to this comment with the word
STOPTo support your work, I also upvoted your post!
Check out the last post from @hivebuzz:
Support the HiveBuzz project. Vote for our proposal!