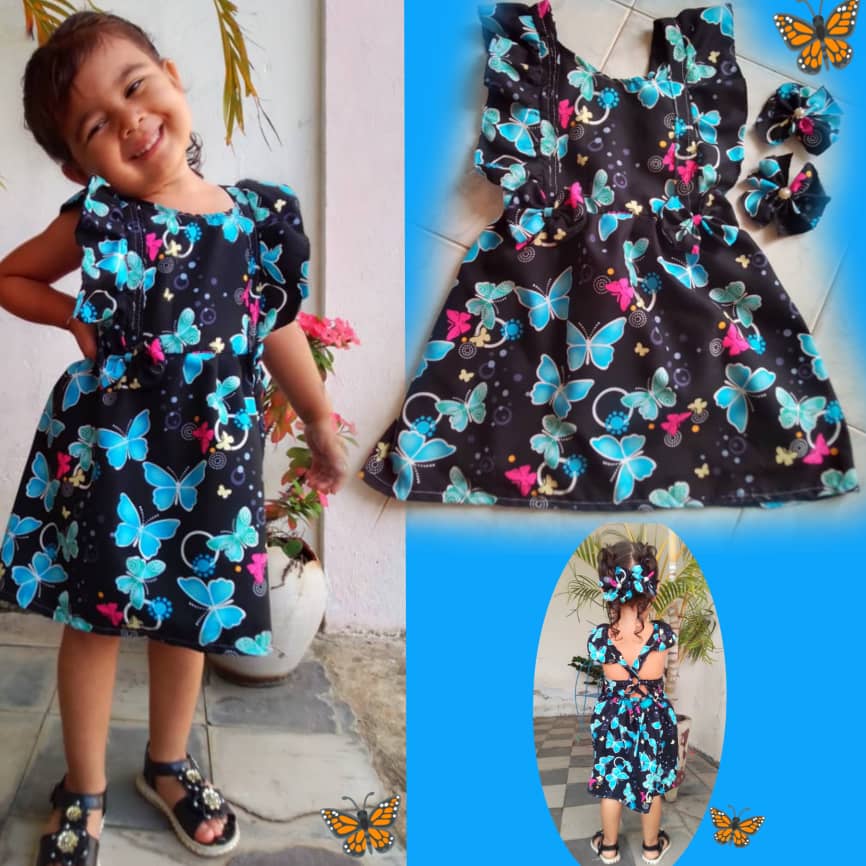
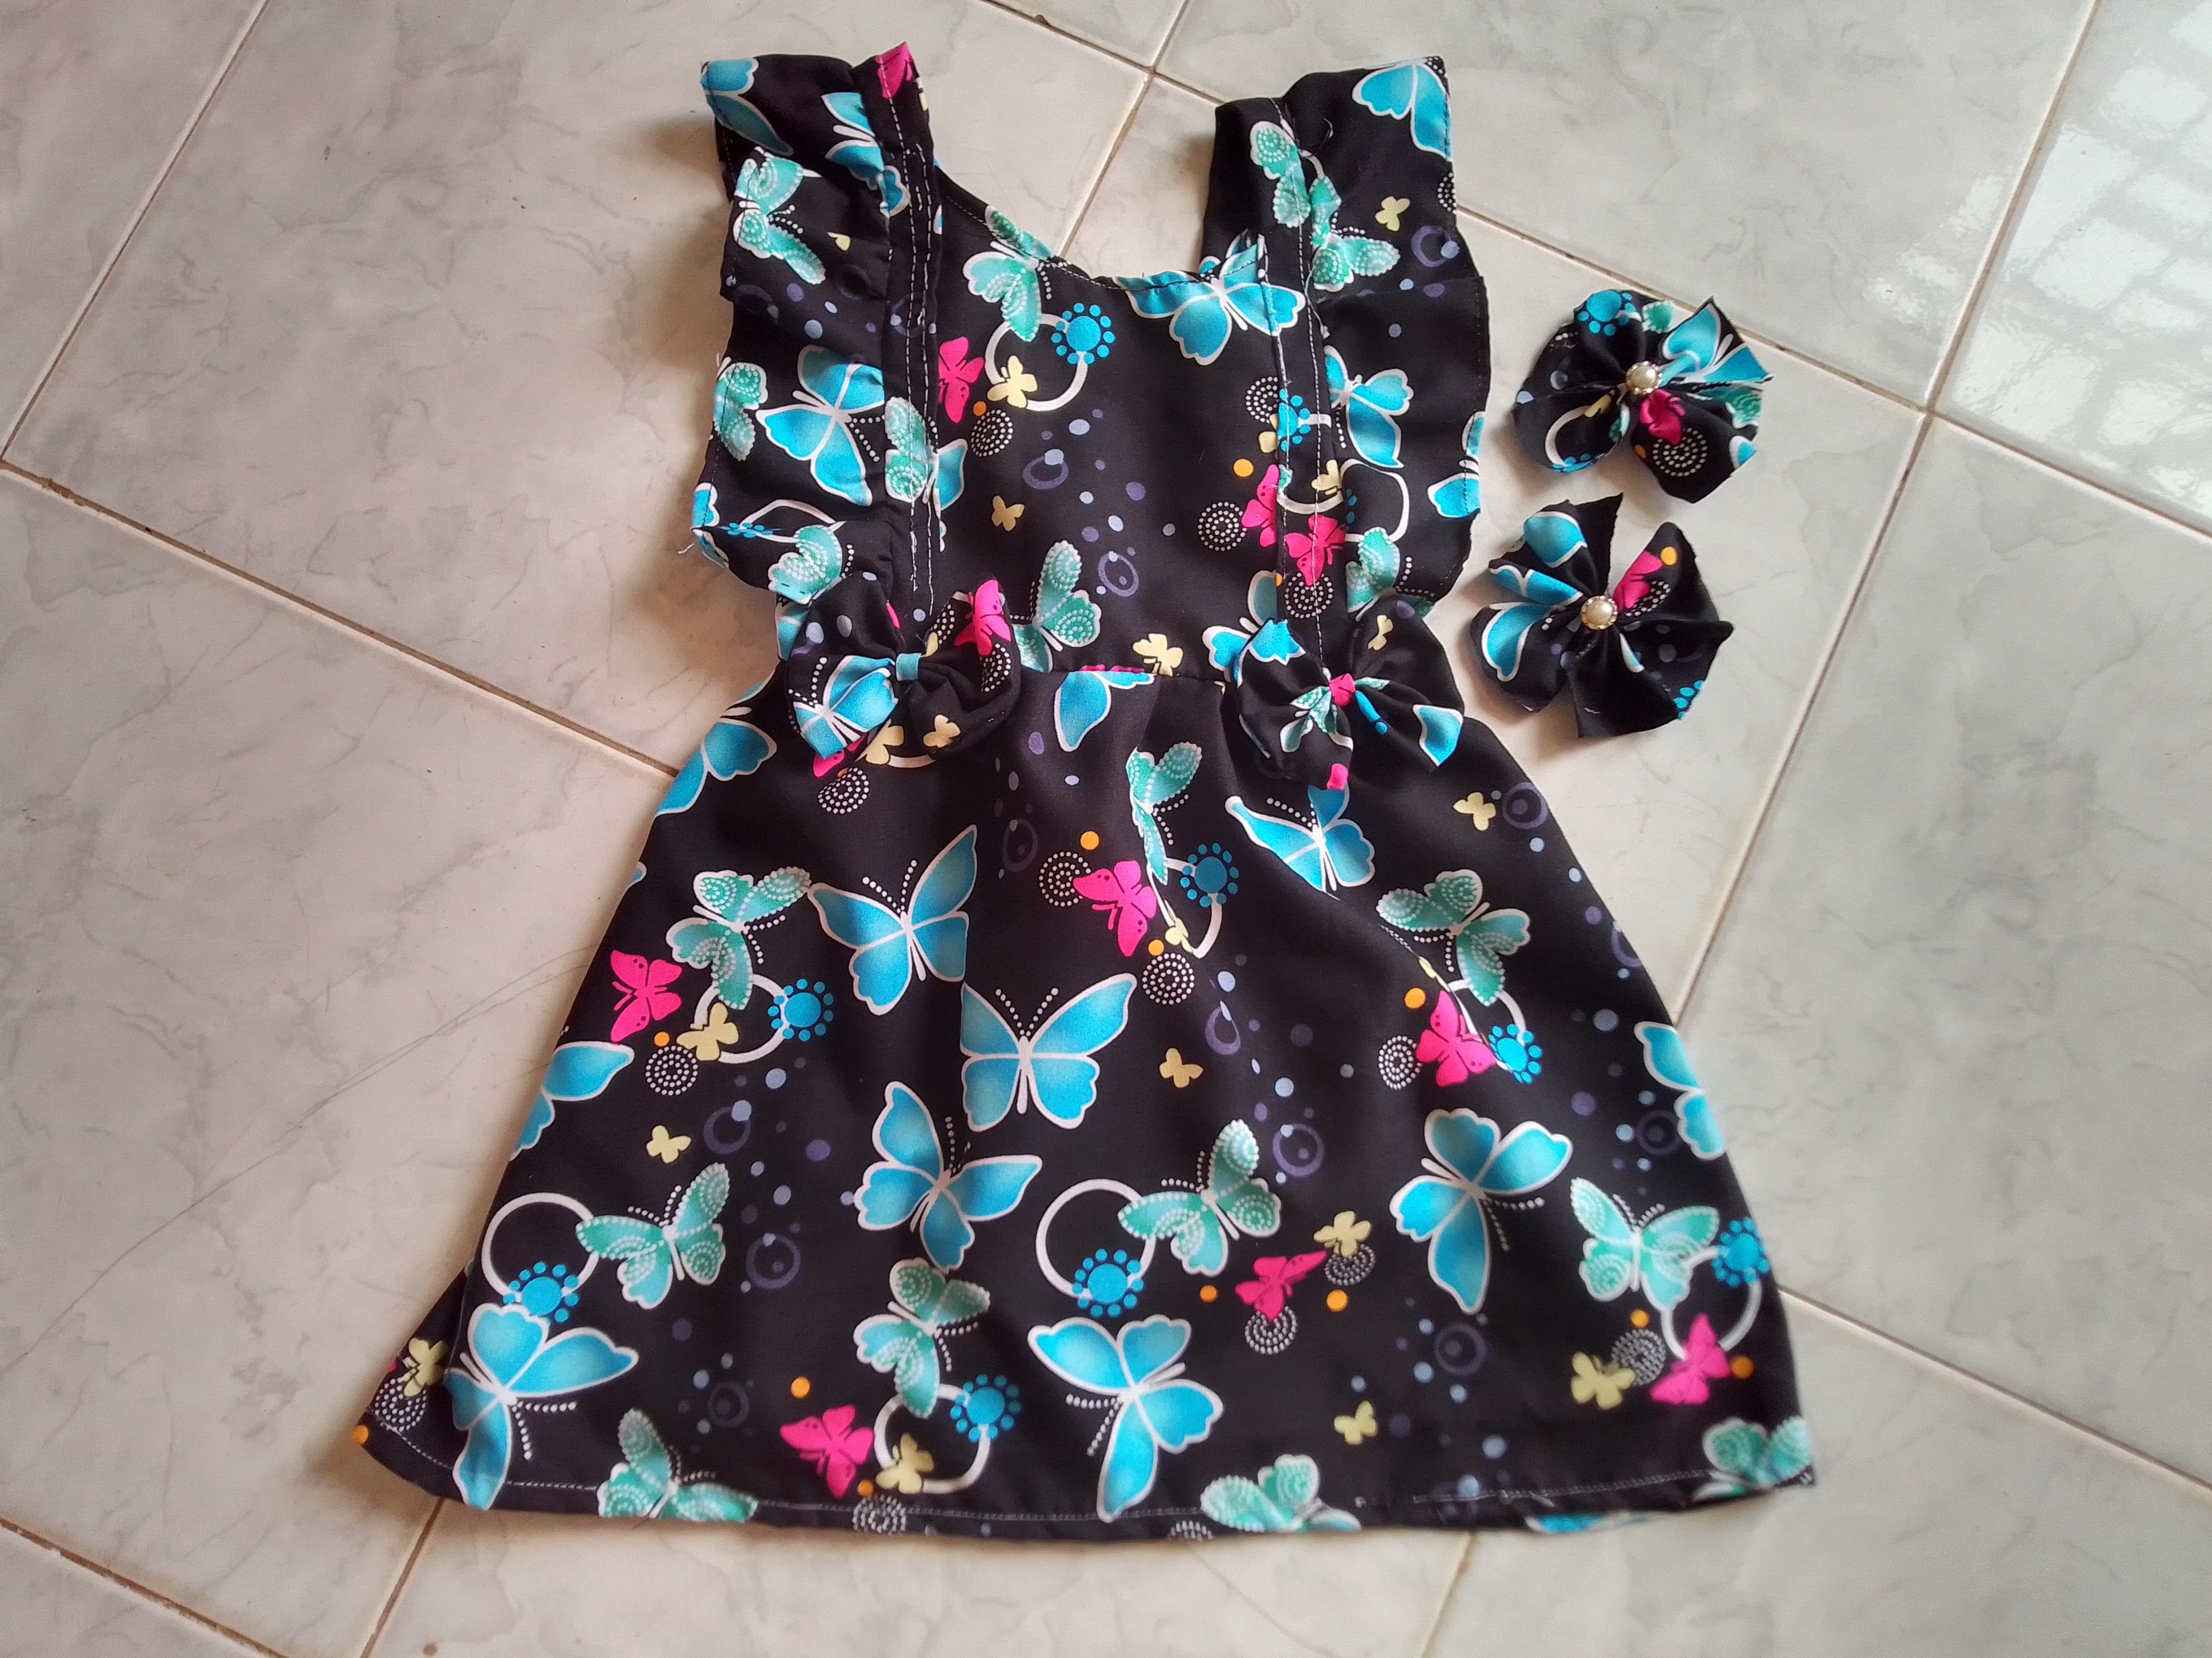
Hermoso vestido estampado de tirantes con volantes cruzados para niñas, hecho a mano//Beautiful printed dress with straps with crossed ruffles for girls, handmade.
Feliz domingo mis grandes artistas textiles, espero estén pasando un hermoso fin de semana lleno de muchas alegrias. Me hace muy feliz compartir una nueva idea en esta hermosa comunidad, y de antemano, permítanme agradecerles por su gran apoyo y por sus lindos comentarios que me llenan de mucha motivación, de verdad muchas gracias, les doy la bienvenida a nuevo tutorial de costura hecho a mano.
Happy Sunday my great textile artists, I hope you are having a beautiful weekend full of joy. It makes me very happy to share a new idea in this beautiful community, and in advance, let me thank you for your great support and for your nice comments that fill me with a lot of motivation, really thank you very much, I welcome you to a new sewing tutorial done by hand.
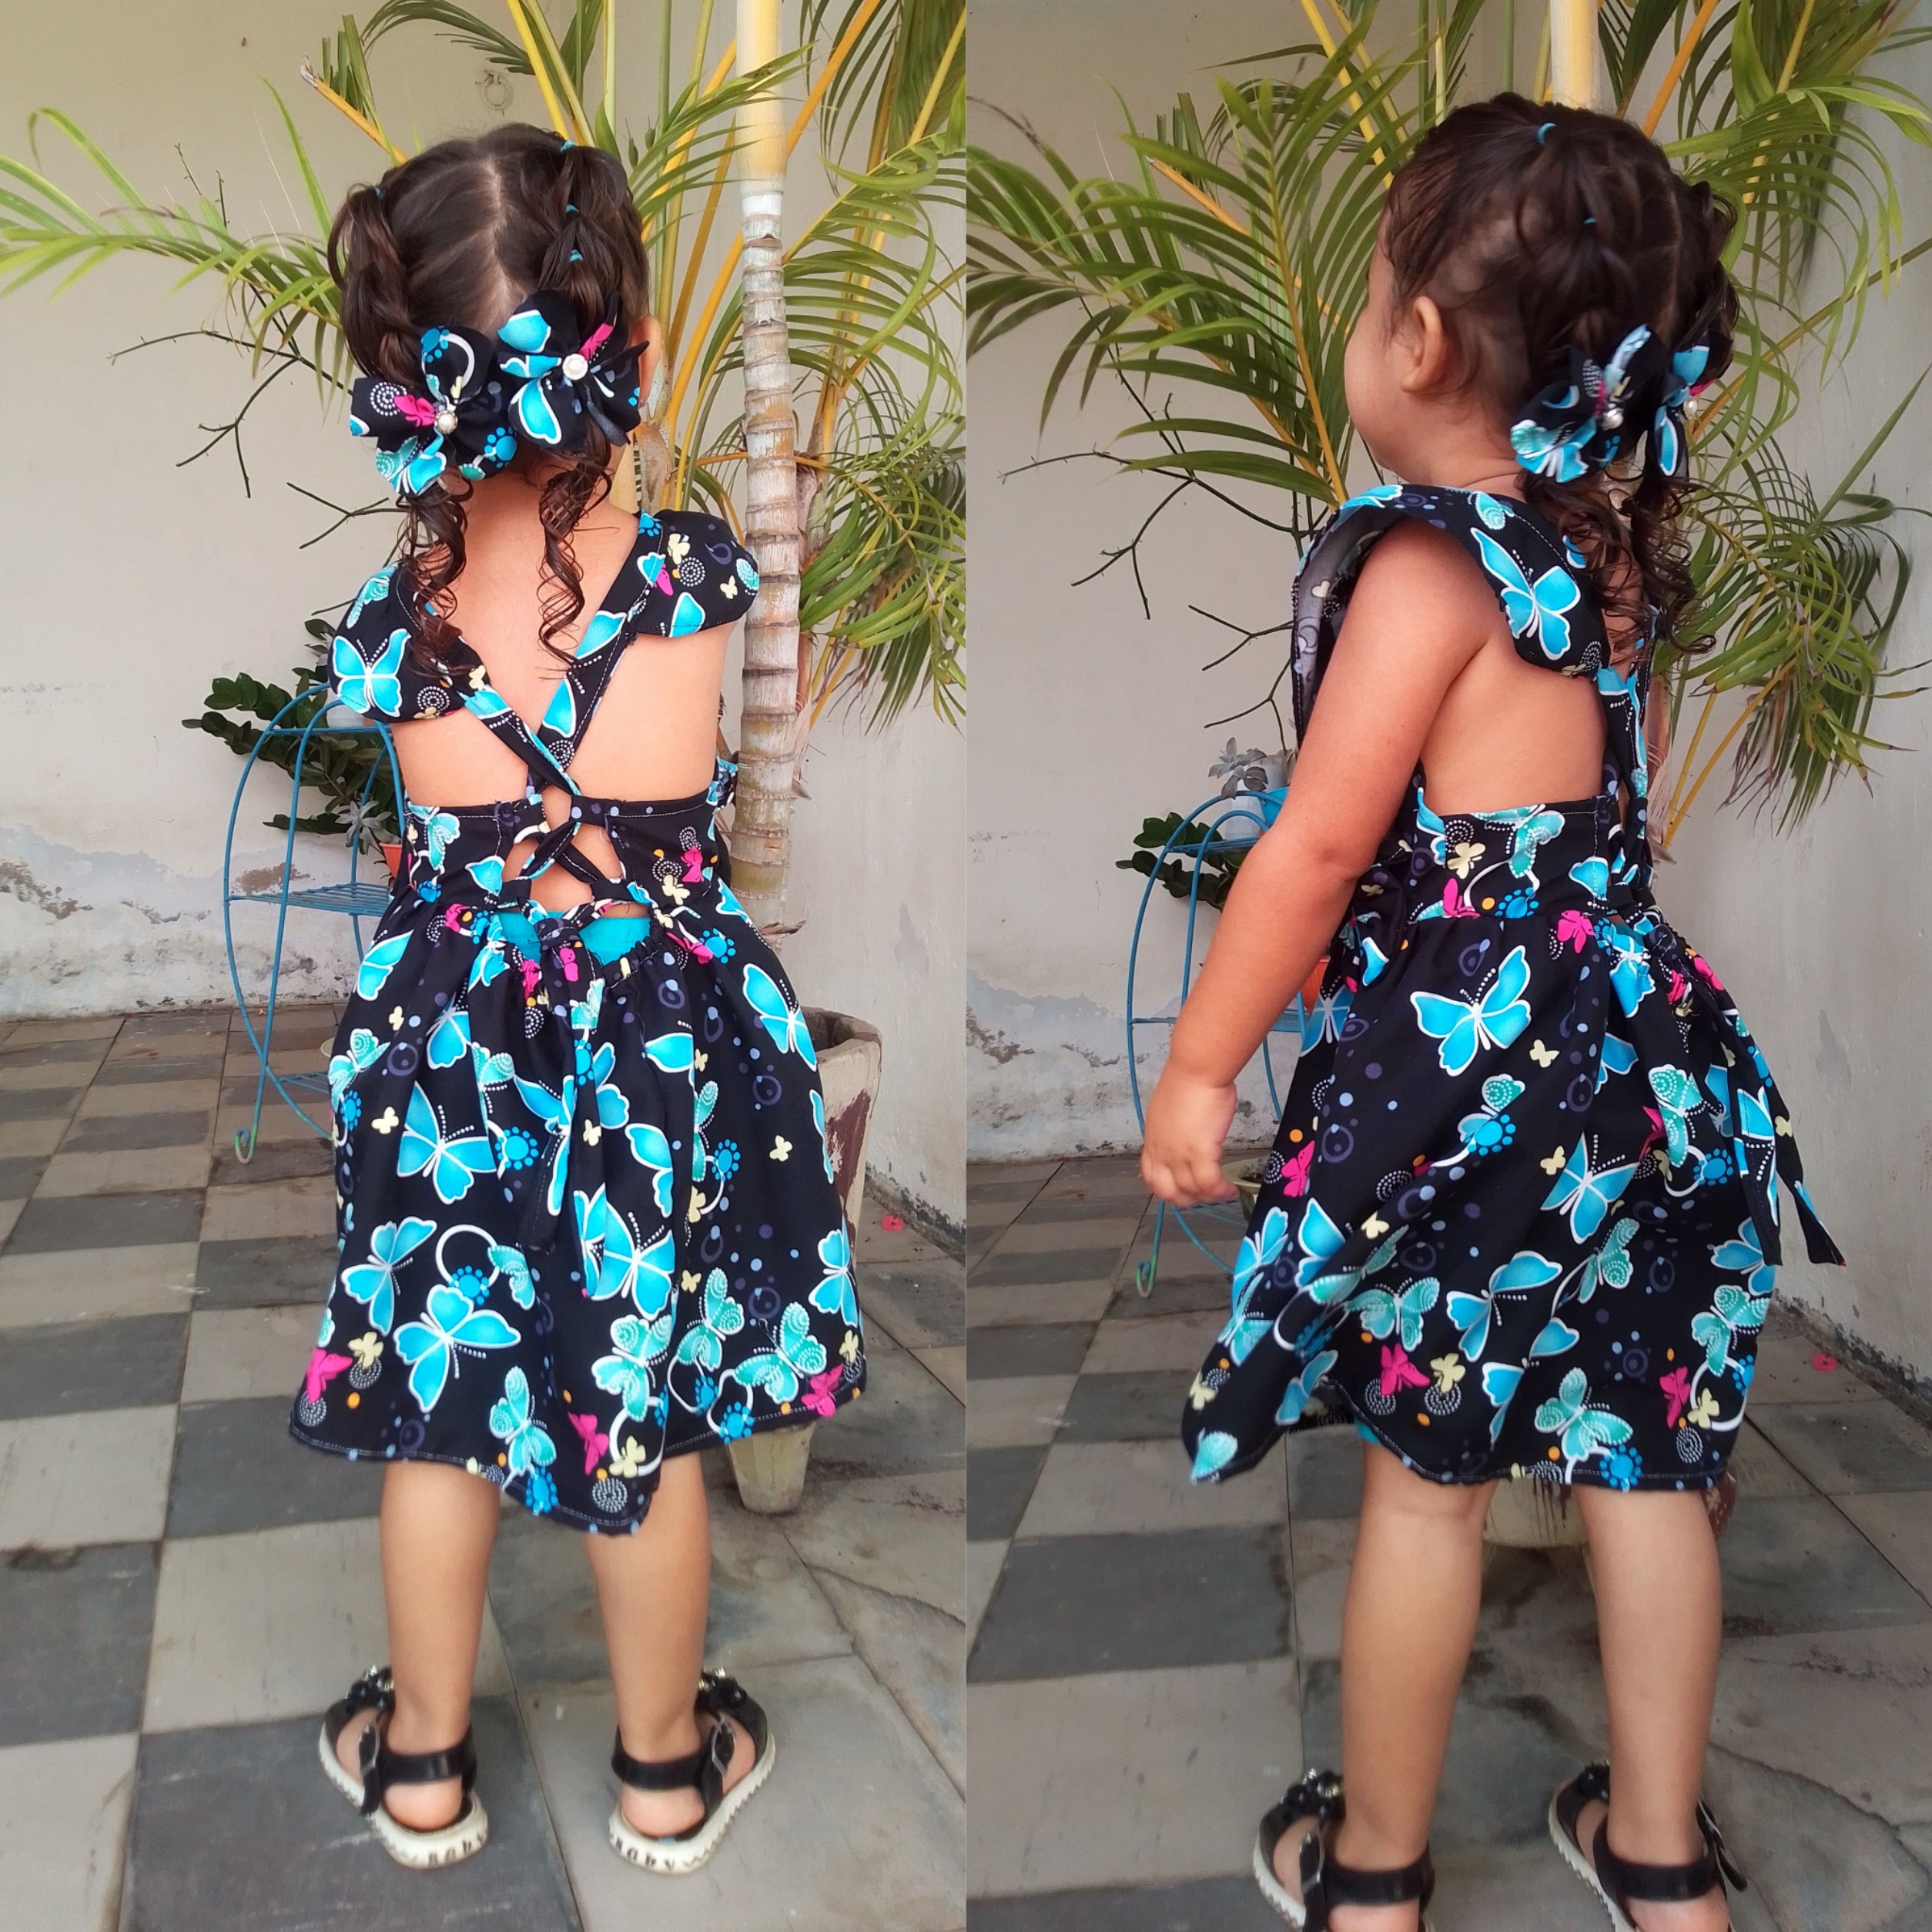
Es increíble la manera en que ha evolucionado la confección de los vestidos para niñas, cada vez son más coquetos y hermosos. Así que, aprovechando lo coqueta que es mi niña jaja, en esta ocasión quise hacerle un diseño de vestido de espalda descubierta muy bonito y muy a la moda, que se destaca por sus bellos tirantes con volantes cruzados en parte posterior, realizado con linda tela estampada en mariposas azules, que le va muy bien a su color de piel.
It is incredible how the making of dresses for girls has evolved, they are becoming more flirty and beautiful. So, taking advantage of how flirtatious my girl is haha, this time I wanted to make her a dress design, with a bare back, very pretty and very fashionable, which stands out for its beautiful straps with crossed ruffles at the back, made with beautiful fabric printed with blue butterflies, which goes very well with her skin color.
La costura fuera de lo que pueda parecer es bastante sencilla, así que si te gusta idea y querés saber como hacerlos te invito a ver este bonito tutorial lleno de lindas imágenes acompañadas de pasos explicativos que te facilitarán su creación.
Sewing outside of what it may seem is quite simple, so if you like the idea and want to know how to do it, I invite you to see this beautiful tutorial full of beautiful images accompanied by explanatory steps that will help you will make it easier to create.
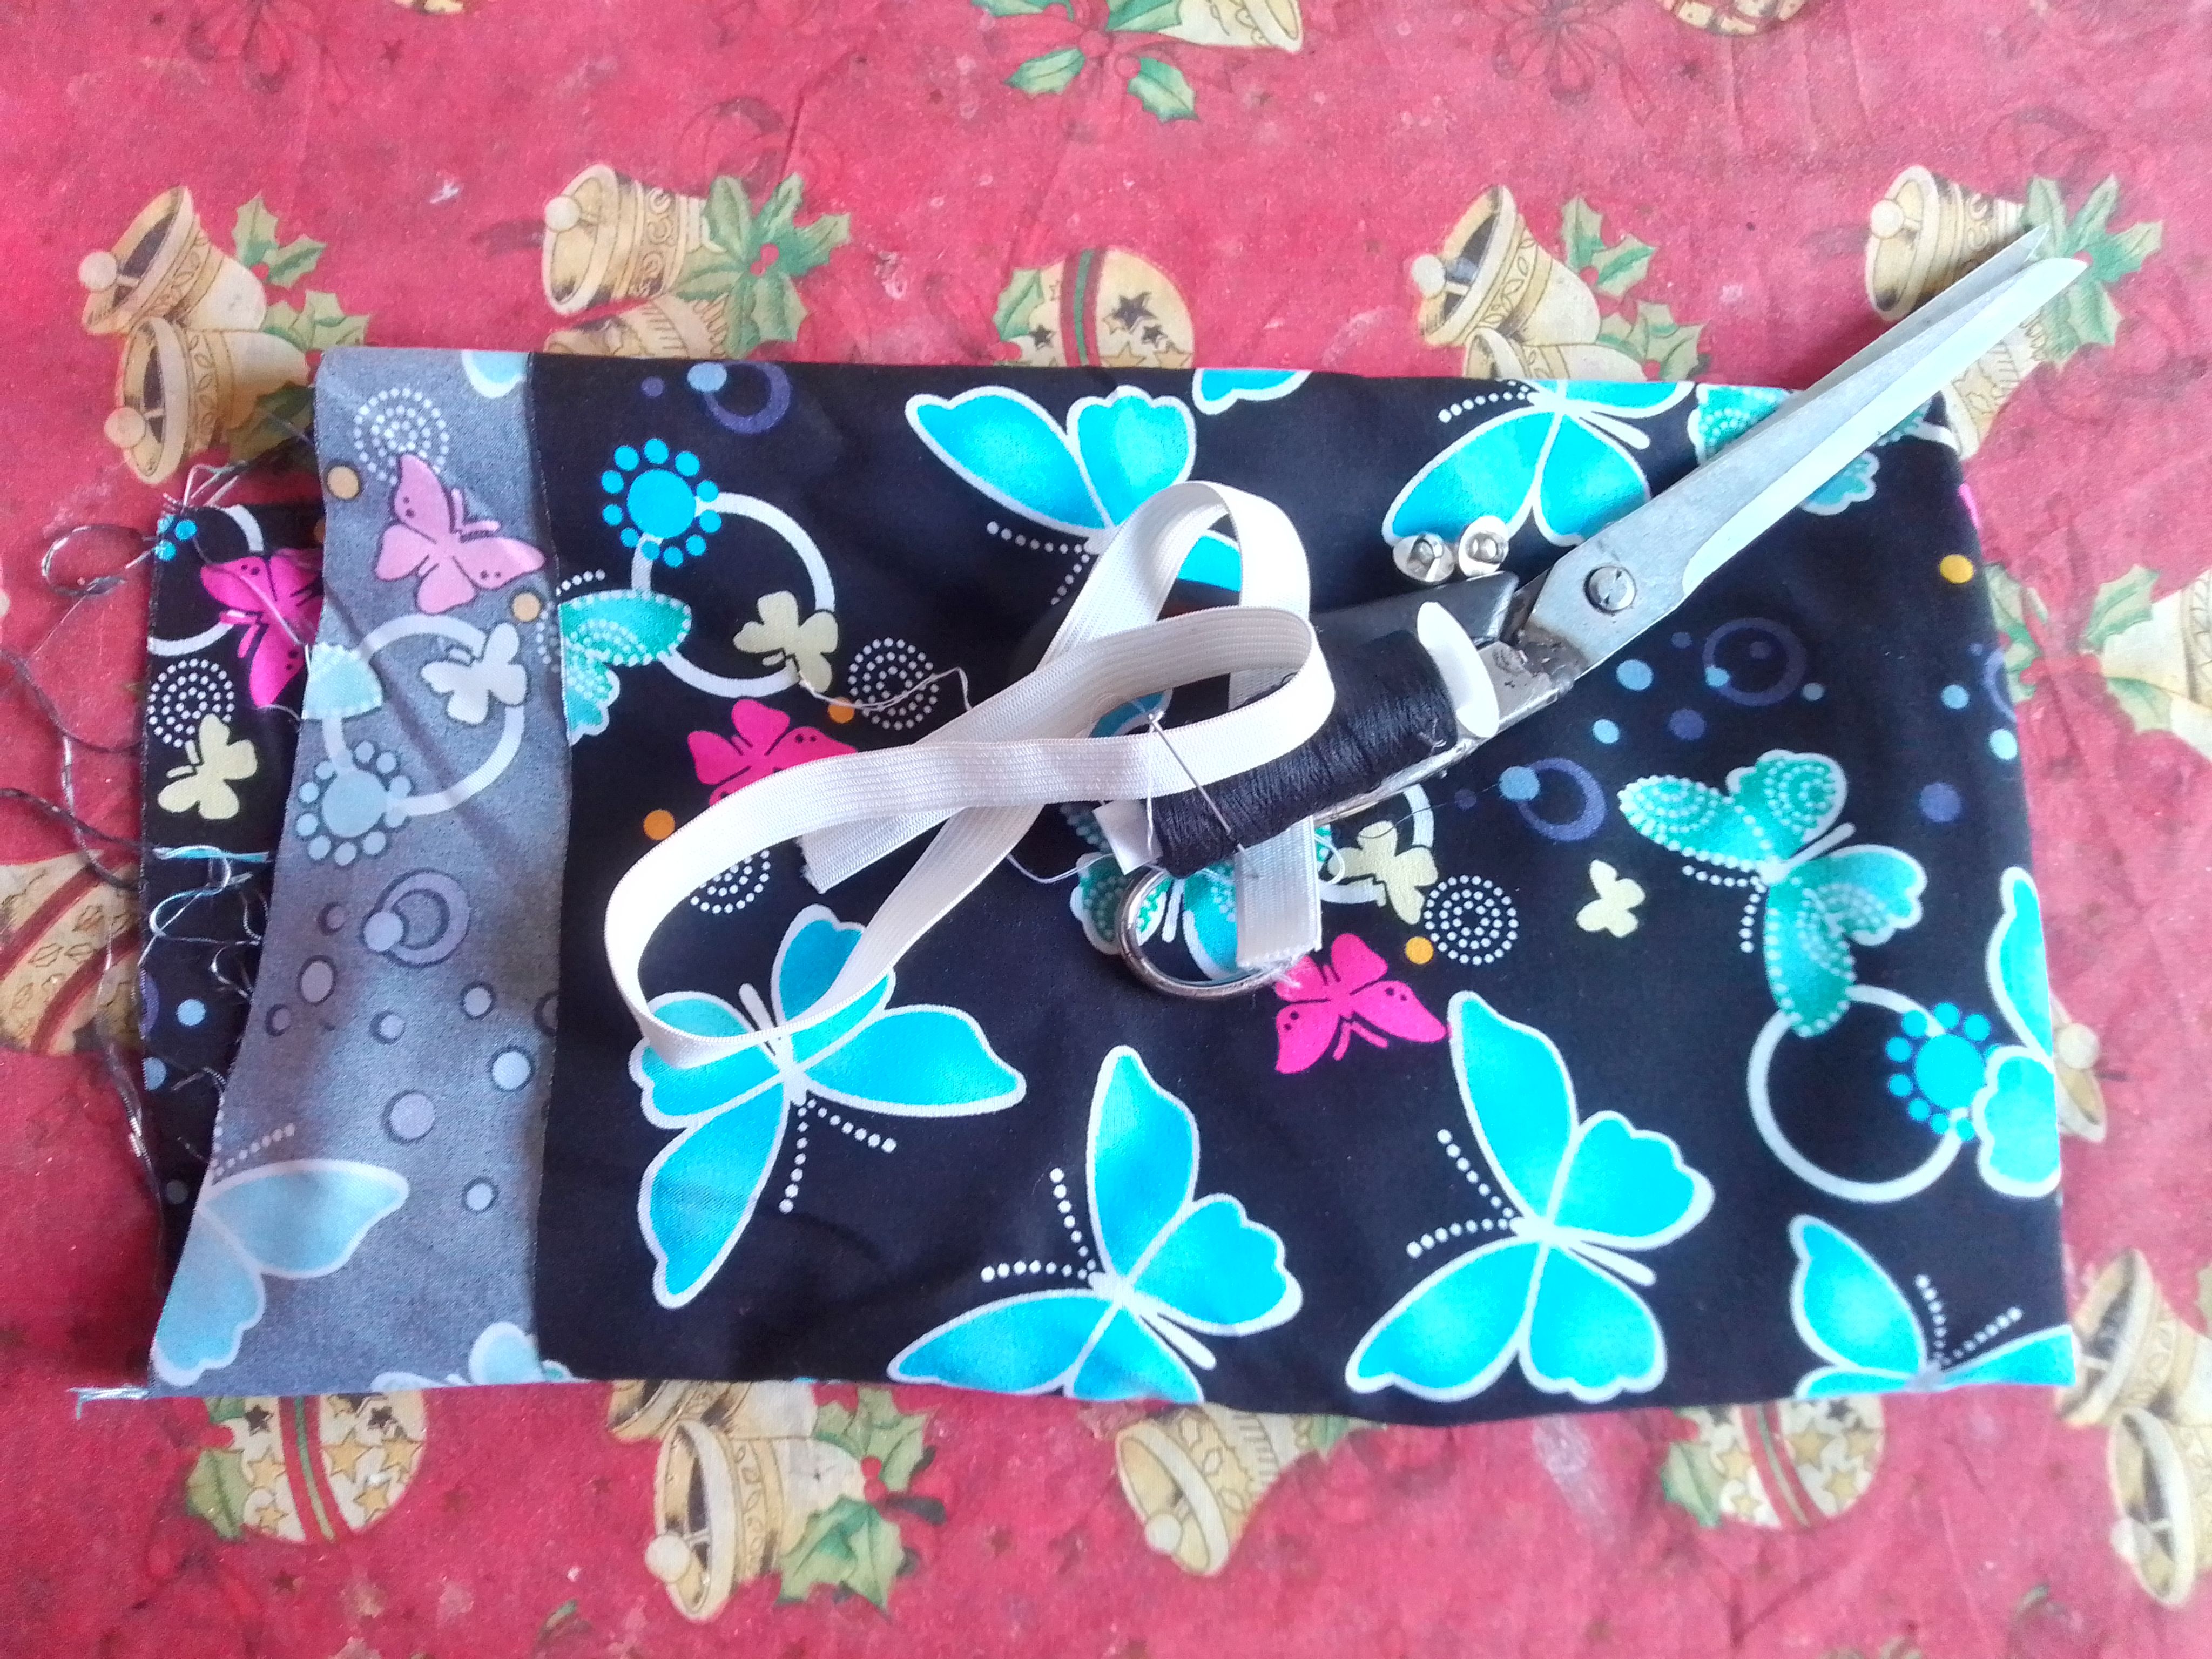
Materiales que necesitas:
- Tela estampada.
- Hilo y aguja.
- Goma elástica.
- Tijeras.
Materials you need:
- Printed cloth.
- Thread and needle.
- elastic band
- Scissors.
(PROCEDIMIENTO)
Paso 01
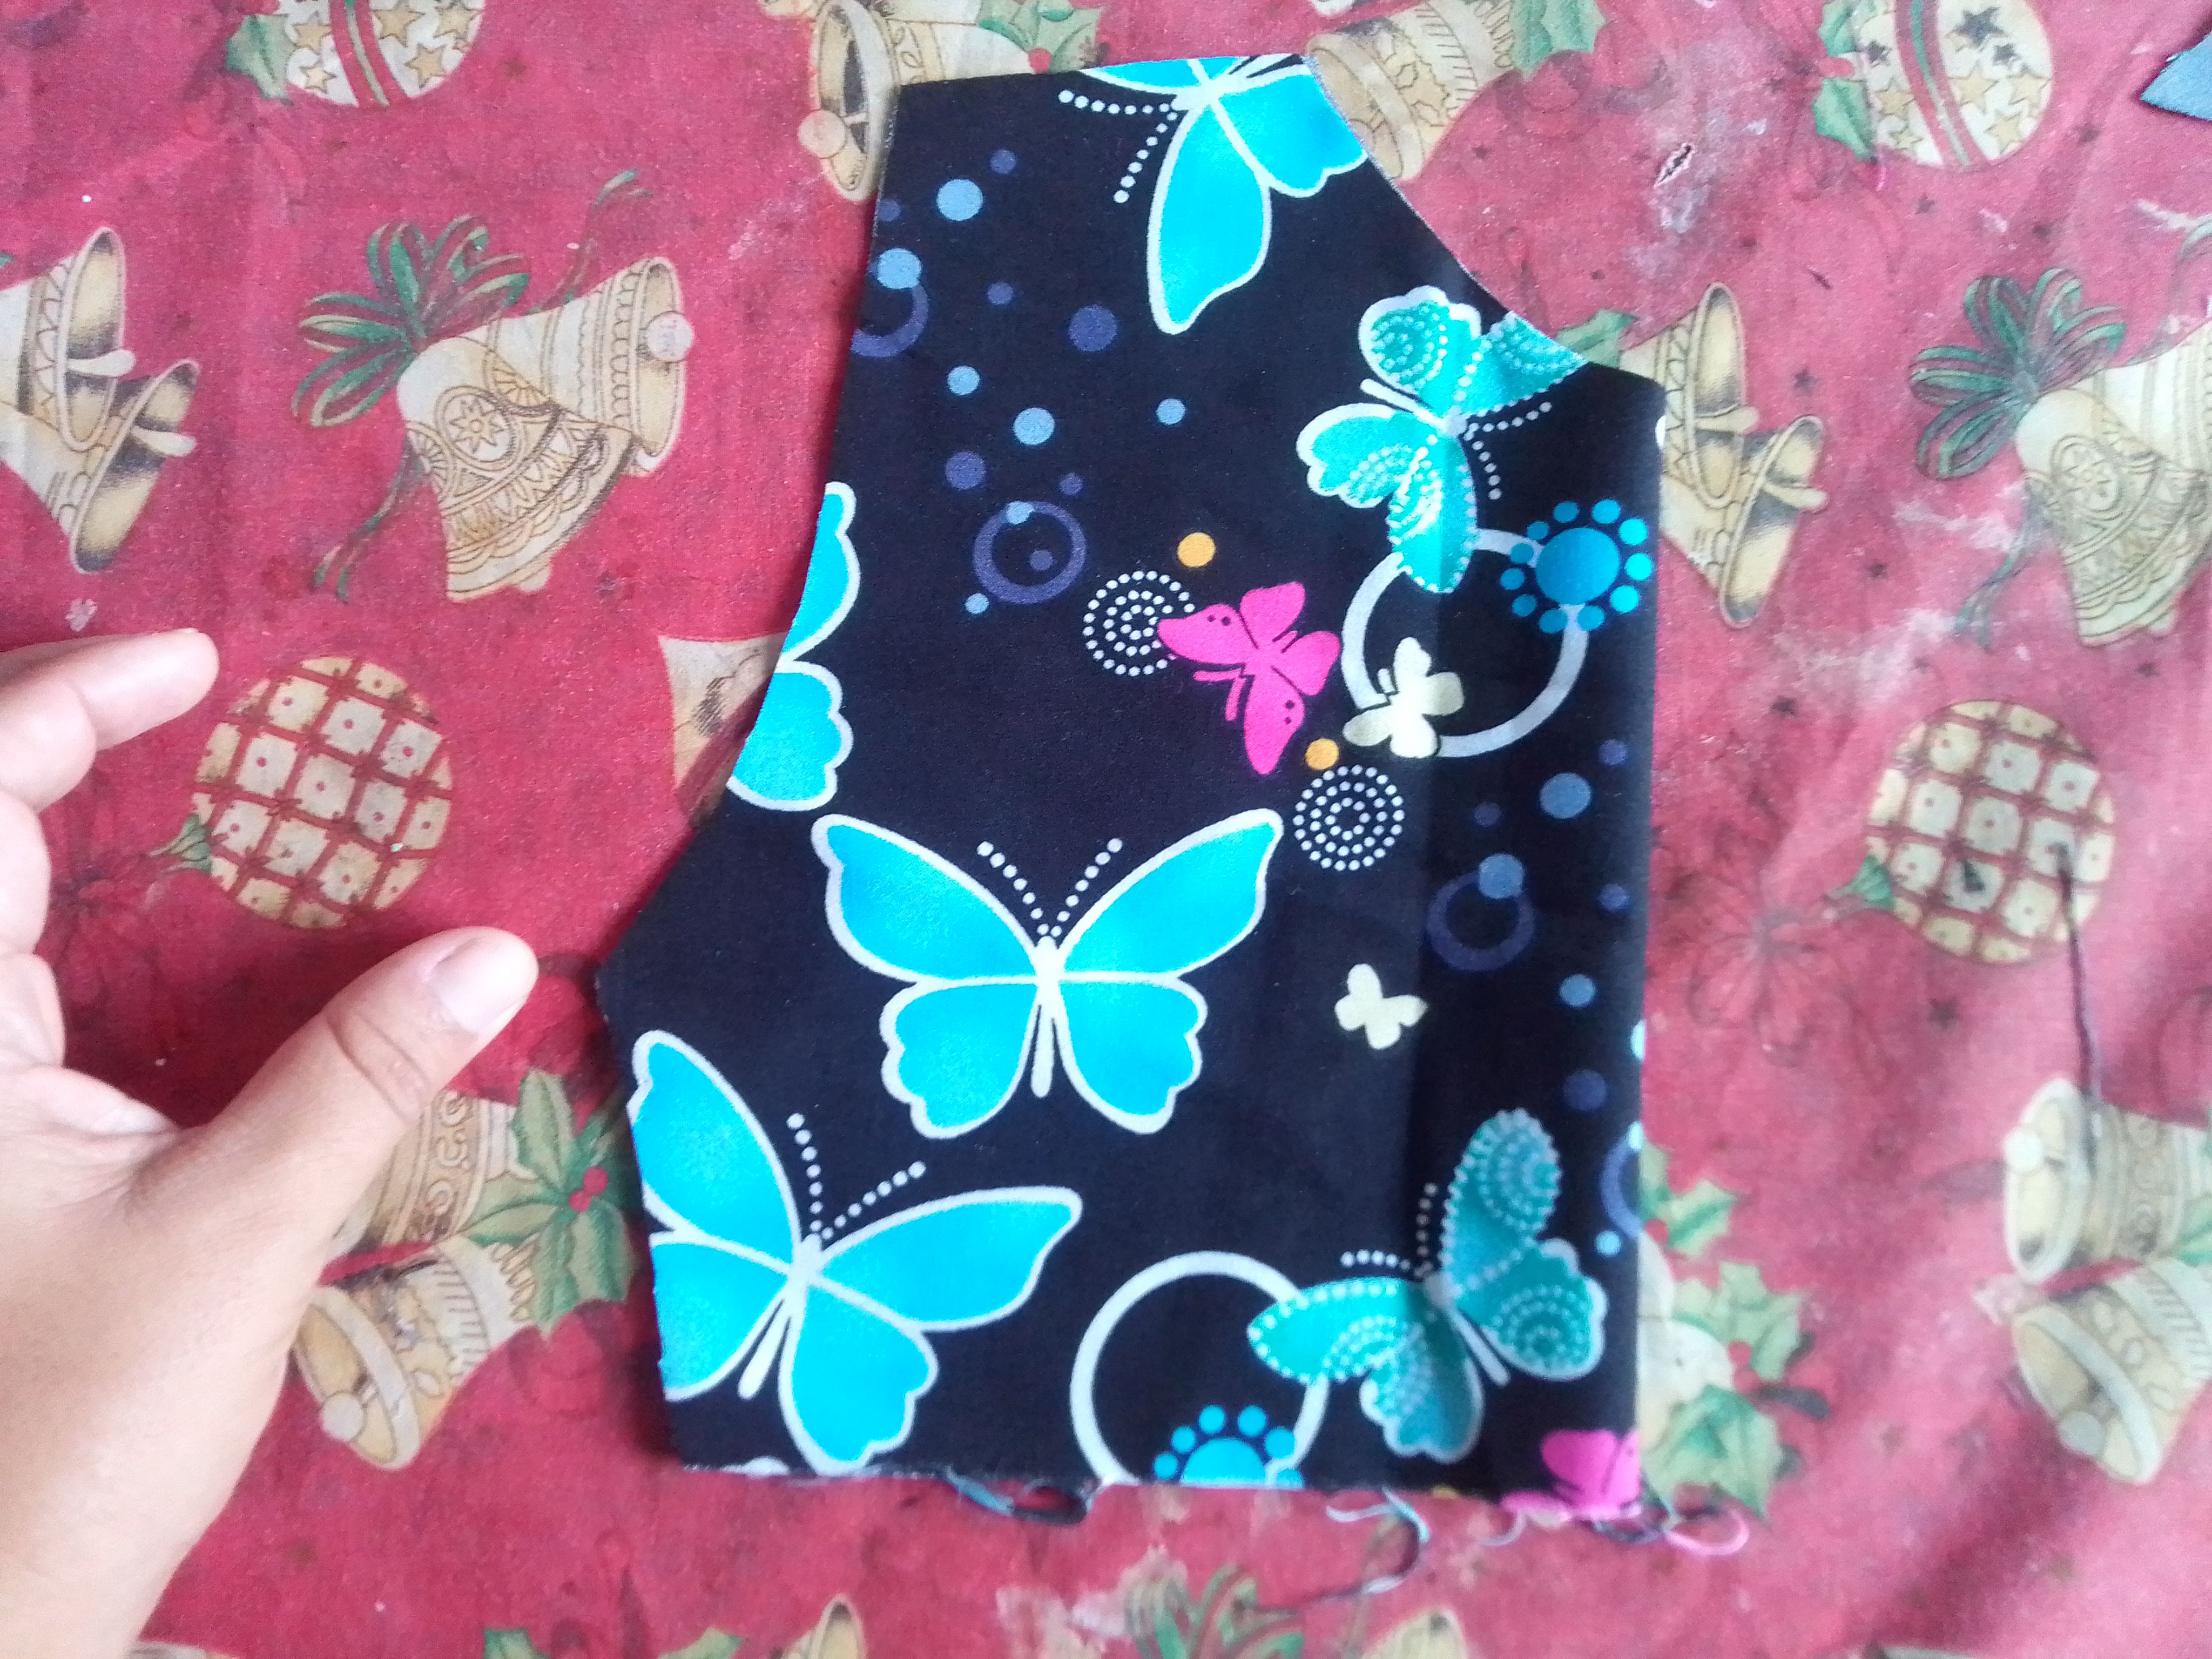
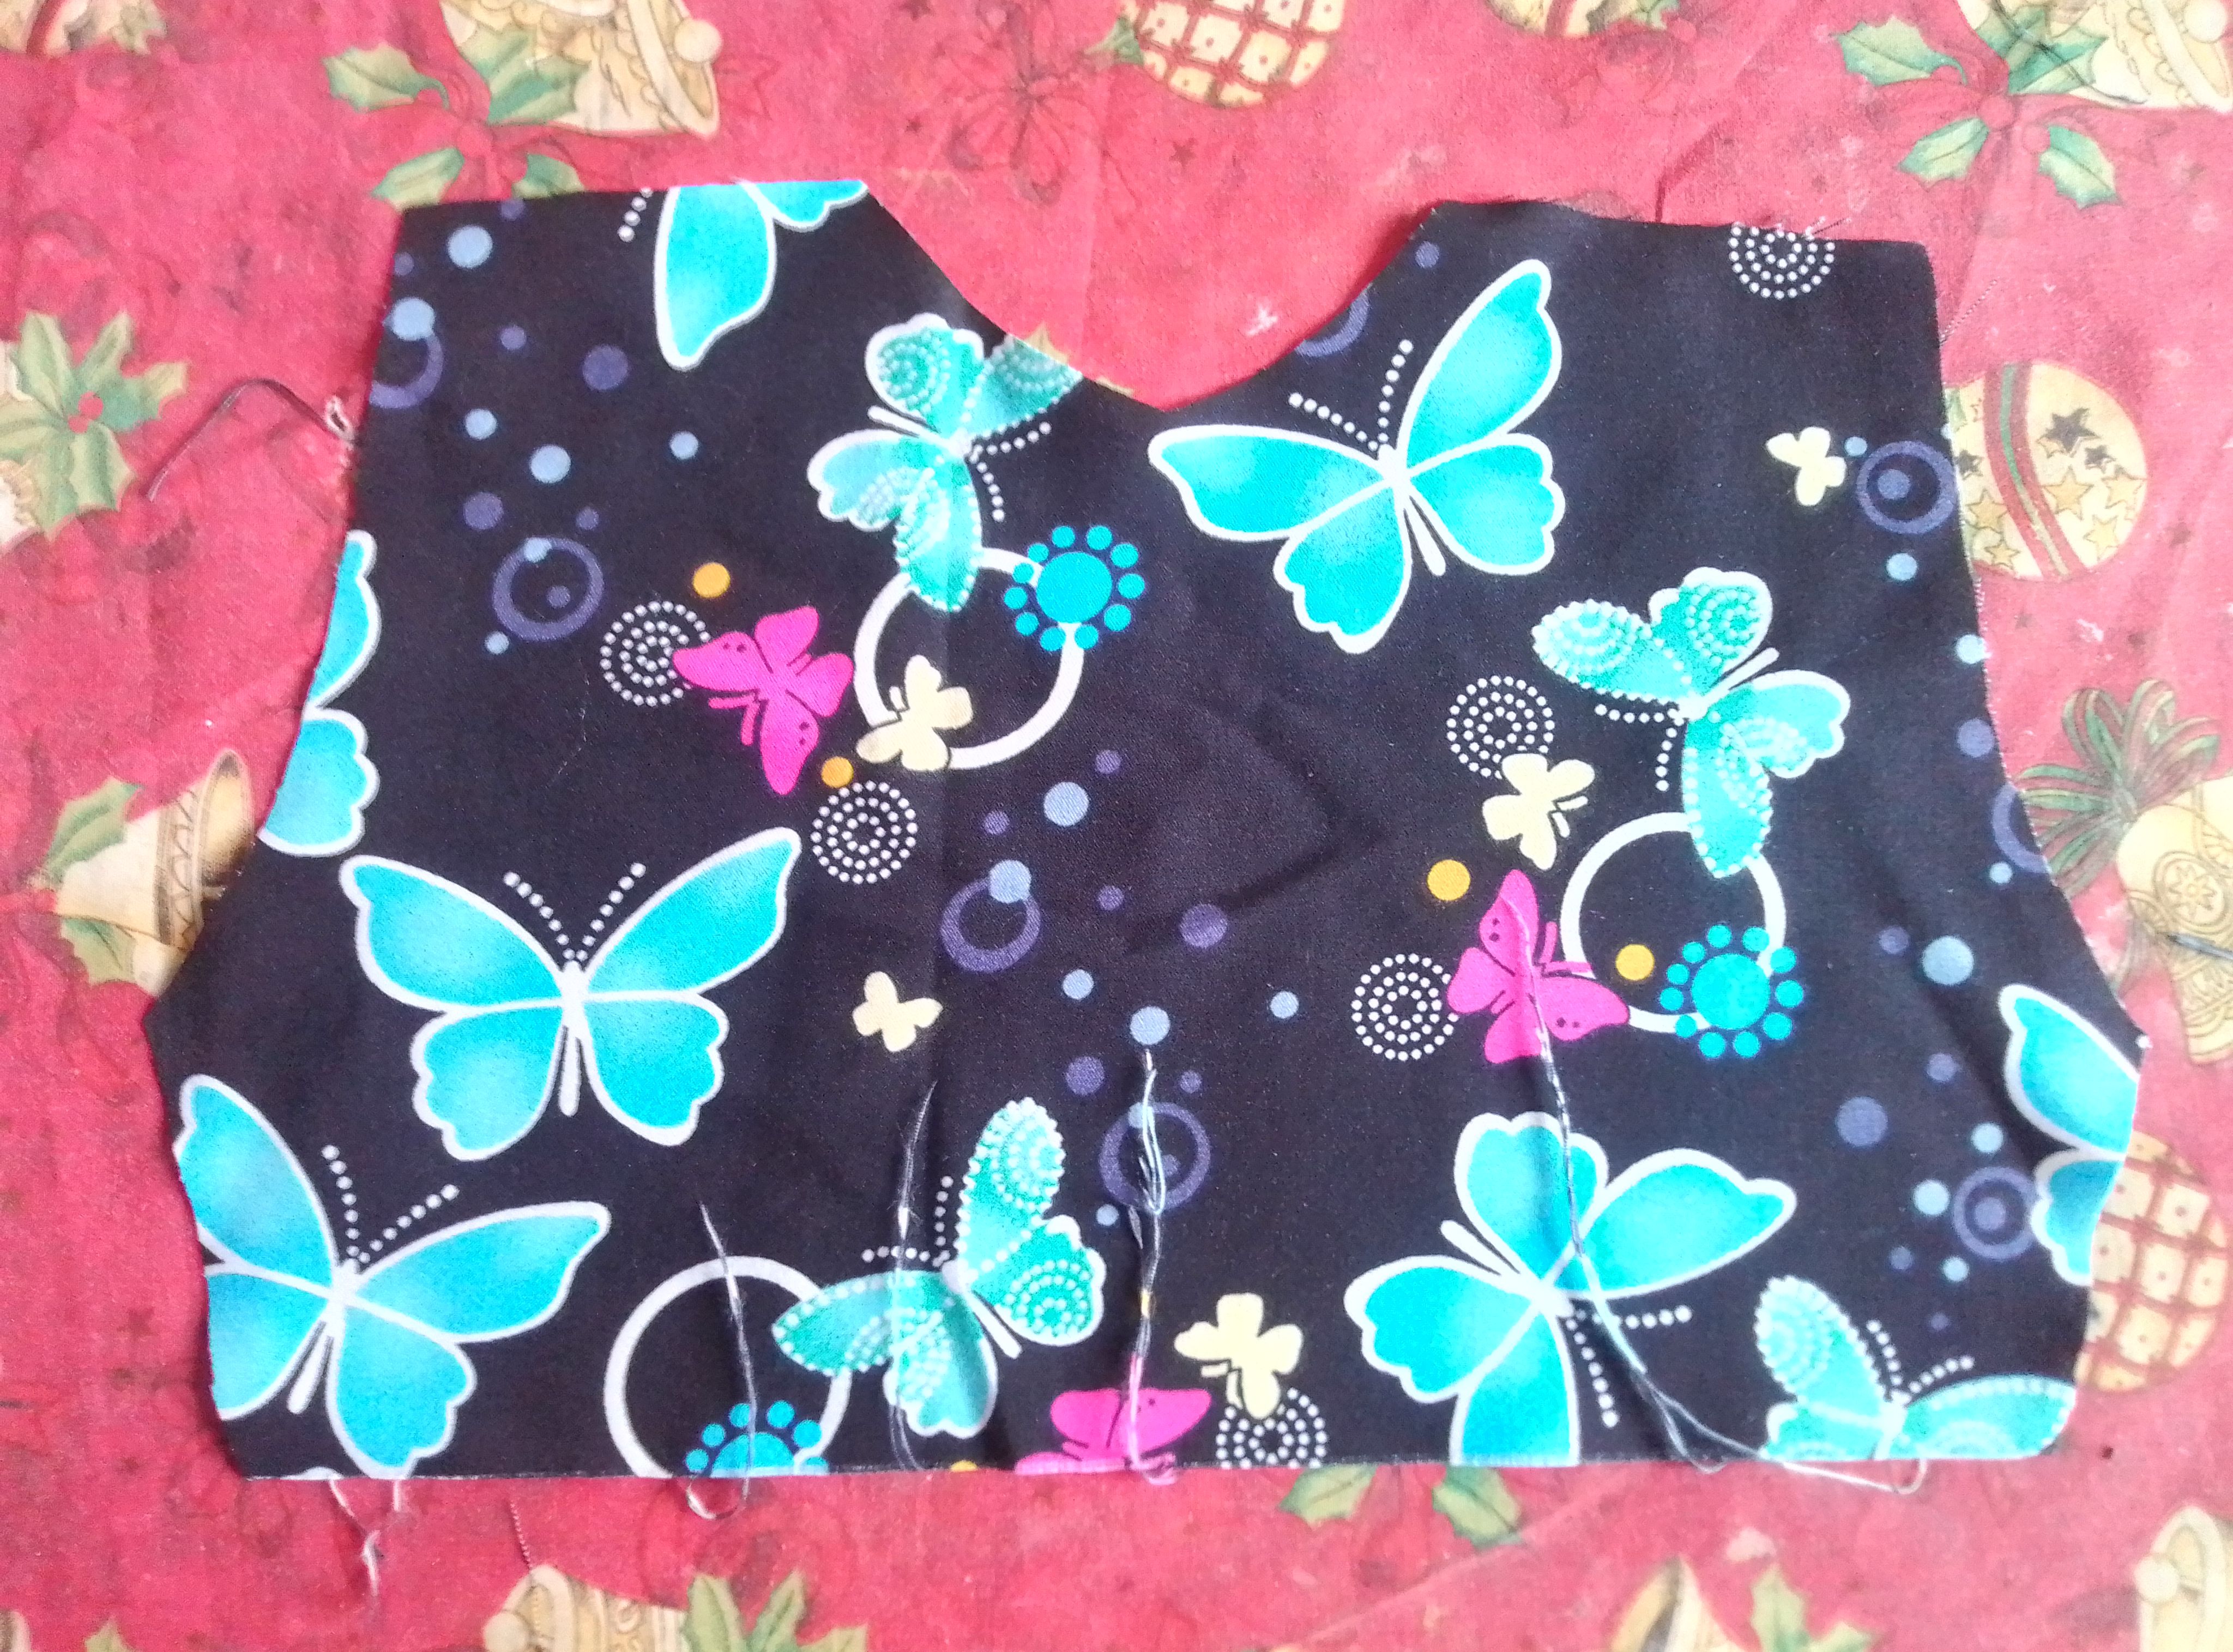
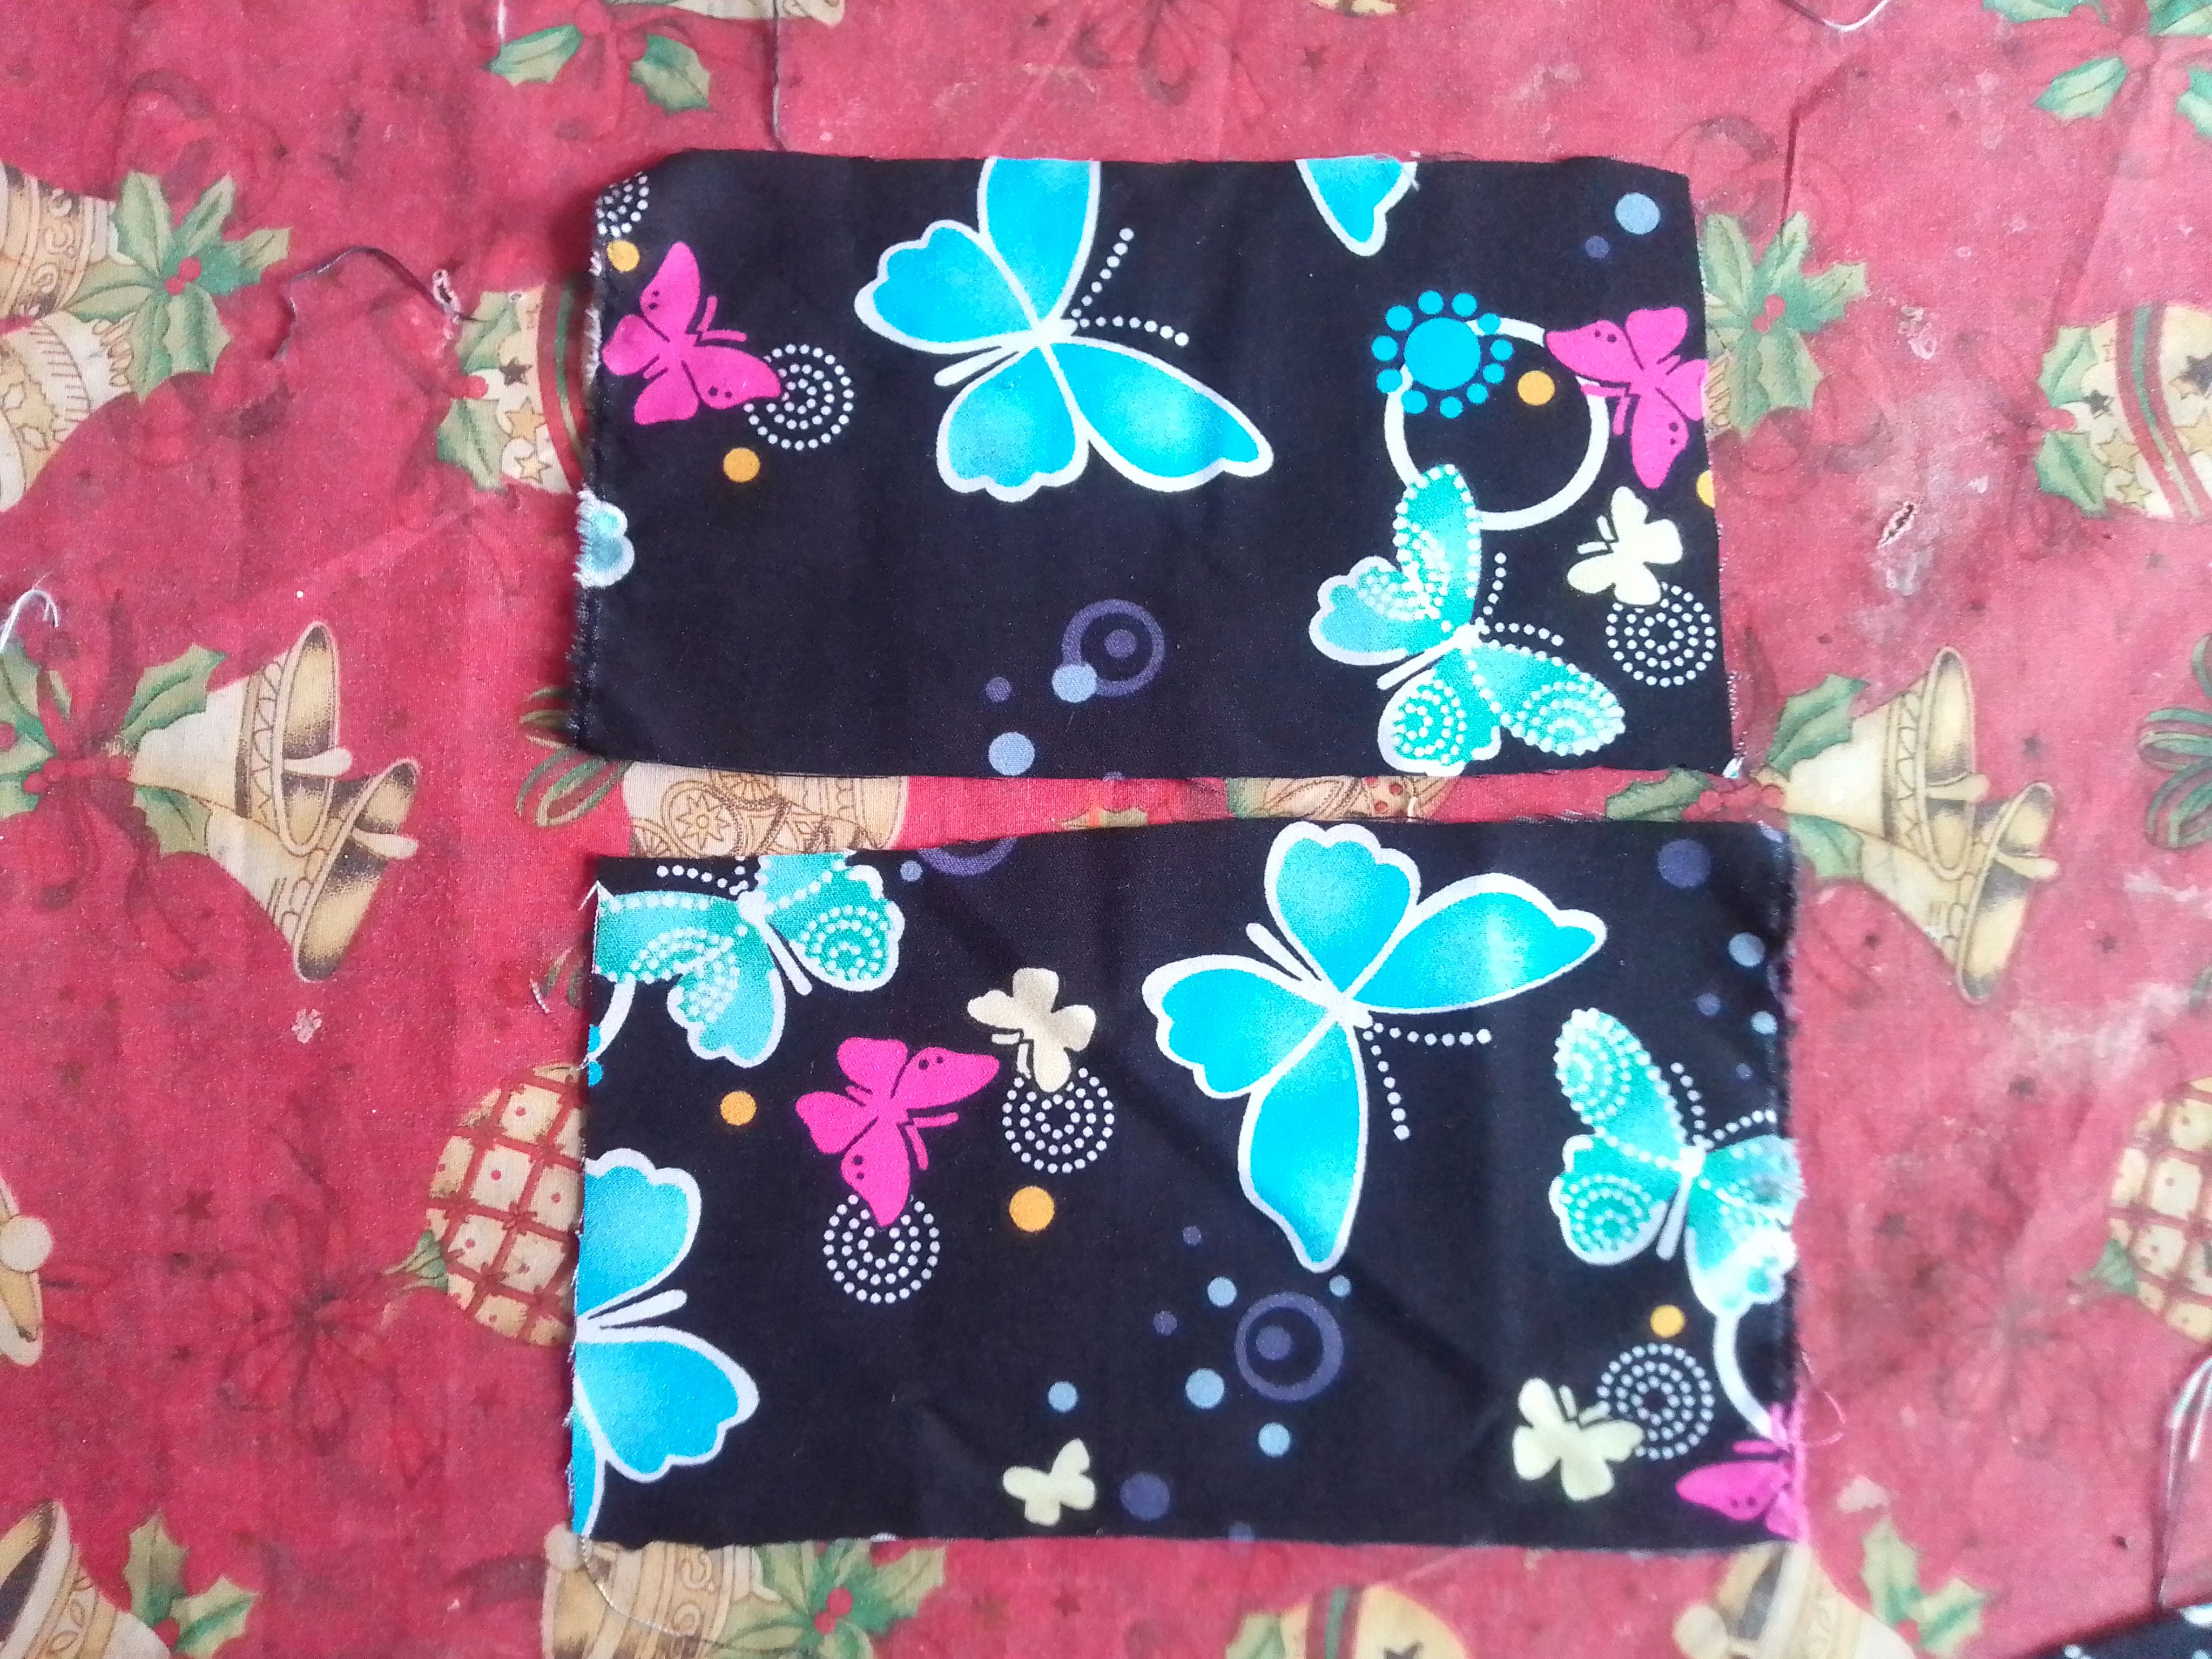
Para tener la primera pieza del vestido, utilizo como patrón la parte superior de un vestido de uso diario de mi niña. Lo coloco sobre la tela simple y corto todo el contorno, como siempre les recomiendo cortar un poco más grande y dejar el espacio por dónde irá la costura.
Step 01
div class="text-justify">To have the first piece of the dress, I use the upper part of my daughter's everyday dress as a pattern. I place it on the plain fabric and cut all the way around, as I always recommend cutting a little larger and leaving a space where the seam will go.
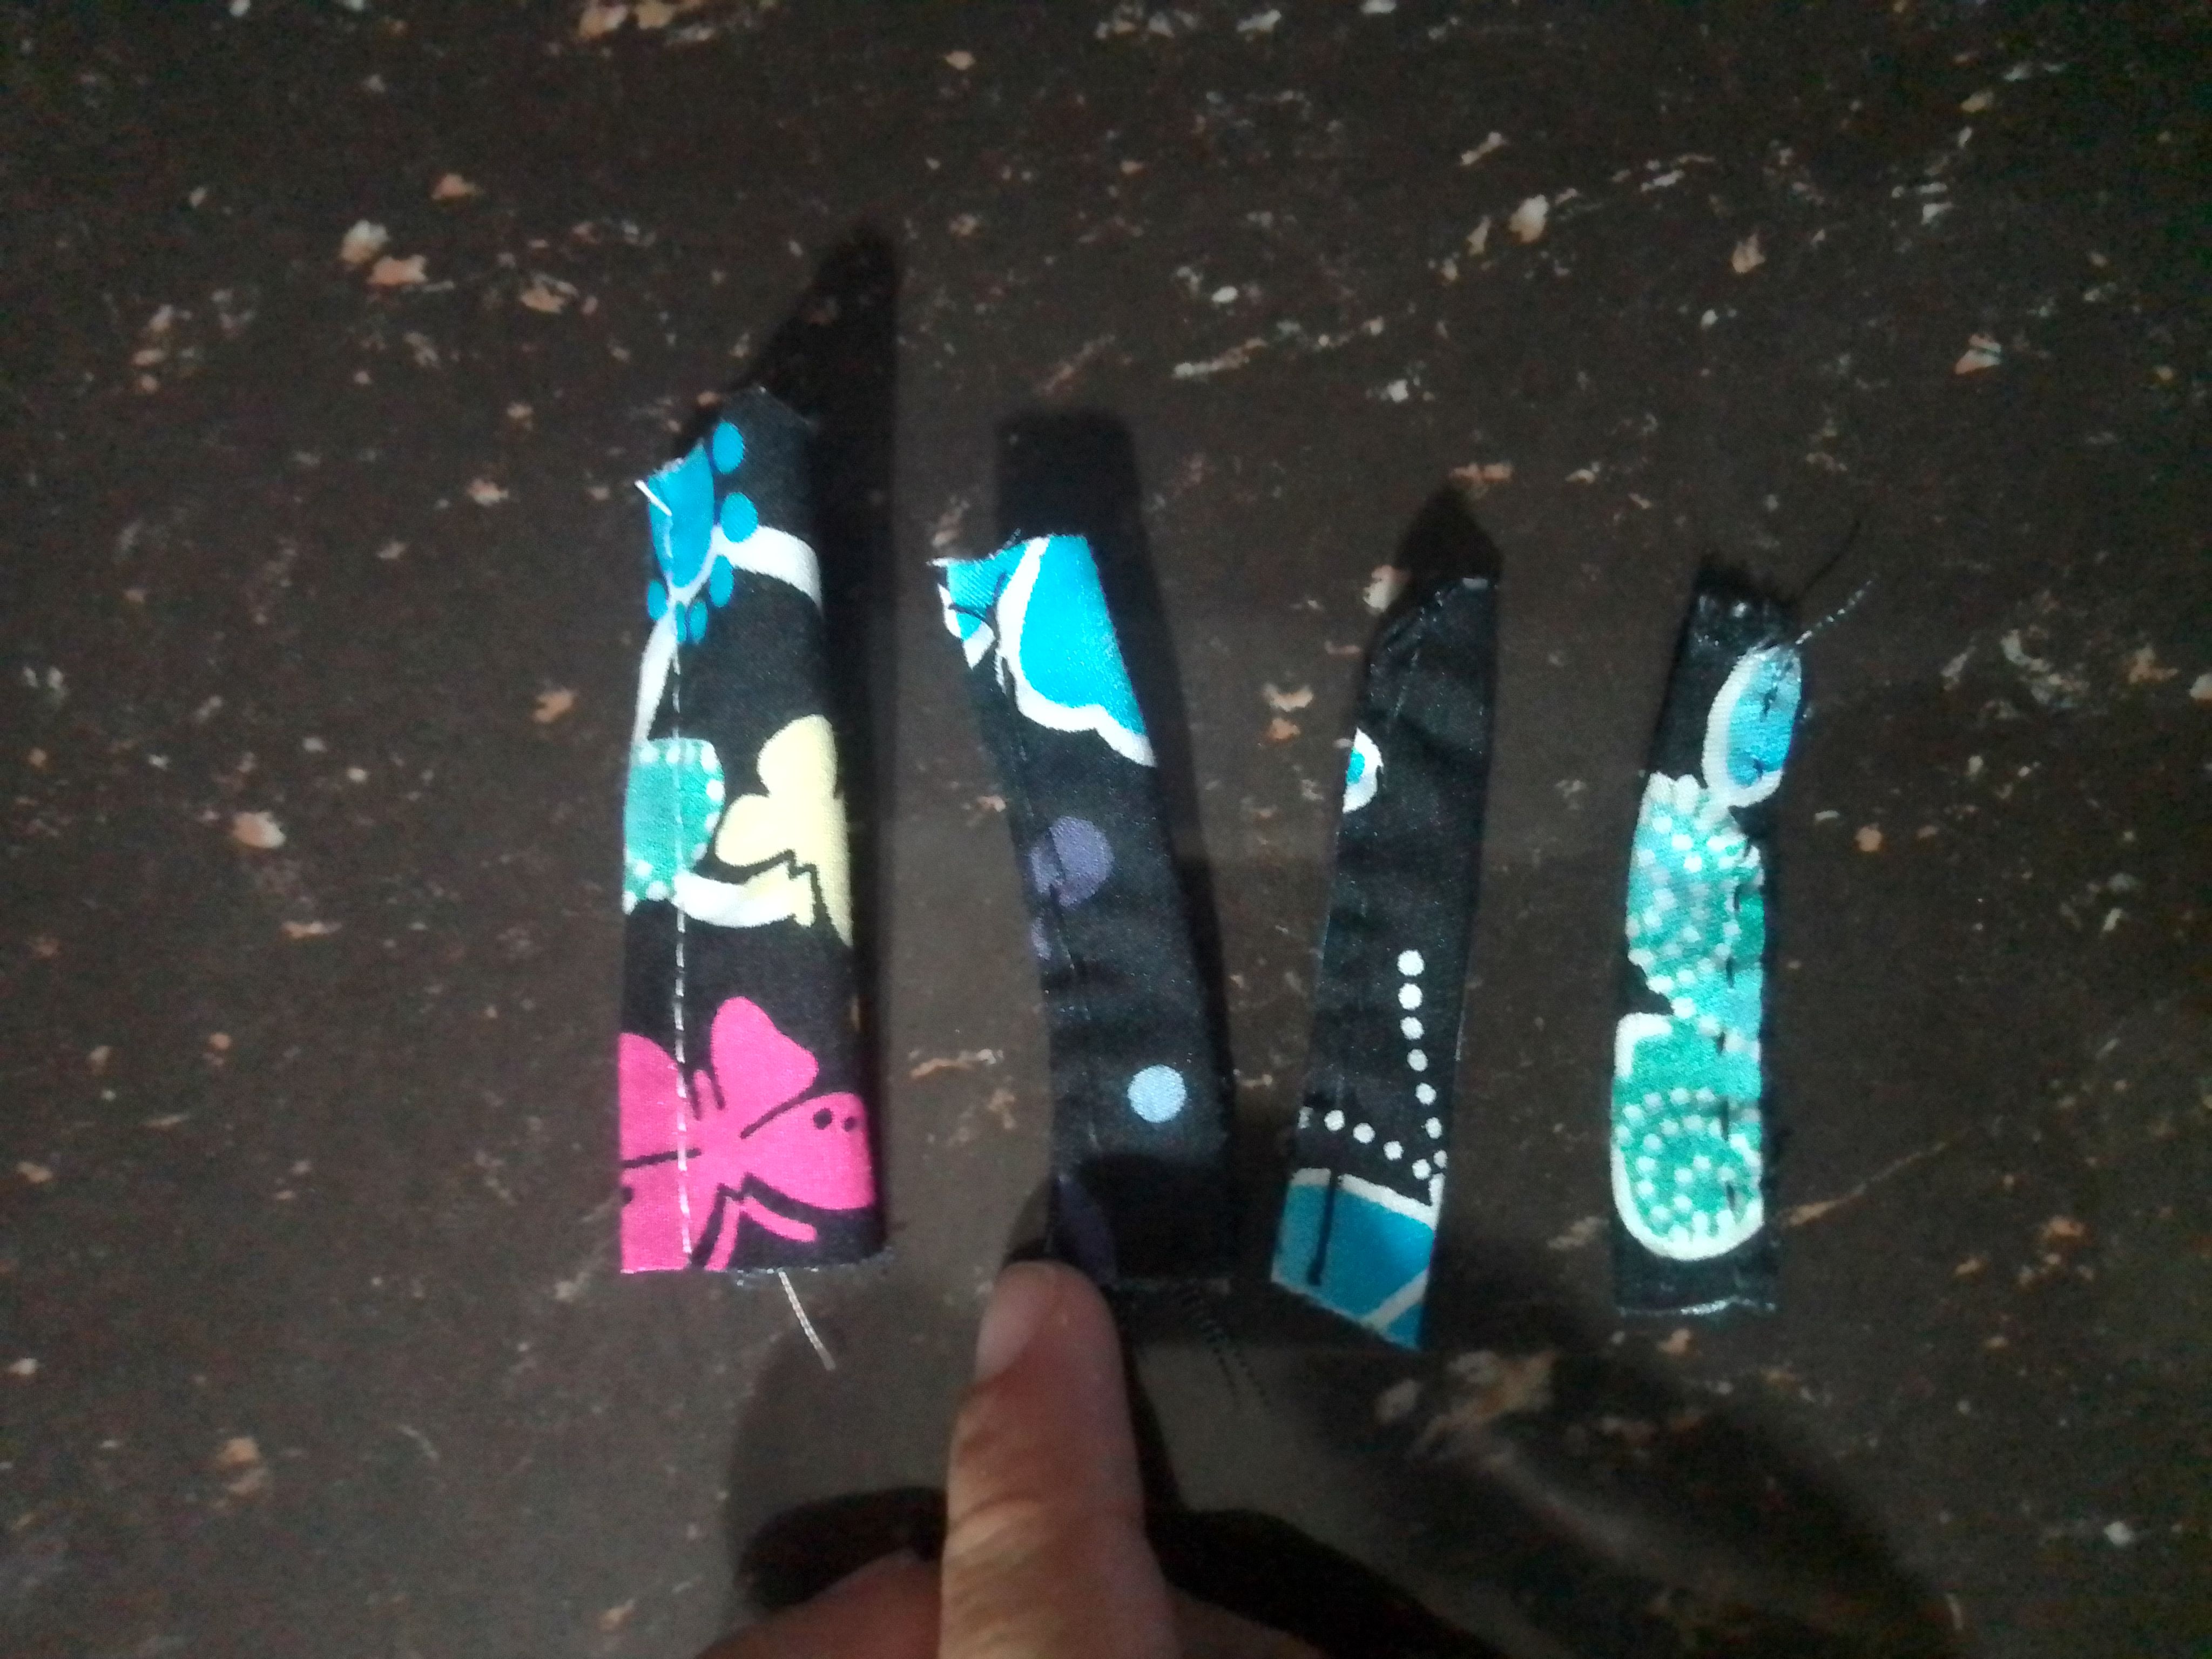
Paso 02
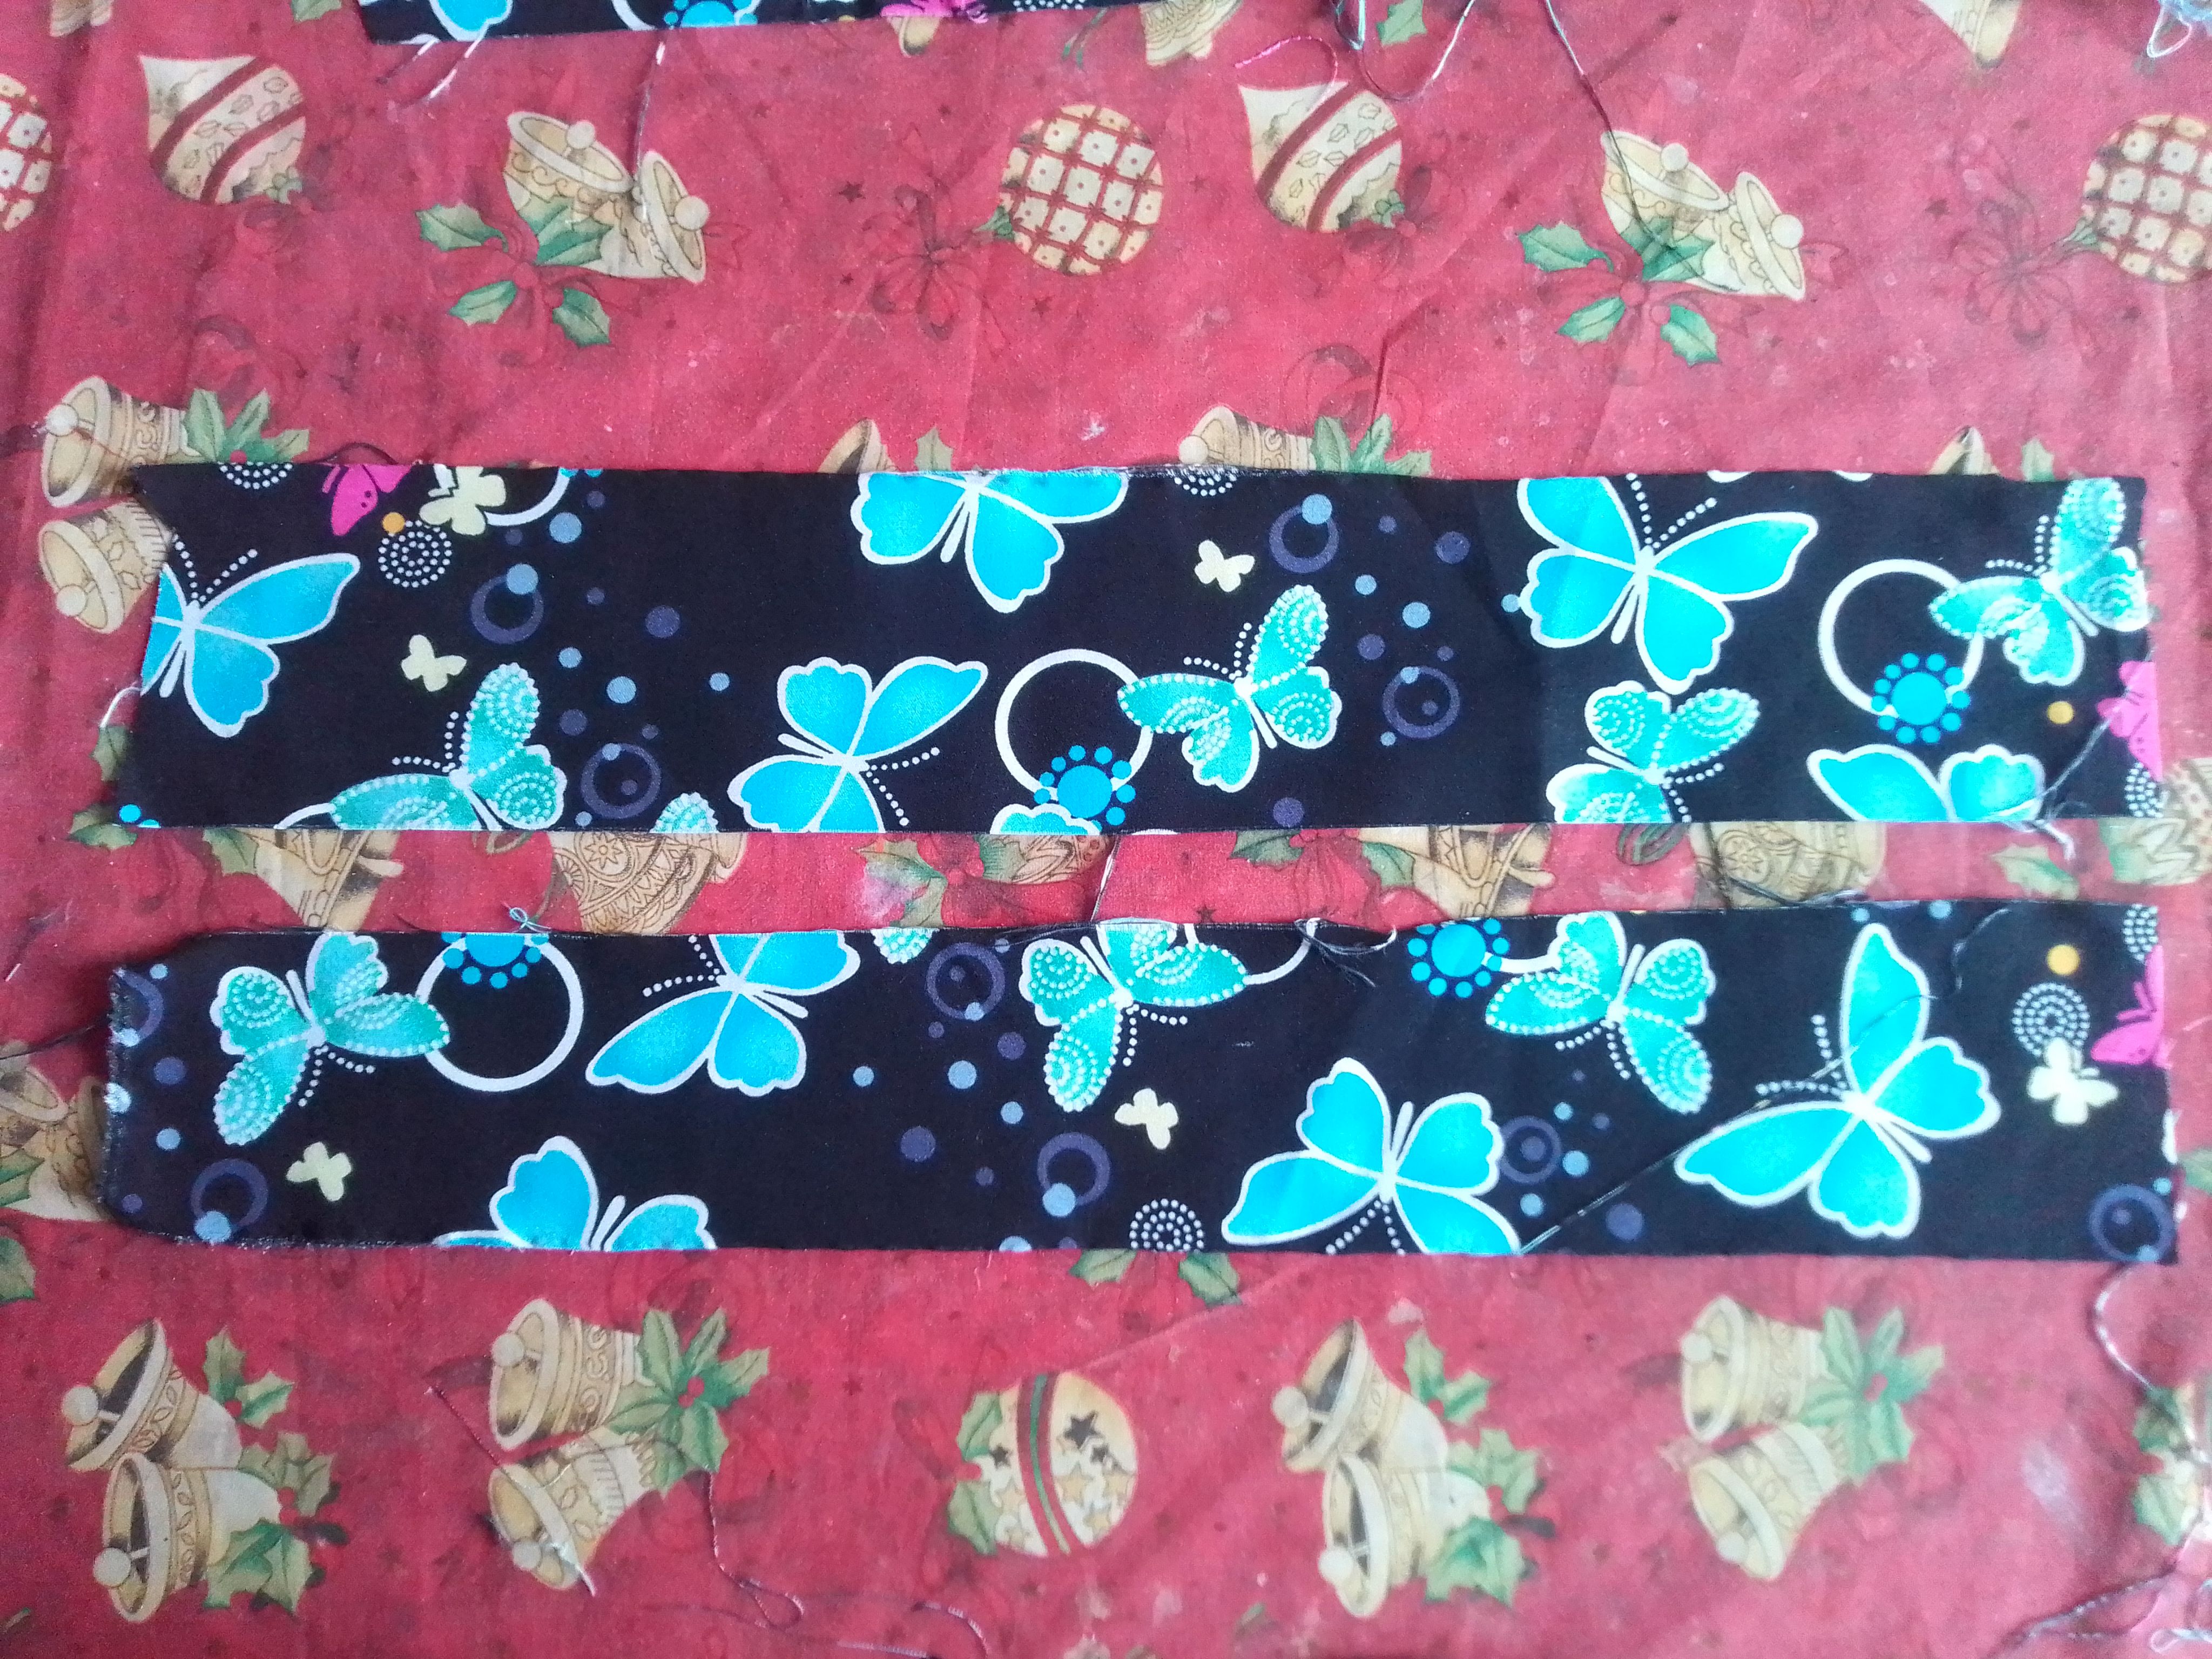
Luego cortamos dos tiras de aproximadamente 3 cm de ancho para los volantes, el largo dependerá del tamaño de la niña, es decir, medimos desde la cintura hasta la parte de atrás de los hombros. A esta tiras le haremos un dobladillo en uno de los bordes y luego la arruchamos por el otro lado. Seguidamente cortamos una tira más larga pero del mismo ancho, hacemos una costura recta para unir al volante y doblamos a la mitad para coser hasta llegar al final de la tira larga.
Step 02
Then we cut two strips of approximately 3 cm wide for the ruffles, the length will depend on the size of the girl, that is, we measure from the waist to the back of the shoulders. We will make a hem on one of the edges of these strips and then we will crinkle it on the other side. Next we cut a longer strip but of the same width, we make a straight seam to attach to the steering wheel and fold in half to sew until we reach the end of the long strip.

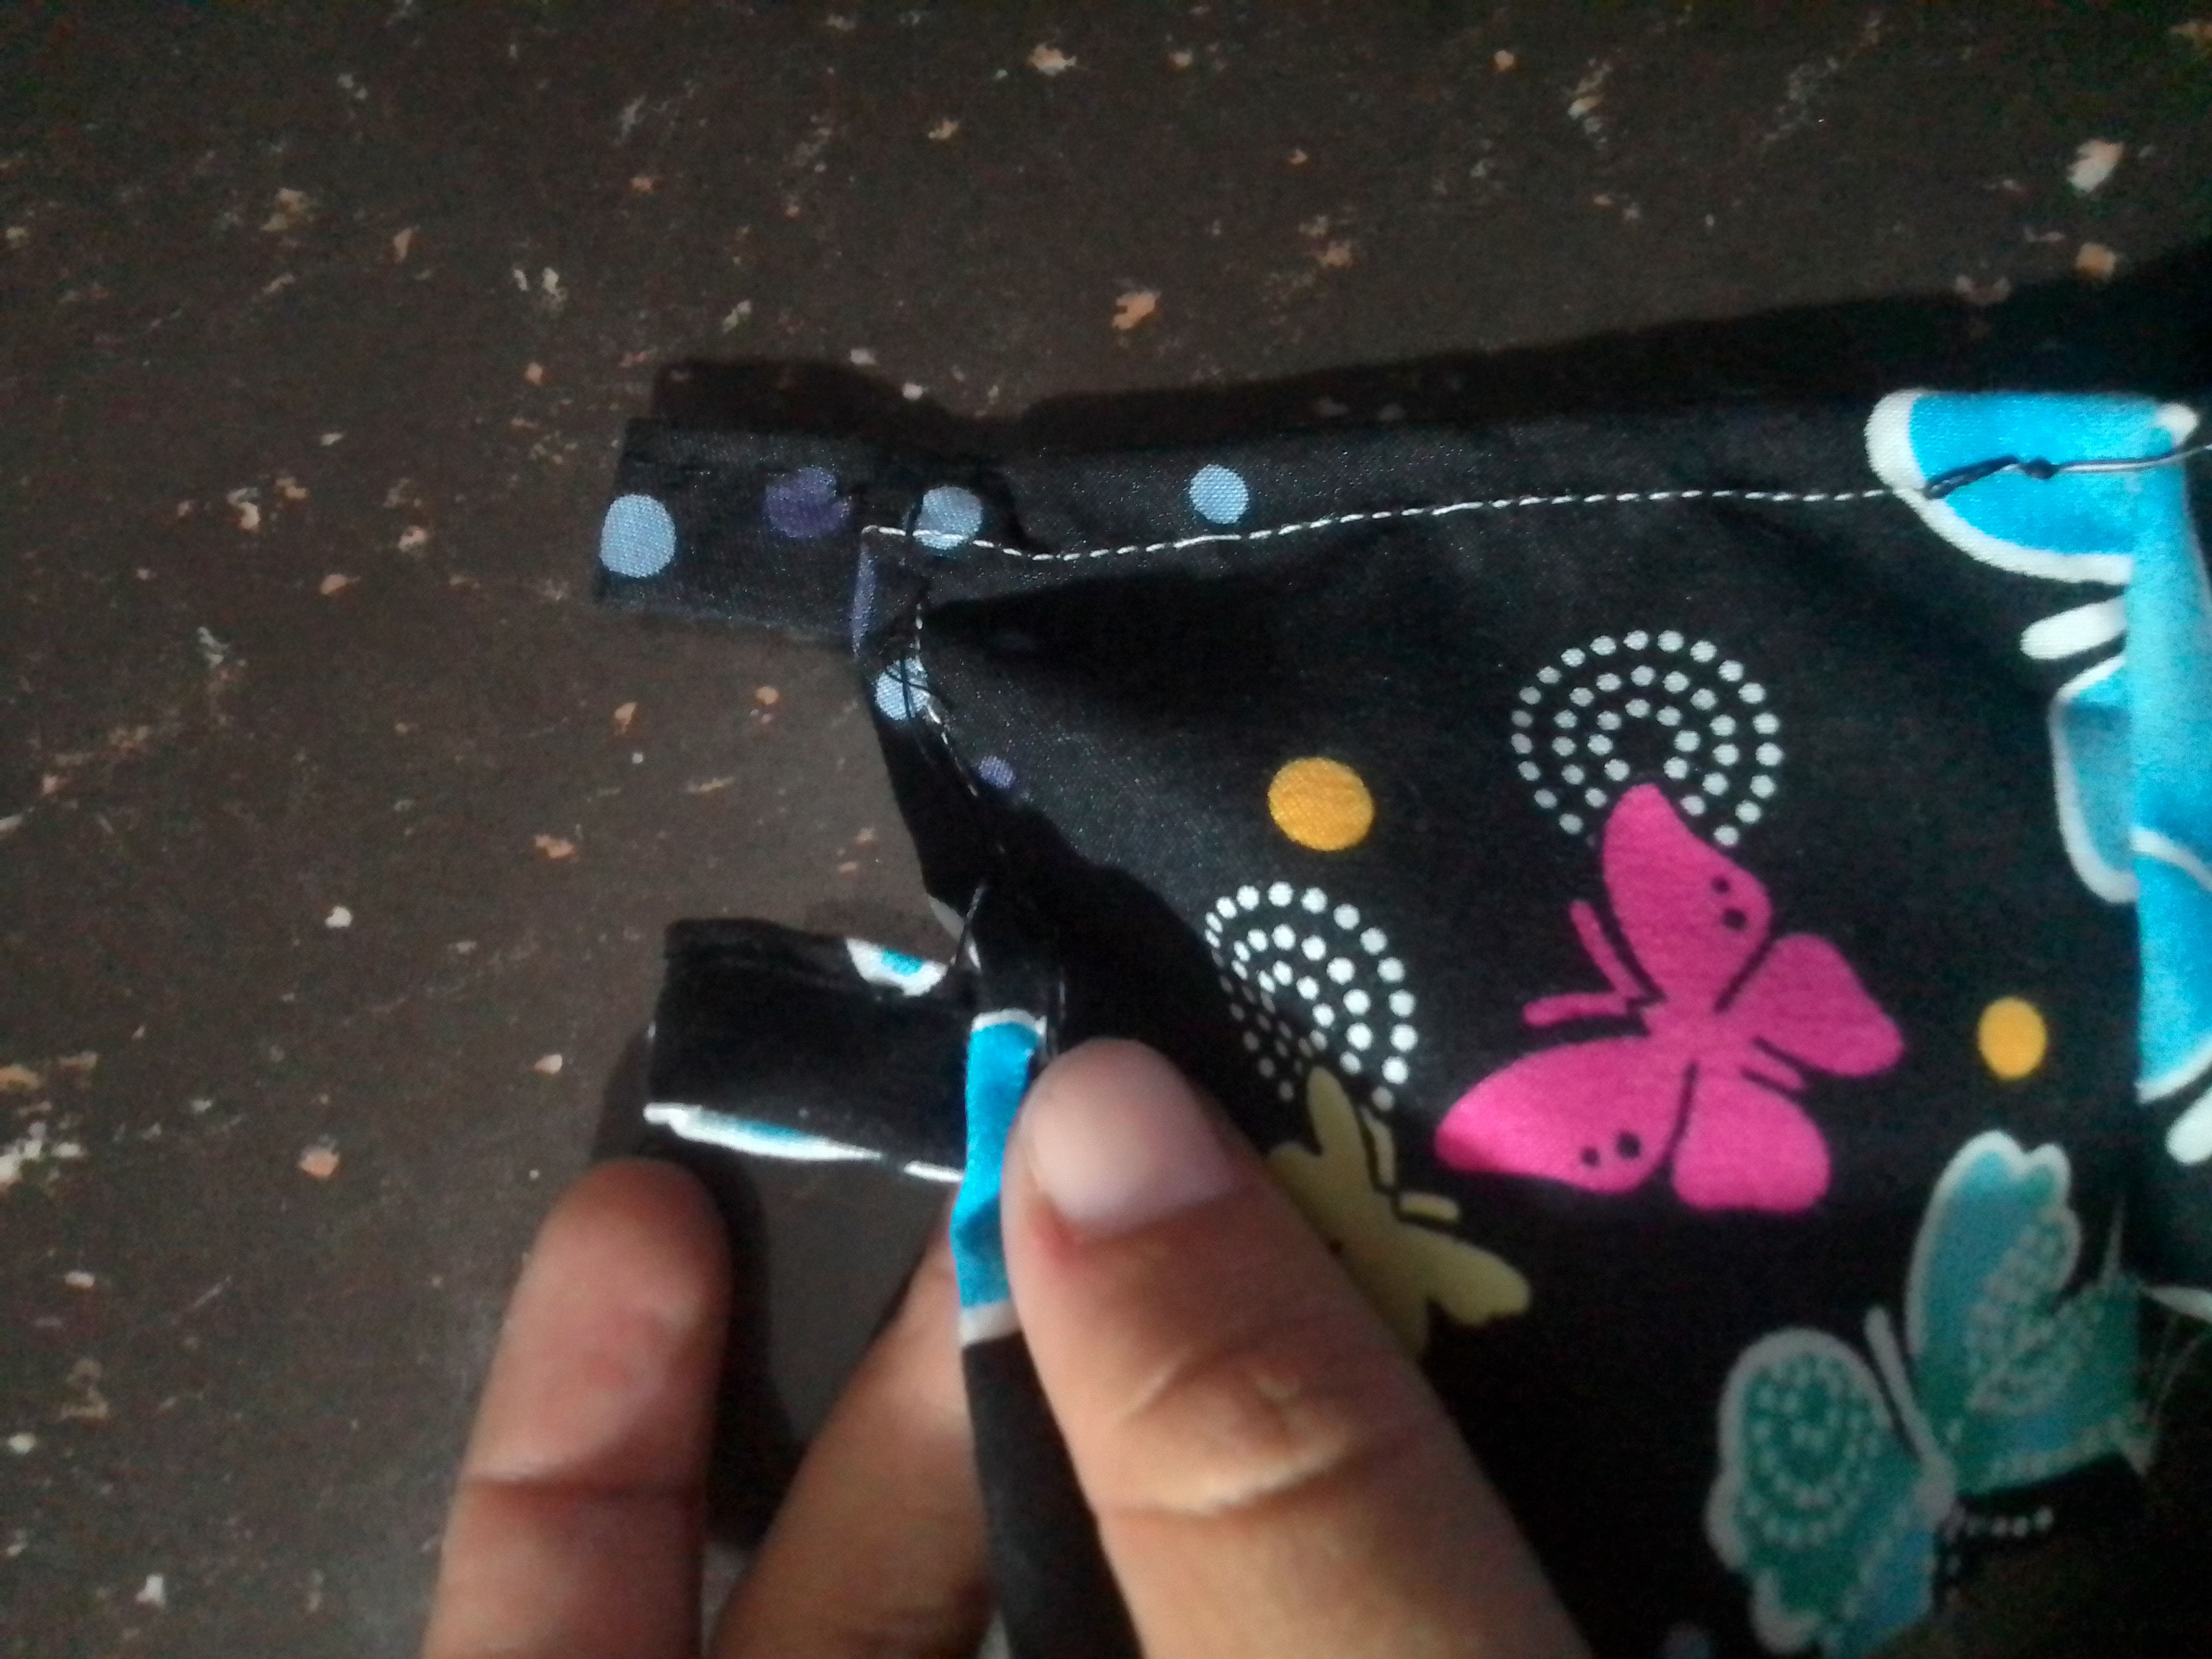
Paso 03
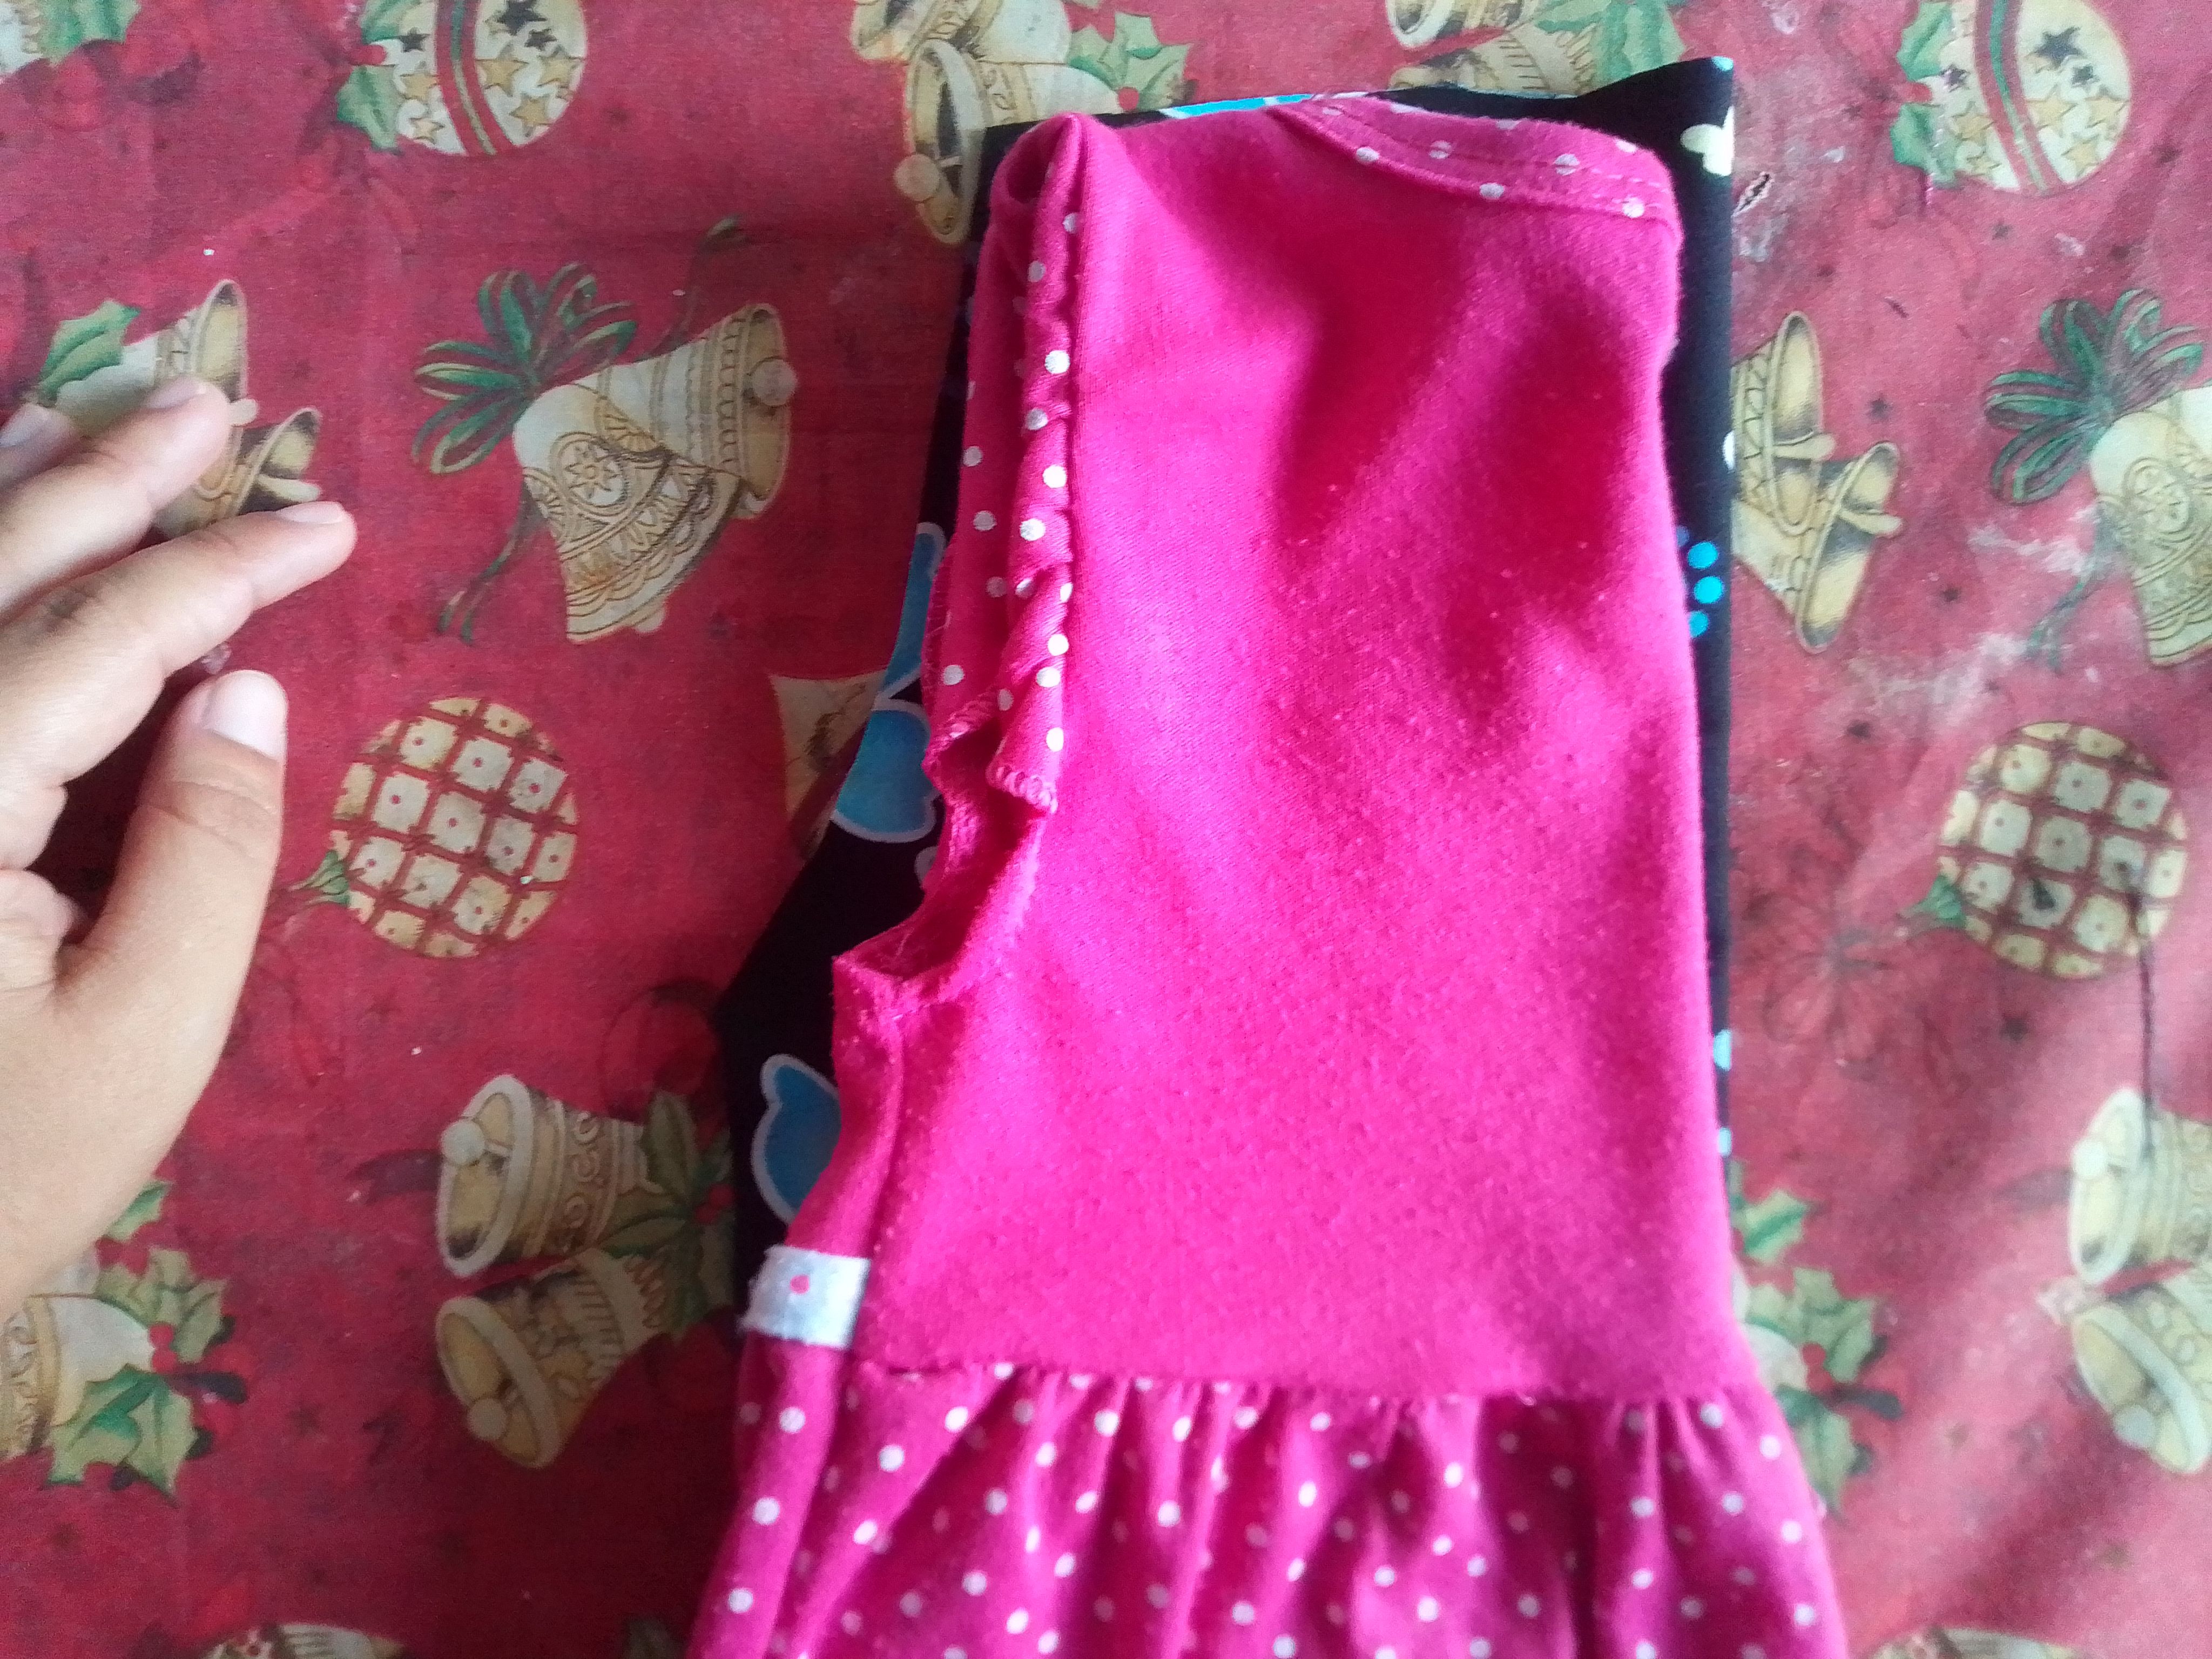
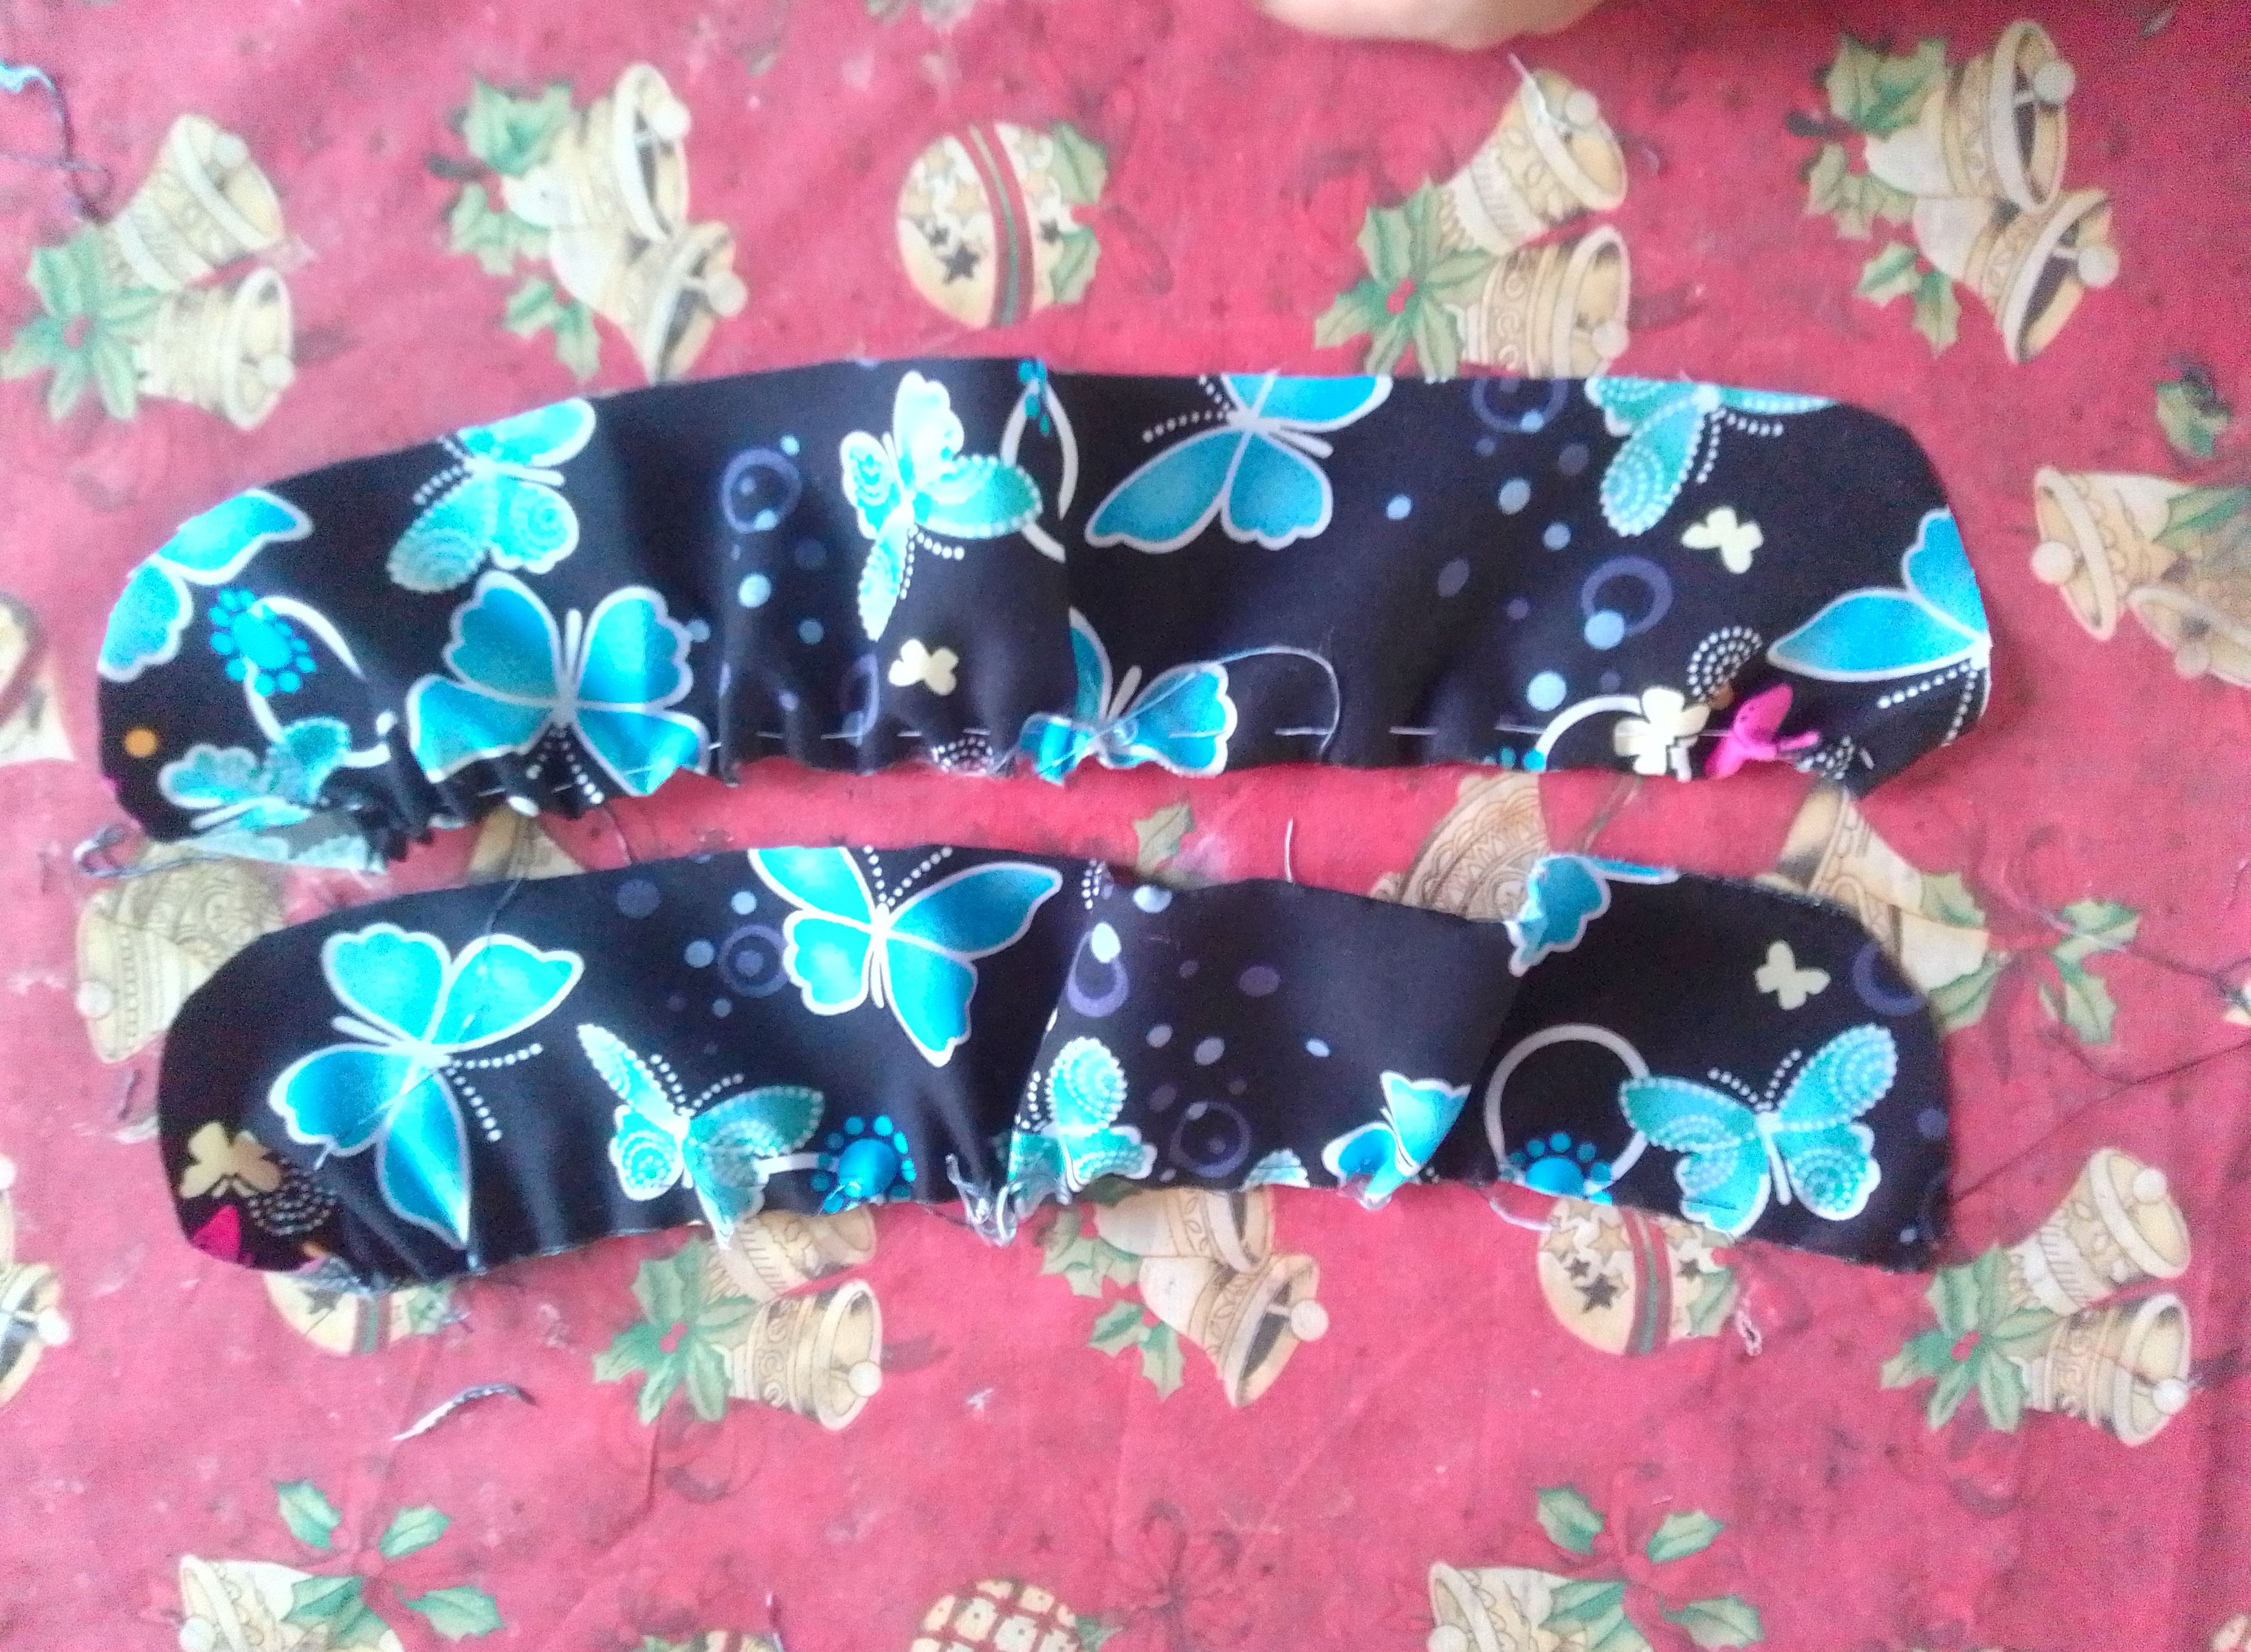
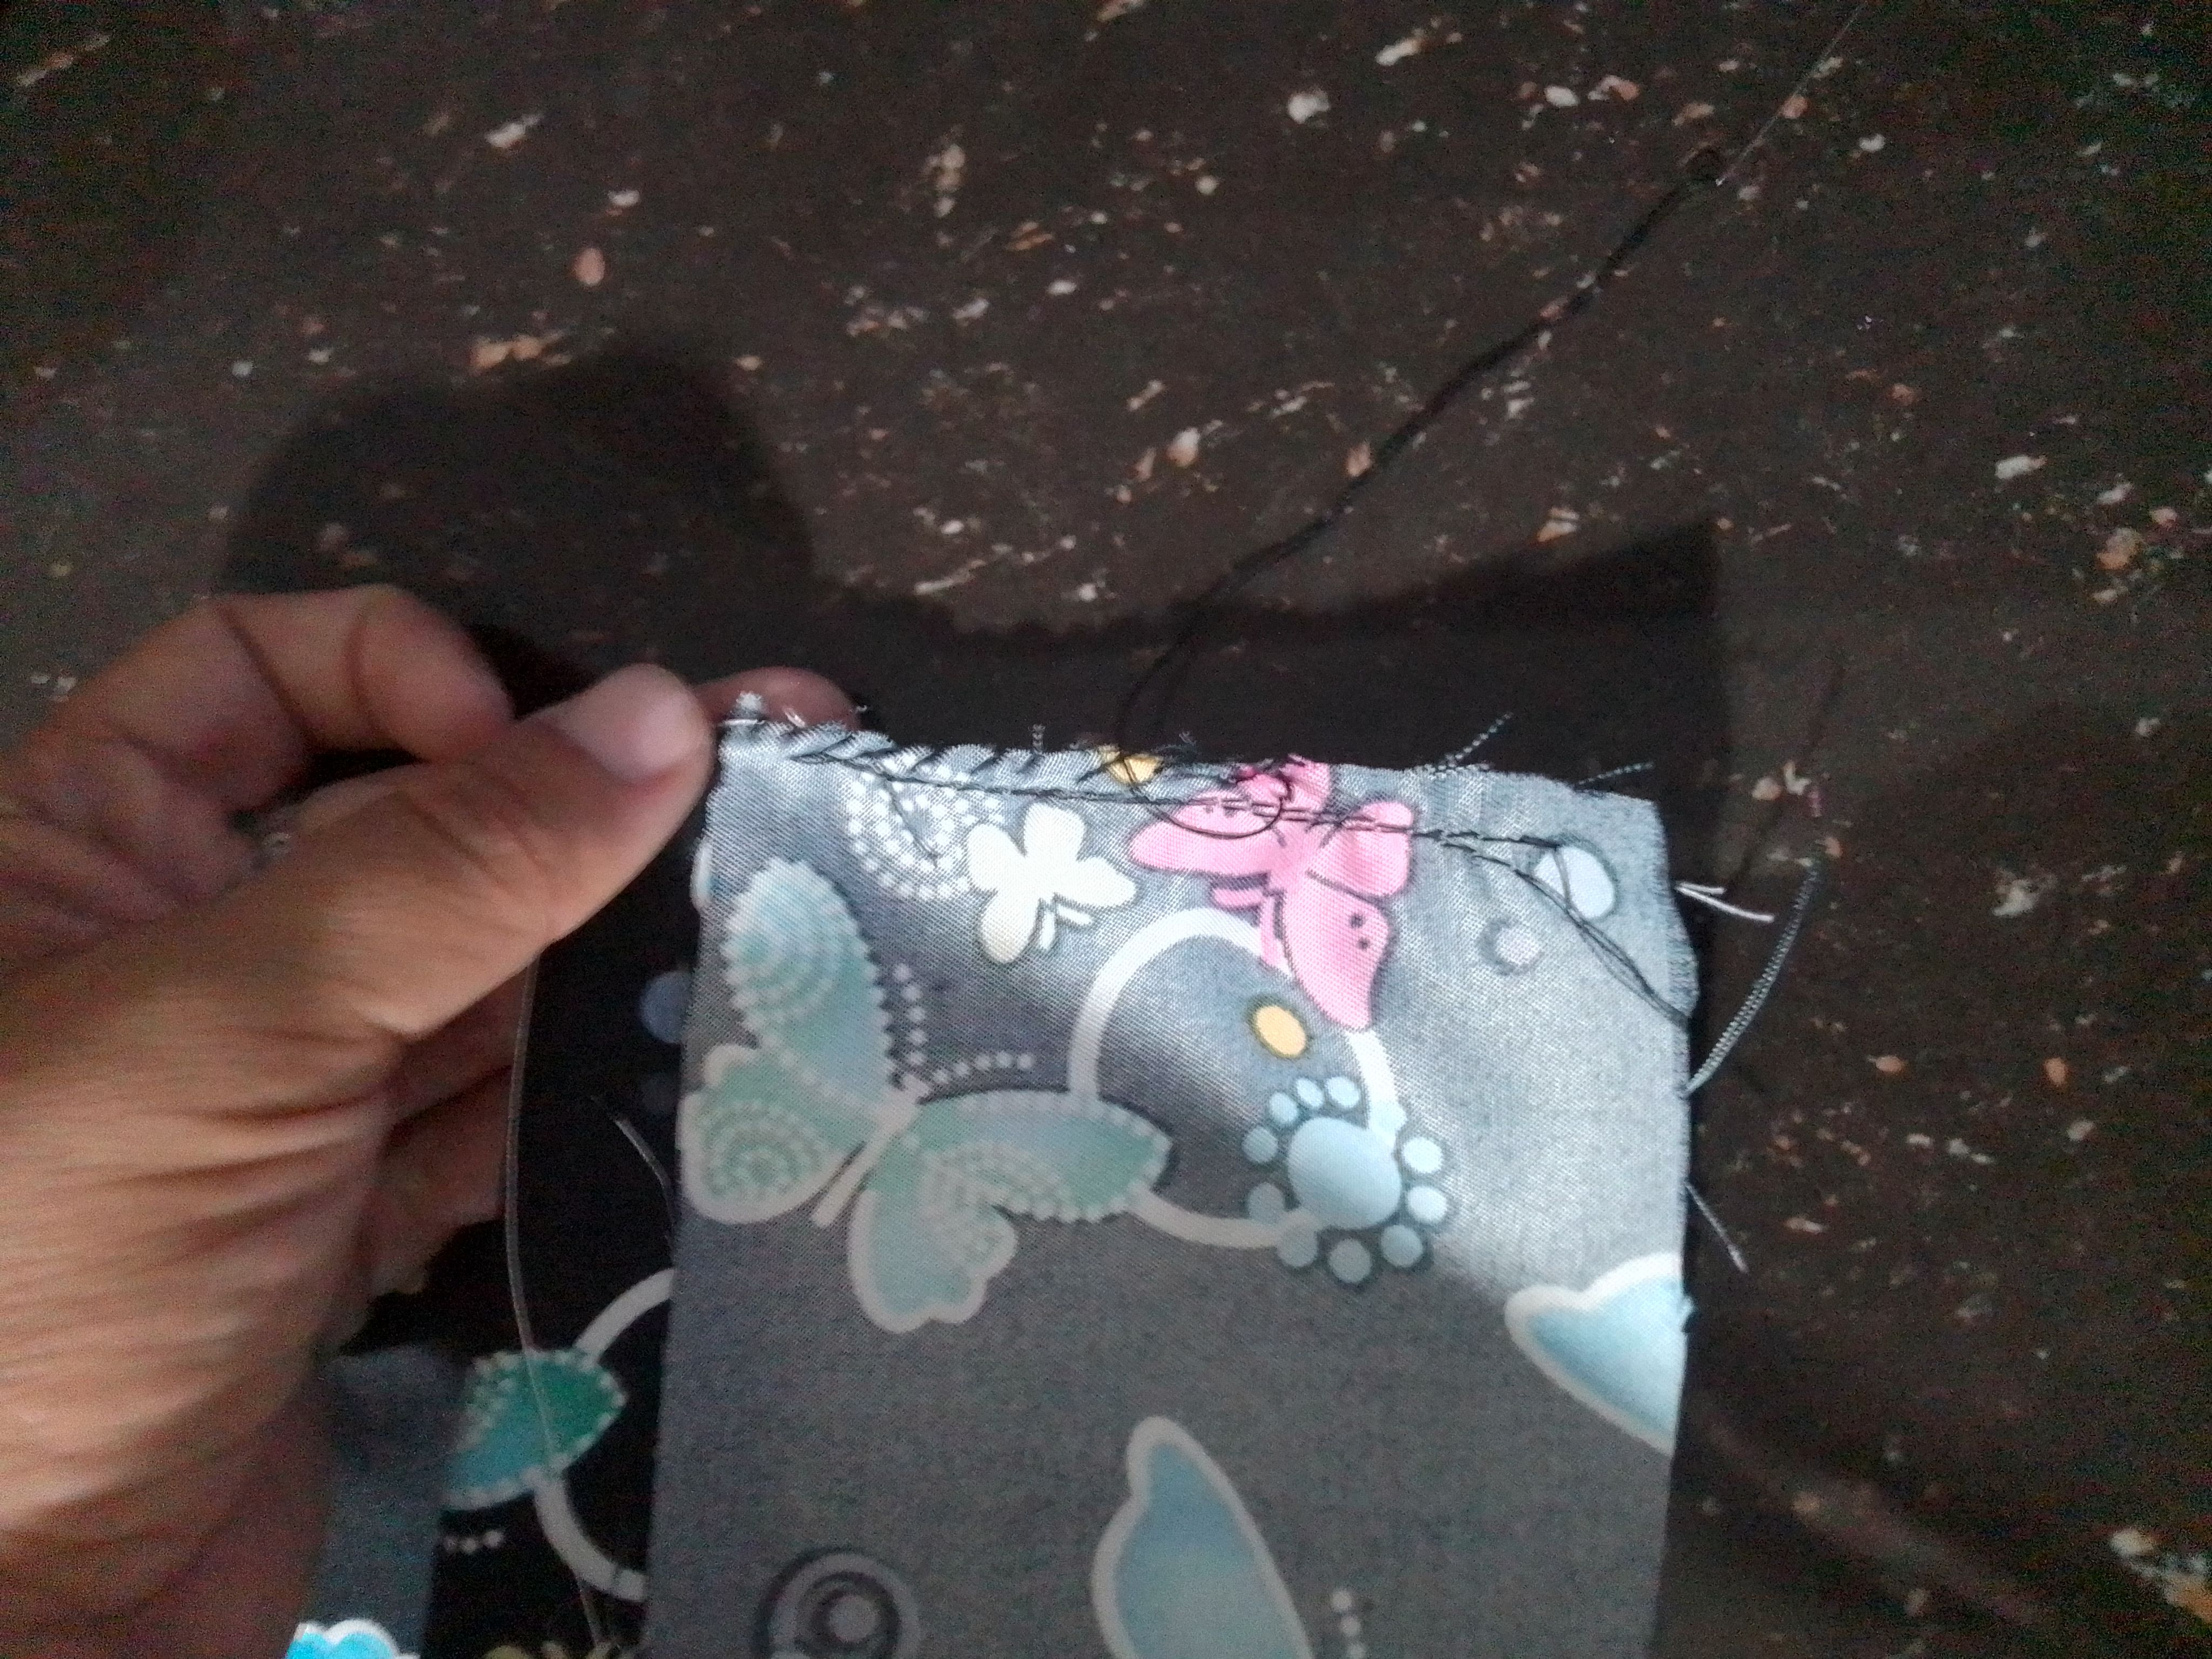
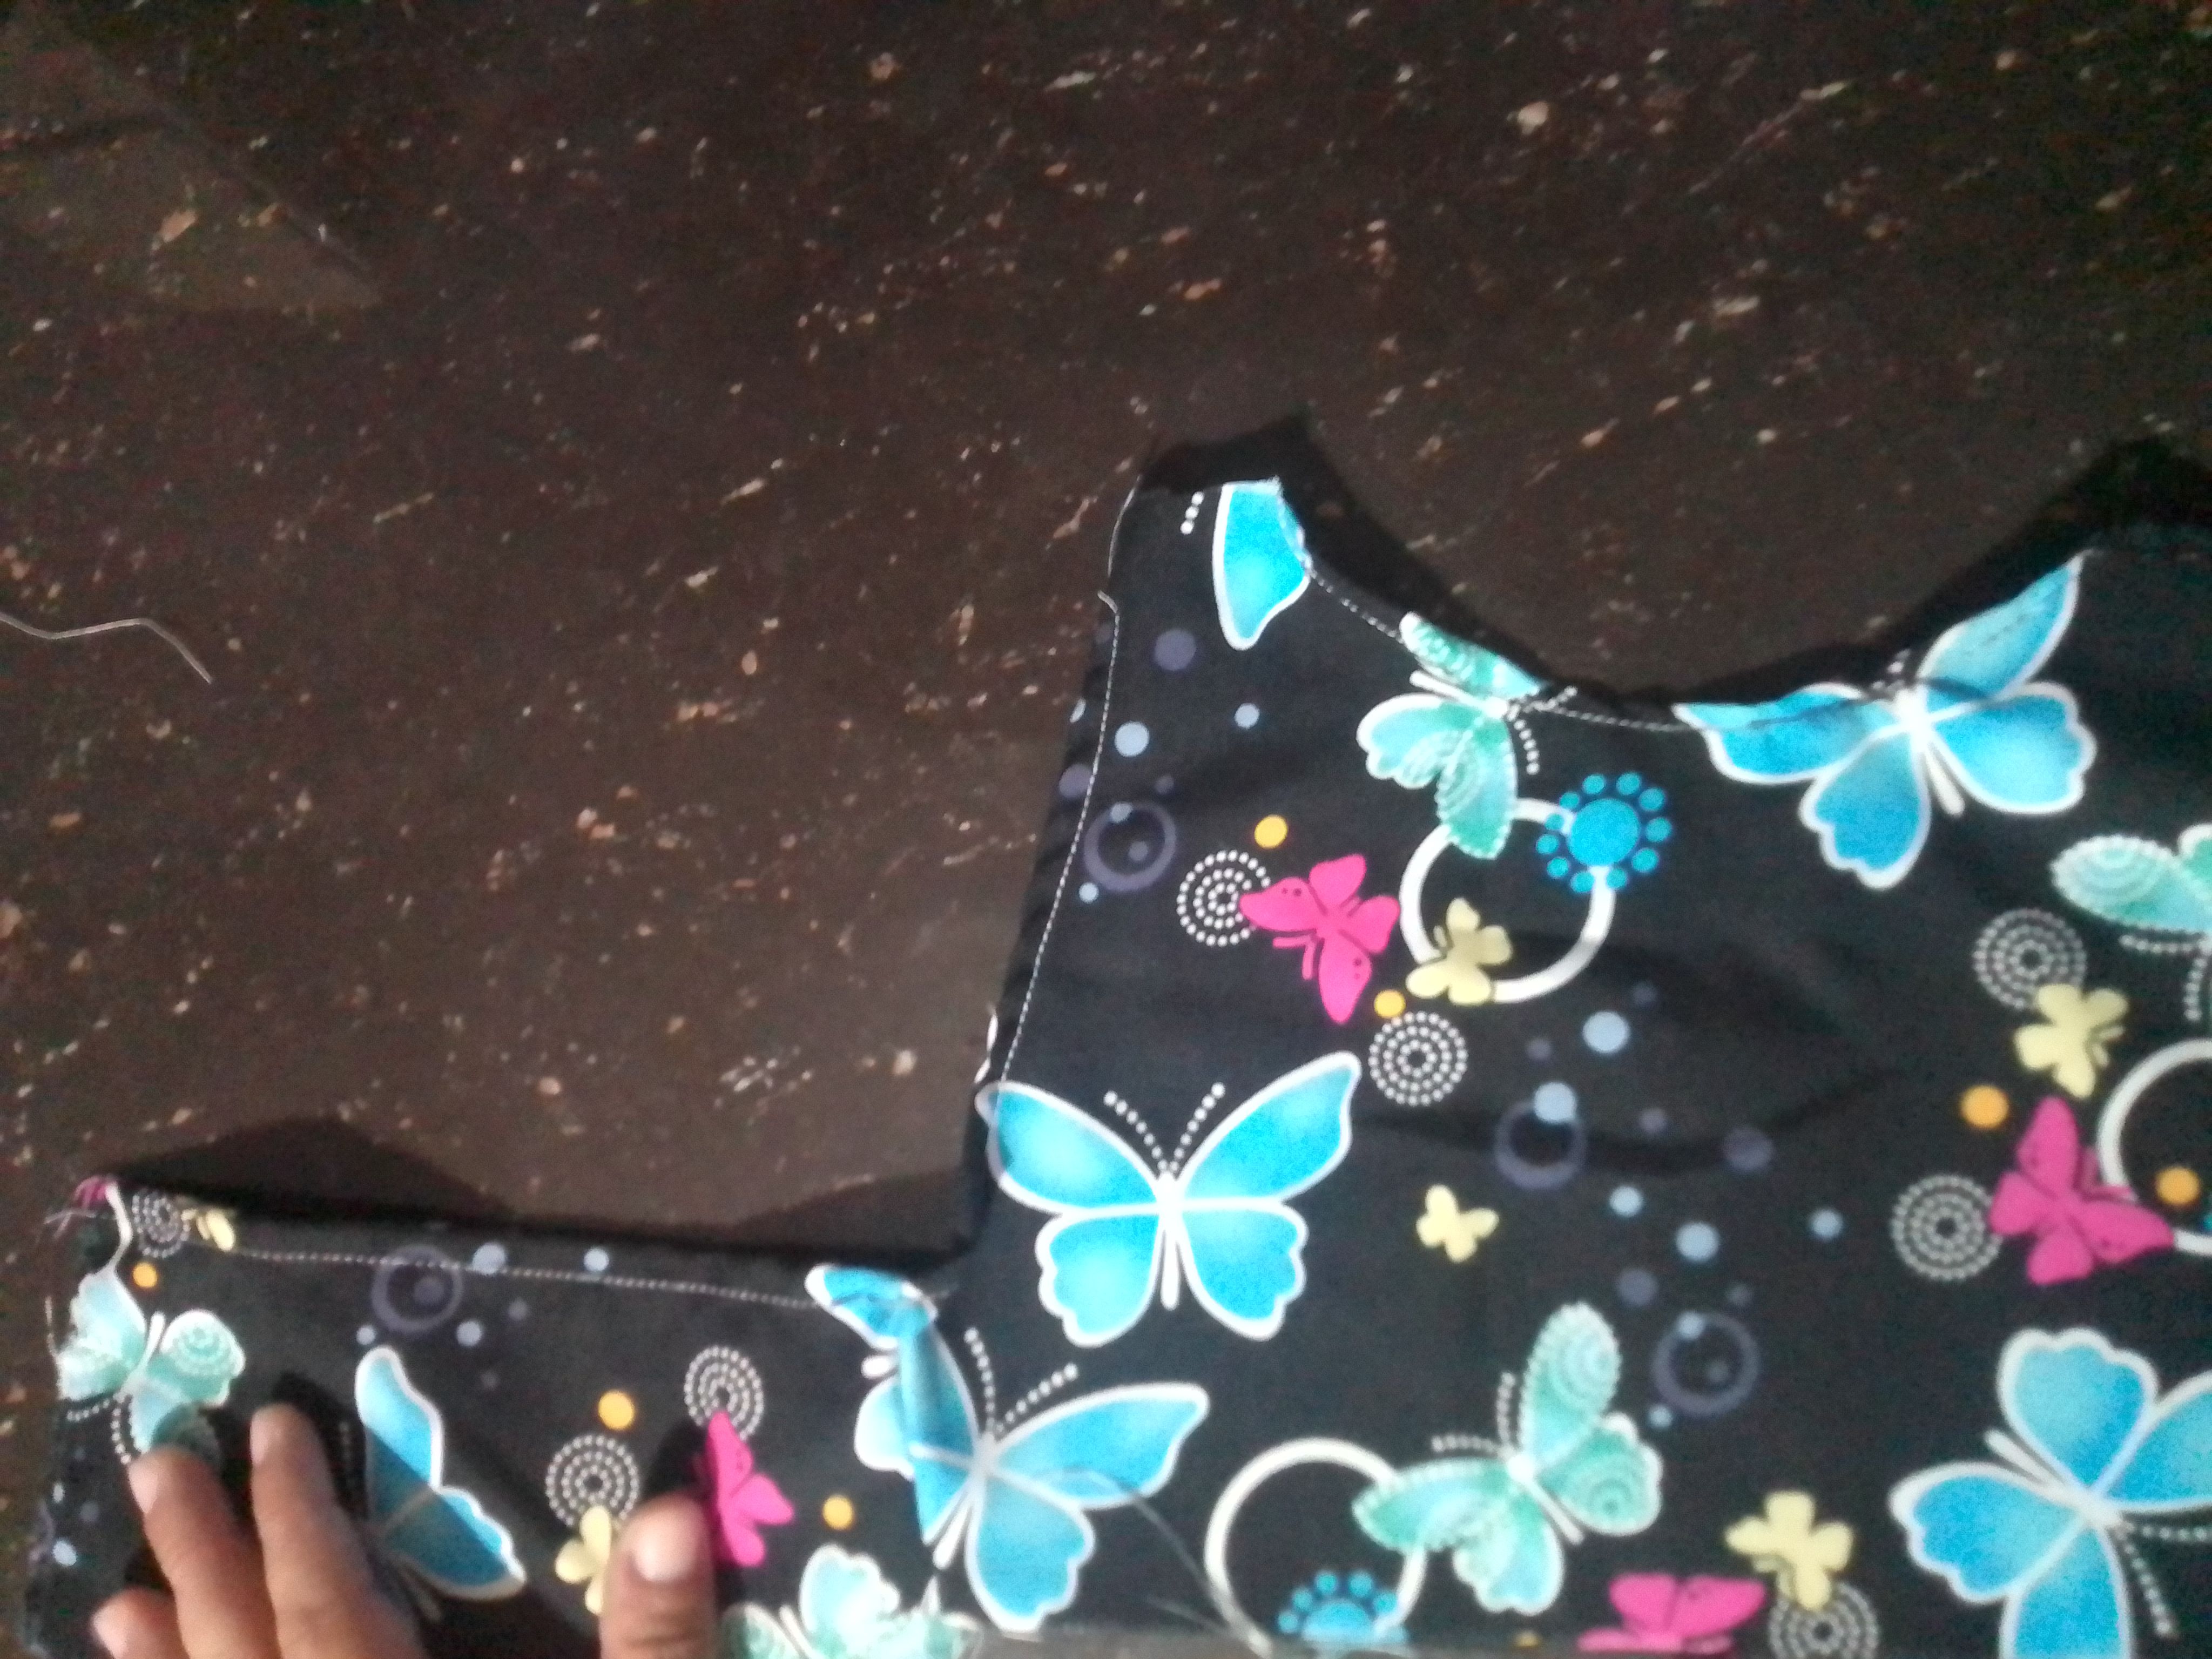
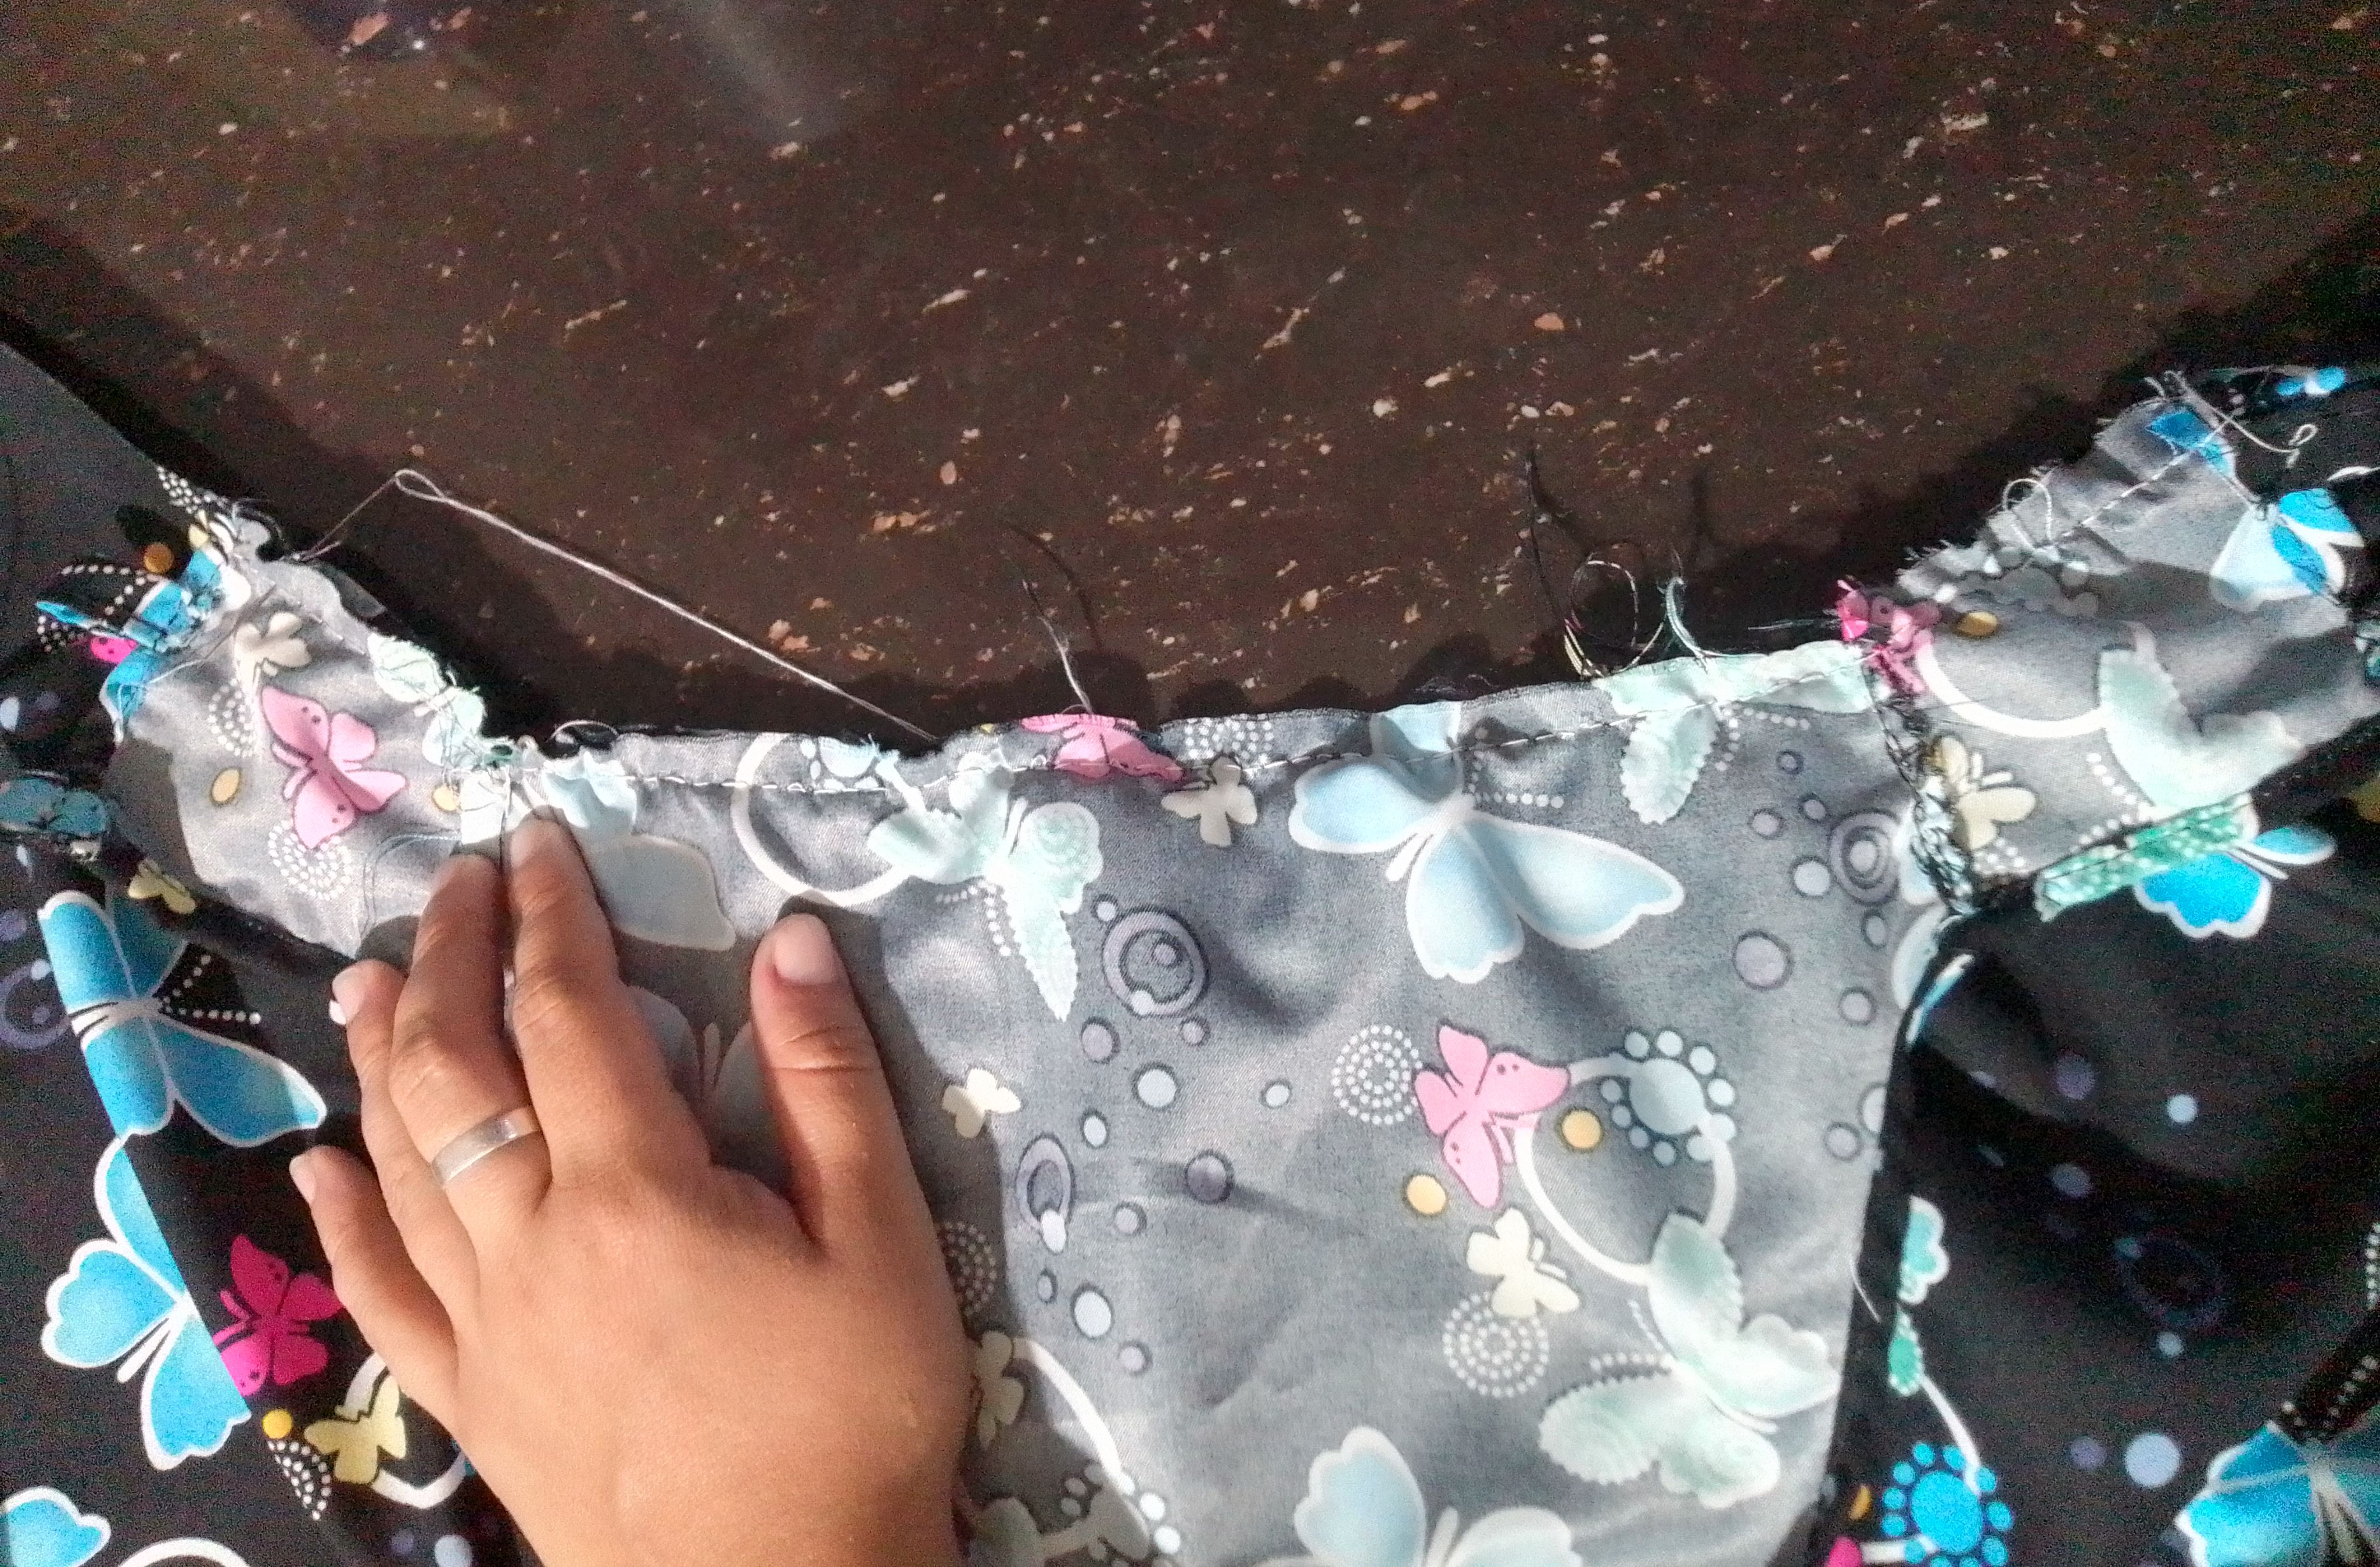
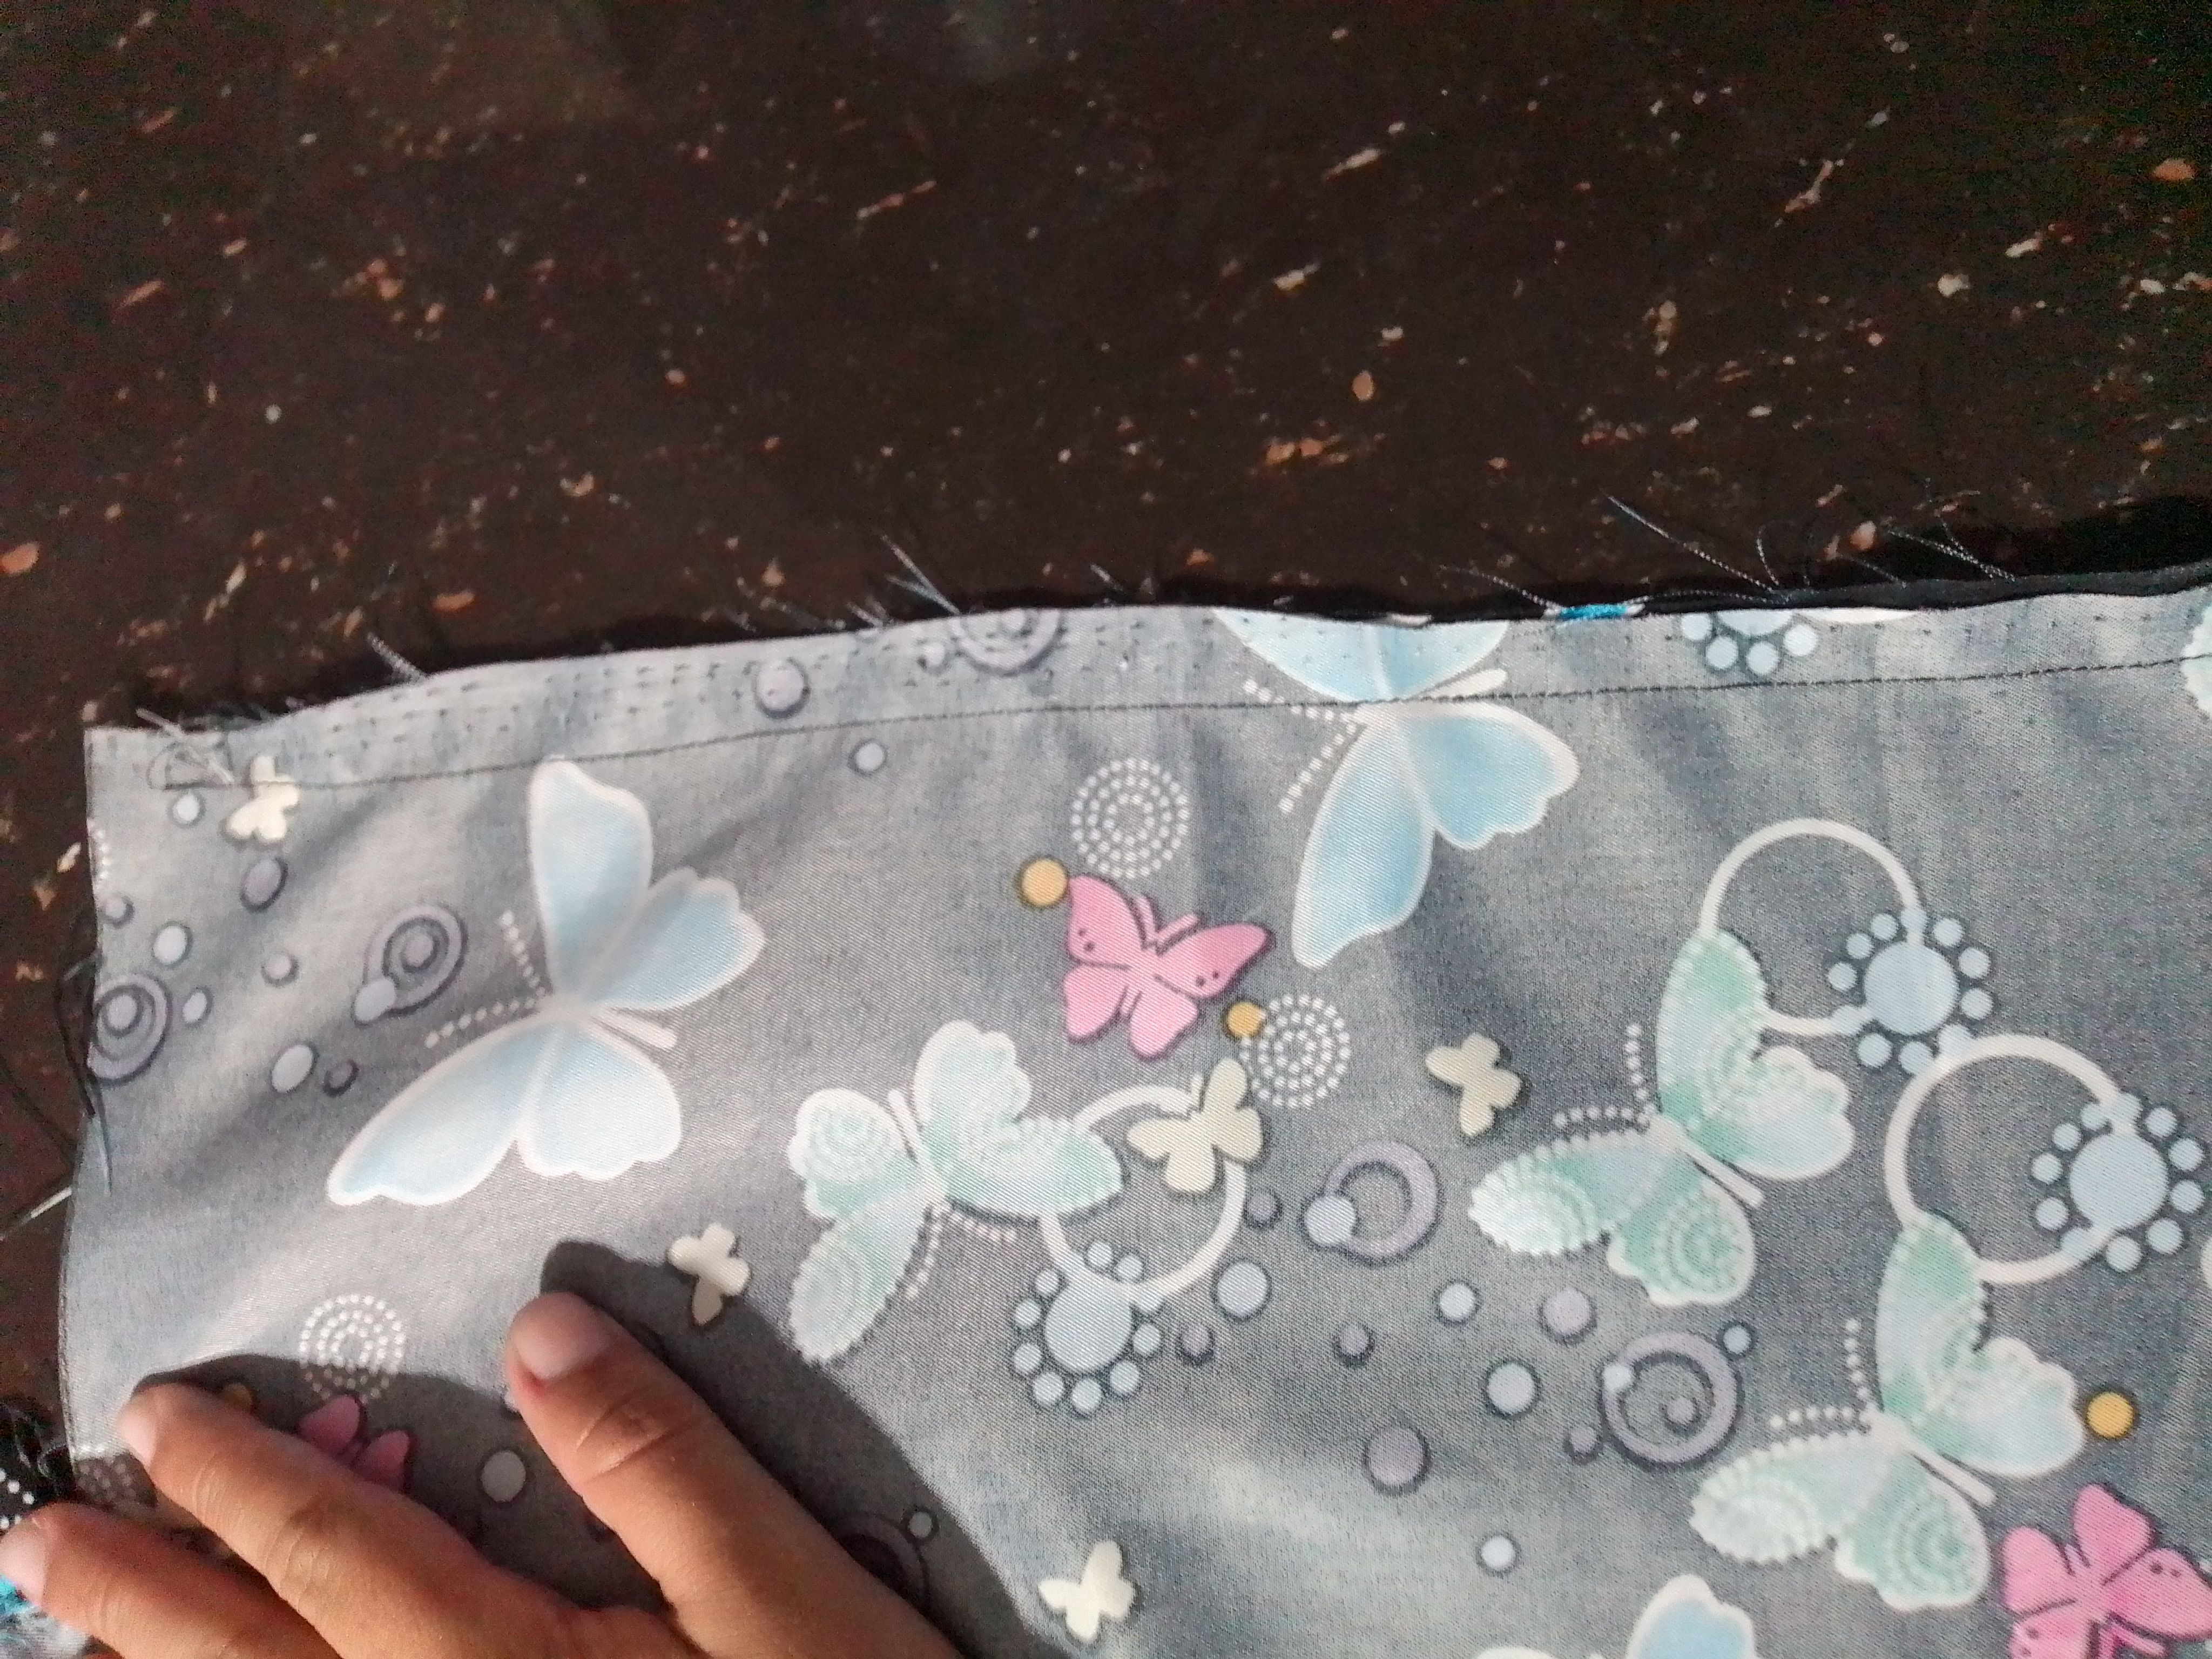
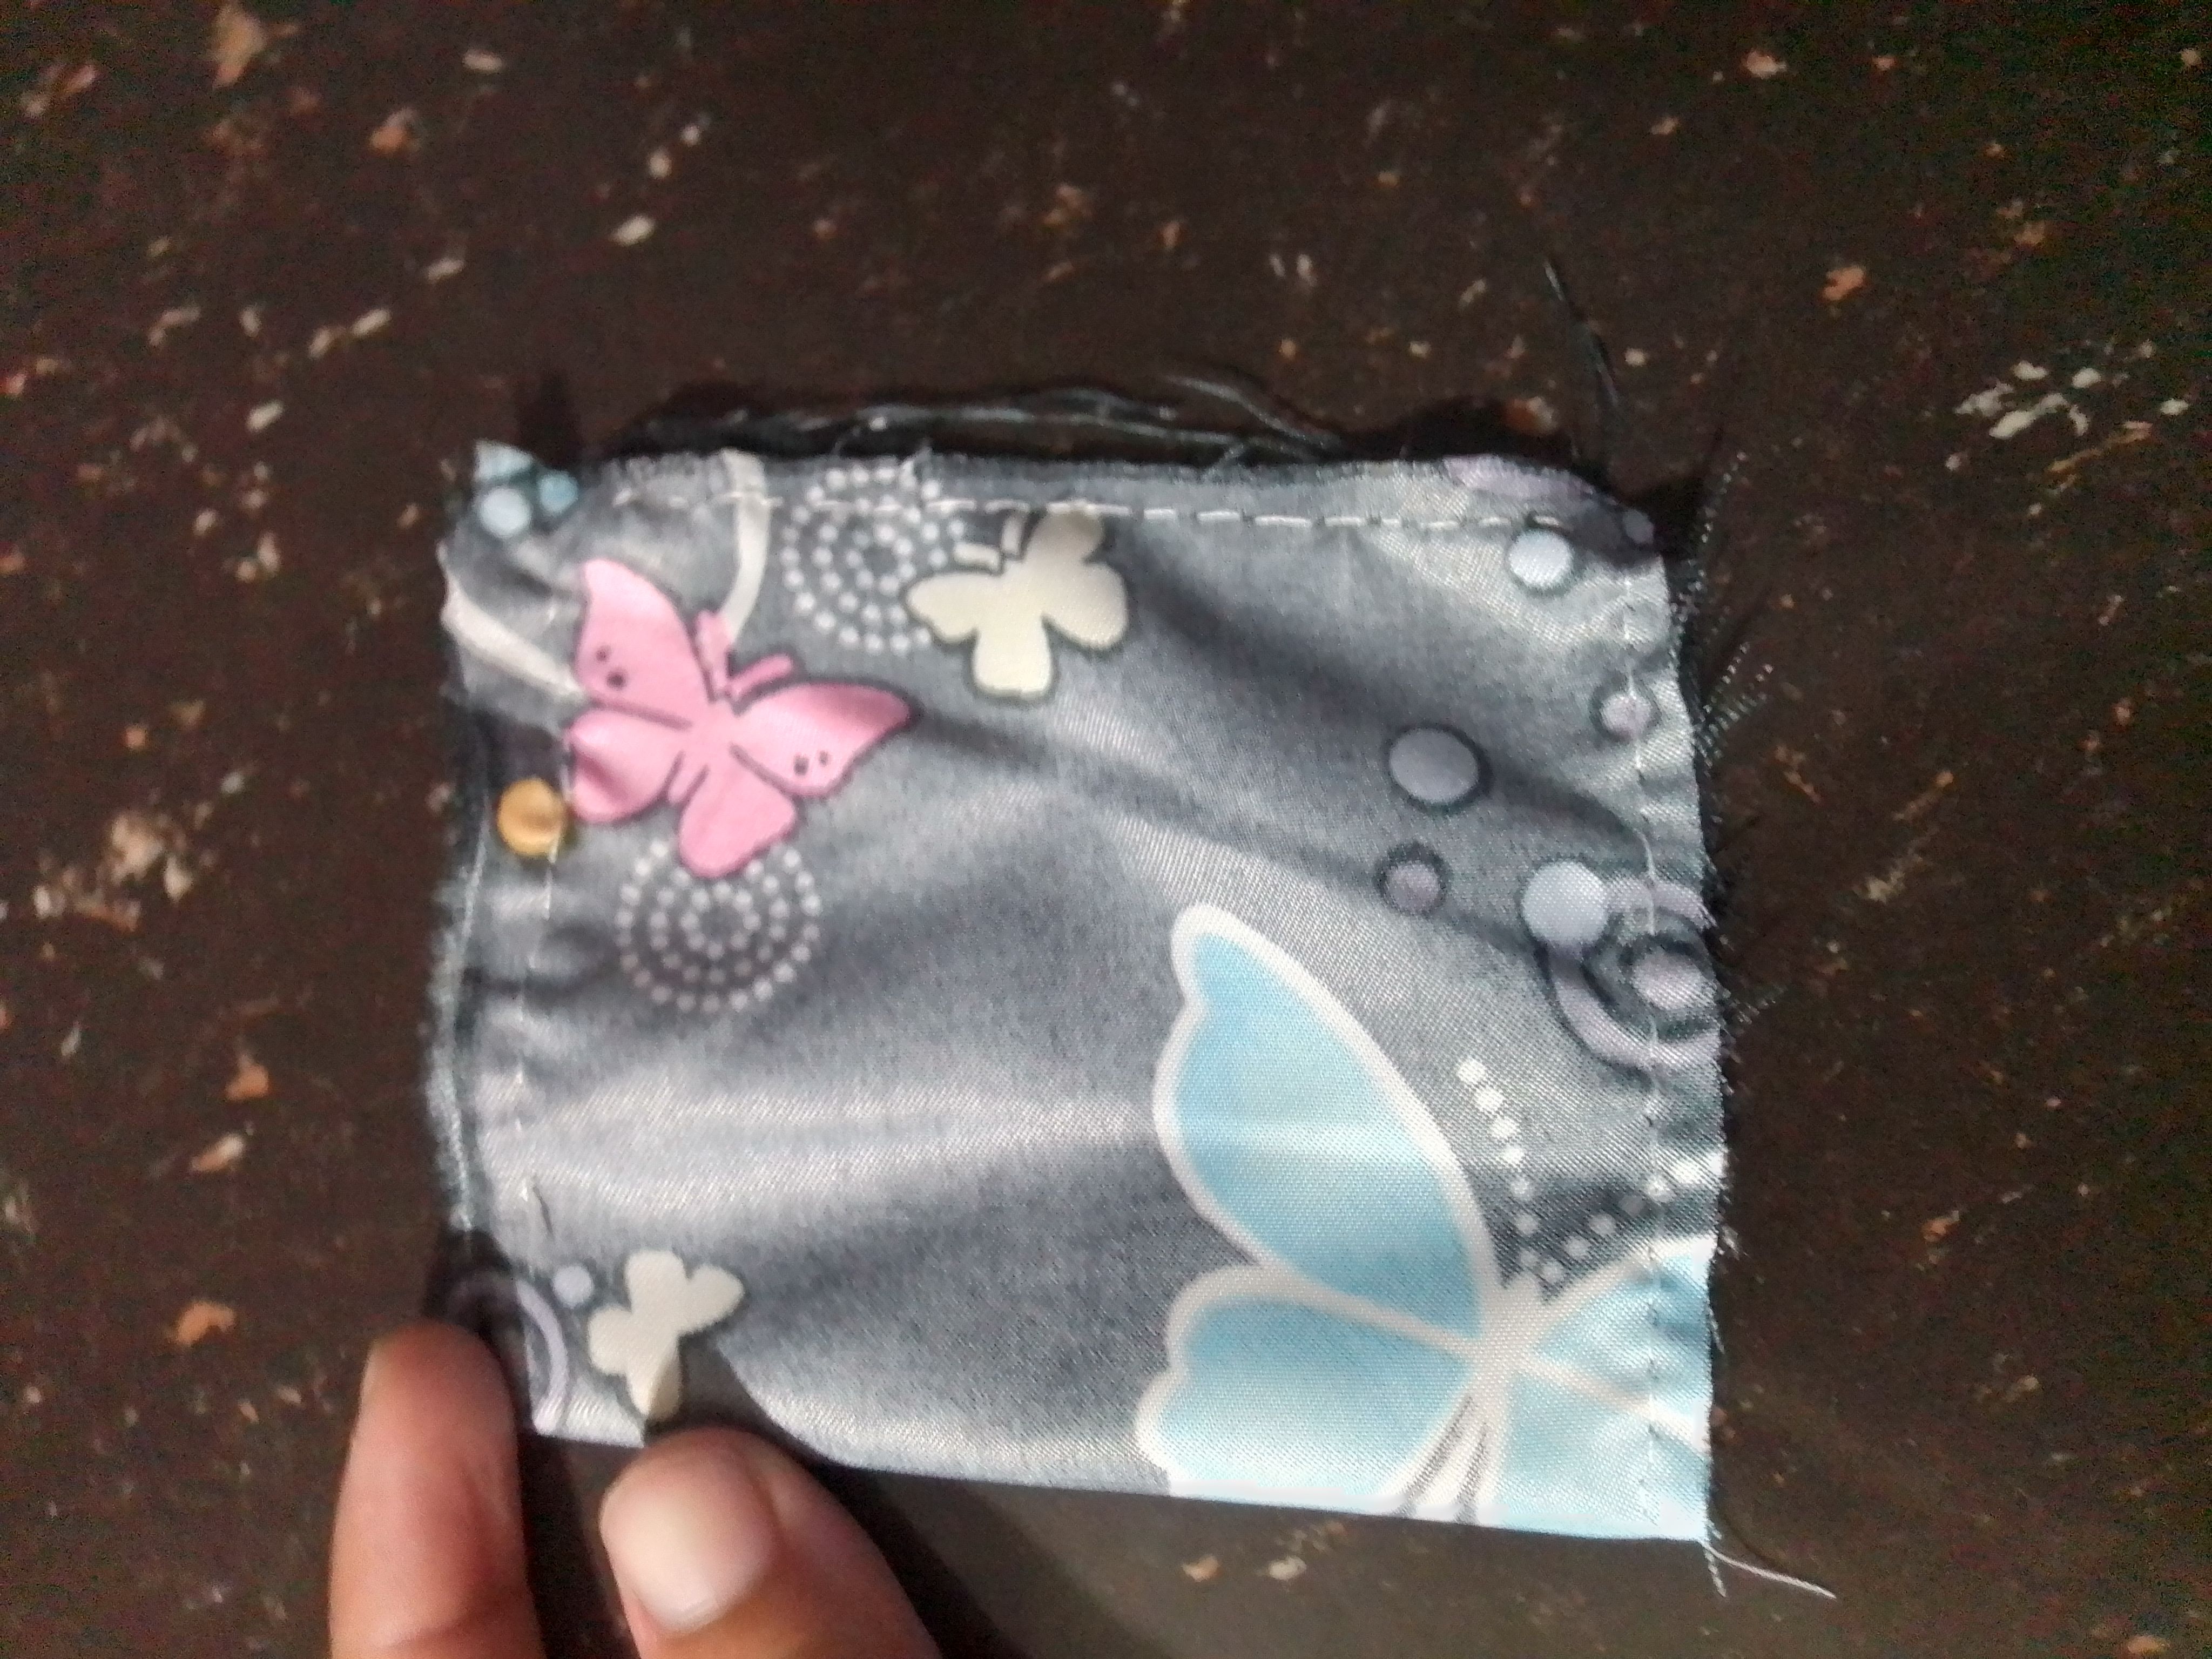
Cortamos las piezas de la parte posterior del vestido que serán dos rectángulos, midiendo desde las costillas sin llegar hasta el medio de la espalda. Ambas partes la cosemos a los lados de la pieza delantera y hacemos el pequeño dobladillo de los bordes, recomiendo en este paso no colocar el hilo doble en aguja y solo dejarlo simple, pues como se trata de una costura superficial, lo sé quiere es que quede lo más bonito y delicado posible. De esta misma manera colocamos los tirantes a nivel de los hombros sobre está pieza delantera y cosemos.
Step 03
We cut the pieces of the back of the dress that will be two rectangles, measuring from the ribs without reaching the middle of the back. We sew both parts to the sides of the front piece and we make the small hem of the edges, I recommend in this step not to place the double thread in the needle and just leave it simple, because as it is a superficial seam, I know what you want is that be as beautiful and delicate as possible. In this same way we place the straps at shoulder level on this front piece and sew.
Paso 04
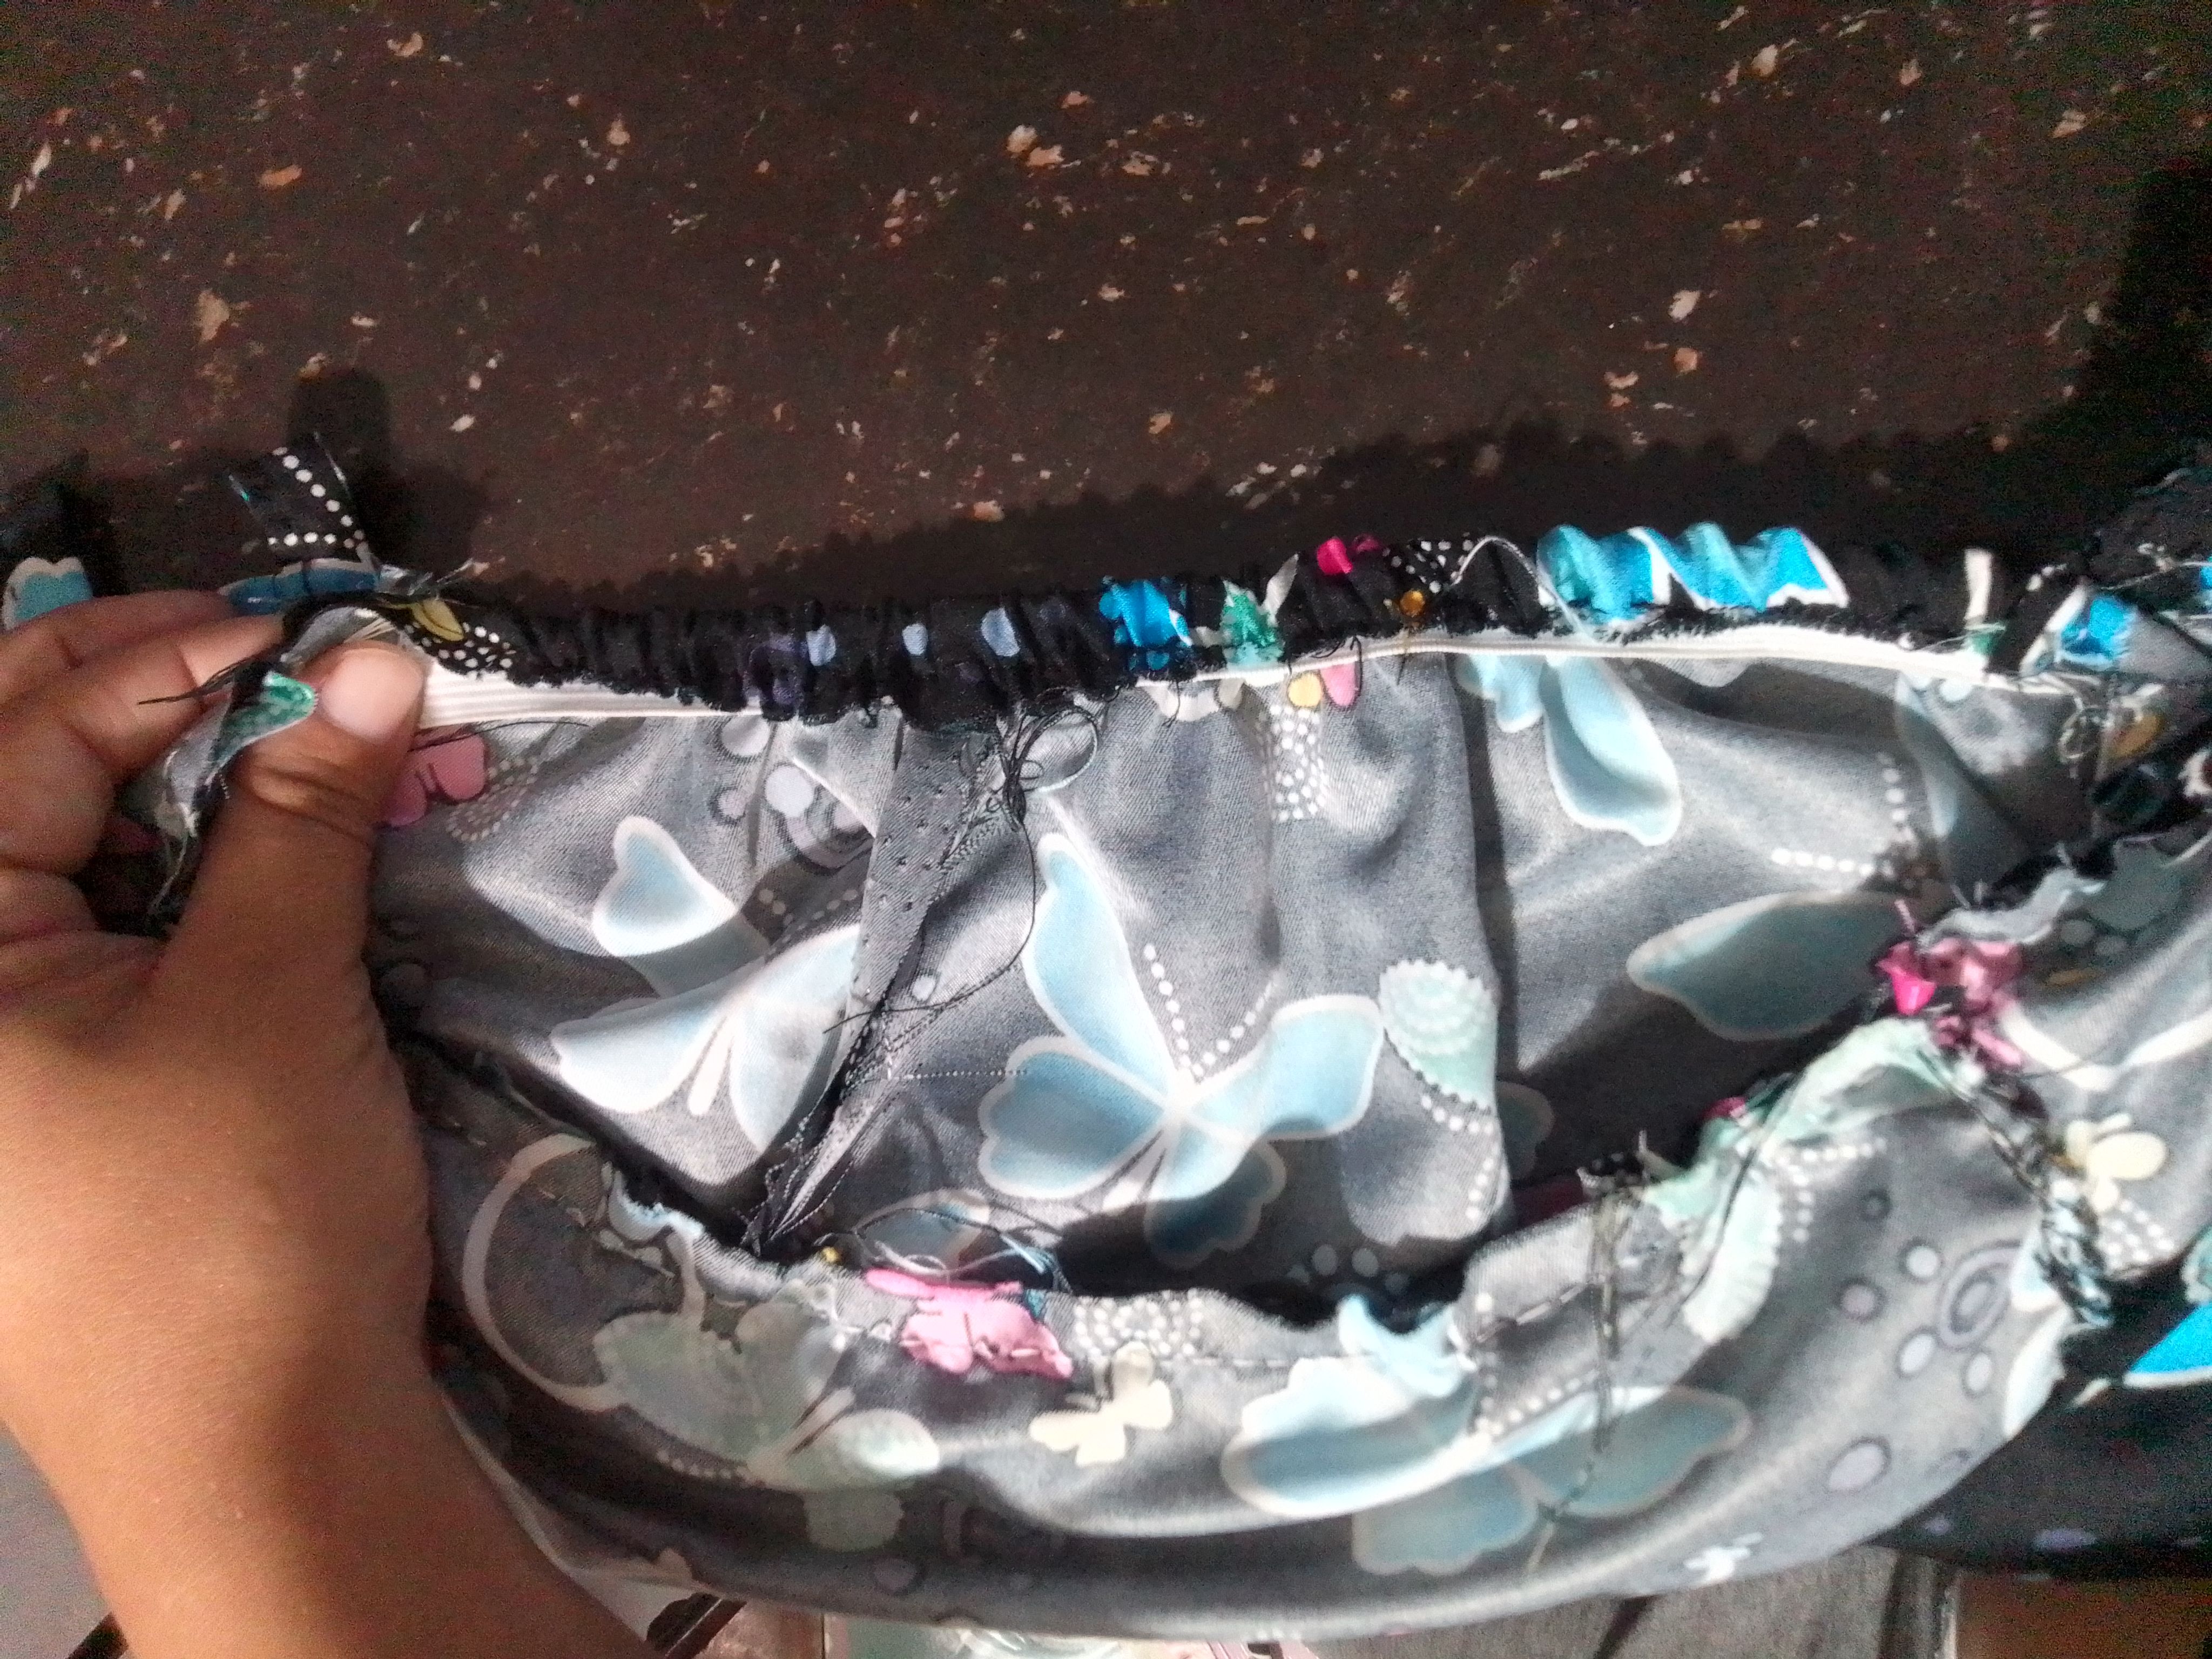
Continuamos con los detalles de la parte de atrás del vestido, así que con dos tiras finas formaremos cuatro trabillas pequeñas, las cuales doblamos por la mitad y cosemos dos en cada una de las piezas traseras que hicimos anteriormente.
Step 04
We continue with the details of the back of the dress, so with two thin strips we will form four small belt loops, which we fold in half and sew two on each of the back pieces that we did previously.
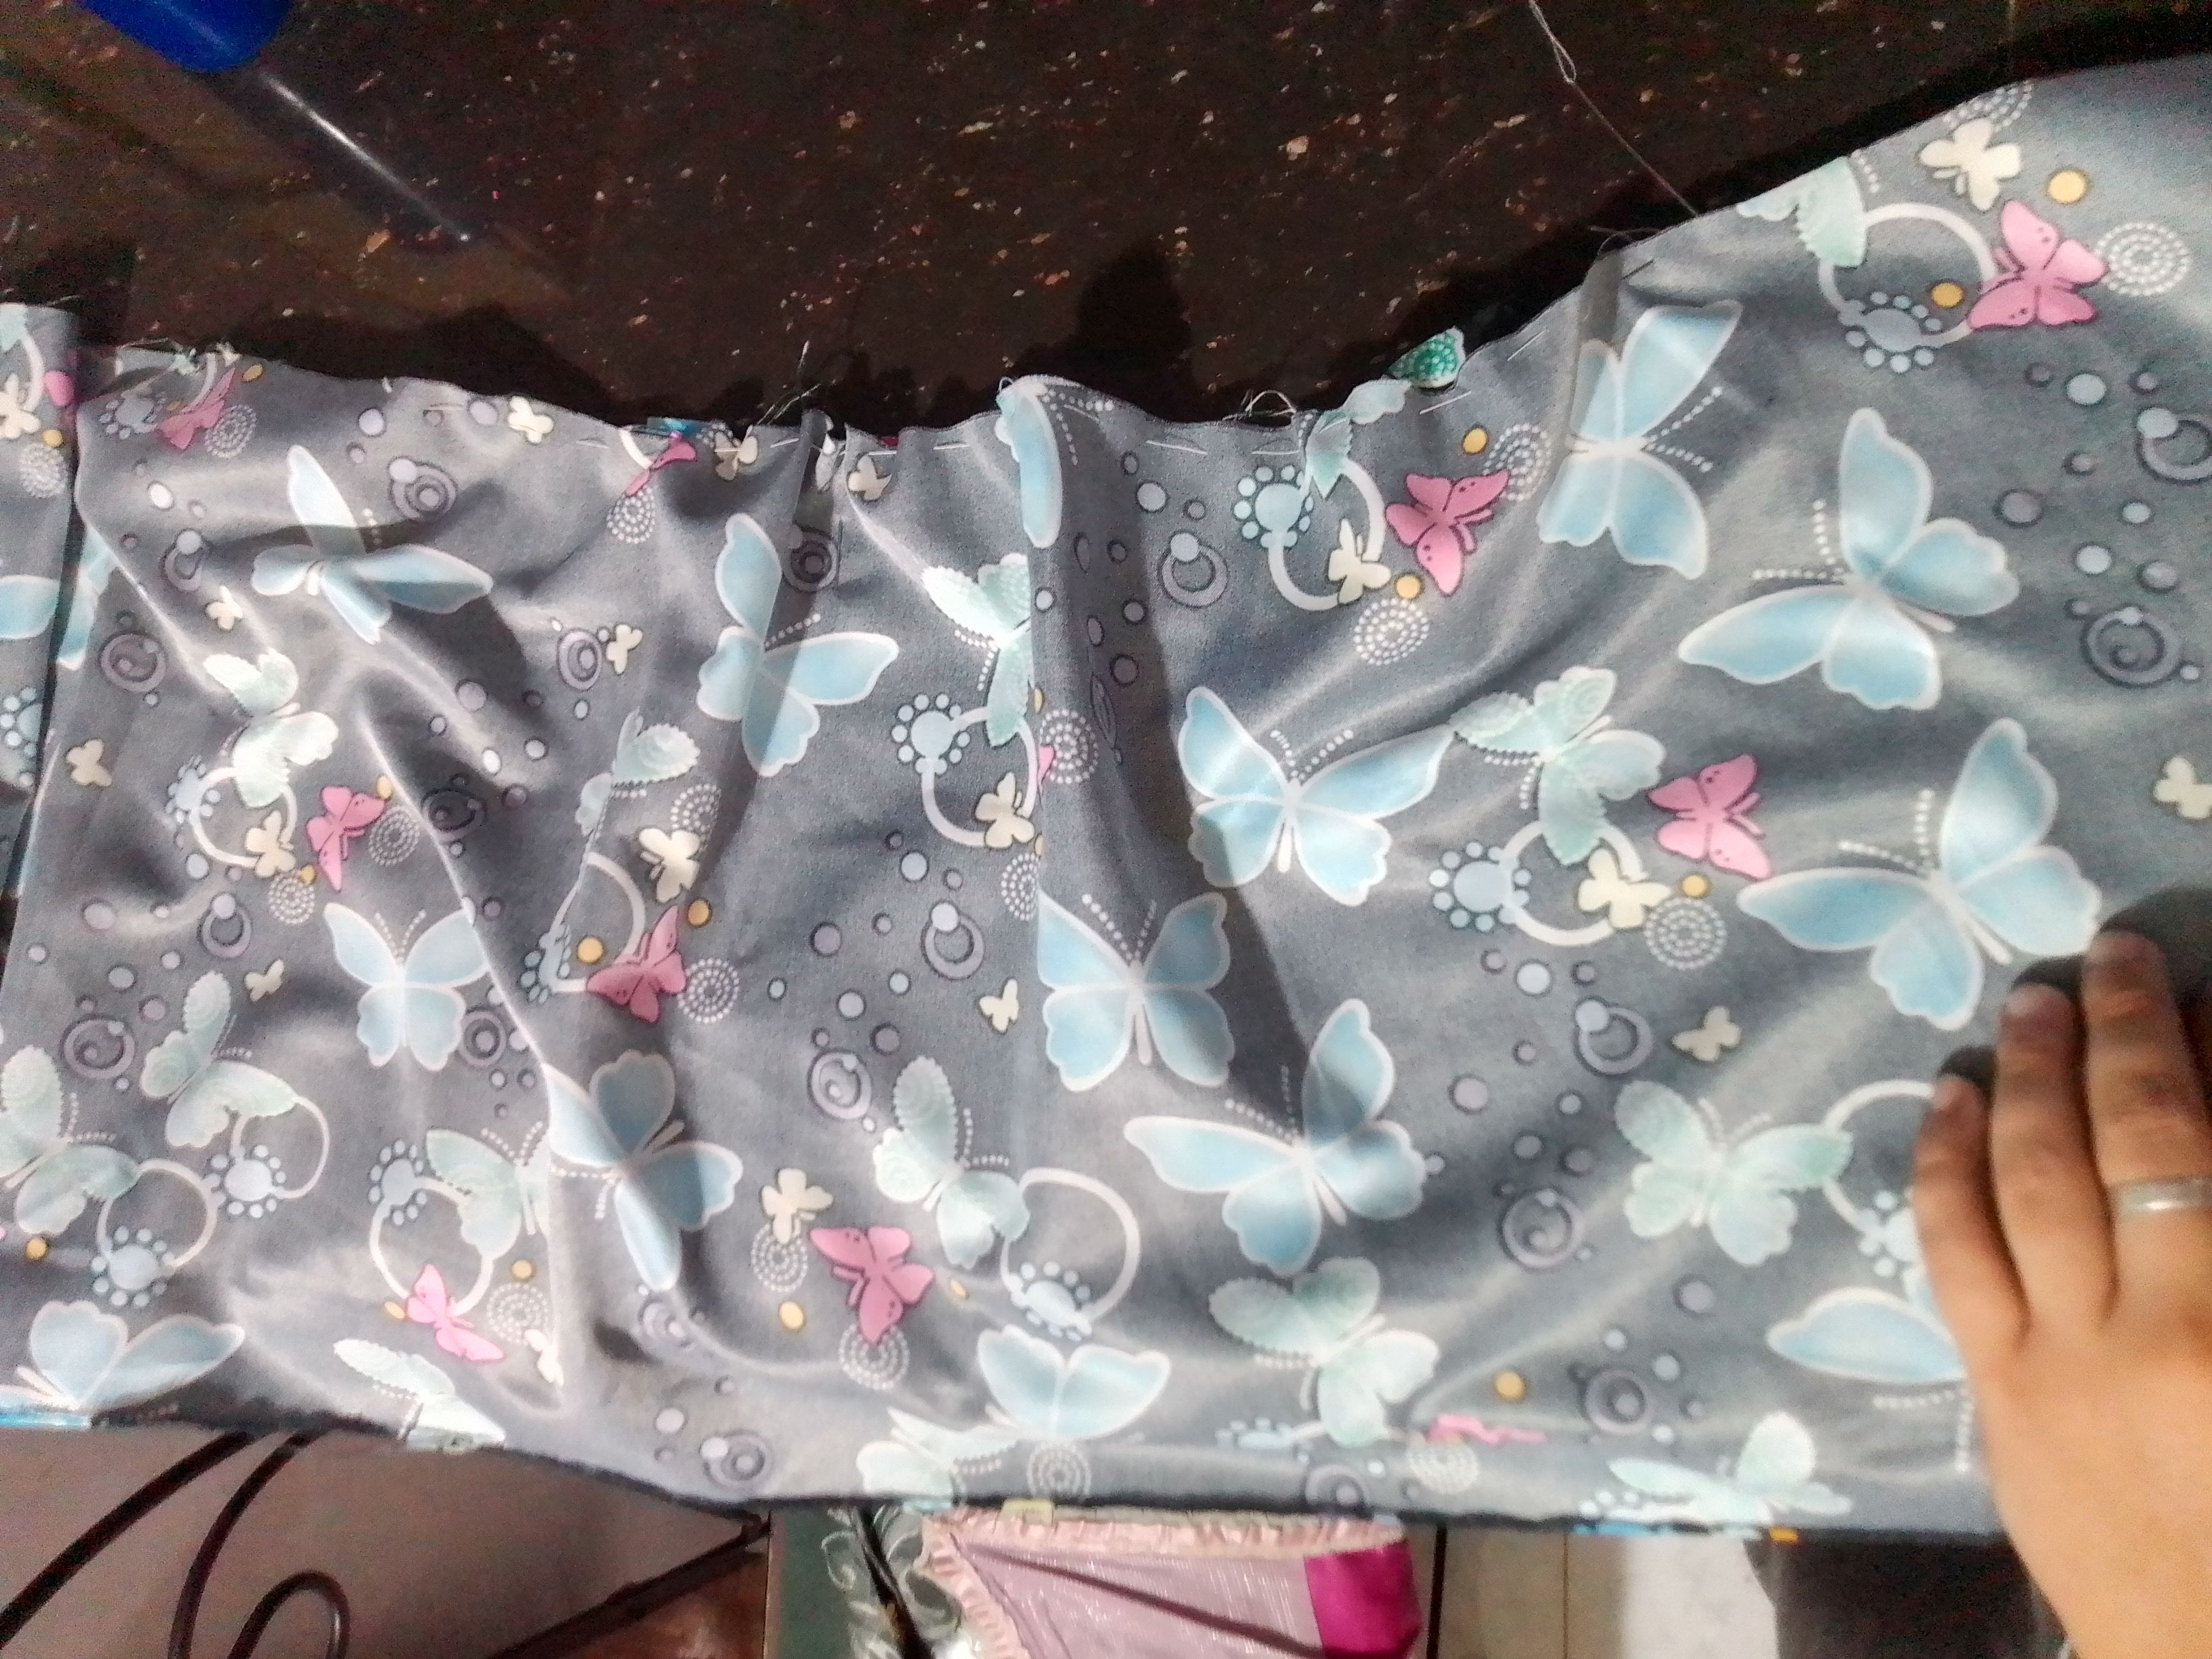
Paso 05
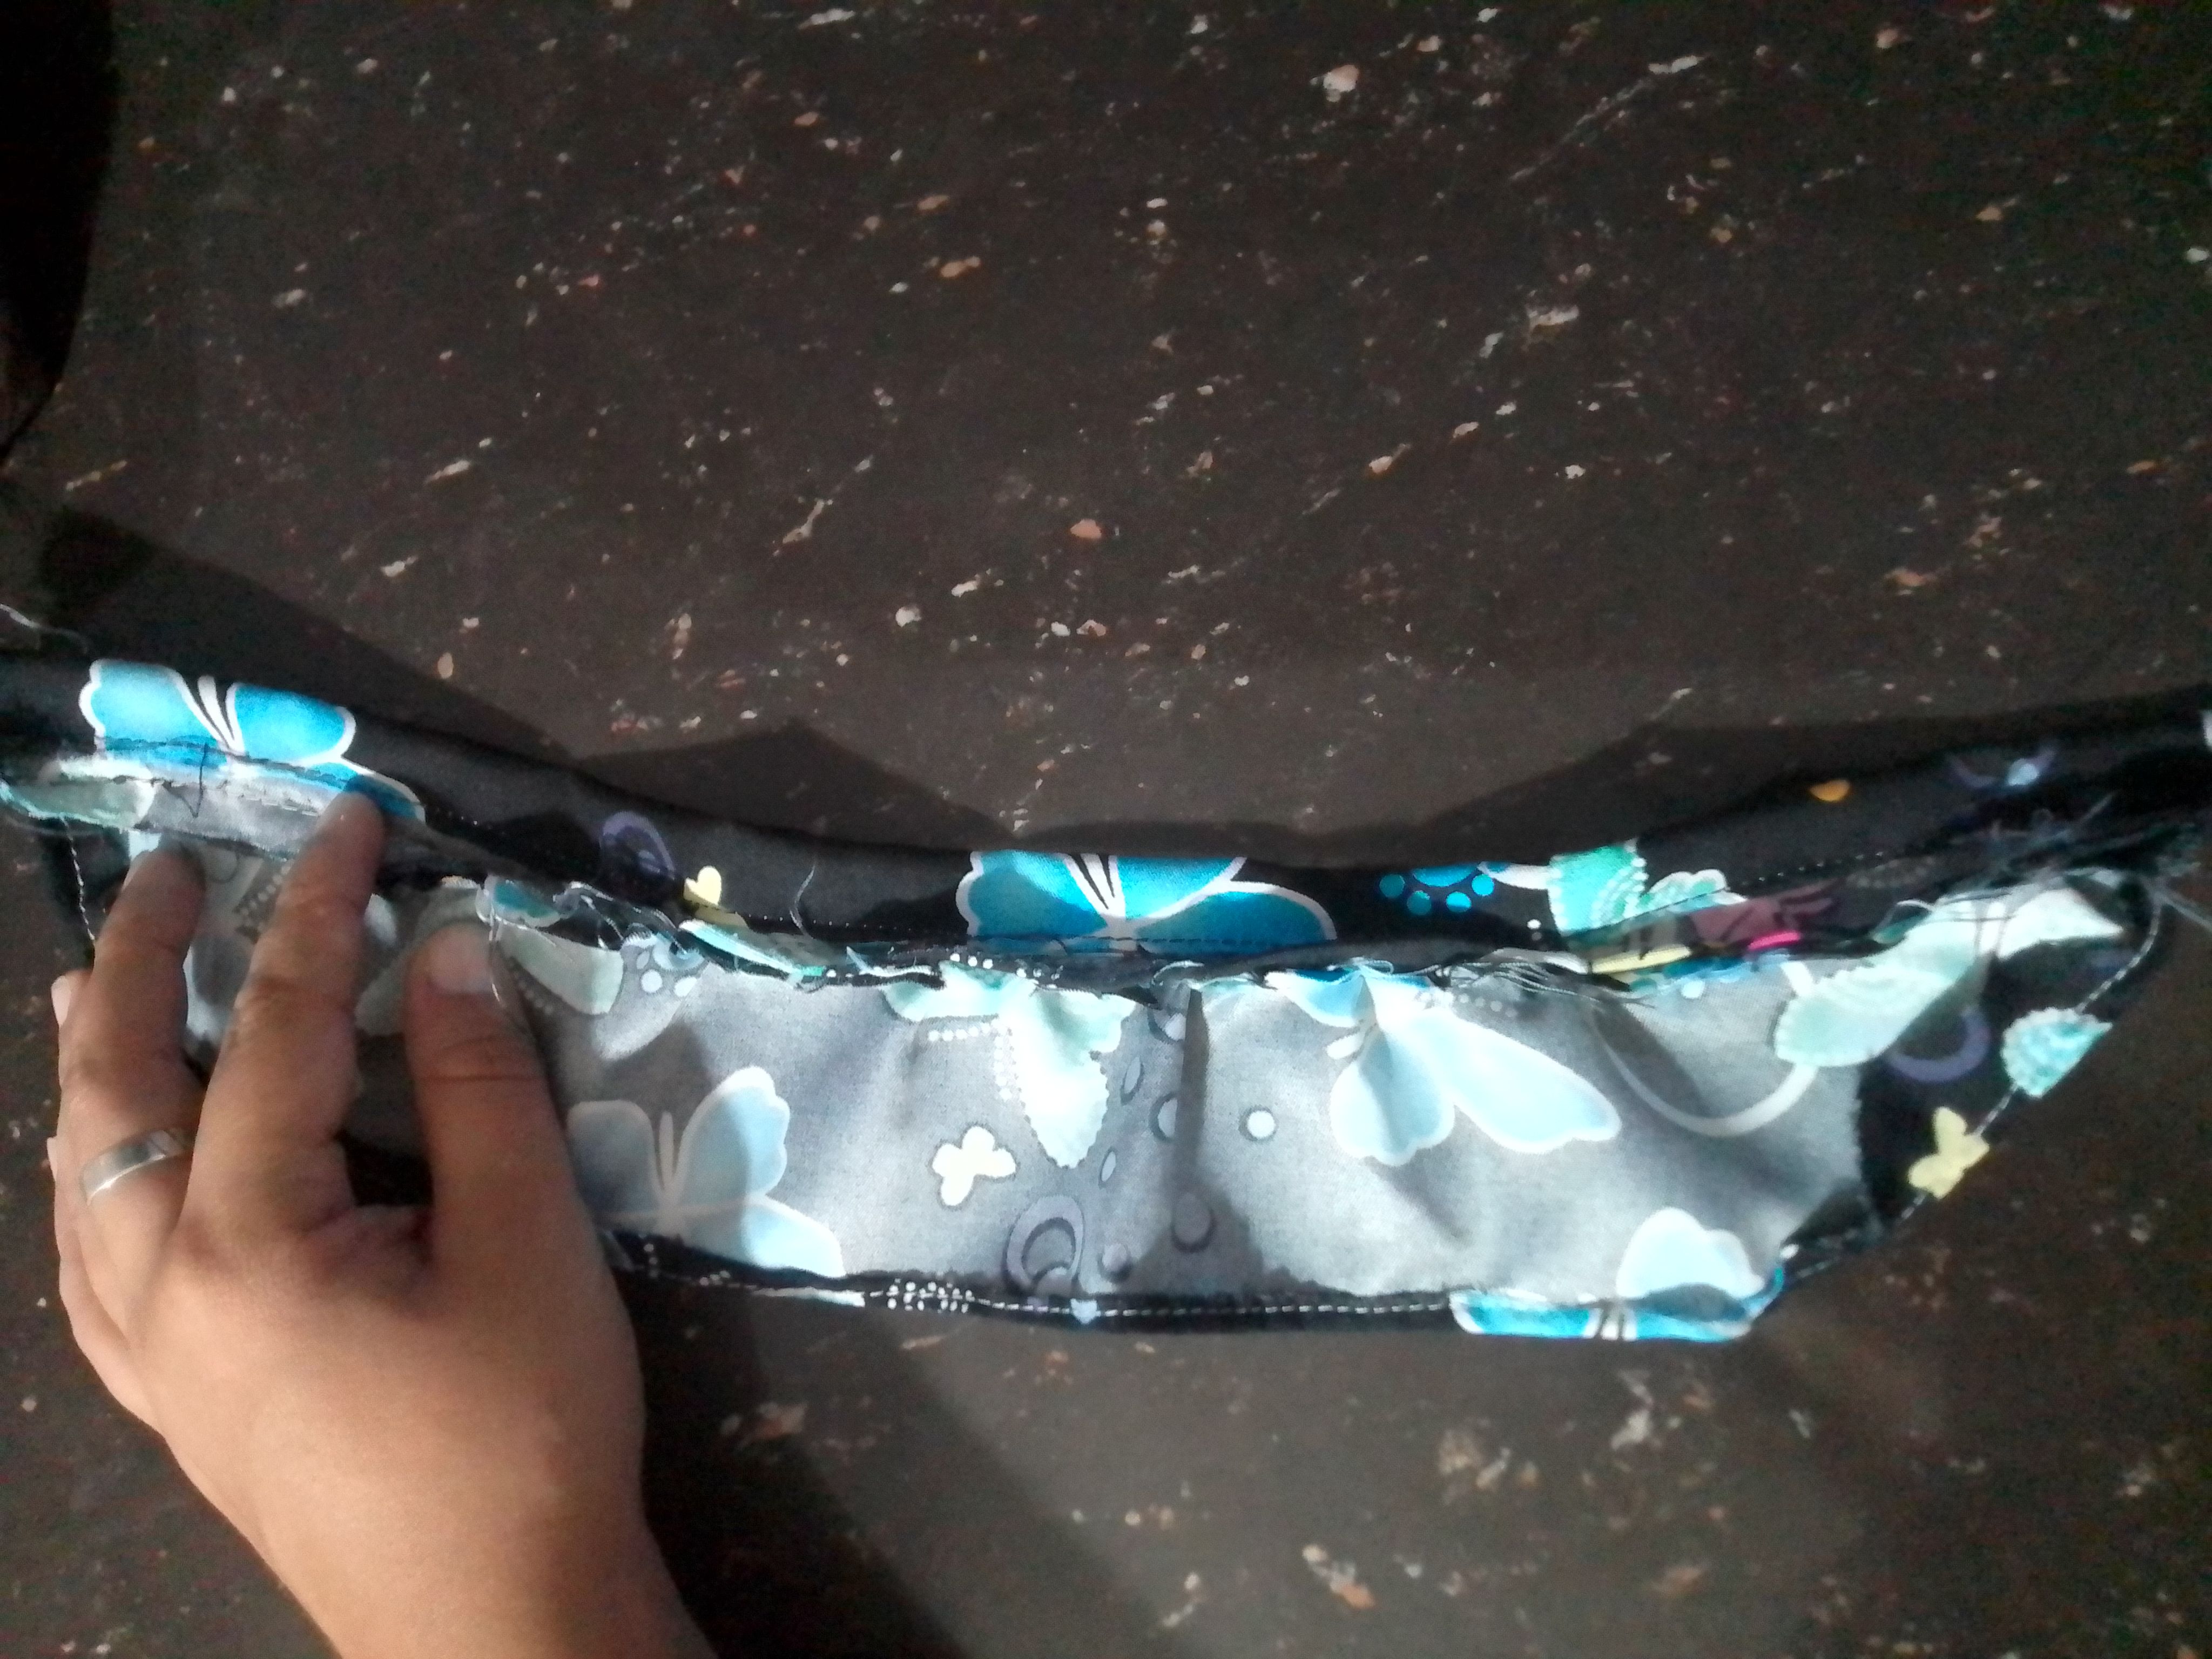
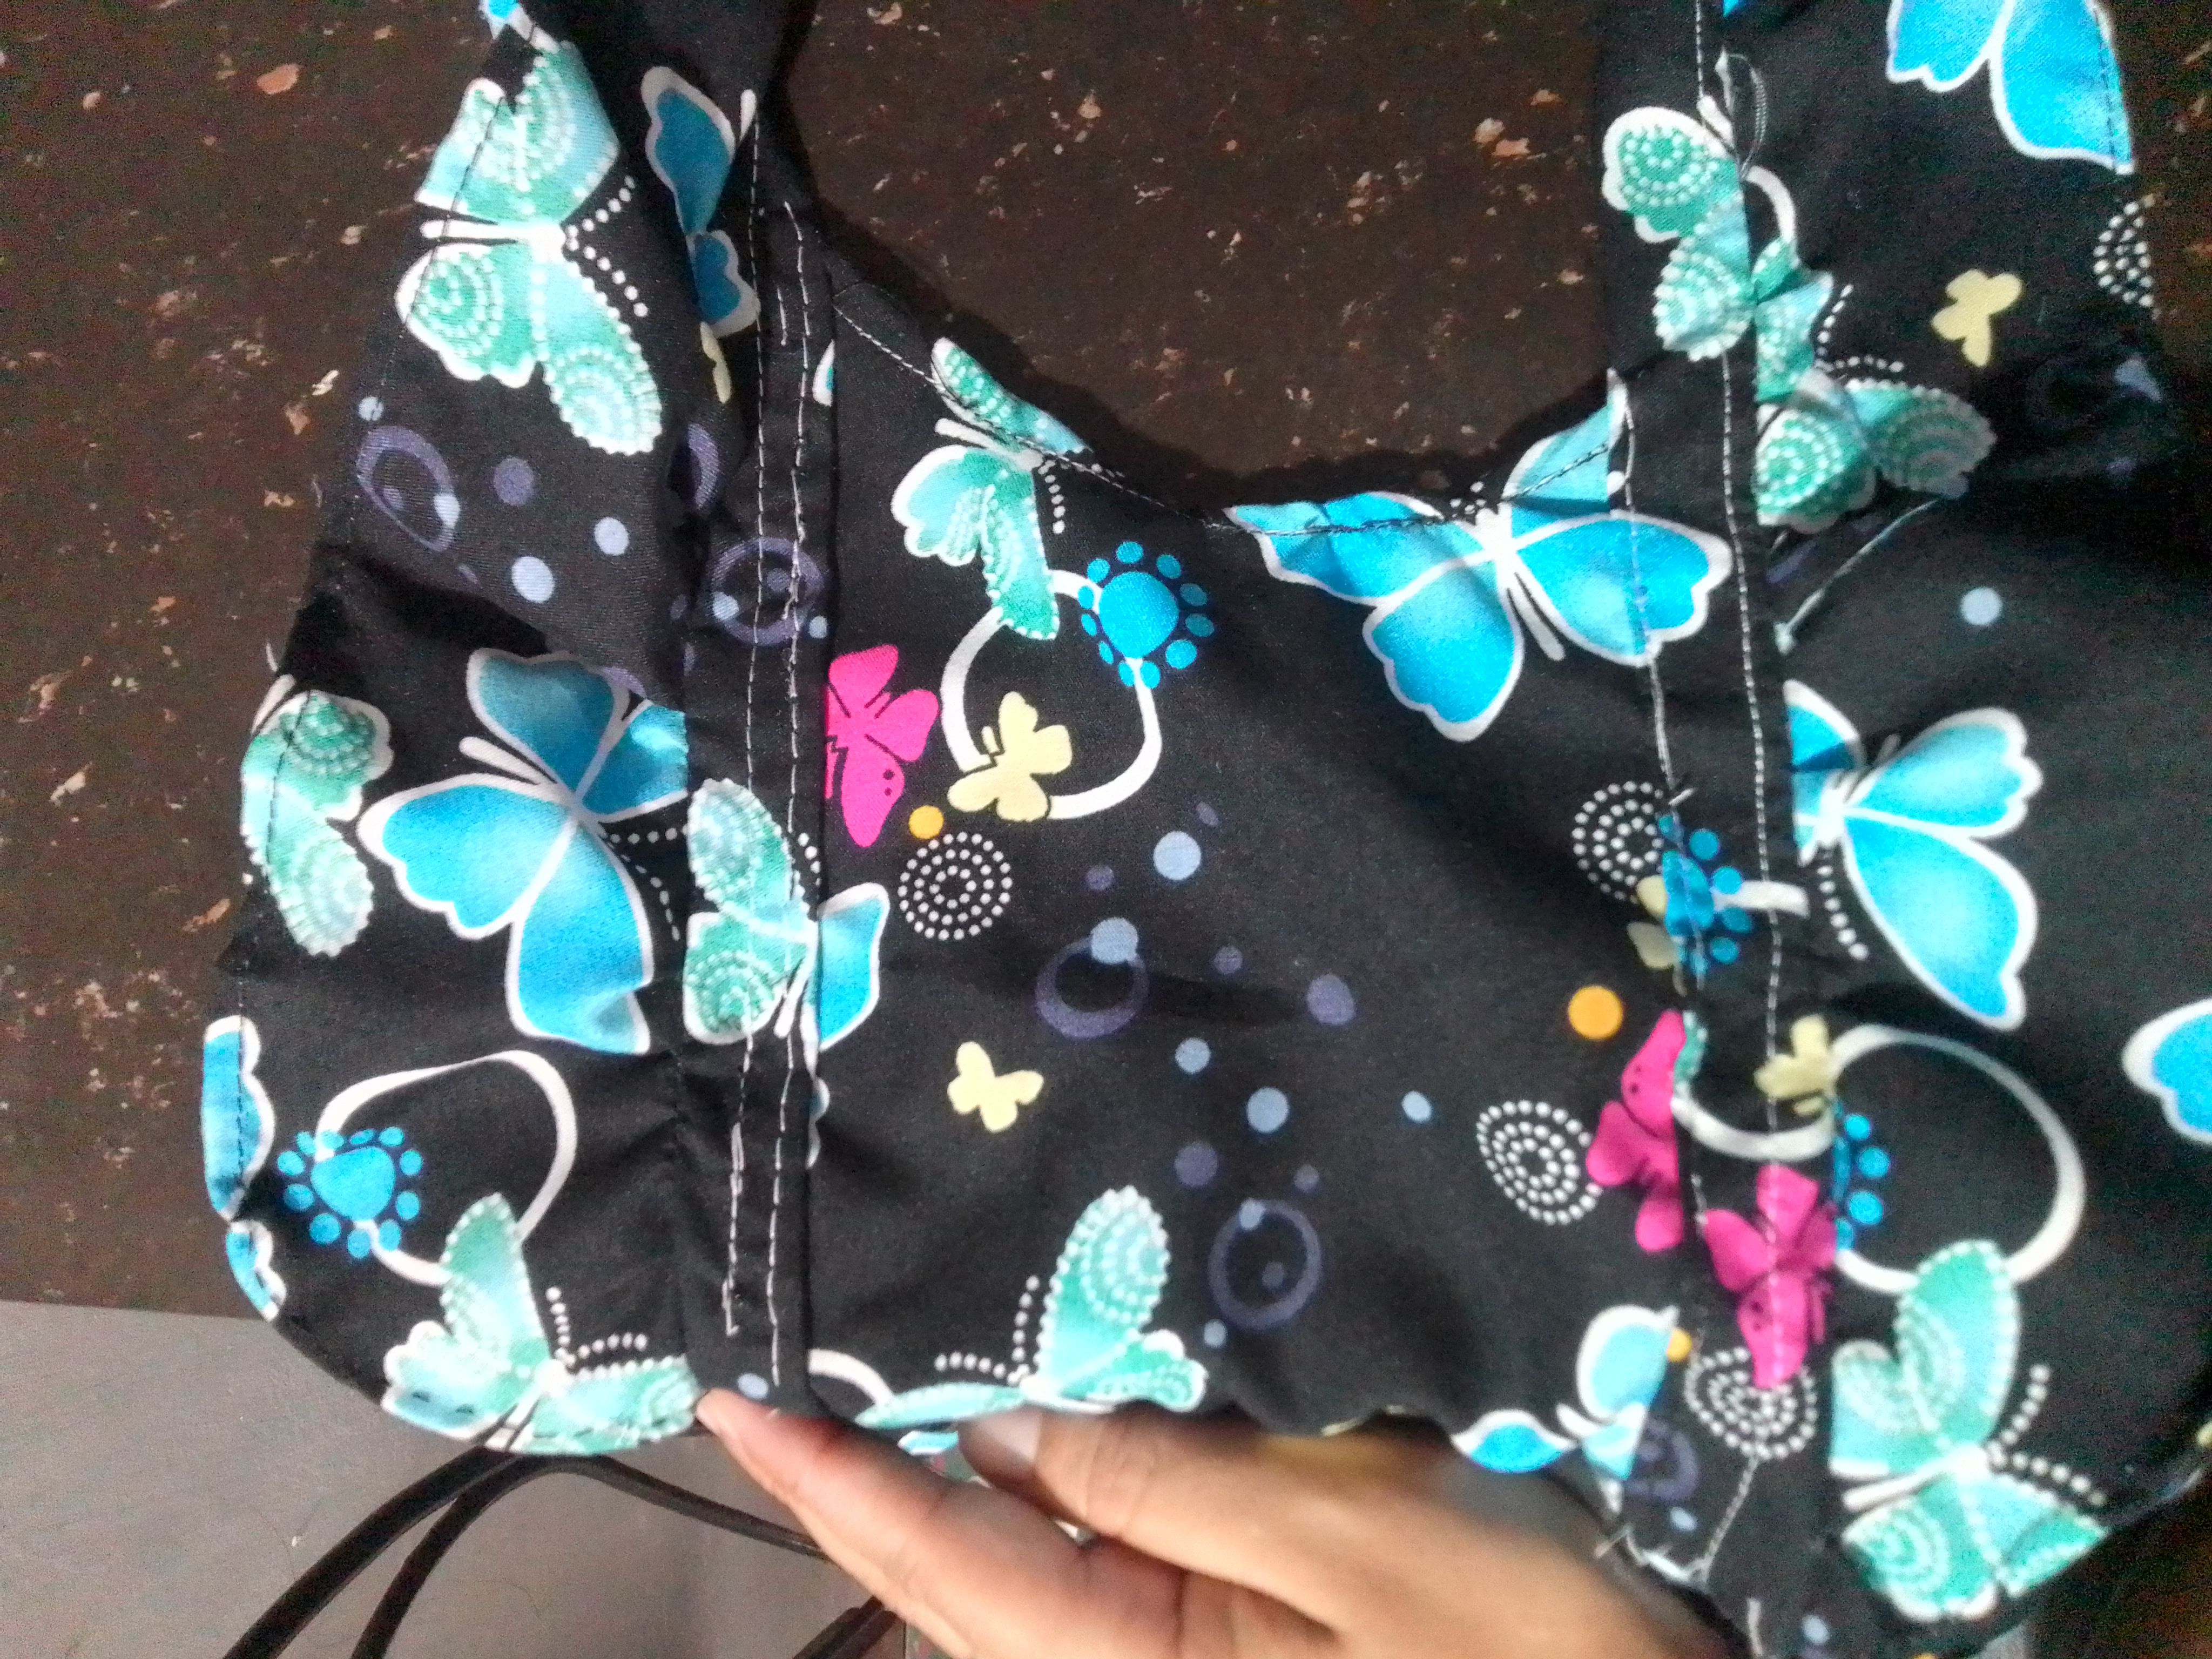
Ya lista la parte de arriba del vestido, es momento de hacer la falda, según las medidas de mi niña, utilicé un largo de 30cm por 80 de ancho. Recuerda, todo esto depende del tamaño de la niña, si deseas una falda más plisada o más larga puedes agrandar las medias. Entonces lo que hacemos es fijarla con alfileres a la pieza de arriba, dejando a los costado un espacio de 12cm. Luego arruchamos un poquito, y cosemos haciendo pequeños plises.
Step 05
Now the top of the dress is ready, it's time to make the skirt, according to my daughter's measurements, I used a length of 30cm by 80 wide. Remember, this all depends on the size of the girl, if you want a more pleated or longer skirt you can make the tights bigger. So what we do is fix it with pins to the top piece, leaving a space of 12cm on the side. Then we crinkle a little, and sew making small pleats.
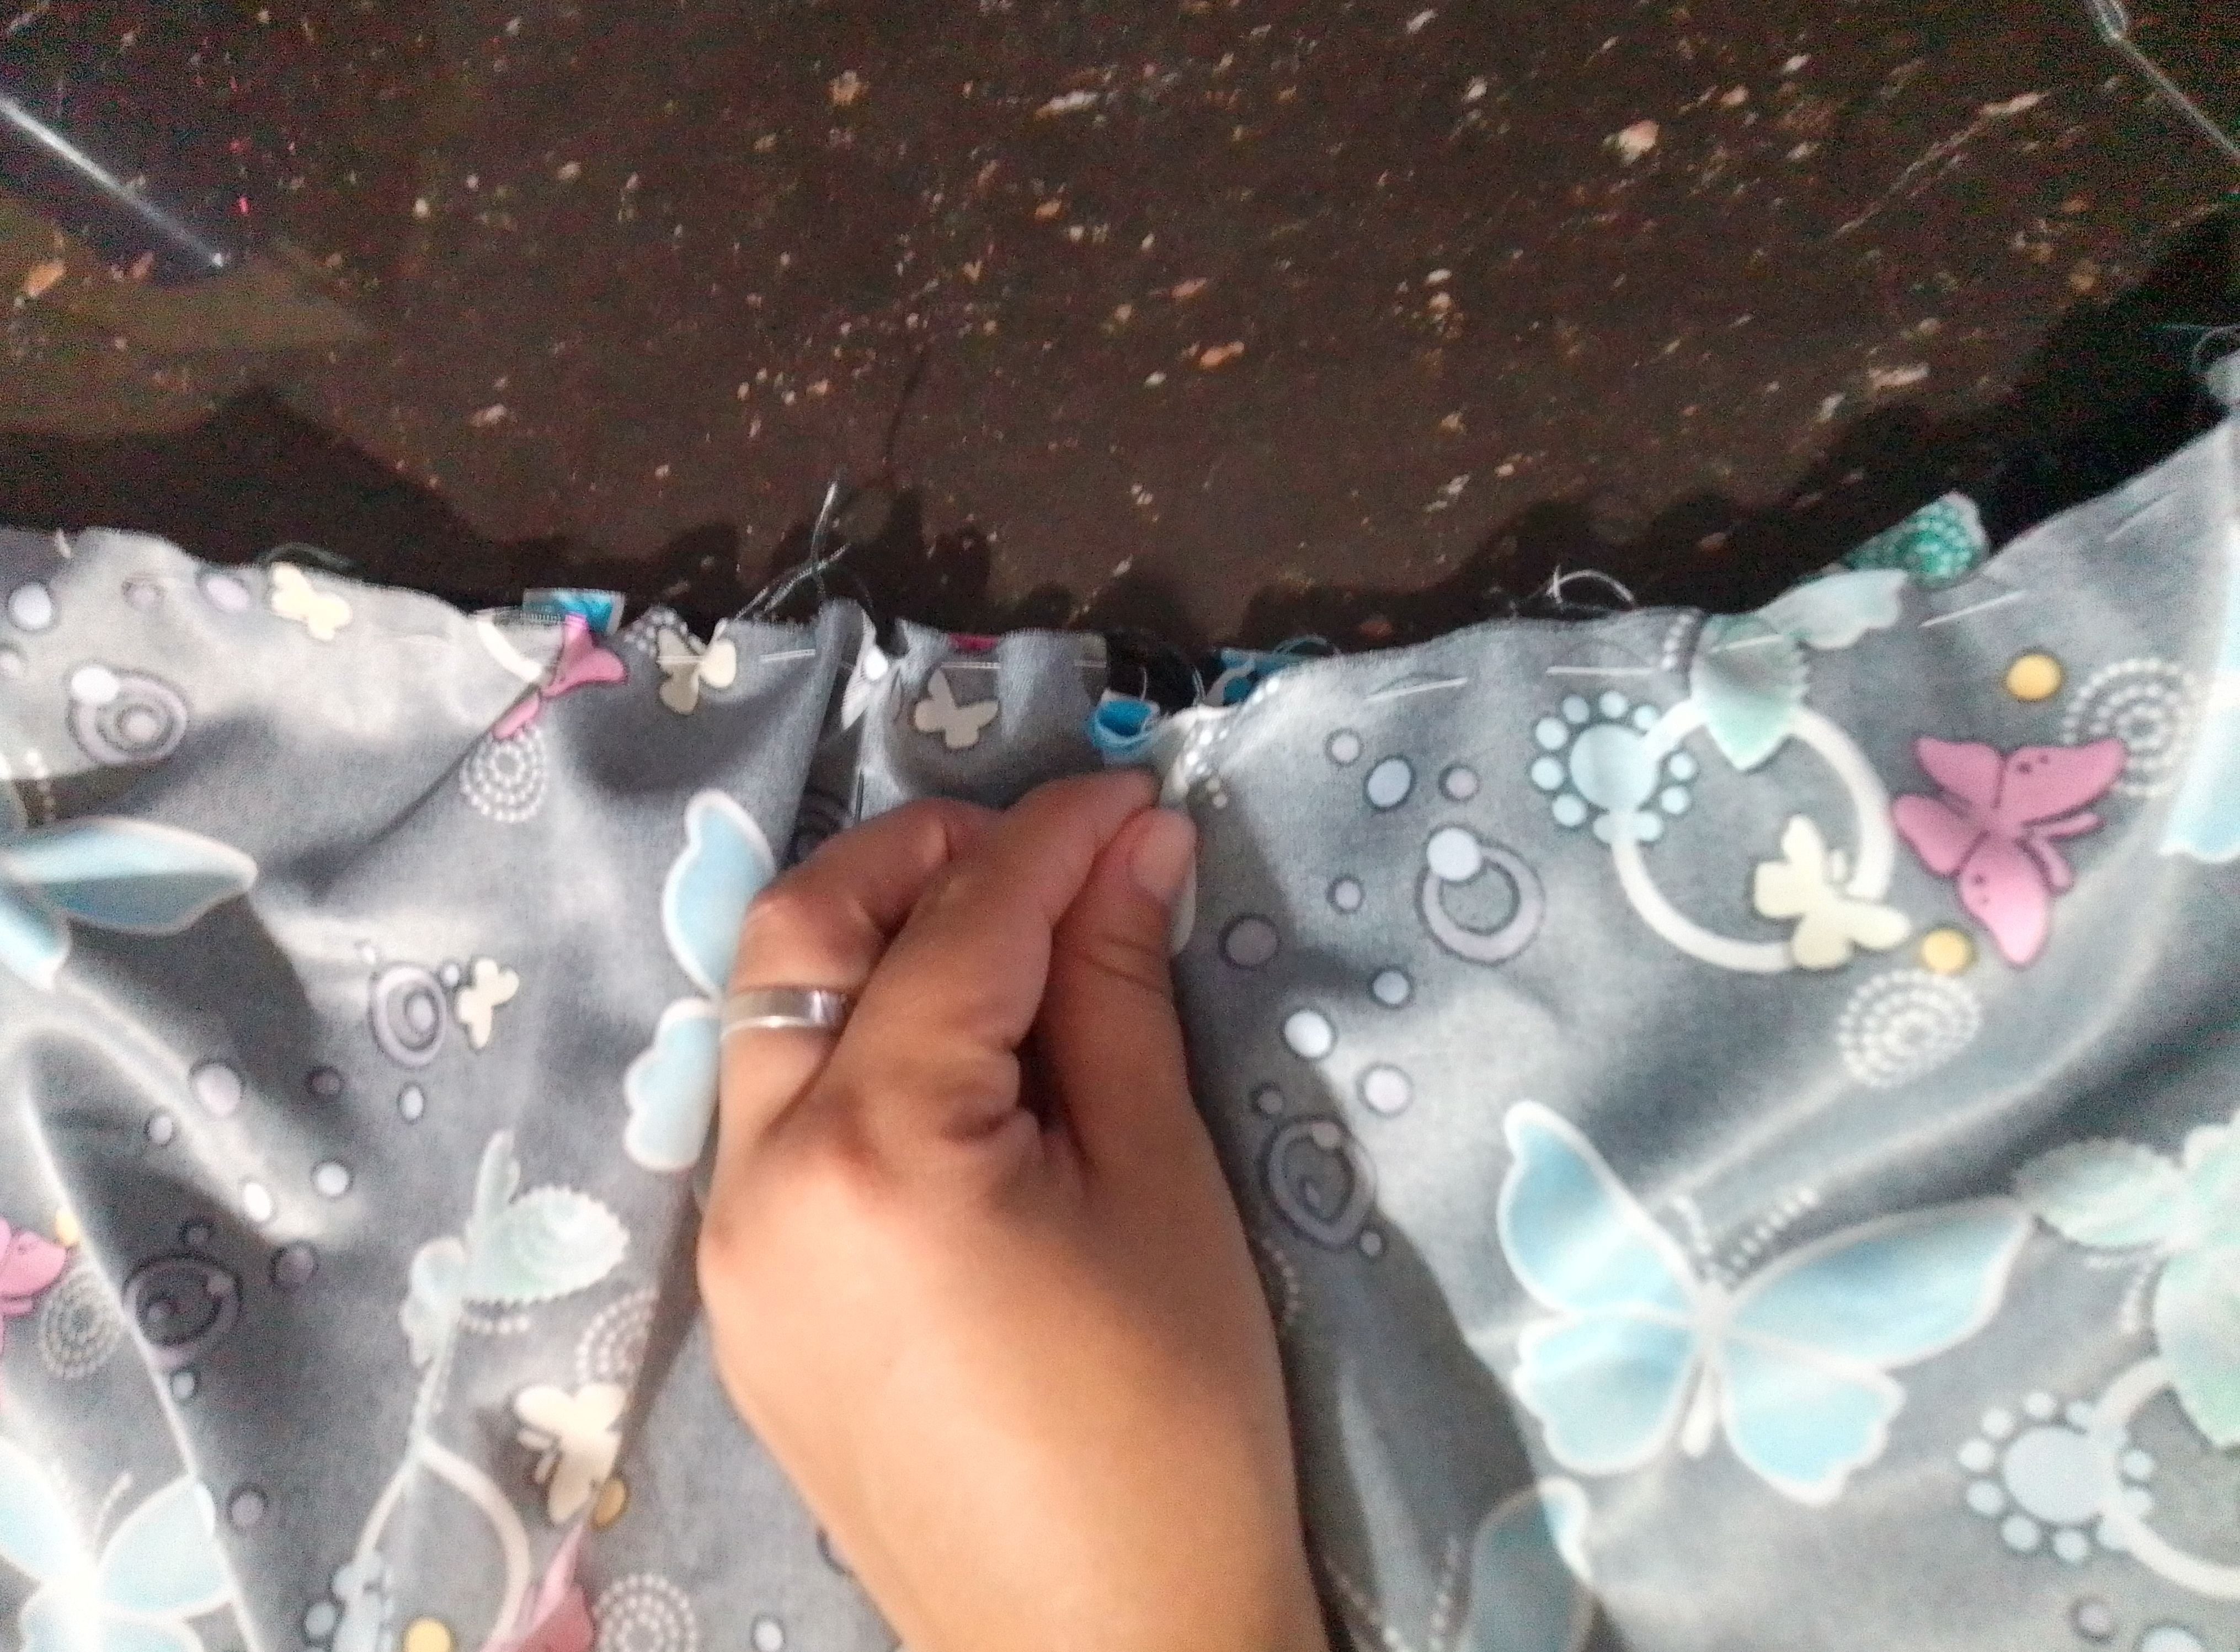
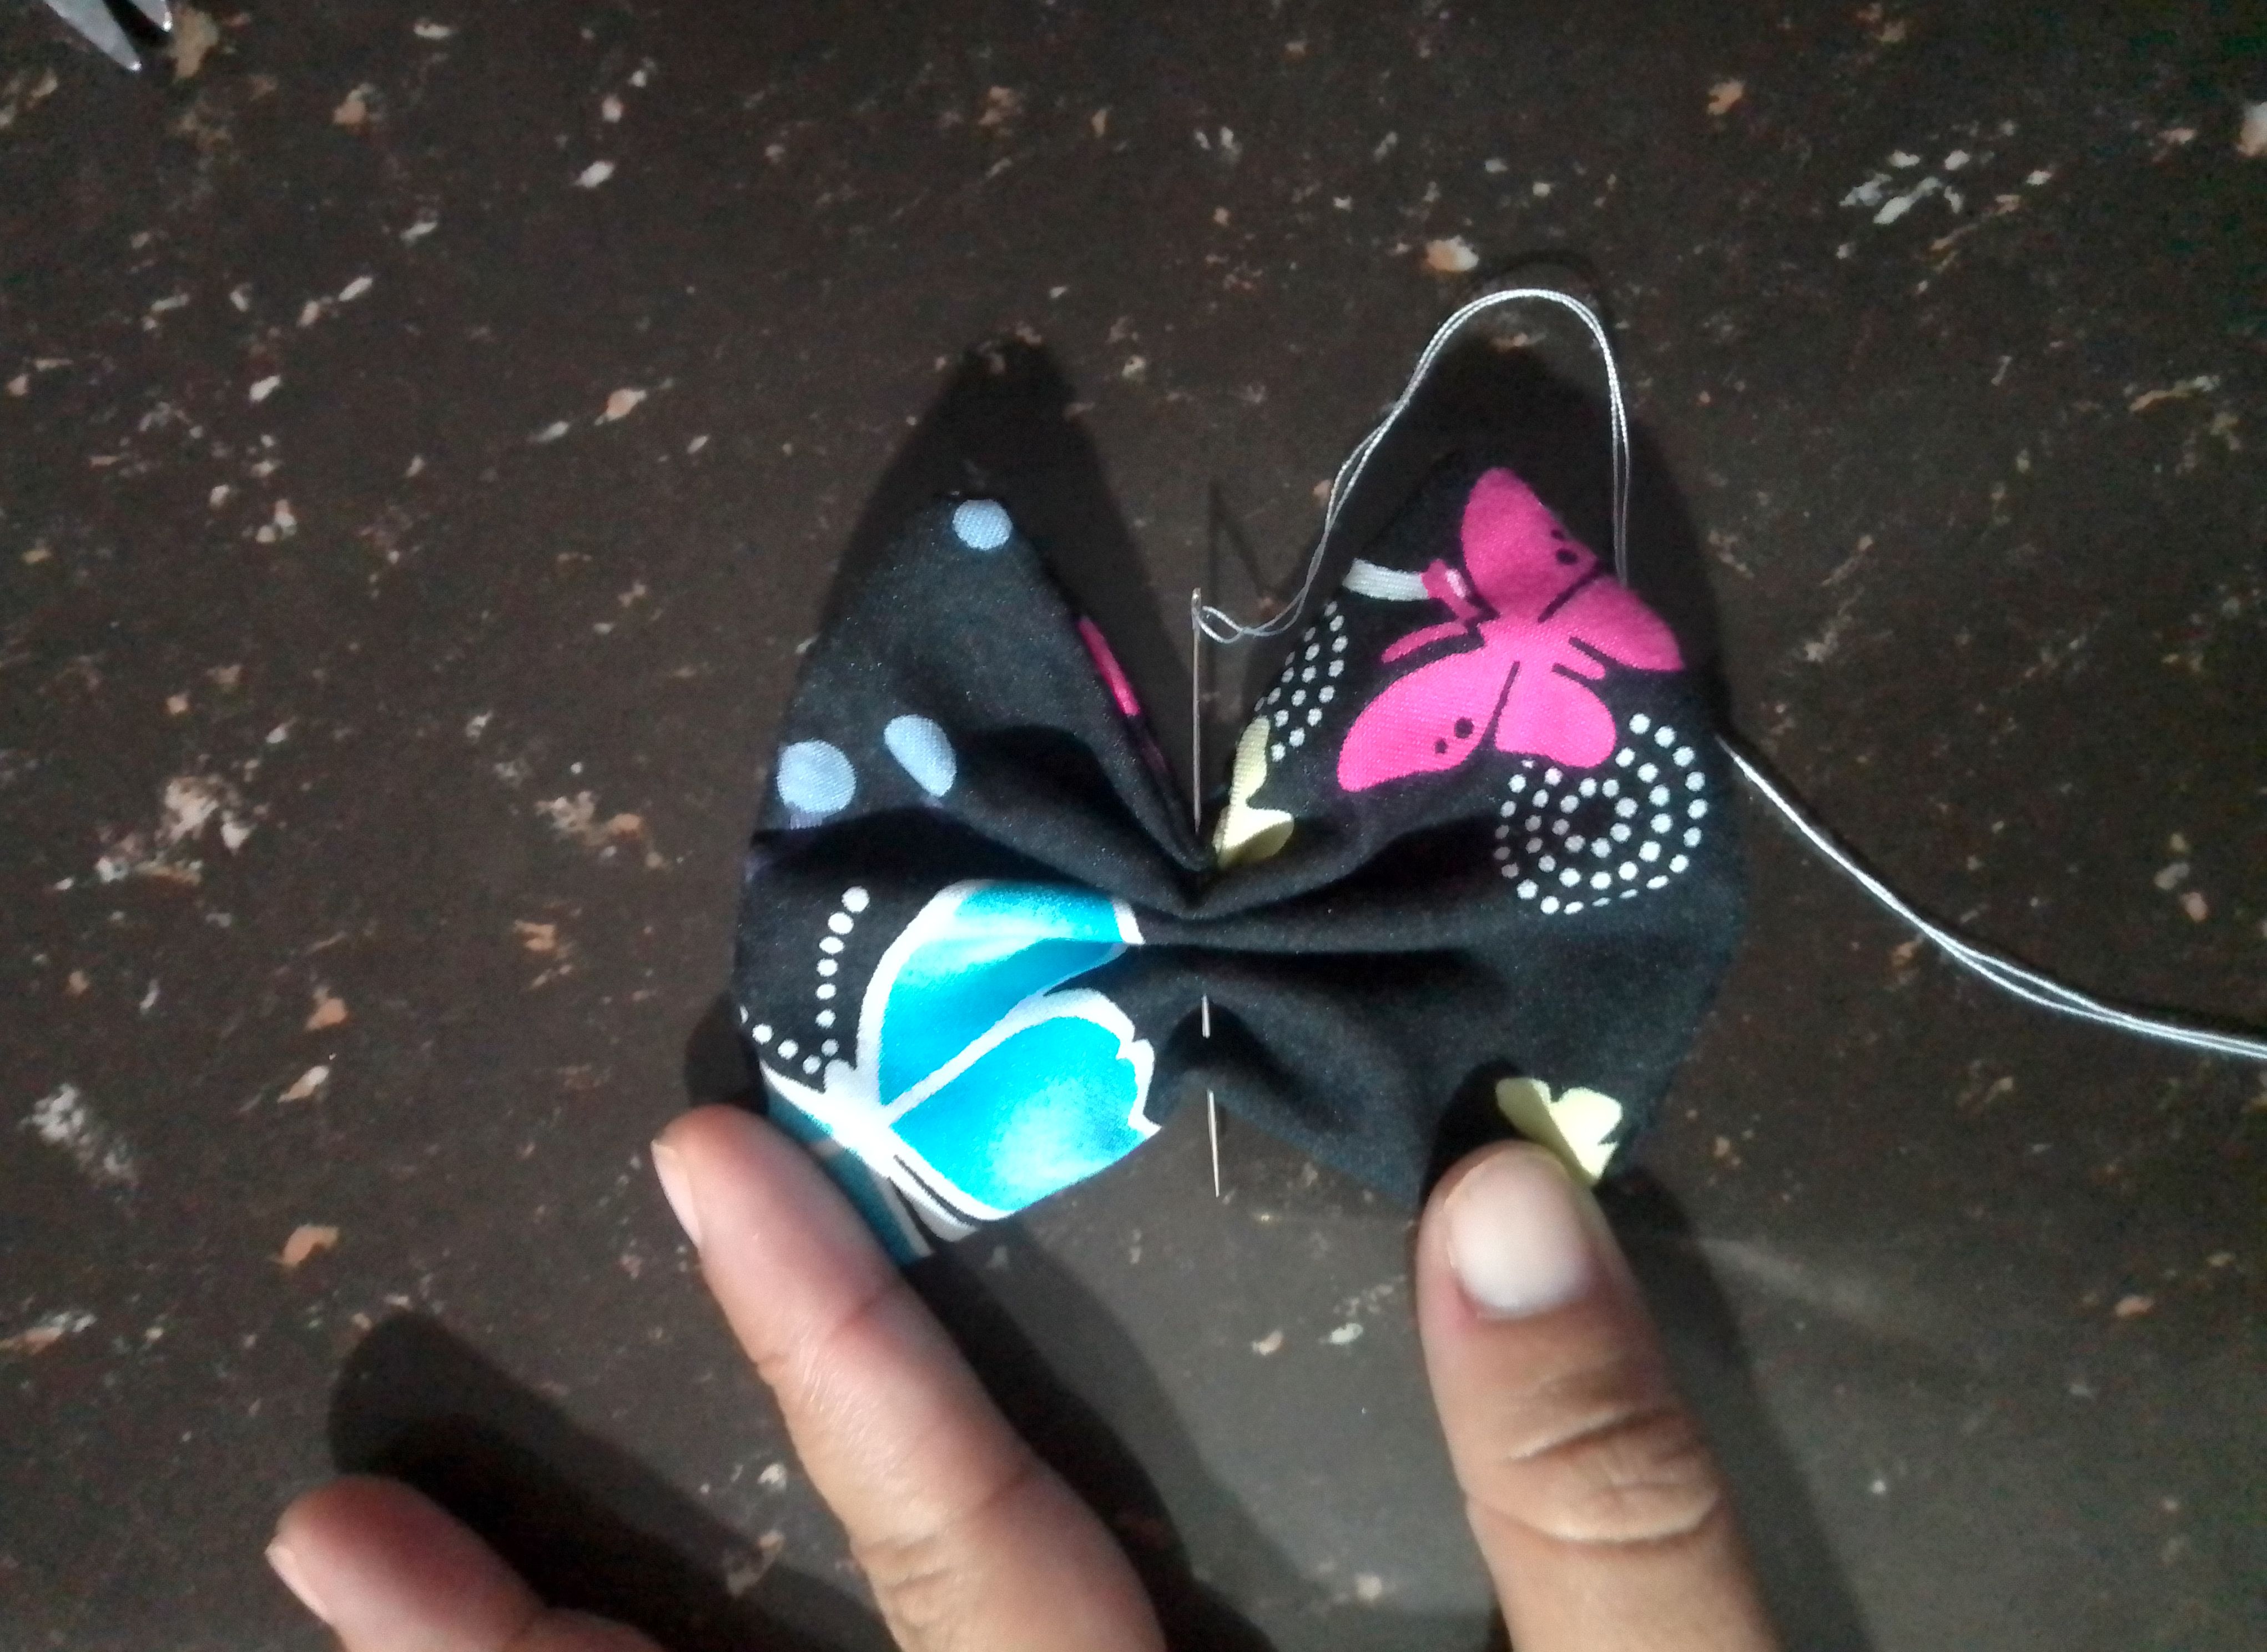
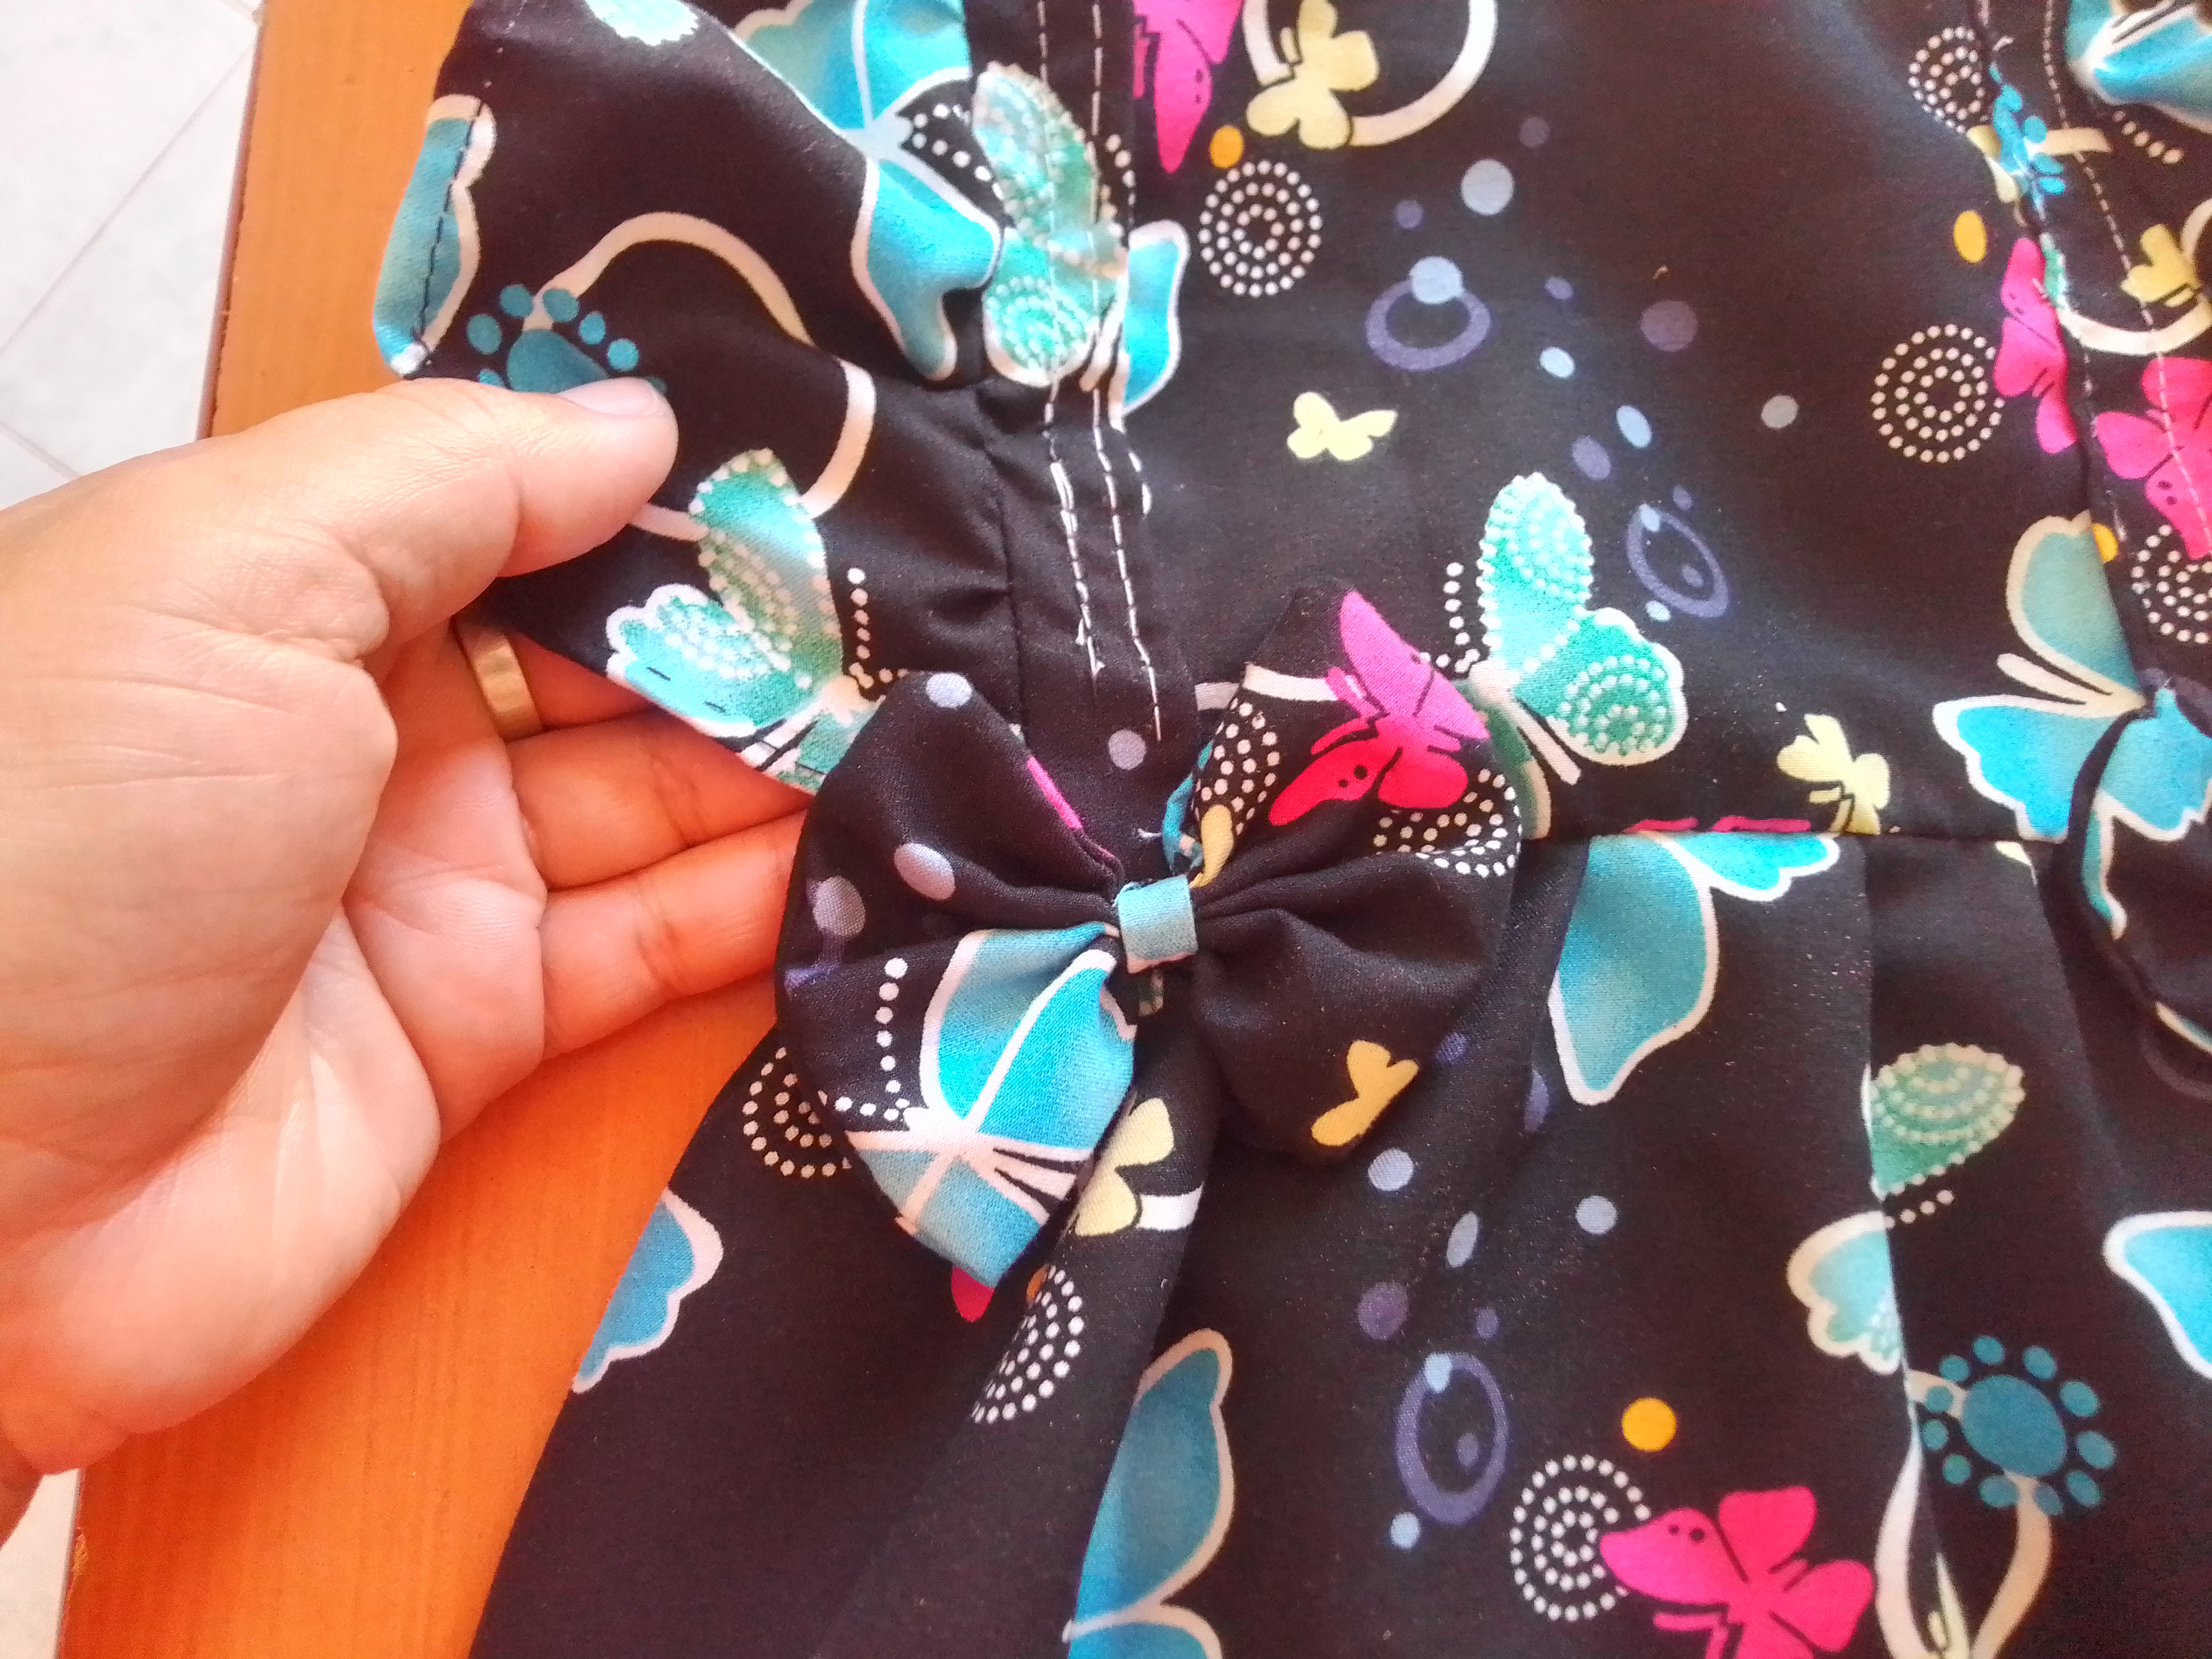
Paso 06
Hacemos una costura recta para unir los extremos de la falda y en el espacio que no arruchamos los vamos a doblar y a colocar una elástica. Luego pasamos a hacer los apliques, que serán dos lazos, por lo que cortamos dos cuadrados de tela y cosemos el reverso, luego giramos y arruchamos el centro. Cosemos cada uno al vestido en la parte delantera, al principio de cada volante.
Step 06
We make a straight seam to join the ends of the skirt and in the space that we did not wrinkle we are going to fold them and place an elastic. Then we move on to making the appliqués, which will be two bows, so we cut two squares of fabric and sew the reverse side together, then turn and crinkle the center. We sew each one to the dress in the front, at the beginning of each ruffle.
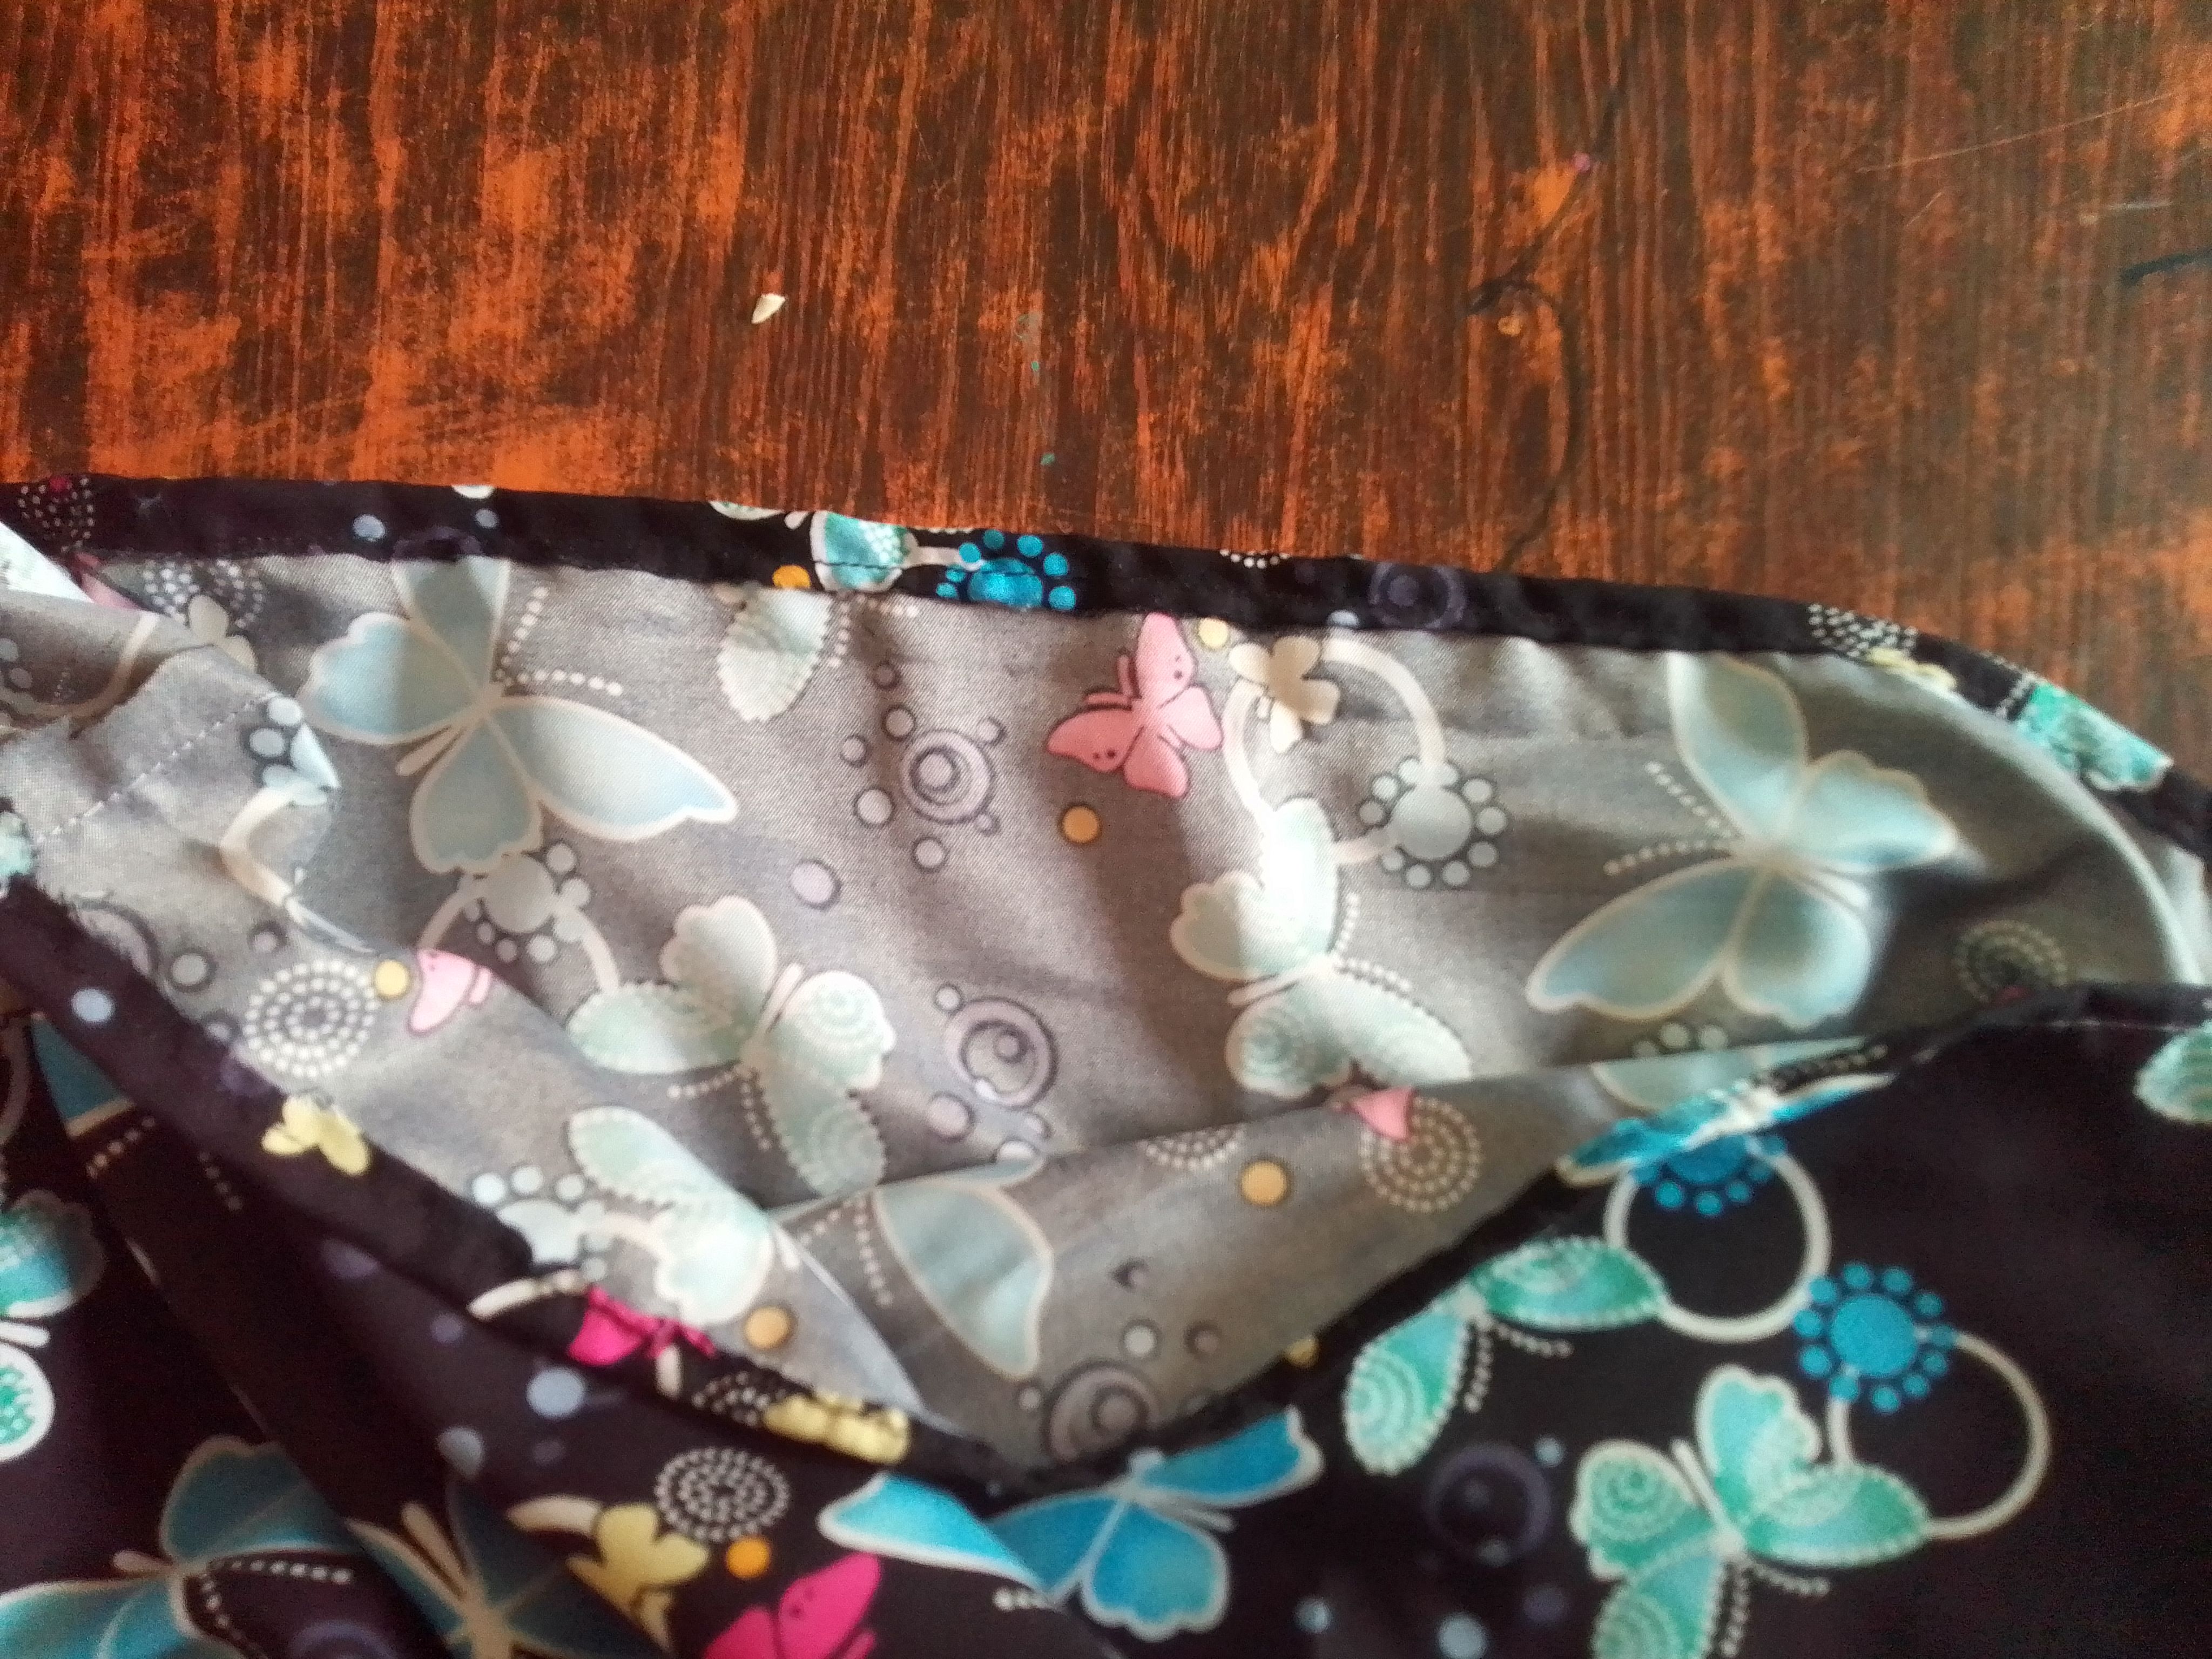
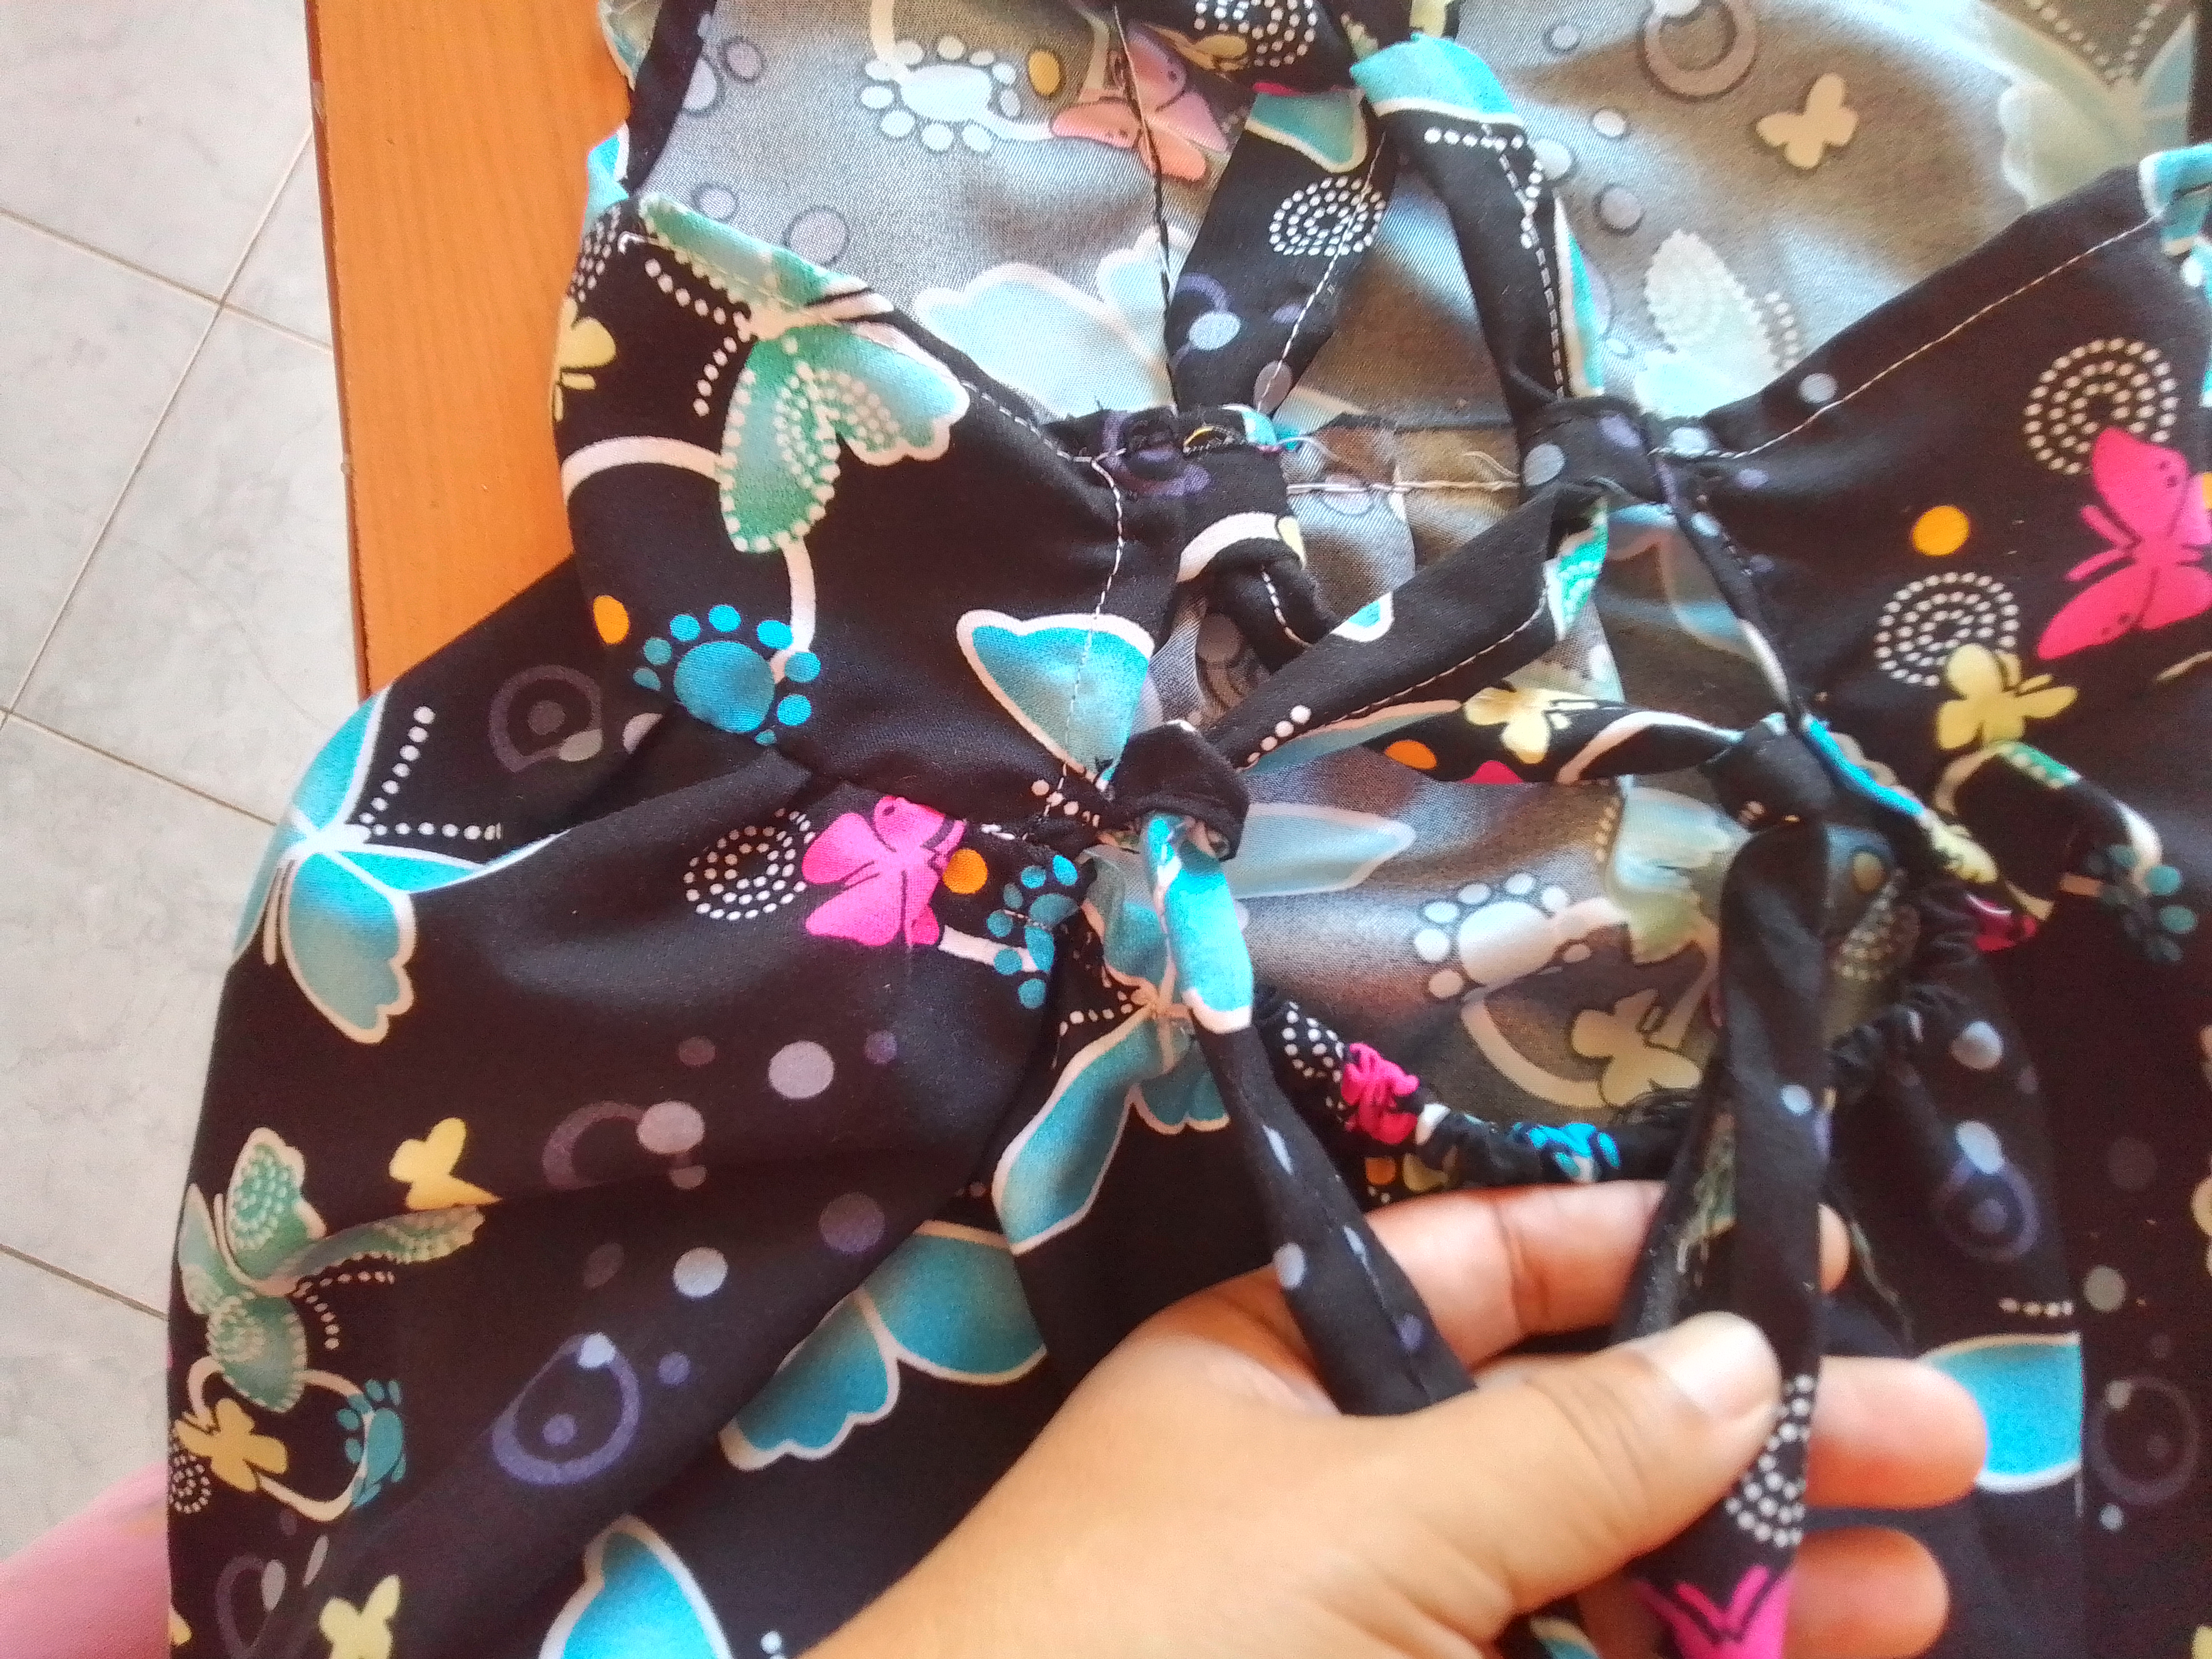
Paso 07
Finalmente hacemos el dobladillo de la parte inferior e introducimos las tiras cruzadas por las trabillas. Y listo!
Step 07
Finally we hem the bottom part and insert the crossed straps through the loops. And voila!
Resultado!
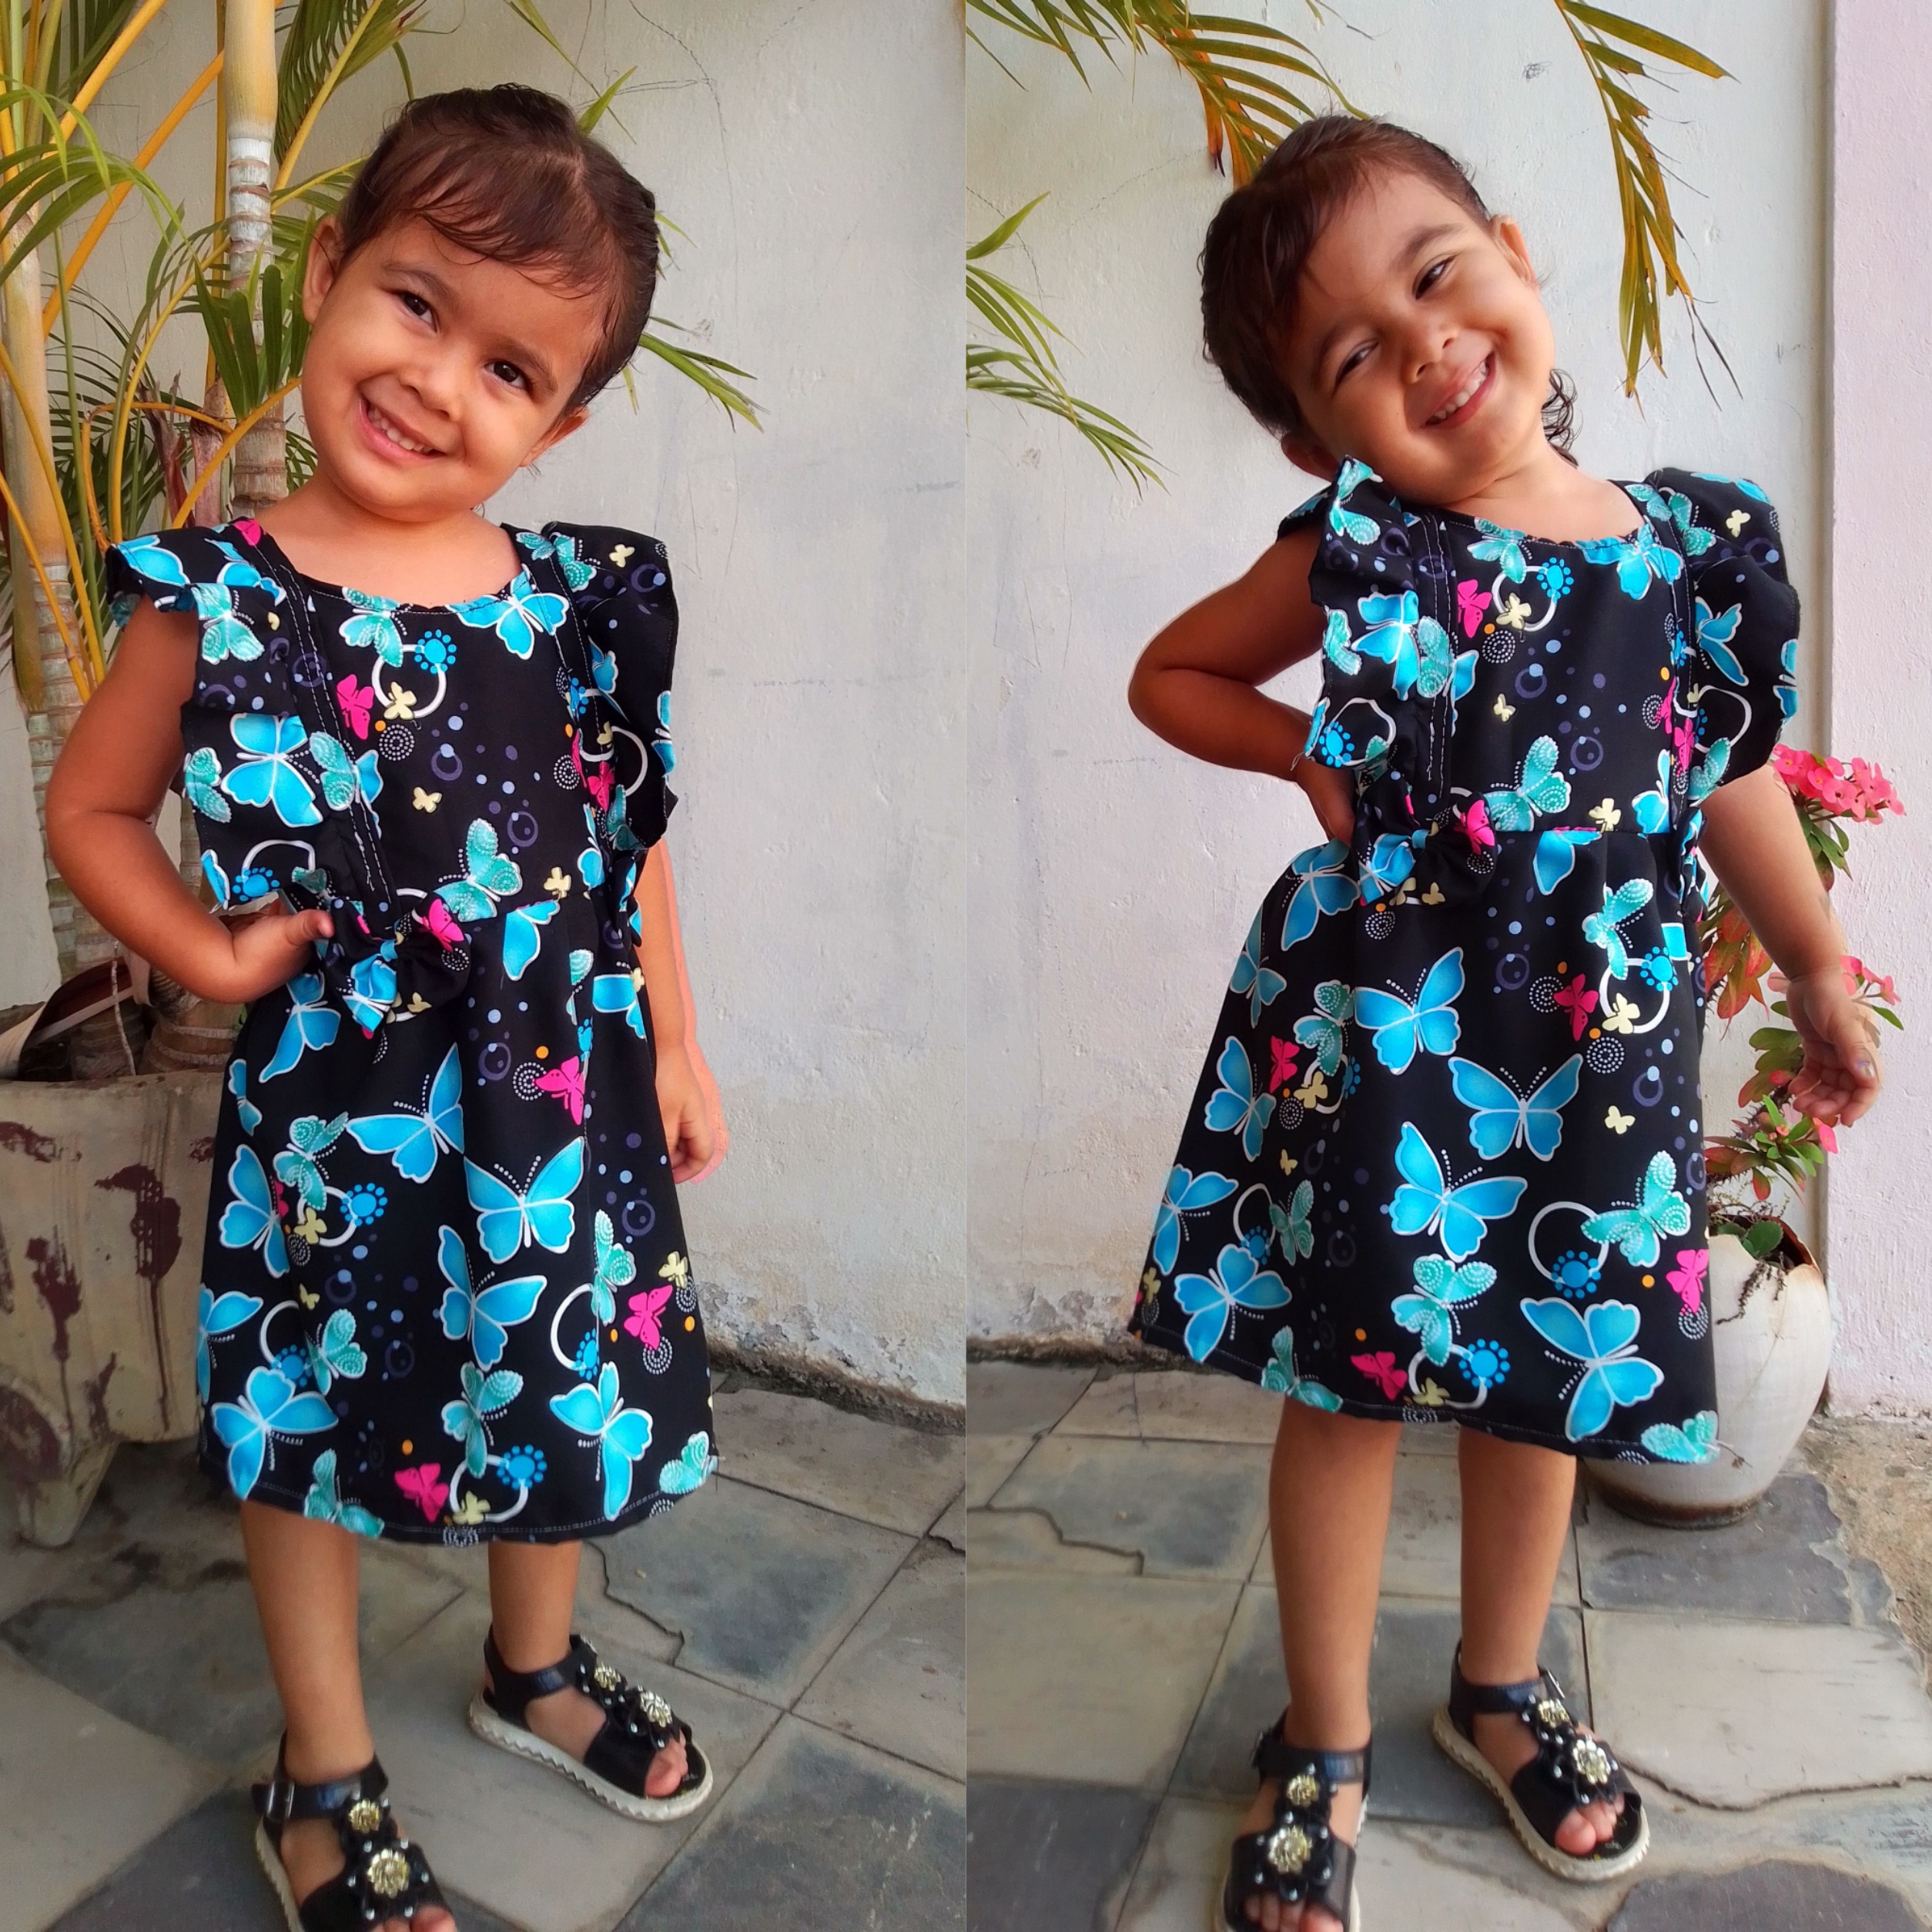
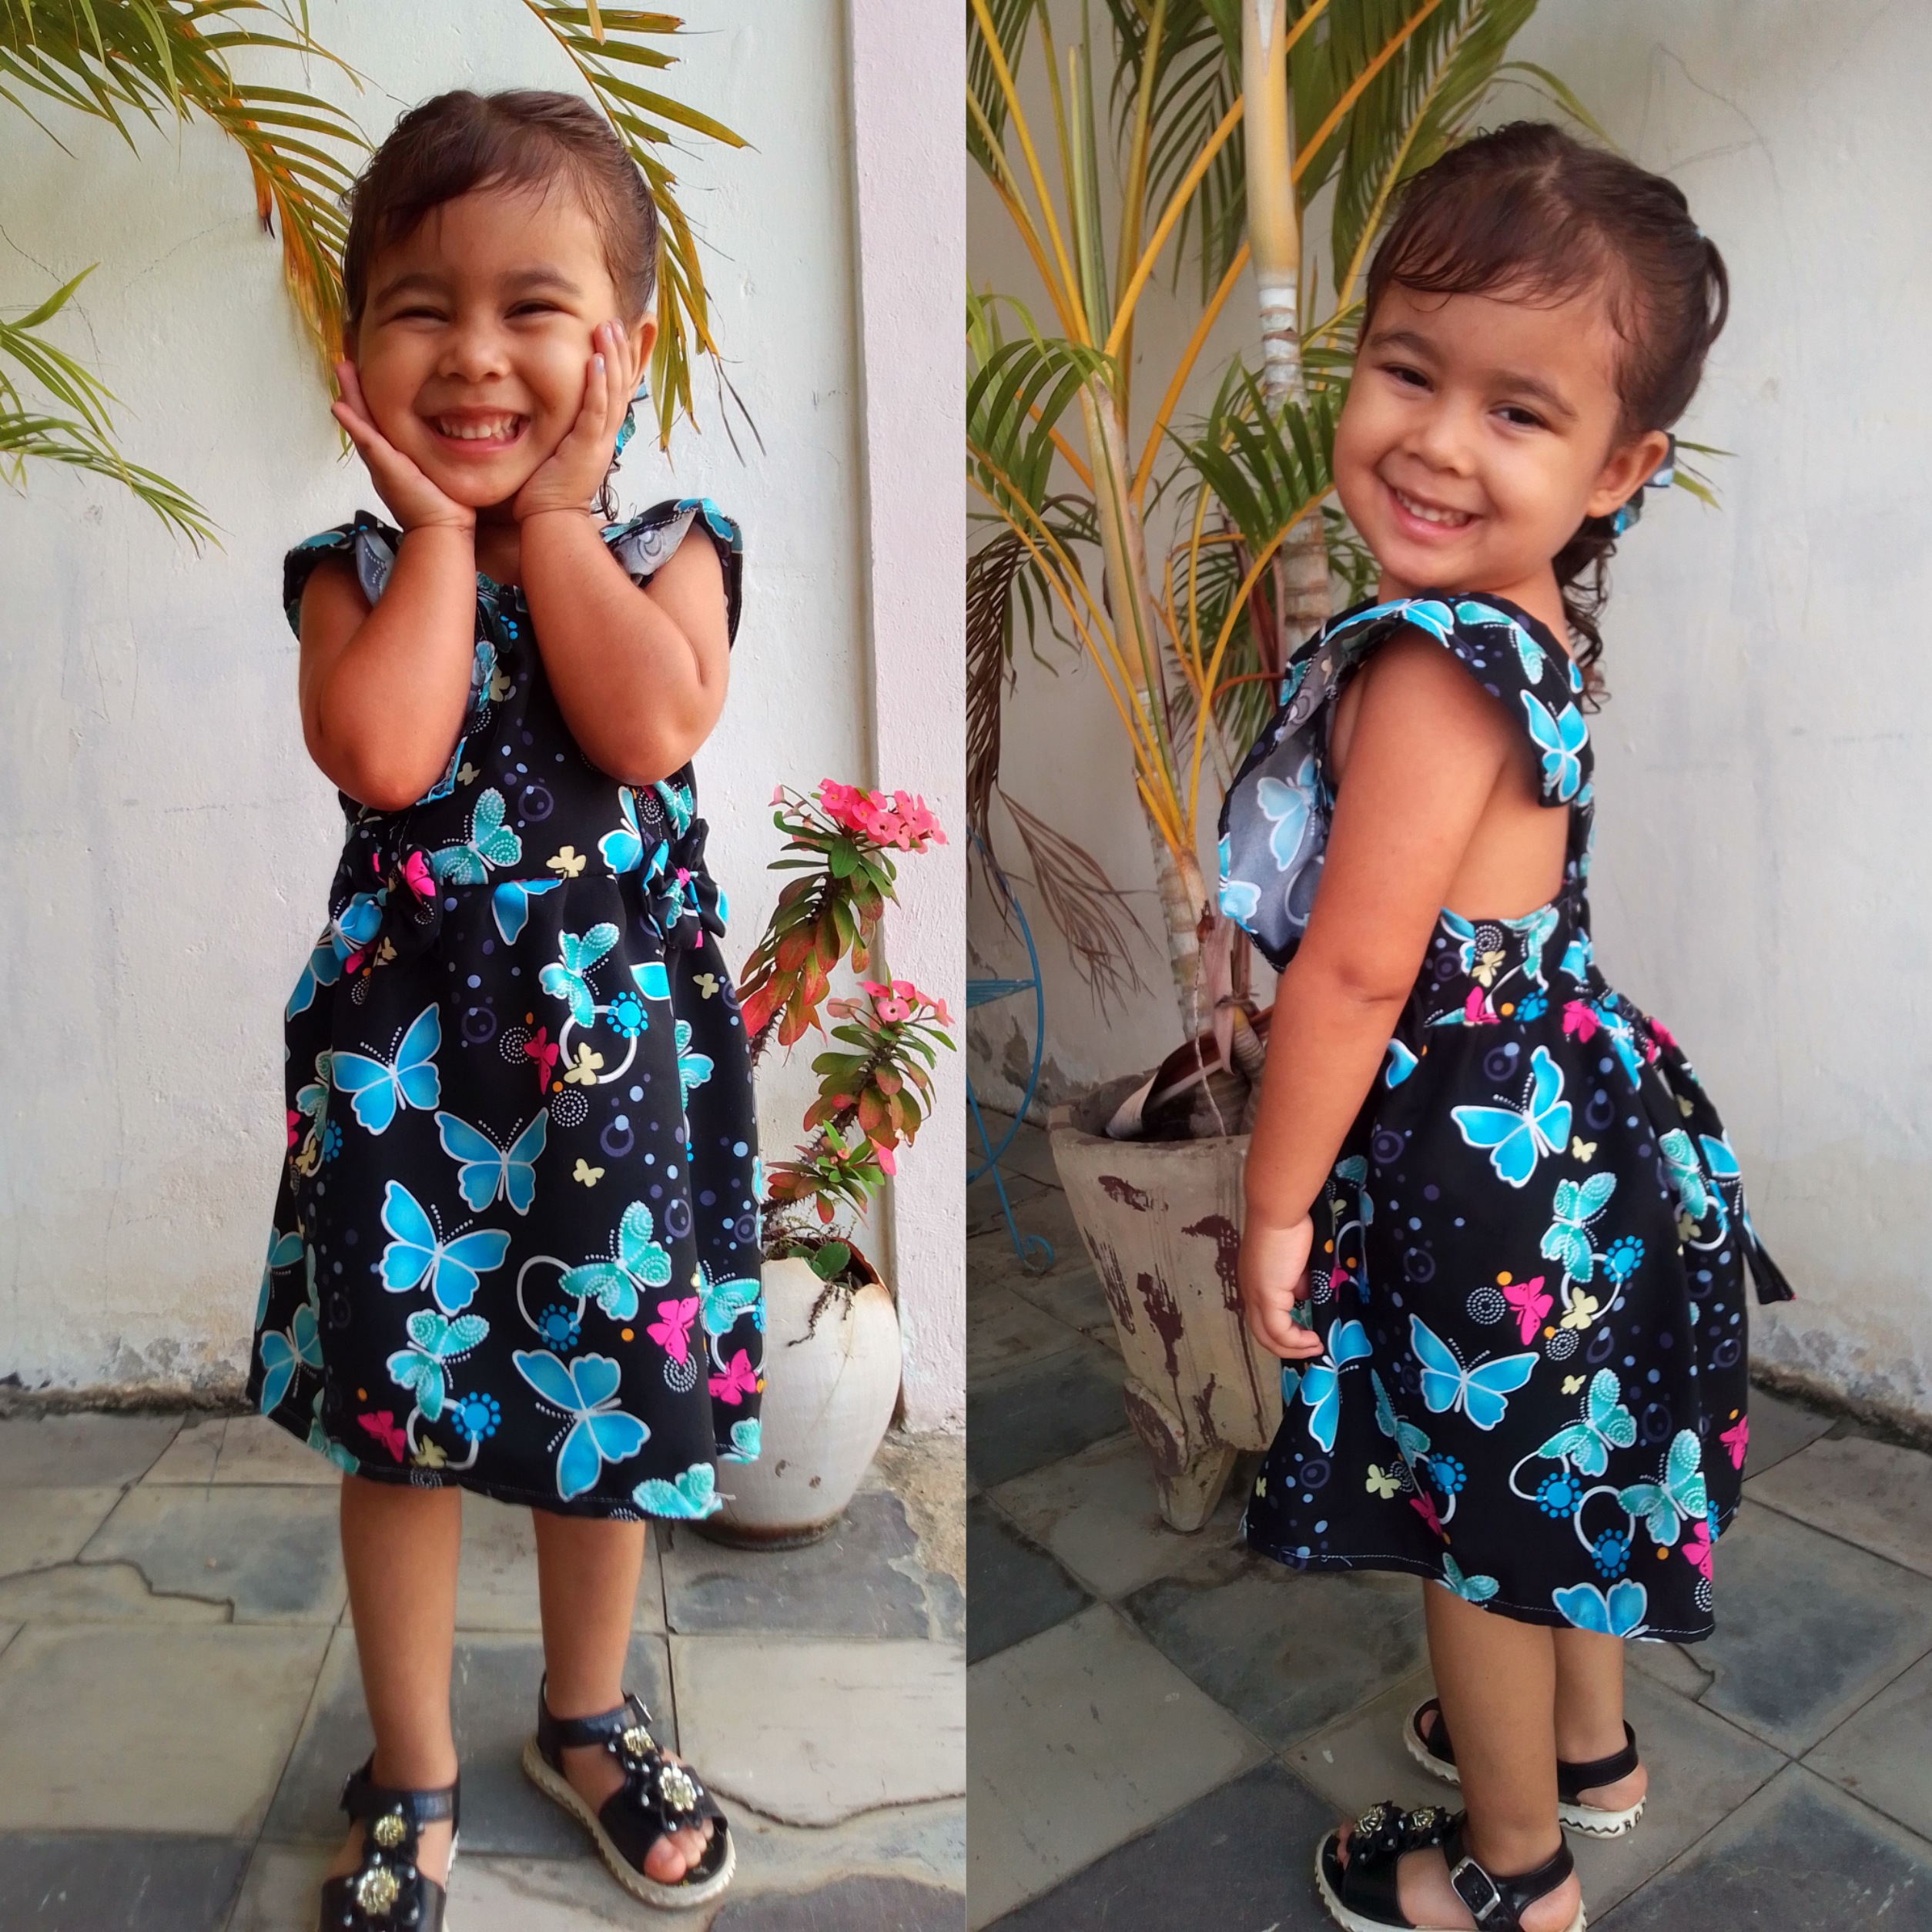
Esta preciosidad de mariposas y volantes, es perfecto para esta toda ocasión, ya que es muy cómodo y coqueto!!! Mi niña está muy feliz, y la verdad me encantó como le quedo. Espero te haya gustado mi trabajo el día de hoy!
This beauty of butterflies and ruffles is perfect for this occasion, since it is very comfortable and flirty!!! My daughter is very happy, and I really loved how it turned out. I hope you liked my work today!
☺ Gracias por tu linda visita a mi post! ☺
Espero te animes a hacer este vestido, te deseo muchas bendiciones, no olvides comentar y decirme que te aparece esta idea. Cuidense mucho, hasta pronto!
I hope you are encouraged to make this dress, I wish you many blessings, do not forget to comment and tell me that this idea appears to you. Take care of yourselves, see you soon!
0
0
0.000
Gracias por el apoyo!
Este vestido es una monada que le queda muy precioso a la beba, además que lo modela de una forma espectacular. El diseño de la parte posterior ha quedado precioso.
Me ha gustado mucho el peinado con adornos que hacen un complemento con el vestido.
Gracias por compartir tu contenido inspirador con nosotros.
Saludos
Hola mi bella!!! Si que lo es, amé este diseño desde que lo ví y supe que a mí niña se le quedaría muy bonito, sobre todo por como le gusta posar en las fotos jaja! Y pues siempre me gusta aprovechar los pedacitos de tela que me quedan para hacer los lazos y como dice usted complementar la prenda! Muchísimas gracias por su apoyo, y por su comentario! Me alegra mucho que sea de su agrado! Saludos y muchas bendiciones para usted!
Wow, esto es caliente para ese pequeño bebé. Me encanta el estilo de cruce de espalda.
Holaaa corazón, muchas gracias! Que bueno que le guste.. Saludos!
Dear @razielmorales, we need your help!
The Hivebuzz proposal already got important support from the community. However, it lost its funding a few days ago and only needs a few more HP to get funded again.
May we ask you to support it so our team can continue its work this year?
You can do it on Peakd, ecency, Hive.blog or using HiveSigner.
https://peakd.com/me/proposals/199
Your support would be really appreciated.
Thank you!
Thank you for sharing this amazing post on HIVE!
Your content got selected by our fellow curator @rezoanulvibes & you just received a little thank you via an upvote from our non-profit curation initiative!
You will be featured in one of our recurring curation compilations and on our pinterest boards! Both are aiming to offer you a stage to widen your audience within and outside of the DIY scene of hive.
Join the official DIYHub community on HIVE and show us more of your amazing work and feel free to connect with us and other DIYers via our discord server: https://discord.gg/mY5uCfQ !
If you want to support our goal to motivate other DIY/art/music/homesteading/... creators just delegate to us and earn 100% of your curation rewards!
Stay creative & hive on!