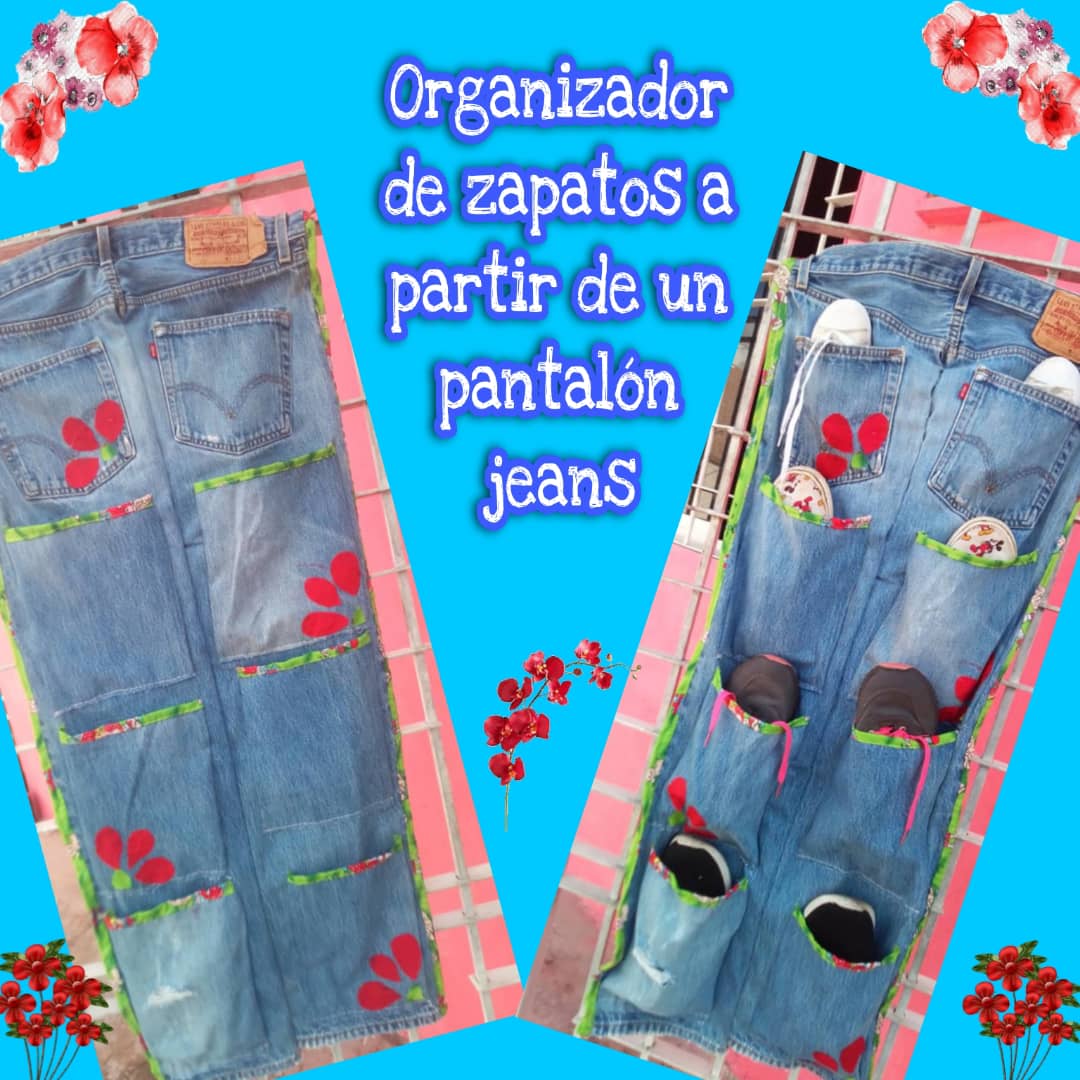
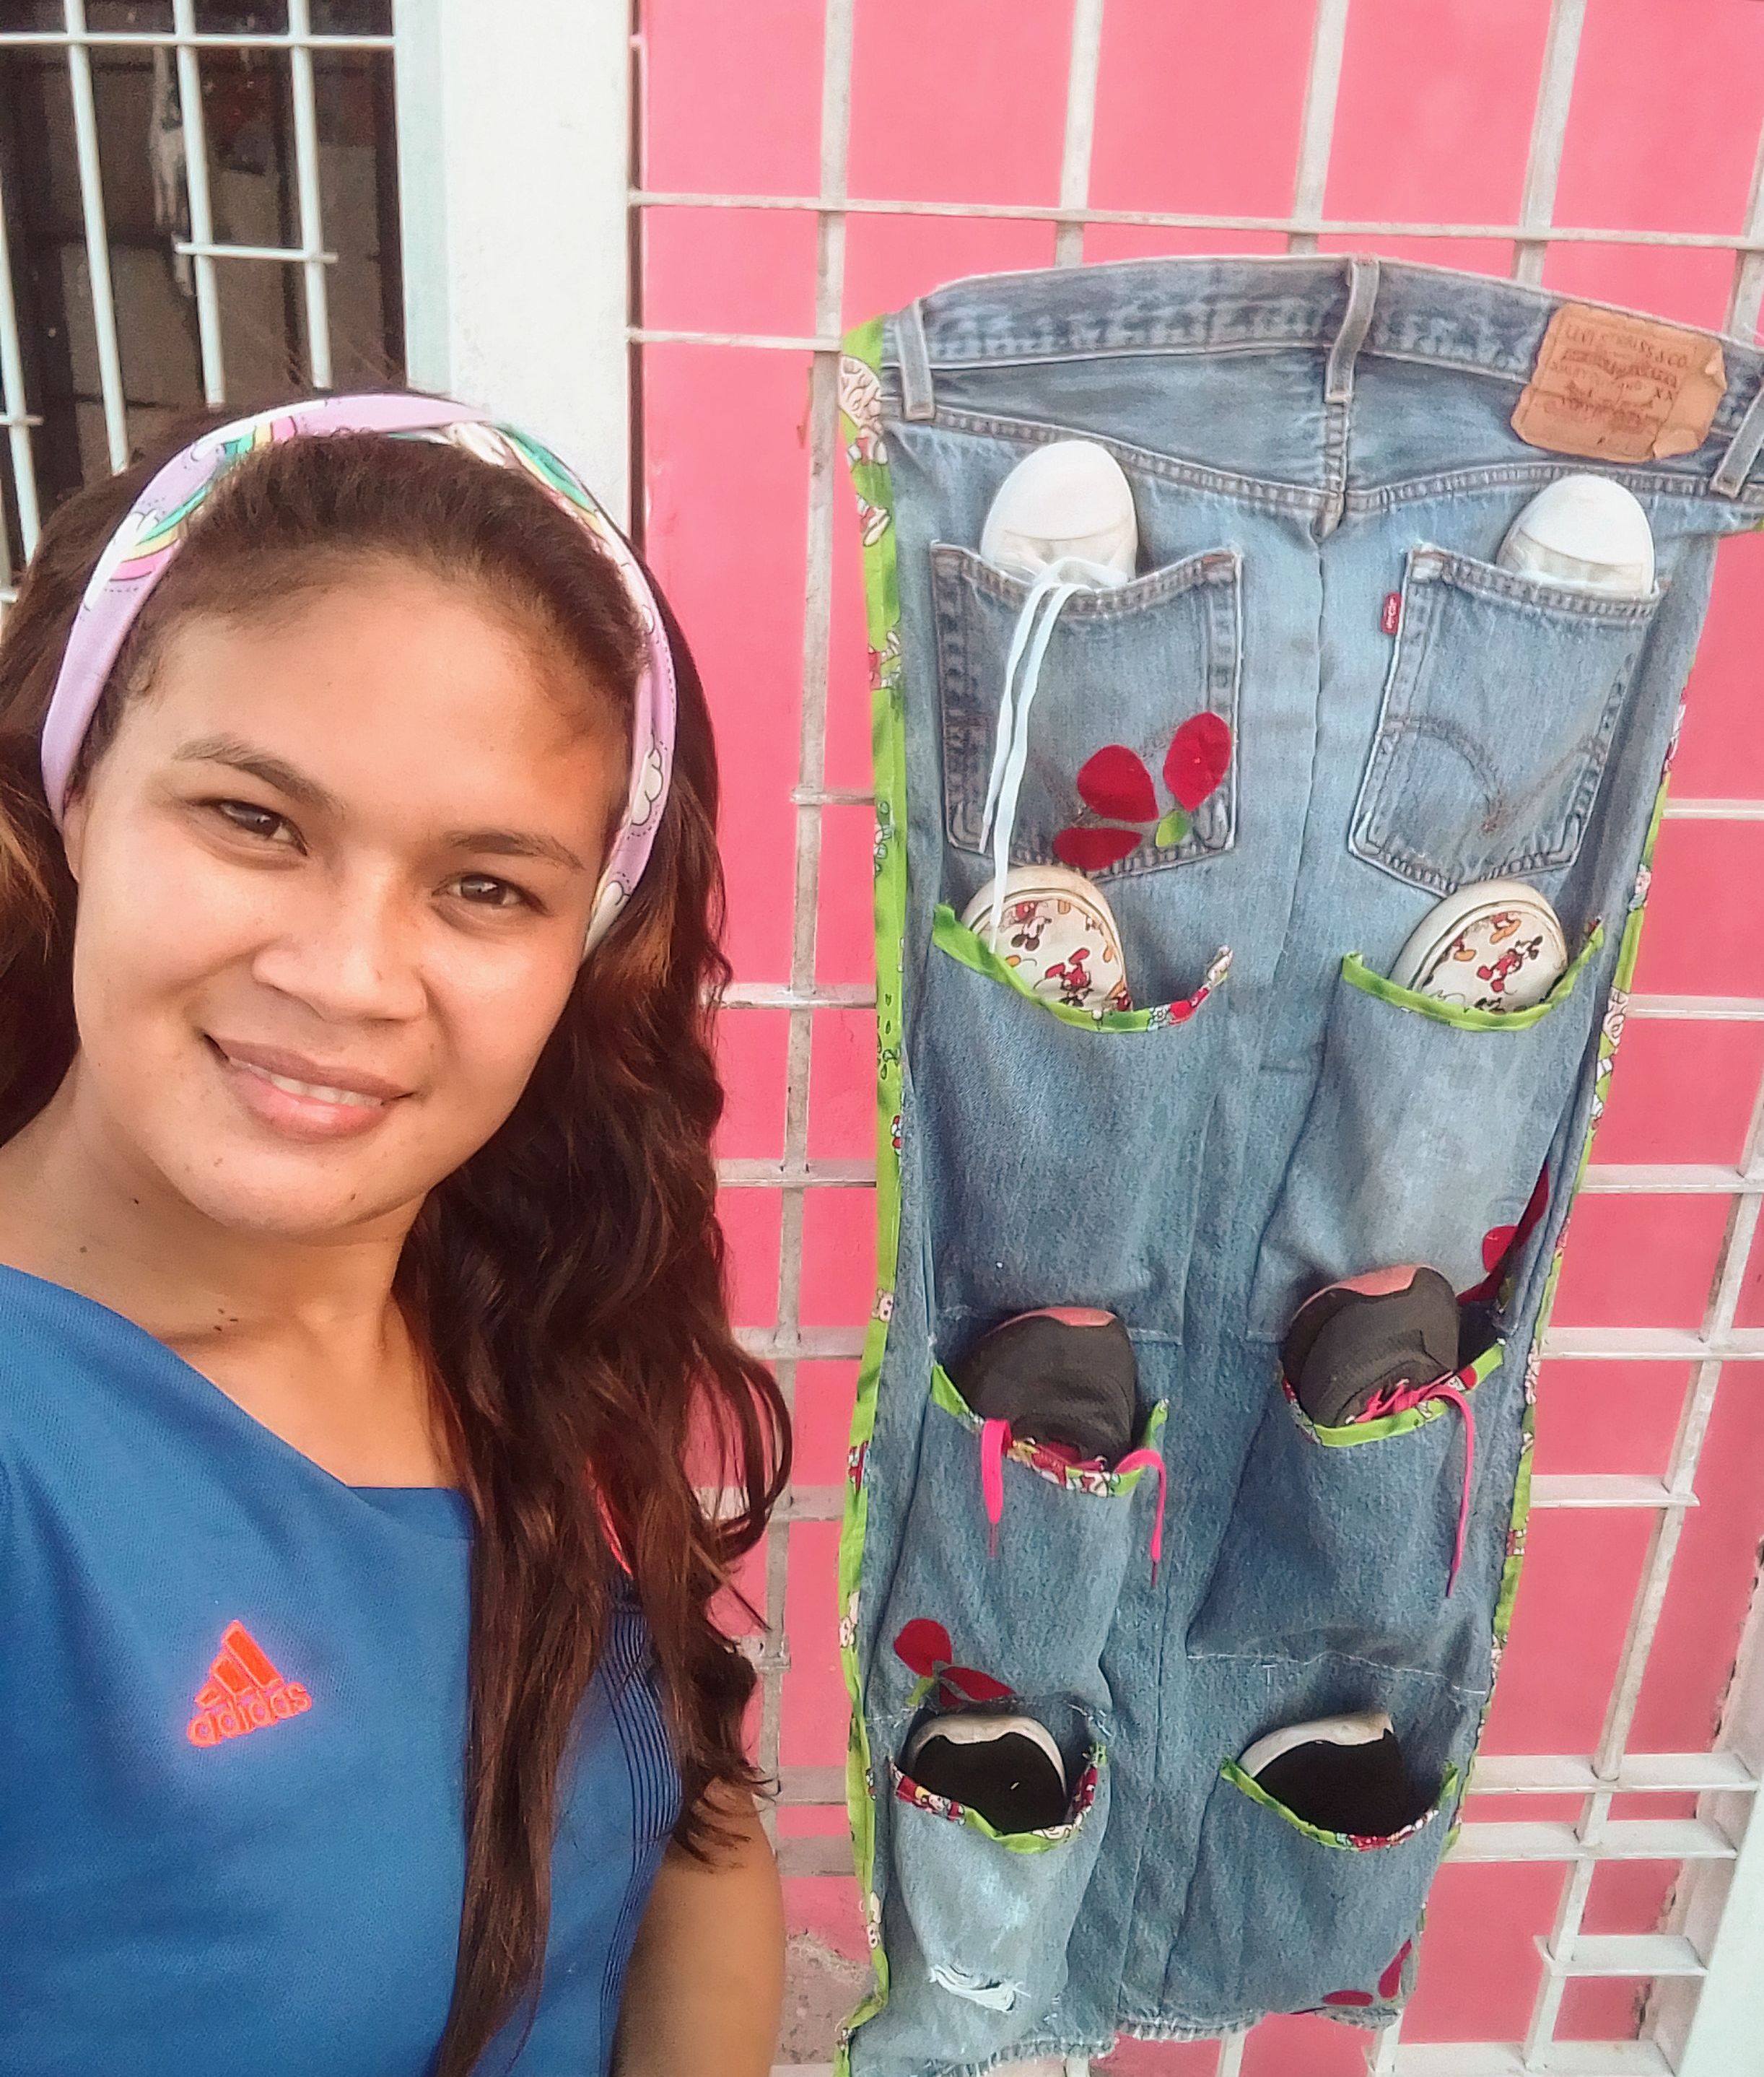
🌸Organizador de zapatos a partir de un pantalón jeans, hecho a mano//Shoe organizer, from a pair of jeans, handmade🌸
Bonita tarde les deseo este lunes de costura a todos los amantes de este arte, de todo corazón espero se encuentren muy bien, contentos y bajo la gracia y bendicion de Dios!!! Quiero darte la bienvenida a una nuevo tutorial de costura hecho a mano.
I wish this sewing Monday a beautiful afternoon to all the lovers of this art, with all my heart I hope you are very well, happy and under the grace and blessing of God!!! I want to welcome you to a new handmade sewing tutorial.
No se si a ustedes les pasa, que cuando empezamos a realizar una costura y nos retrasamos en terminarla por cualquier motivo, tenemos eso en mente todo el tiempo, nos levantamos cada mañana con un ¡Hoy si lo termino!, Y resulta que no lo haces, entonces a cada momento estamos pensando en eso y te sientes de cierta manera comprometida con este trabajo que iniciaste y no terminaste, pues exactamente, esto fue lo que me pasó con este proyecto.
I don't know if it happens to you, that when we start sewing and we are late in finishing it for whatever reason, we have that in mind all the time, we wake up every morning with a Today! if I finish it!... And it turns out, that you don't; so we are thinking about that every moment and you feel somehow committed to this work that you started and did not finish, well, this is exactly what happened to me with this project.
Al principio no estaba segura si llevar a cabo está tarea, ya que con la tela de este pantalón quería también restaurar unas sillas que están dañadas, pero me di cuenta que la tela no me iba a alcanzar o eso pensaba. Lo cierto es que decidí realizar una zapatera, puesto que de verdad me era necesario, pienso que estos organizadores son indispensables en el cuarto, debido a que siempre están los zapatos aquí y allá y al momento de salir te ahorras mucho tiempo en estar buscándolos, sobre todo los zapatos de niños que le encanta jugar con ellos y dejarlos en todos lados.
At first I wasn't sure if I should carry out this task, since with the fabric of this pants I also wanted to restore some chairs that are damaged, but I realized that the fabric would not reach me , or so I thought. The truth is that I decided to make a shoe rack, since it was really necessary for me, I think that these organizers are essential in the room, because the shoes are always here and there and when you go out you save a lot of time looking for them, especially children's shoes that he loves to play with and leave them everywhere.
Sinceramente este ha sido uno de los proyectos más difíciles que me he propuesto hacer, pienso que la tela de jeans es súper complicada de coser a mano, gruesa y dura, y puede causar cierto estres hacer las costuras, también creo que por eso tarde mucho en hacerlo, a pesar de que me gusta terminar lo que empiezo a coser si es posible el mismo día, este no fue el caso. Me di muchas pausas, pero al fin puder terminarla. Acompáñame hasta el final y te enseño cómo hice este bonito organizador de zapatos a partir de un pantalón jean.
Honestly this has been one of the most difficult projects I've ever set out to do, I think that jean fabric is super complicated to sew by hand, thick and hard, and can cause some stress to do the seams, I also think that's why it takes a long time to do it, even though I like to finish what I start to sew if possible the same day, this was not the case. I took many breaks, but finally I was able to finish it. Come with me to the end and I'll show you how I made this pretty shoe organizer out of jean pants.
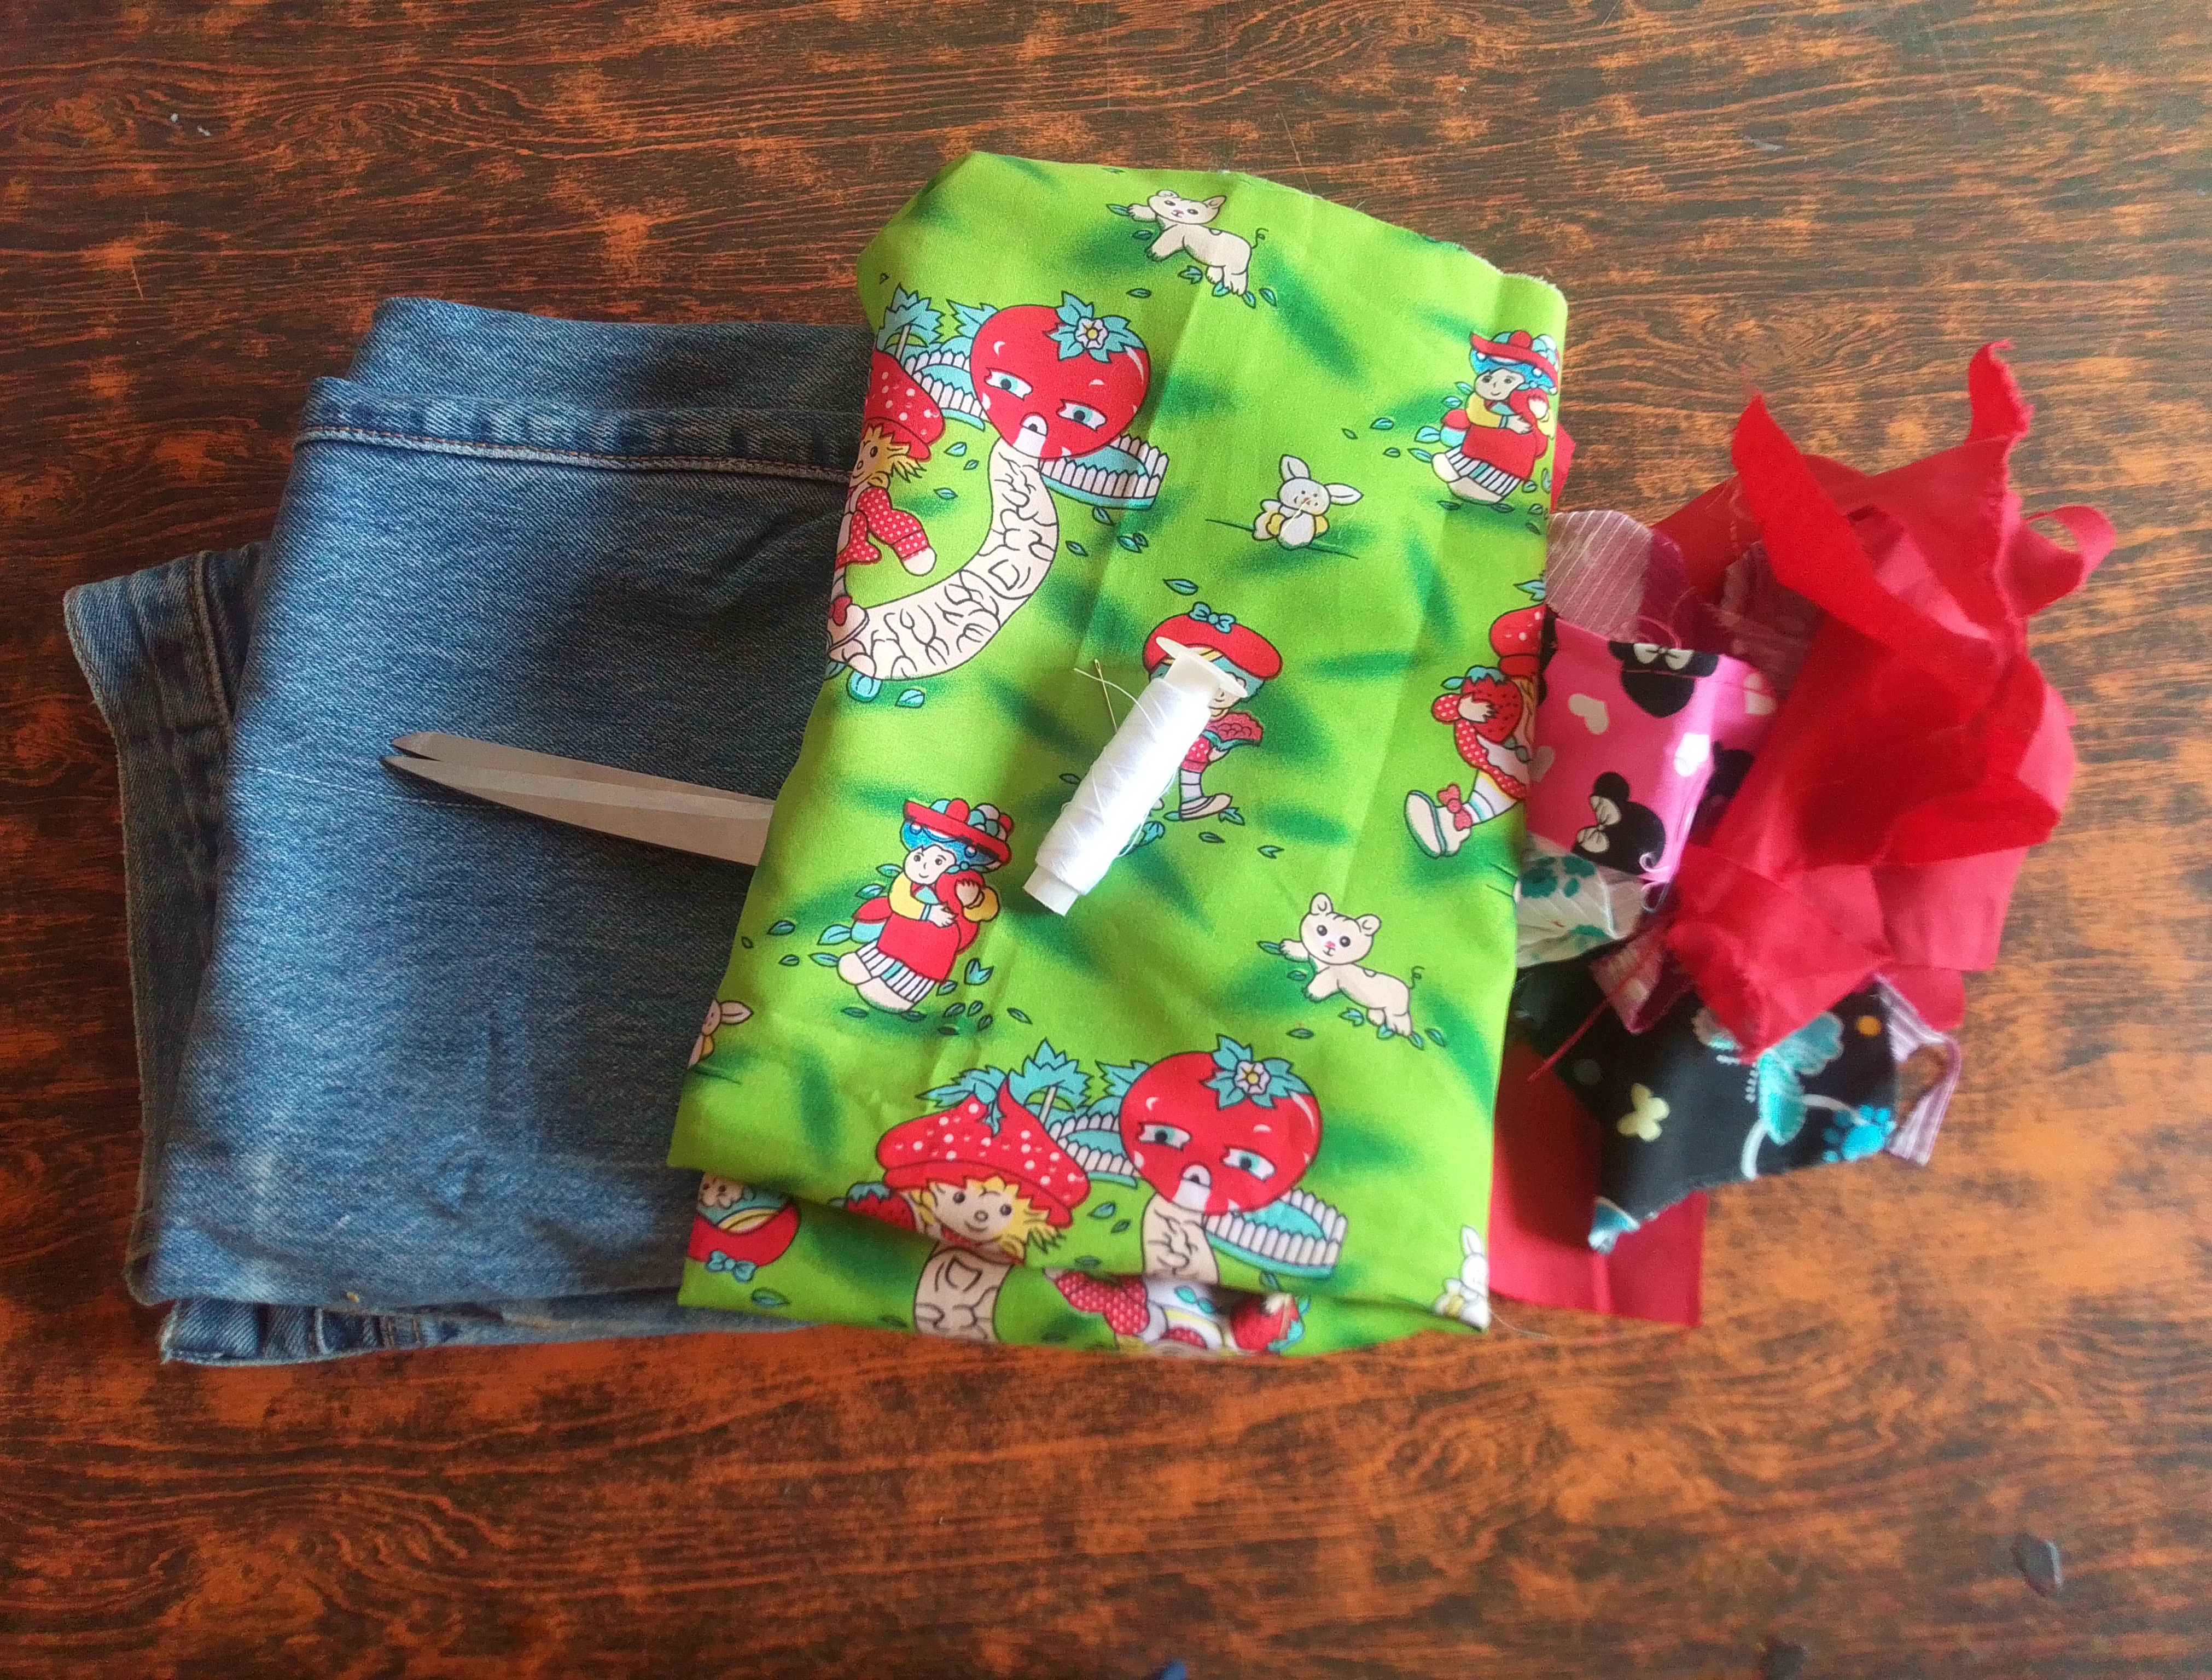
Materiales que necesitas:
- Pantalón jeans.
- Tela estampada.
- Hilo y aguja.
- Tijeras.
- Tela roja ( opcional)
Materials you need:
- Jeans pants.
- Printed cloth.
- Thread and needle.
- Scissors.
- Red cloth (optional)
(PROCEDIMIENTO)
Paso 01
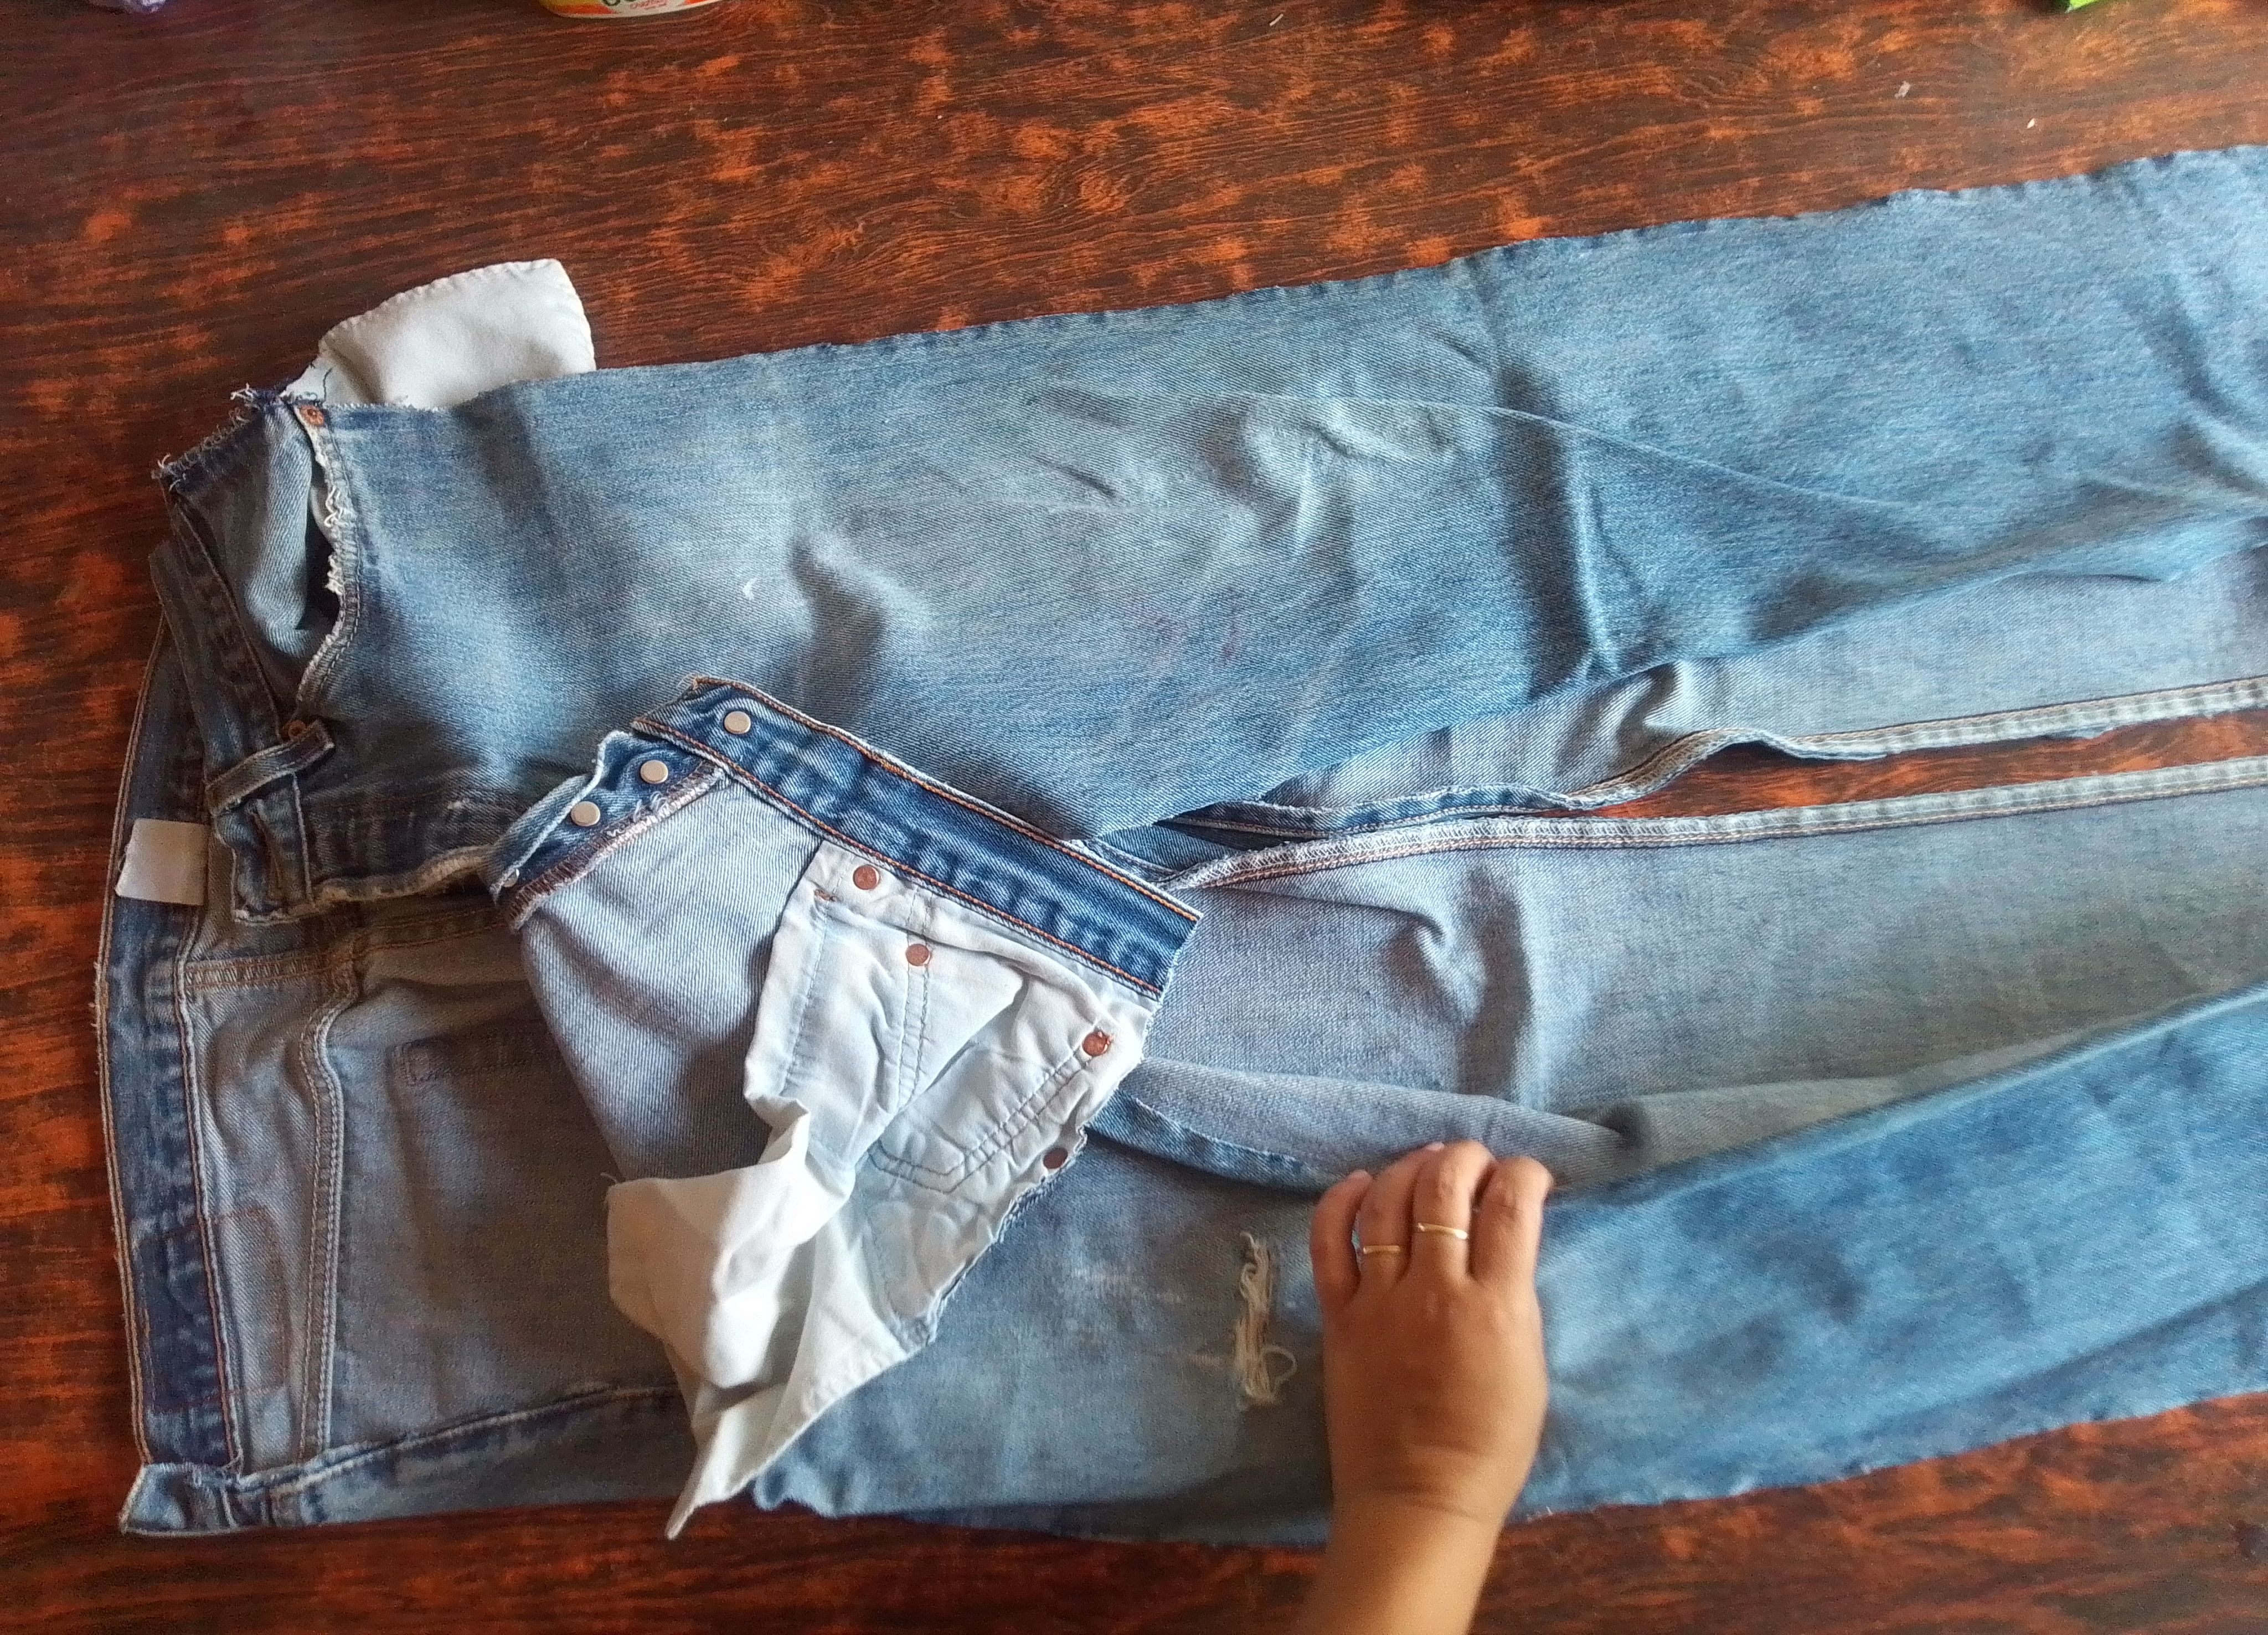
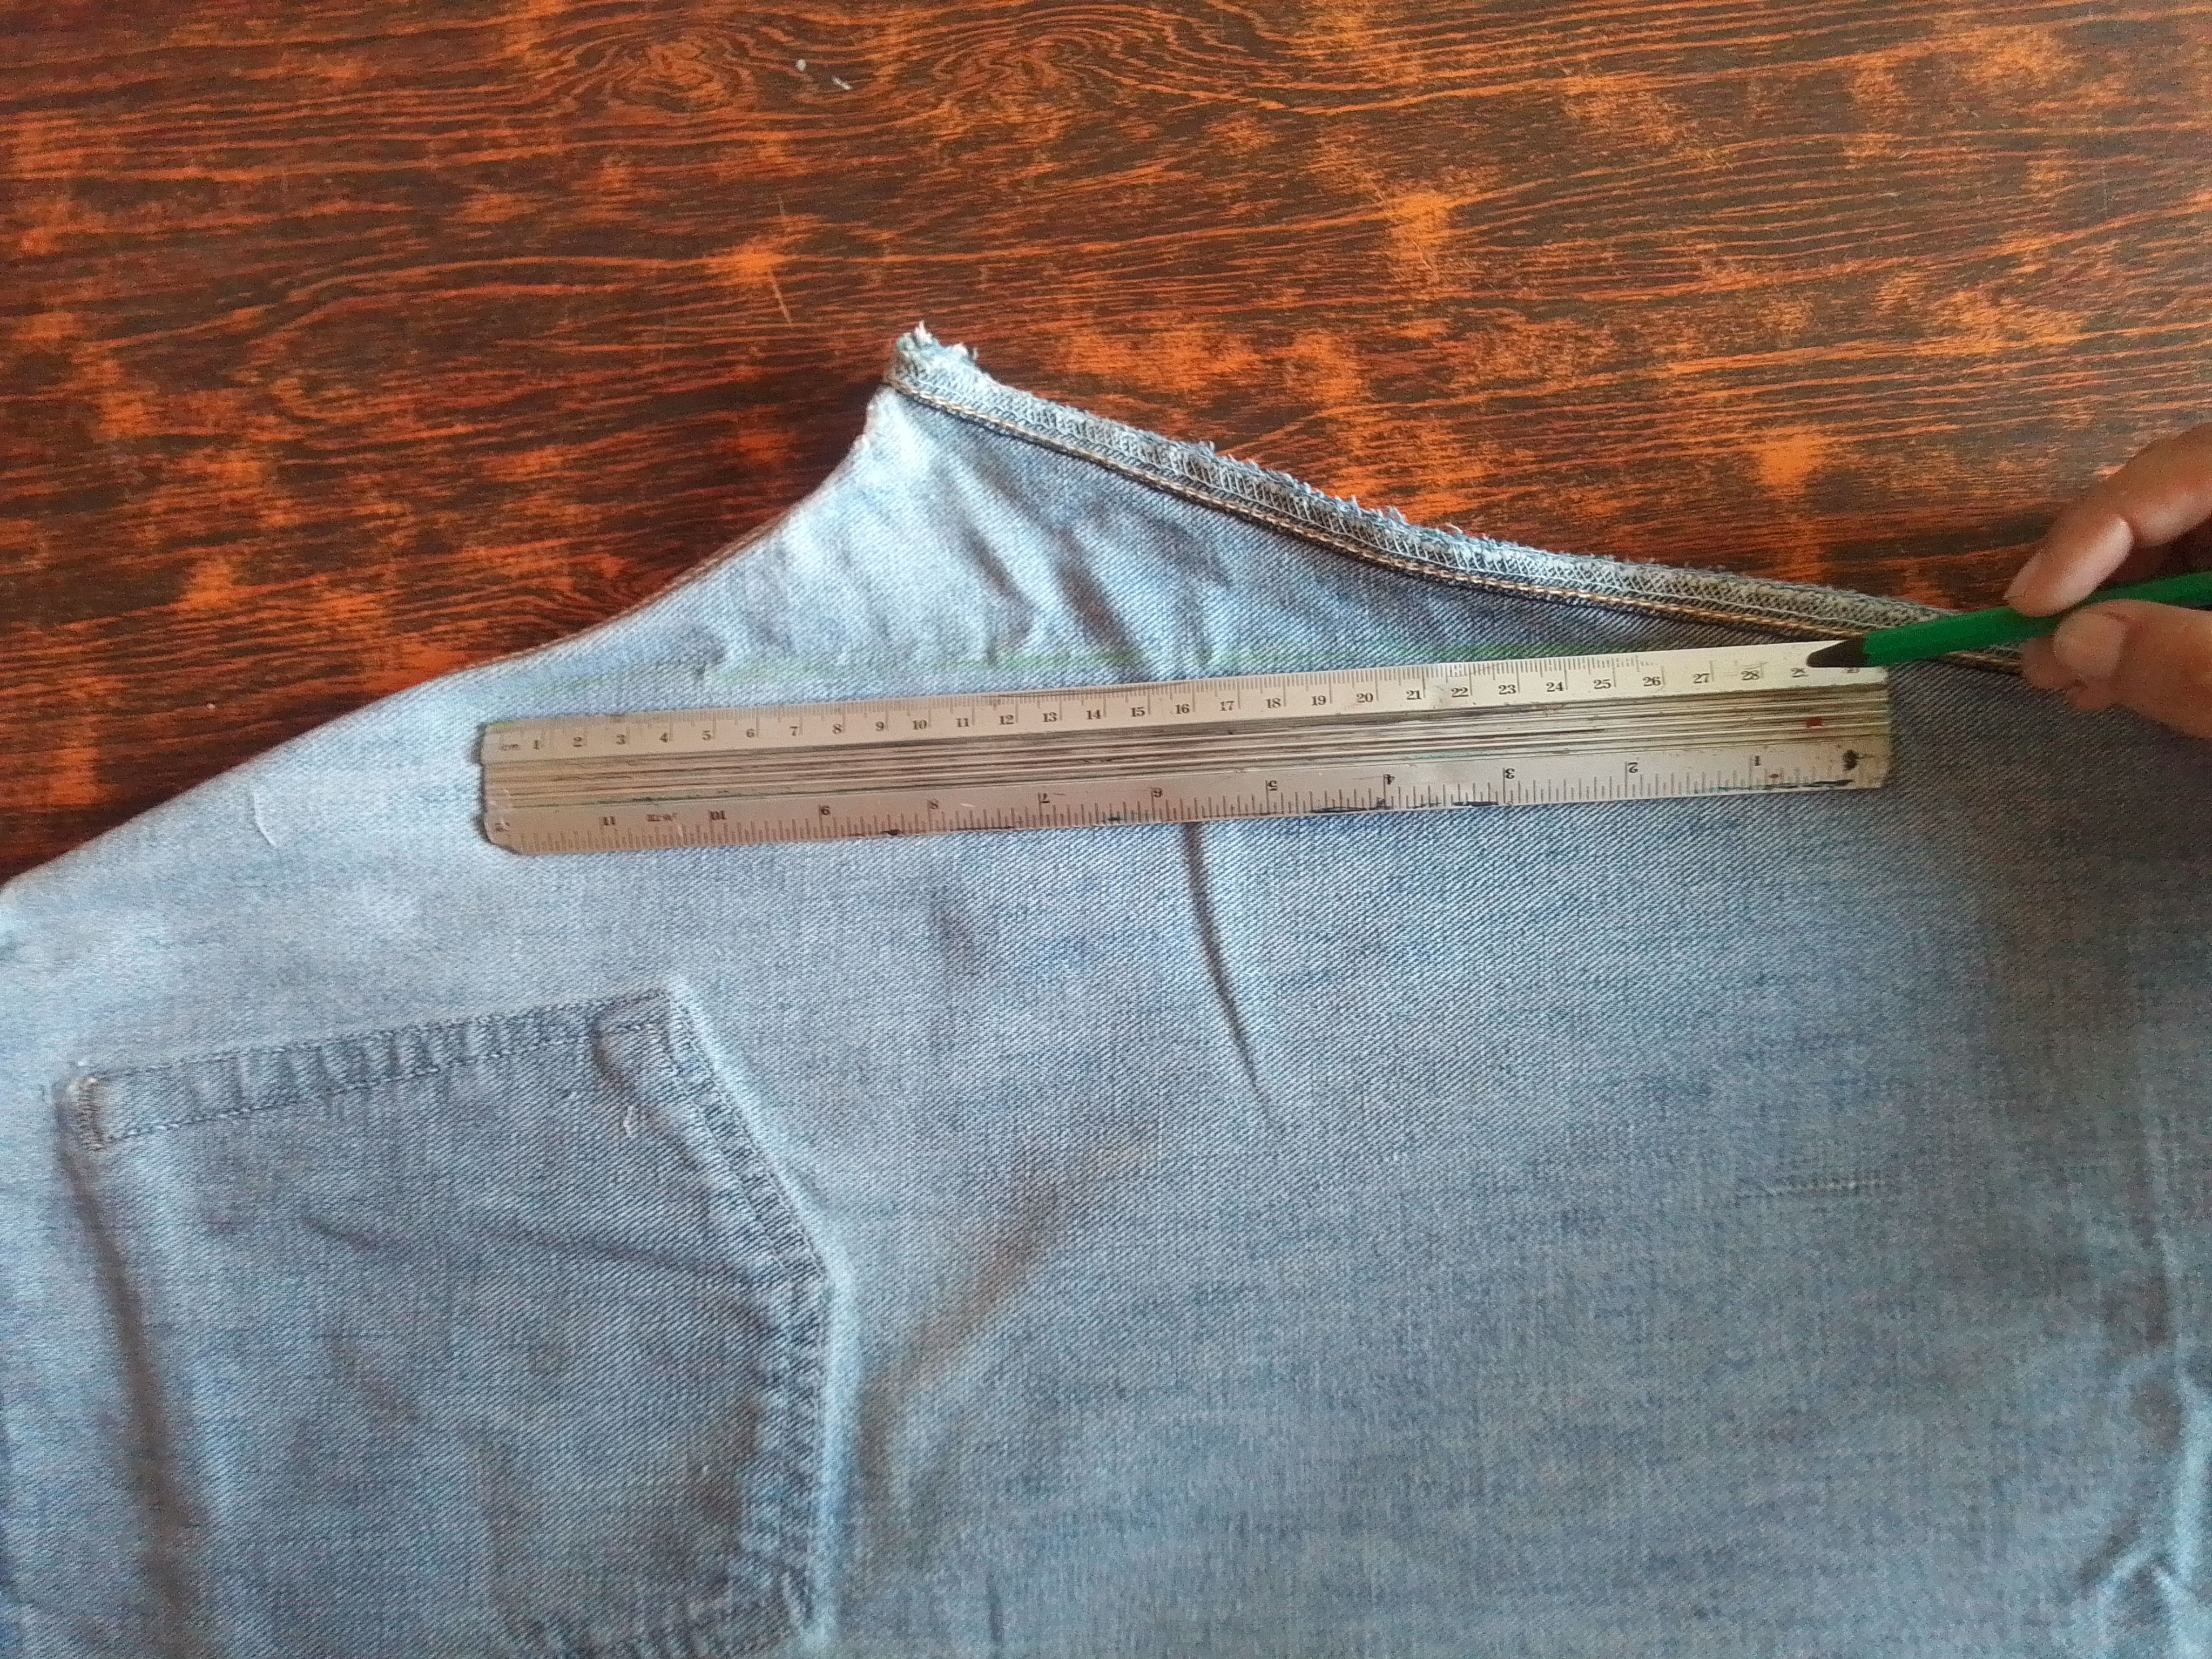
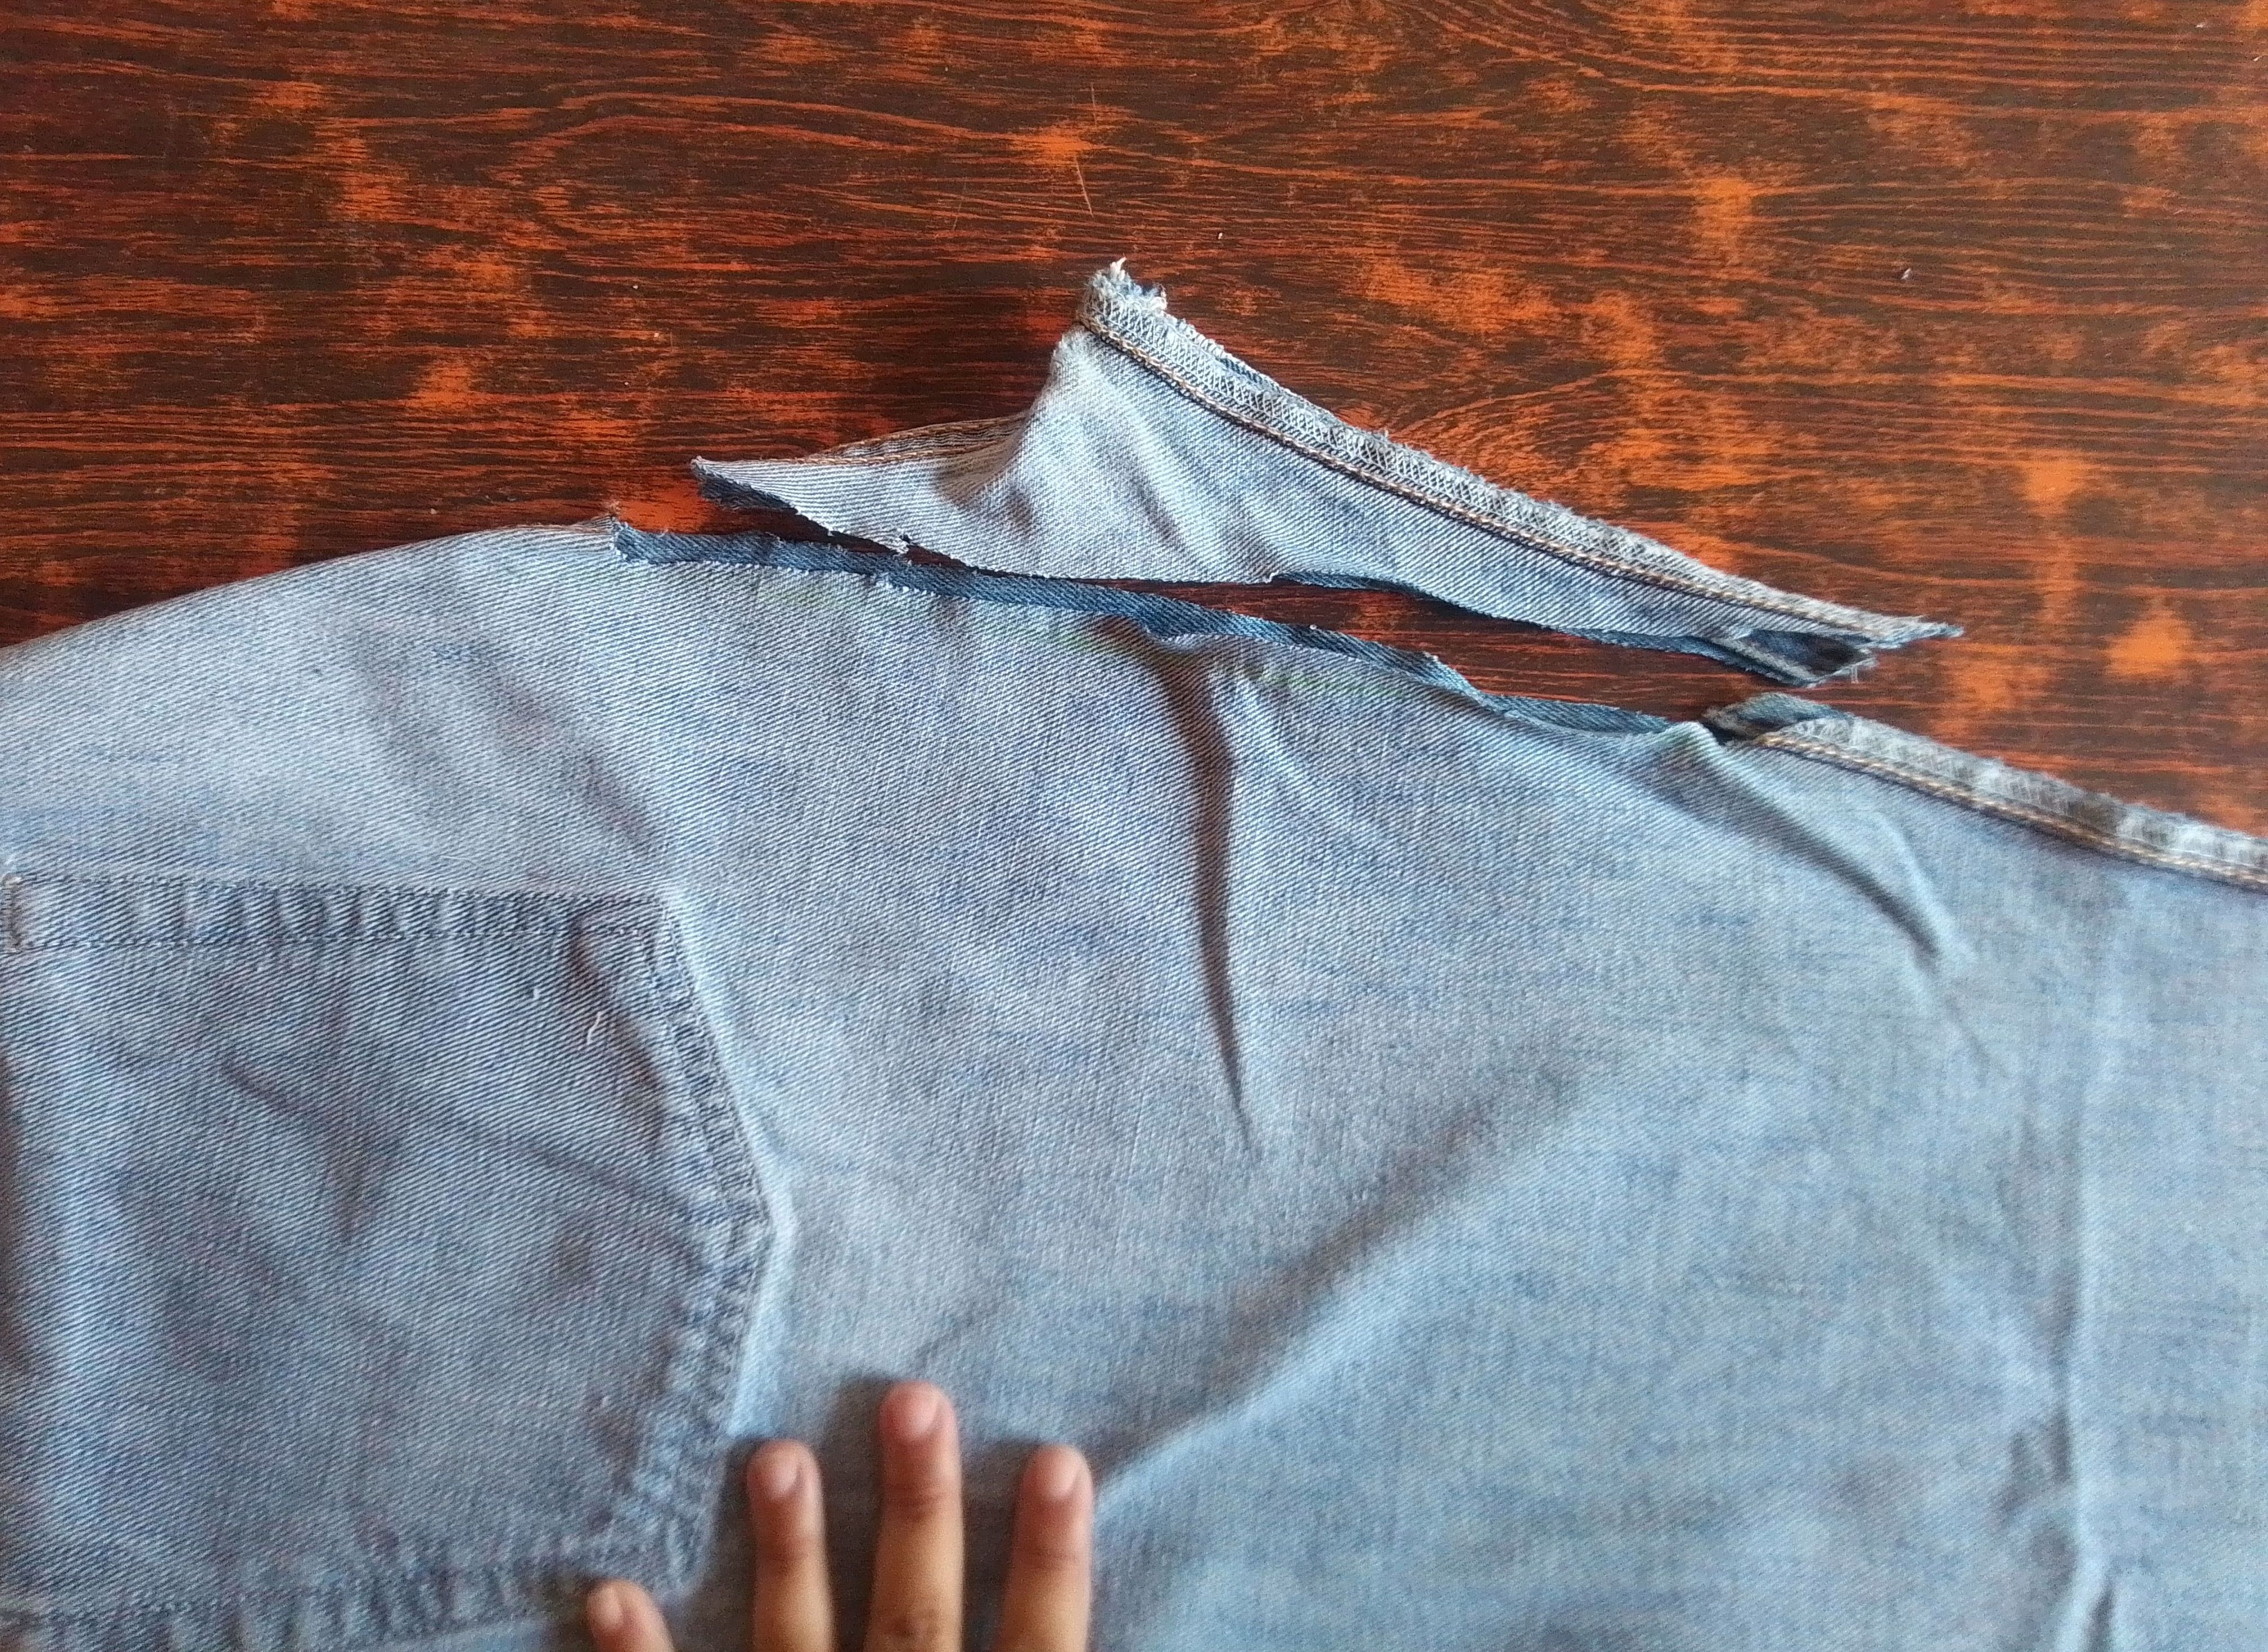
En este primer paso, estiramos el pantalón sobre nuestra mesa de trabajo muy bien, luego con ayuda de la tijera, hojilla o pinza de descoser, cortamos todos los hilos que unen el pantalón, los que van a los costados y por las piernas y separamos las.dos partes del pantalón. Utilizo la parte trasera, que ya tiene dos bolsillos para la base del organizador, por lo que doblo a la mitad y estiró la punta del fundillo para luego con una regla marcar una línea recta.
Step 01
In this first step, we stretch the pants on our work table very well, then with the help of scissors, blades or pliers to unstitch, we cut all the threads that join the pants, those that They go to the sides and the legs, and we separate the two parts of the pants. I use the back, which already has two pockets for the base of the organizer, so I fold it in half and stretch out the tip of the hem, then use a ruler to mark a straight line.
Paso 02
Cortamos está punta y haremos una costura recta uniendo ambas piernas del pantalon. Es importante decirles, que cada costura debe hacerce con hilo doble y lo más fuerte y resitente posible, para tener una organizador más duradero.
Step 02
Cut this tip and make a straight seam joining both pant legs. It is important to tell them that each seam must be done with double thread and as strong and resistant as possible, in order to have a more durable organizer.
Paso 03
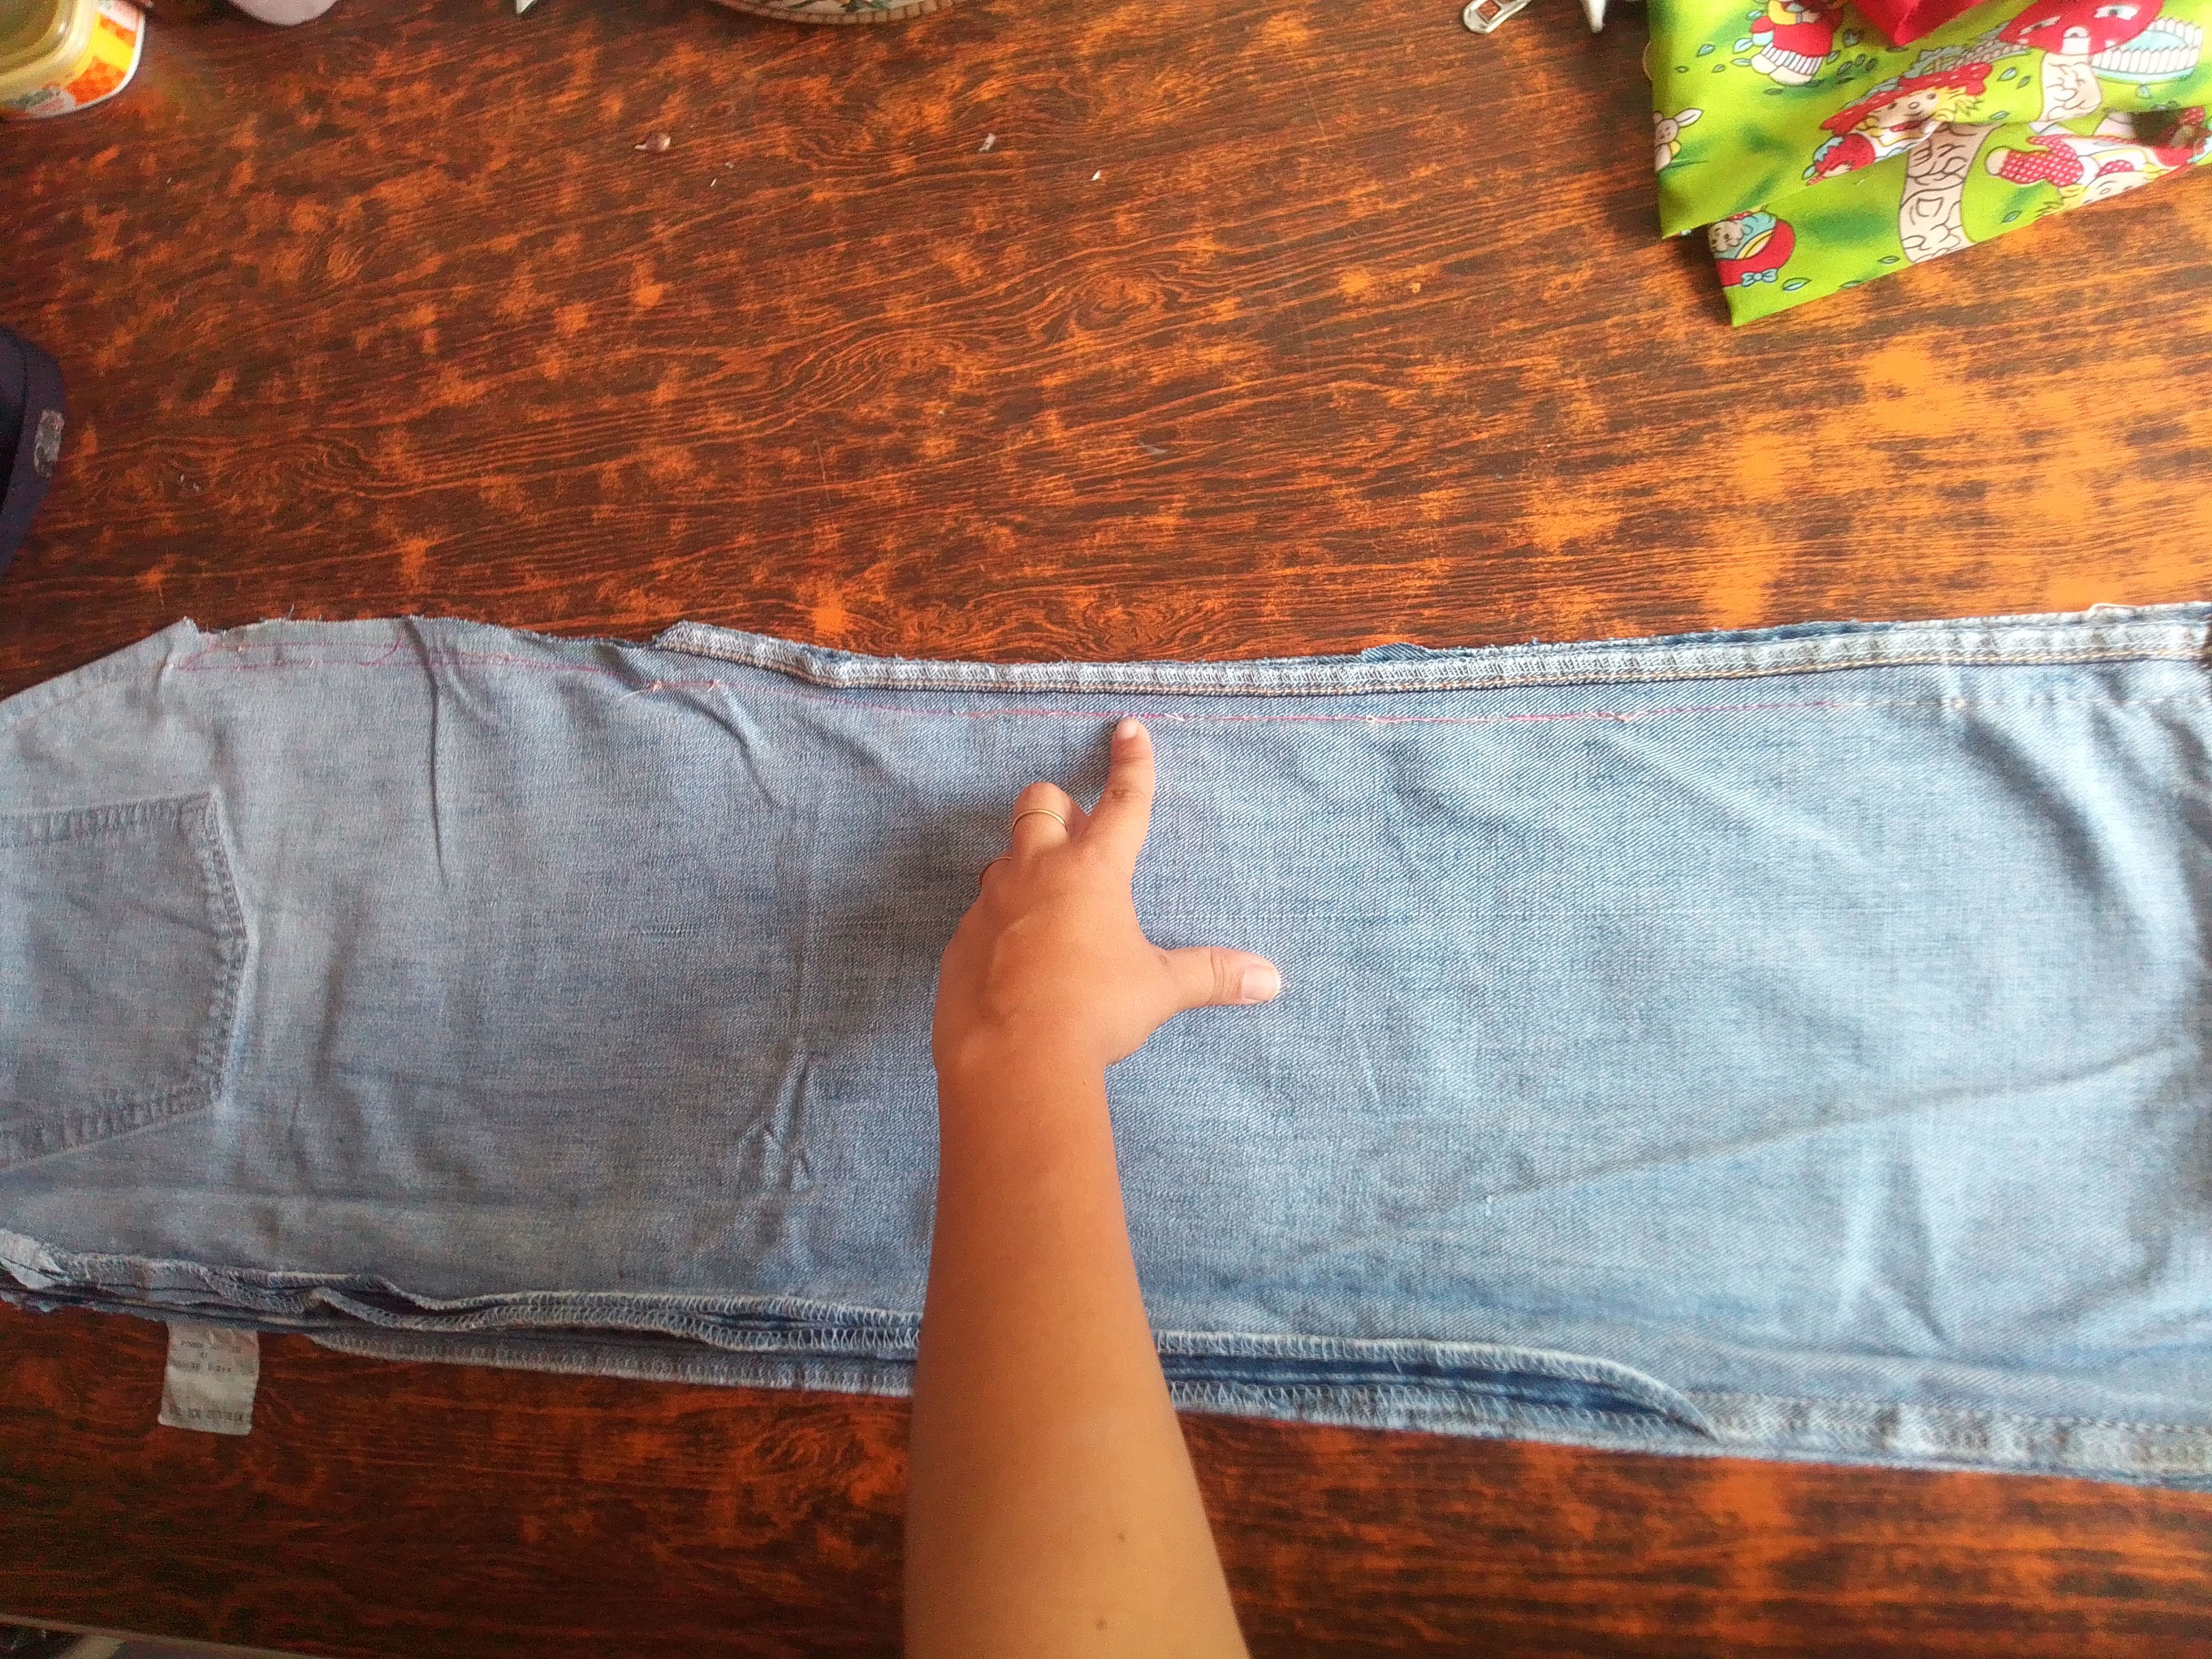
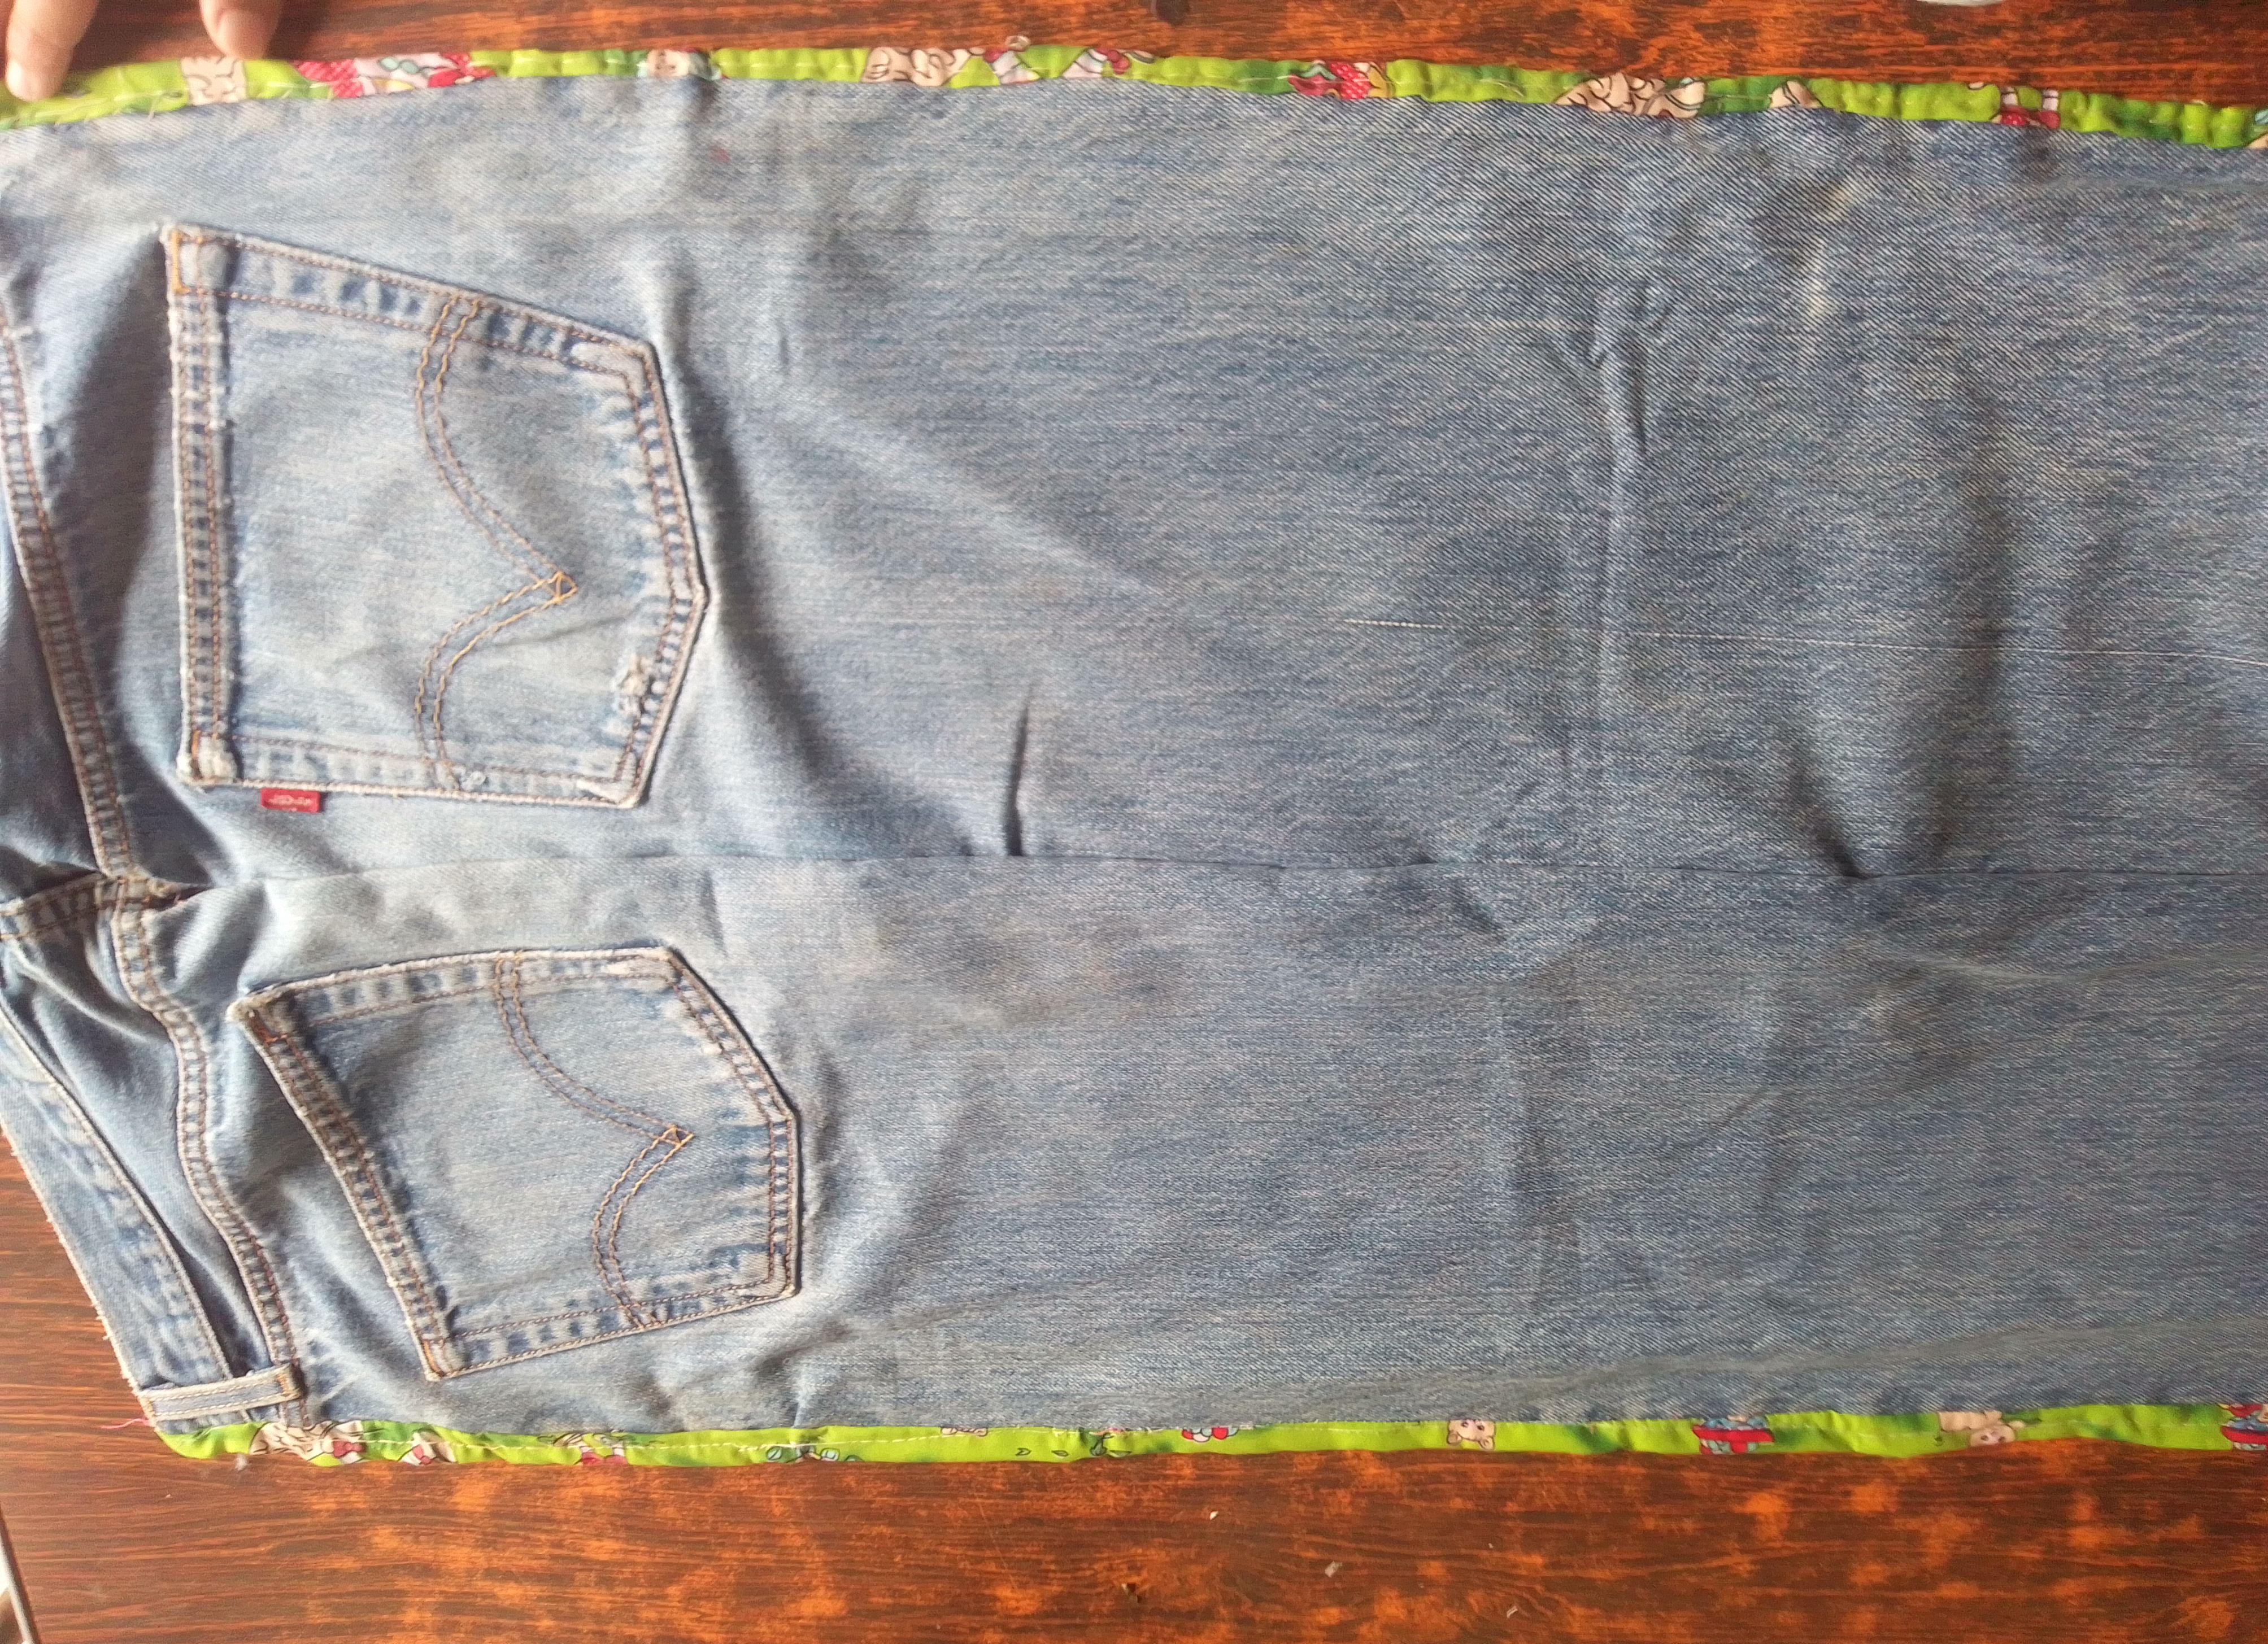
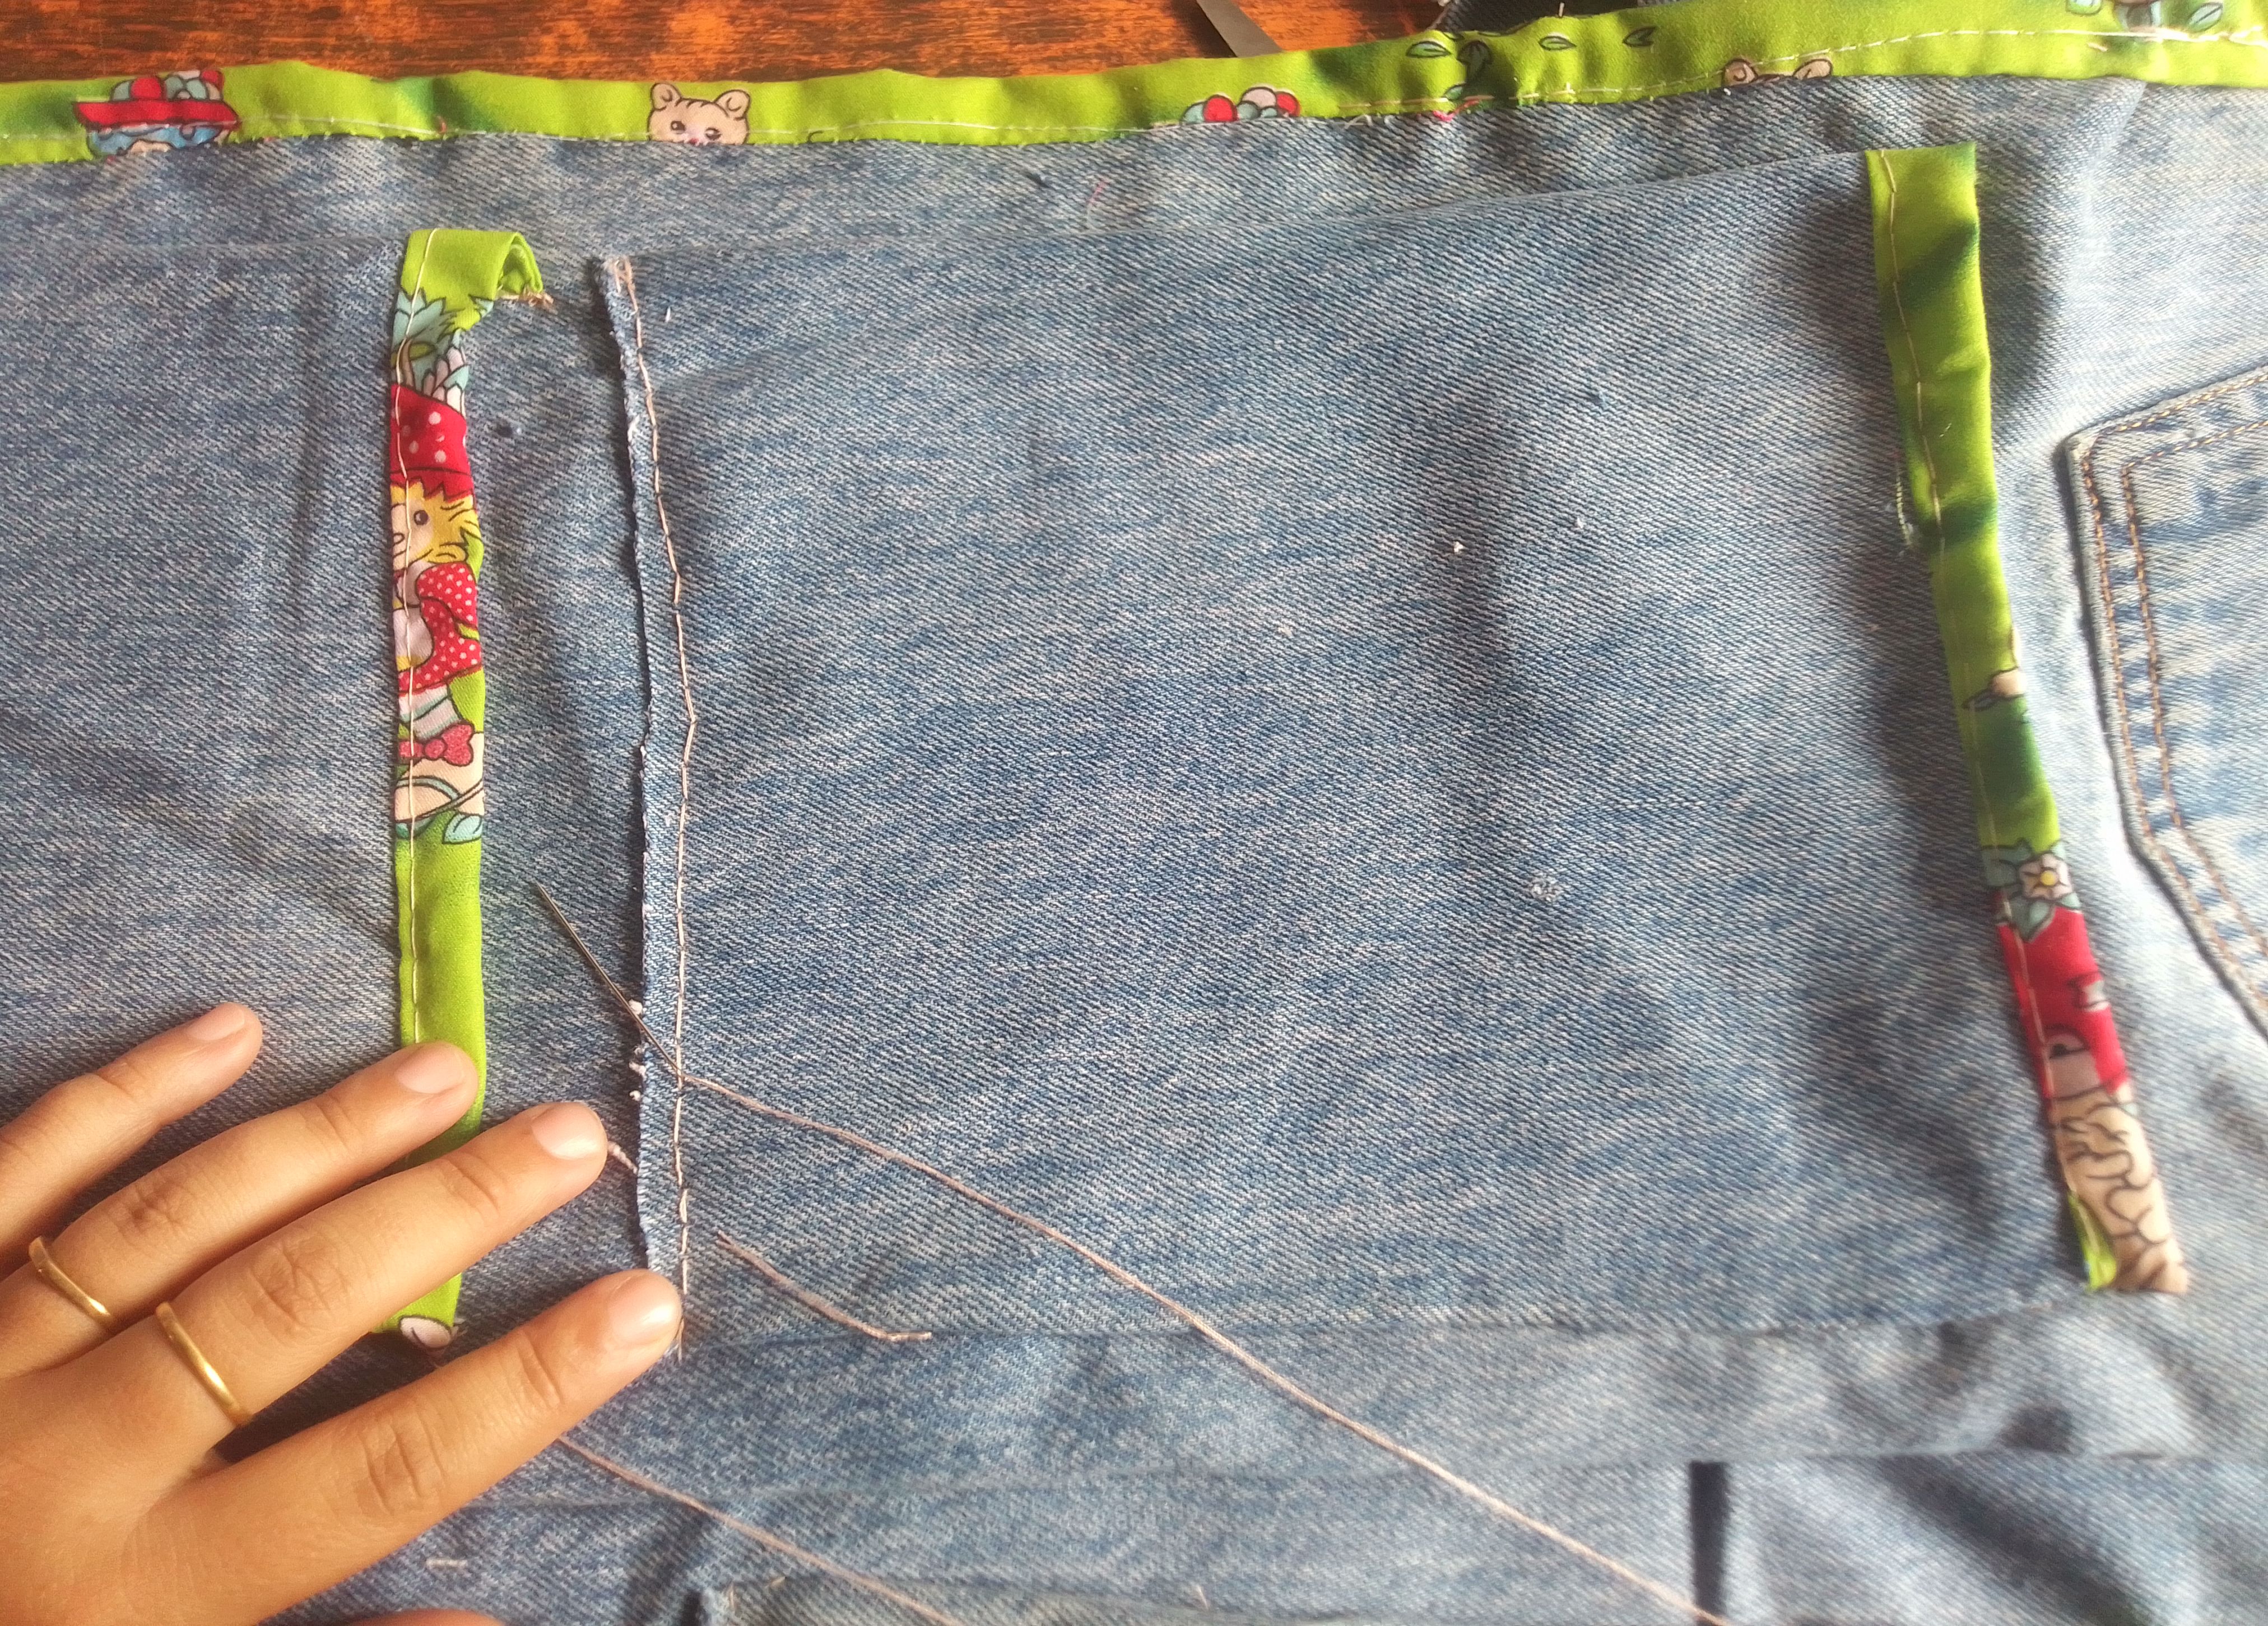
Hecho esto, corto de la tela estampada largas tiras de 3cm de ancho por el algo del pantalón. Estás tiras las coso en los bordes de los costados del pantalón, para cubrirlos y hacerlo más decorativo.
Step 03
Once this is done, I cut long strips of 3cm wide strips of the printed fabric for the pant part. These strips are sewn on the edges of the sides of the pants, to cover them and make it more decorative.

Paso 04
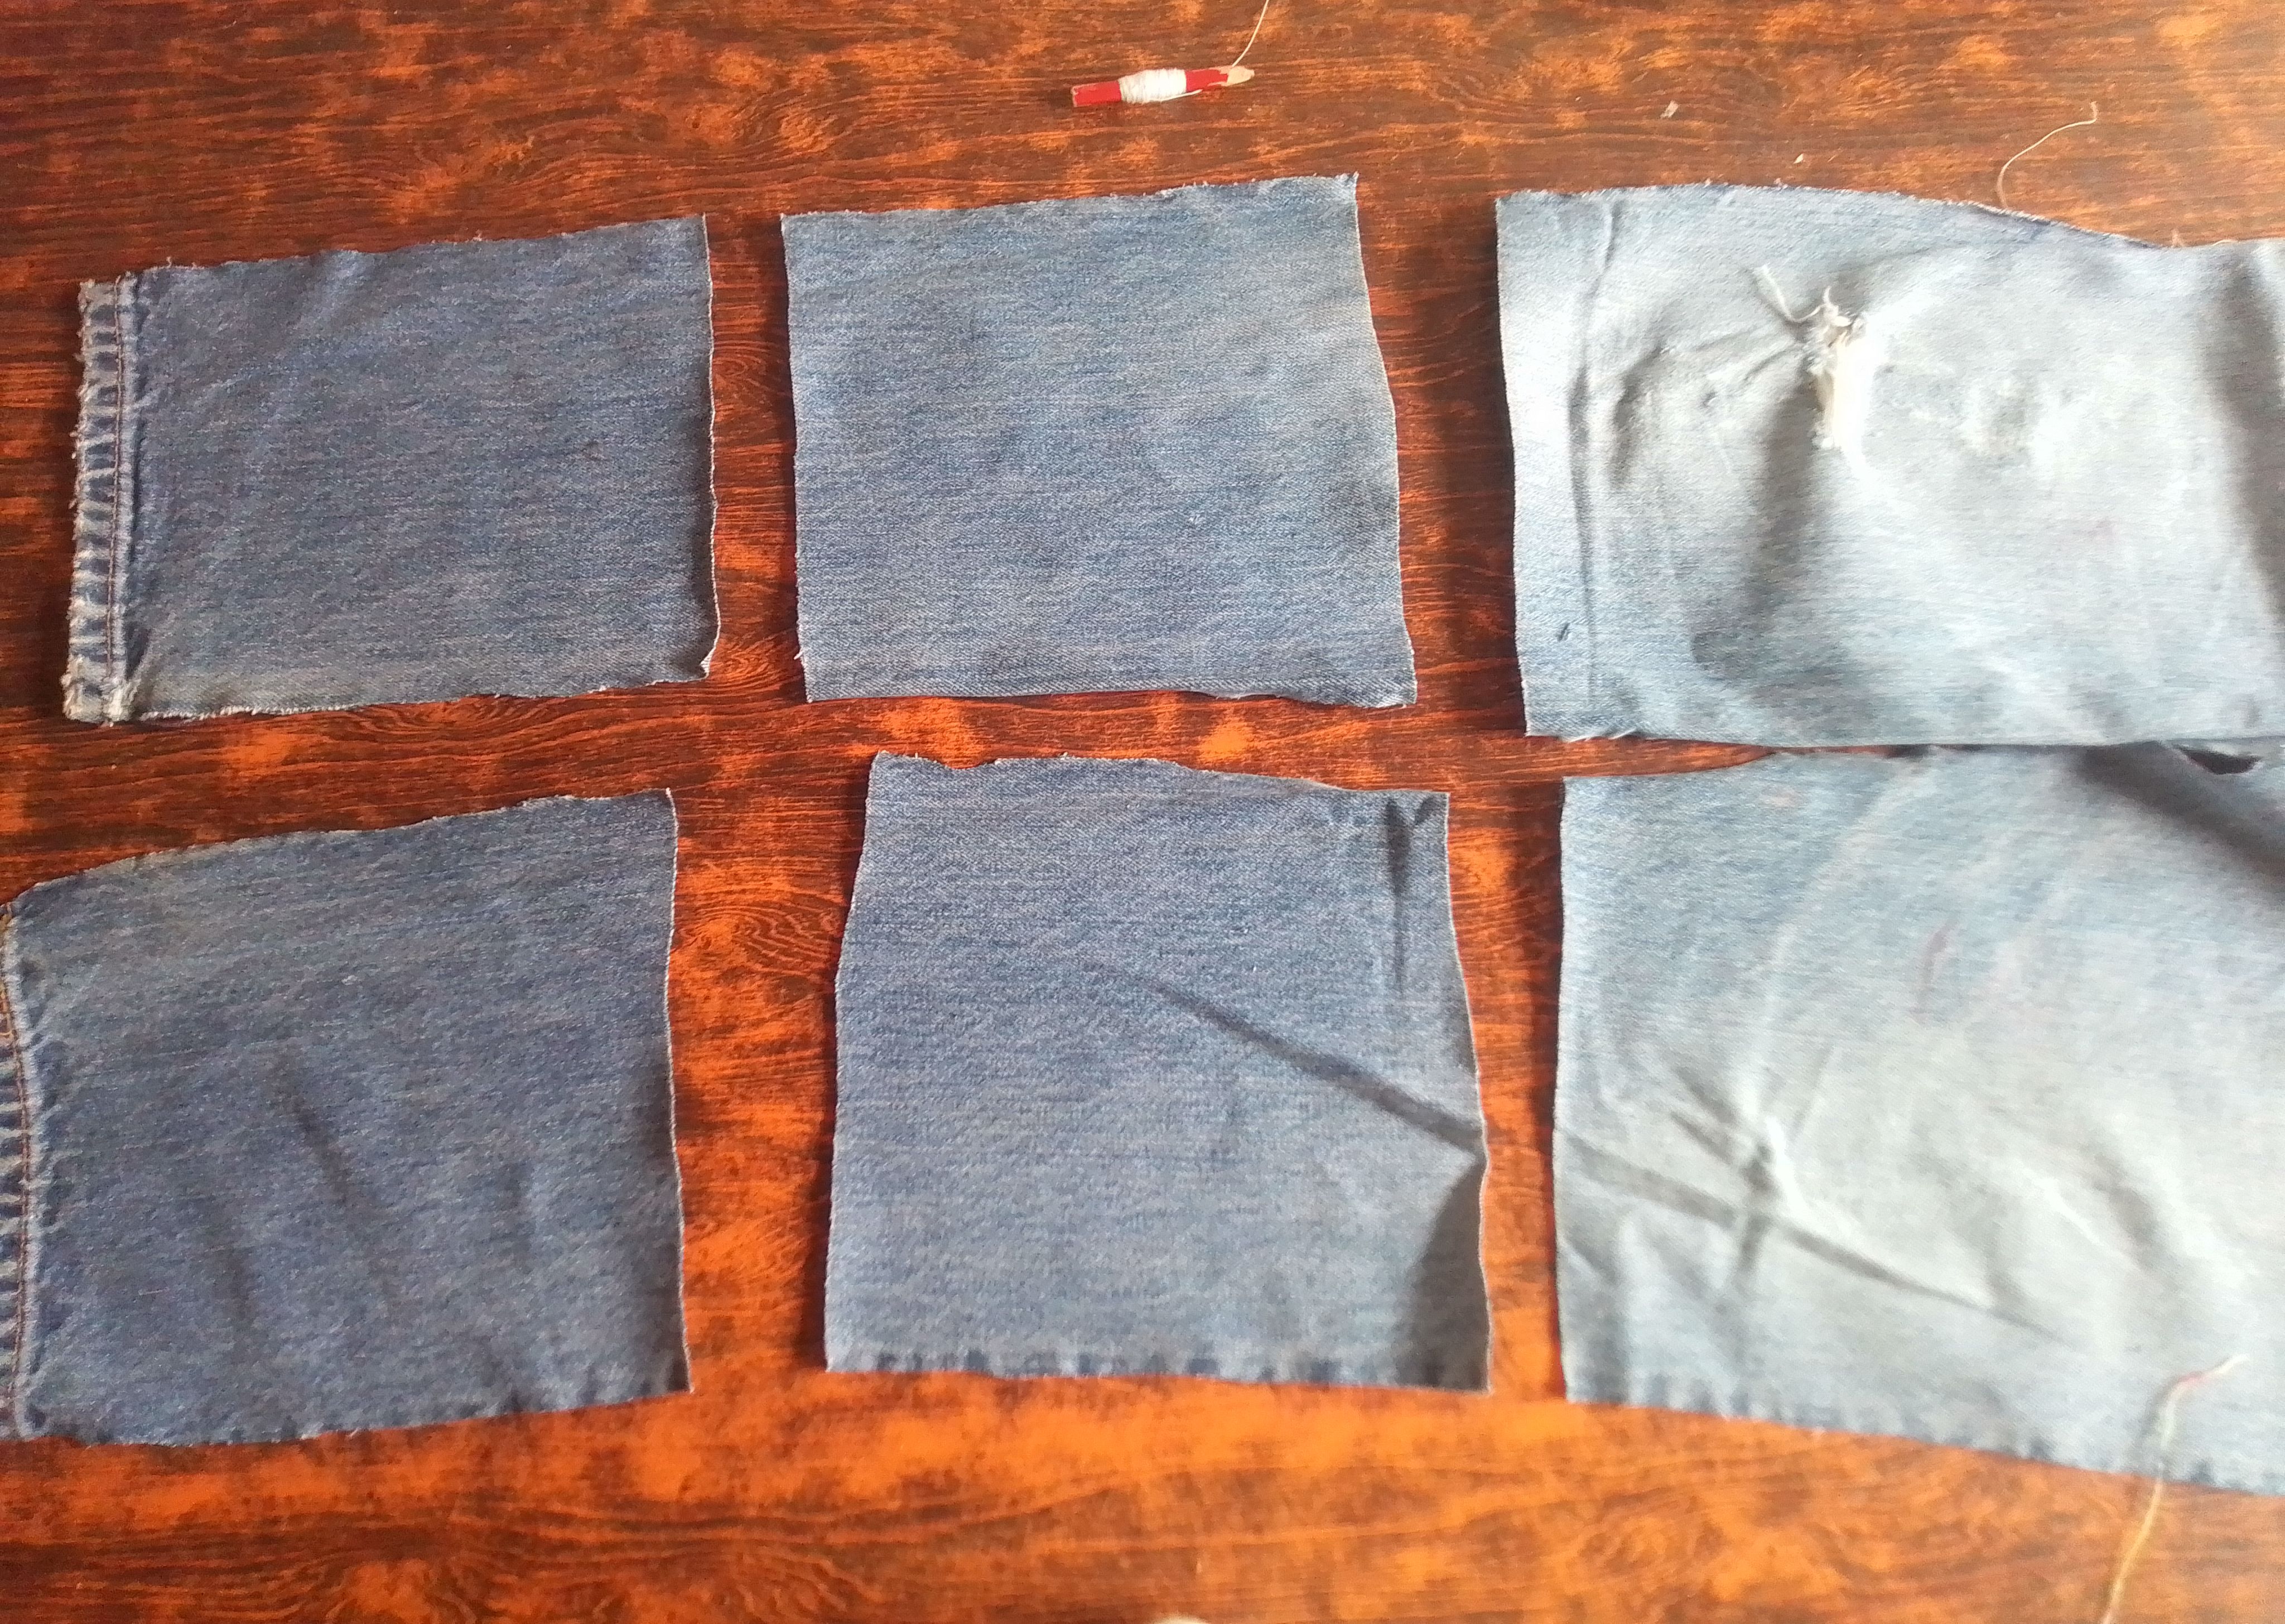
Ahora utilizo las piernas de la parte delantera del jeans para cortar 6 piezas cuadradas y hacer los espacios donde irían organizados los zapatos. Seguimos combinado con la tela estampada, por lo que corto tiras pequeñas para los bordes superiores de cada pieza y coso como especie de un dobladillo en cada uno.
Step 04
Now I use the legs of the front part of the jeans to cut 6 square pieces and make the spaces where the shoes would be organized. We continue to blend with the patterned fabric, so I cut small strips for the top edges of each piece and sew sort of a hem on each one.

Paso 05
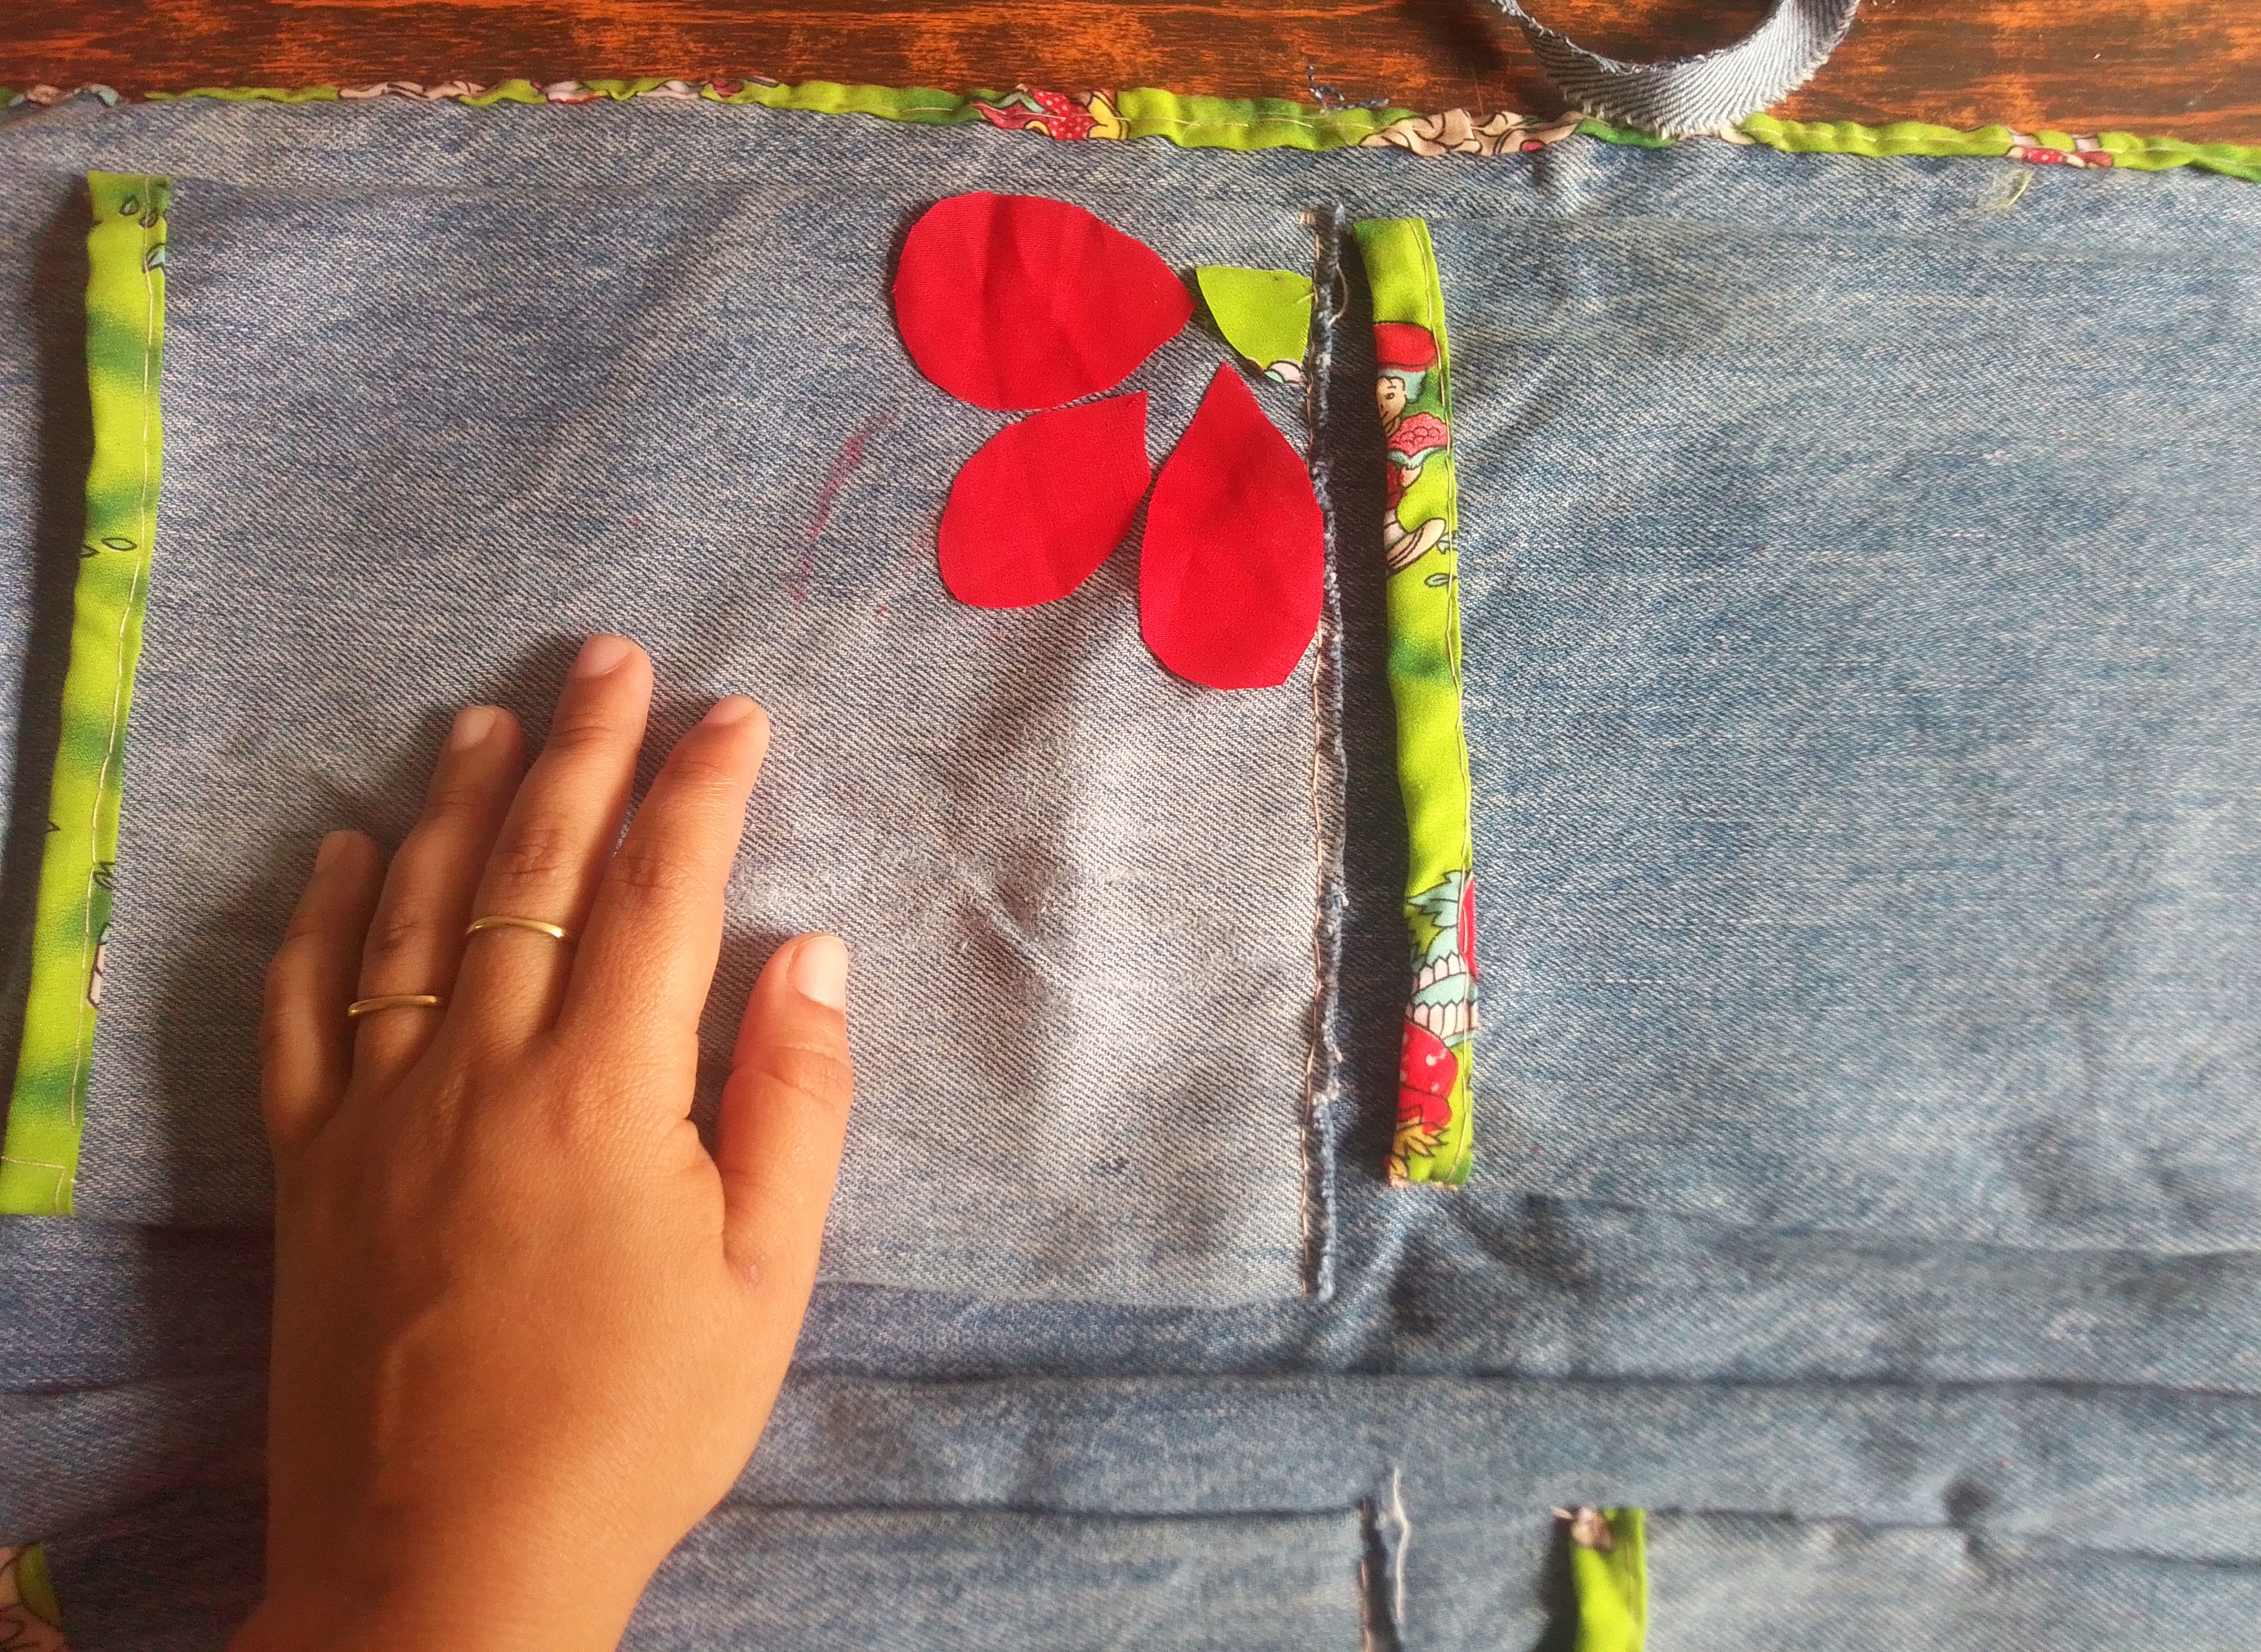
Siguiendo su forma las cosemos al pantalon una sobre ella otra, vaya! Aquí si me costó coser jaja. Despues de tenerlas todas en su lugar, cortamos pétalos de tela roja para bordarlas y decorar los espacios con algunas flores. Está decoración es opcional pero se ve muy hermosa, tu puedes colocar la decoración de que deseas.
Step 05
Following its shape we sew them to the pants one on top of the other, wow! Here I had a hard time sewing haha. After having them all in place, we cut petals out of red fabric to embroider them and decorate the spaces with some flowers. This decoration is optional but it looks very beautiful, you can place the decoration you want.
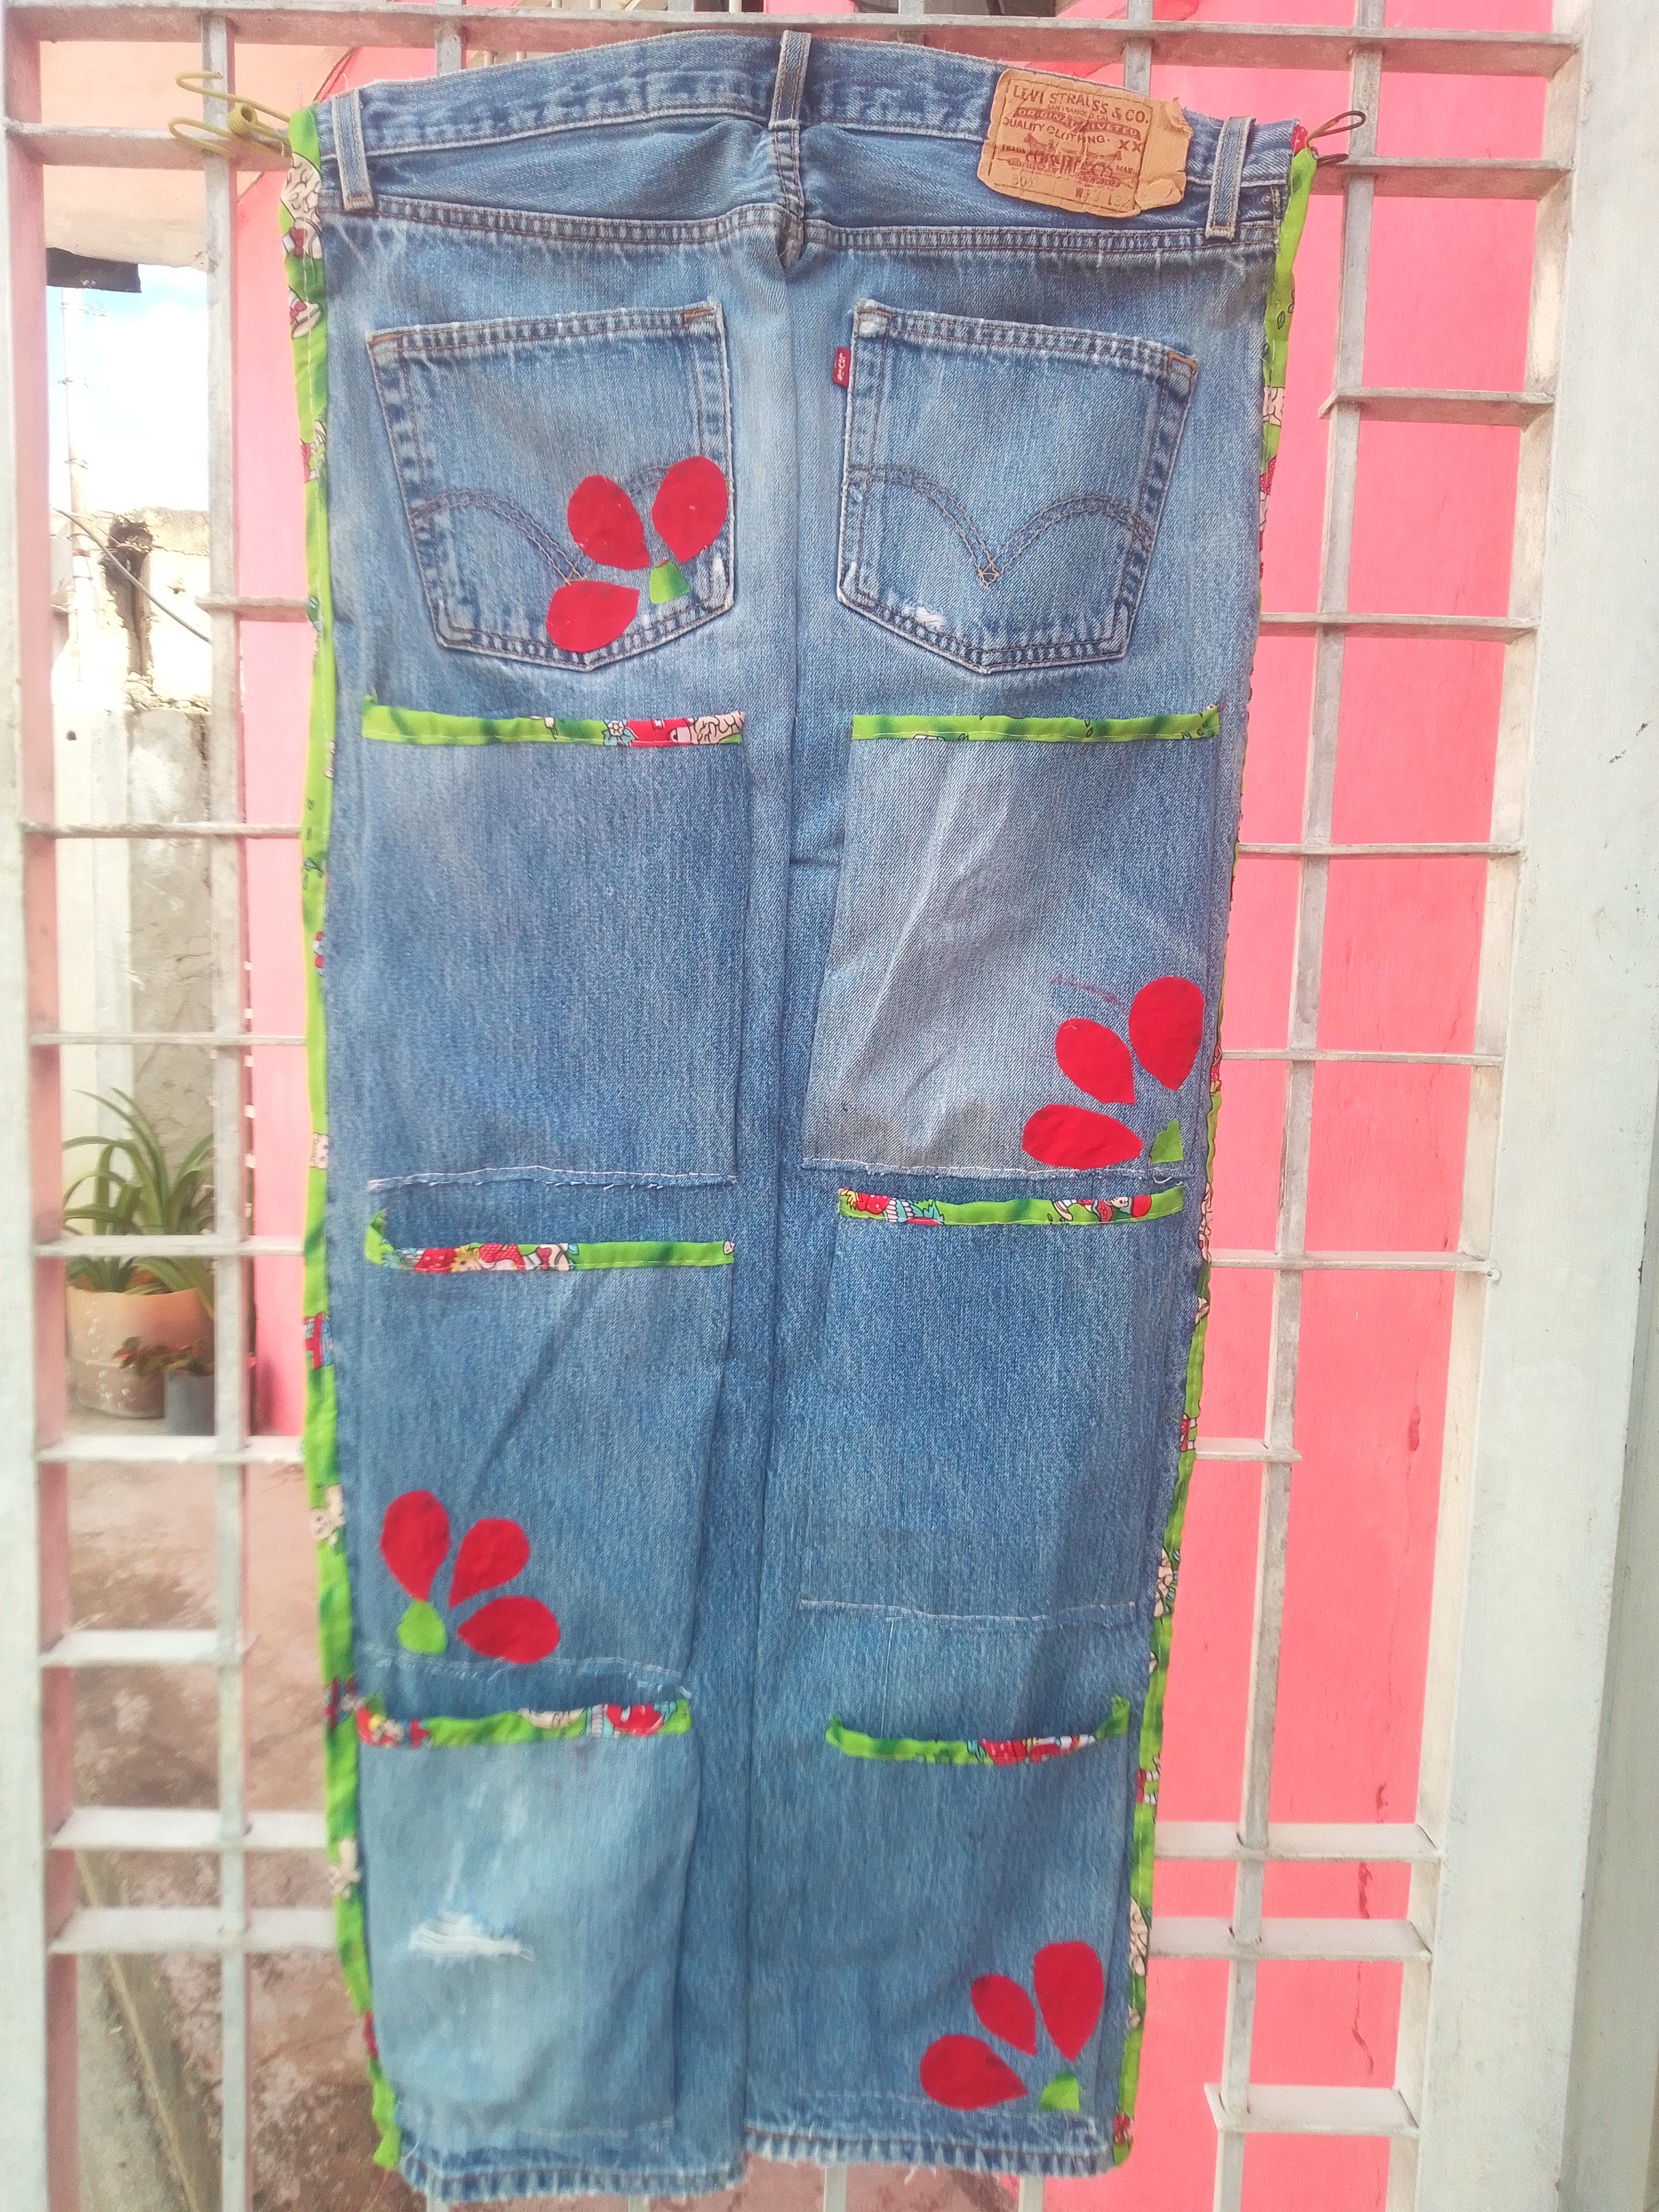
🌸Resultado! 🌸
De esta manera ha quedado mi organizador de zapatos reciclando un viejo pantalón jean. Me encantó el resultado, y es que el proceso no es difícil, lo que lo hace complicado es la tela que escojas para elaborarlo,sobre todo si lo haces a mano, pero con tiempo, poco a poco seguro lo lograras, y podrá darle este nuevo uso a tus viejos jeans.
This is how my shoe organizer turned out, recycling an old jean. I loved the result, and it is that the process is not difficult, what makes it complicated is the fabric you choose to make it, especially if you do it by hand, but with time, little by little you will surely achieve it, and you will be able to give it this new use to your old jeans.
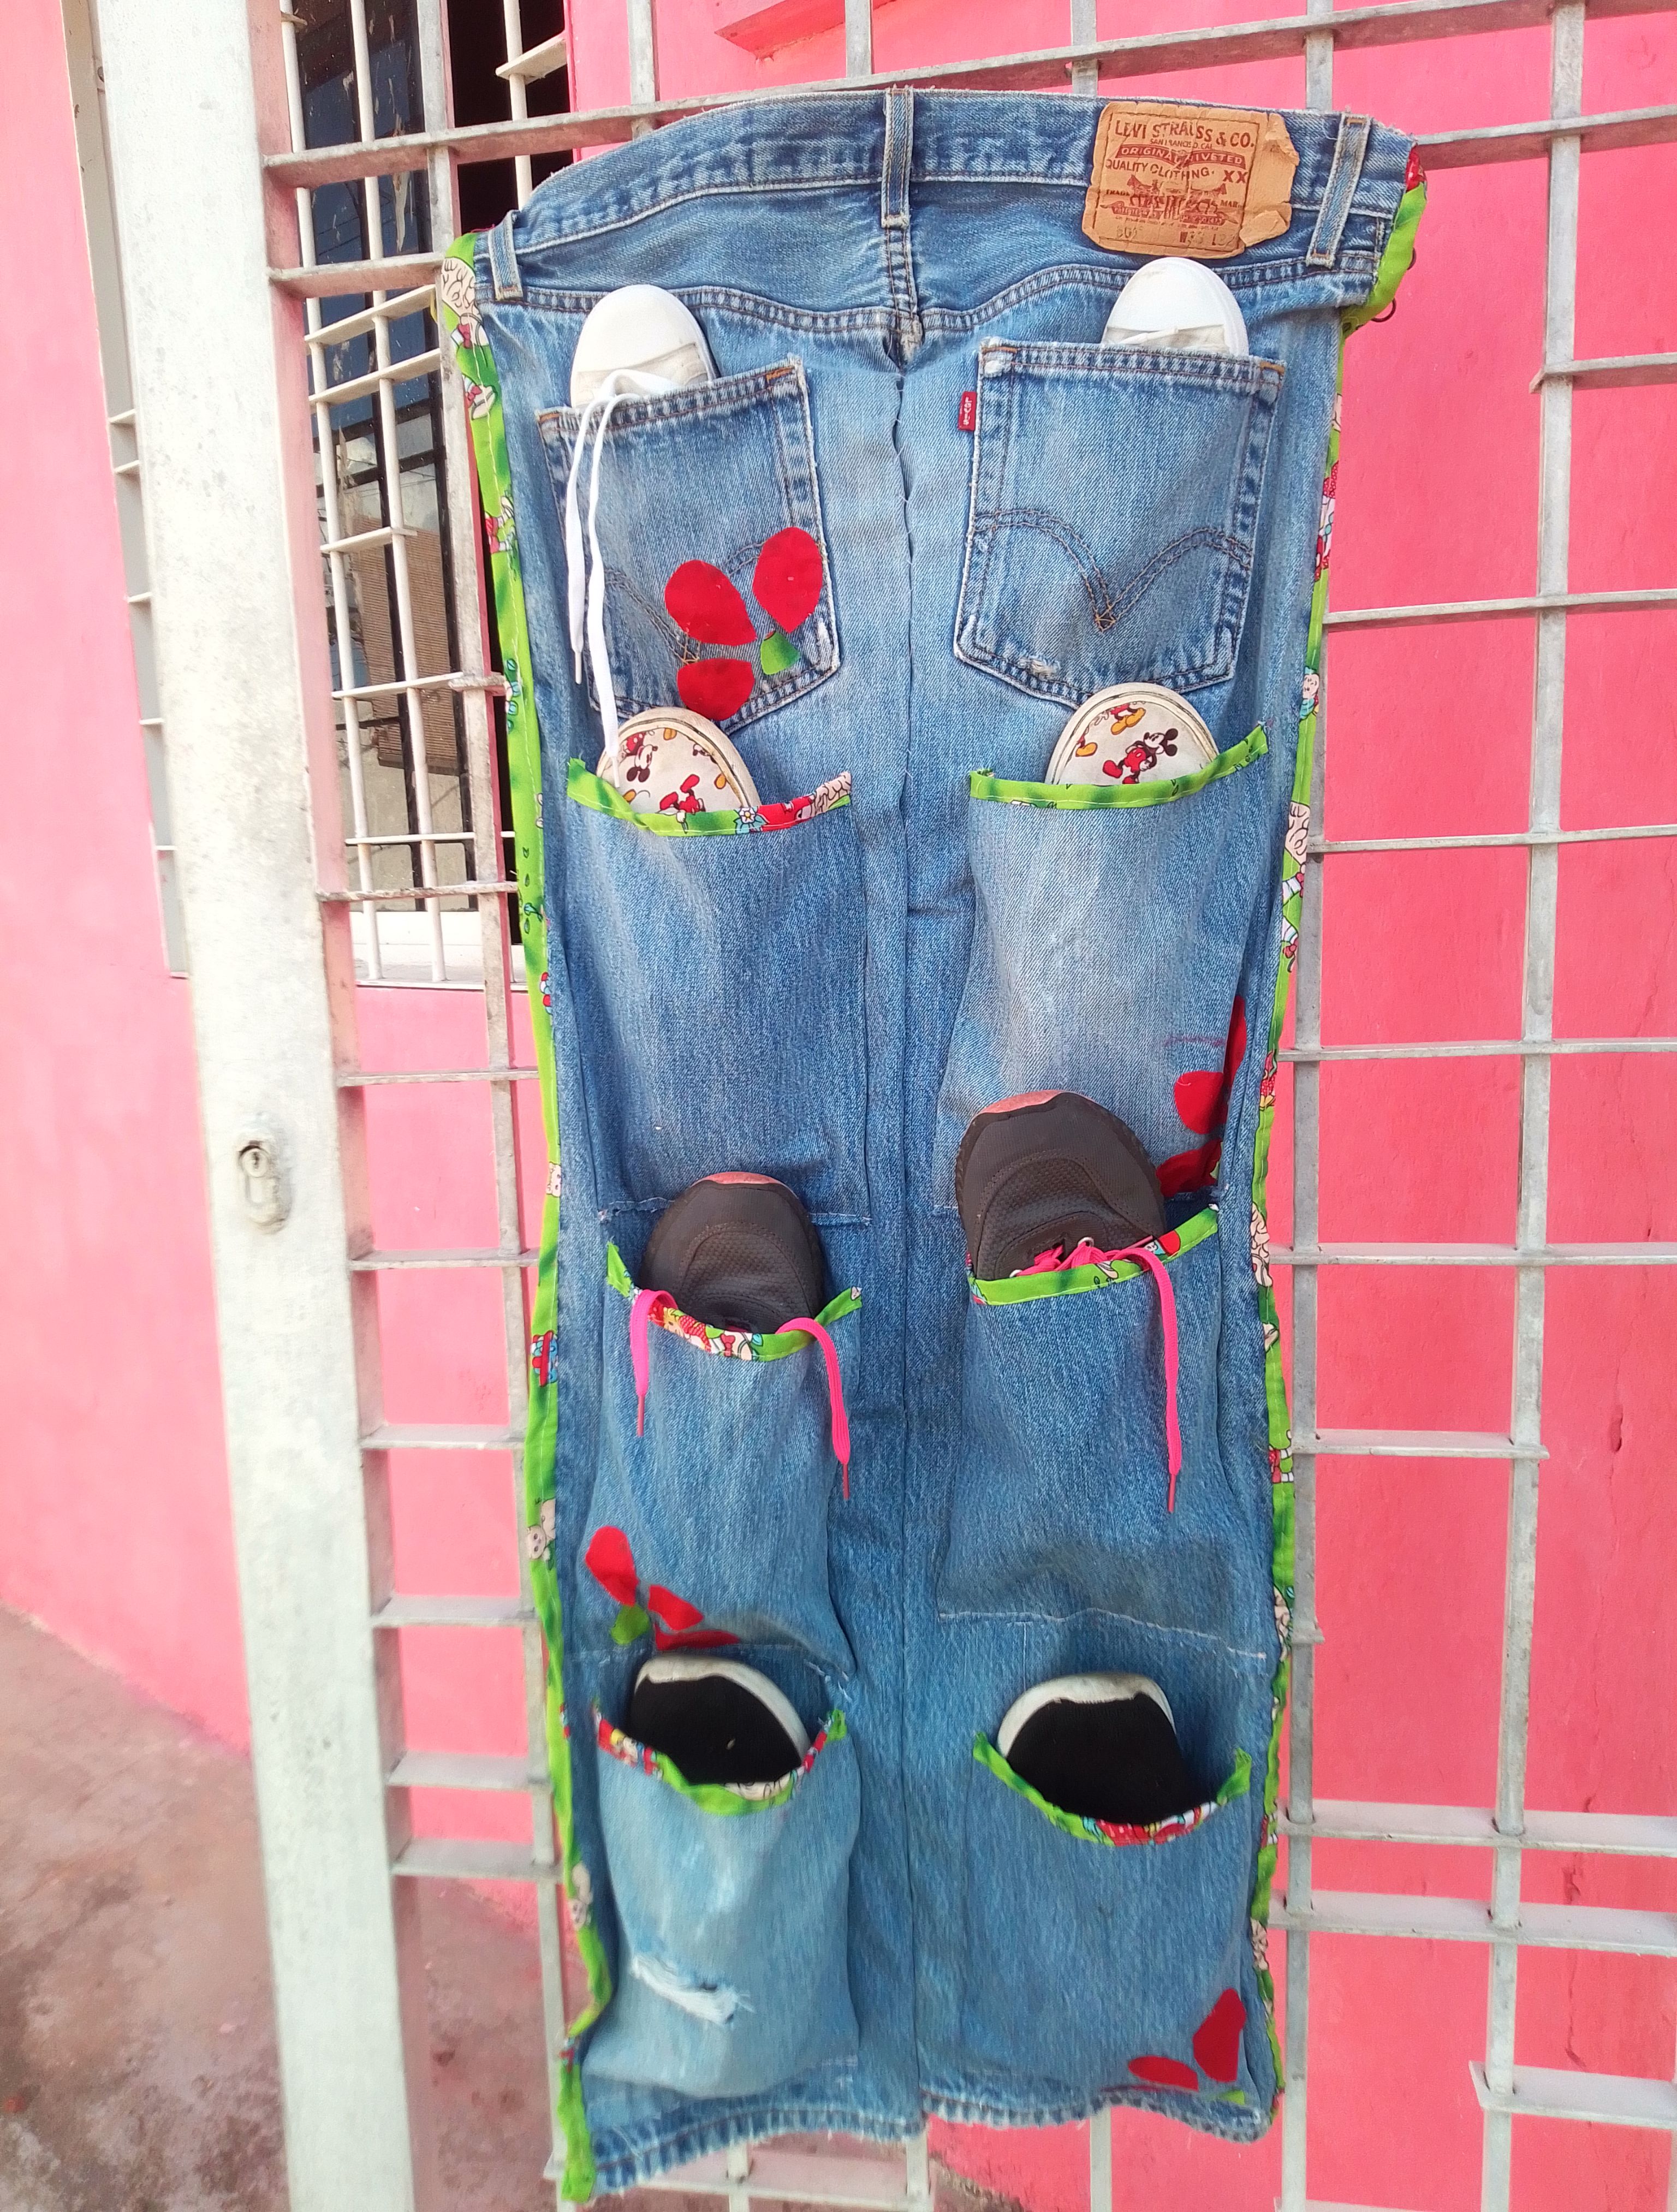
Reciclar y darle nuevo uso a las prendas que ya no utilizamos, siempre será una buena y mejor opcion que desecharlas. Lo mejor de todo, es que esta no solos es una buena idea para organizar los zapatos, sino que es multiuso y puedes utilizarla para guardar muchas otras cosas. Espero este tutorial sea de su agrado y me digas a través de tus comentarios que te parece, si has hecho una, que tan complicado fue hacerla. Gracias por tu linda visita, Dios les bendiga siempre, hasta pronto!.
Recycling and giving new use to the clothes that we no longer use, will always be a good and better option than throwing them away. Best of all, this is not only a good idea to organize shoes, but it is multipurpose and you can use it to store many other things. I hope this tutorial is to your liking and tell me through your comments what you think, if you have made one, how complicated it was to make it. Thank you for your nice visit, God bless you always, see you soon!
0
0
0.000
a mi me gusto esta opción, aunque los cojines también son necesarios este pantalón era ideal para crear esta zapatera. la decoración esta hermosa.
Holaaa! Esa es una tarea que quedó pendiente y pronto la haré.. me agrada que le haya gustado mi trabajo.. muchas gracias.. 🤗🤗
Like seriously I do feel somehow if I am enable to complete a work I am doing at hand, sometimes I don't sleep at night think how the outcome will look like. You really did amazing project, you have proof to me that not material is a waste. I have many jeans I think I will give a try to this. Thanks for sharing this ideas I love it
I think that happens to many seamstresses hehe! What a joy to have been able to encourage you to recycle your jean through this tutorial, it is a pleasure to share this content with you! Greetings and blessings, thanks for commenting!
Admiro la forma en que coser de manera tan prolija. Siempre he querido coser y no me he atrevido porque no dispongo de una máquina, pero tu me demuestras que no hay excusas, que solo en nuestra mente nos colocamos limitaciones. Hoy nos compartes un hermoso proyecto, con muchísimo trabajo manual, y con excelente acabado. Te felicito.
Hola mi bella! No tener máquina puede frenar mucho al momento de querer hacer algo de costura, pero me gusta mucho hacerlo a mano, hay costuras que tienden a ser dificultosas, pero poco a poco si se puede, la verdad es que coser a mano tiene muchas ventajas. Te doy las gracias por tus bellas palabras! Me alegra que te guste.. bendiciónes y un abrazo!
Saludos @razielmorales, si que sabes aprovechar las telas , te quedó muy lindo el trabajo, un proyecto perfecto par mantener los zapatos organizados.
Bendiciones!