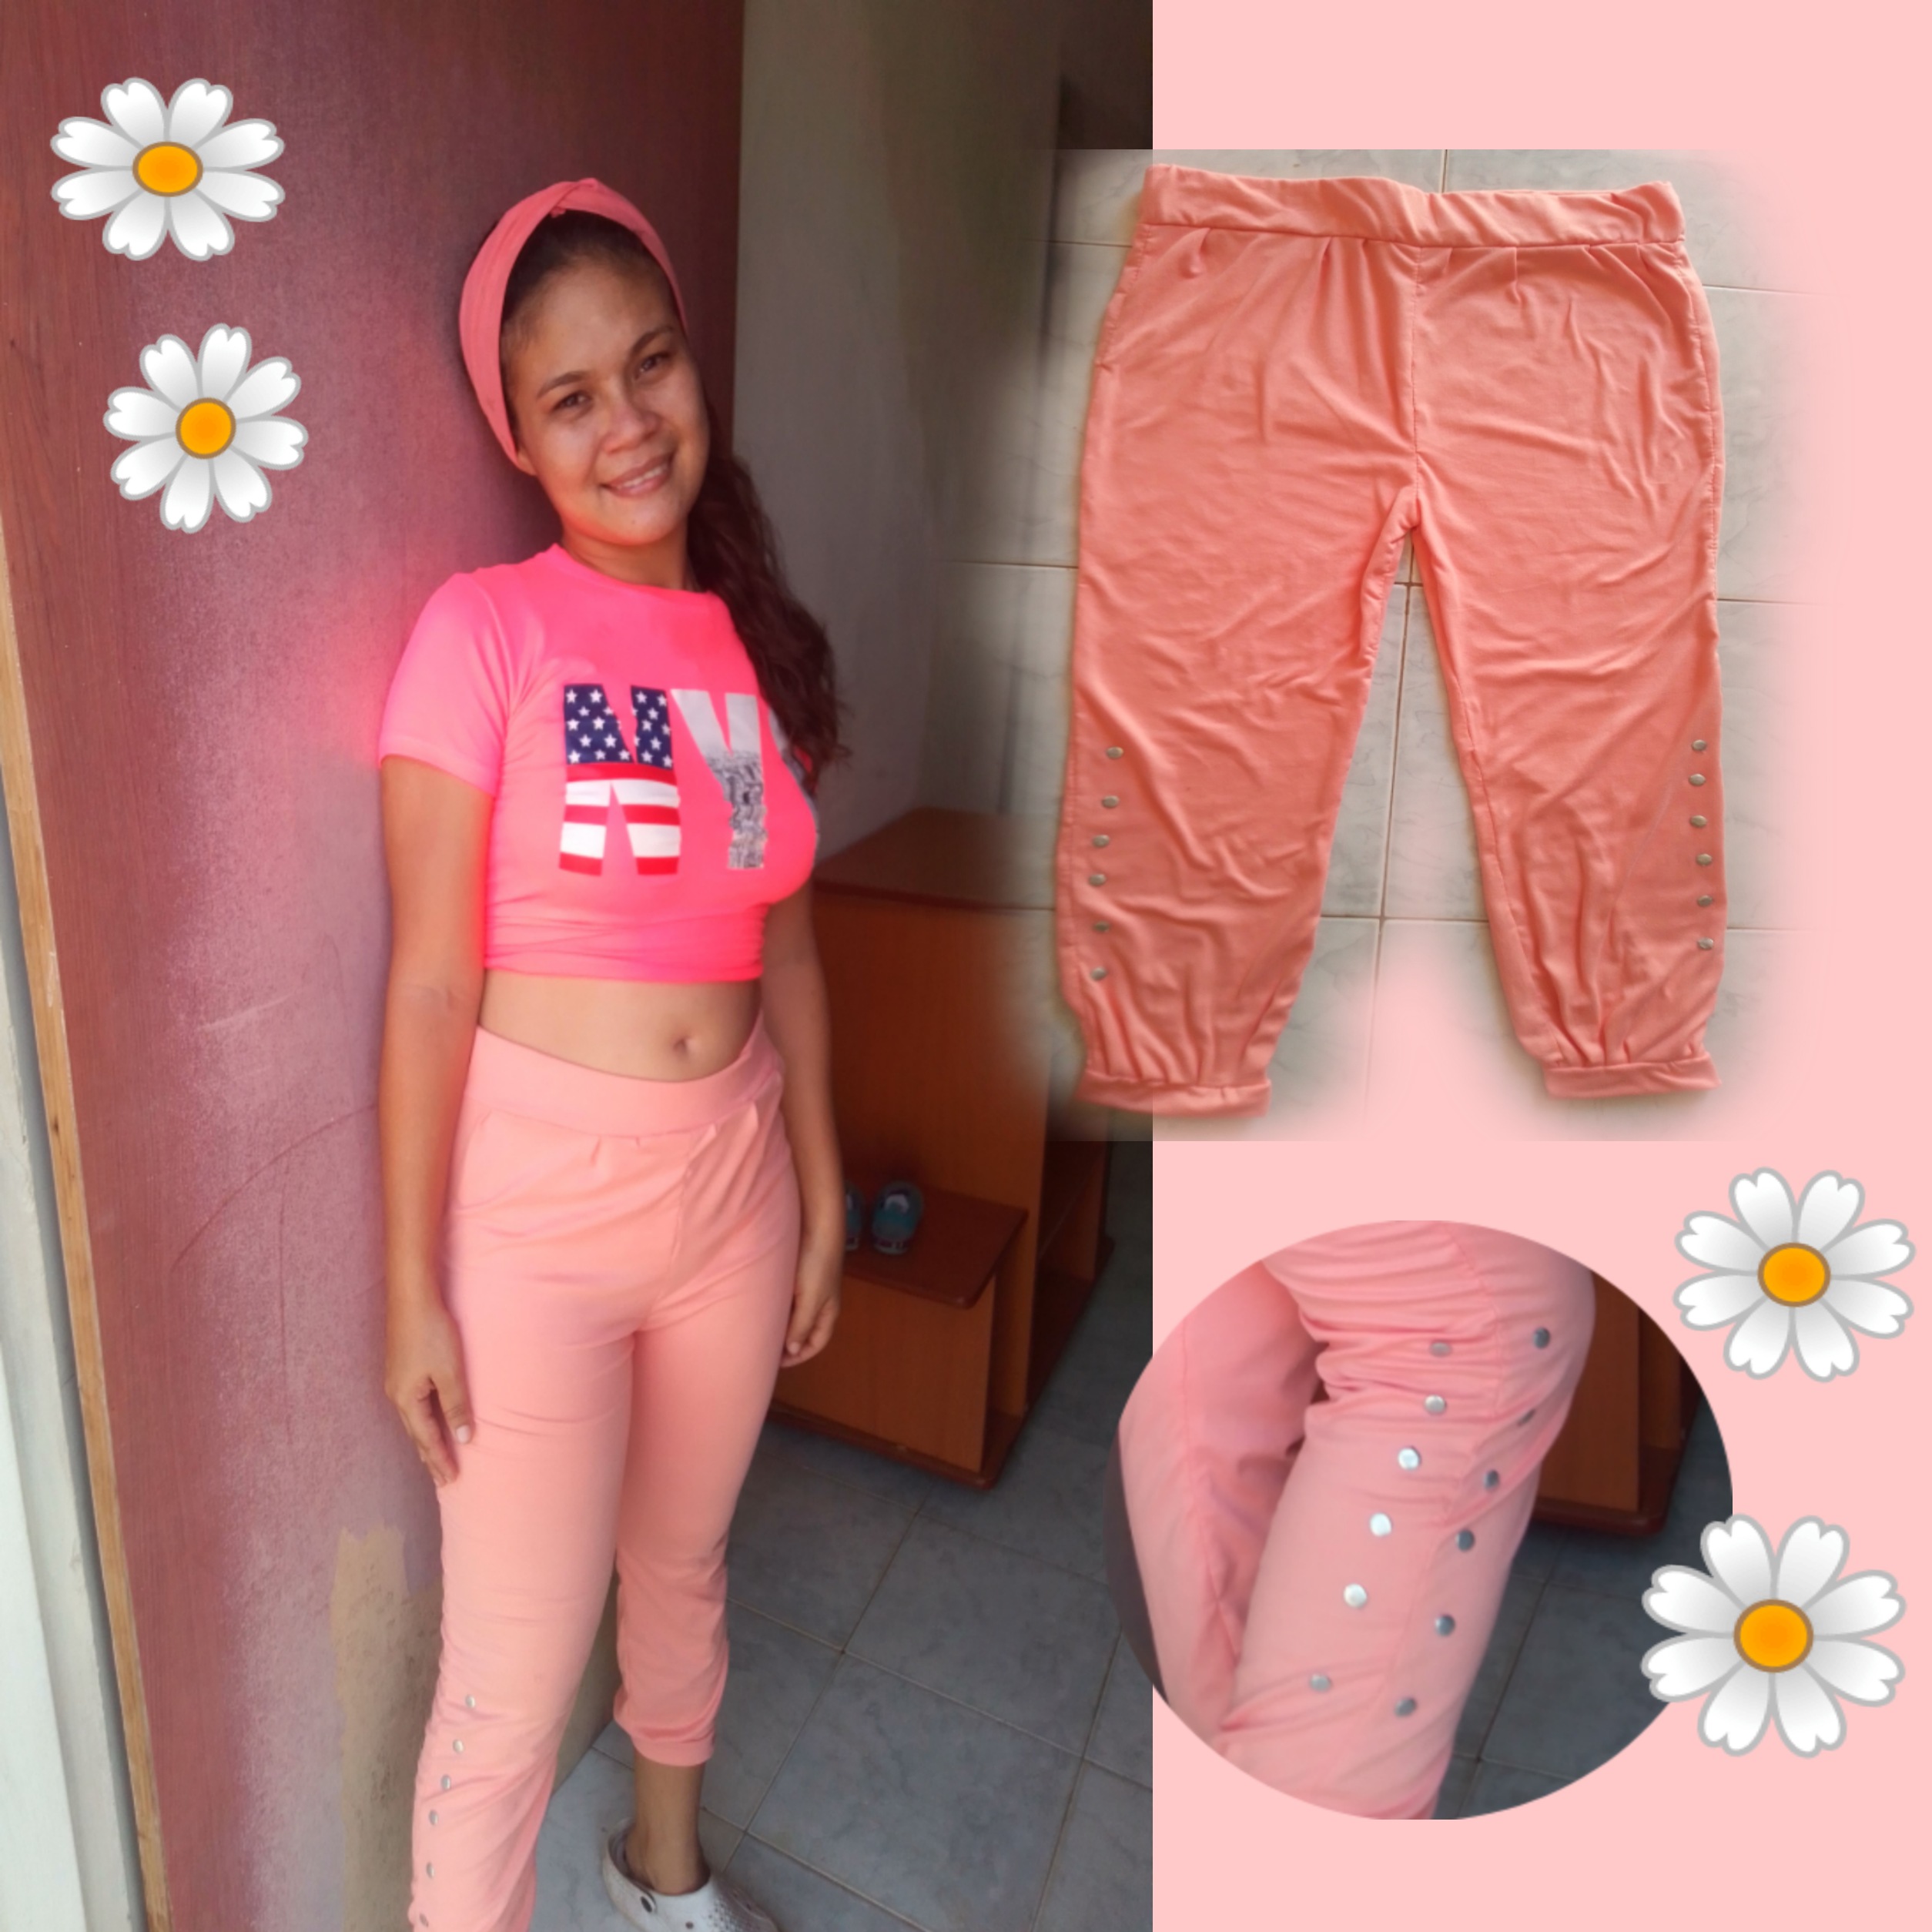
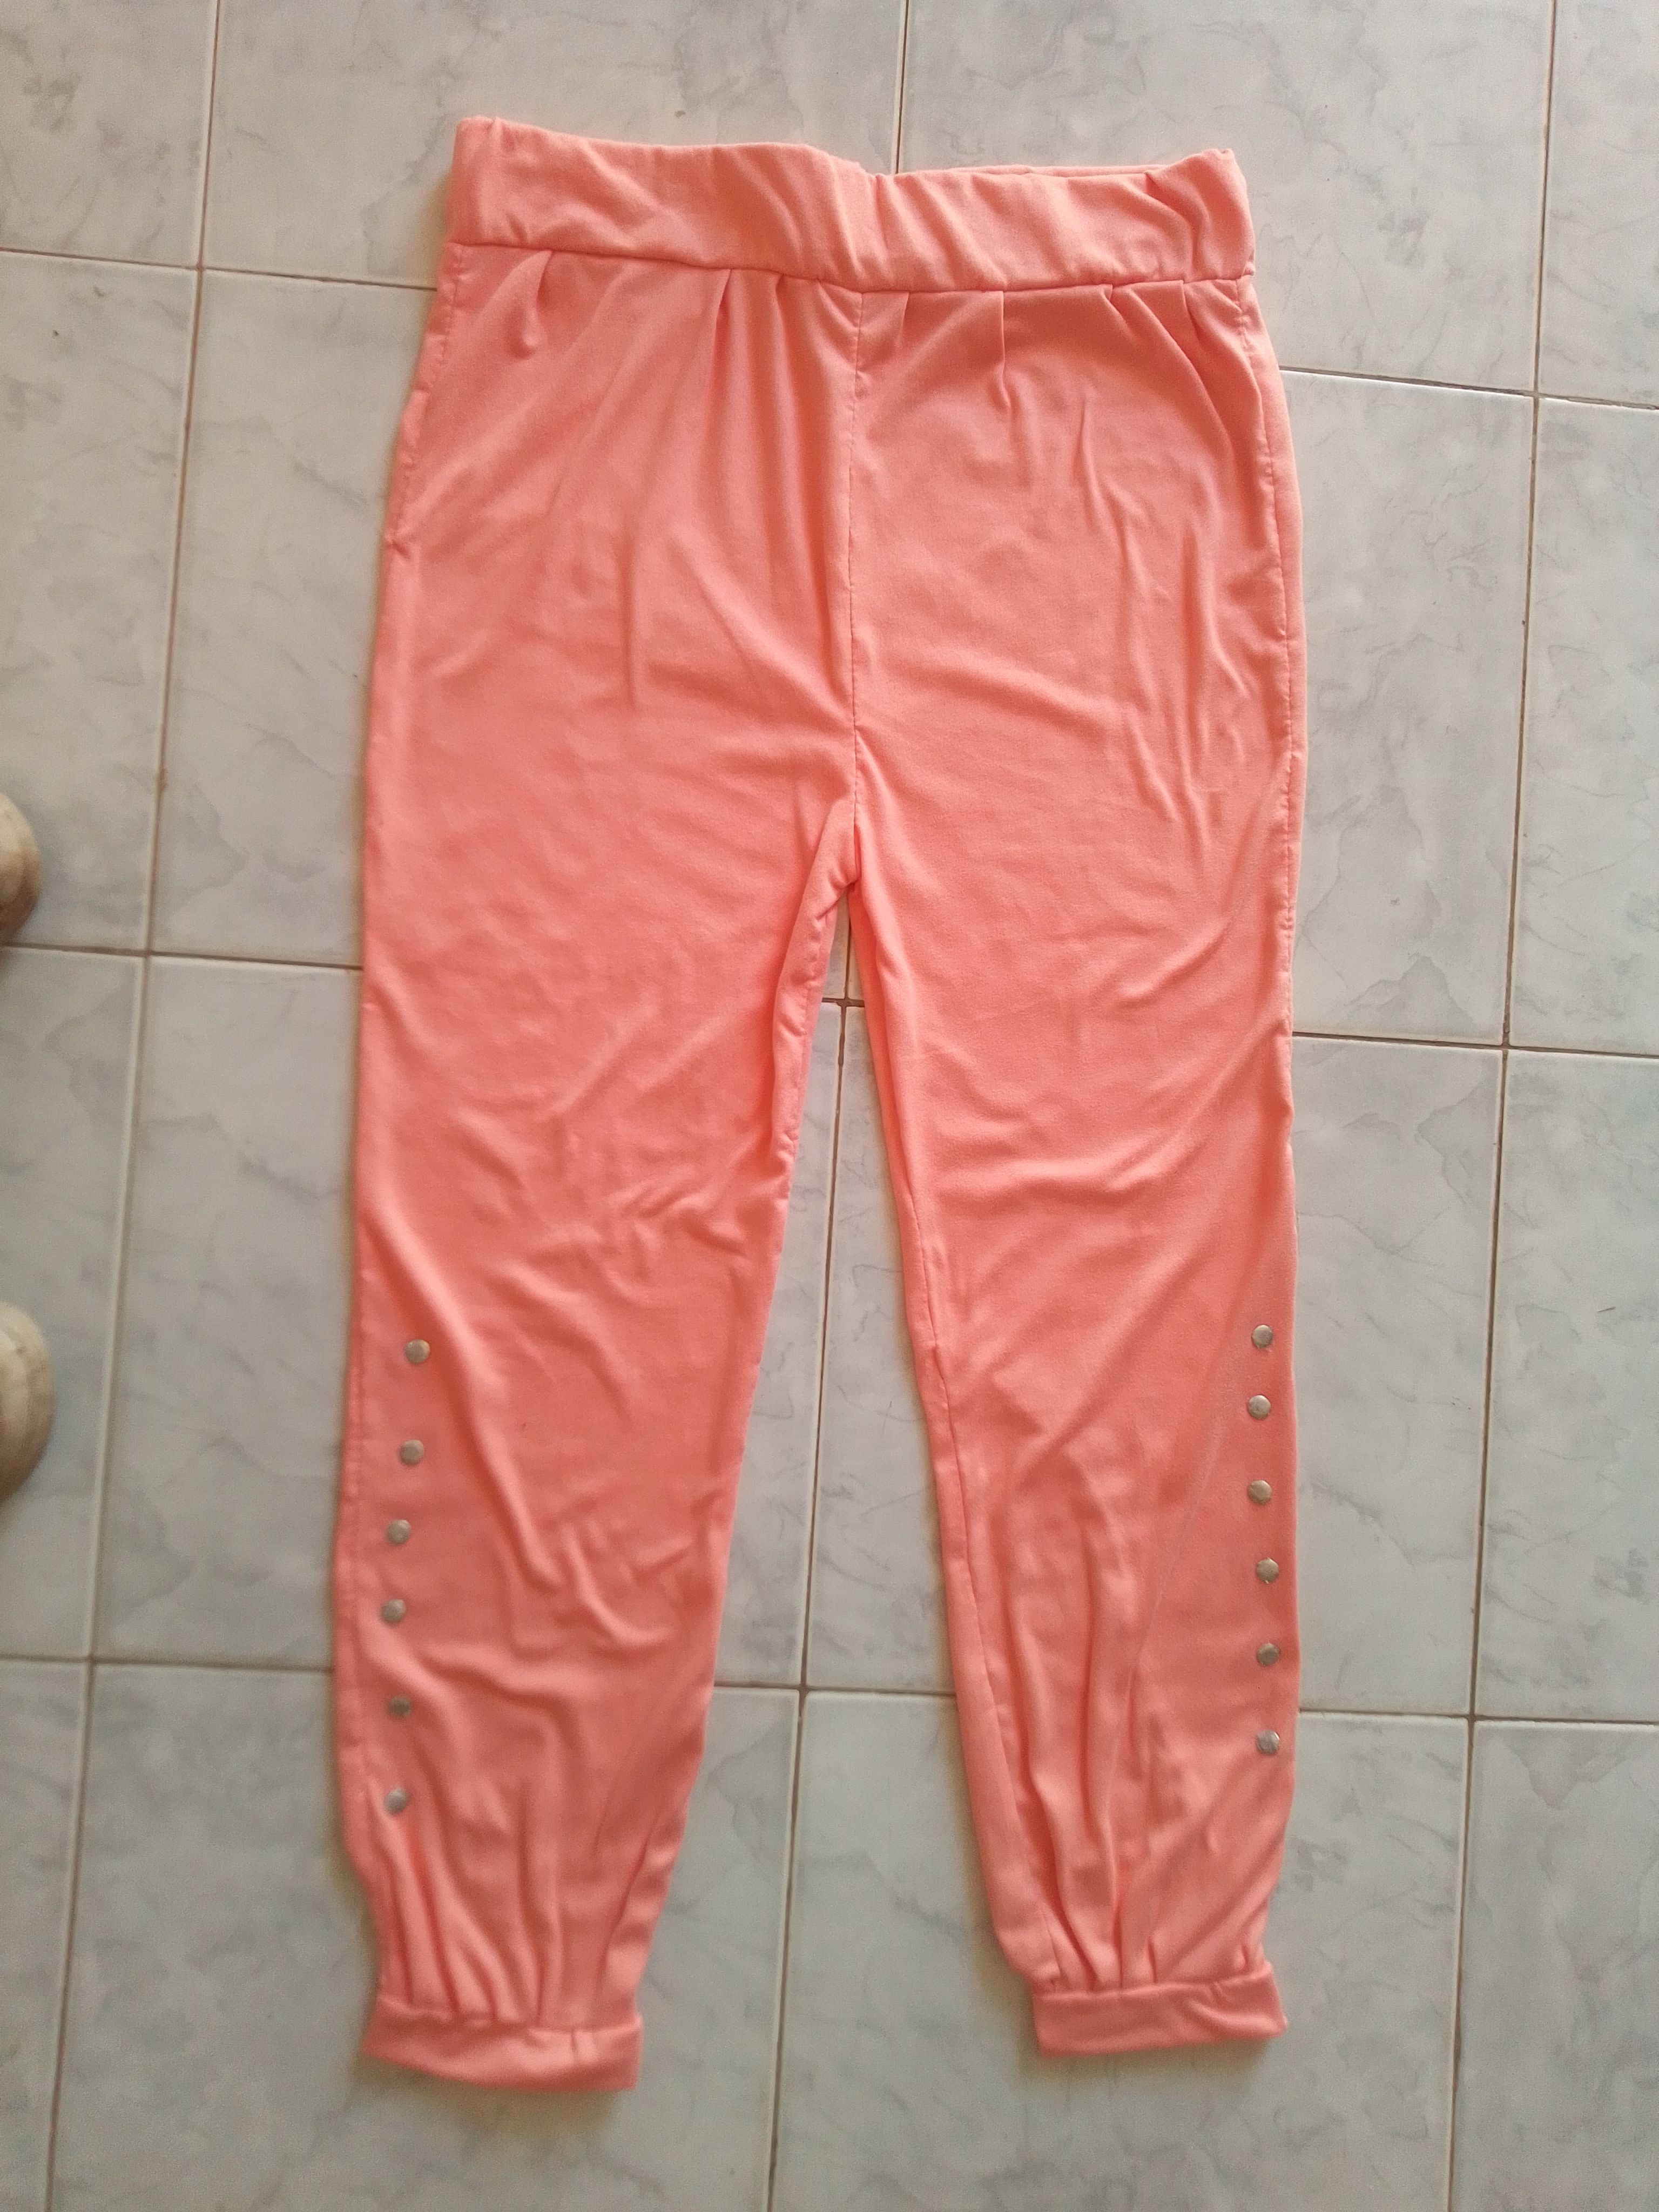
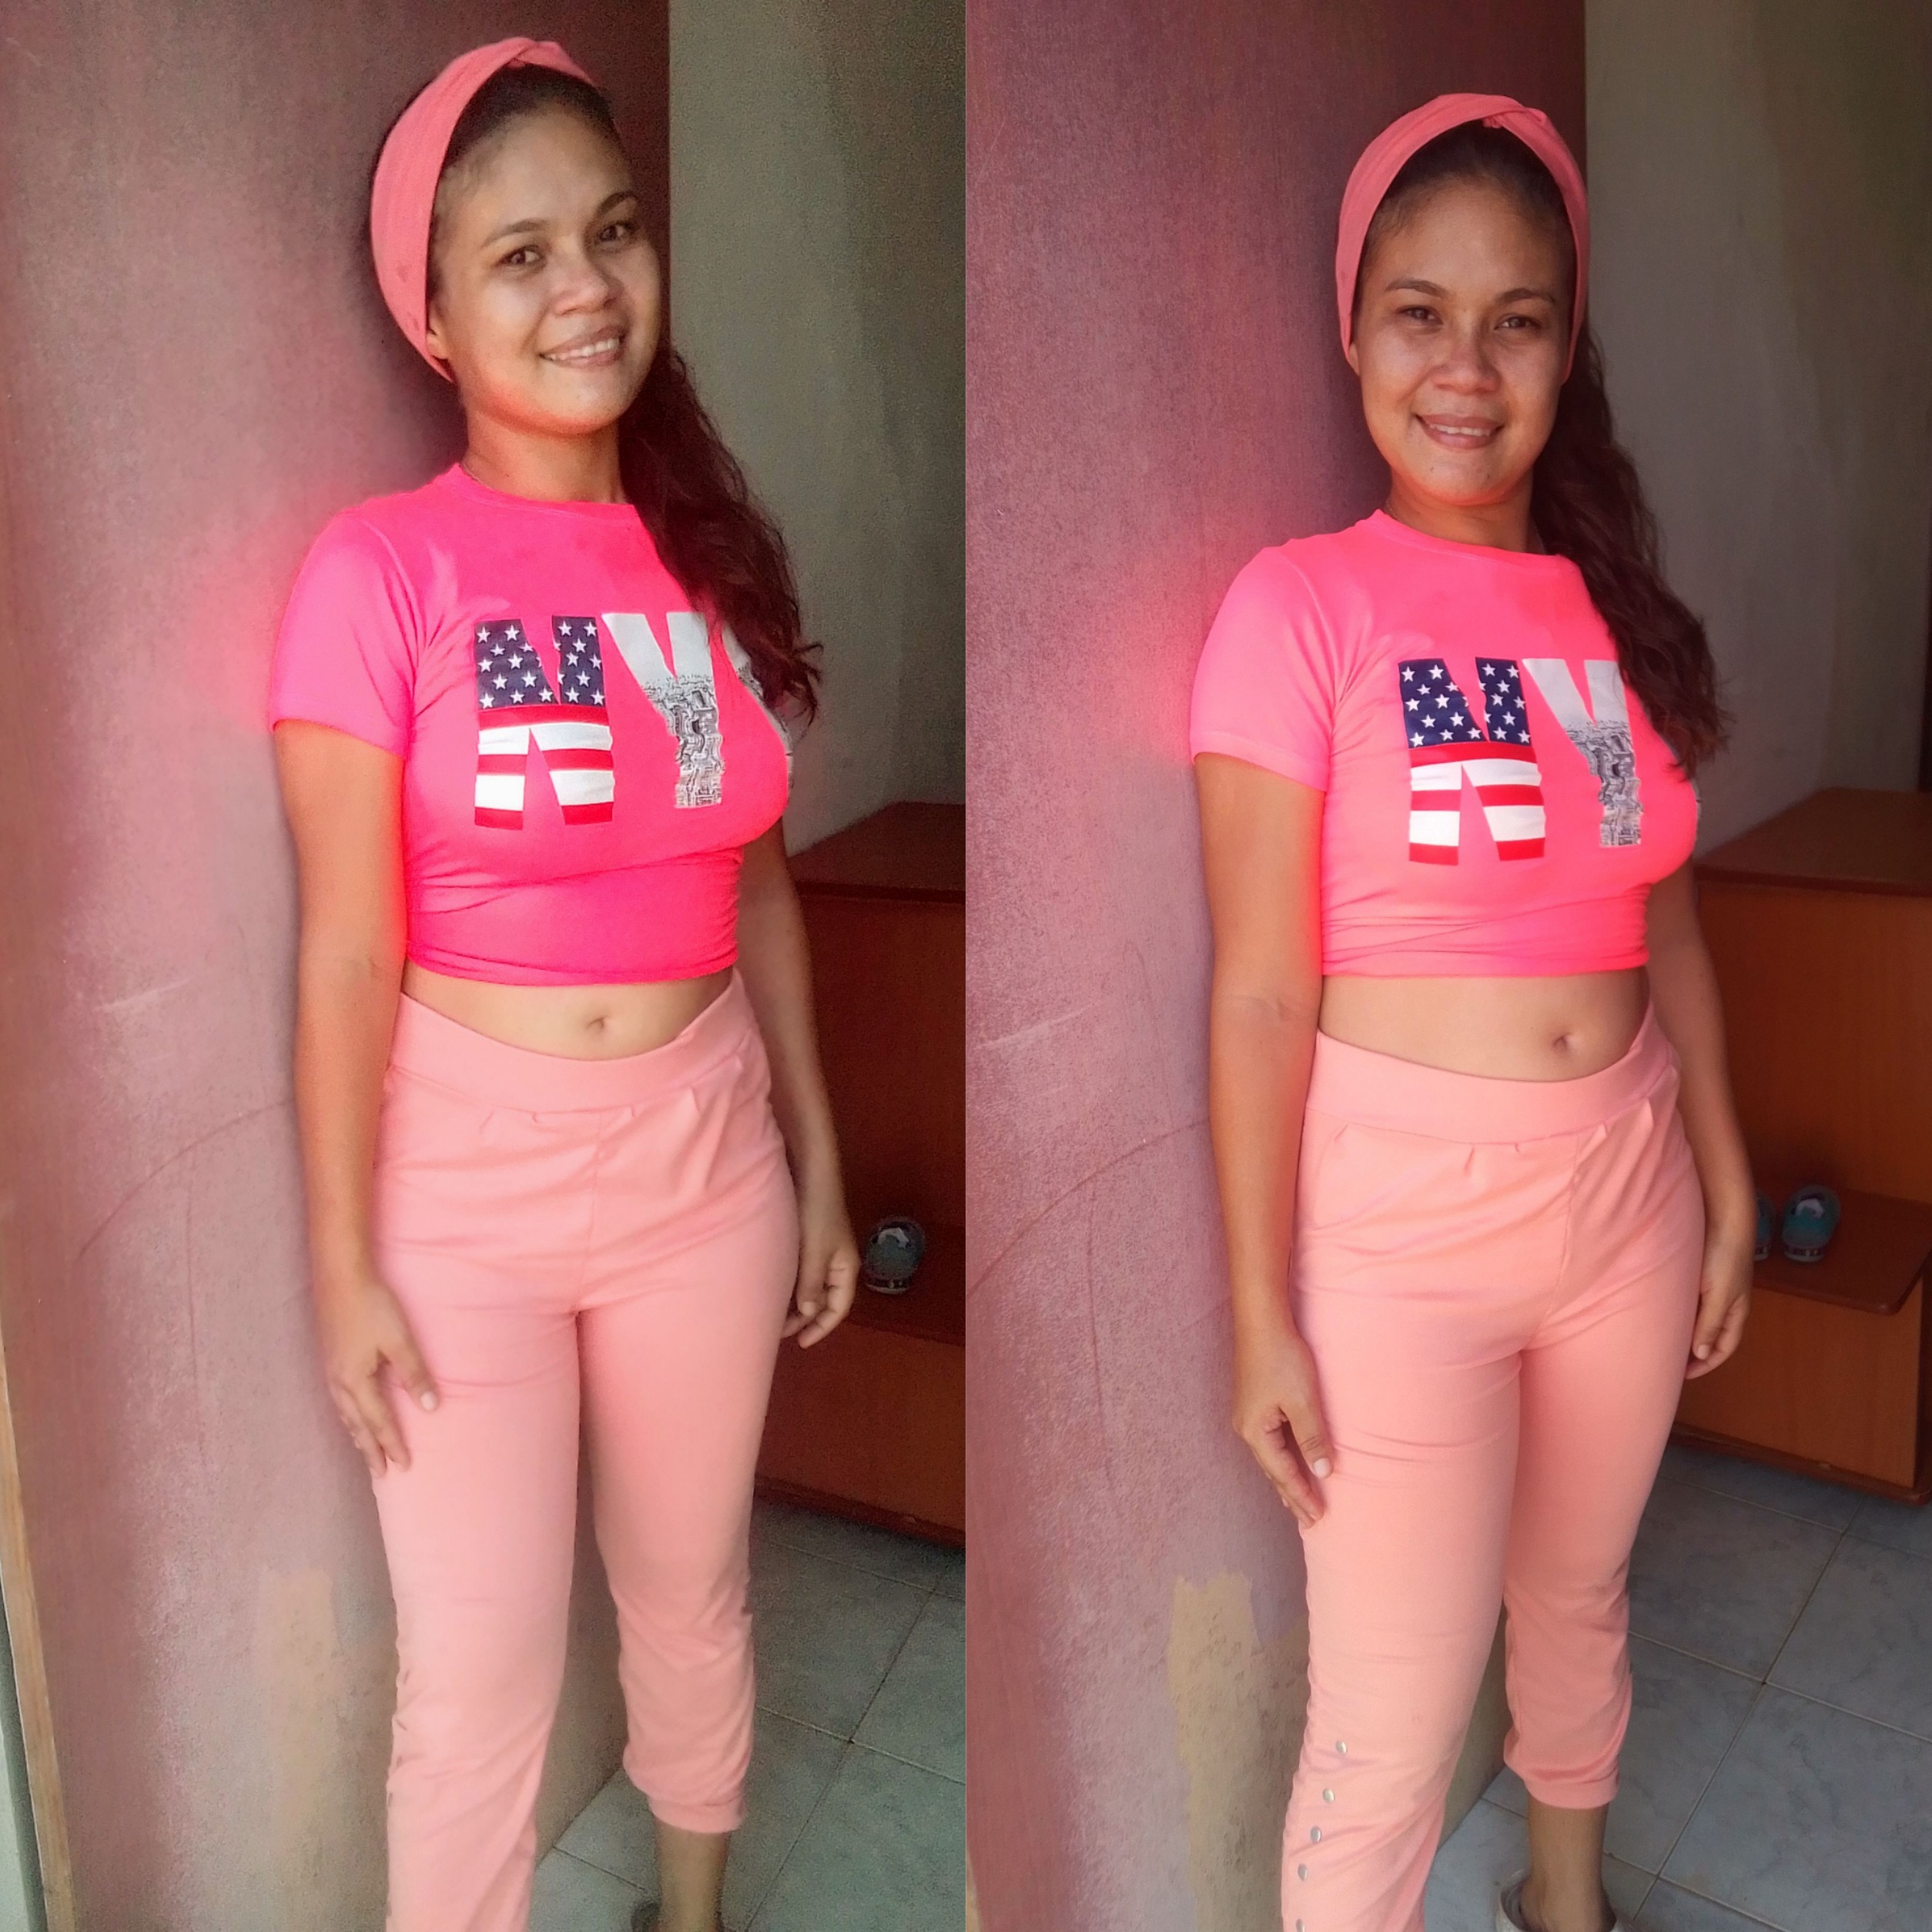
Pantalón Capri alto de pretina gruesa y bellos apliques metalizados en las piernas//High Capri pants with a thick waistband and beautiful metallic appliqués on the legs.
Hola, qué tal mi bonita gente costurera! espero estén pasando un precioso y bendecido día, y que su vida este llena de mucha salud y paz, yo por mi parte estoy muy feliz de poder compartir con ustedes un nuevo contenido de costura hecho a mano.
Hello, how are you my beautiful sewing people! I hope you are having a beautiful and blessed day, and that your life is full of good health and peace, for my part I am very happy to be able to share with you a new handmade sewing content.
Hace algún tiempo les comenté cuando hice las compras de mis telas, les comenté que tenía muchos proyectos en mente, pero que los principales, era hacer para mí, unos pantalones pues la verdad los necesitaba, ya que los demás ya están muy viejitos y usados.
Some time ago I told you when I made purchases of my fabrics, I told you that I had many projects in mind, but that the main ones were to make pants for myself, because I really needed them, since the others are already very old and used.
La moda de los pantalones altos de los 90 siempre me ha encantado, y aunque desapareció en algún momento, me alegra verla y que haya tomado relevancia estos ultimos tiempos, he llegado a pensar que es la más bonita para destacar la silueta de una mujer, sobre todo a nivel de la cintura y abdomen. Así, que como propuesta costura para hoy, he elaborado de una suave y delicada tela piel de durazno, color piel;un bonito pantalón Capri alto, de pretina gruesa y espectaculares apliques metalizados en los costados de cada pierna que se ajusta muy bien a la forma del cuerpo. De manera que si quieres saber cómo hacerlo, te invito a leer hasta el final! Vamos!
I've always loved the high-rise pants fashion of the 90s, and although it disappeared at some point, I'm glad to see it and that it has become relevant in recent times; I have come to think that it is the most beautiful to highlight the silhouette of a woman, especially at the level of the waist and abdomen. So, as a sewing proposal for today, I have made a soft and delicate peach skin fabric, skin color; a nice high Capri pants, with a thick waistband and spectacular metallic appliqués on the sides of each leg that fits very well to the body shape. So if you want to know how to do it, I invite you to read until the end! Come on!
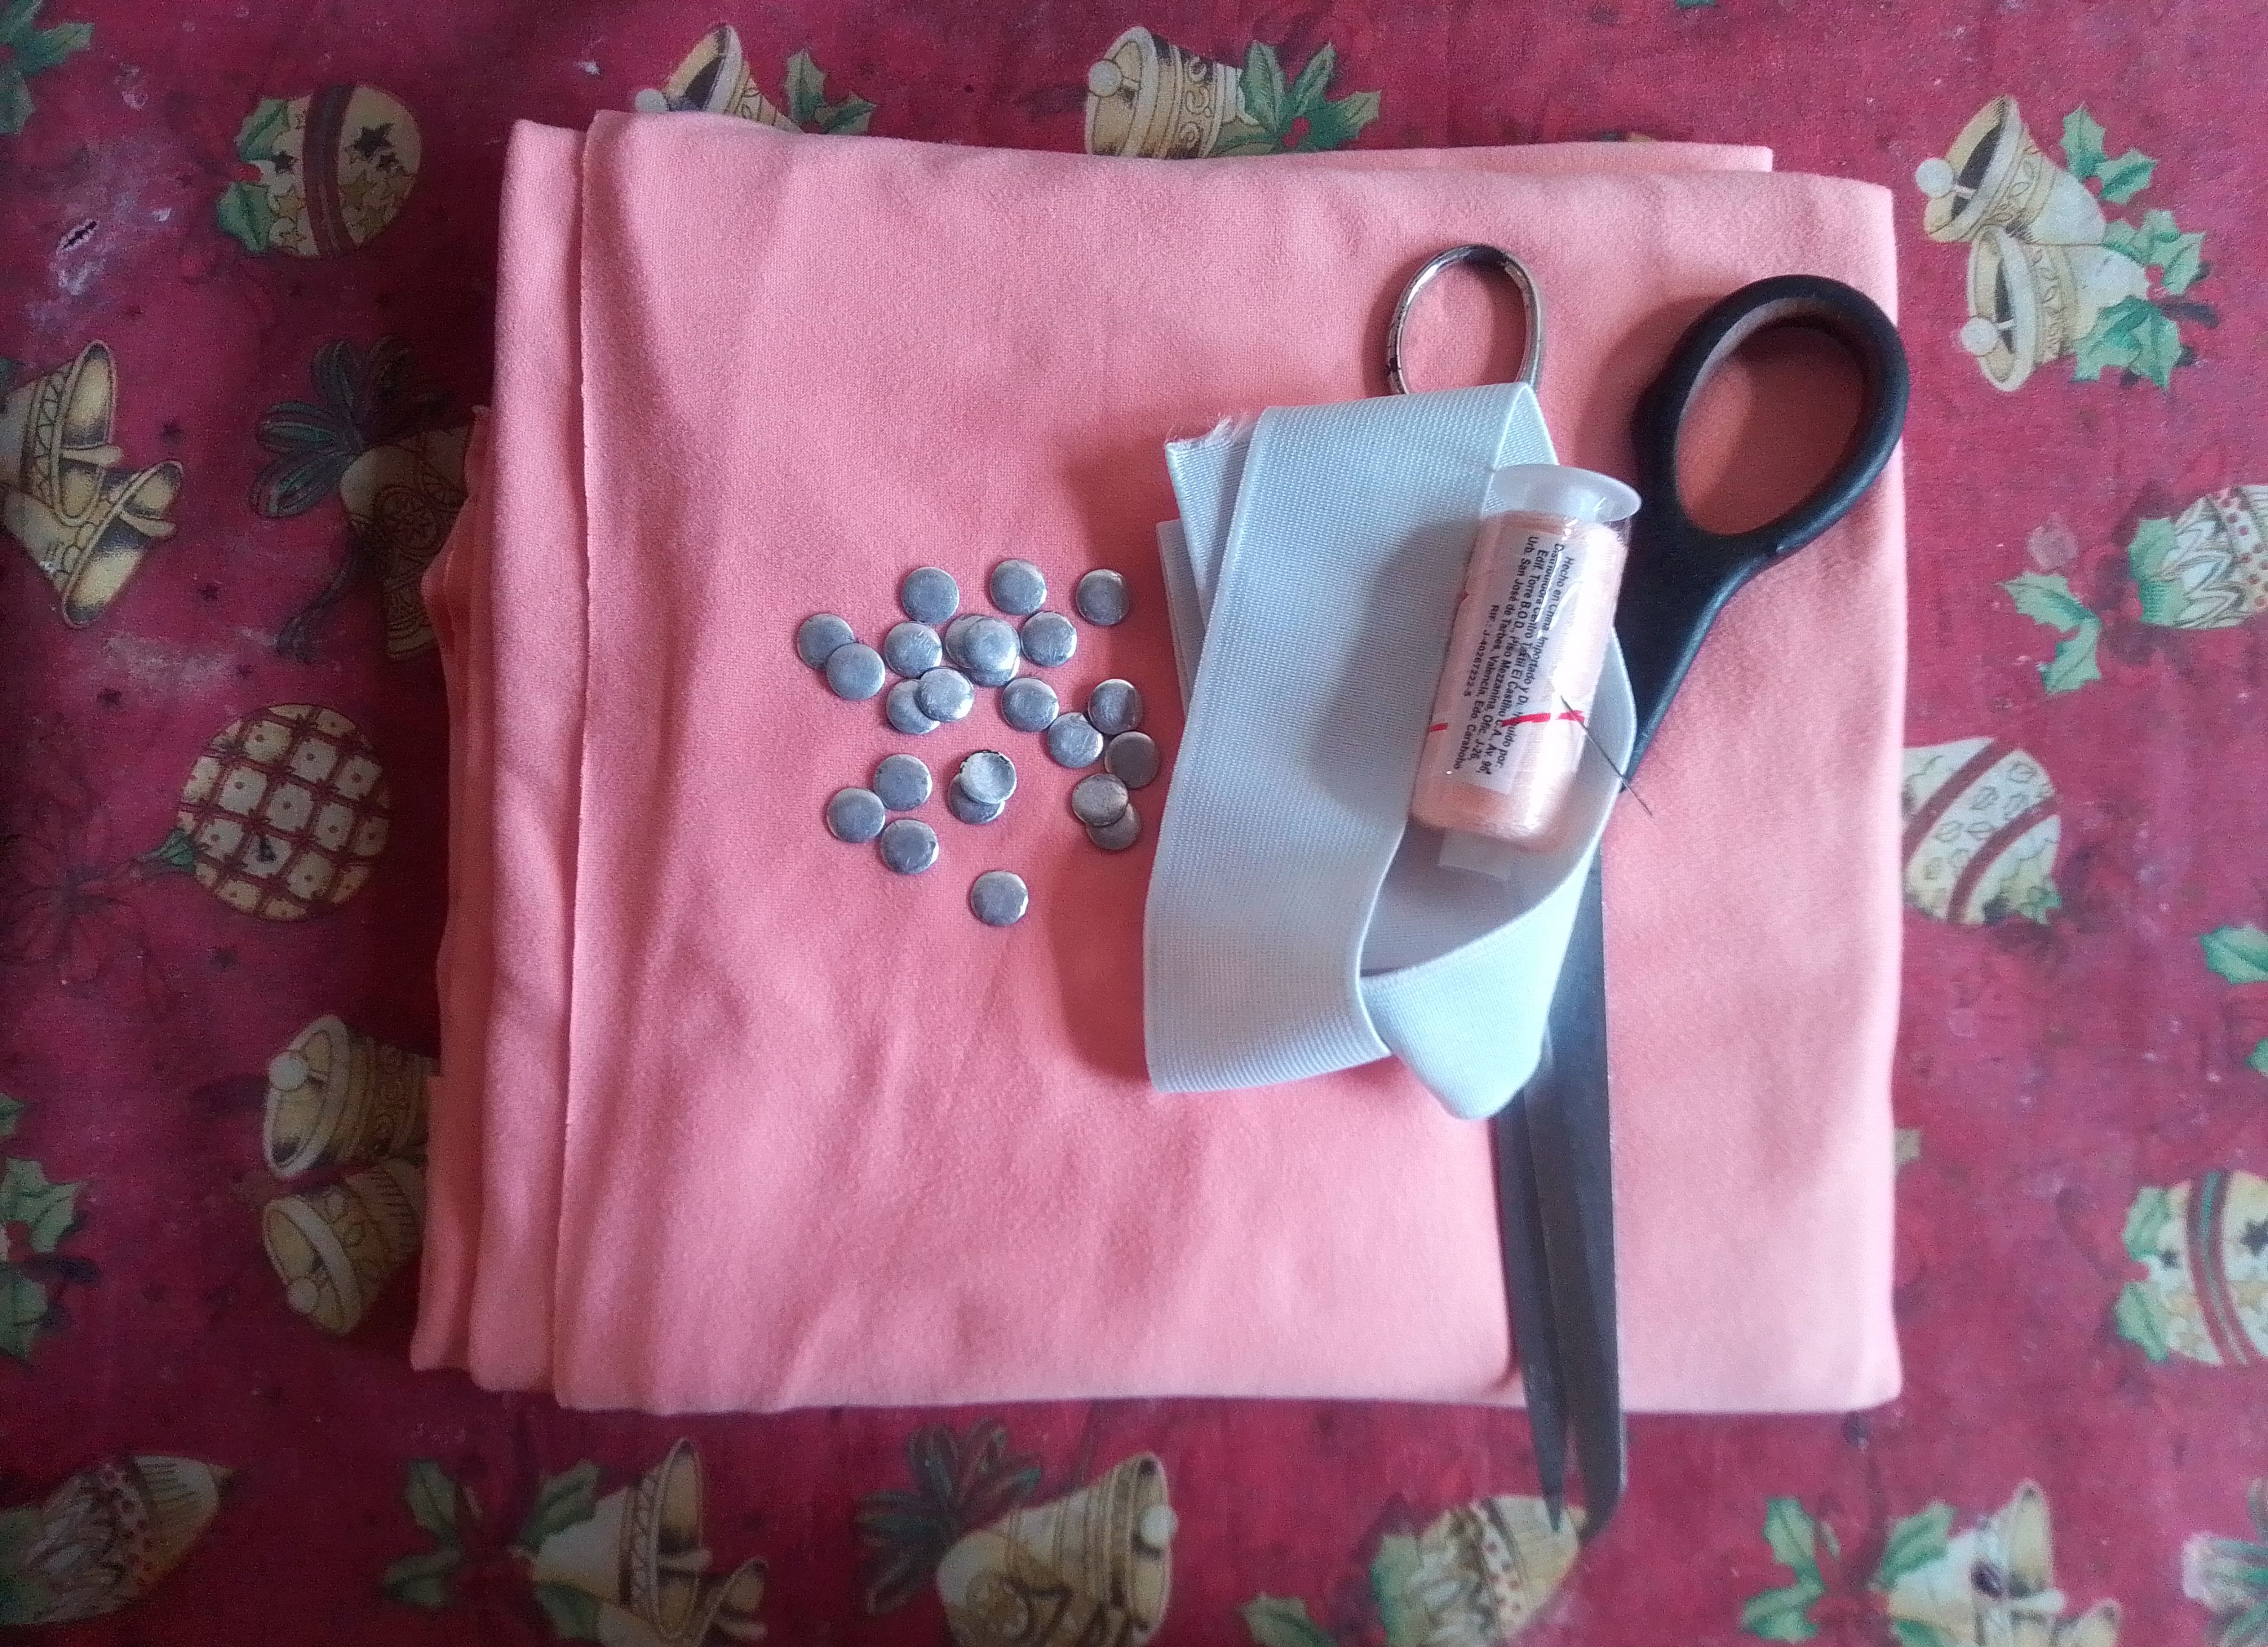
Materiales que necesitas:
- Tela piel de durazno(del color de su preferencia)
- Hilo y aguja.
- Elástica.
- Tijeras.
- Hot fix de metal. (apliques)
Materials you need:
- Peach skin fabric (in the color of your choice)
- Thread and needle.
- Elastic.
- Scissors.
- Hot fix metal. (appliques)
(PROCEDIMIENTO)
Paso 01
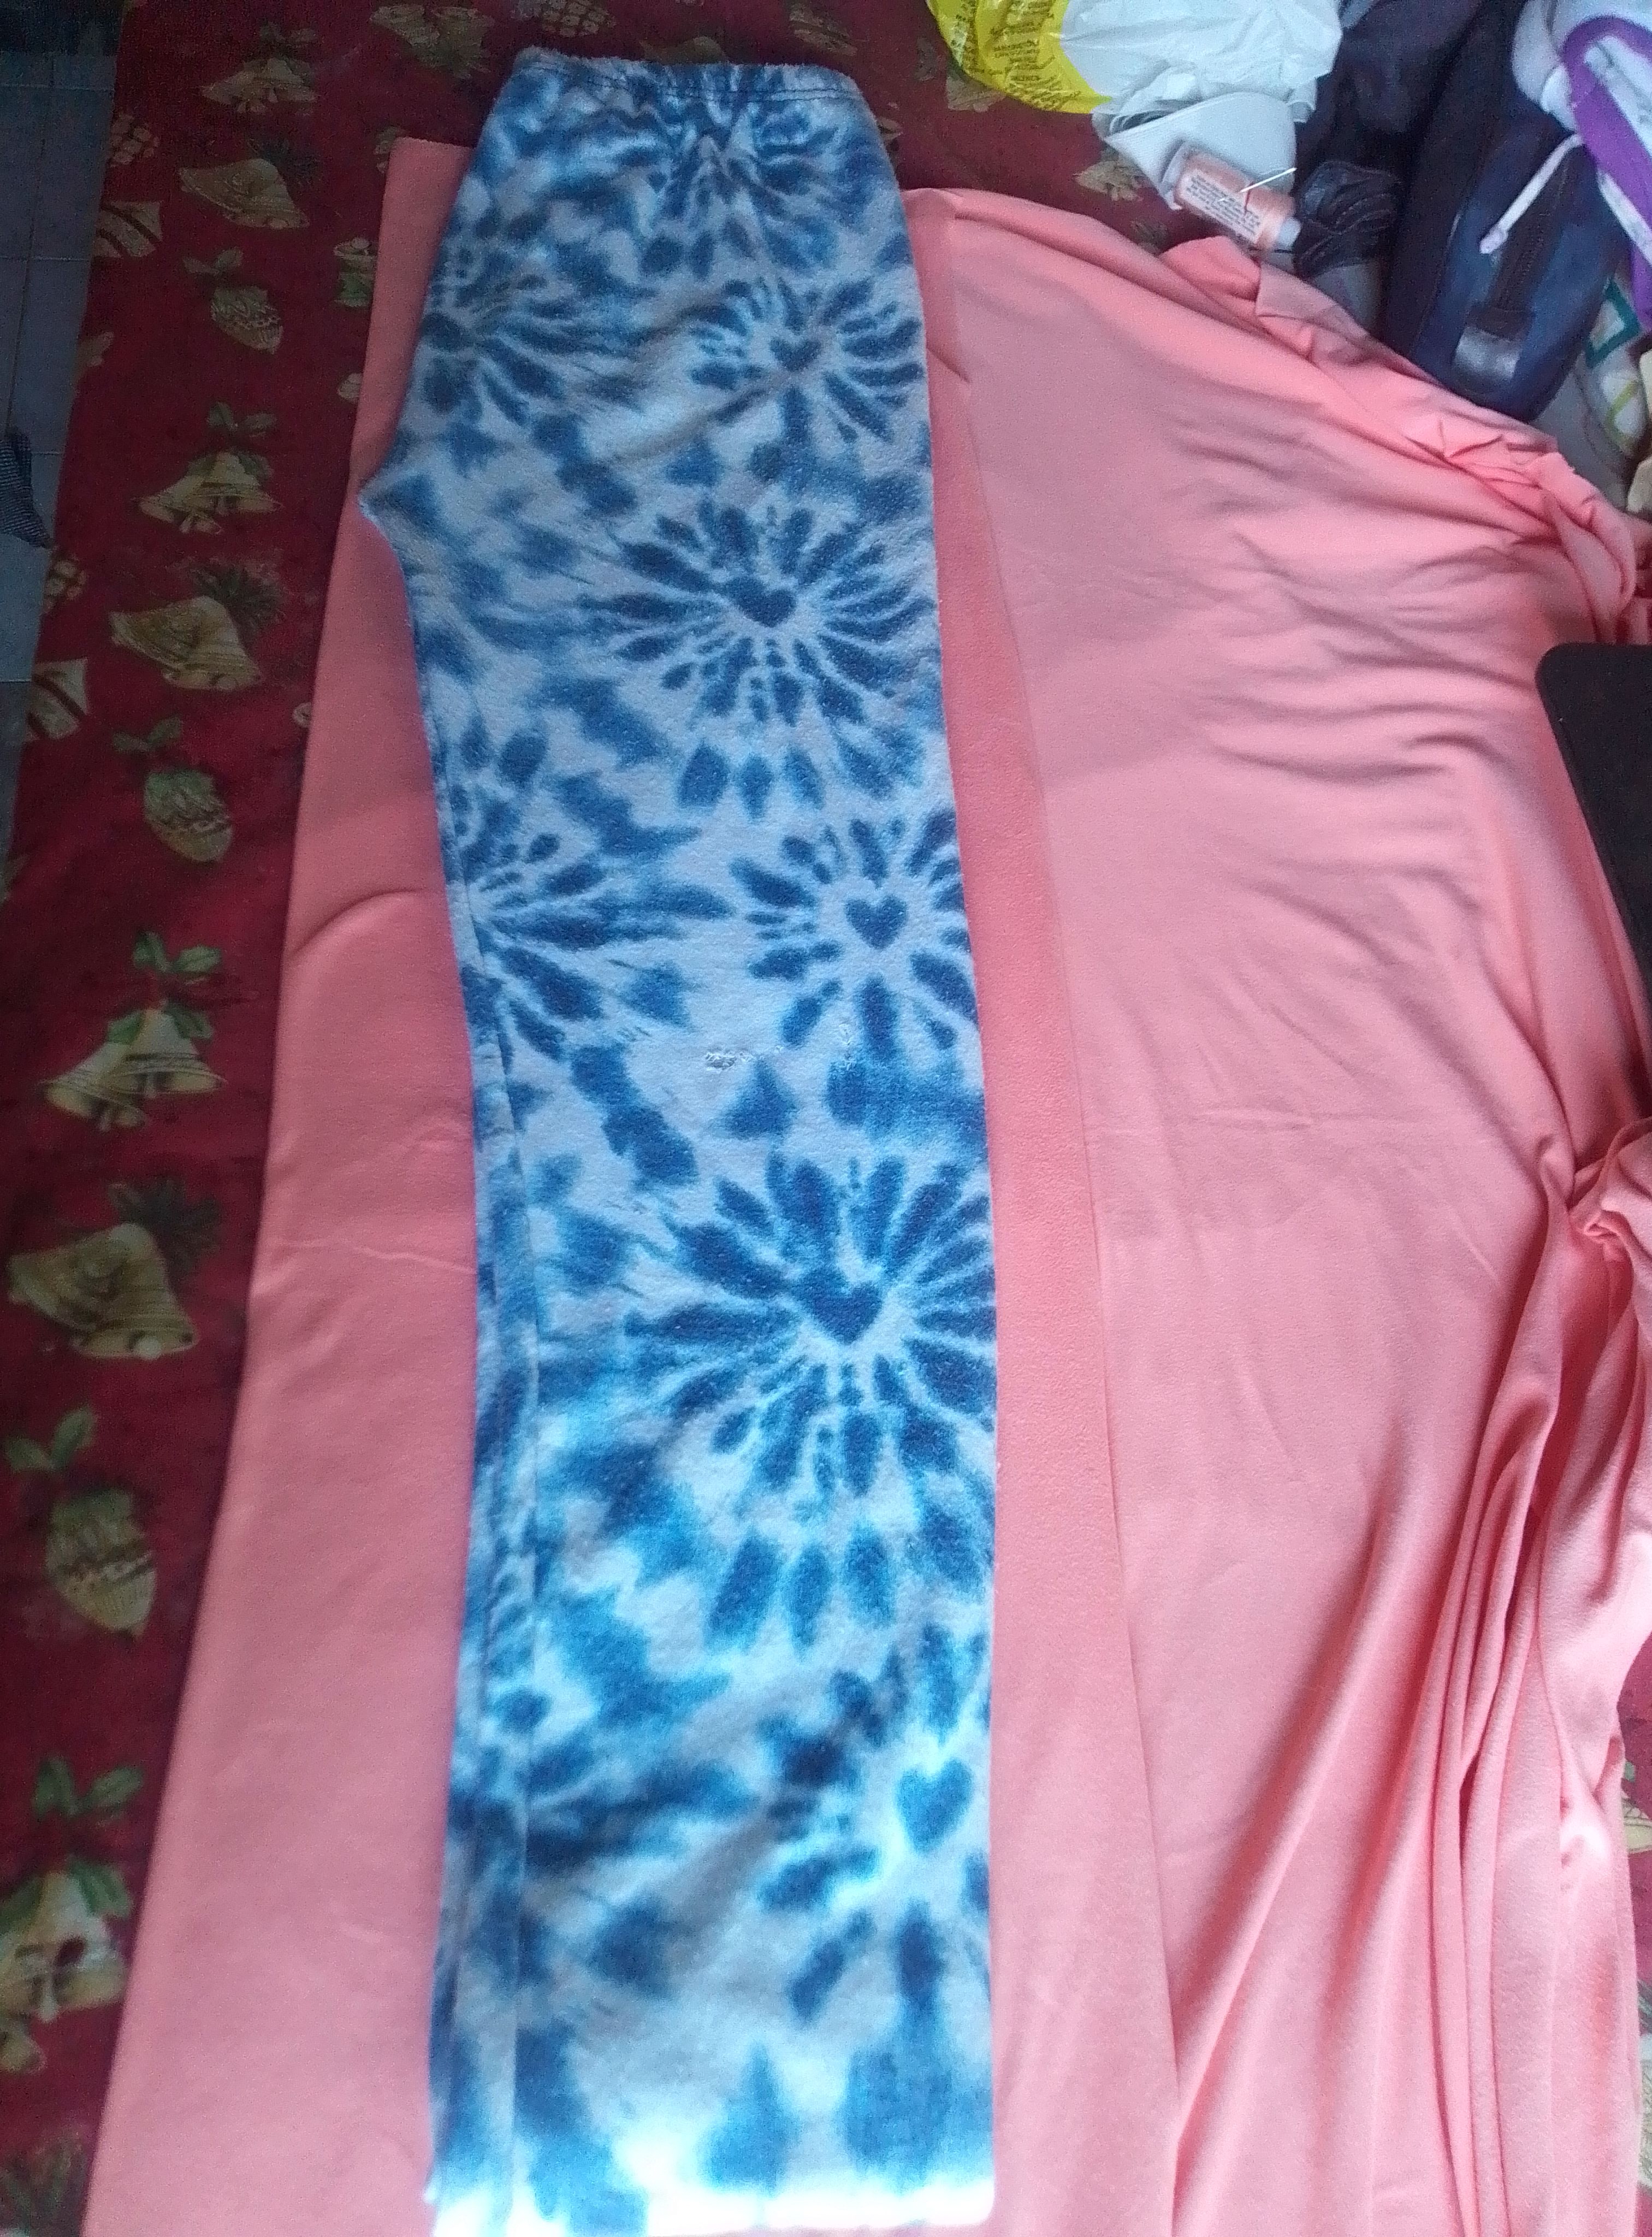
Como le he mencionado en publicaciones anteriores, cuando se trata de hacer alguna confección para nosotros mismos, es muy necesario que tengas un molde de lo que deseas hacer y no hay nada más exacto, que usar nuestra propia ropa del diario para esto, así que lo que haremos será tomar una pantalón y estirarlo muy bien sobre la tela doblada; mi molde es un poco más largo de lo quería hacer, así que doble un poco en la parte inferior de cada pierna y saqué un poco hacia afuera la pretina; luego cortamos el contorno y repetimos el paso para obtener las piezas delanteras y traseras del pantalón.
Step 01
As I have mentioned in previous posts, when it comes to making some confection for ourselves, it is very necessary that you have a template of what you want to do and there is nothing more exact, than to use our own daily clothes for this, so what we will do is take a pair of pants and stretch them very well on the folded fabric; my pattern is a bit longer than I wanted to make, so I folded a little at the bottom of each leg and pulled the waistband out a bit; then we cut the outline and repeat the step to obtain the front and back pieces of the pants.
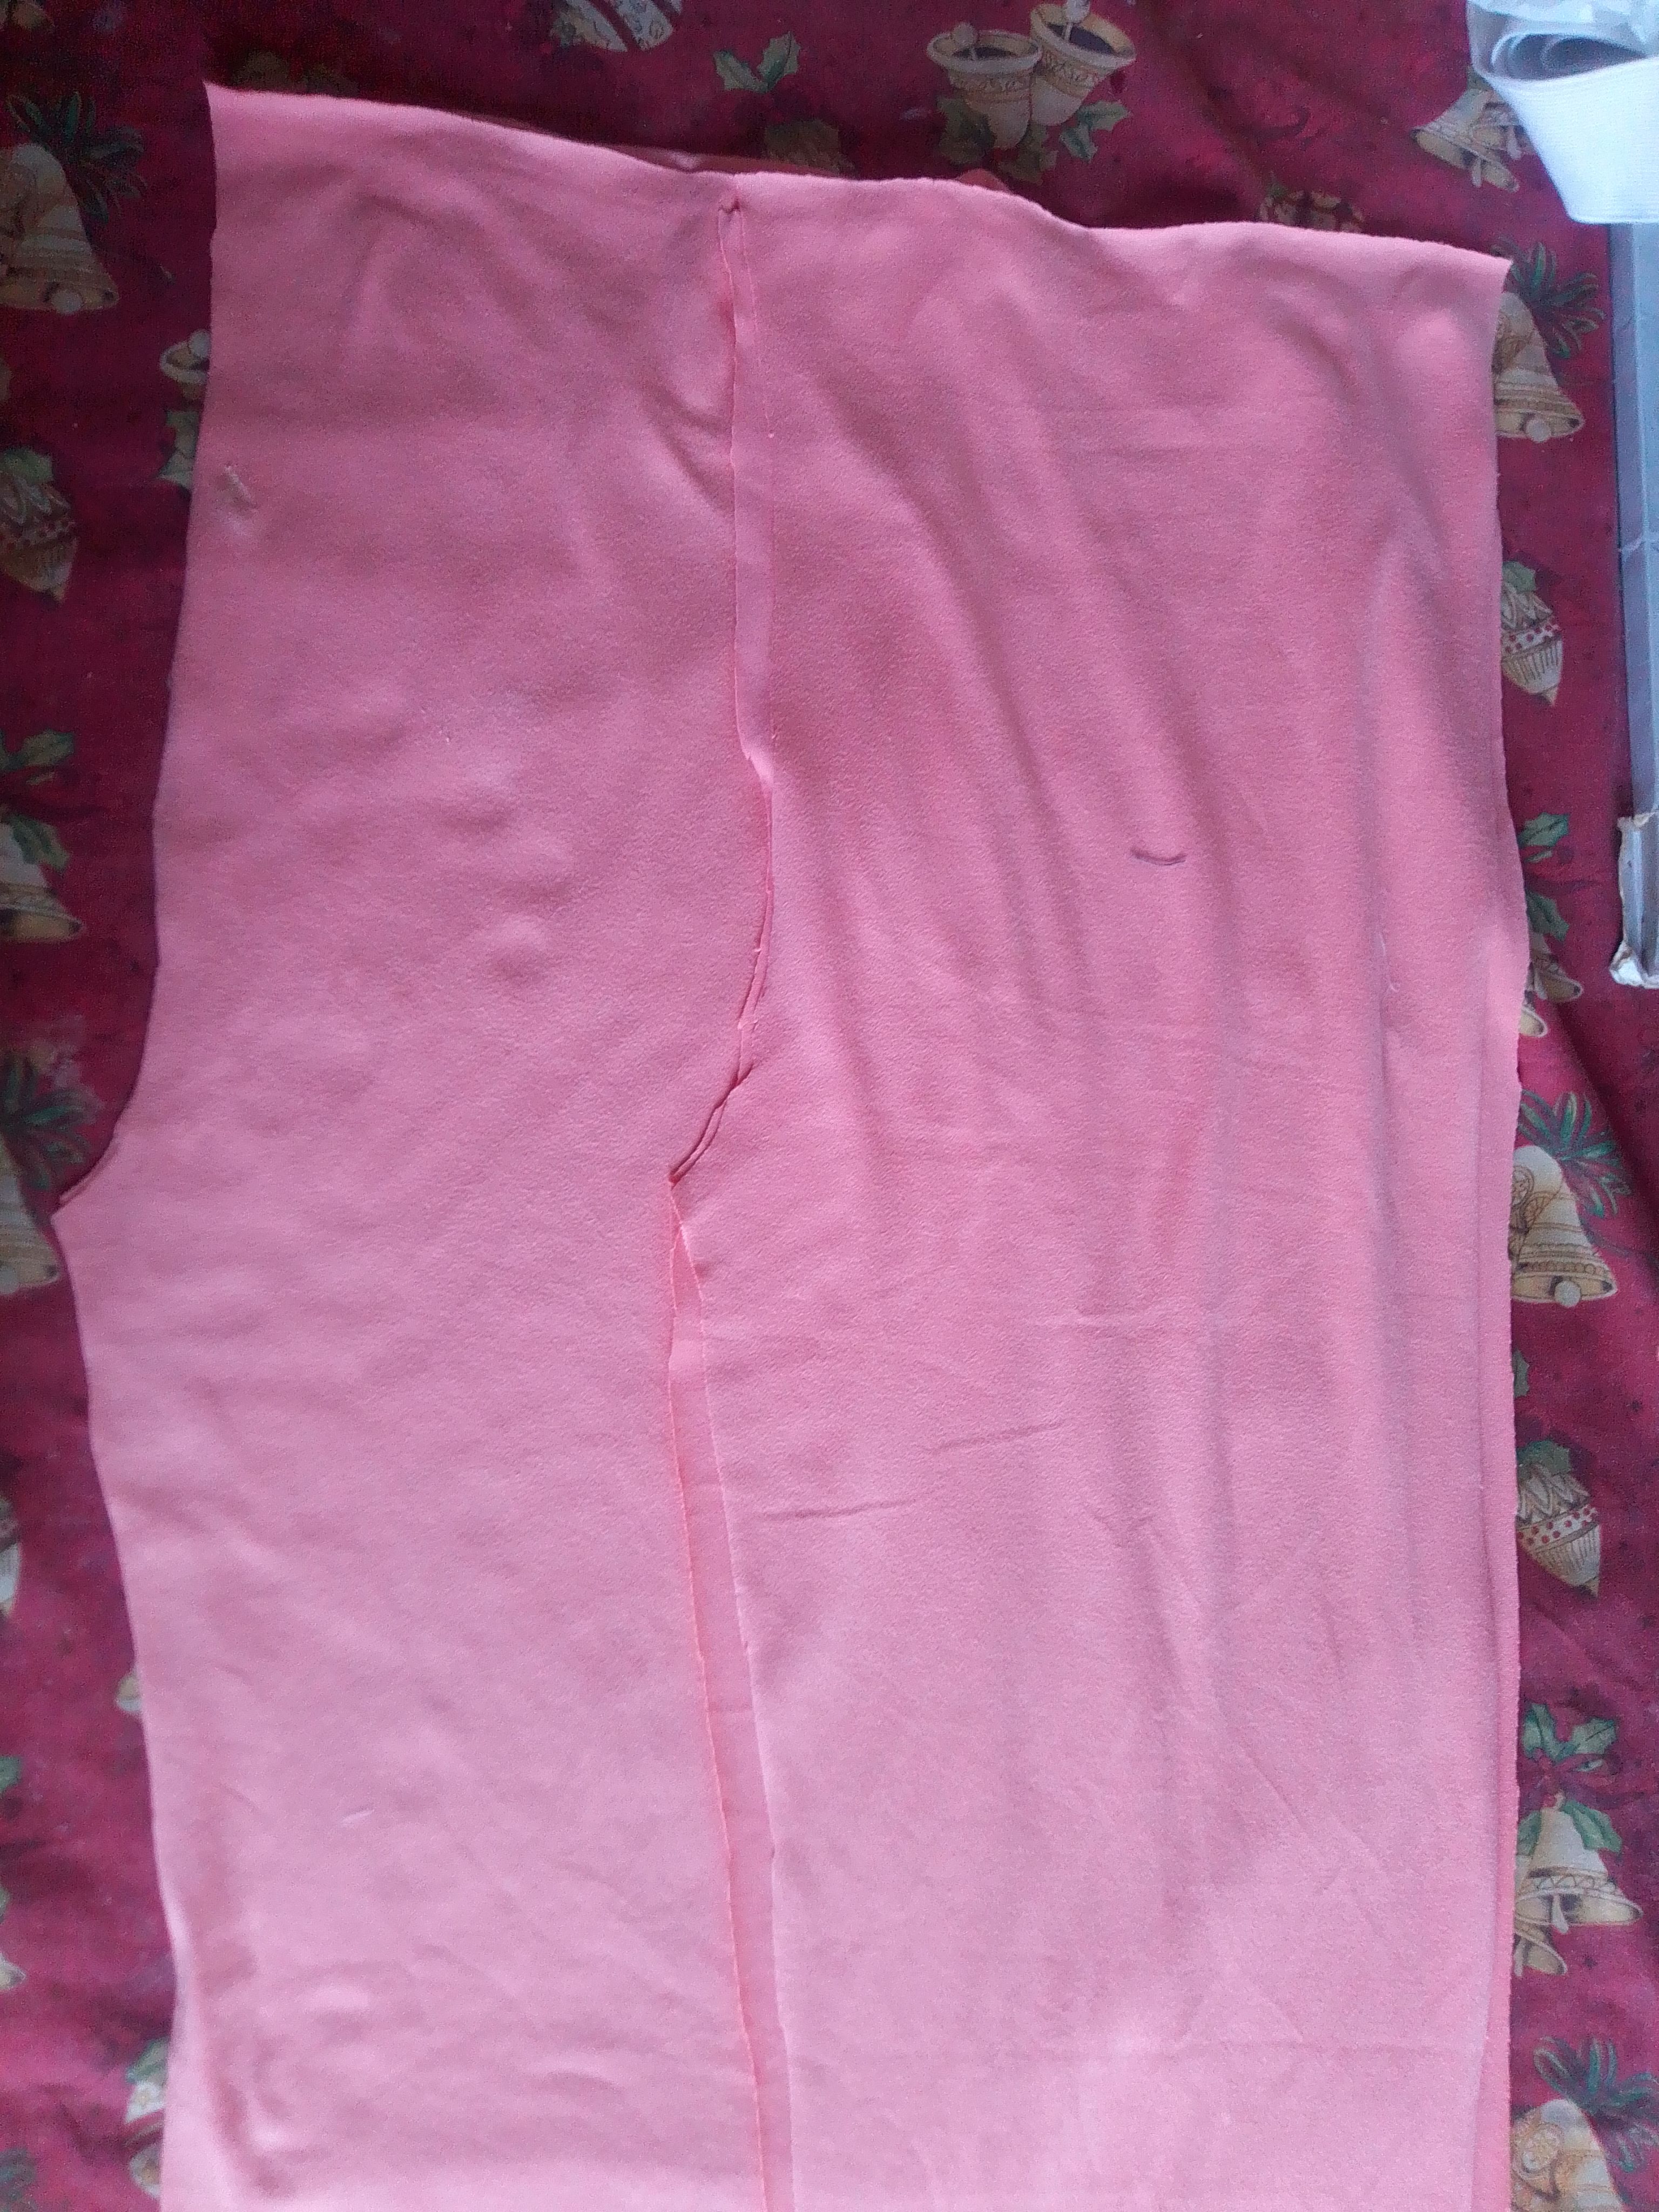
Paso 02
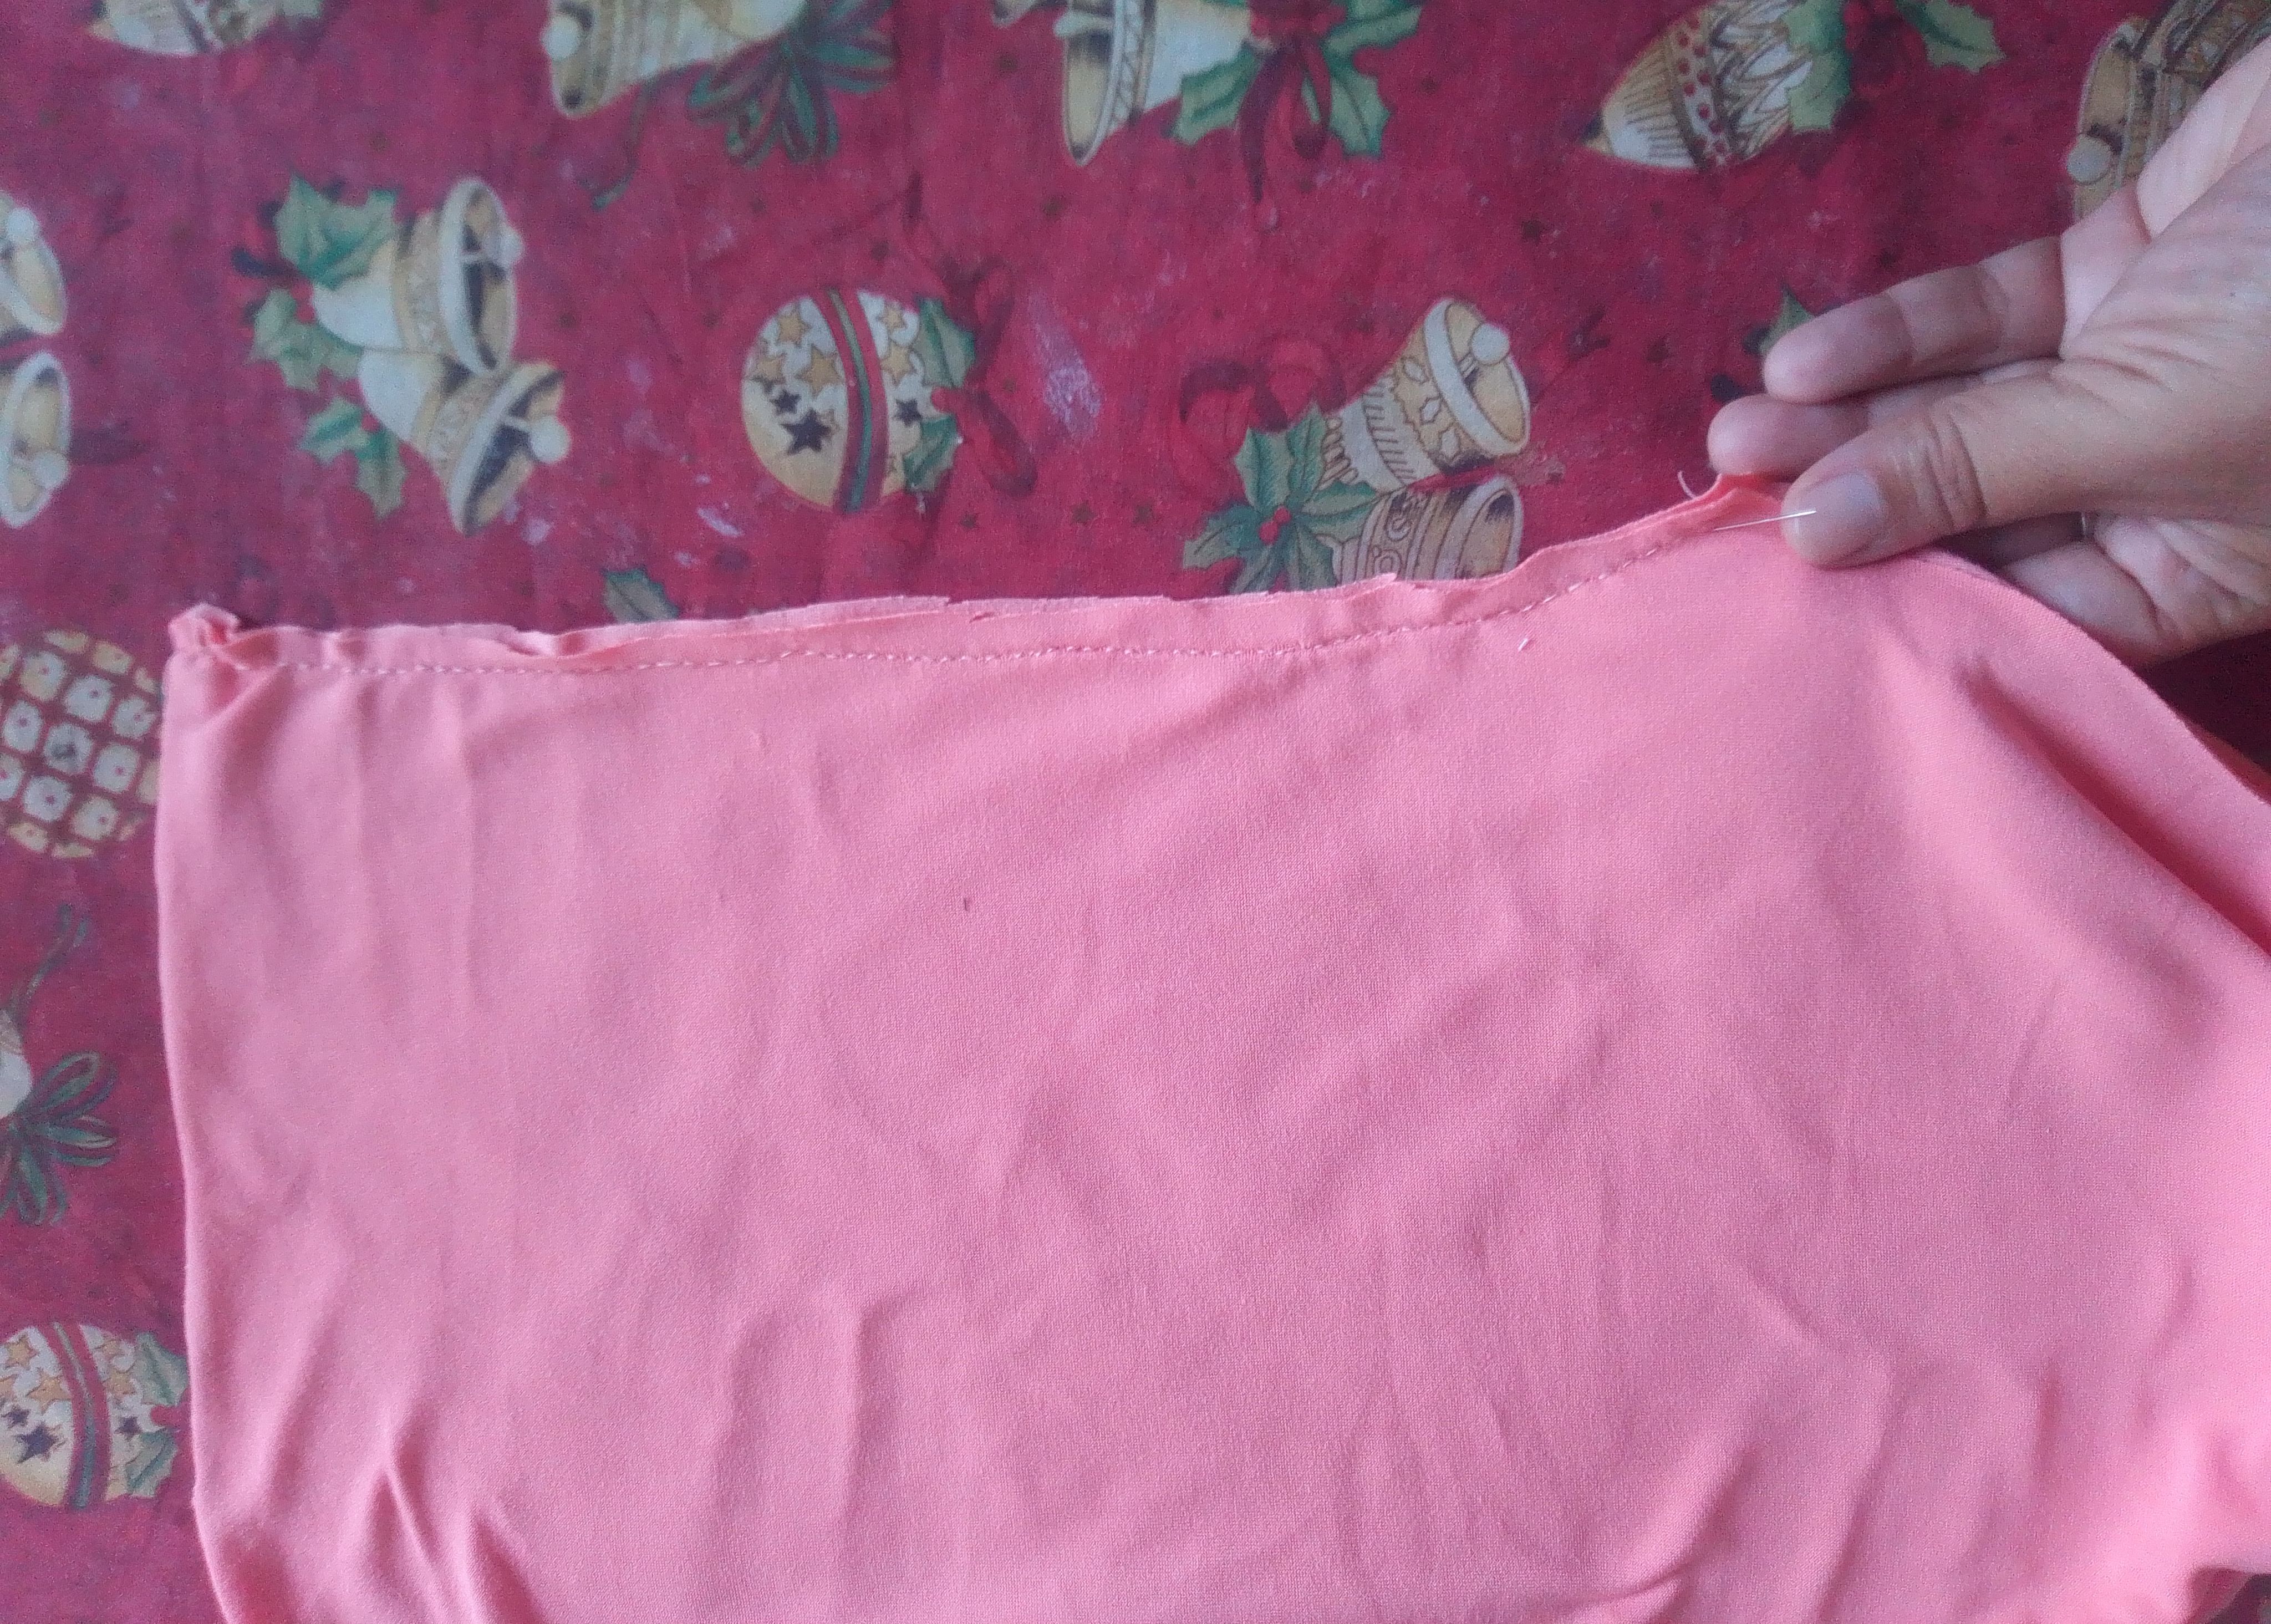
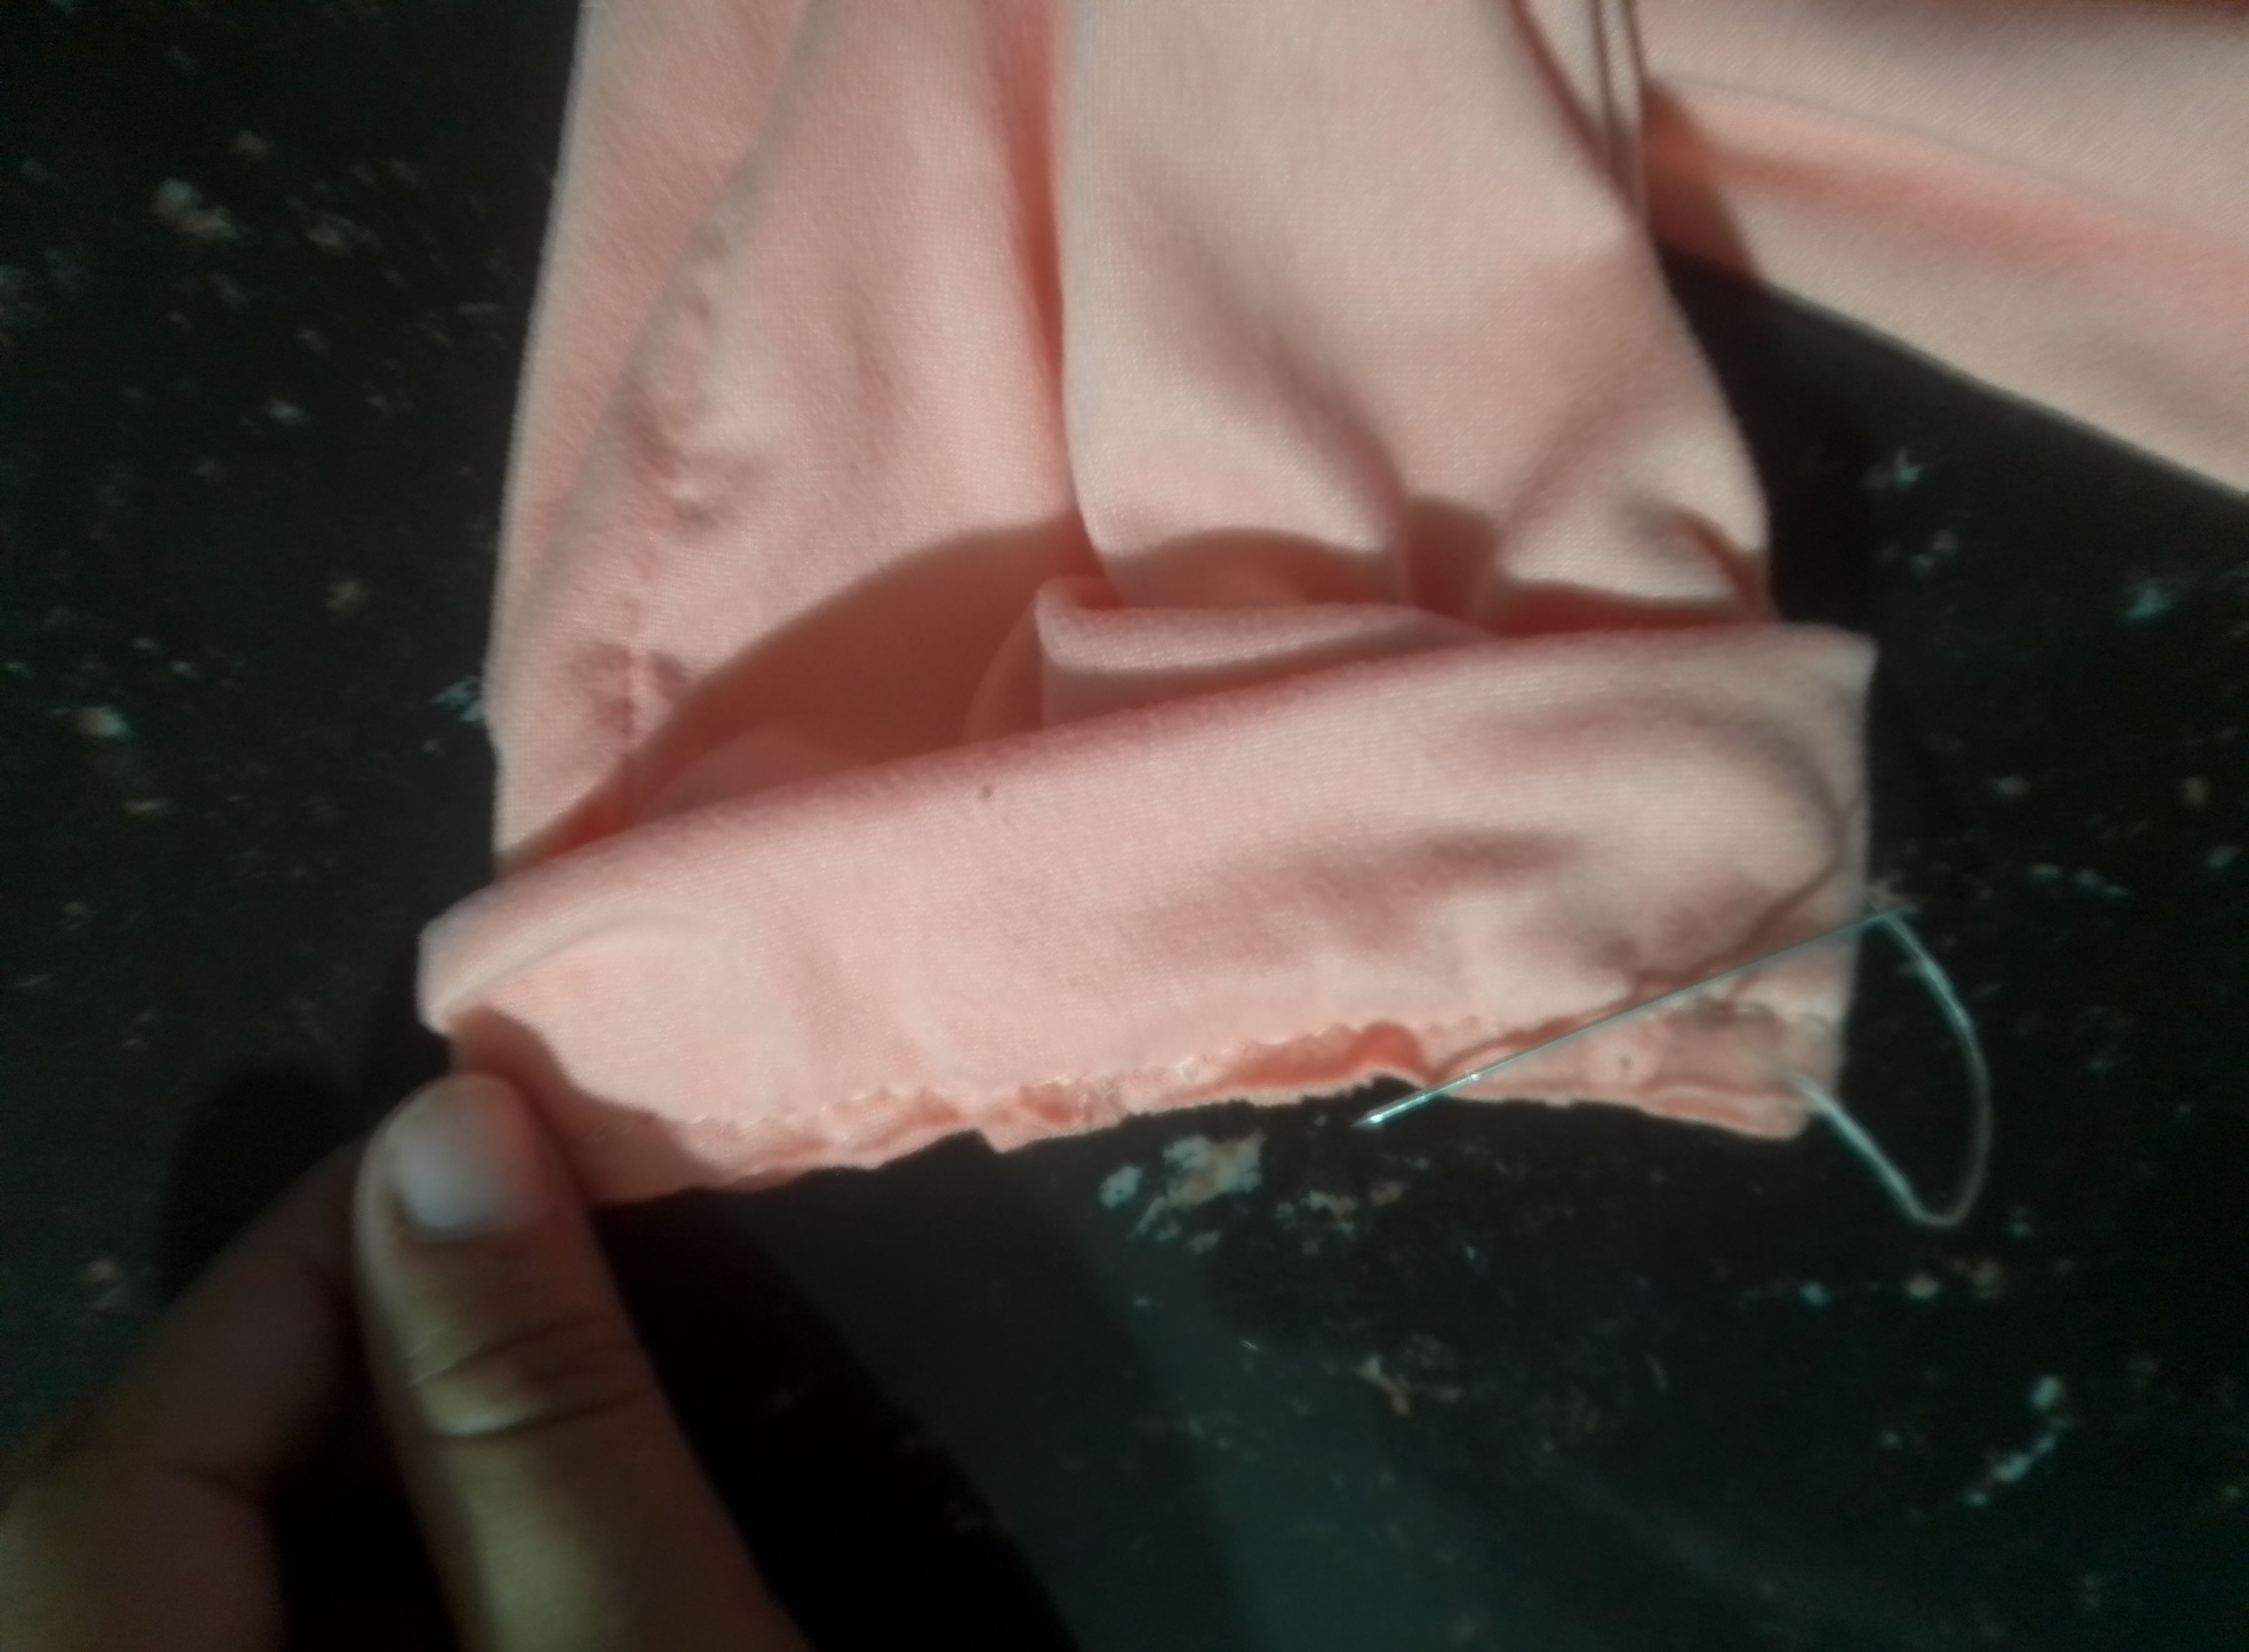
Luego de esto, comienzo a unir las partes con una costura desde la parte baja del pantalón hasta la pretina, continúo con las costuras recta de los costados y la costura de las entrepiernas. Realiza siempre un acabado en los bordes para hacer esta prenda más duradera y resistente.
Step 02
After this, I start joining the parts with a seam from the bottom of the pants to the waistband, I continue with the straight seams on the sides and the crotch seam. Always make a good finish on the edges to make this garment more durable and resistant.
Paso 03
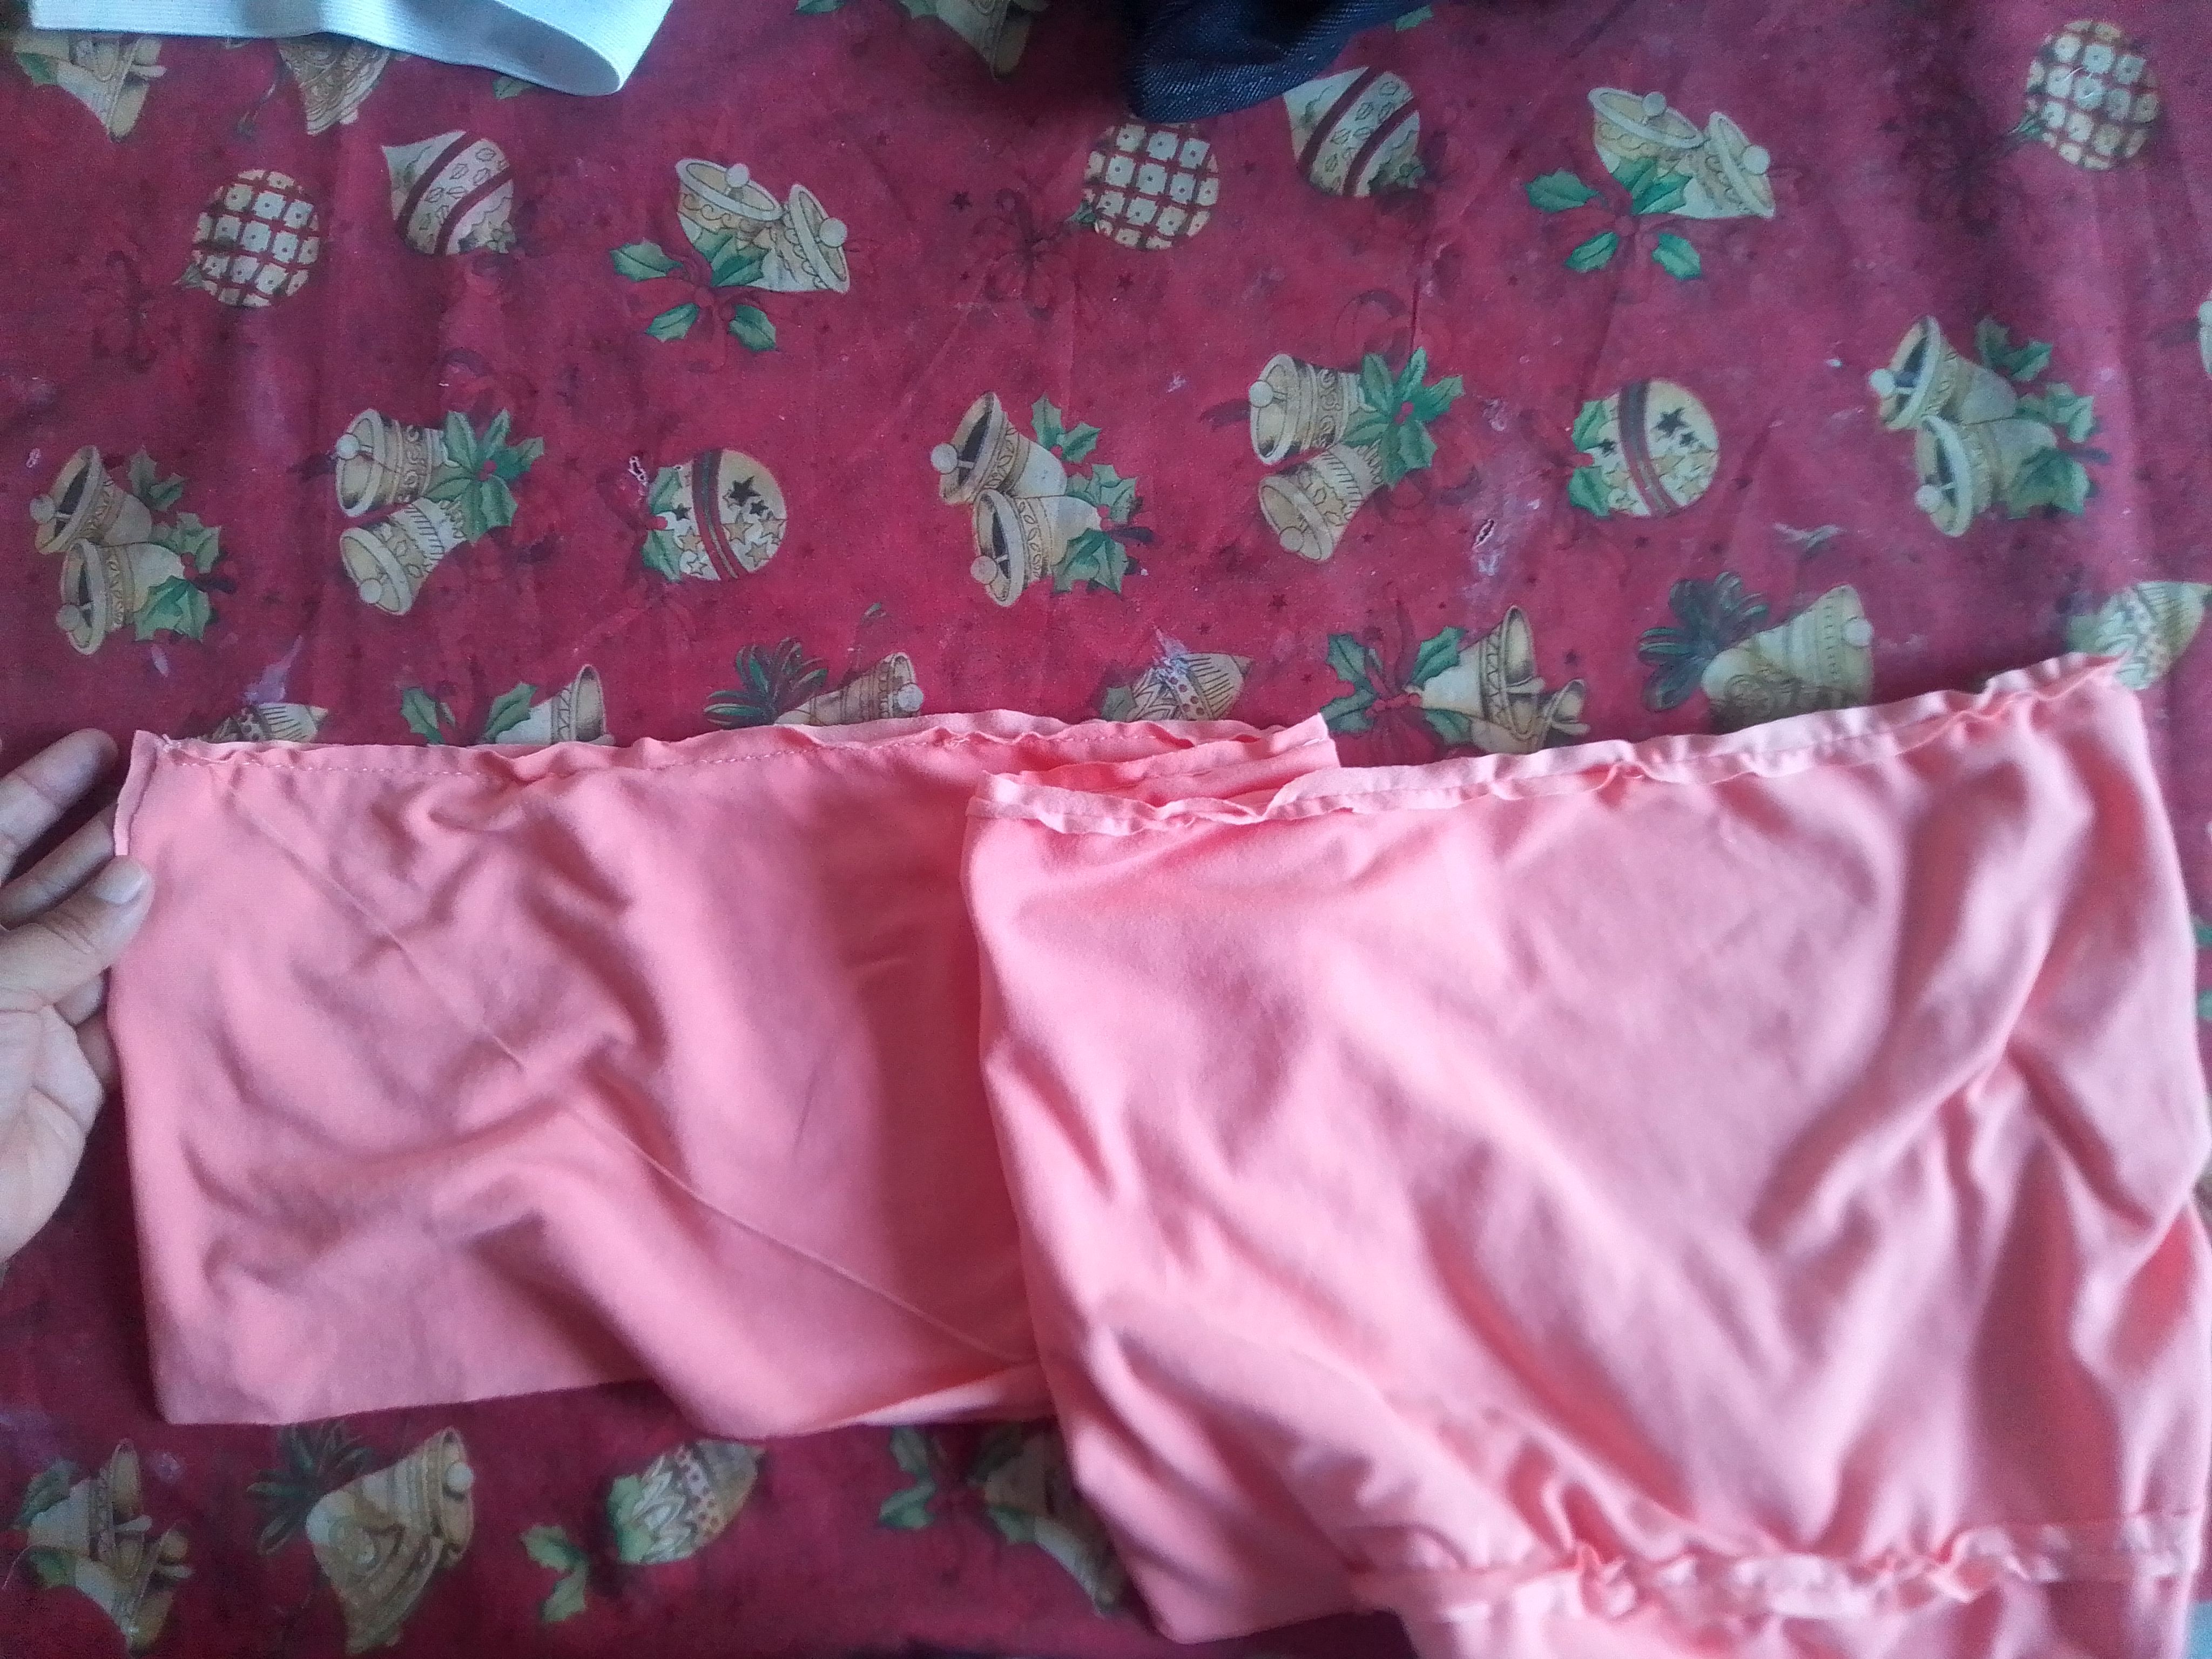
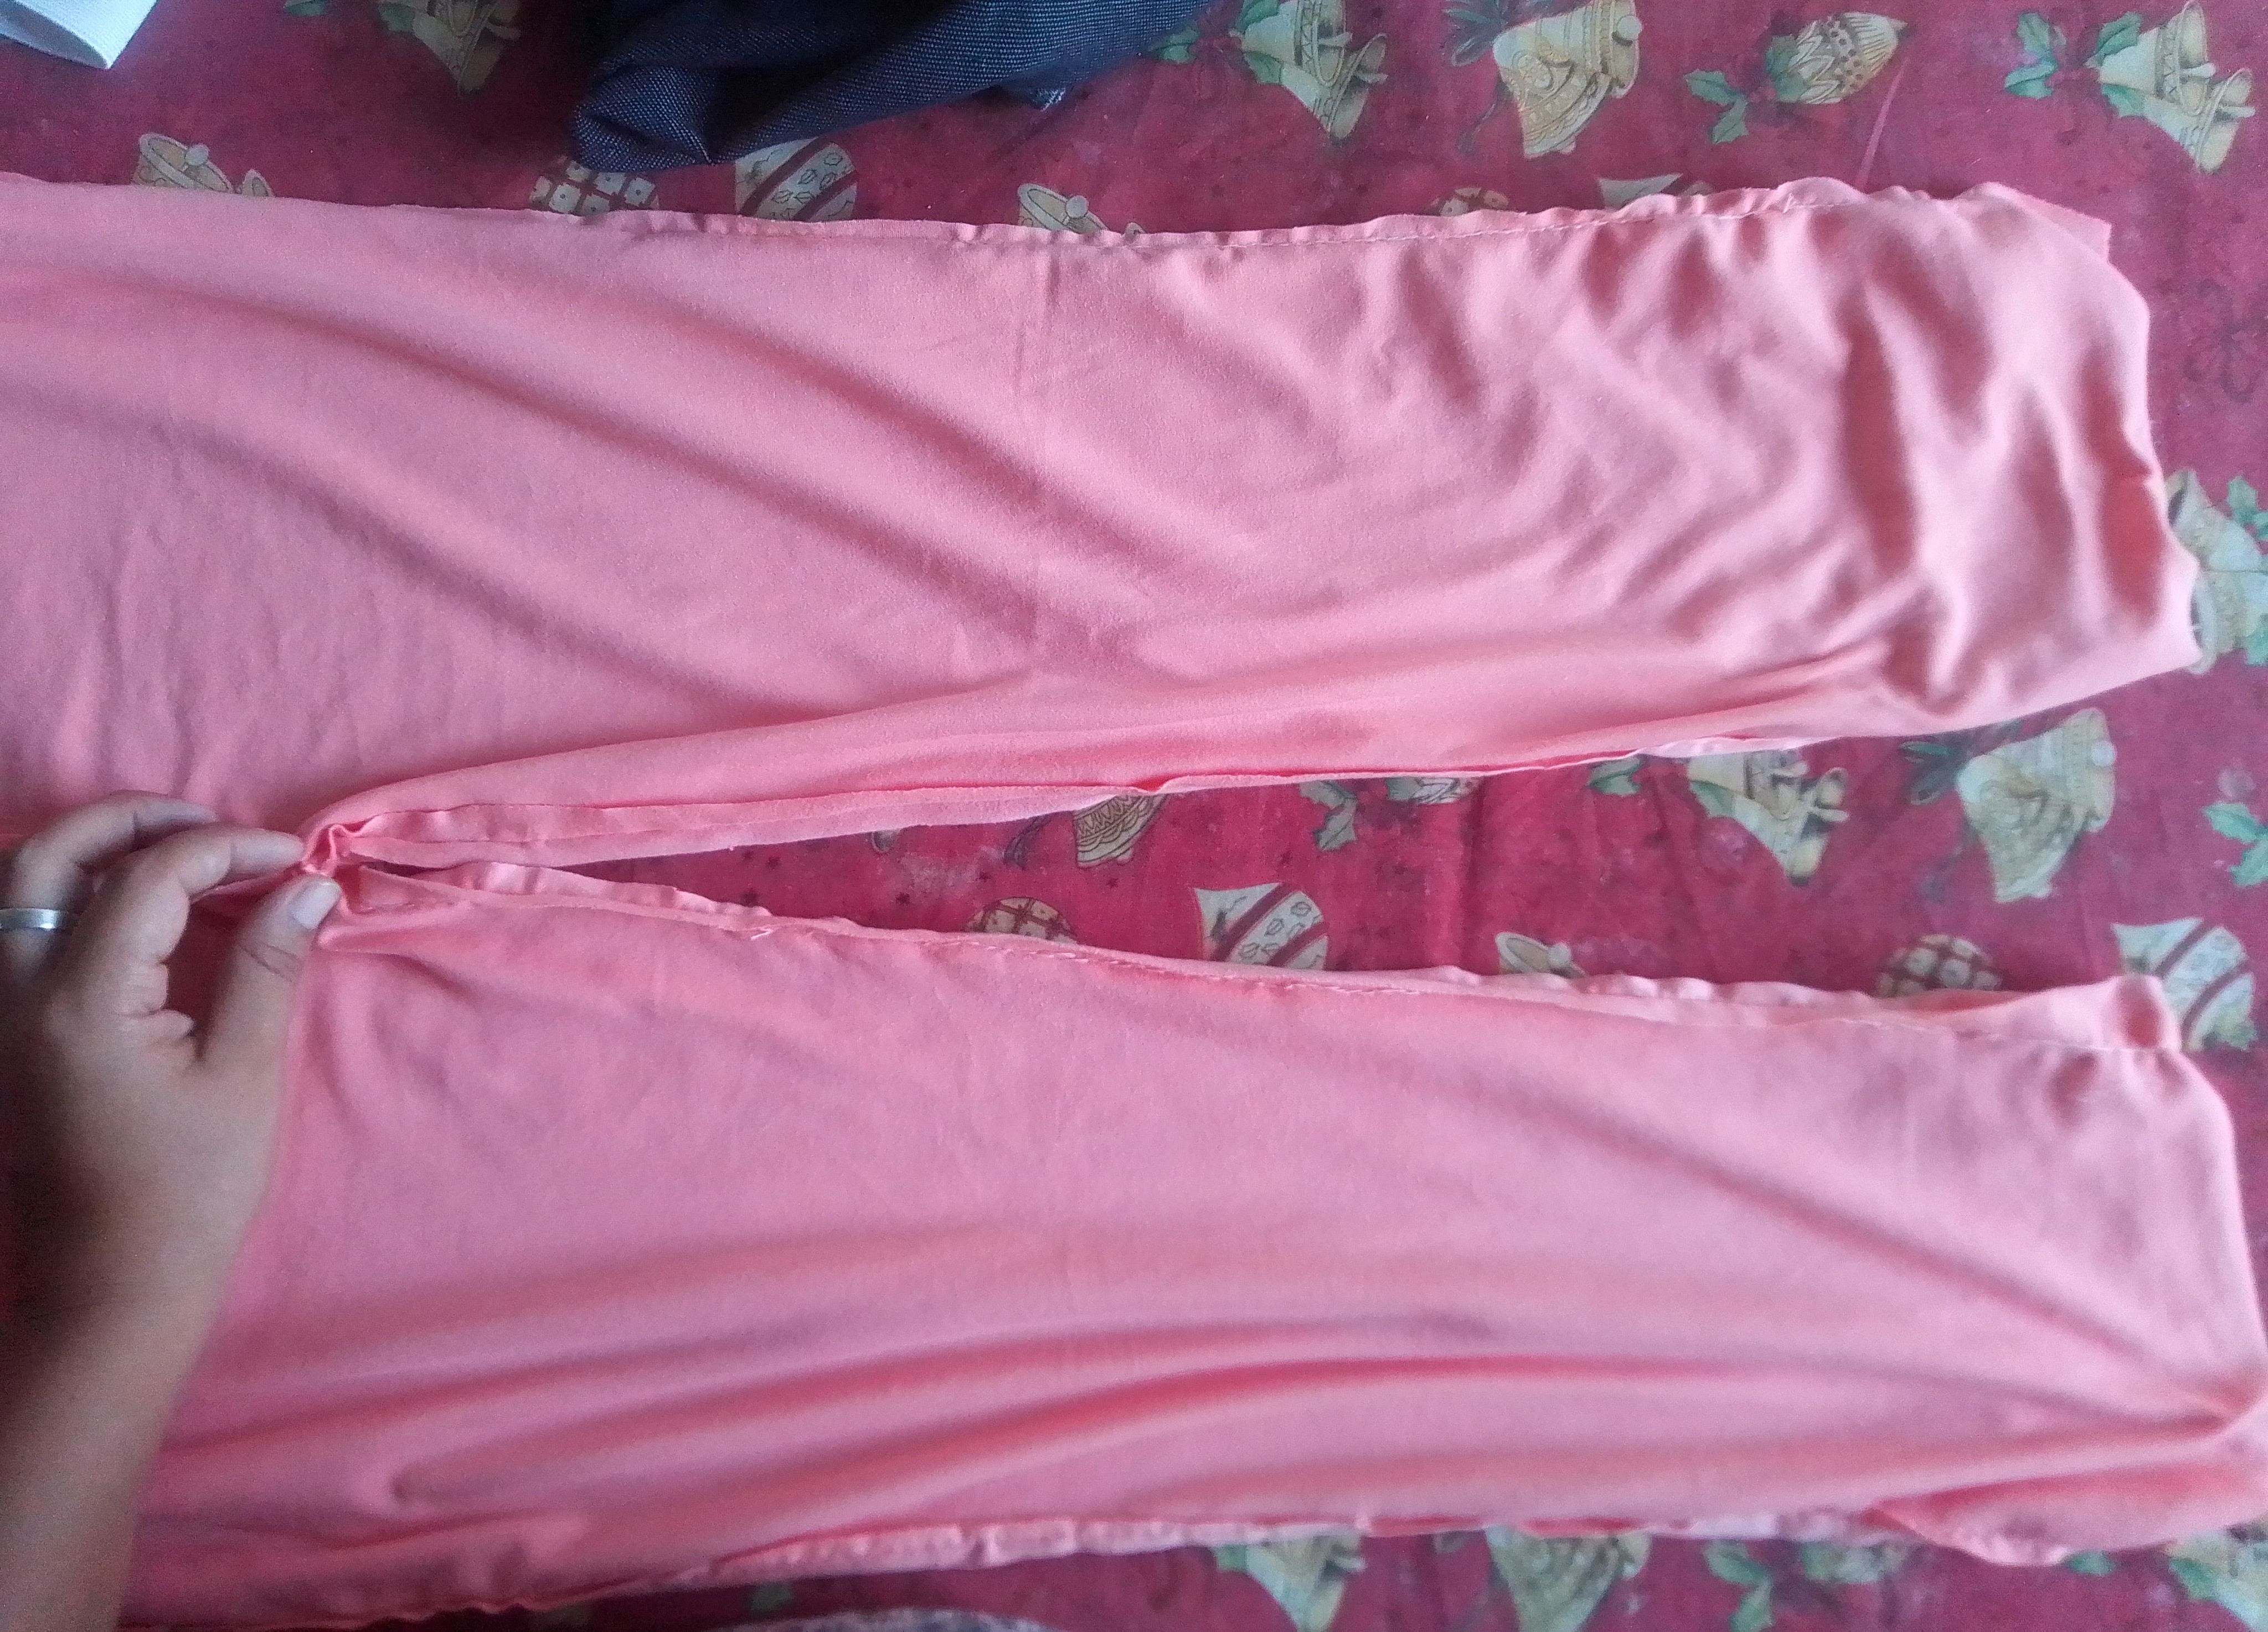
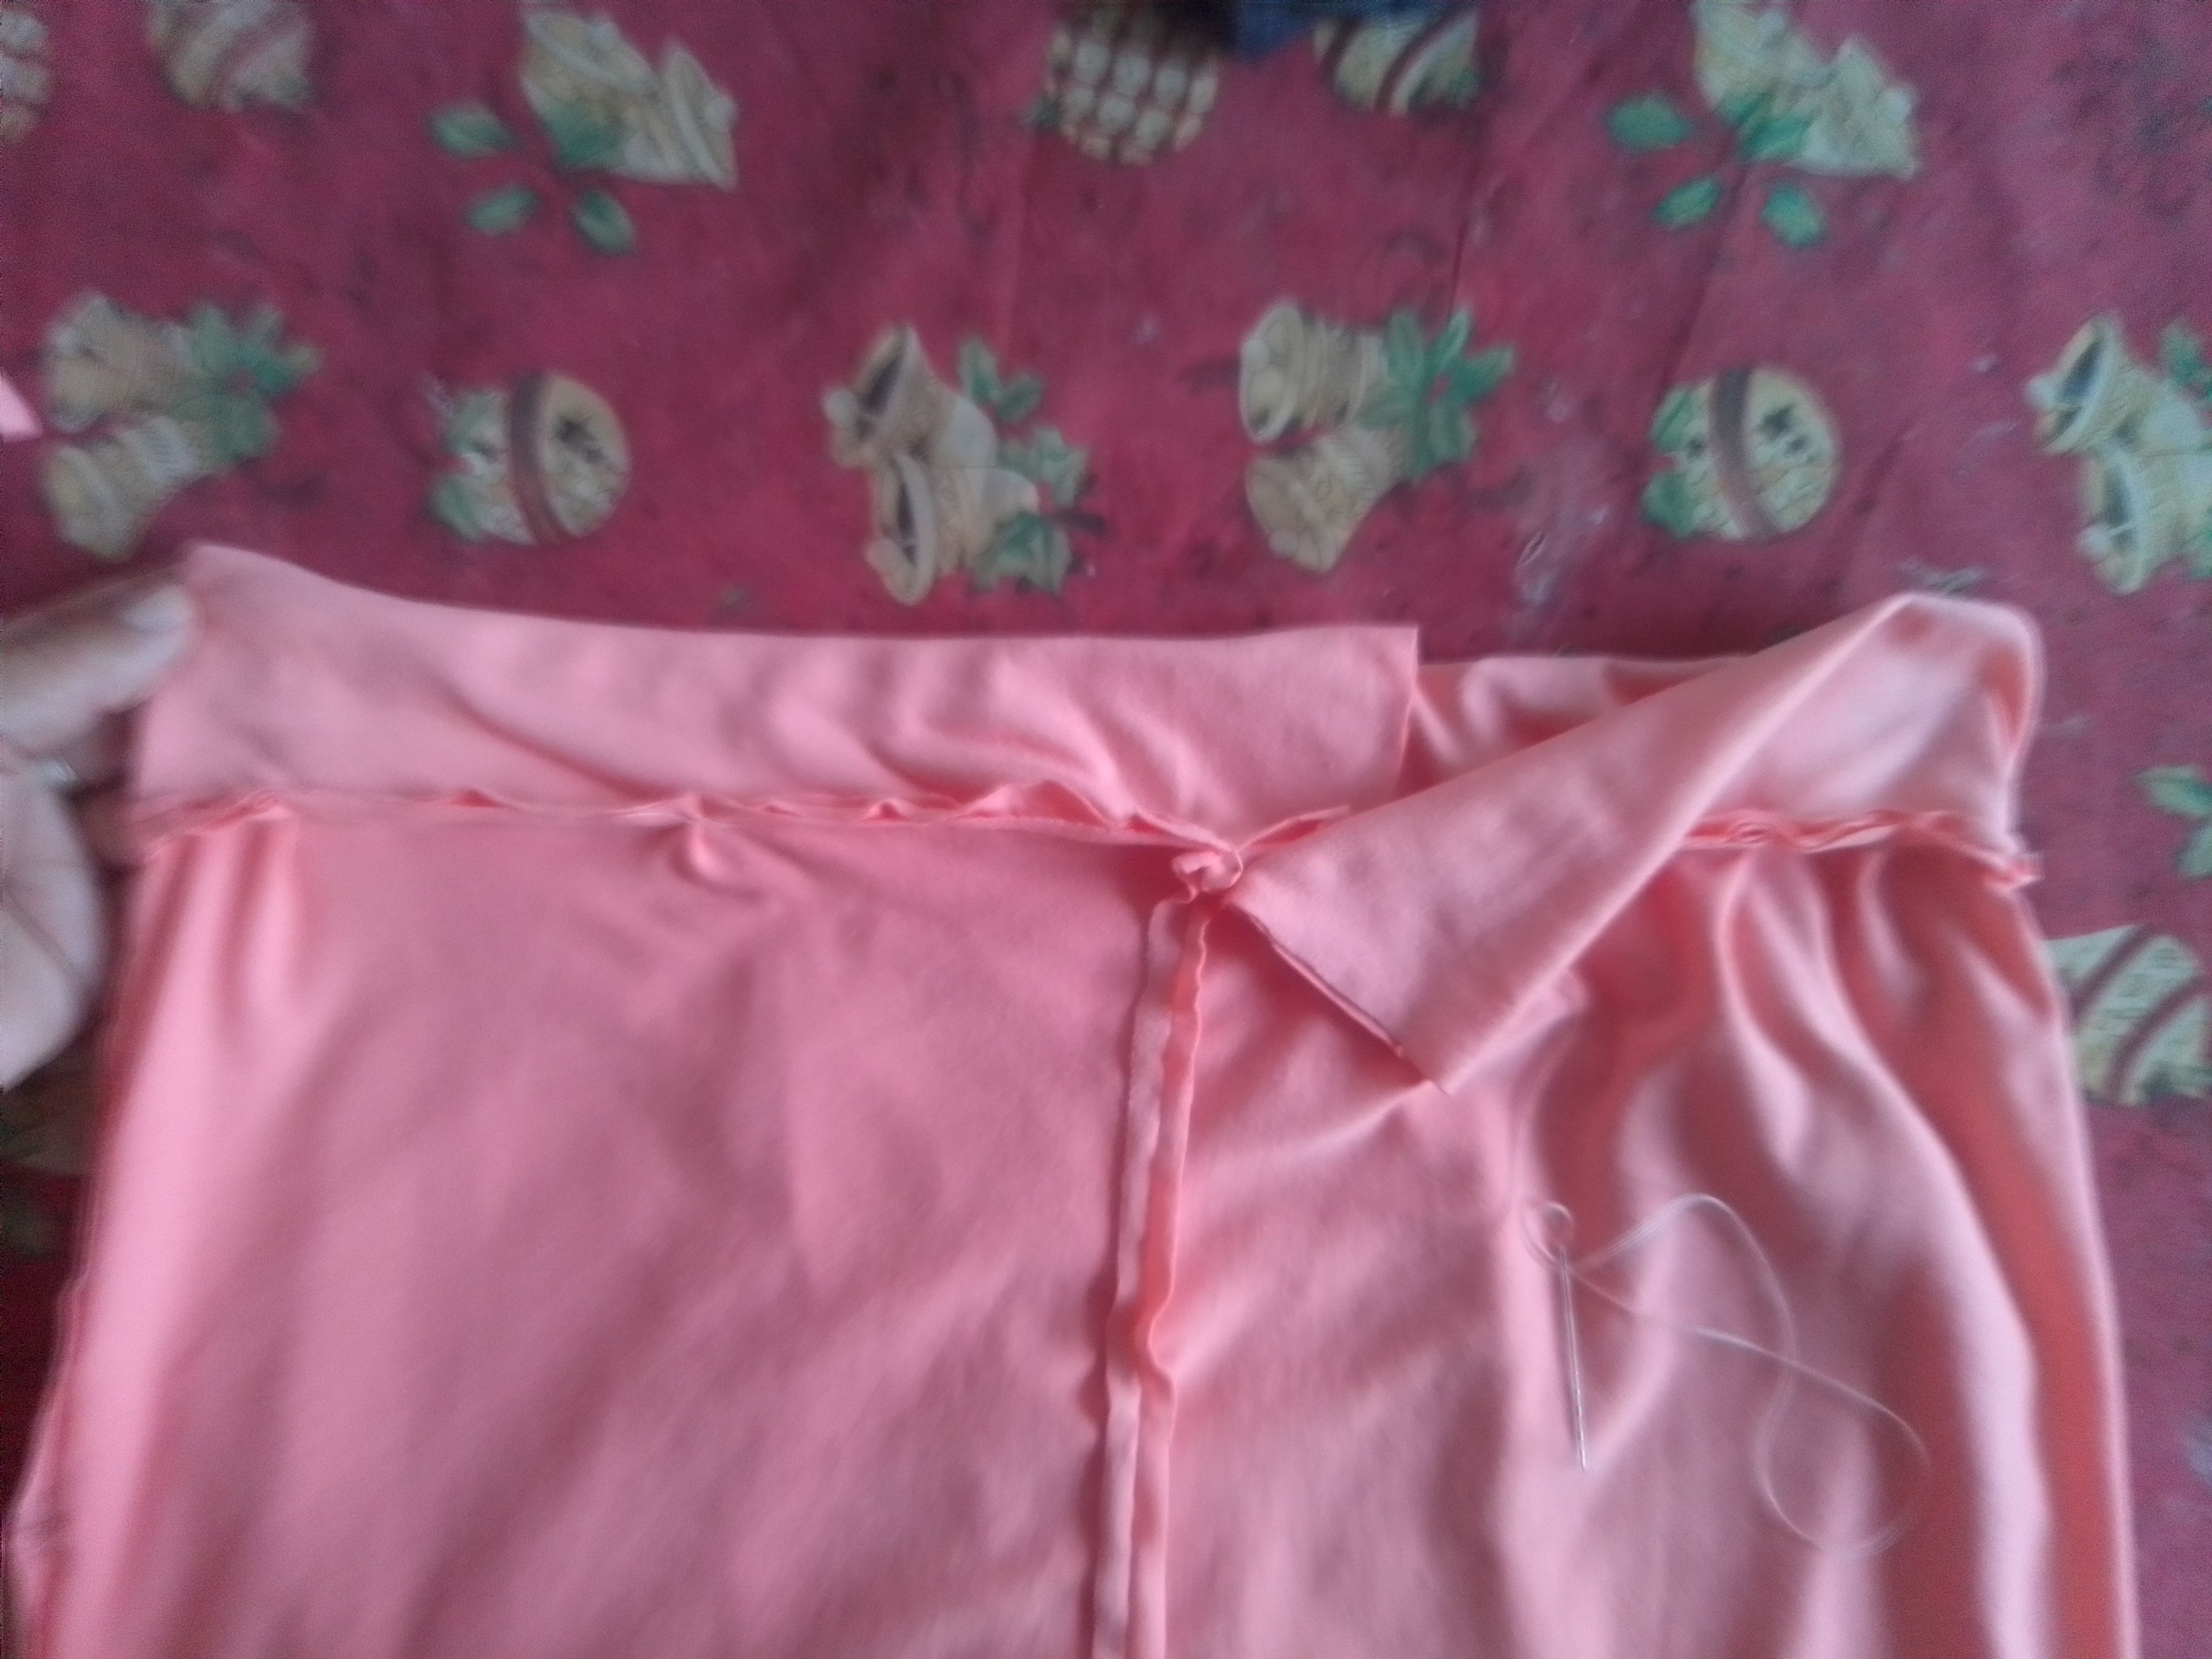
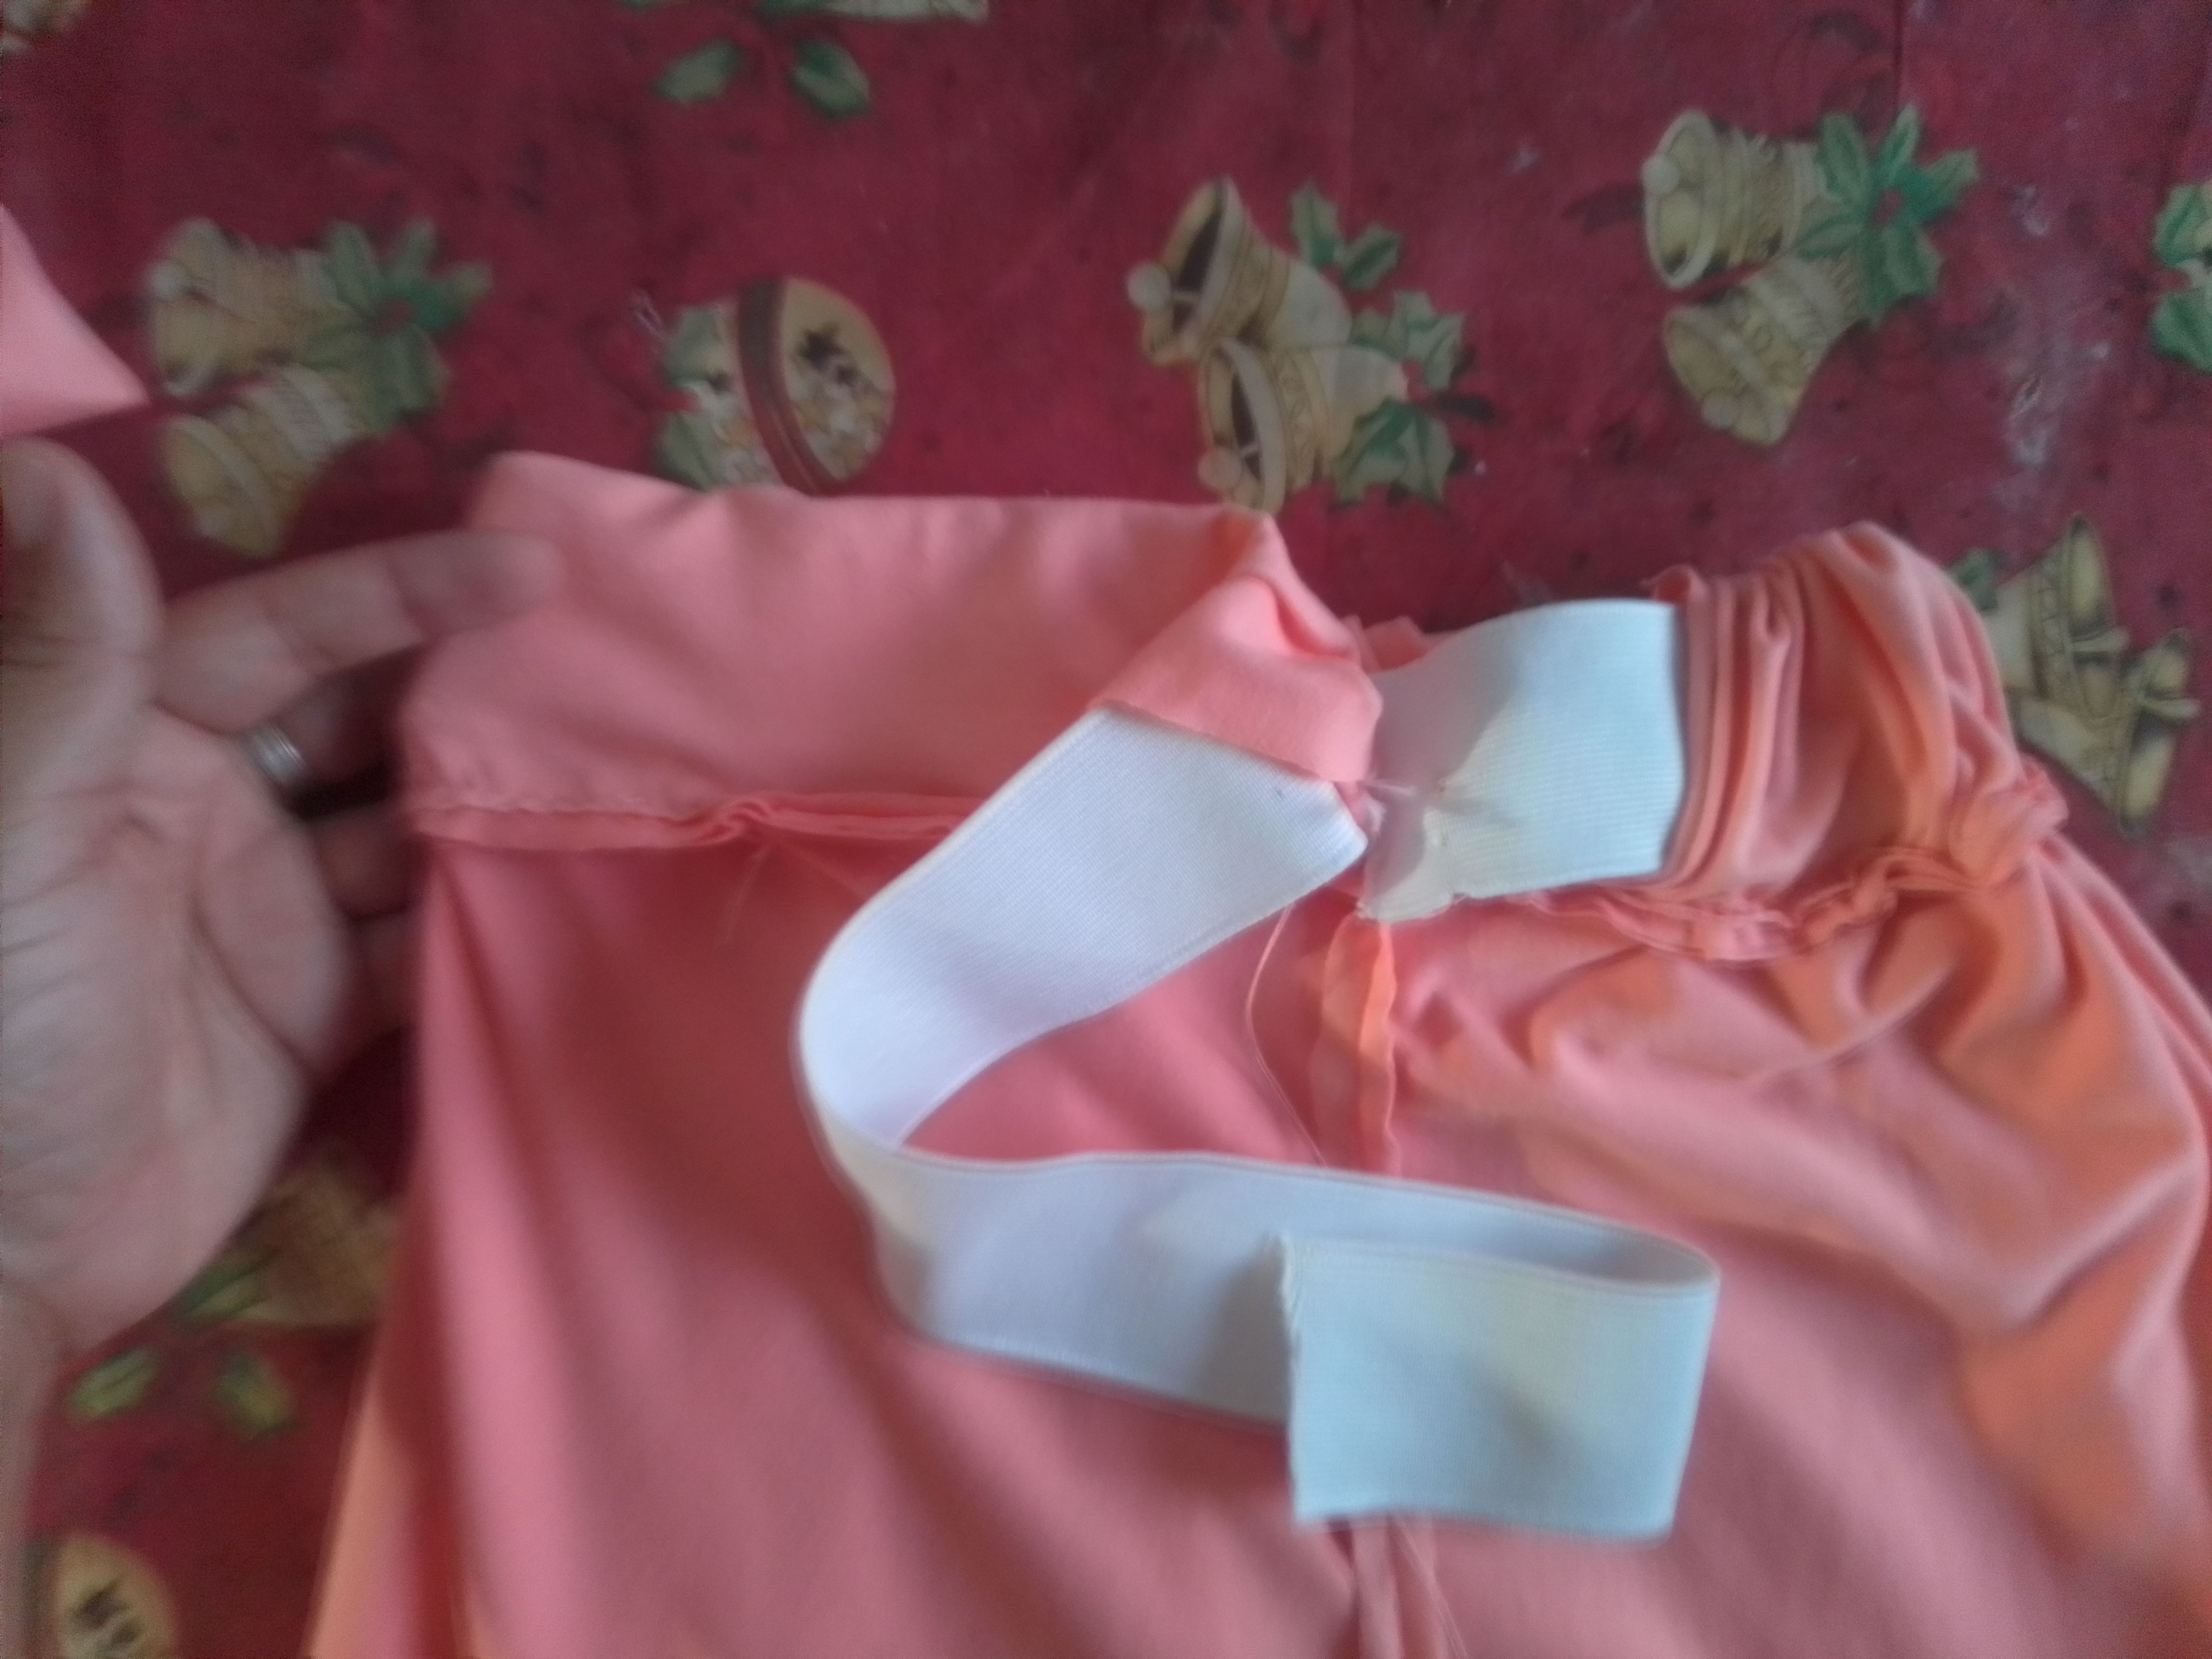
Una vez tengamos la primera parte del pantalón armada, colocamos la tela doble nuevamente y tomamos la medida de una elástica gruesa para medir y cortar una tira del tamaño de las caderas, así mismo la cosemos en la parte superior del pantalón haciendo pequeños plises mientras se cose y dejando un agujero por dónde introducimos con ayuda de un gancho para cabello la misma goma elástica y cerramos con una costura está parte.
Step 03
Once we have the first part of the pants assembled, we place the double fabric again and take the measurement of a thick elastic to measure and cut a strip the size of the hips, likewise we sew it in the upper part of the pants making small pleats while sewing and leaving a hole through which we introduce the same elastic band with the help of a hair clip and close this part with a seam.
Paso 04
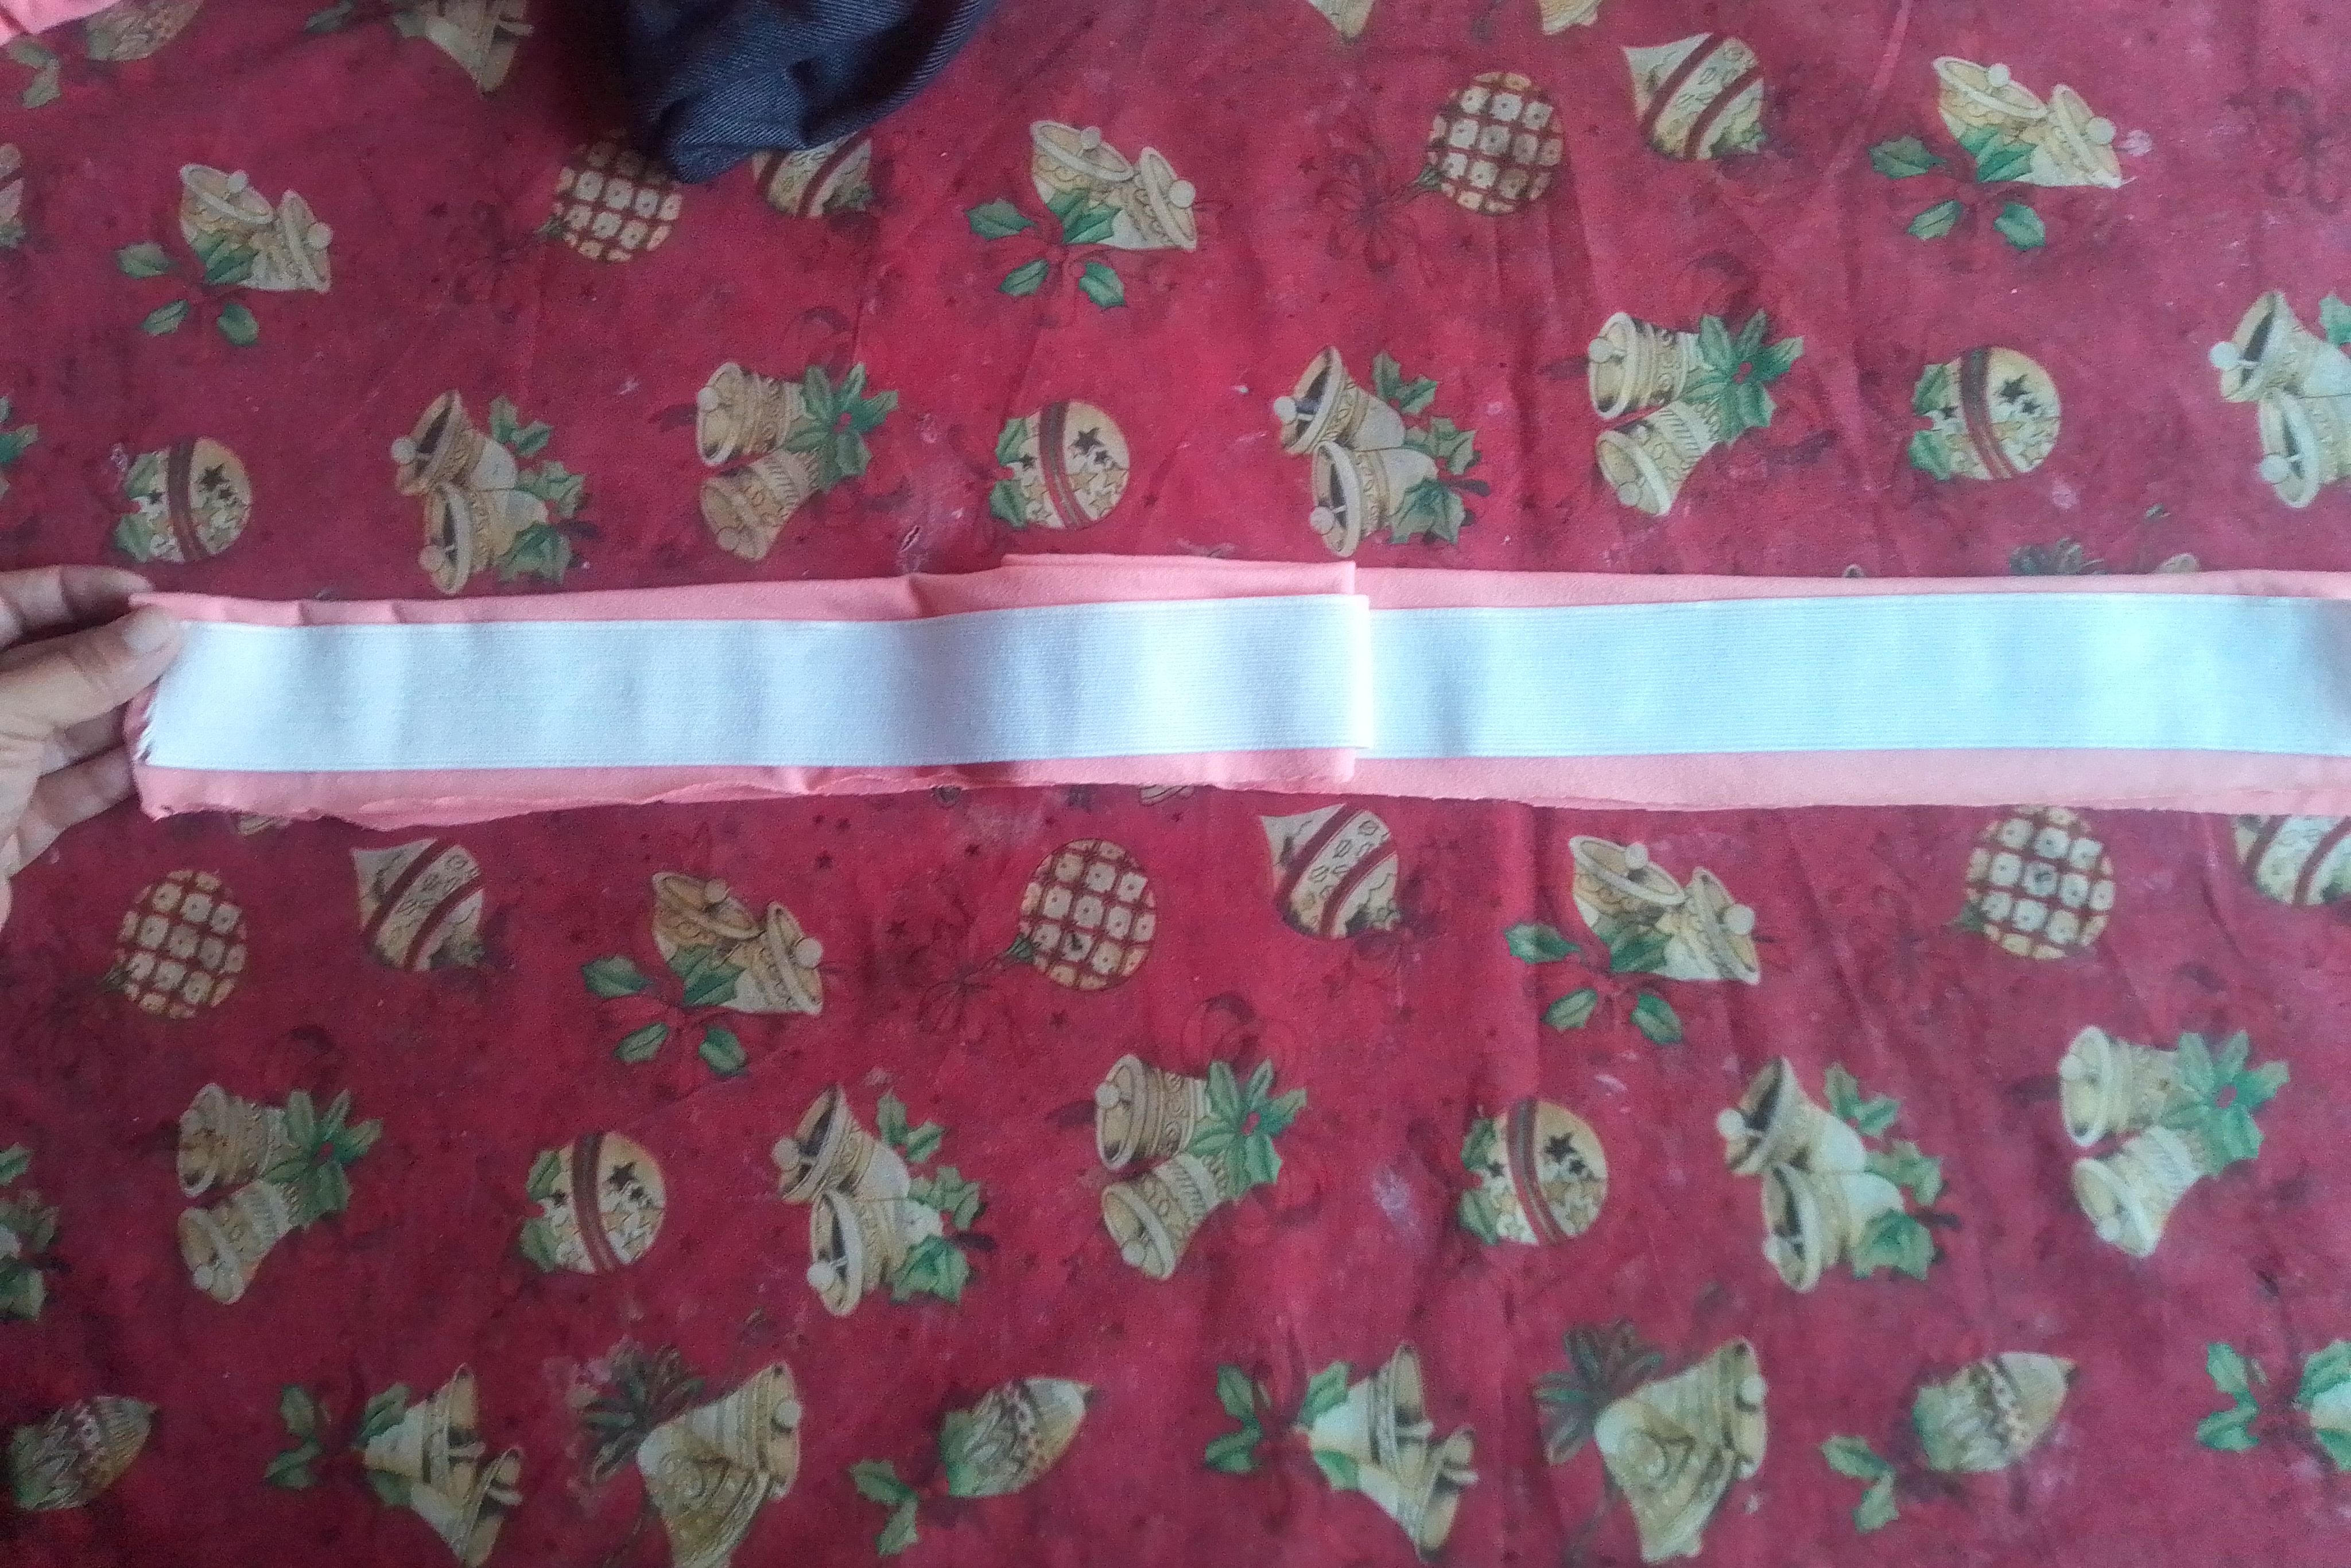
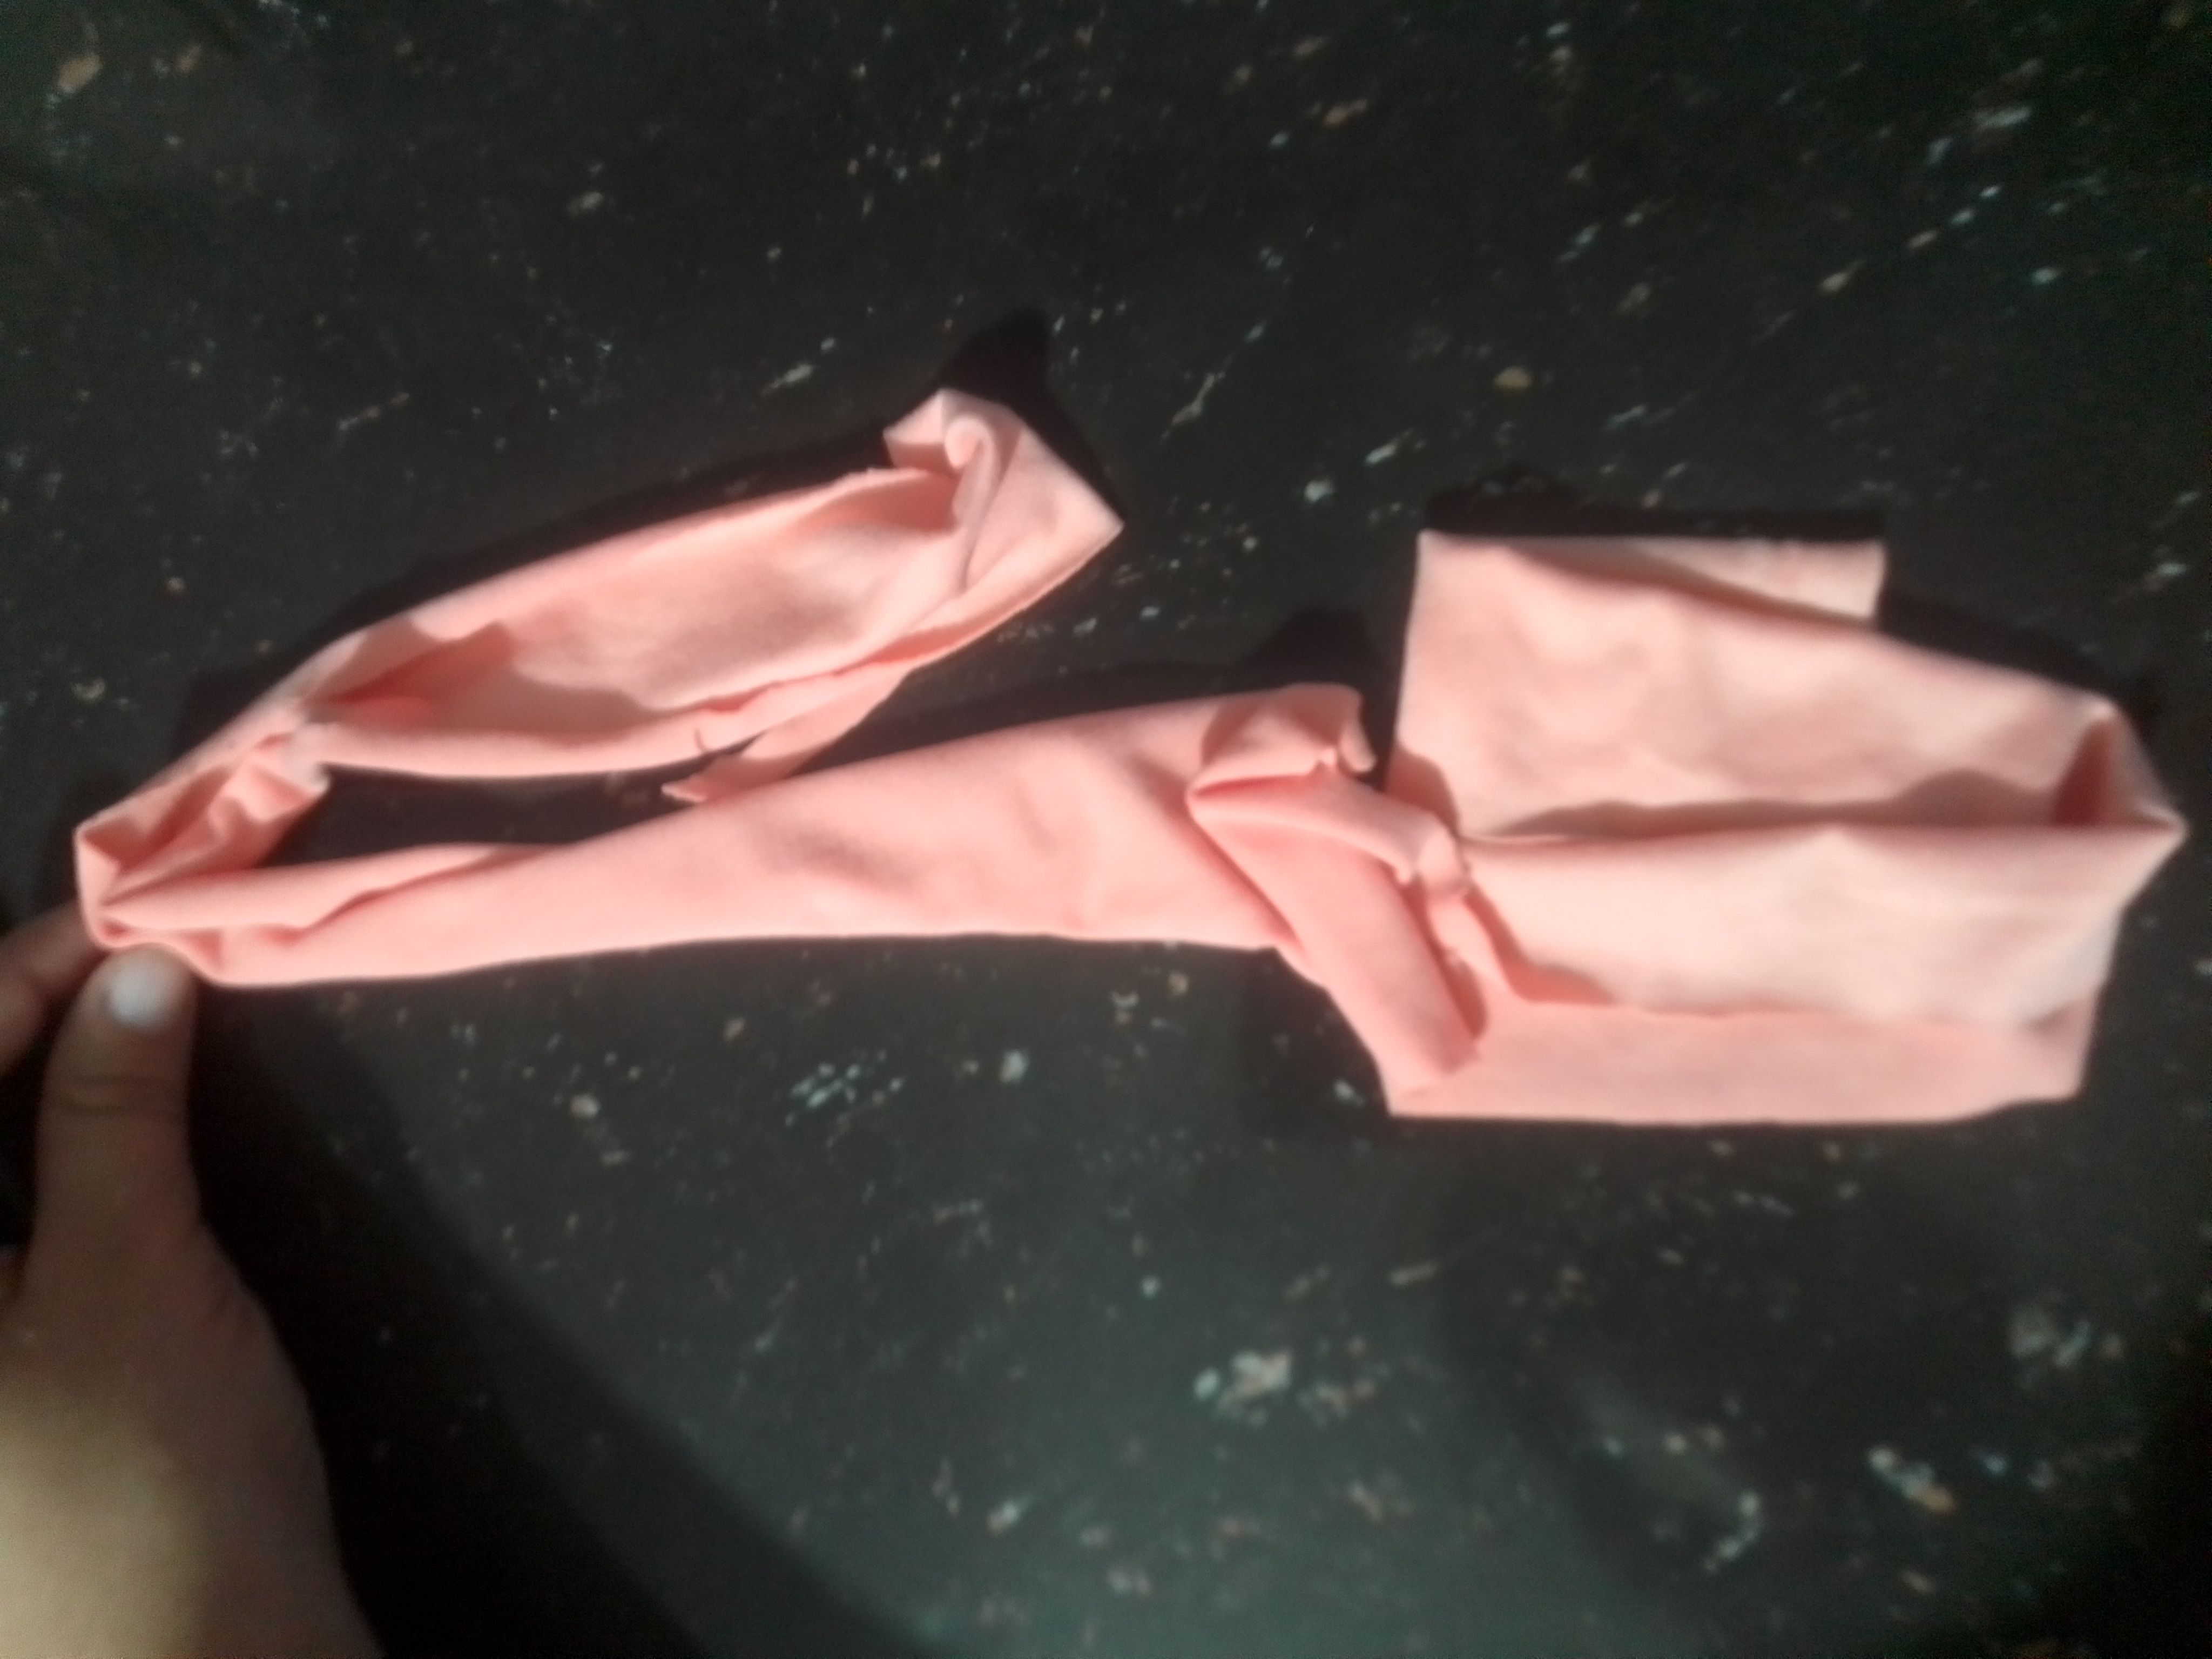
Continuamos con la parte inferior del pantalón y medimos nuestras pantorrillas para cortar una tira doble de este mismo tamaño, cosemos en el final de cada pierna haciendo nuevamente plises en la misma dirección.
Step 04
We continue with the lower part of the pants and measure our calves to cut a double strip of this same size, we sew at the end of each leg making pleats again in the same direction.
Paso 05
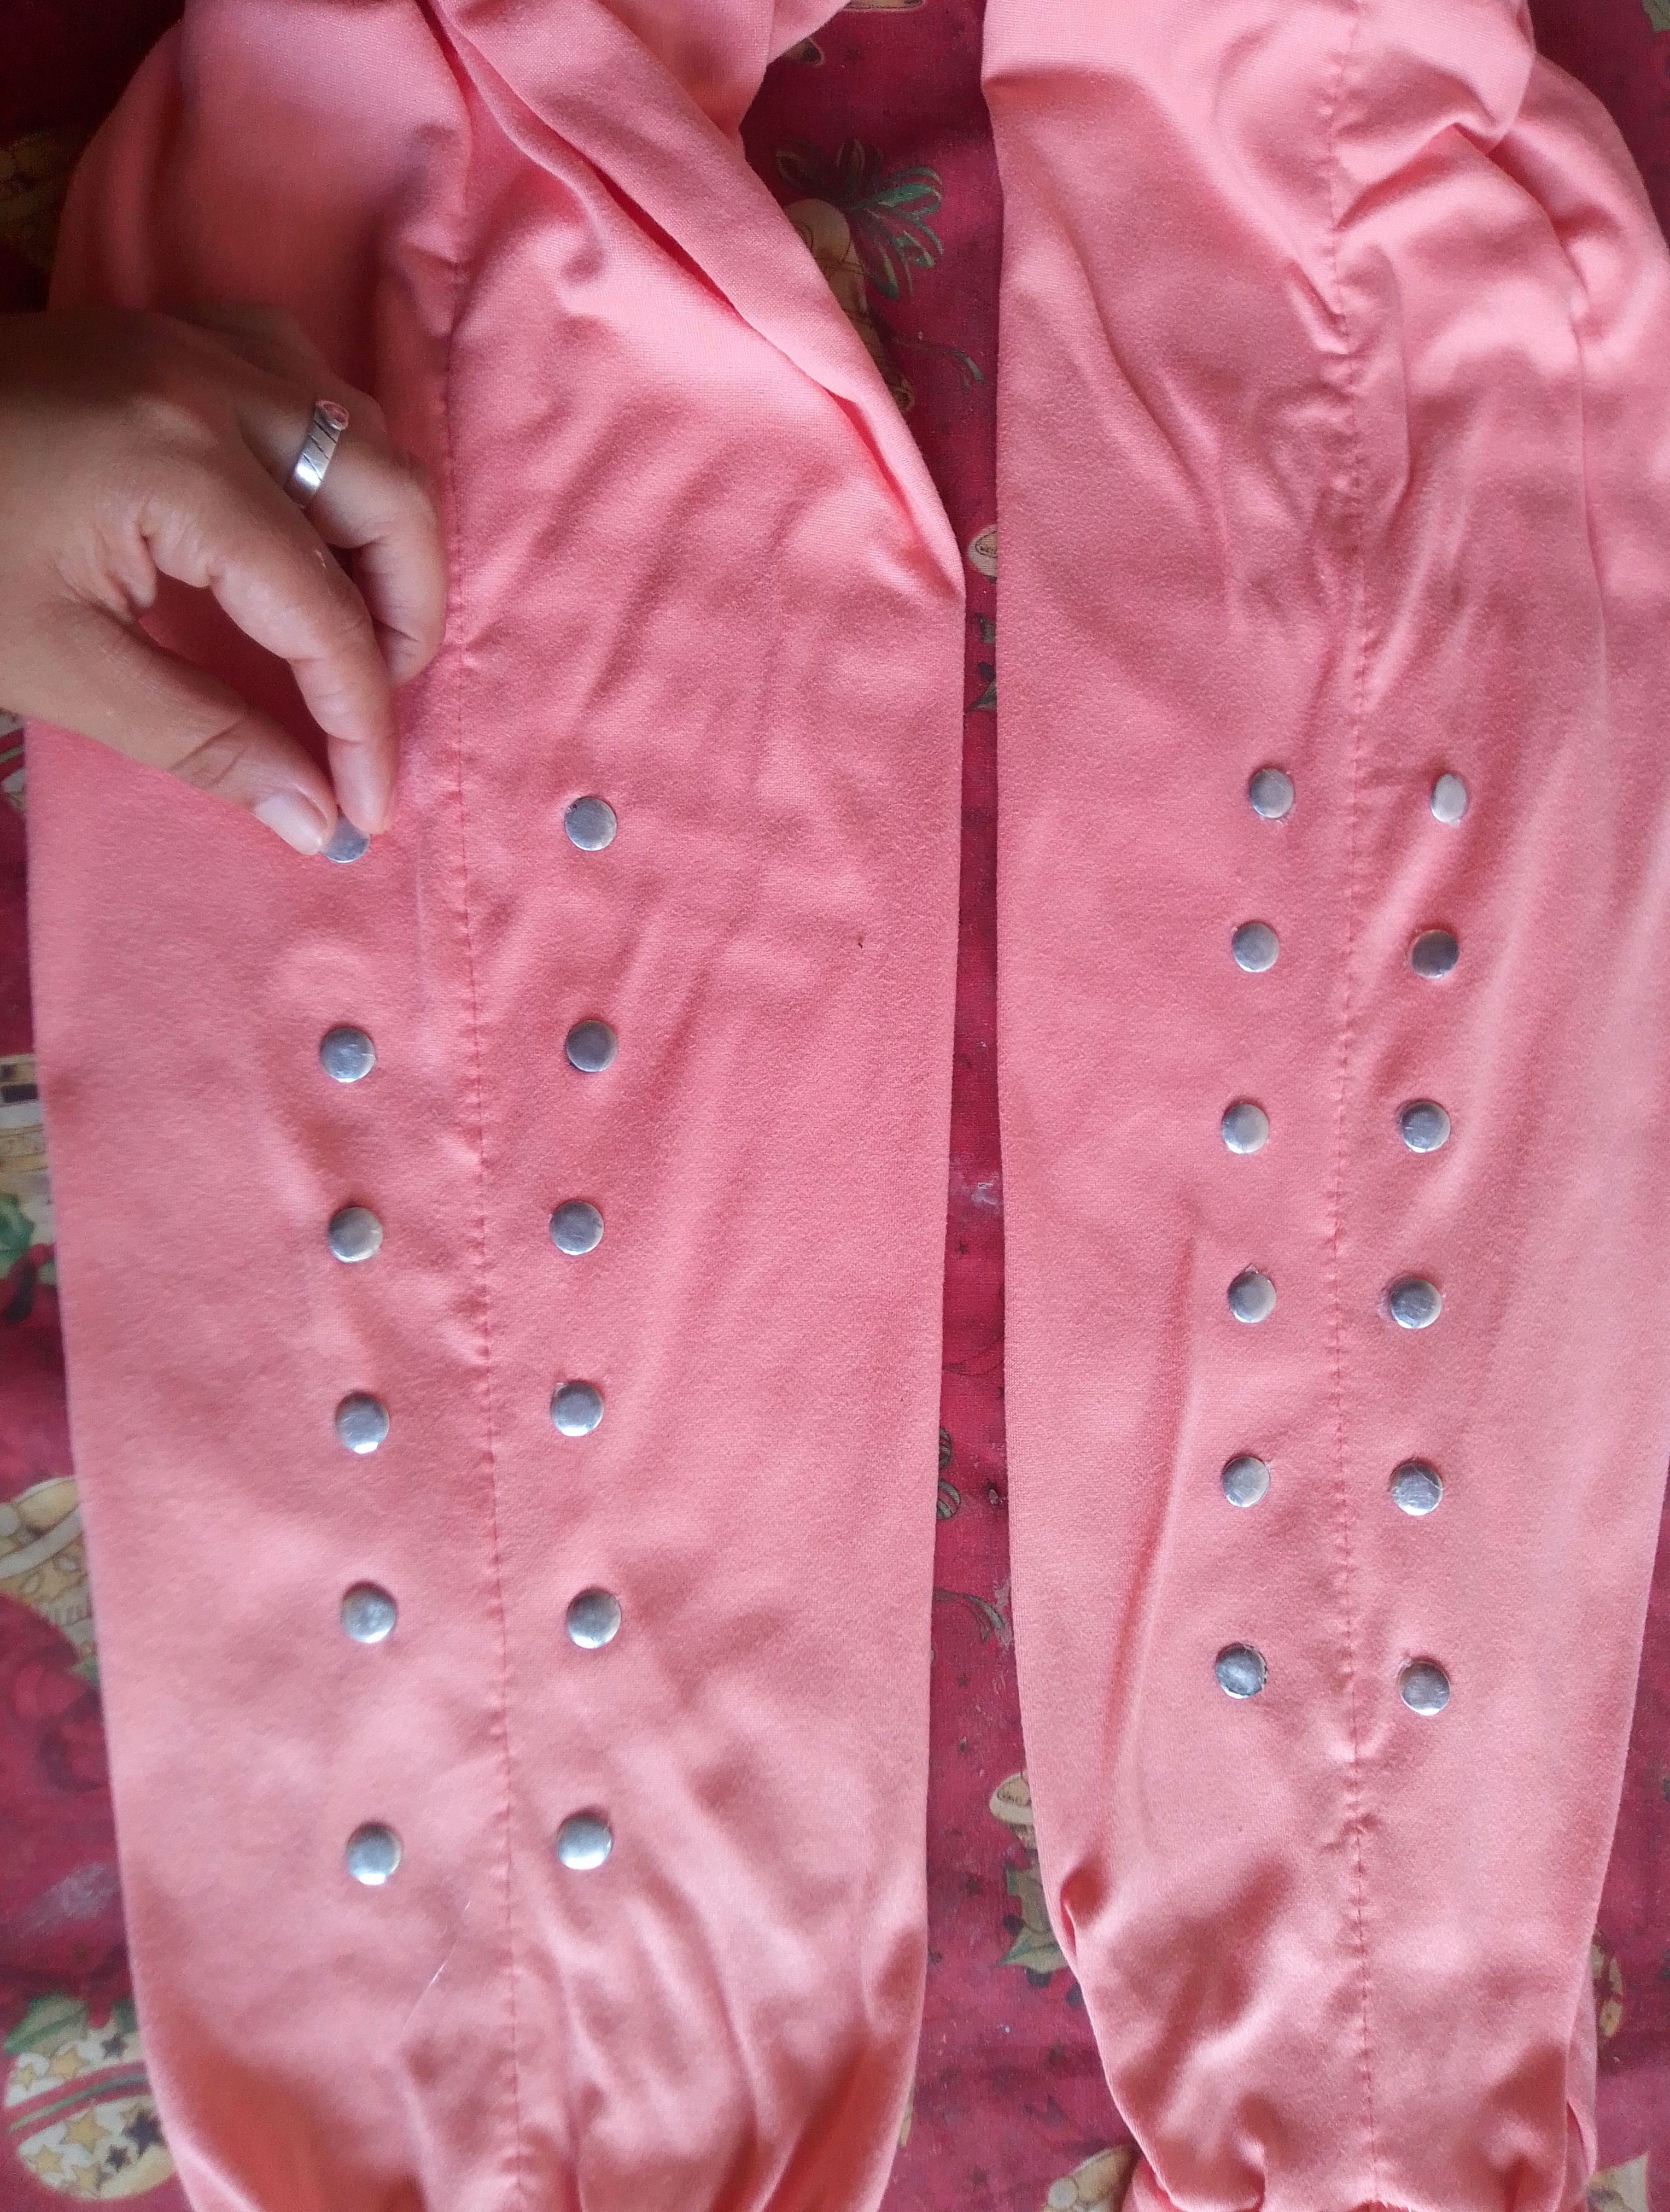
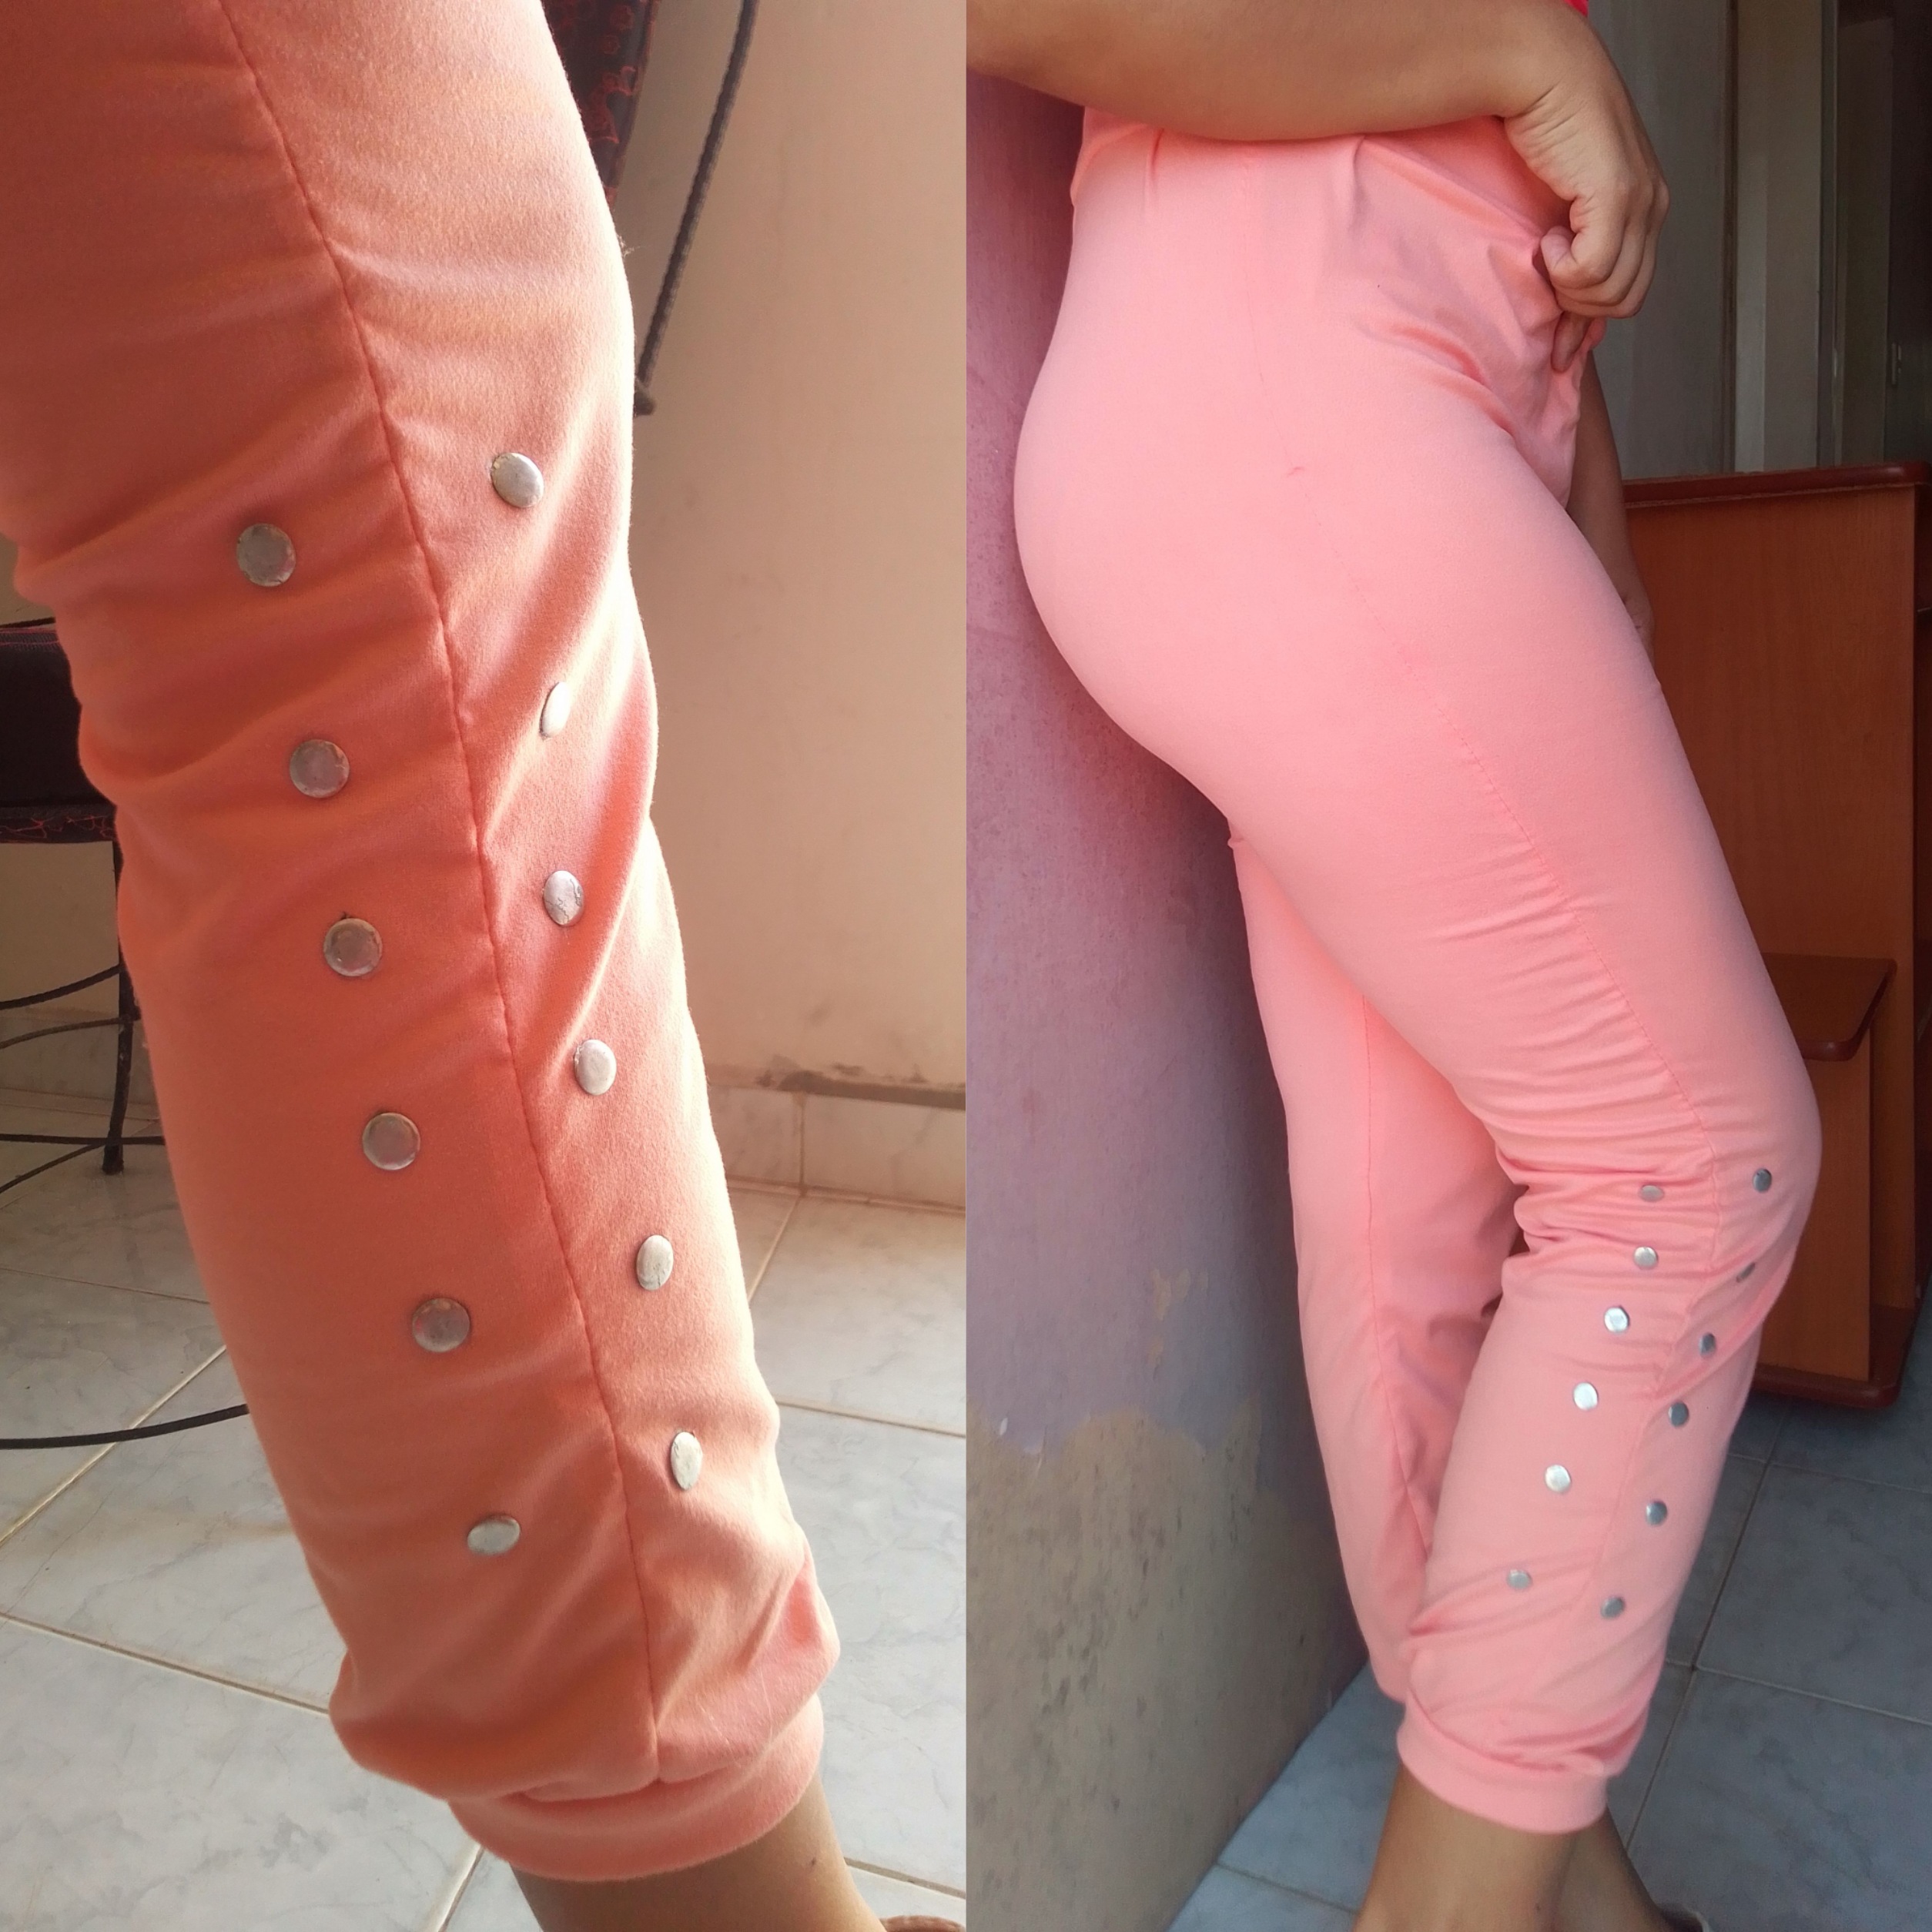
Con una pega especial de apliques para ropa, finalizamos colocando “Hot Fix” de metal de dos en dos en los costados de las piernas de este bonito pantalón. Este material podemos encontrarlo en tiendas de bisutería o tiendas de tela, o bien podemos despegar de los viejos pantalones y utilizarlos cómo es mi caso.
Step 05
With a special appliqué glue for clothing, we finished by placing metal "Hot Fix" two by two on the sides of the legs of these beautiful pants. We can find this material in jewelry stores or fabric stores, or we can remove them from old pants and use them, as is my case.
Resultado!
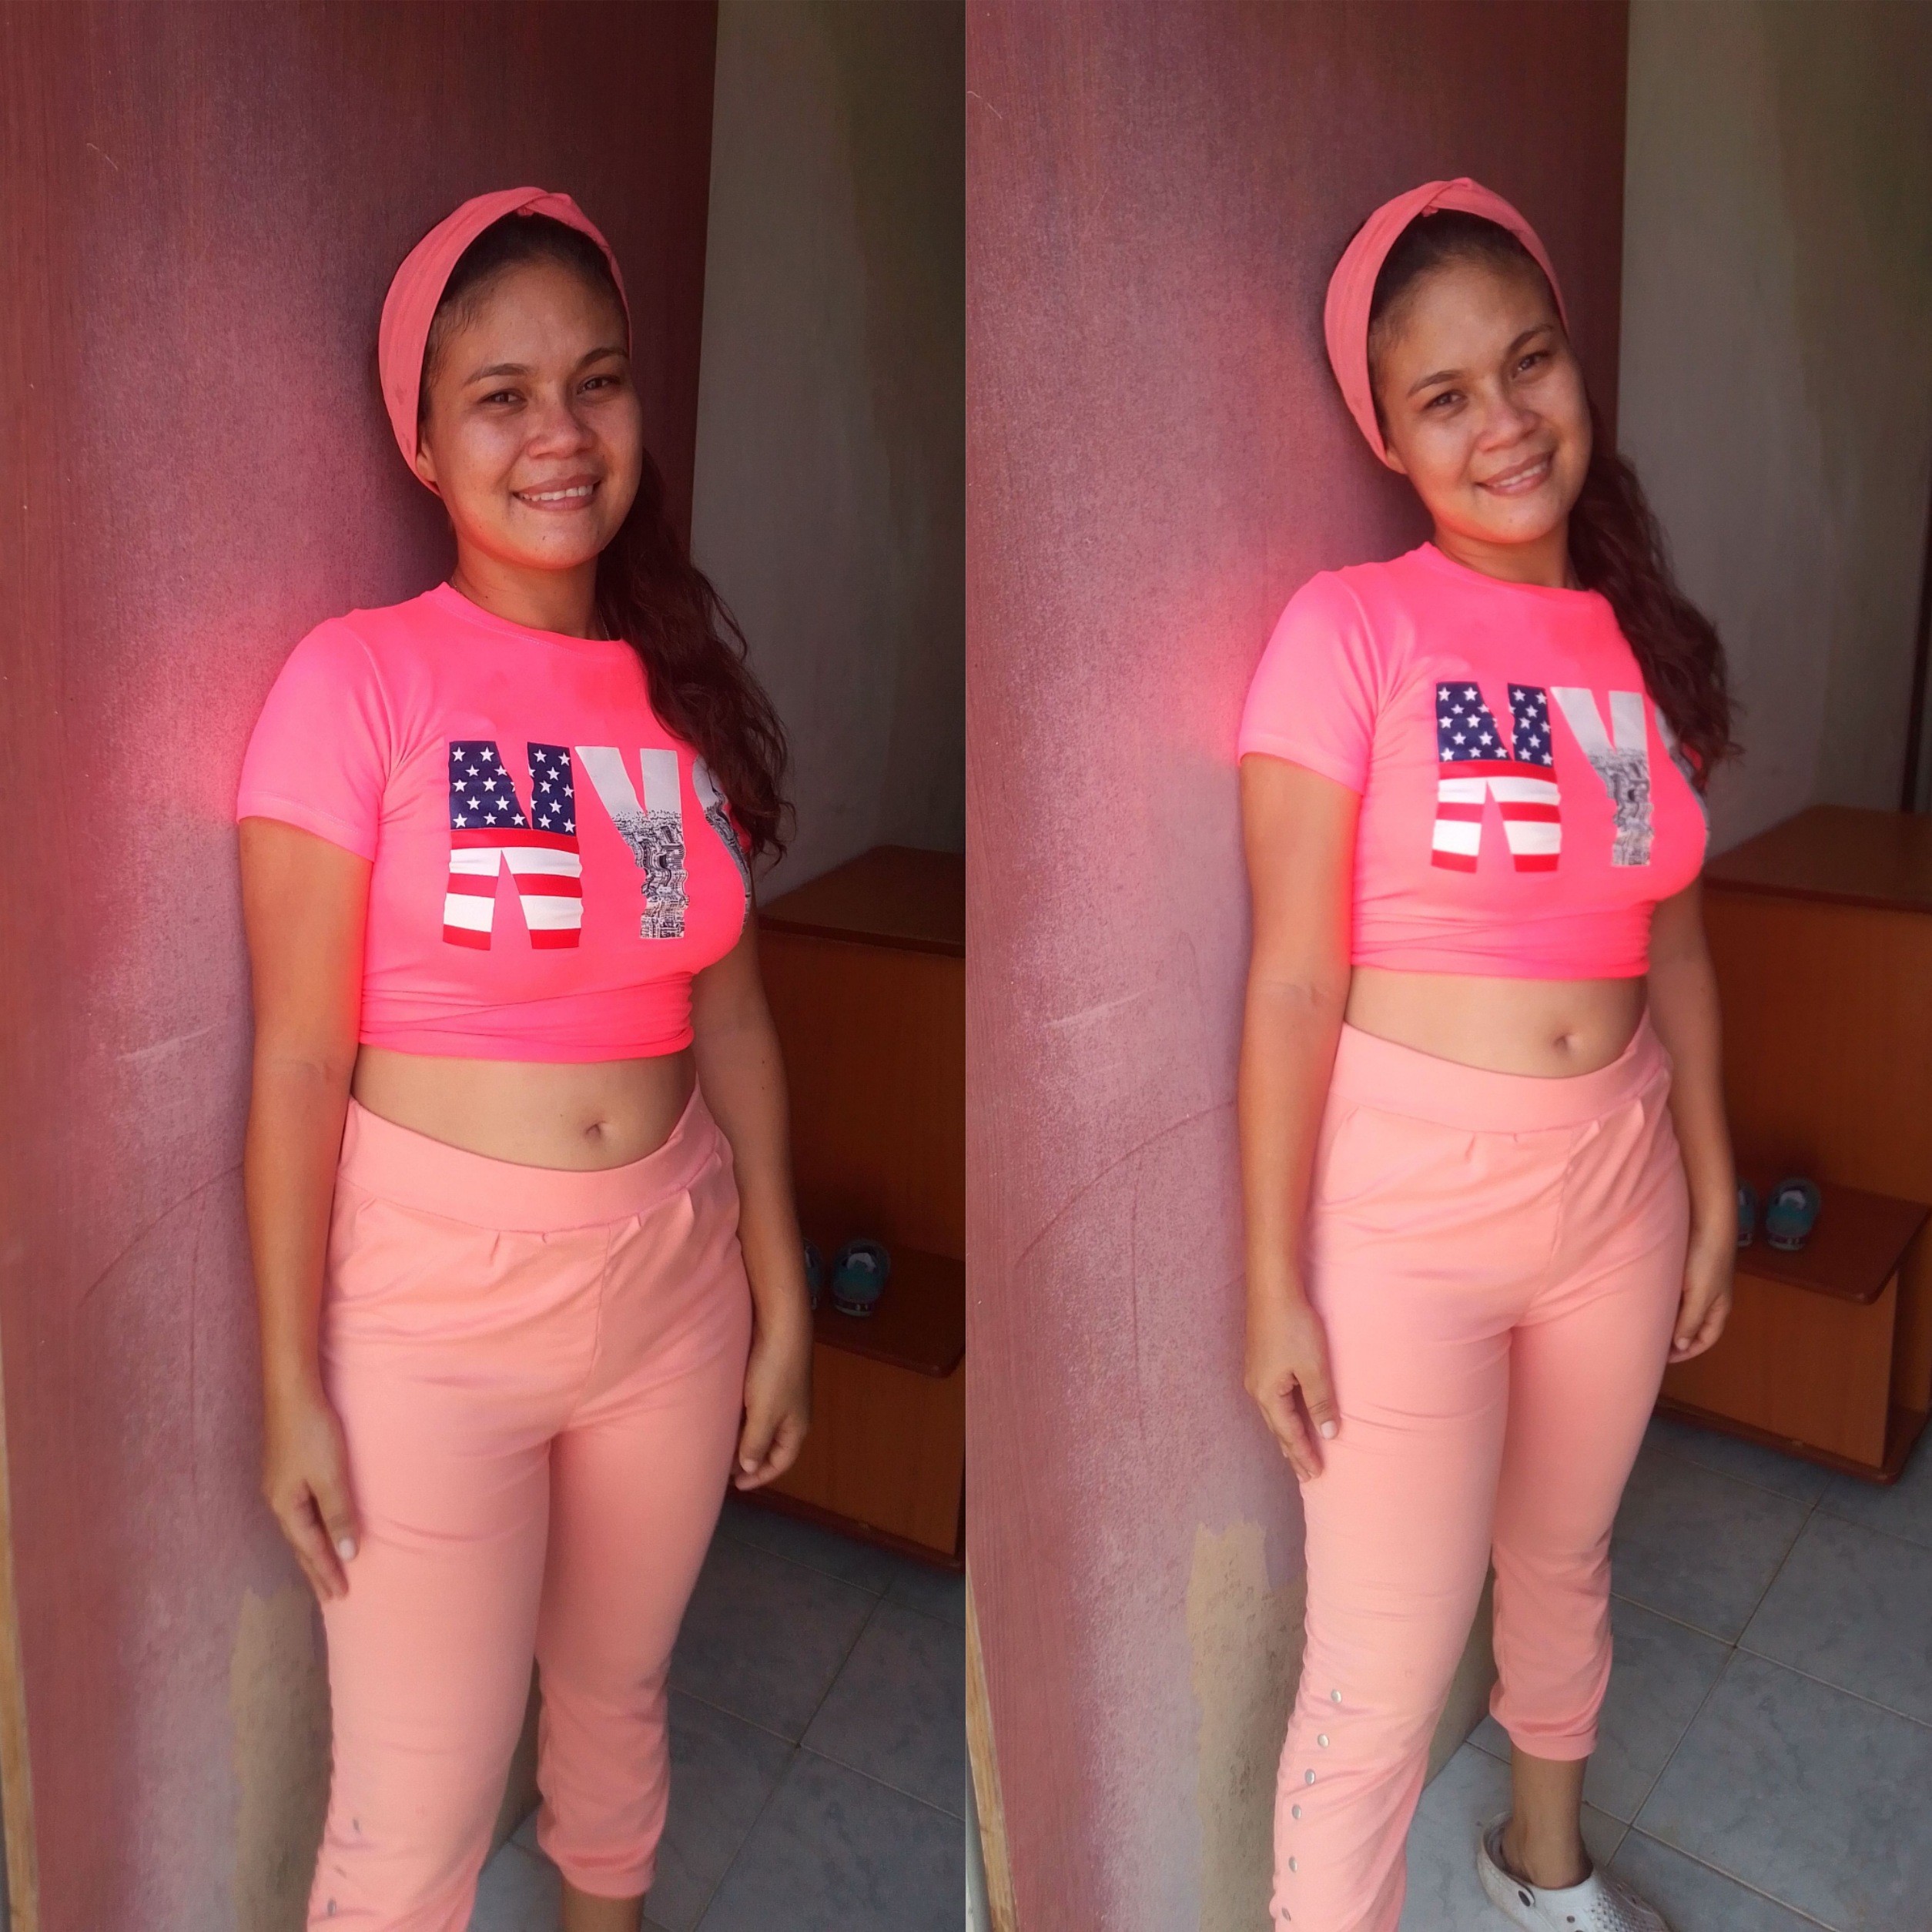
Y de esta manera ha quedado mi proyecto de hoy, cabe destacar que no tengo un cuerpo perfecto (risas) pero me encantó como me se ve. Espero sea de su agrado mi trabajo de hoy.
And this is how my project for today has turned out, it should be noted that I don't have a perfect body (laughs) but I loved how it looks on me. I hope you like my work today.
☺ Gracias por tu linda visita a mi post! ☺
Así pues, hemos llegado hasta el final, les agradezco mucho el apoyo que de uno y otra manera me brindan. Me despido deseandoles una vez más una gran noche, cuídense mucho.! Hasta una próxima oportunidad!
So, we have reached the end, I thank you very much for the support you give me in one way or another. I say goodbye wishing you once again a great night, take care of yourselves! Until a next opportunity!
0
0
0.000
Hi @razielmorales
Do you know you could have used #diy tag for this post to earn some BUIDL tokens in addition to Hive crypto?
In case you are not aware, read this post to know the kinds of content, among others, you could post using #diy tag.
You could also use the #diy tag when you share content showcasing your DIY skills.
When you use #diy tag your posts will also appear on https://built-it.io website, giving you wider exposure.
Because most people are not aware of the potential of BUIDL token, it can still be bought at very cheap price now.
cc @build-it
Dear @razielmorales,
May I ask you to review and support the Dev Marketing Proposal (https://peakd.com/me/proposals/232) we presented on Conference Day 1 at HiveFest?
The campaign aims to onboard new application developers to grow our ecosystem. If you missed the presentation, you can watch it on YouTube.
You cast your vote for the proposal on Peakd, Ecency, Hive.blog or using HiveSigner.
Thank you!