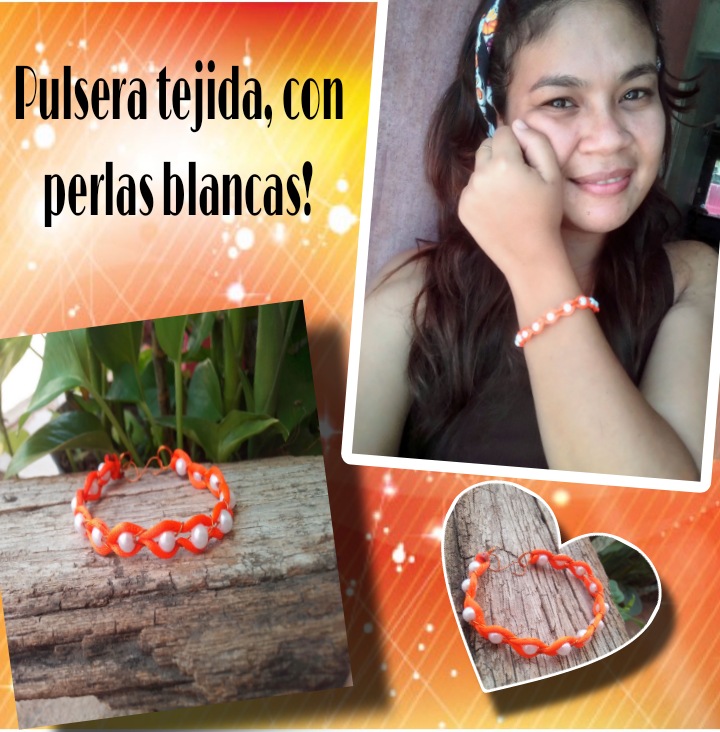
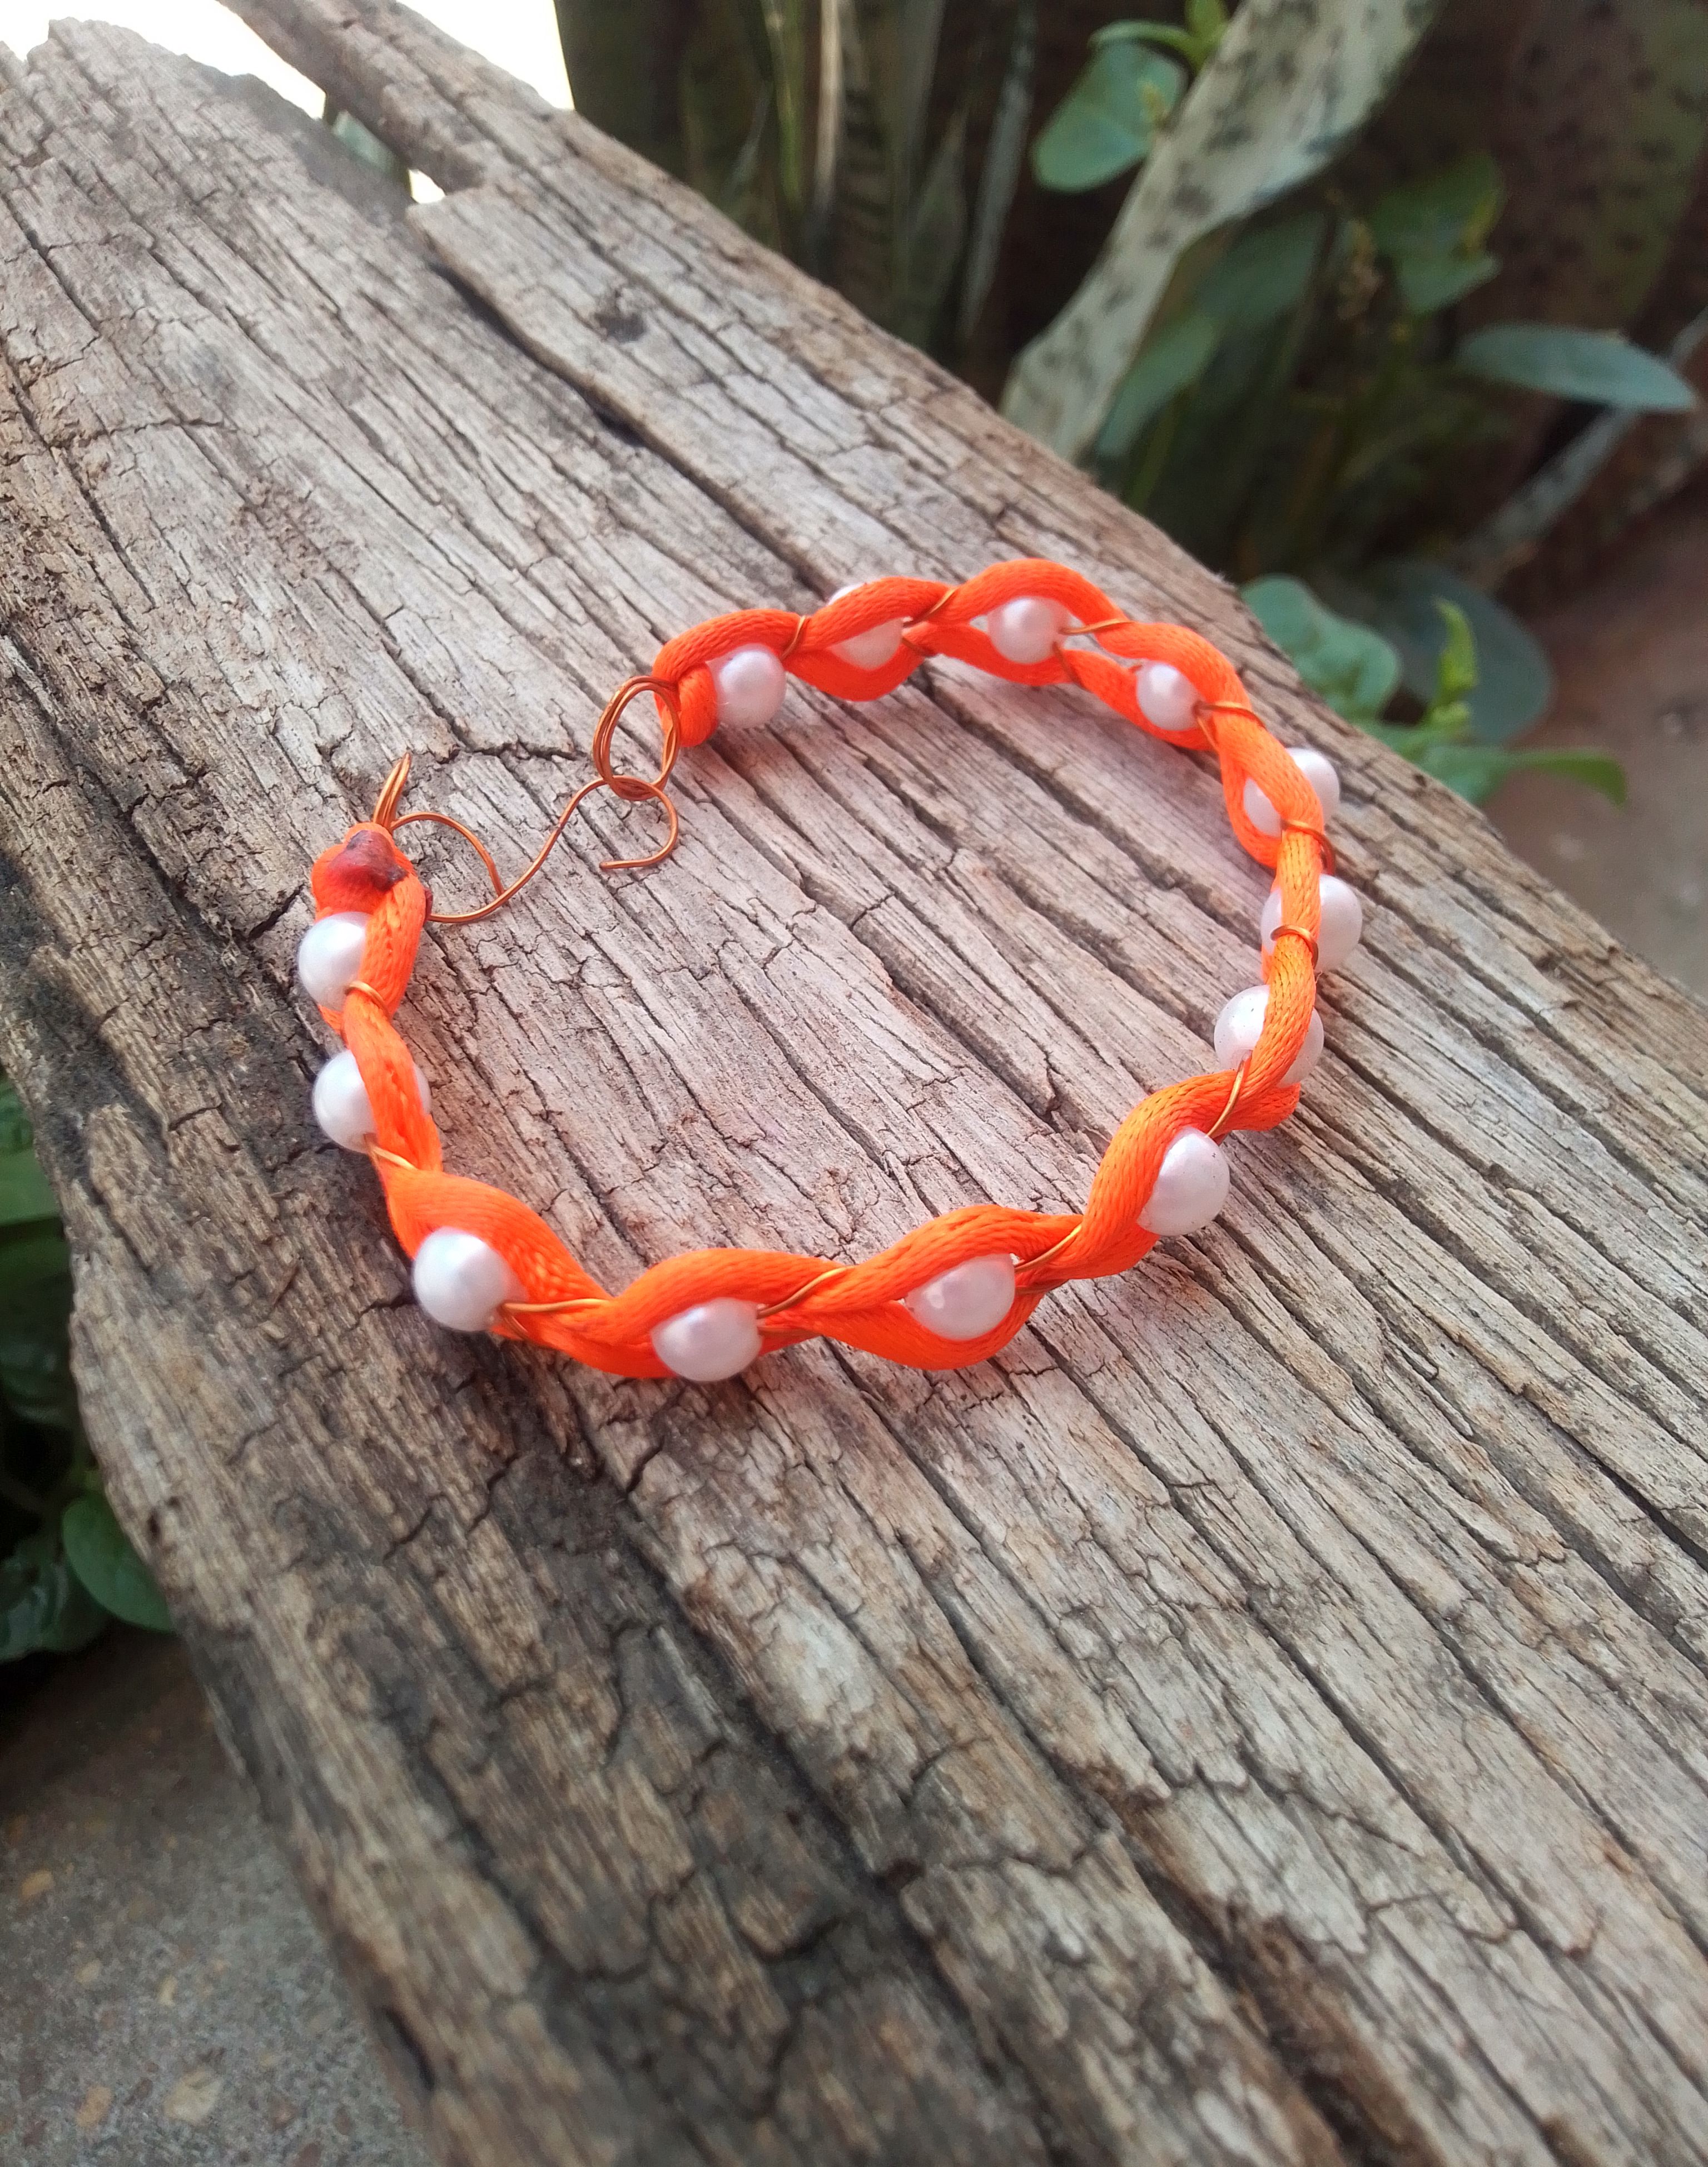
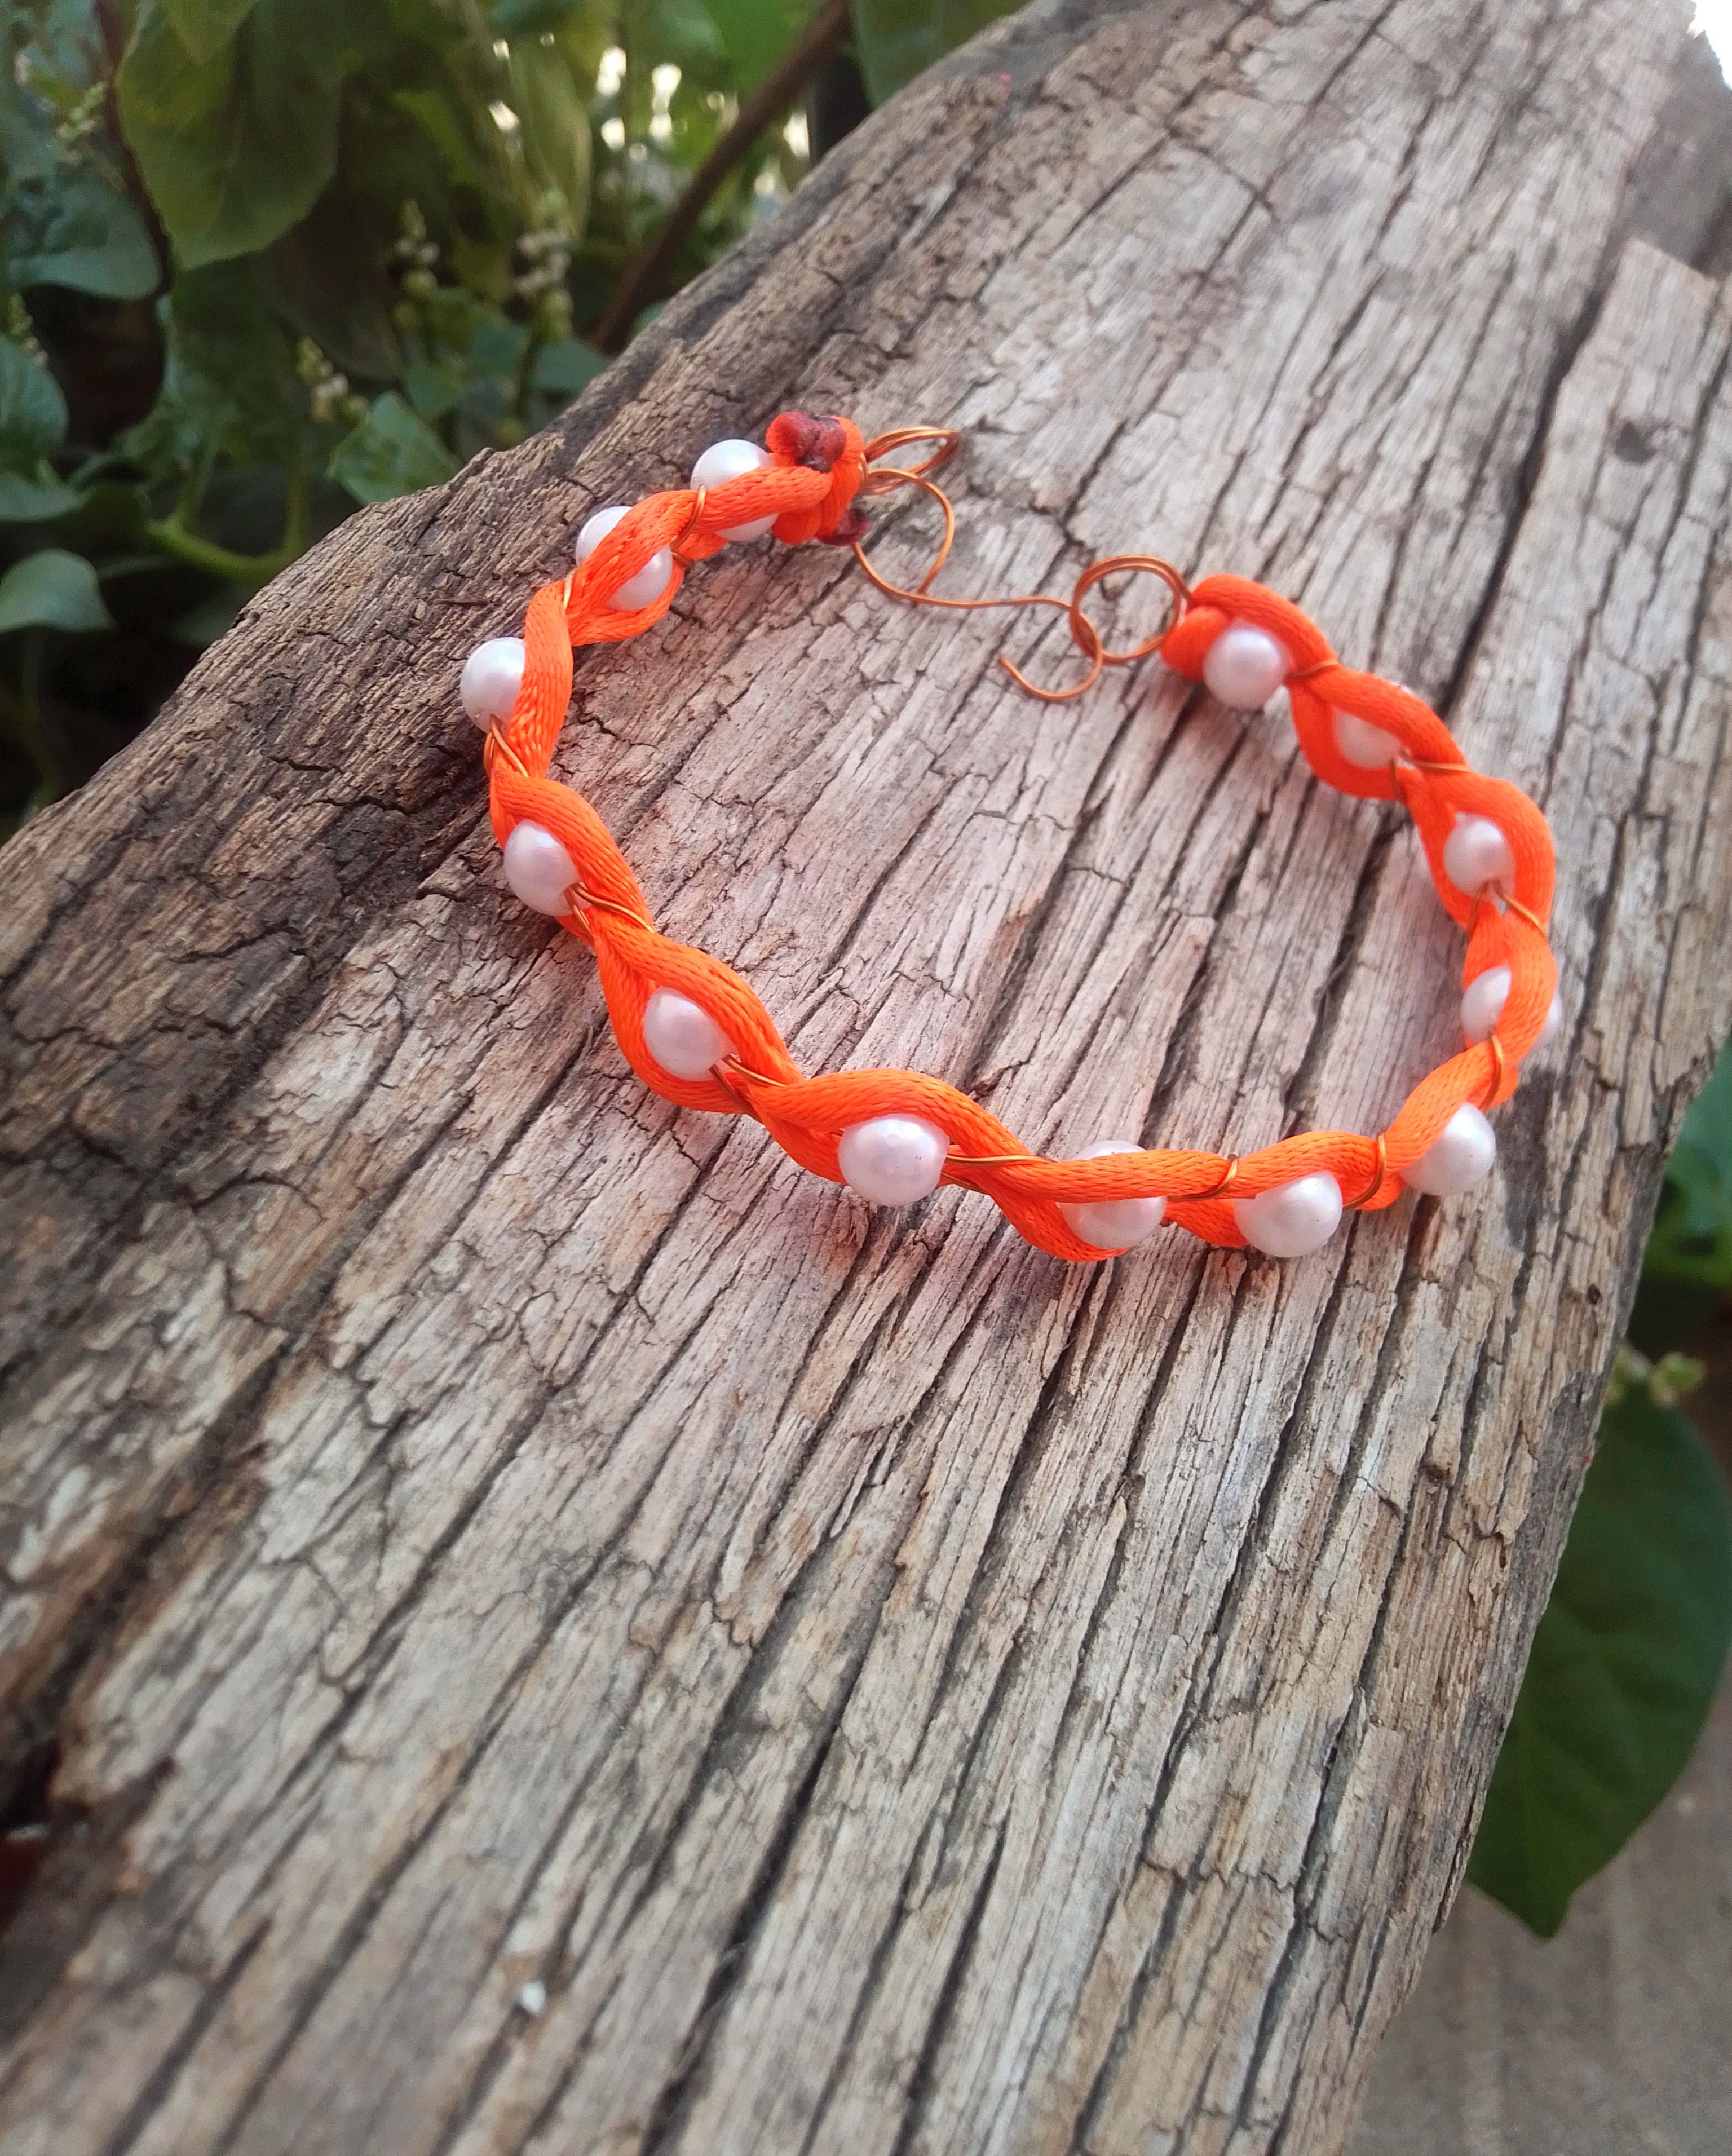
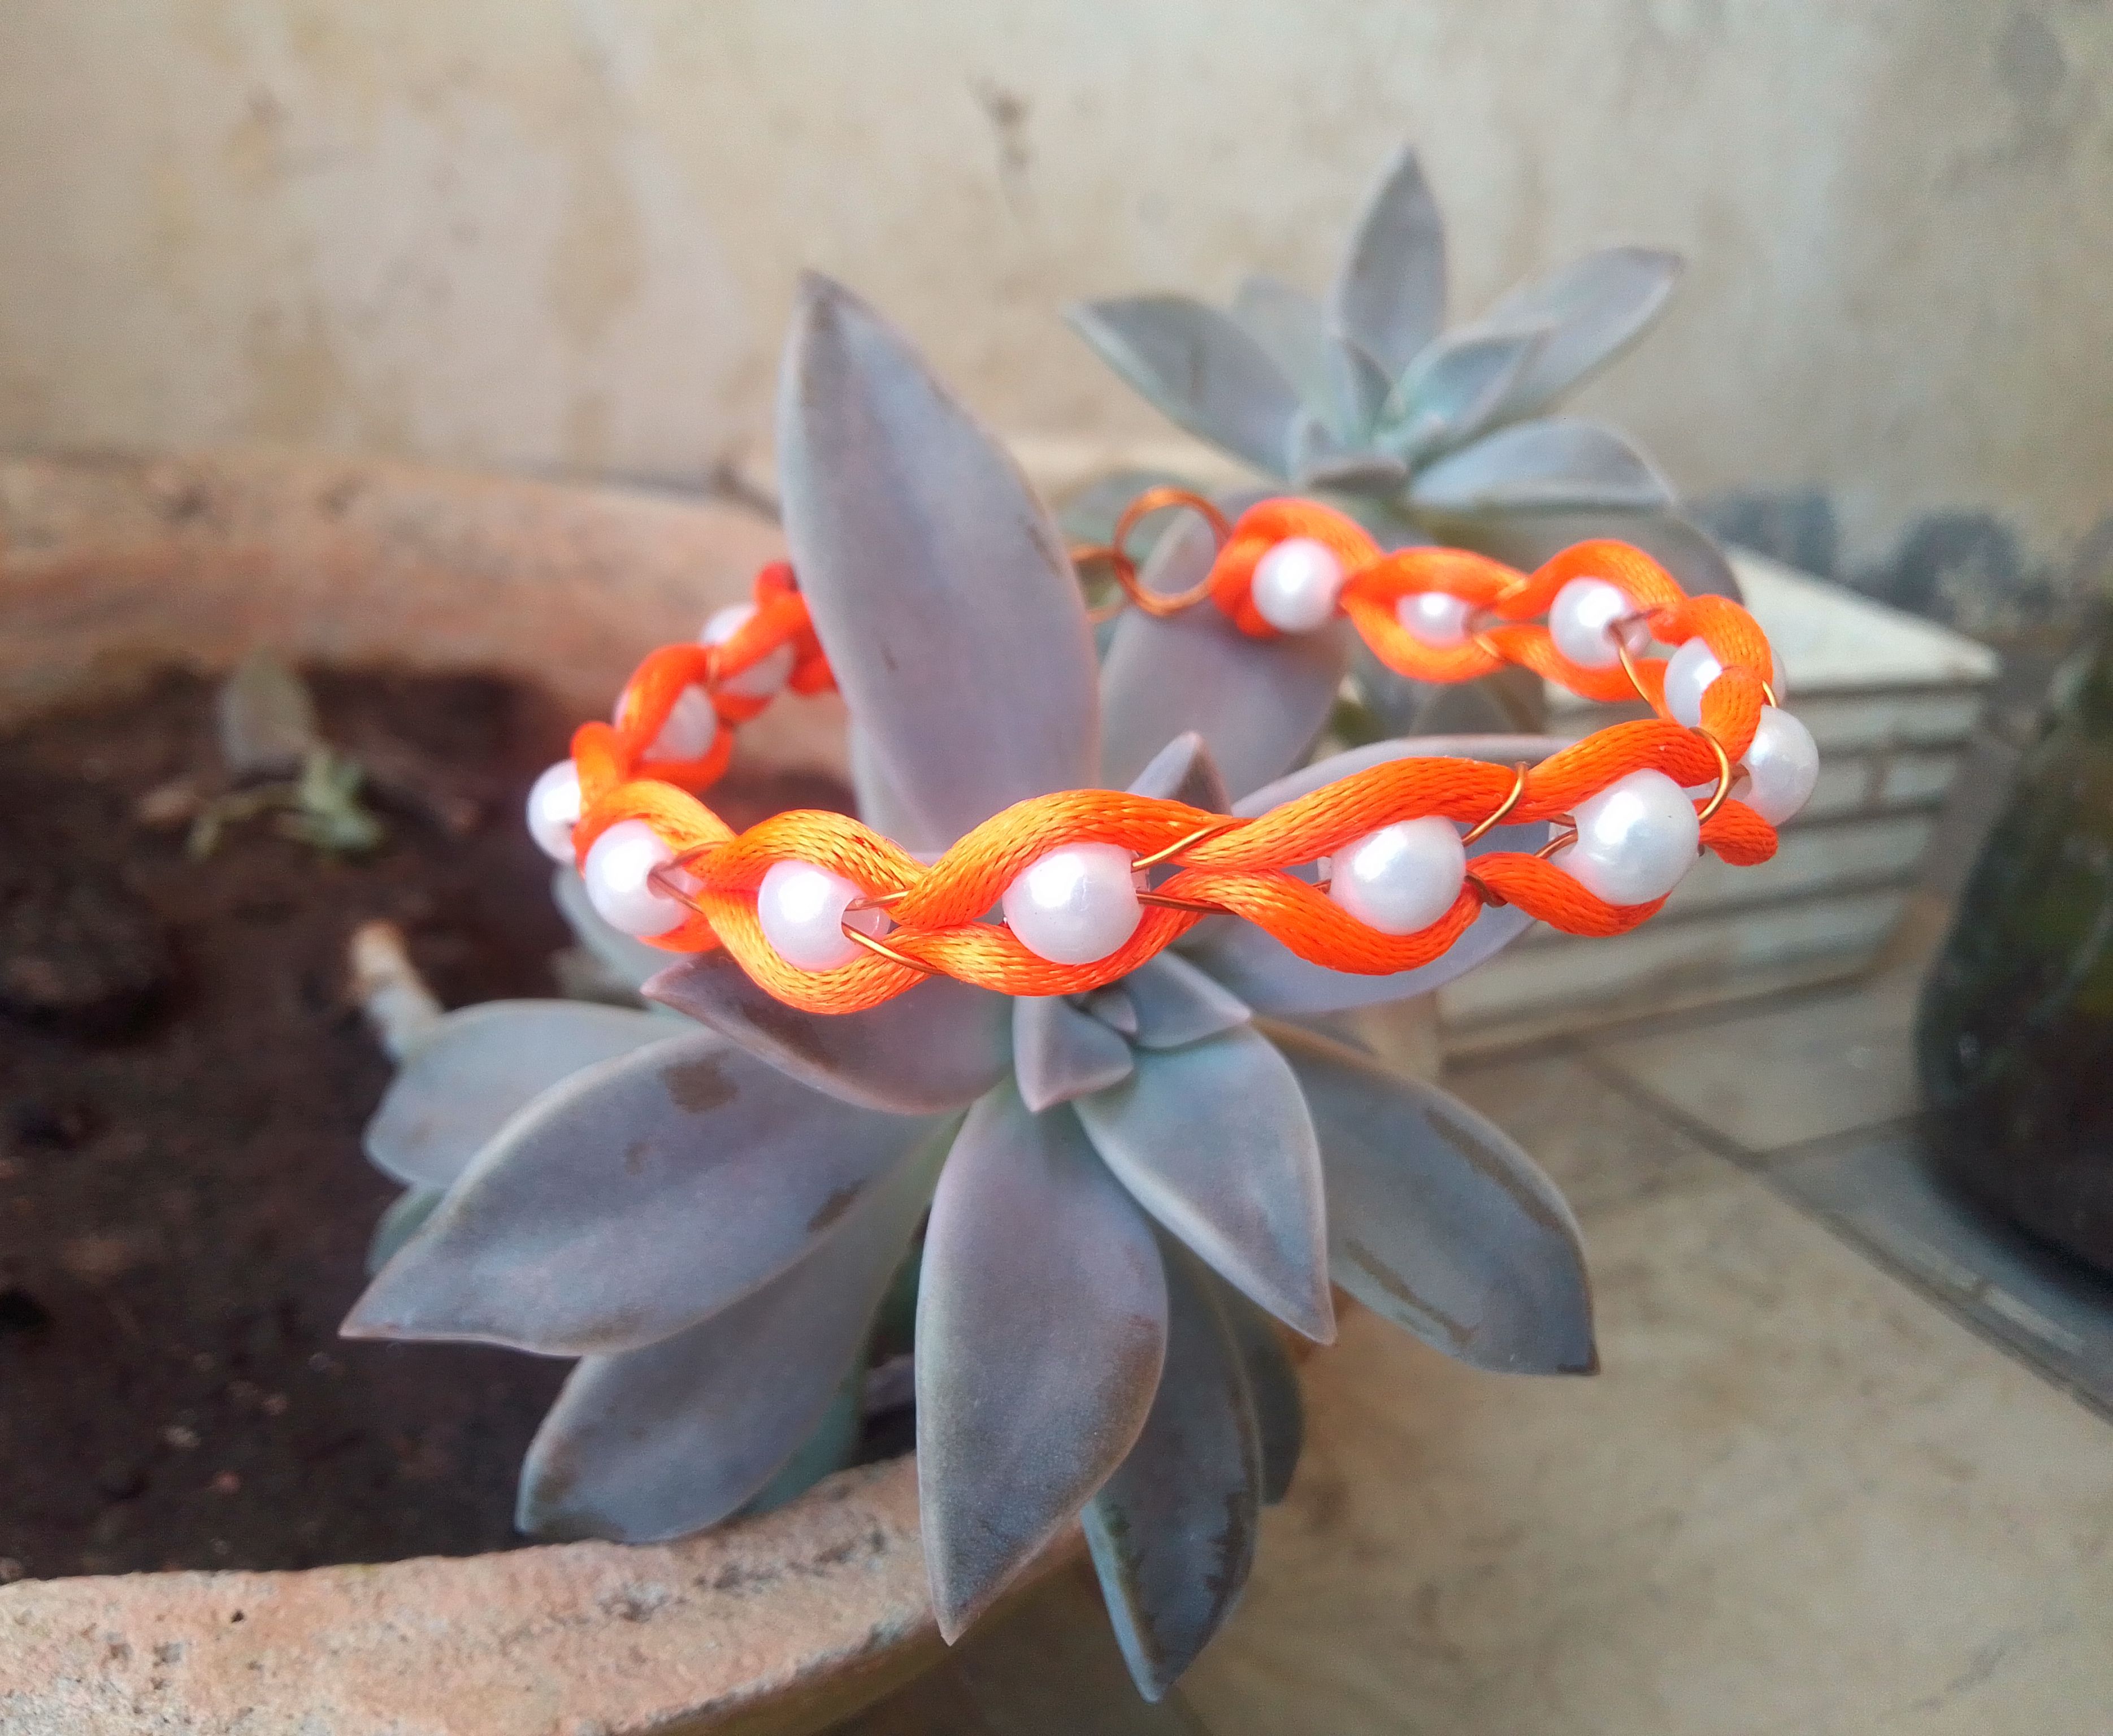
🧡Pulsera en color naranja tejida con perlas blancas//Orange bracelet woven with white pearls.🧡
Feliz domingo linda comunidad!!!
Hoy día el estar a la moda es para muchos, algo muy necesario, y los accesorios son prendas casi tan importantes al momento de asistir a algún evento, como la ropa o un par de zapatos. Mas que todo para nosotras, pienso que a tomado mucha relevancia desear y querer cadia día lucir más bonita, elegir un buen accesorio que se adapte perfectamente a nuestras necesidades es indispensable en ocasiones y de esta manera, en todo momento resaltar la belleza, sentirnos bien y comoda.
Today being fashionable is for many, something very necessary, and accessories are almost as important garments when attending an event, as clothes or a pair of shoes . More than anything for us, I think that wishing and wanting to look prettier every day has taken on a lot of importance. Choosing a good accessory that perfectly suits our needs is essential on occasions and in this way, at all times highlight beauty, feel good and comfortable.
Cada vez es más plácido, haber tomado la tarea de realizar mis propios accesorios y ahora los de mi nena, es un modo excelente, fácil y rápido de expresar mi parte más artística y creativa, es fascinante ver como tan poco tiempo puedo conseguir piezas sencillas y elegantes. El día de ayer, pase una de las mejores tardes clasificando mi material de bisutería, pues estaba bastante desordenado, entre ellos encontré un bello hilo cola de ratón de un resaltante color anaranjado, inmediatamente pensé combinarlo con bellas perlas blancas para elaborar una linda pulsera en un tejido muy llamara mucho la atención.. Y si eres de estás personas a la que este accesorio llamo la atención, acompañame hasta el final de este post para darte instrucciones fáciles de seguir y las complemento con imágenes para que puedas desde casa elaborar de una manera muy rápida.
It is becoming more and more pleasant, having taken on the task of making my own accessories and now those of my daughter, it is an excellent, easy and quick way to express my most artistic and creative side, it is Fascinating to see how I can achieve simple and elegant pieces in such a short time. Yesterday, I spent one of the best afternoons classifying my jewelry material, because it was quite messy, among them I found a beautiful mouse tail thread of a striking orange color, I immediately thought of combining it with beautiful white pearls to make a beautiful bracelet in a fabric that will attract a lot of attention. And if you are one of these people to whom this accessory caught the attention, follow me to the end of this post to give you easy-to-follow instructions and I complement them with images so that you can make a way very quickly.
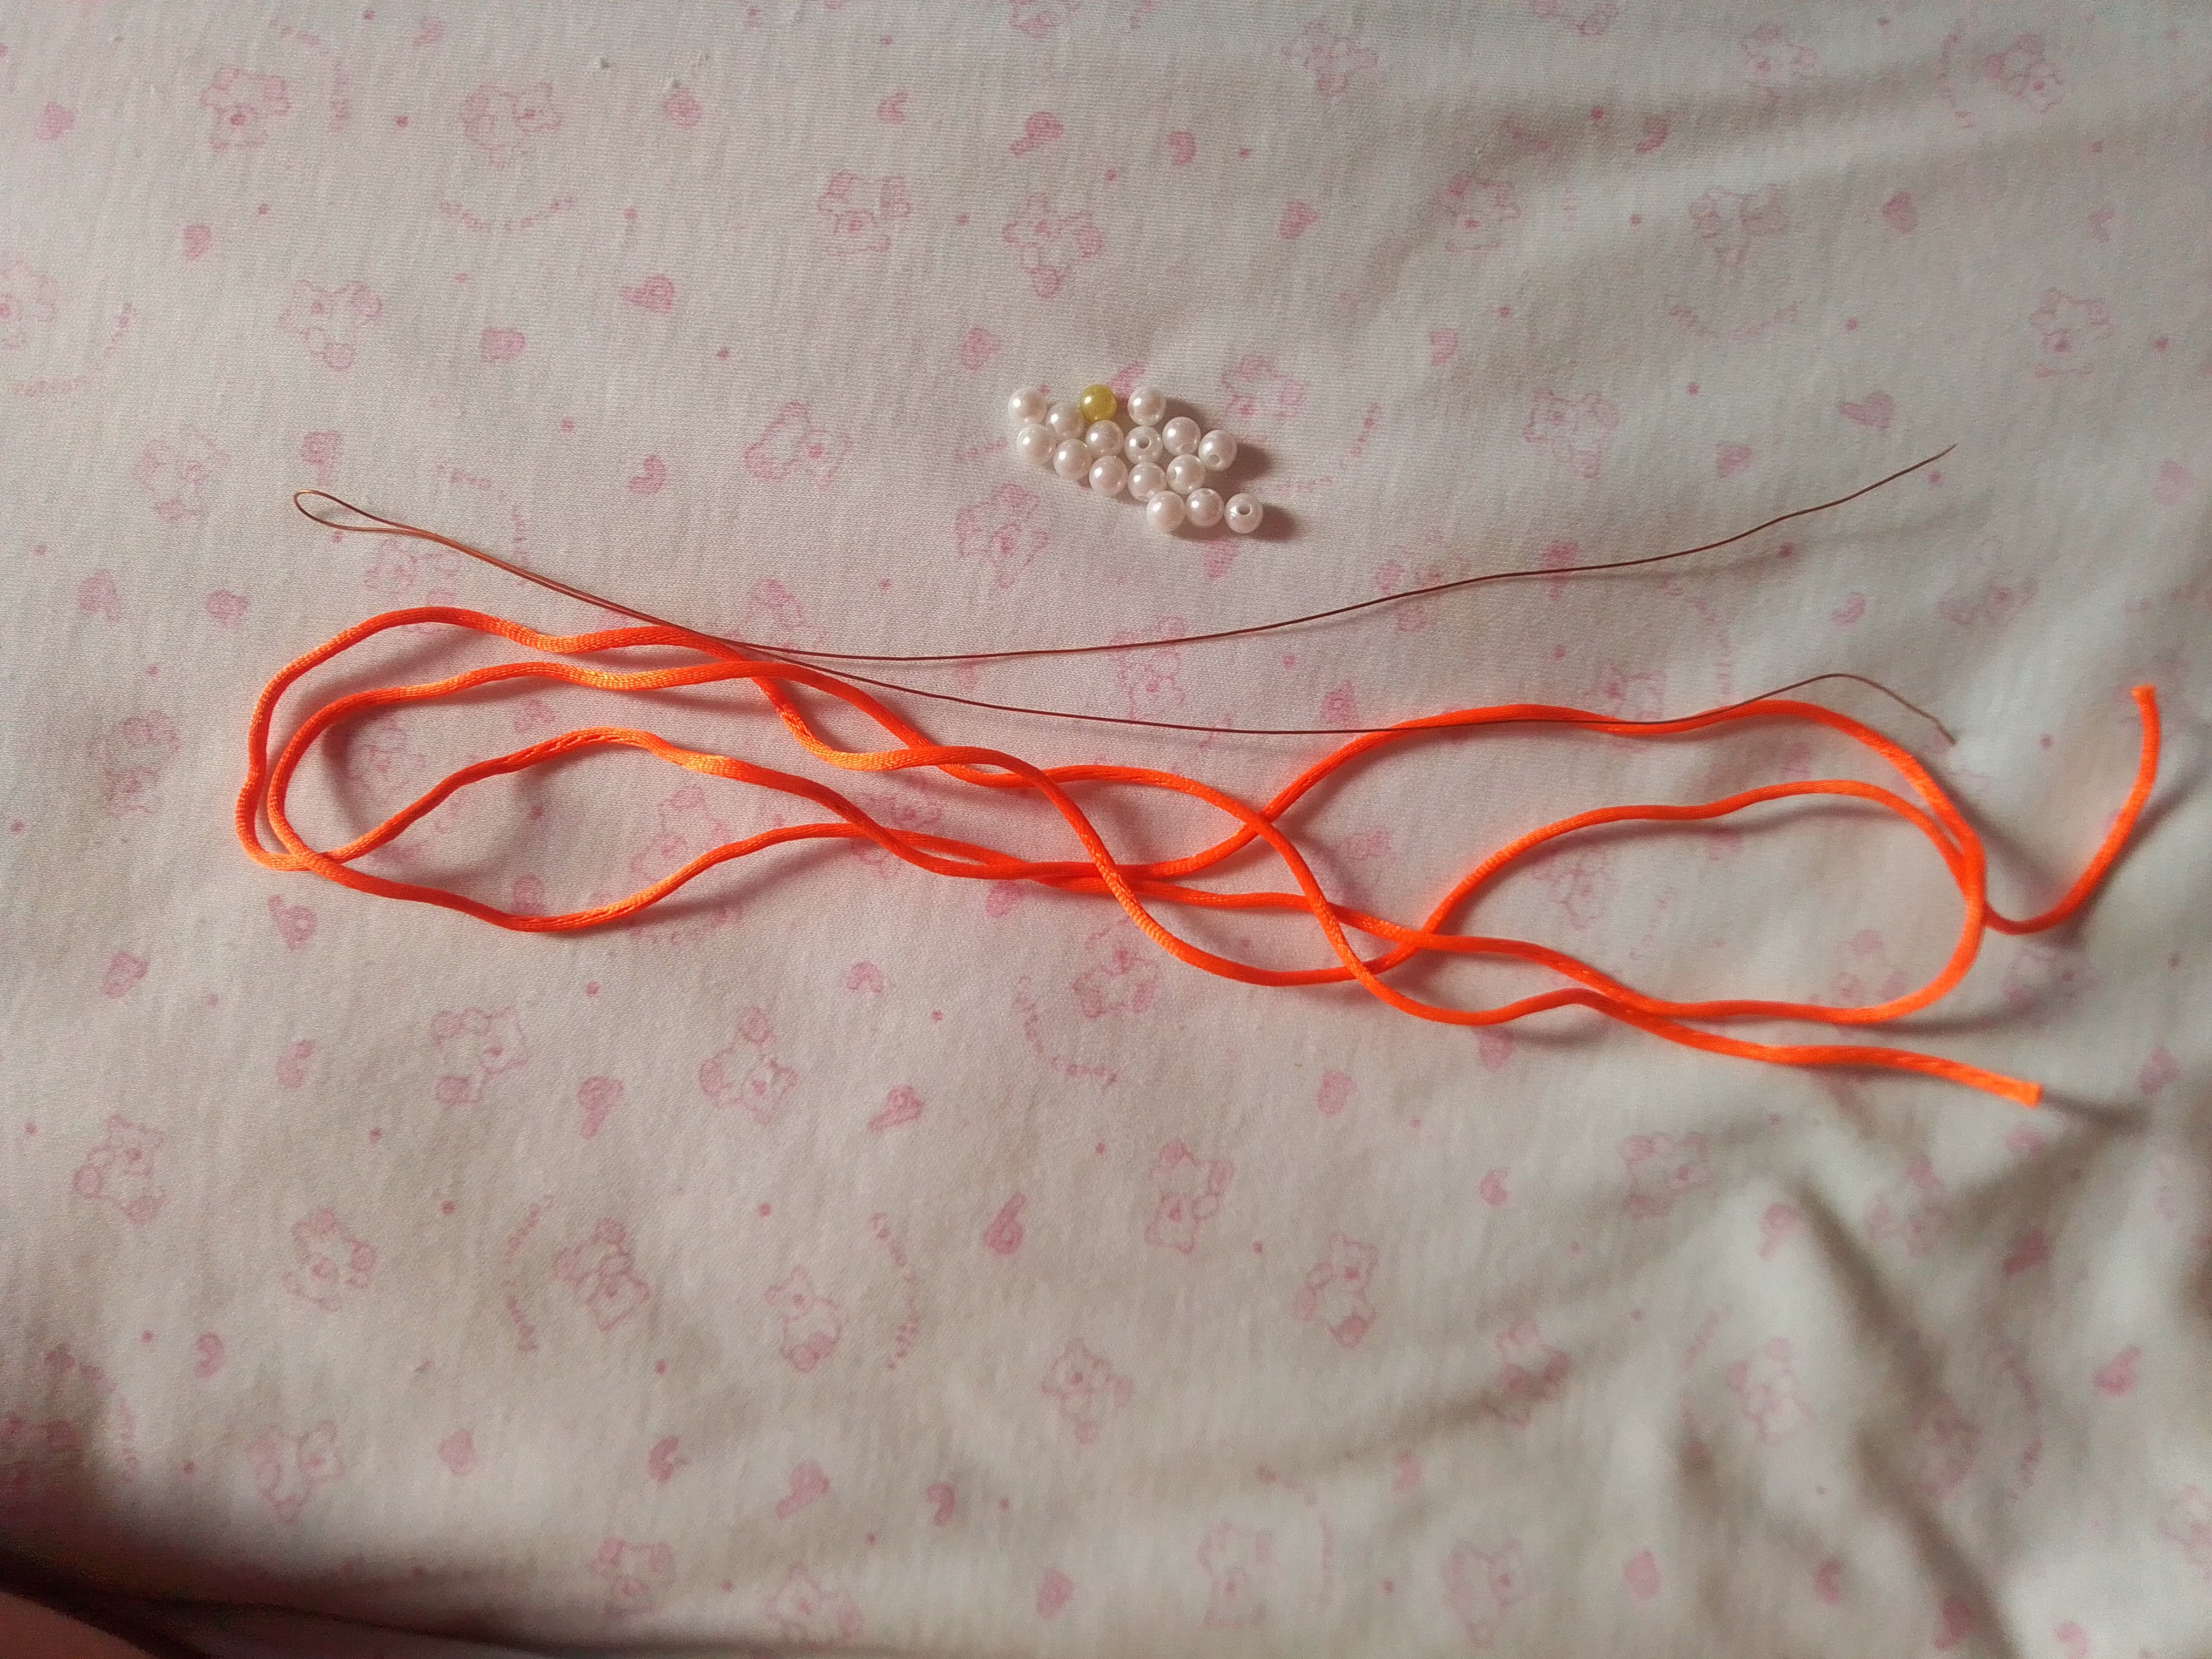
Materiales que necesitas:
- Hilo cola de ratón.
- Alambre de bisutería fino.
- Perlas blancas.
- Lapicero.
- Sujetador.
Materials you need:
- Thread tail of mouse.
- Fine jewelry wire.
- White pearls.
- Pencil.
- Fastener hook.
(PROCEDIMIENTO)
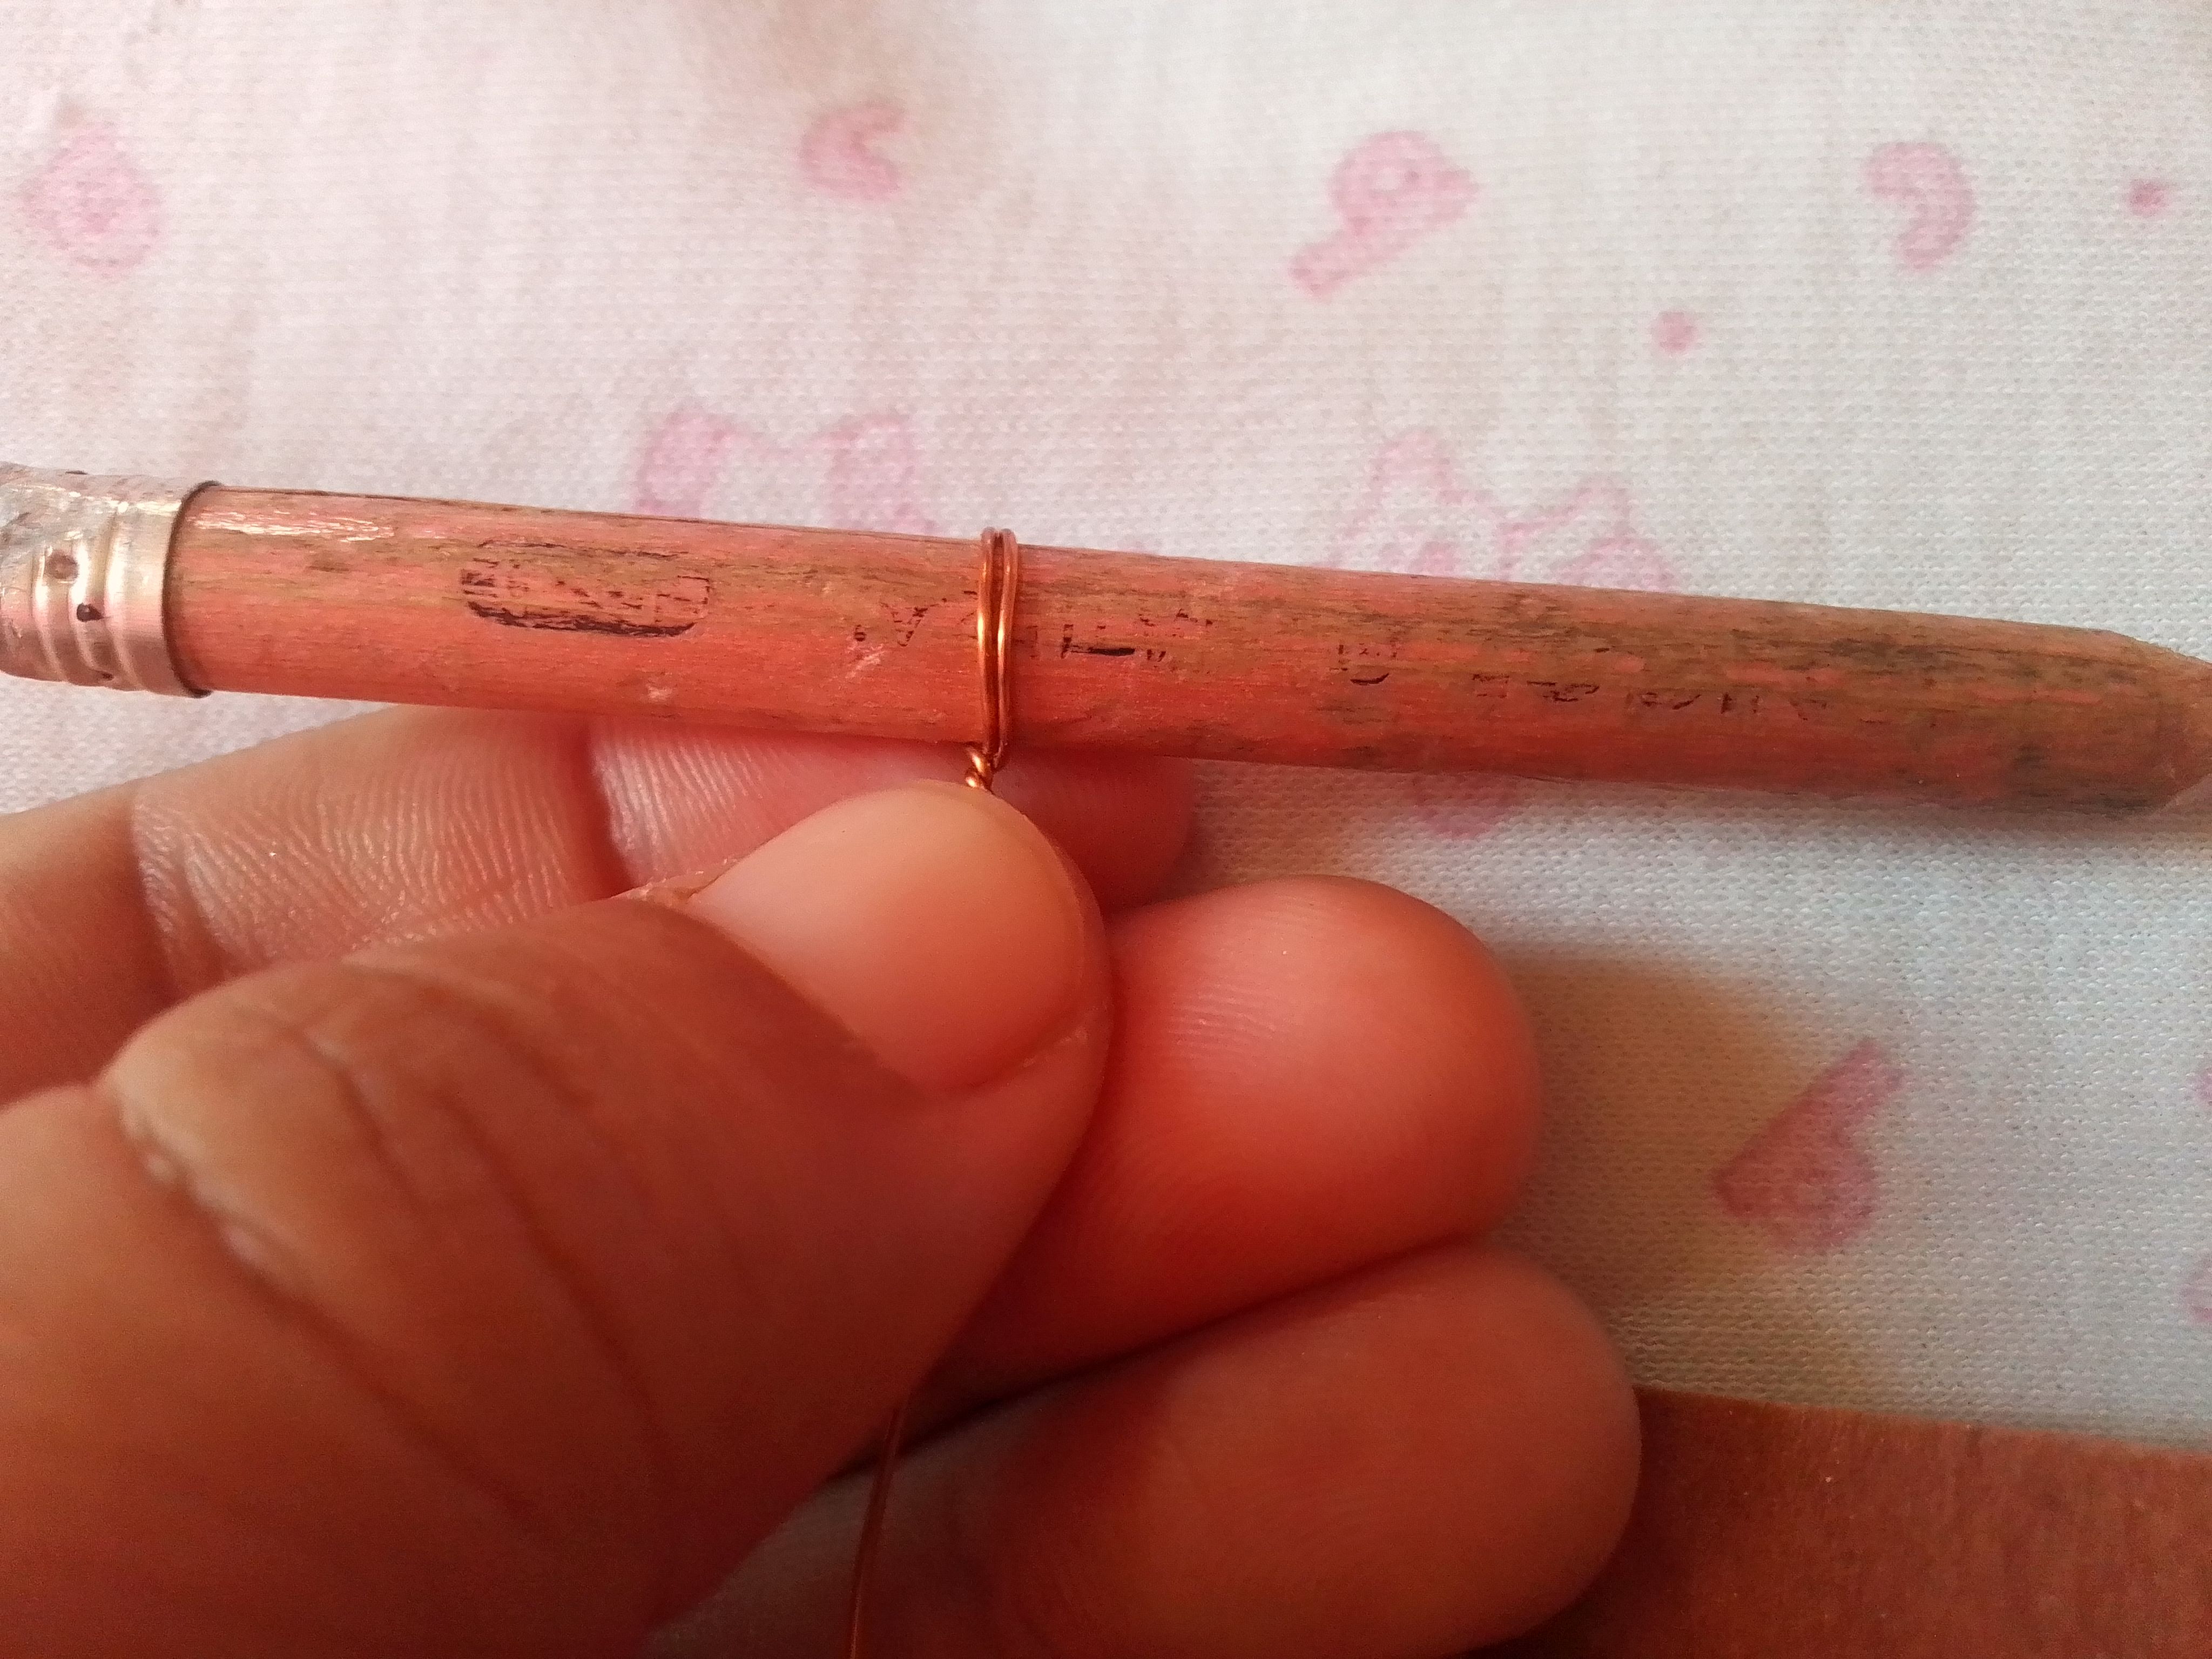
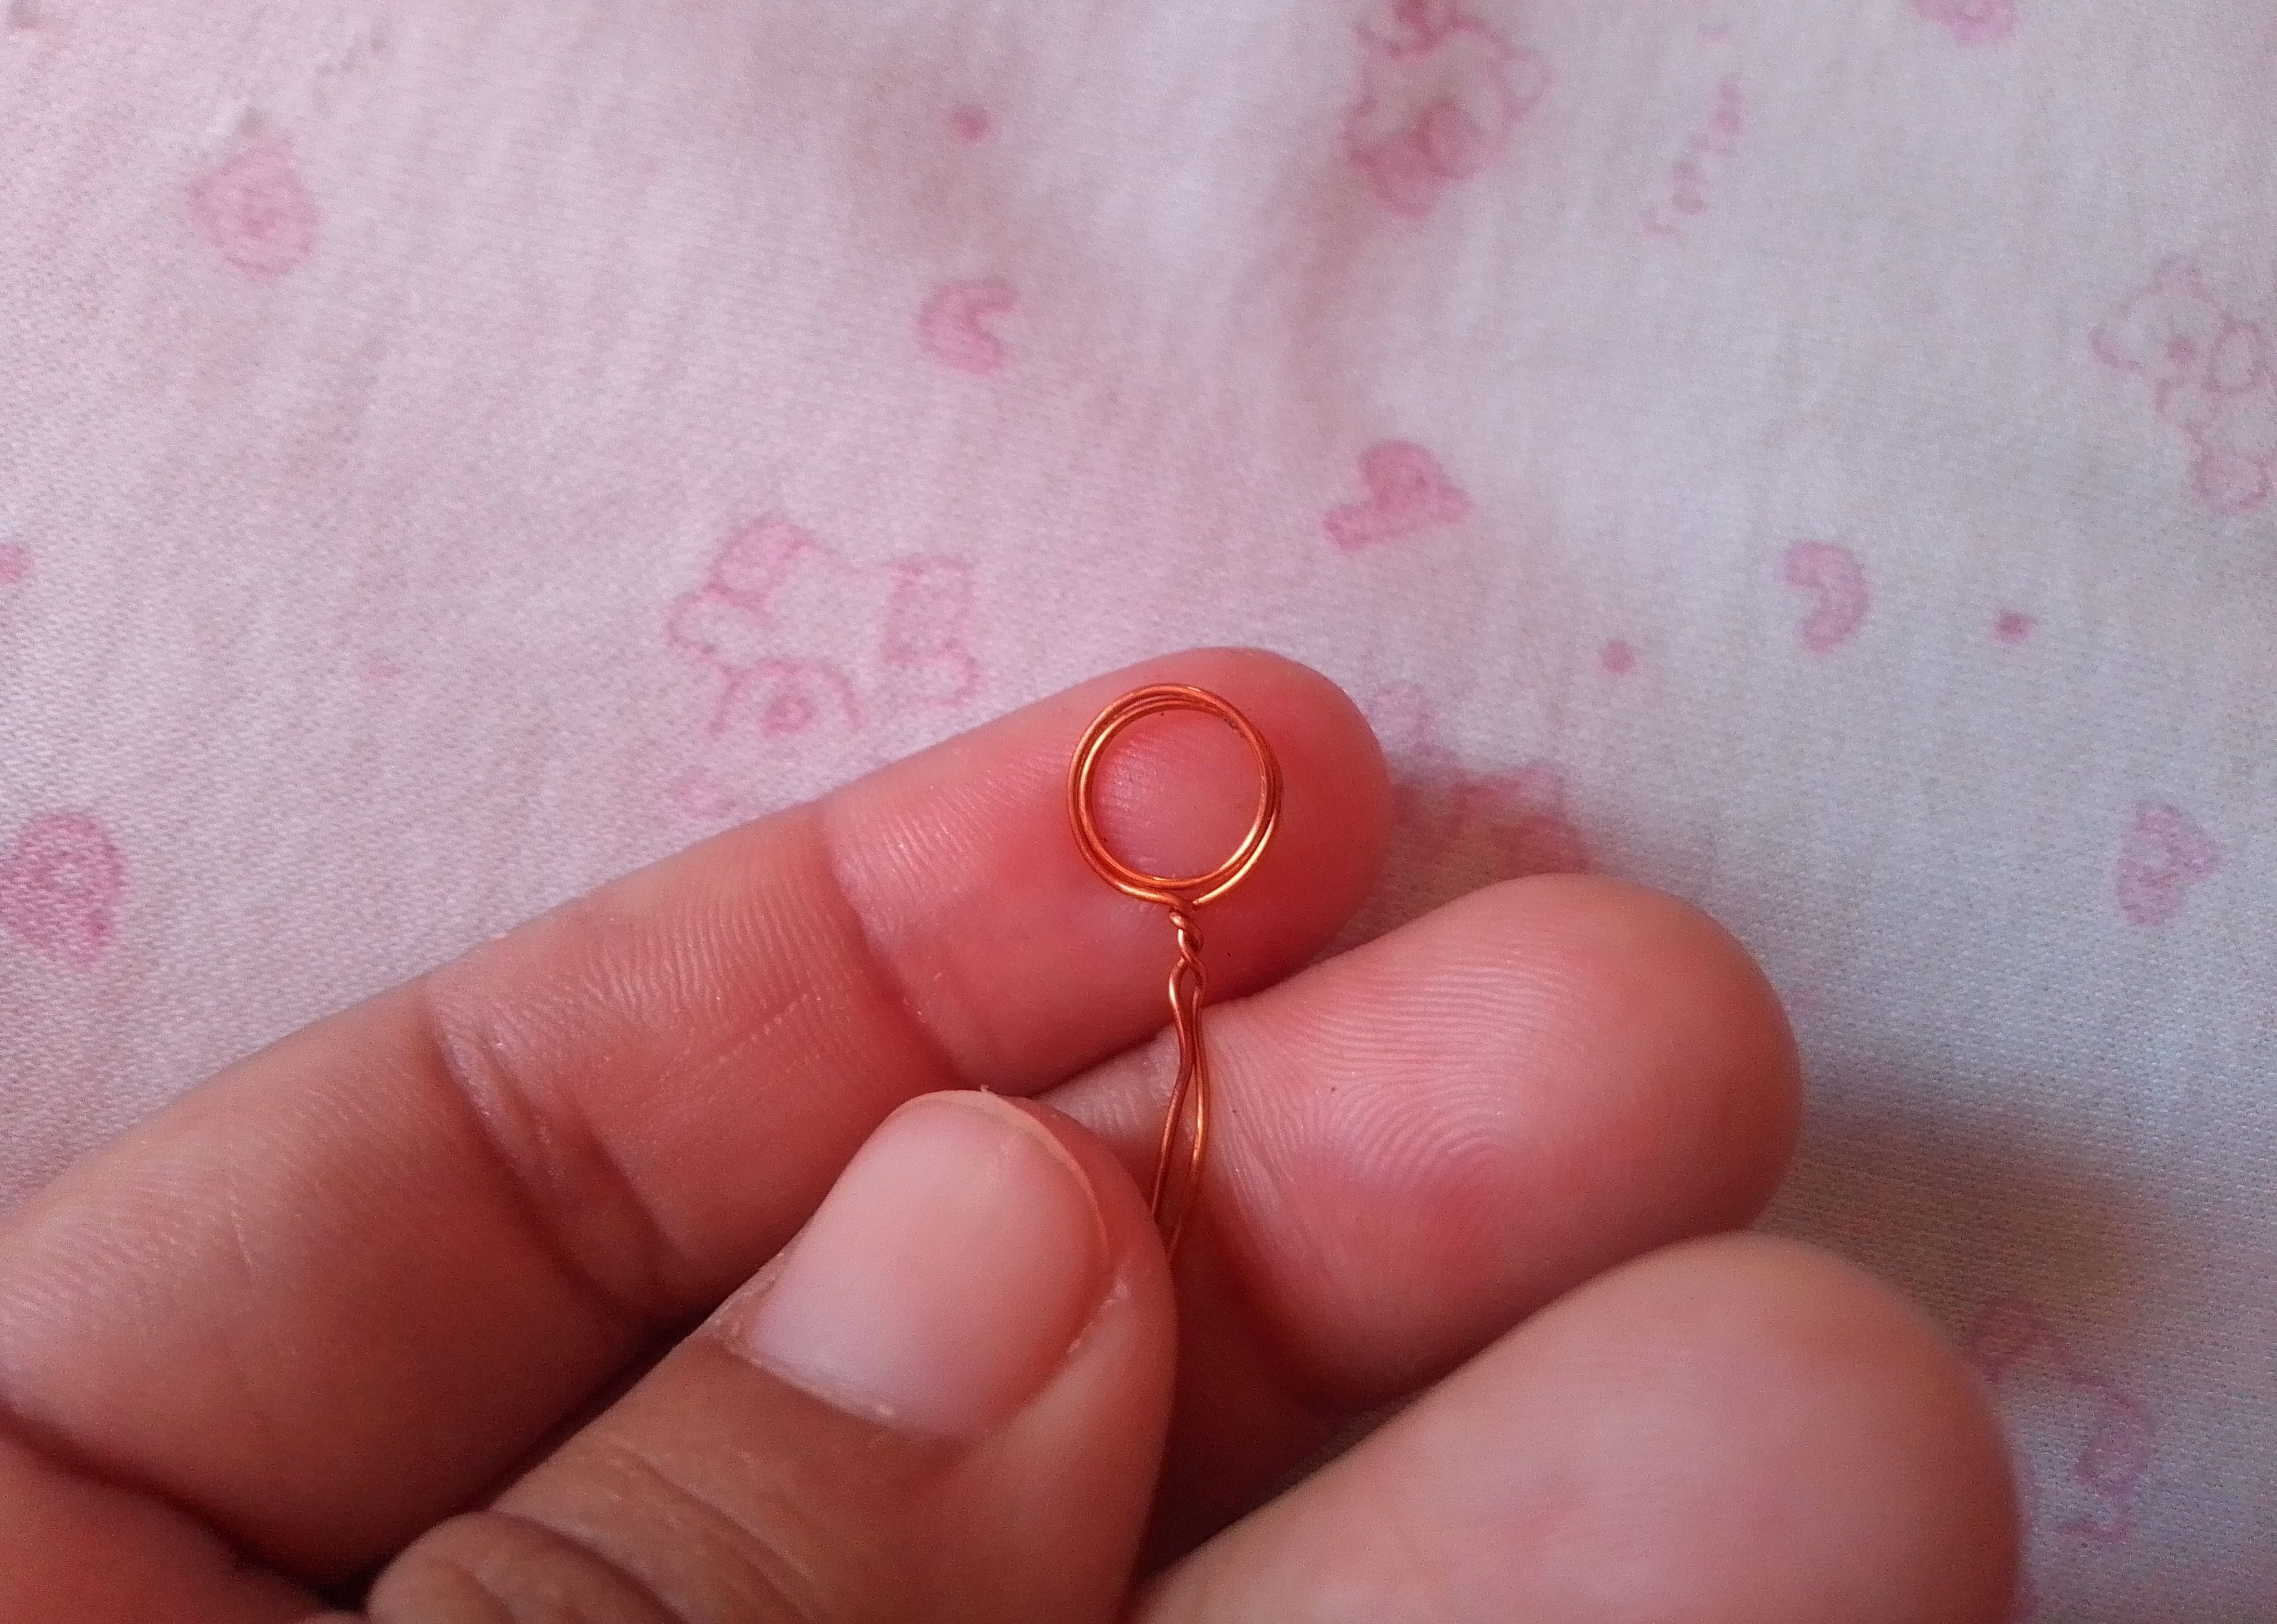
Paso 01
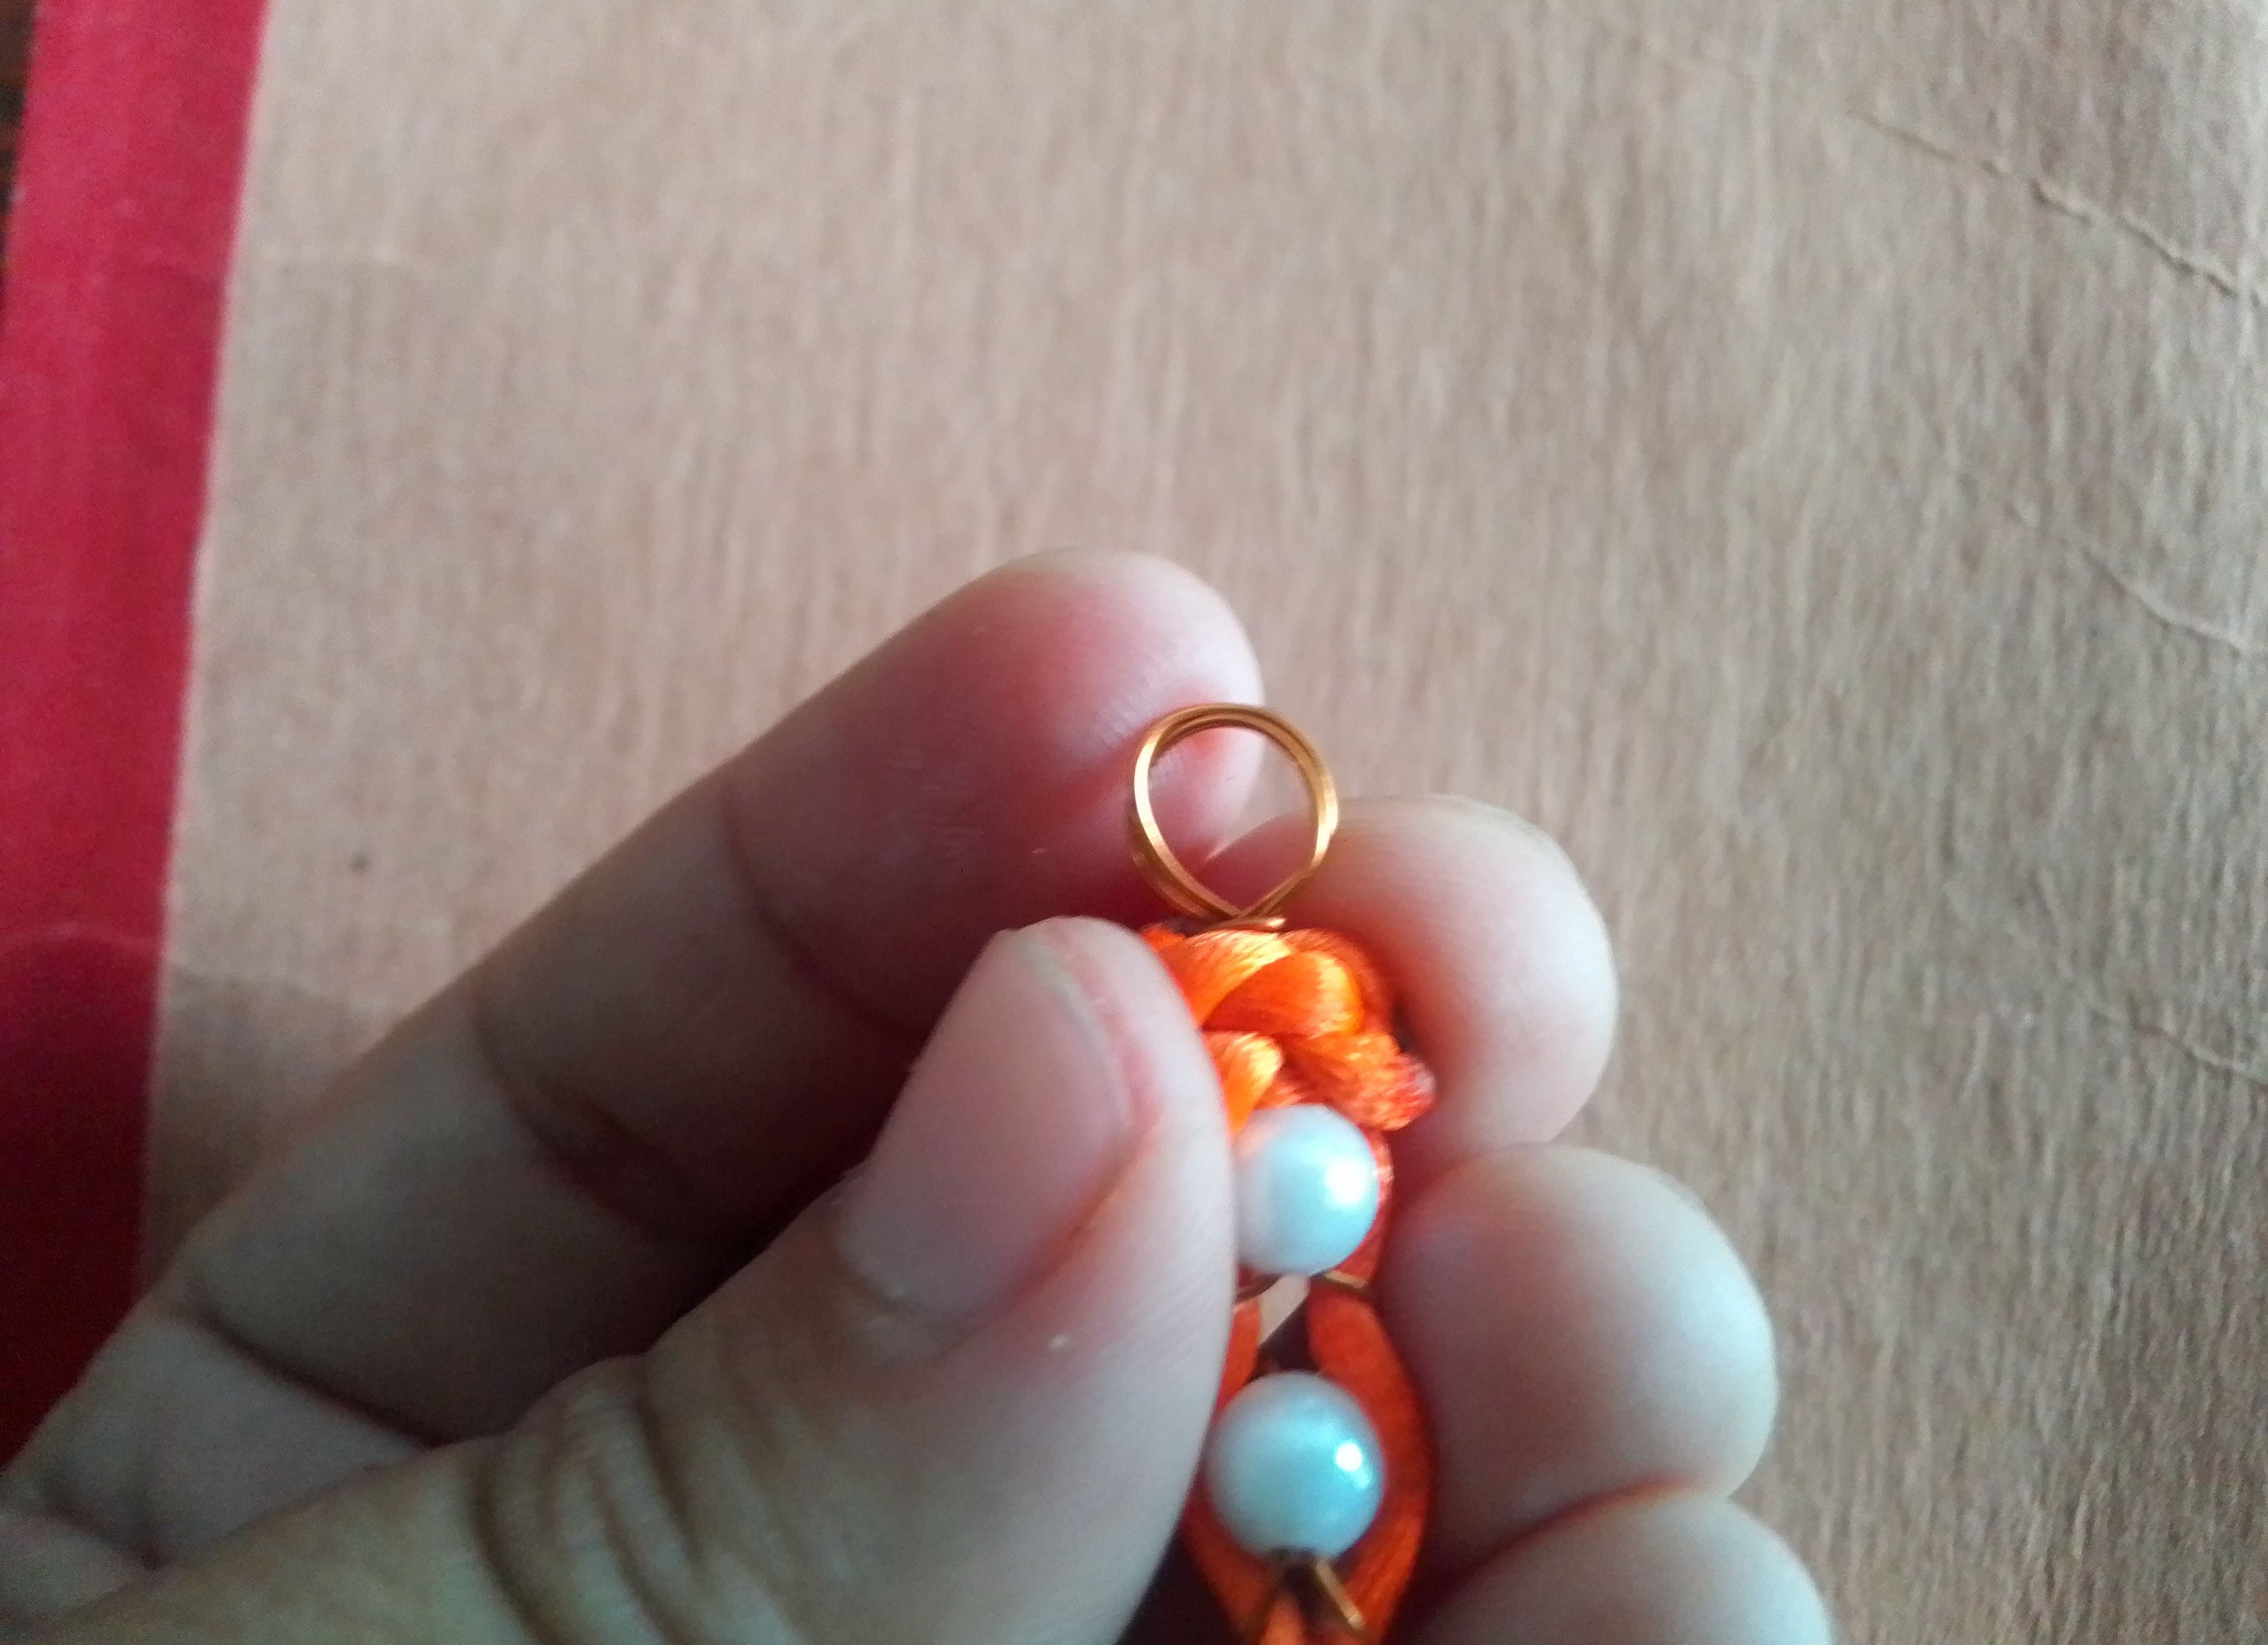
Para iniciar la elaboración de esta linda pulsera, tomo un trozo de alambre de 40cm de largo, lo doblo a la mitad y con ayuda de un lapiz, crearé un aro argolla doble, girando el alambre en ocasiones por la circunferencia o forma de lápiz.
Step 01
To start making this beautiful bracelet, I take a 40cm long piece of wire, fold it in half and with the help of a pencil, I will create a double hoop, twisting the wire twice by the circumference or pencil shape.
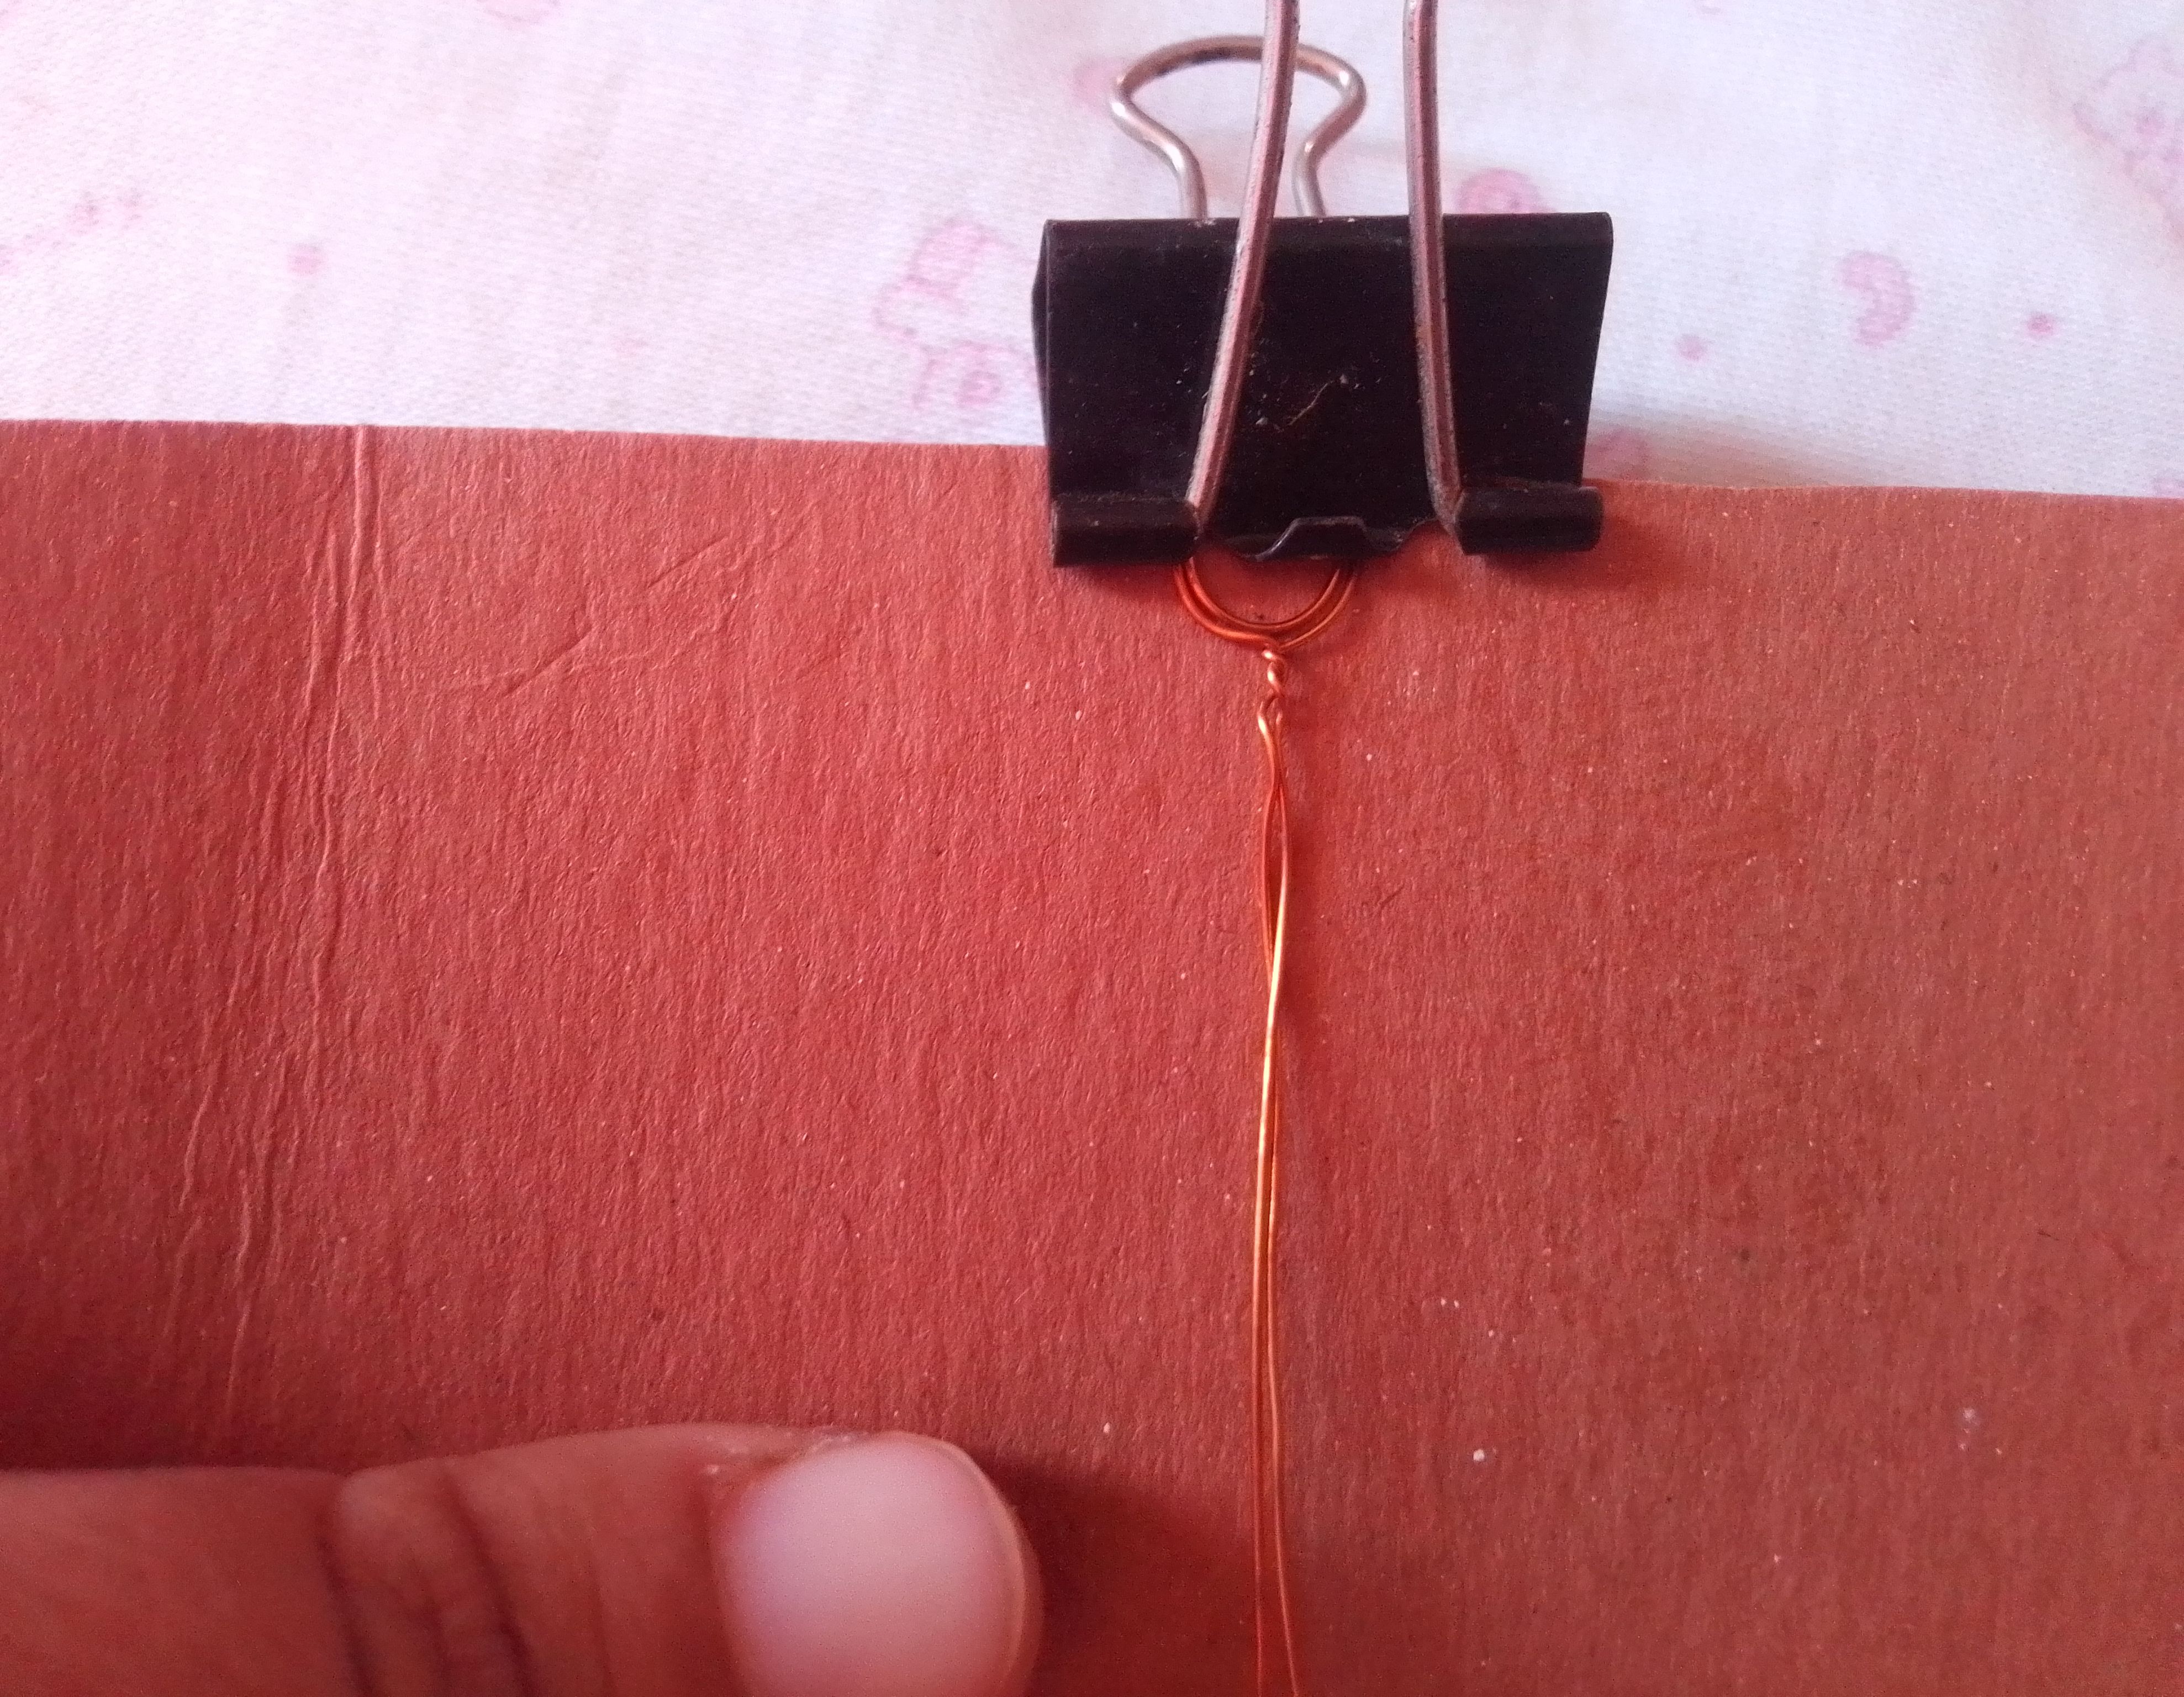
Paso 02
Por falta de materiales, intento innovar con lo que tengo a la mano, por lo que coloco este aro de alambre sobre una cartulina y los sujeto con un gancho o pinza para hojas de papel. Ya fijado, procedo a realizar un nudo común en la punta con el hilo cola de ratón.
Step 02
Due to a lack of materials, I try to innovate with what I have on hand, so I place this wire hoop on a piece of cardboard and attach it with a paper clip or clip. Once fixed, I proceed to make a common knot at the tip with the mouse tail thread.
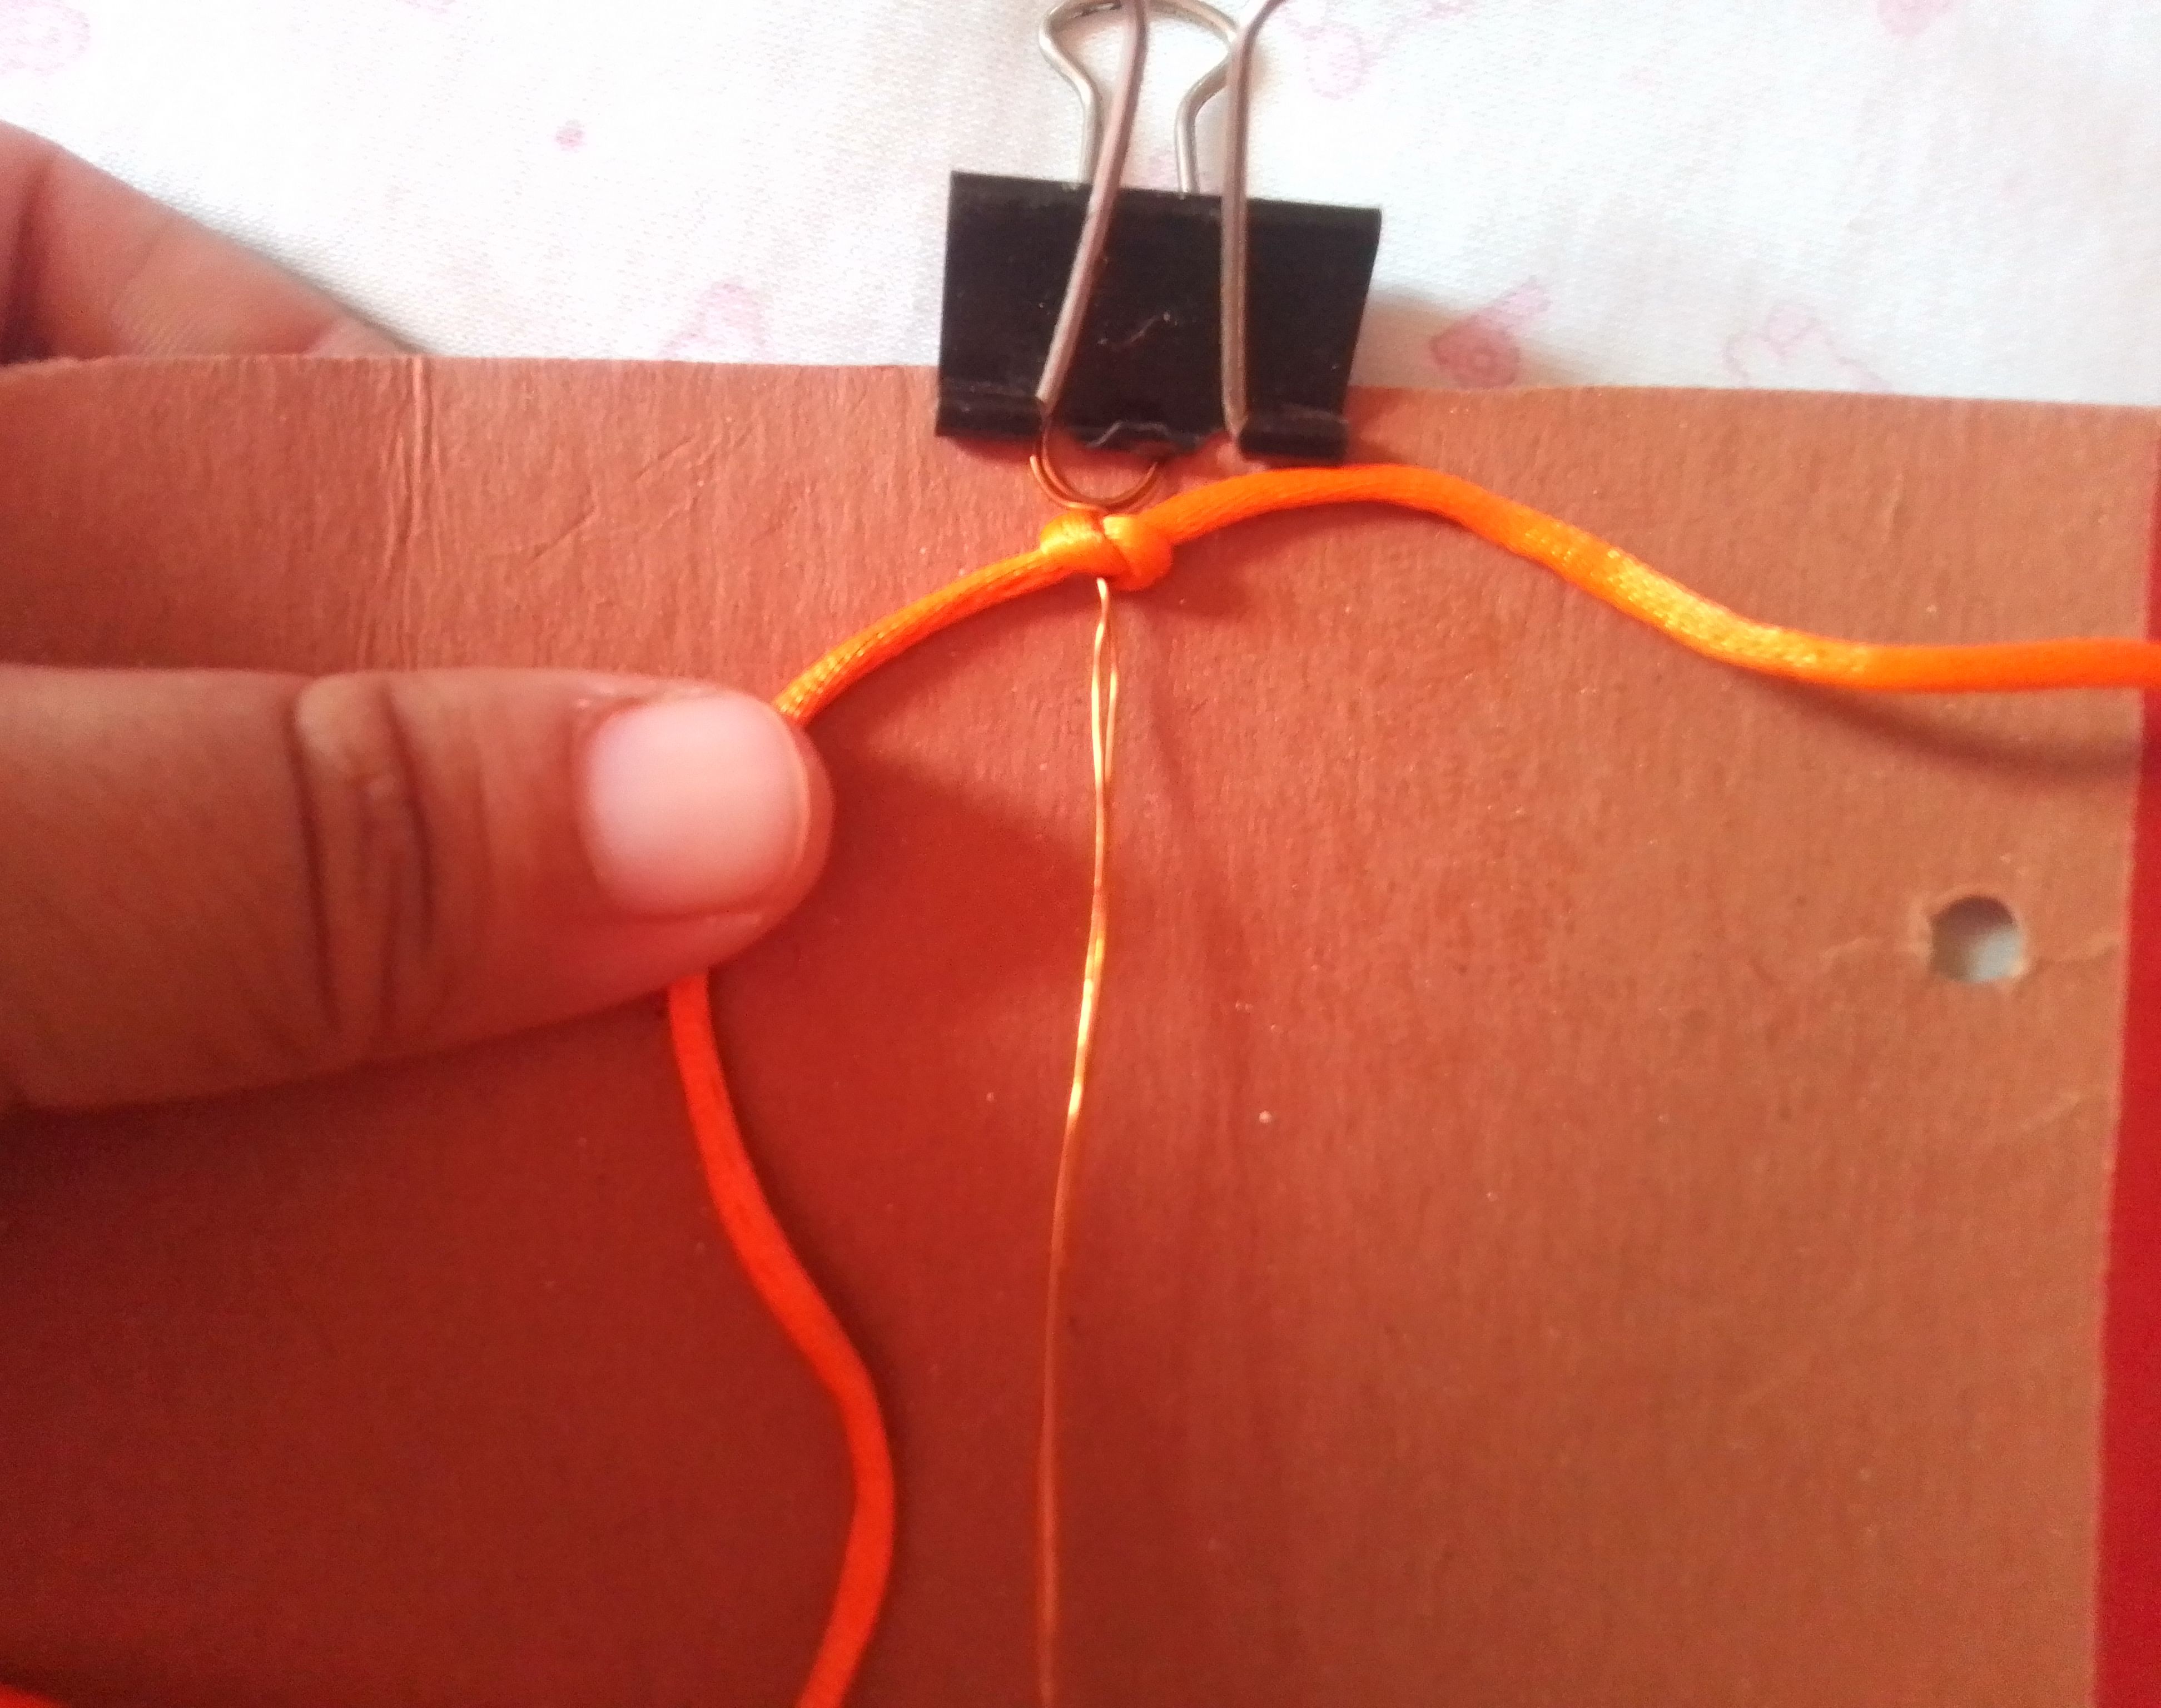
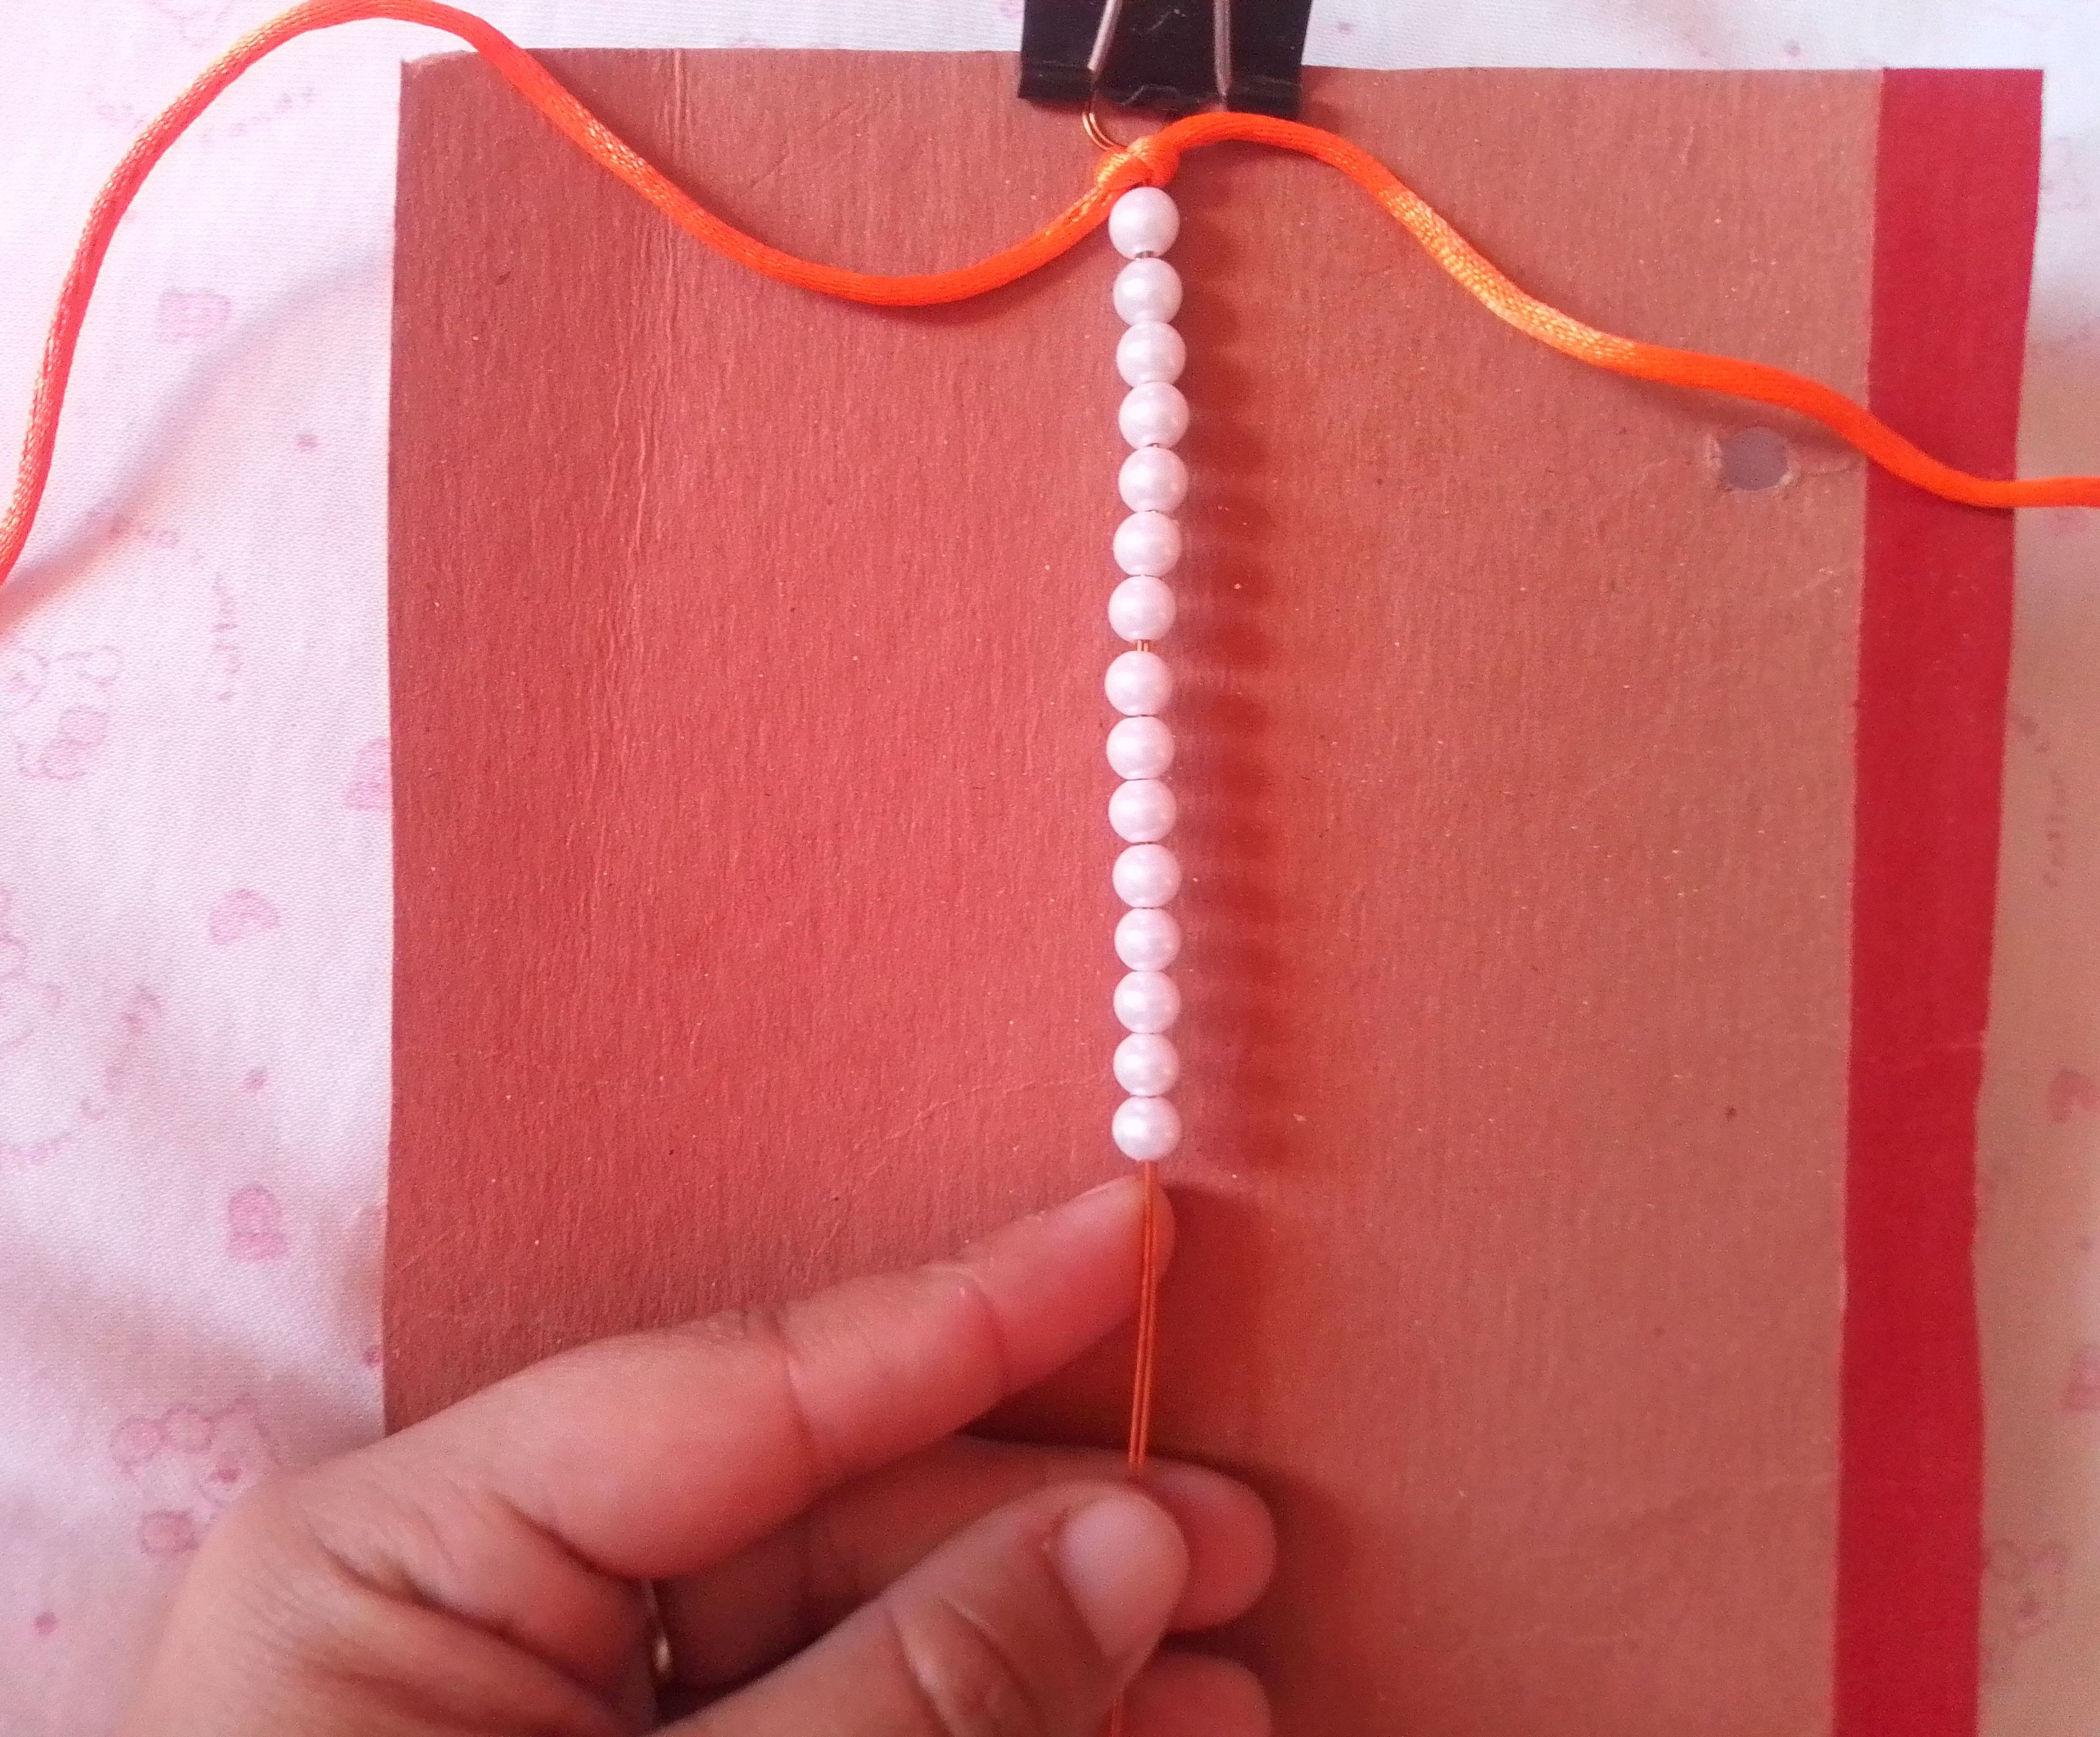
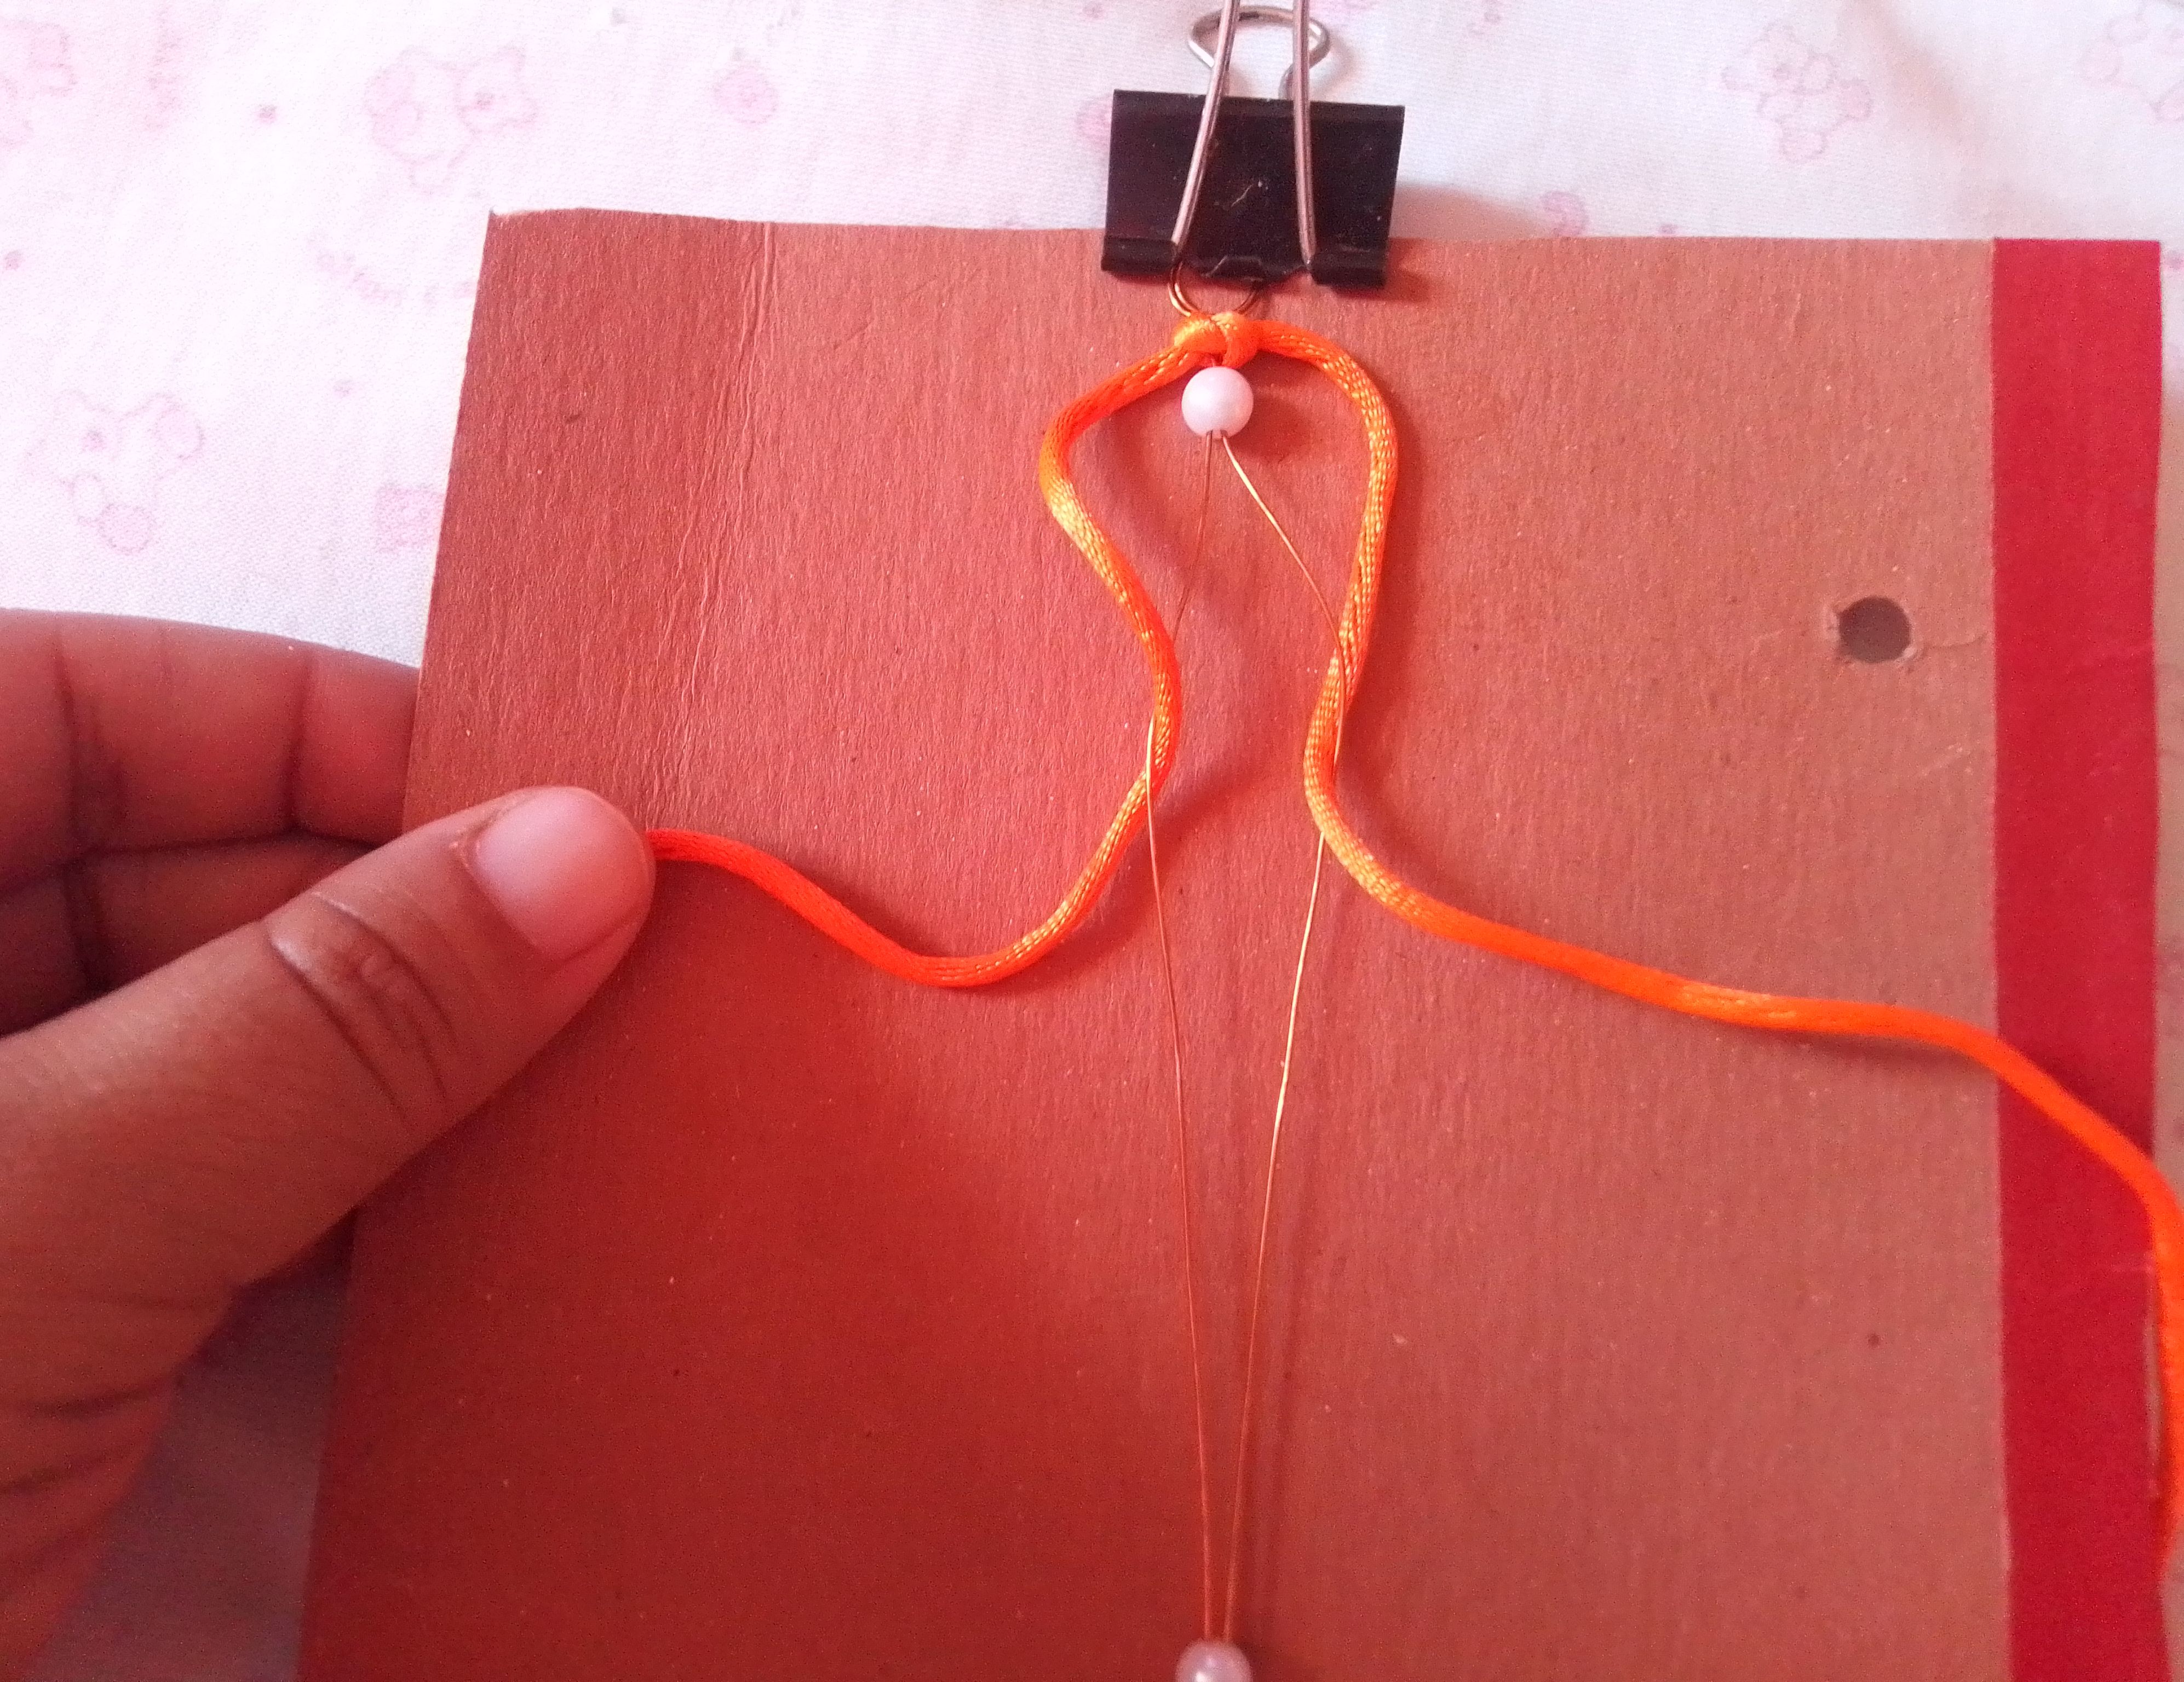
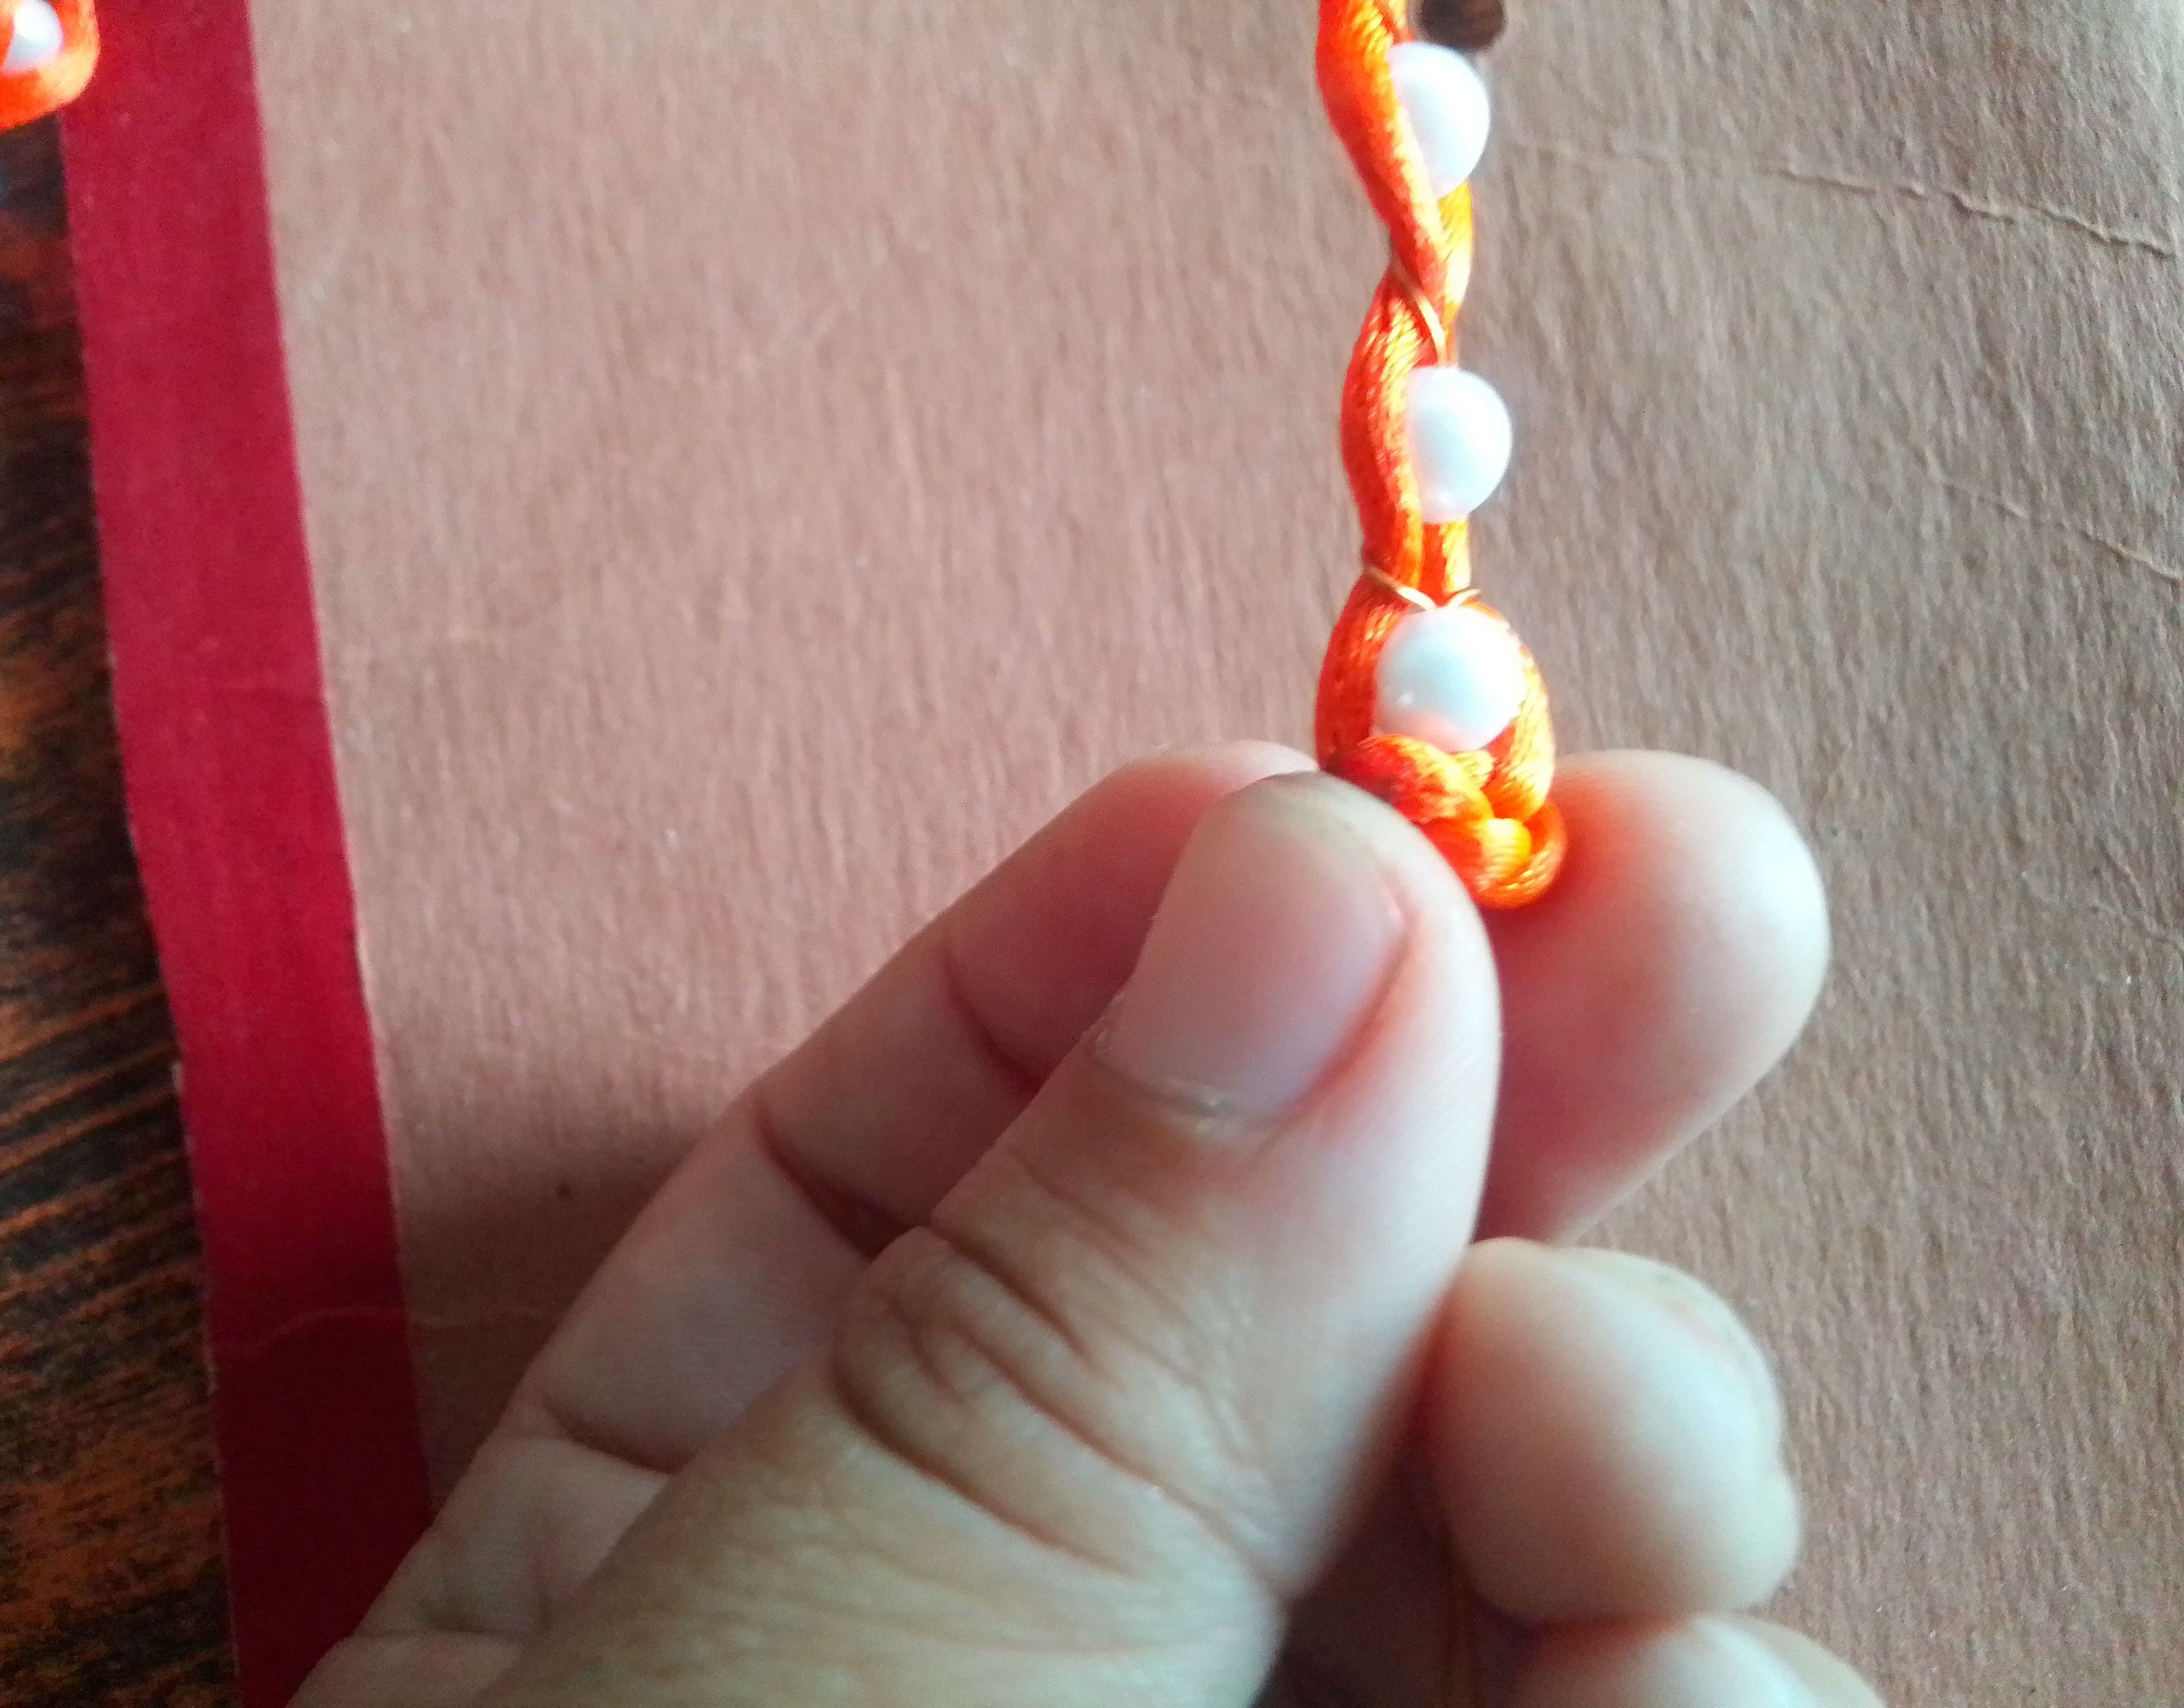
Paso 03
Ahora por ambos almbres introducimos las perlas, doblamos un poco la punta del alambre para que estás no se salgan mientras realizamos el tejido. La cantidad de perlas que debes insertar depende del tamaño de la mano, en mi caso solo utilice 12 perlas. Luego tomo el hilo naranja de un lado (derecha) y lo paso por abajo de uno de los alambres y la primera perla.
Step 03
Now we introduce the pearls through both wires, we bend the tip of the wire a little so that they do not come out while we weave. The number of pearls you must insert depends on the size of the hand, in my case I only used 12 pearls. Then I take the orange thread from one side (right) and pass it under one of the wires and the first pearl.
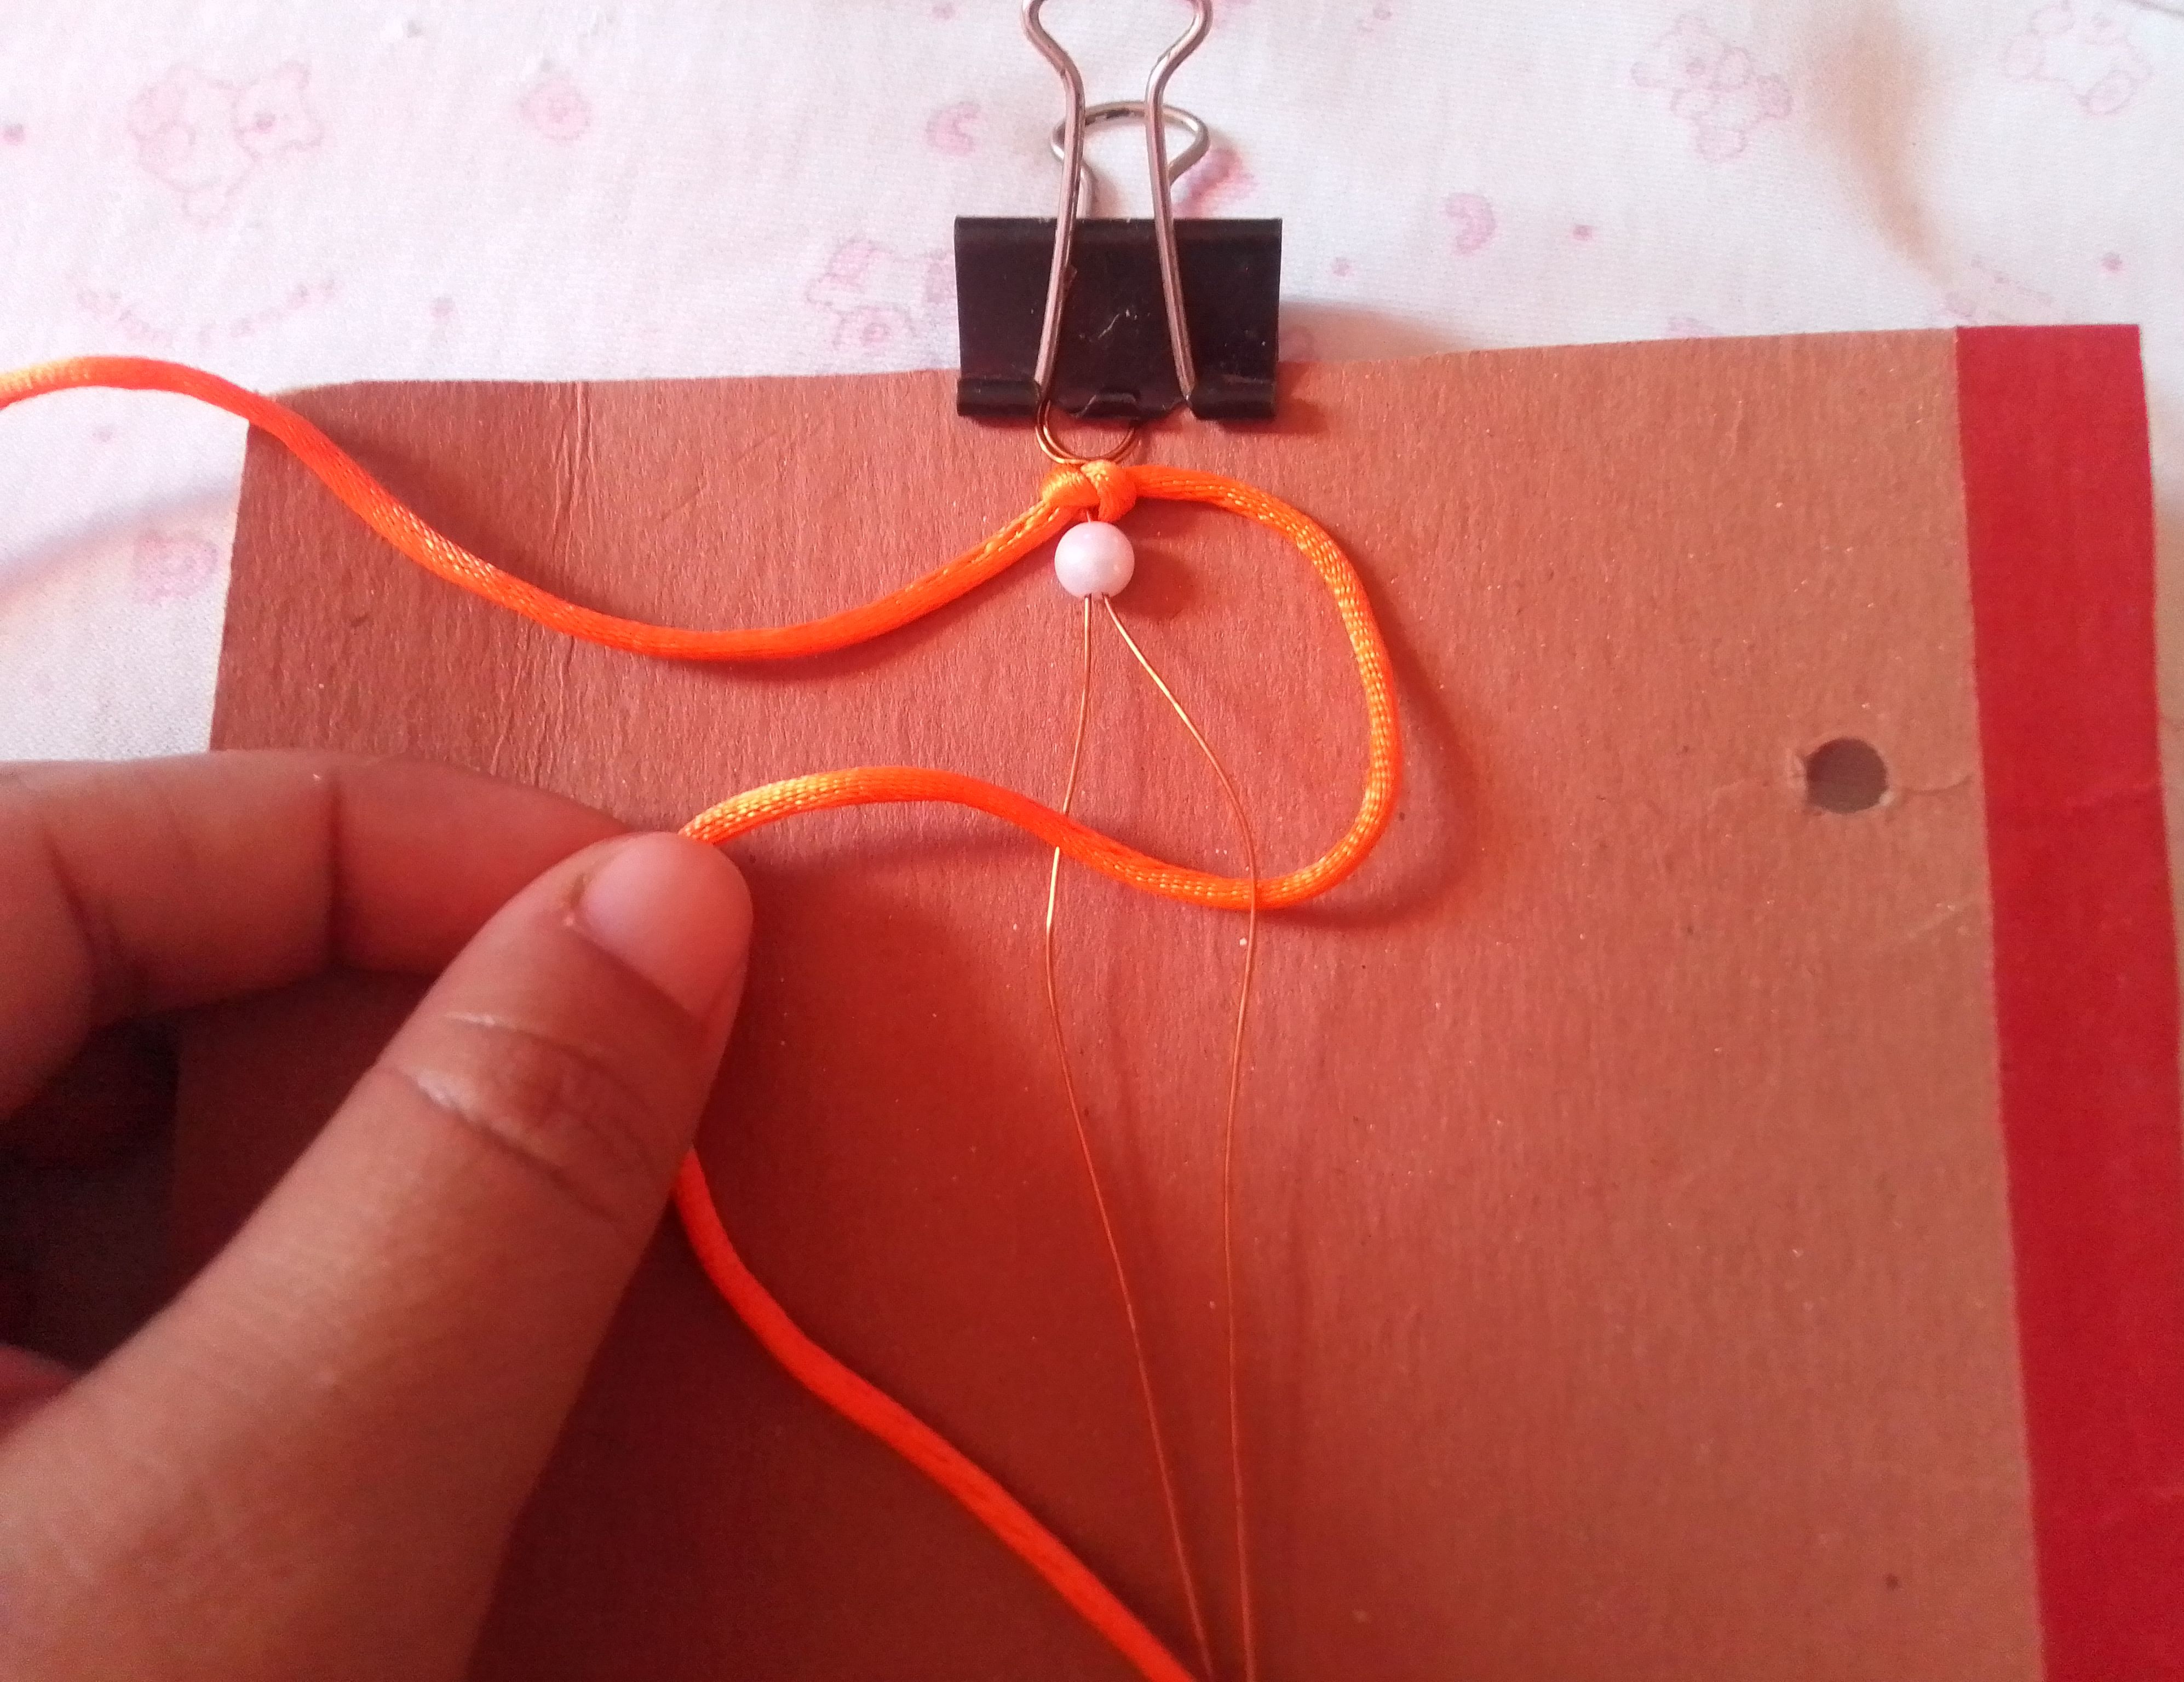
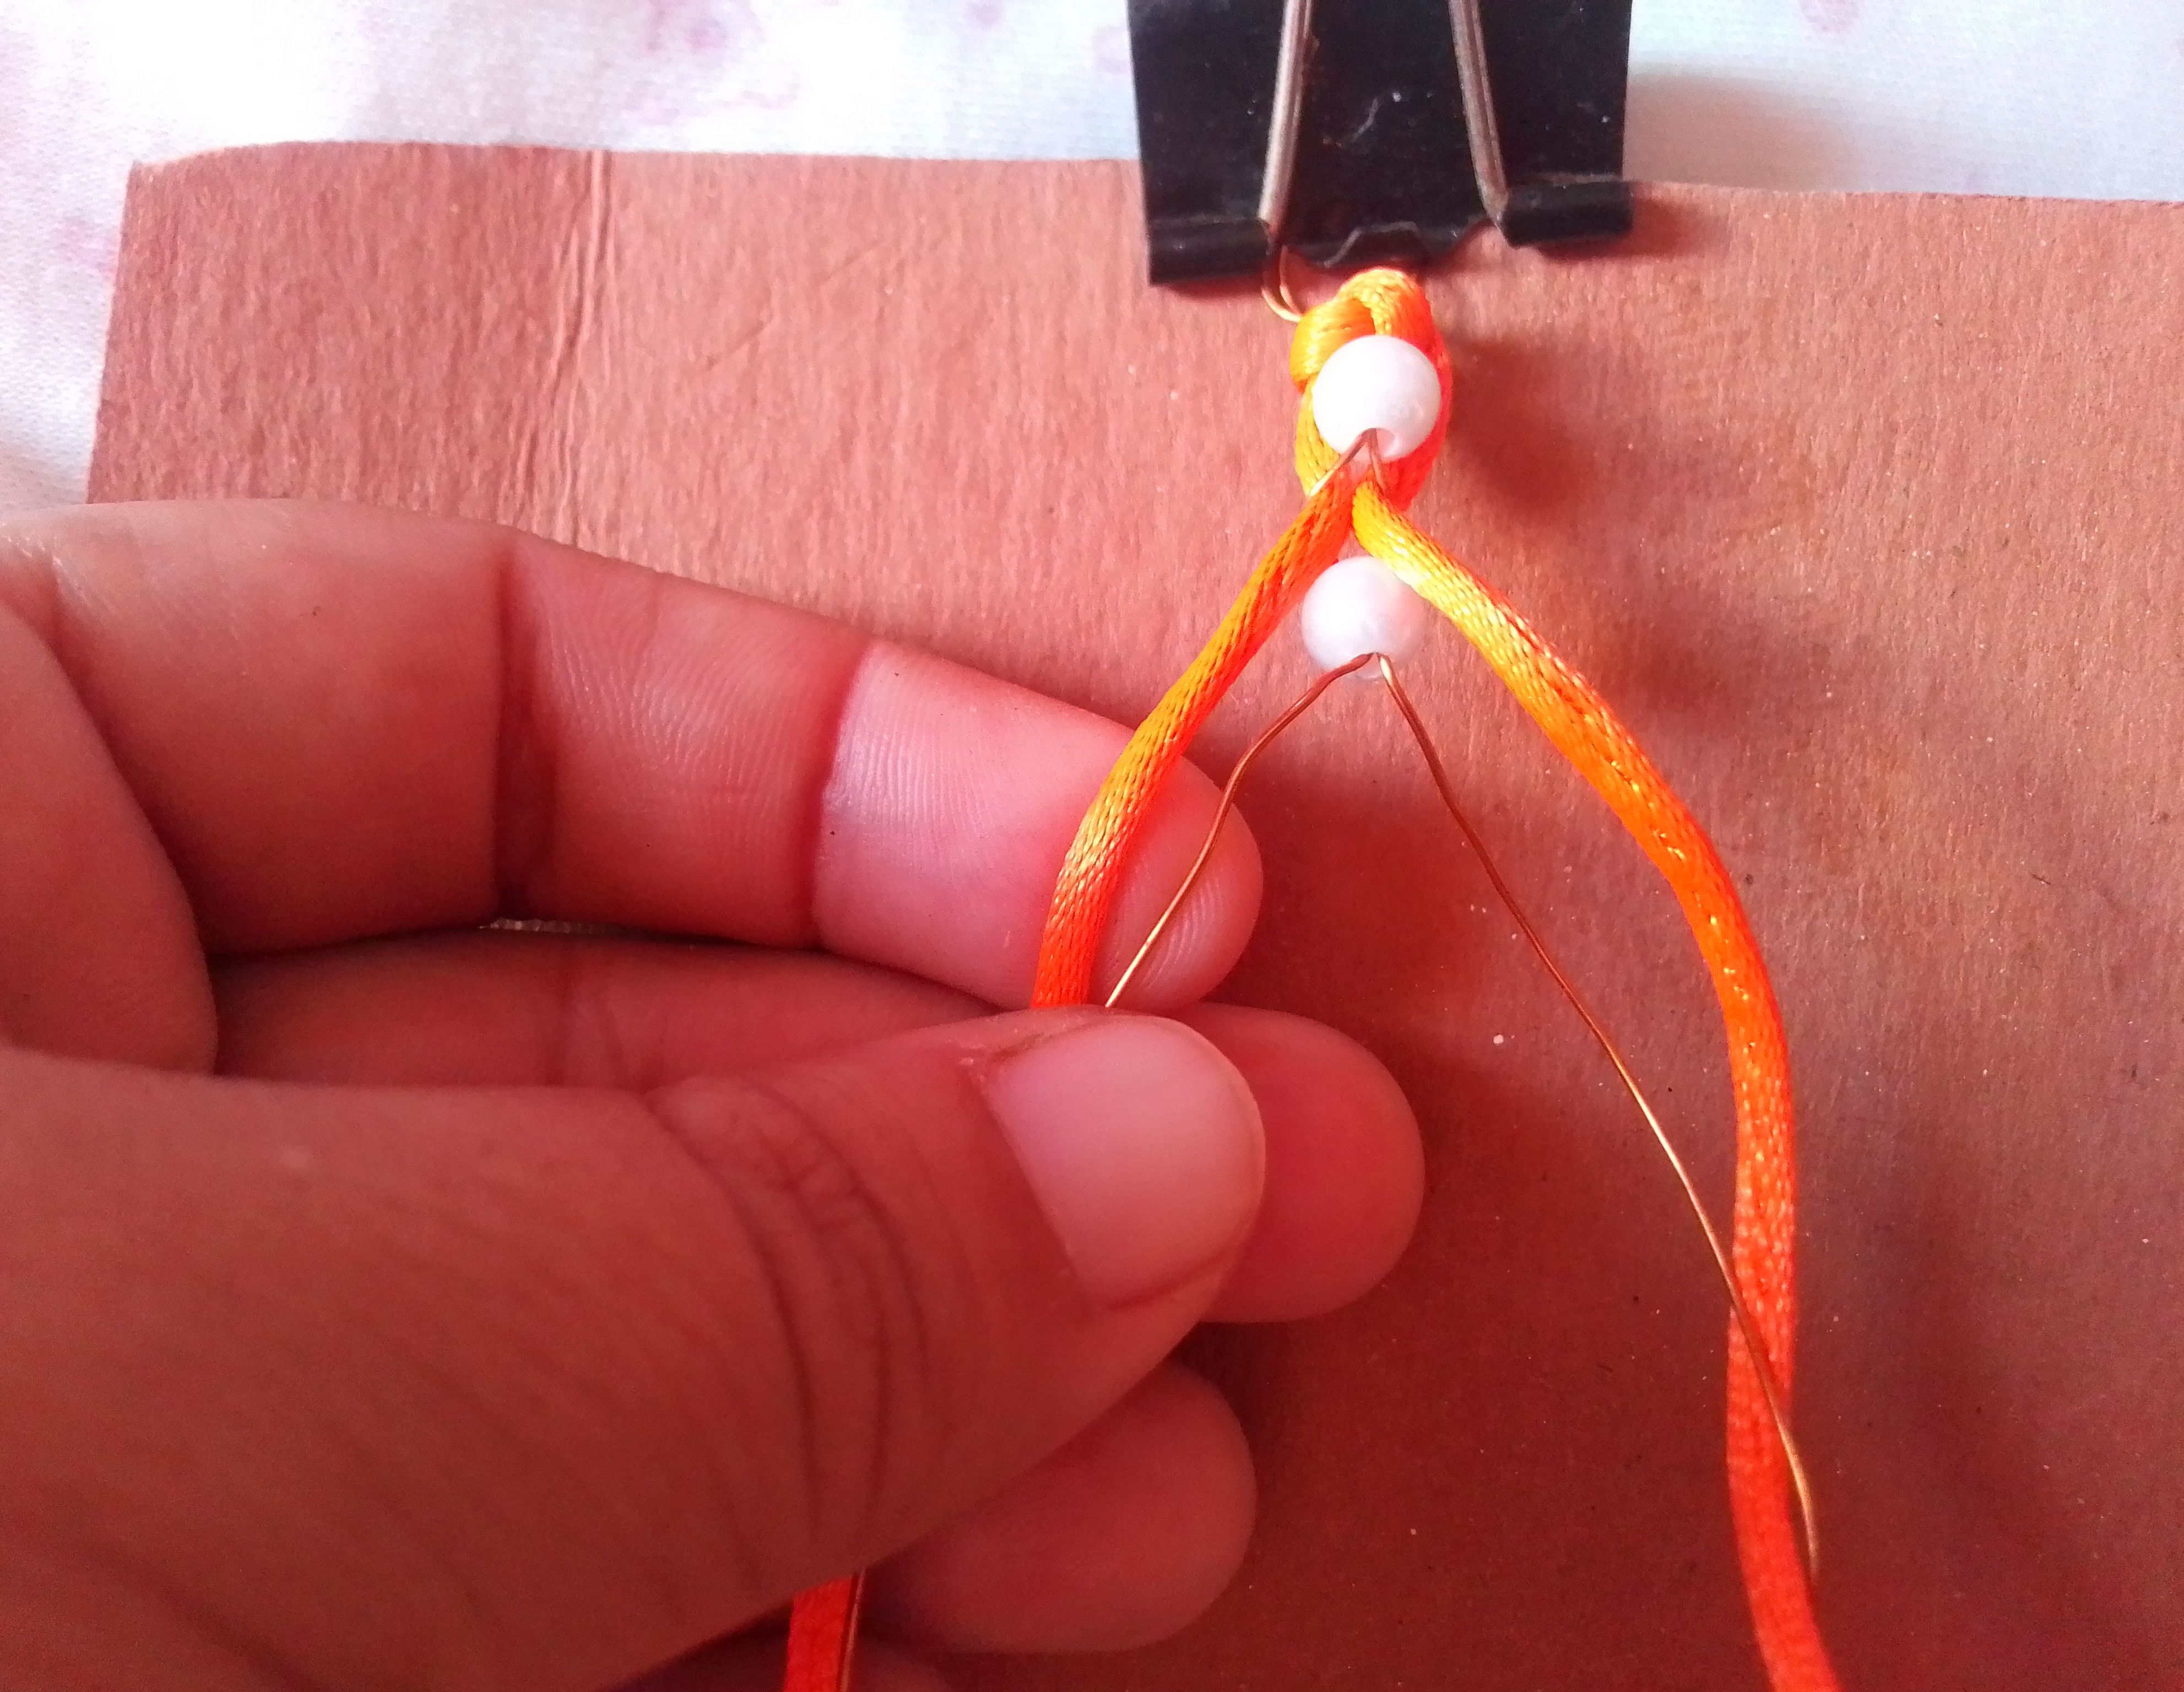
Paso 04
Tomo el otro extremo del hilo ( izquierdo) y lo paso también por abajo del otro alambre. De esta manera cruzo ambos almbres hacia el centro quedando los hilos hacia la parte de afuera. Subo la segunda perla y apretamos un poco.
Step 04
I take the other end of the thread (left) and pass it under the other wire as well. In this way I cross both wires towards the center, leaving the threads towards the outside. I raise the second pearl and we press a little.
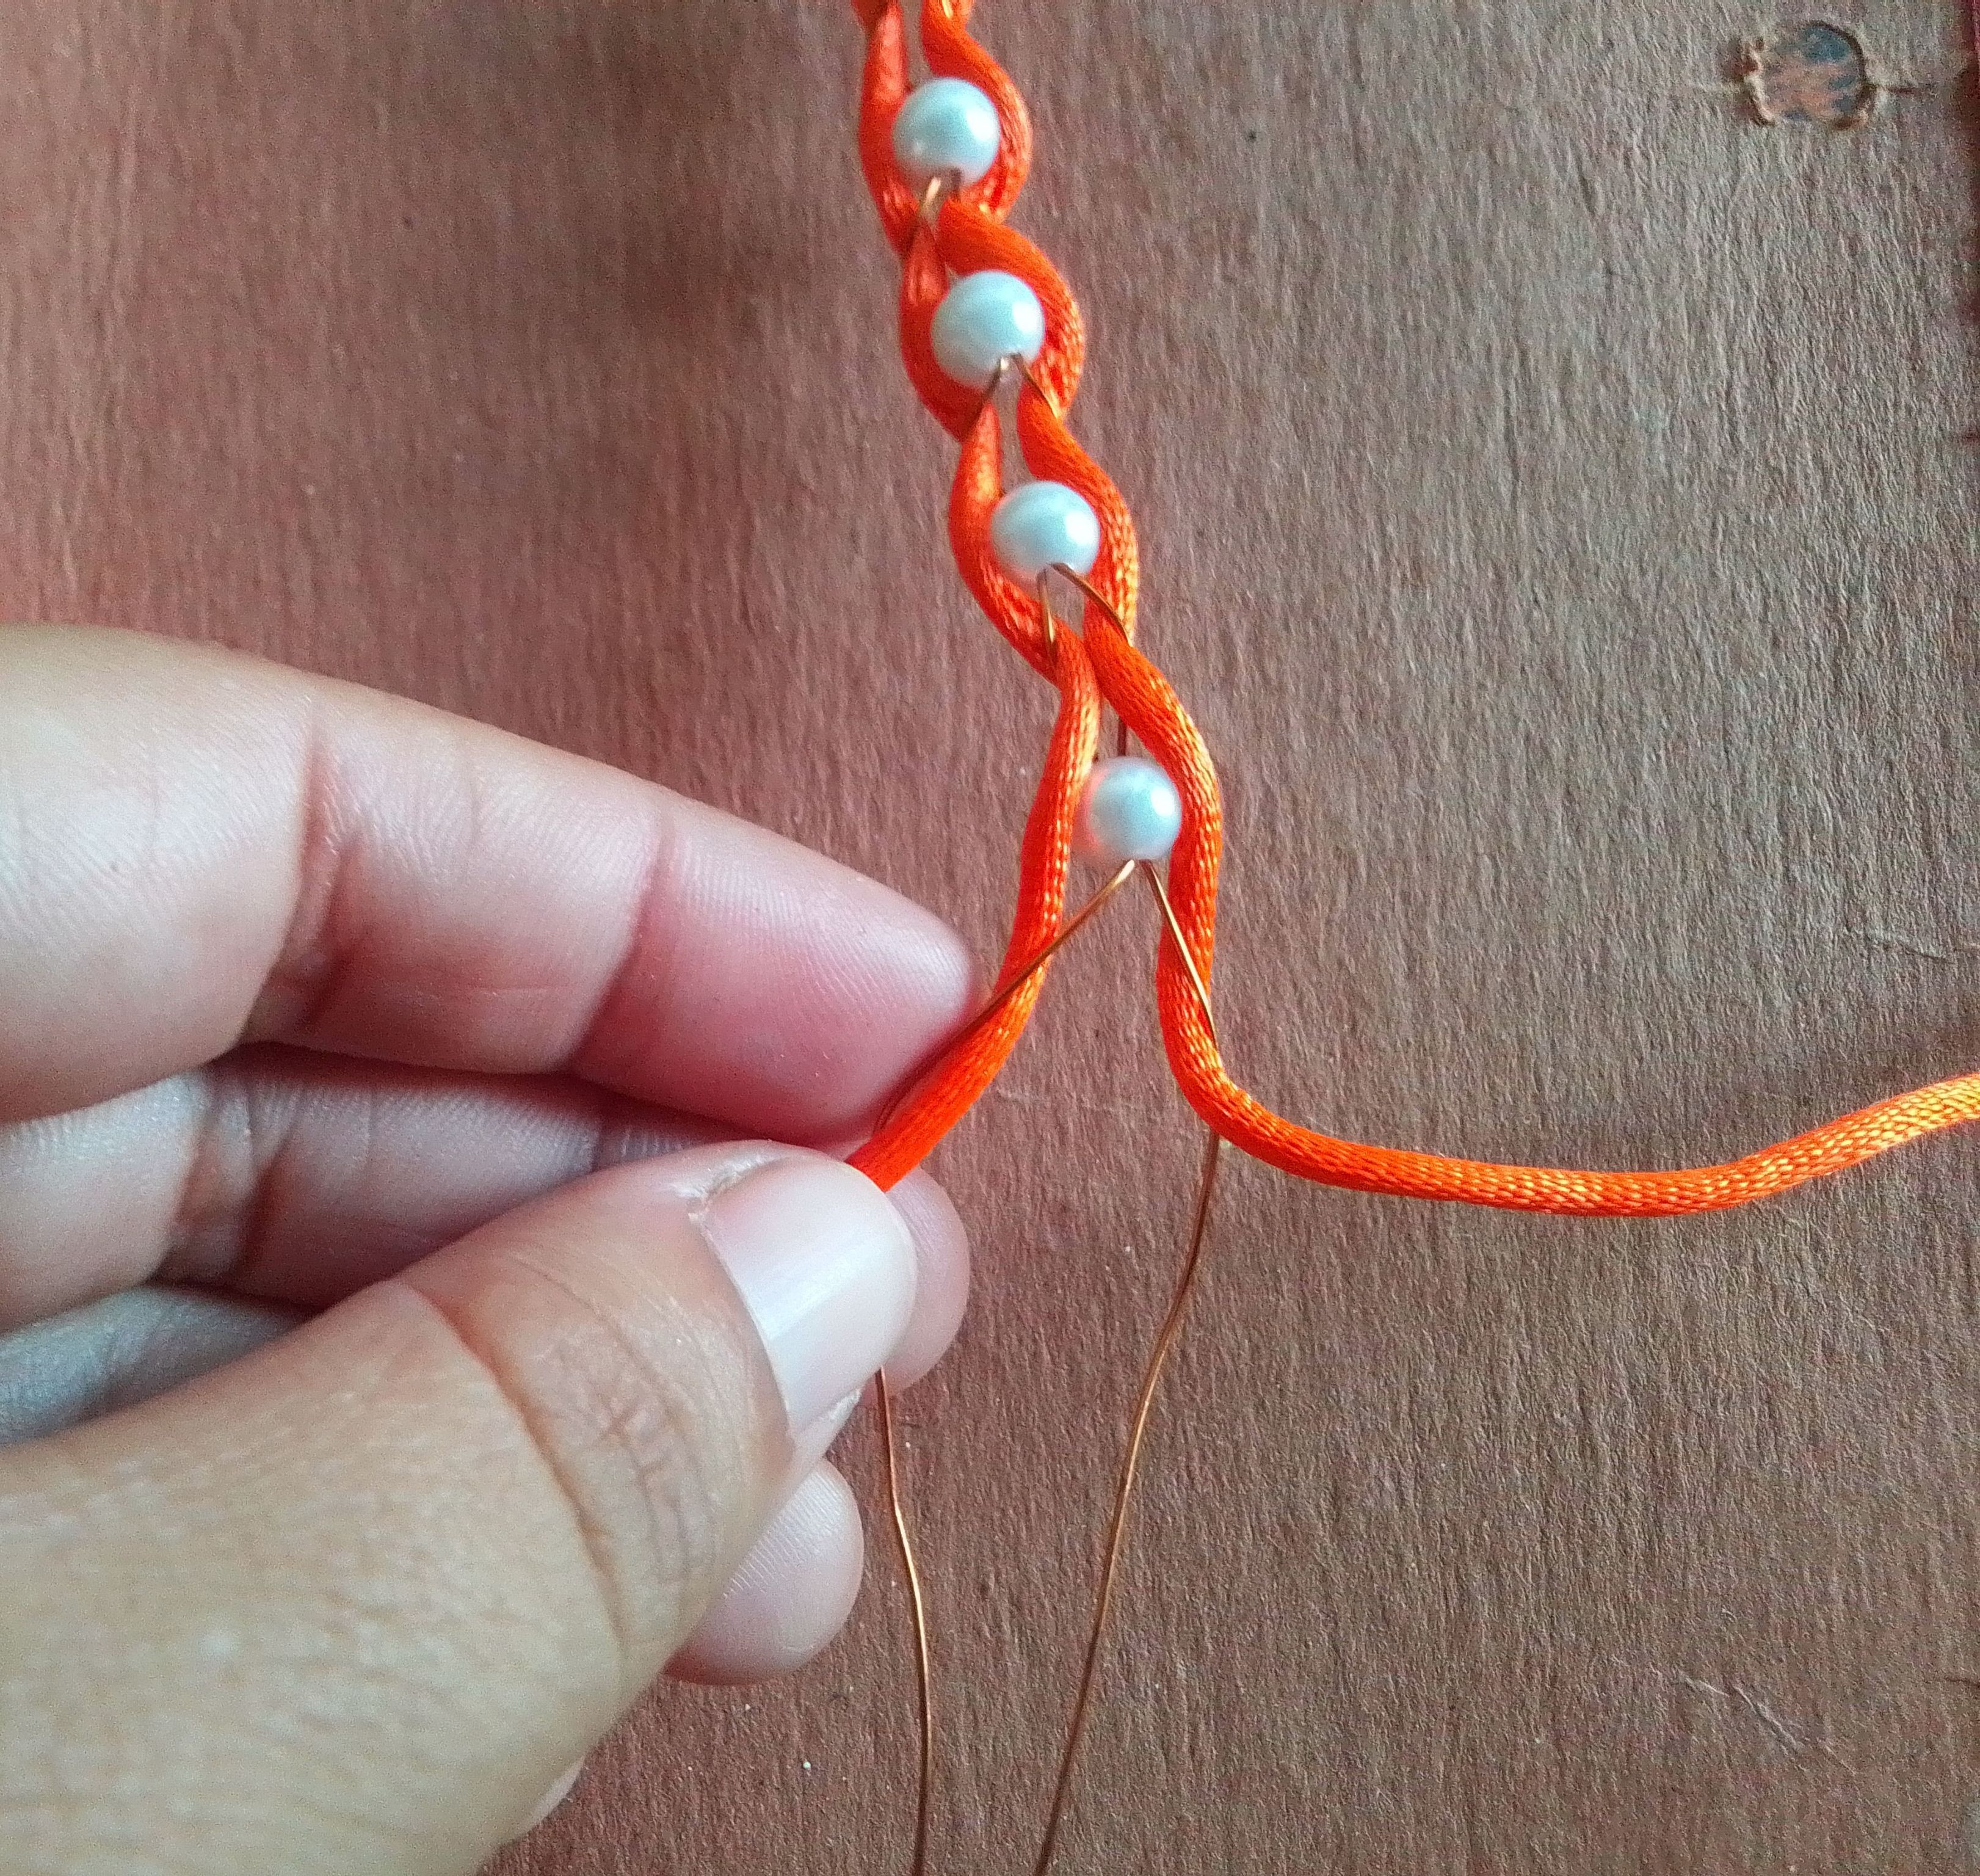
Paso 05
Continuo los pasos hasta tener el tamaño que deseamos. Recuerda siempre ir acomodado y perfeccionando toda la pulsera mientras la haces. Al llegar al final, realiza otro nudo y quema un poco cada punta para evitar que se se suelte.
Step 05
I continue the steps until I have the size we want. Always remember to be accommodated and perfecting the entire bracelet while you do it. When you reach the end, make another knot and burn each end a little to prevent it from coming loose.
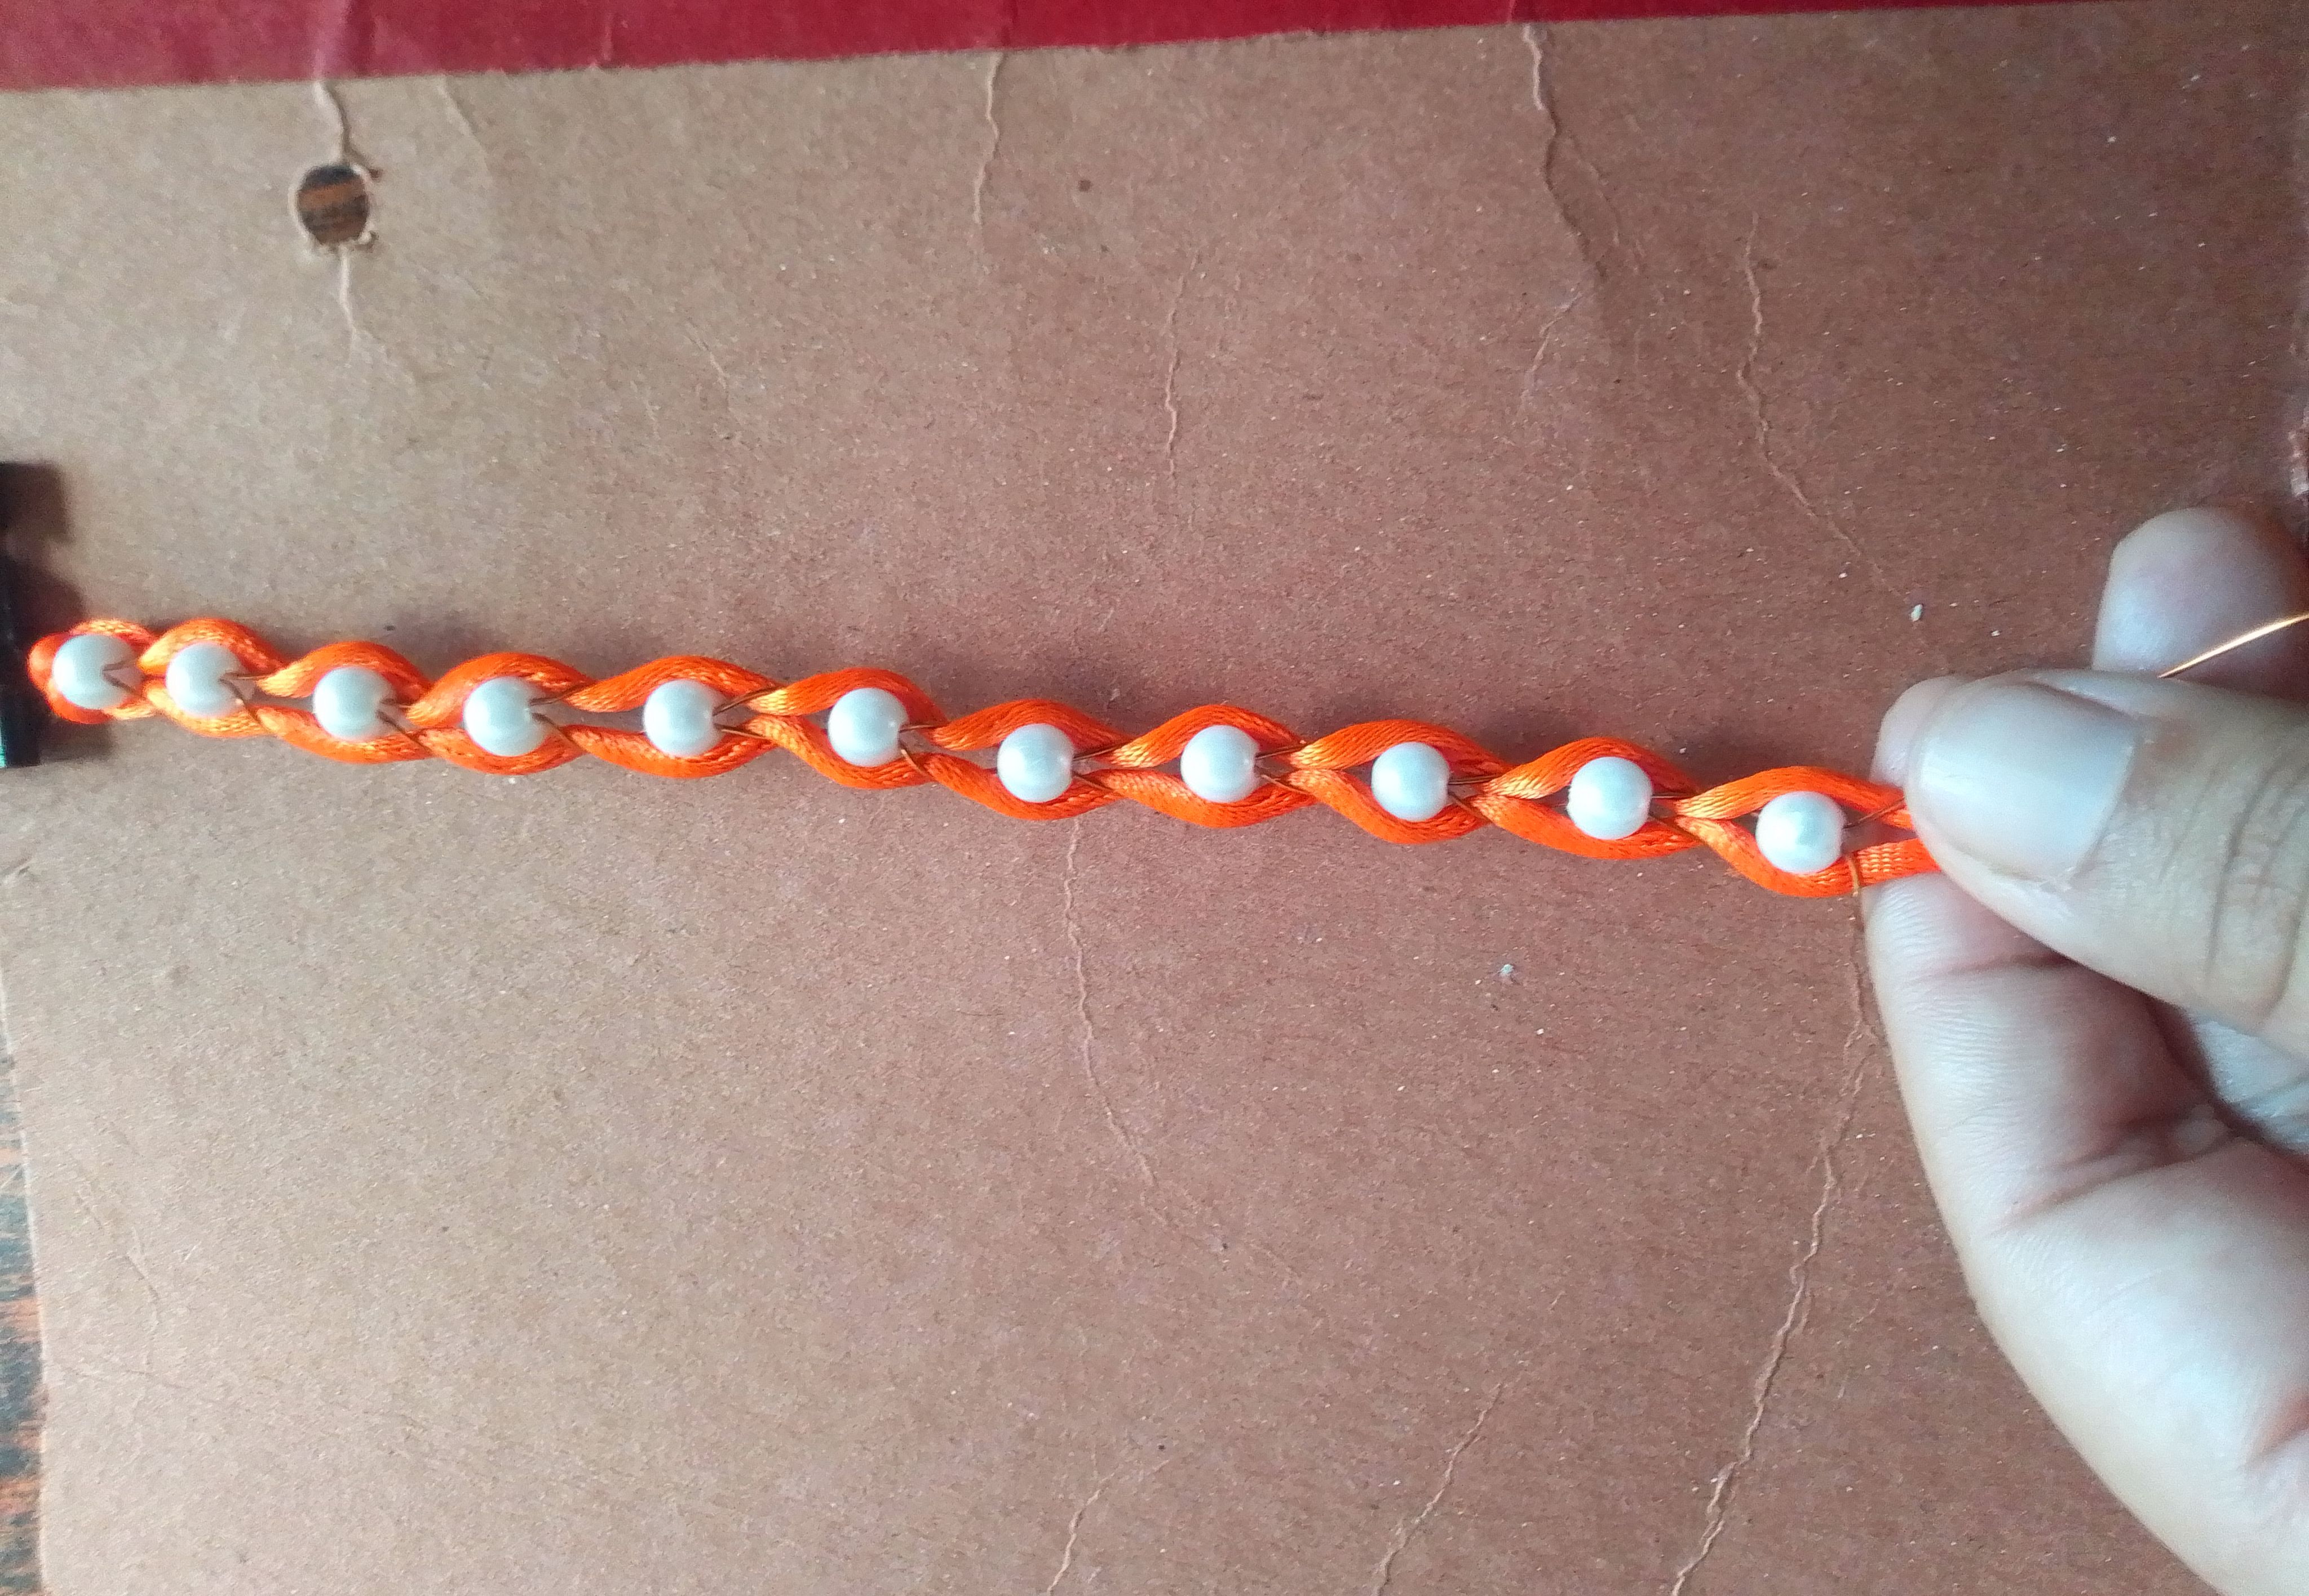
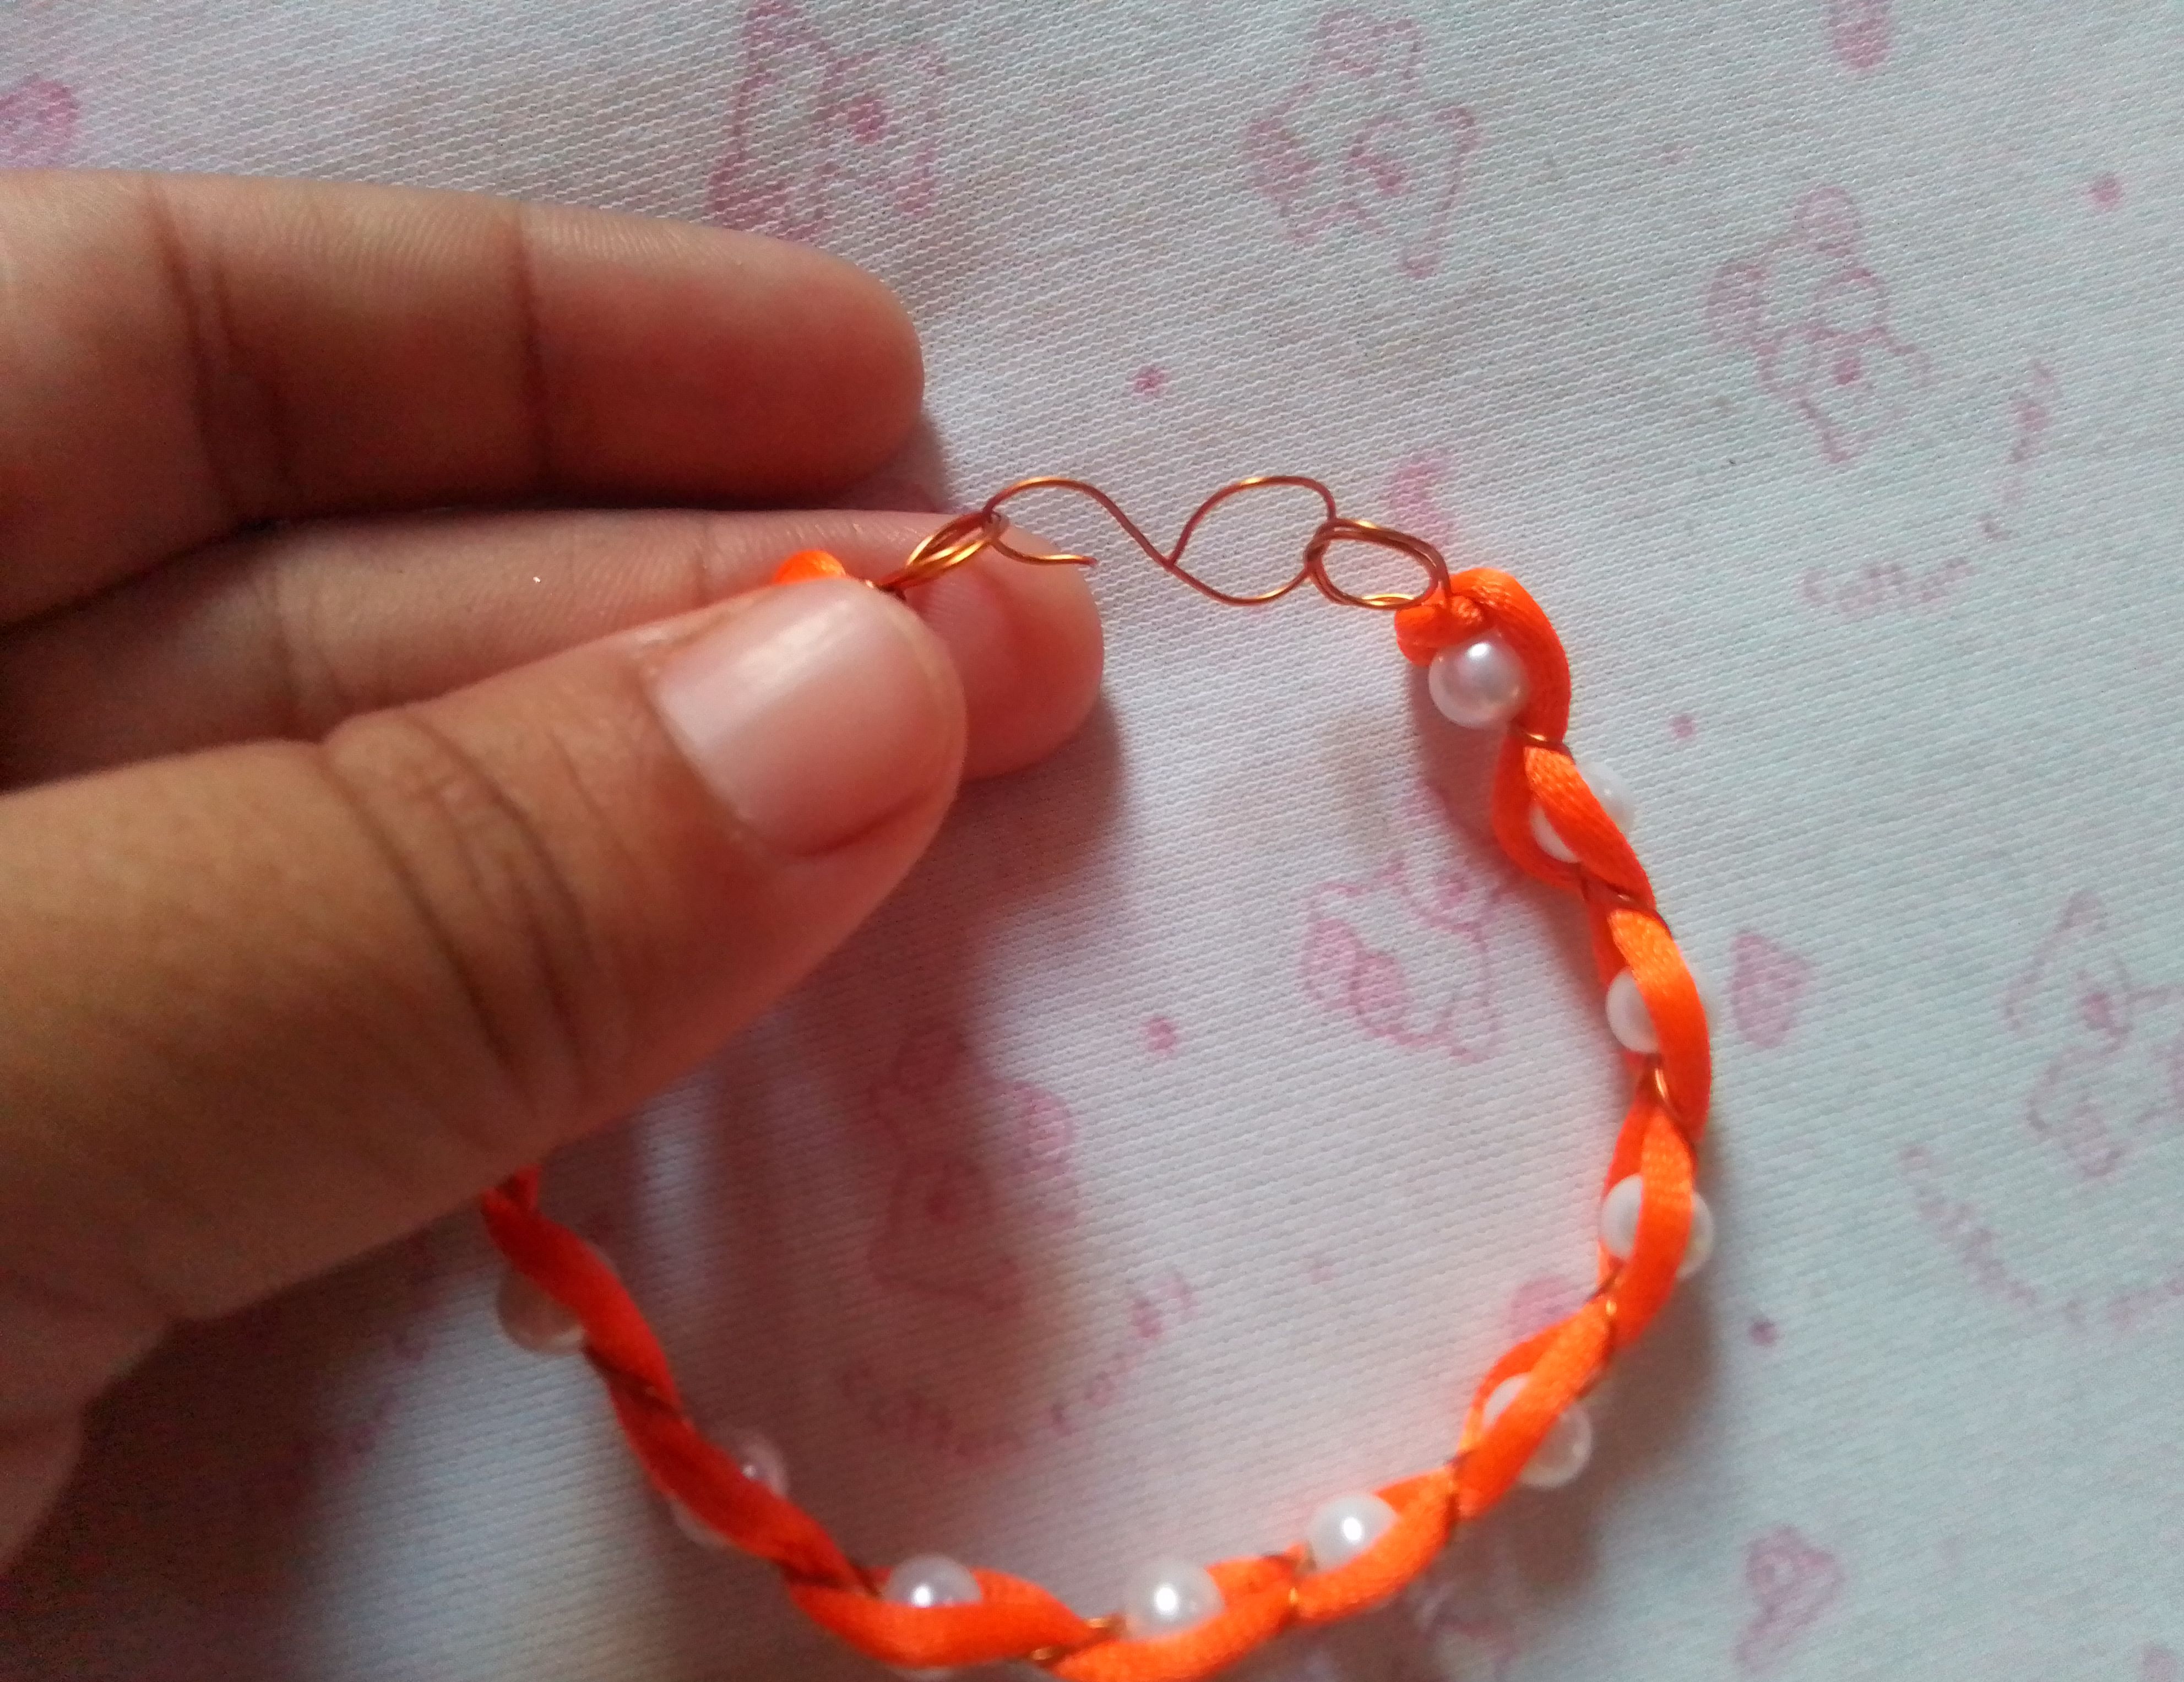
Paso 06
Listo el tejdo, cierro el otro extremo de la pulsera con otra argolla y la ayuda del lápiz. Finalizo colocando el broche en cada argolla.
Step 06
The fabric is ready, I close the other end of the bracelet with another ring and the help of the pencil. I finish by placing the brooch in each ring.
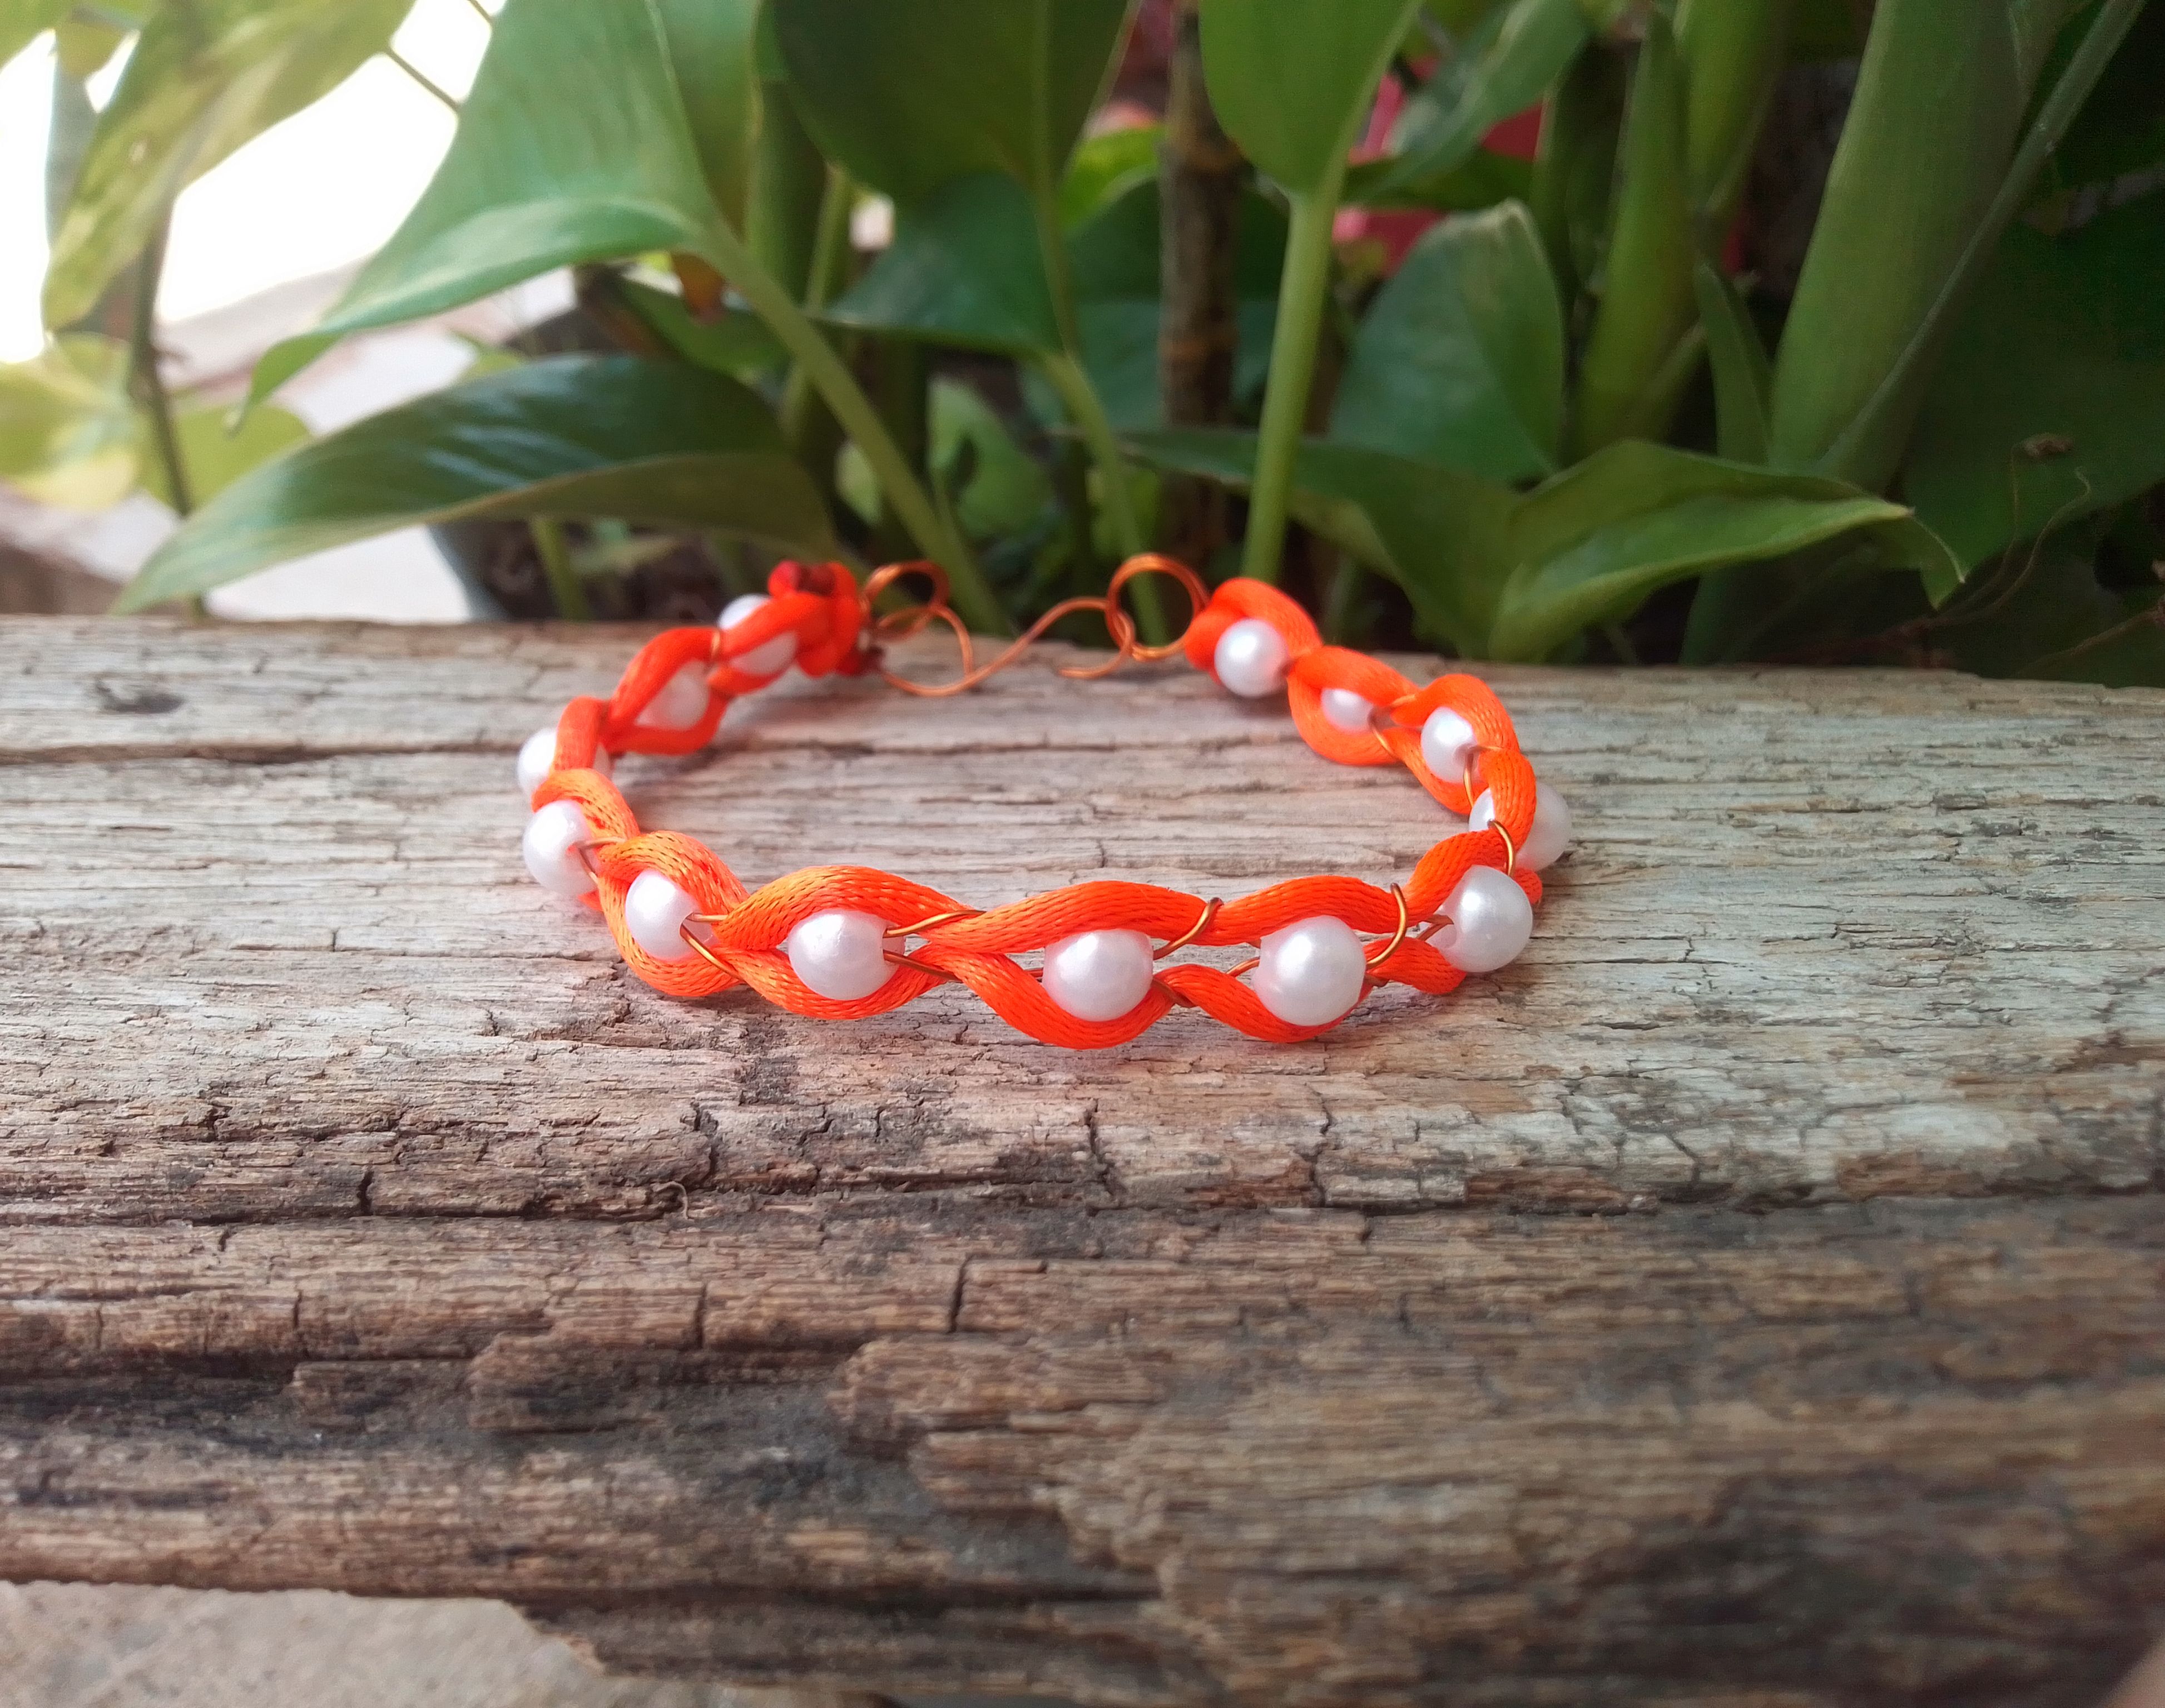
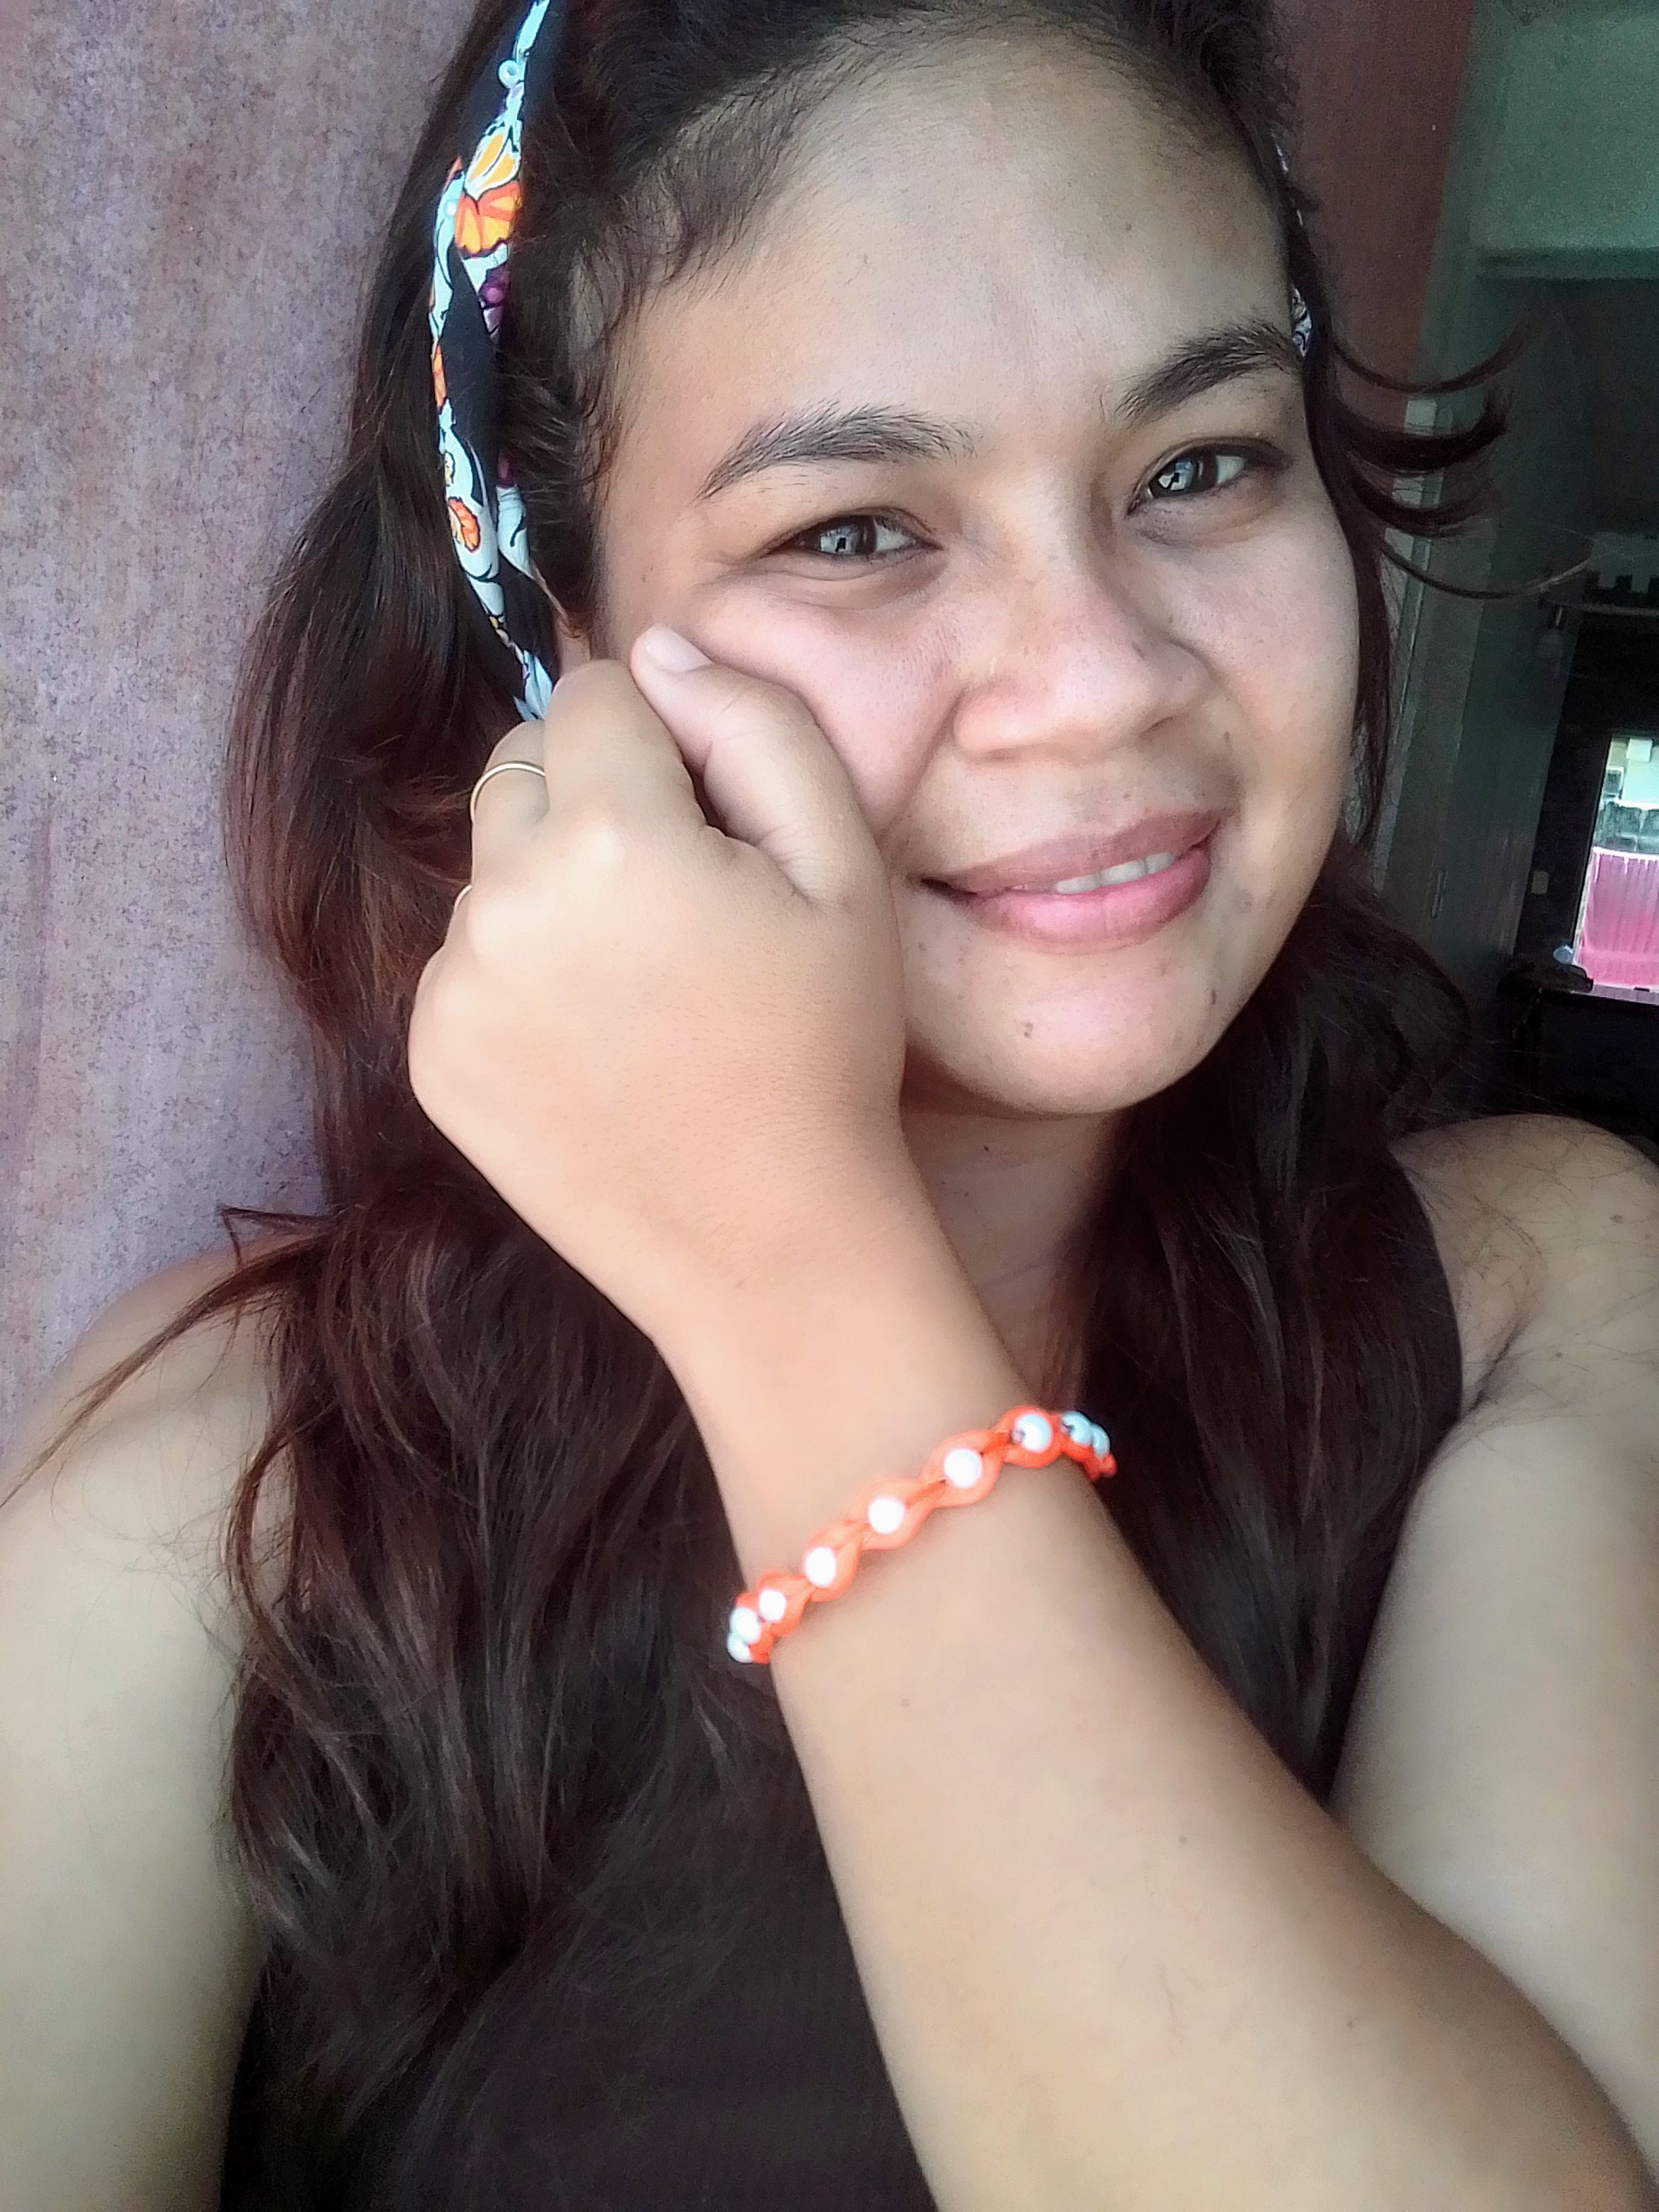
🧡Resultado! 🧡
Este resultado me encantó, estoy pensando elaborar algunos trabajos tejidos para mis próximos proyectos y variar los colores. Tengo muchos trabajos en mente, para seguir practicando, pero por ahora puedo decir que este es un de mis favoritos y uno de los que más rápido hice. Con cariño les muestro este bonito final, espero les guste.
I loved this result, I'm thinking of making some woven works for my next projects and vary the colors. I have many jobs in mind, to keep practicing, but for now I can say that this is one of my favorites and one of the fastest I did. With love I show you this beautiful ending, I hope you like it.
Muchas gracias por llegar hasta aquí, lee deseo una excelente tarde, muchos exitos y que Dios les bendiga siempre.. Hasta la próxima!
Thank you very much for coming this far, I wish you an excellent afternoon, lots of success and may God always bless you. See you next time!
0
0
0.000
that is a very colourful bracelet 🤩
Thanks for the support!
Hermosa!!!
🤗
Thanks for the support!
https://twitter.com/1423889954275569665/status/1637616428948811777
The rewards earned on this comment will go directly to the people( @derppunk ) sharing the post on Twitter as long as they are registered with @poshtoken. Sign up at https://hiveposh.com.