Confeccionando franela deportiva cuello V y pasos para cortar las mangas [Esp/Eng]
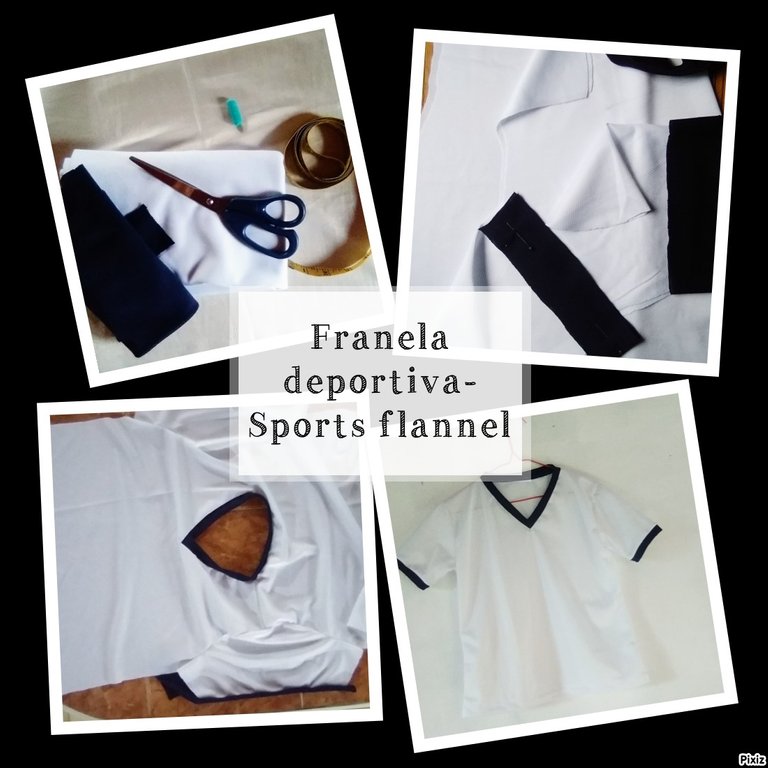
Hola apreciadas amigas, amantes de la confección, diseño, agujas y demás 🤗🤗. Está semana me he animado a confeccionar una blusa que tenía pendiente en elaborar pero por cuestion de tiempo no la había podido realizar, había pensado que me llevaría mucho tiempo. Pero para mí sorpresa en solo una tarde la terminé, así que hoy les traigo mi trabajo pero está vez quiero explicarles cómo cortar las mangas de acuerdo a las medidas.
Hace tiempo elabore una franela, pero no sabía cómo medir y cortar las mangas, aún así me arriesgue, y para ser sincera, se me dificultó 🧐 que quedará bien y que incluso se viera bien.
Pero está vez, trataré de explicar cómo medir y cortar las mangas.
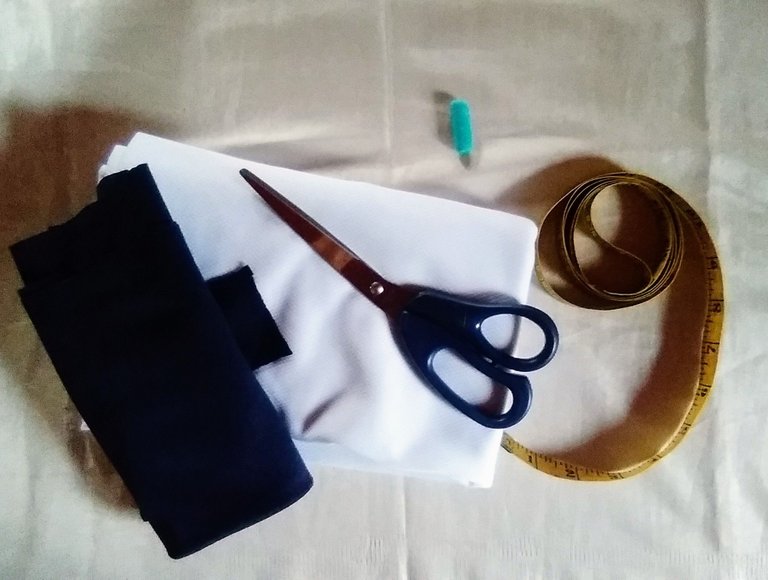
Materiales:
Tela dos tonos: blanco y azul marino.
Tijera, cinta métrica, tiza, hilo, aguja.
Hello dear friends, lovers of sewing, design, needles and others 🤗🤗. This week I have encouraged me to make a blouse that I had pending to make but because of time I had not been able to do it, I had thought it would take me a long time. But to my surprise I finished it in just one afternoon, so today I bring you my work but this time I want to explain how to cut the sleeves according to the measurements.
Some time ago I made a flannel, but I didn't know how to measure and cut the sleeves, I still took a risk, and to be honest, I had a hard time 🧐 to make it look good and even look good.
But this time, I will try to explain how to measure and cut the sleeves.
Materials:
Two tone fabric: white and navy blue.
Scissors, tape measure, chalk, thread, pins.
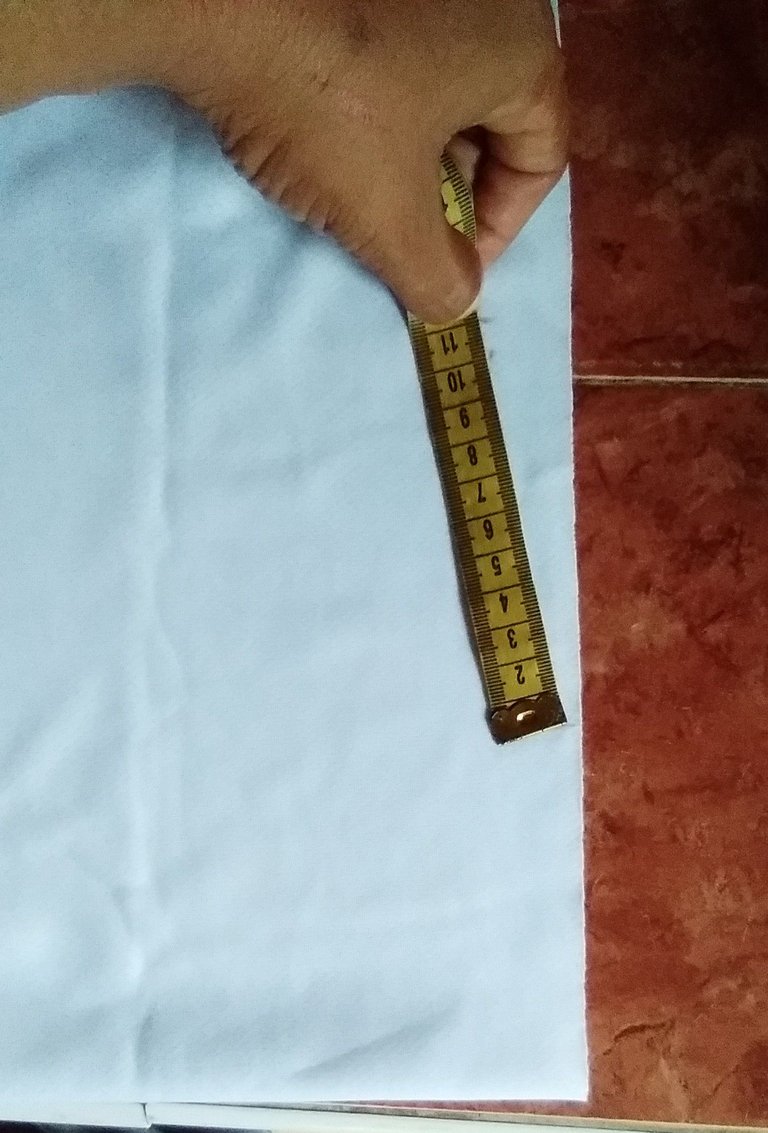
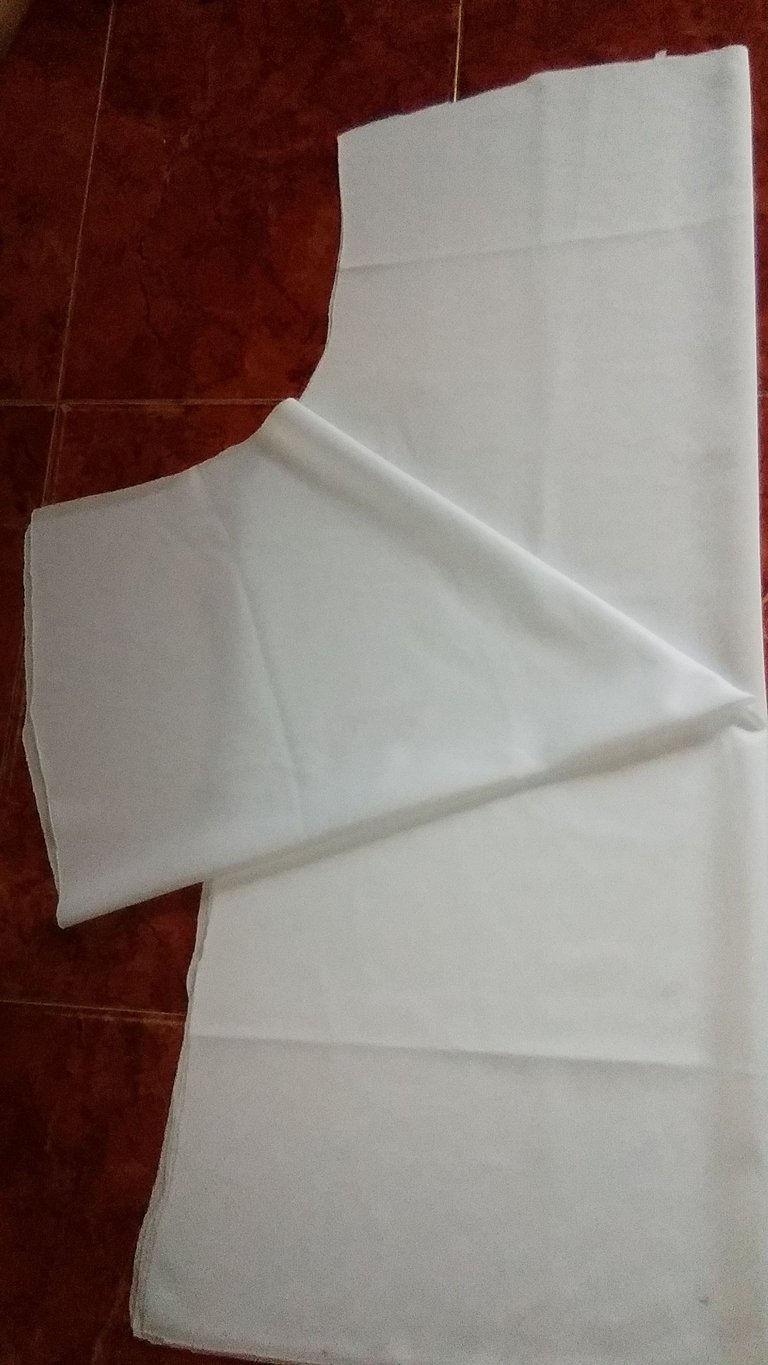
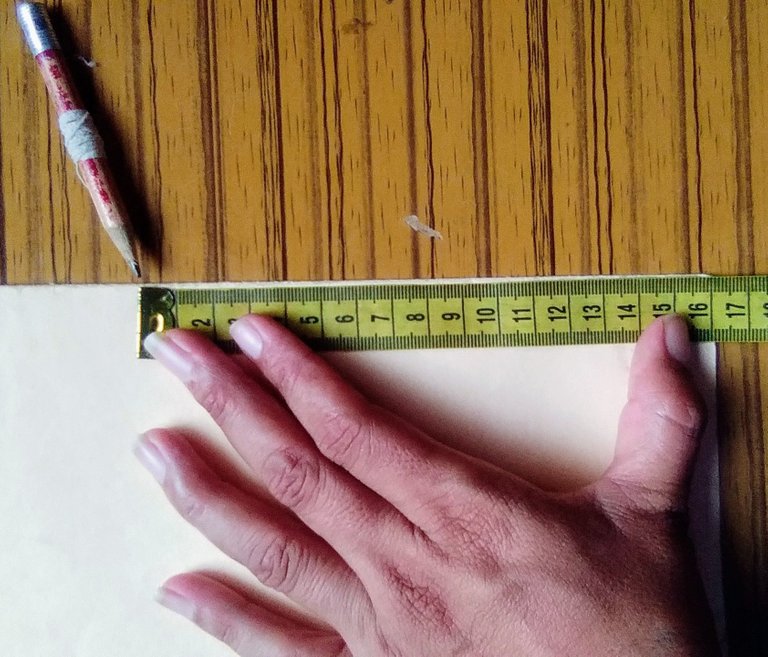
Trabaje las medidas sobre la tela sin patrones.
Las medidas a tomar en cuenta es: hombro, contorno del cuello y busto, largo de la franela, largo de la manga y contorno de brazo.
Nota: Las medidas de cuello y los contornos tanto de cuello como de busto se saca la cuarta parte.
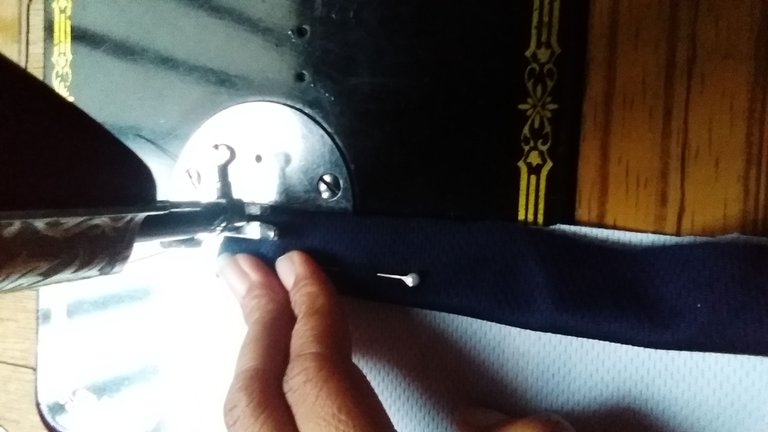
Teniendo doble la tela, marque la tela con la tiza punto de partida desde la esquina superior, comenzando con la medida del cuello siendo 38cm÷4 =9,5cm, luego la medida de hombro con 11cm desde el cuello hasta el hueso del hombro. Y se marca bajando 2cm del borde de la tela.
Work the measurements on the fabric without patterns.
The measurements to be taken into account are: shoulder, neck and bust circumference, flannel length, sleeve length and arm circumference.
Note: The neck measurements and the neck and bust contours should be taken as a quarter.
Having folded the fabric, mark the fabric with the chalk starting point from the top corner, starting with the neck measurement being 38cm÷4 =9.5cm, then the shoulder measurement with 11cm from the neck to the shoulder bone. And mark down 2cm from the edge of the fabric.
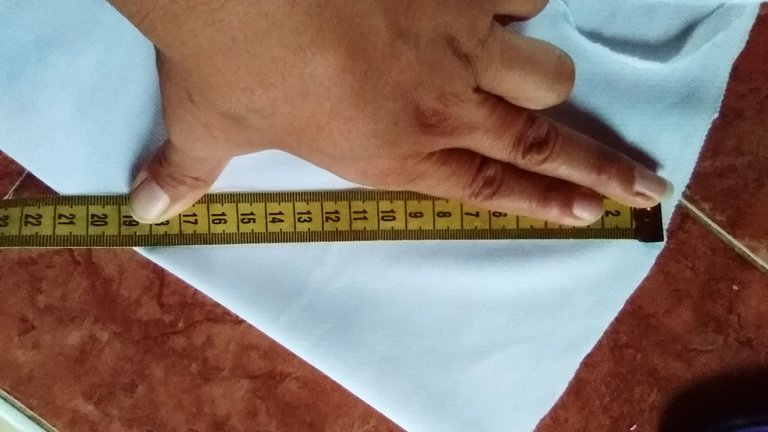
Luego marcar el contorno del busto que es 98÷4=24.5, luego el largo de la franela, trazar las líneas para cortar la tela. Tanto la parte delantera como la trasera la diferencia es en la parte del frente el cuello en V y la parte de atrás solo le quitaré 2cm para el cuello.
Then mark the bust contour which is 98÷4=24.5, then the length of the flannel, draw the lines to cut the fabric. Both the front and the back the difference is in the front the V-neck and the back I will only remove 2cm for the neck.
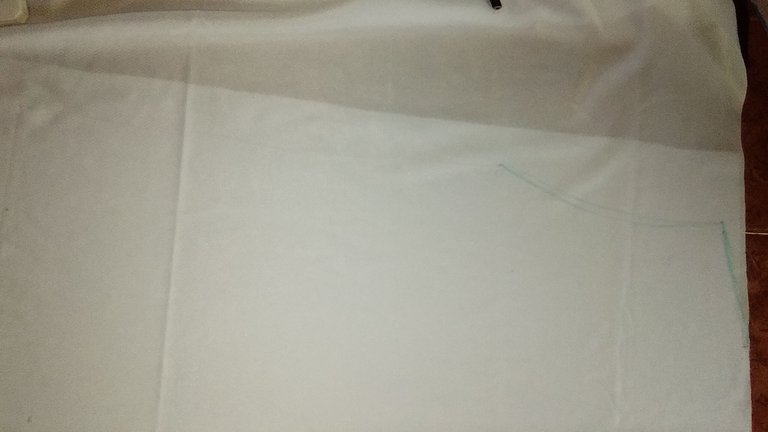
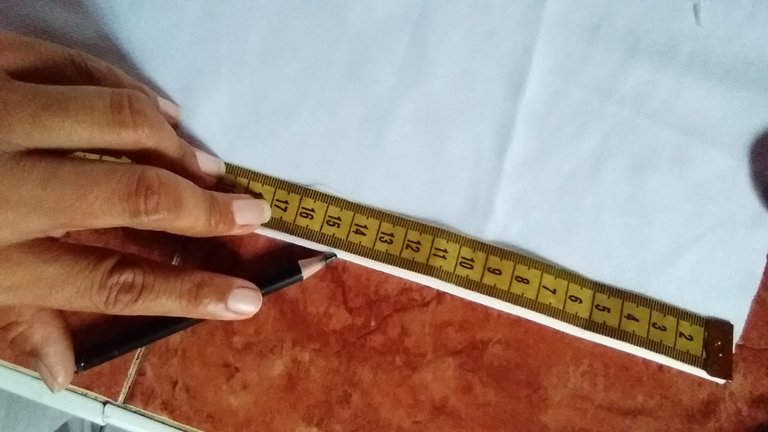
Cuello V
Teniendo la tela doblada medimos la cantidad deseada (hasta donde se desea que llegue en el pecho) en este caso 14cm y desde allí marcamos haciendo una línea diagonal hasta la marca del primer punto de la medida del hombro.
V-neck
Having the fabric folded we measure the desired amount (up to where you want it to reach in the chest) in this case 14cm and from there we mark making a diagonal line up to the mark of the first point of the shoulder measurement.
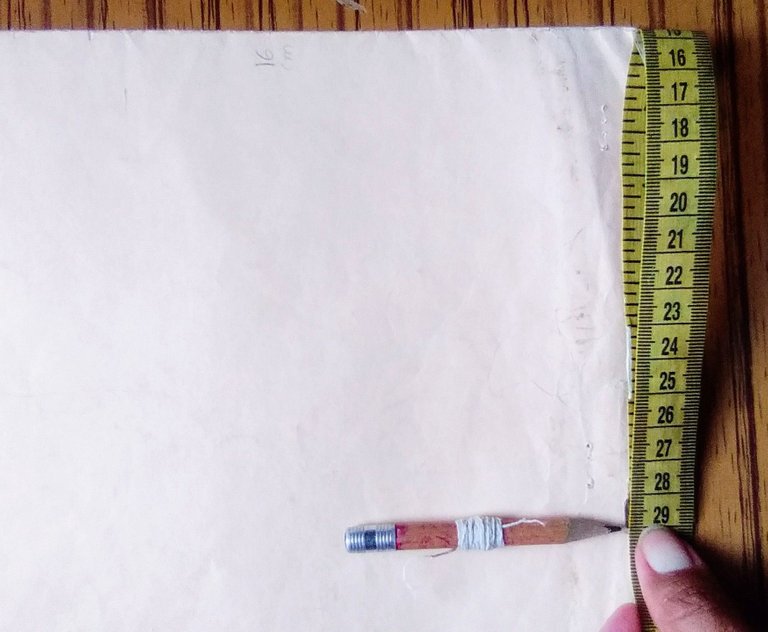
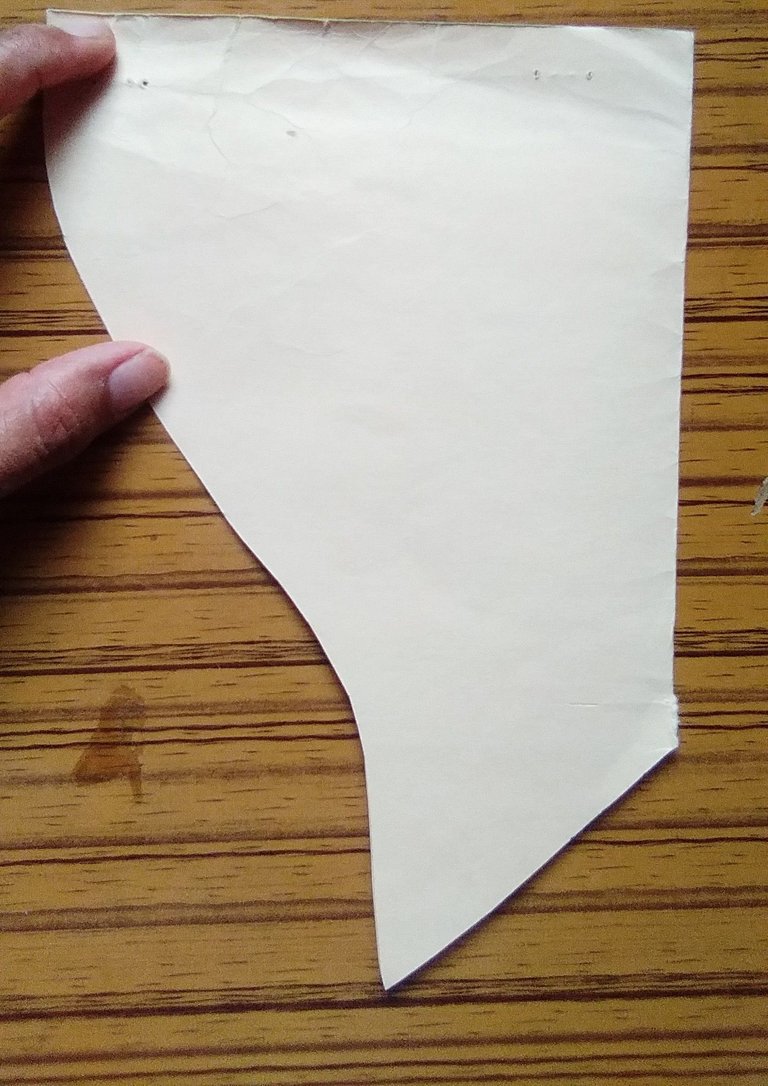
Para las mangas
Haré el procedimiento en cartulina para que sea más visible, pues las fotografías trabajando con la tela no salieron bien marcadas.
Considerando el largo de la manga 16cm y contorno del brazo 29cm. Trabajaré basándome en estas dos medidas.
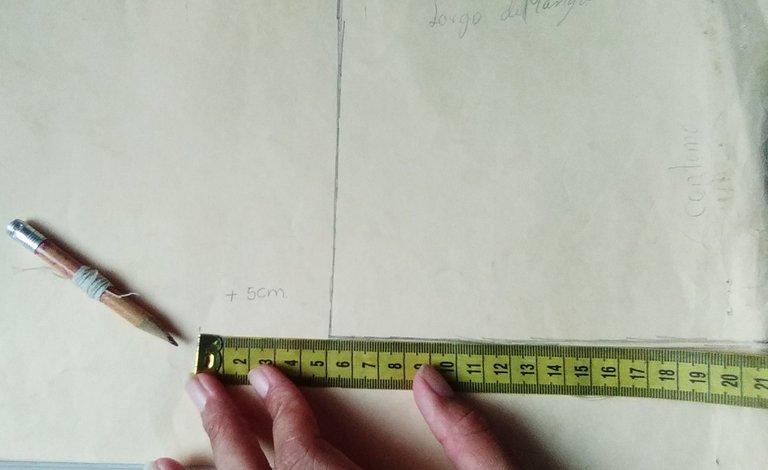
Haré un rectangulo por un lado 16cm (este lado debe estar la tela doblada) y por el otro lado del rectángulo la mitad de la medida del contorno de brazo es decir 29÷2= 14,5cm.
For the sleeves.
I will do the procedure on cardboard to make it more visible, as the photographs working with the fabric did not come out well marked.
Considering the sleeve length 16cm and arm circumference 29cm. I will work based on these two measurements.
I will make a rectangle on one side 16cm (this side should be the fabric folded) and on the other side of the rectangle half the measurement of the arm circumference that is 29÷2= 14,5cm.
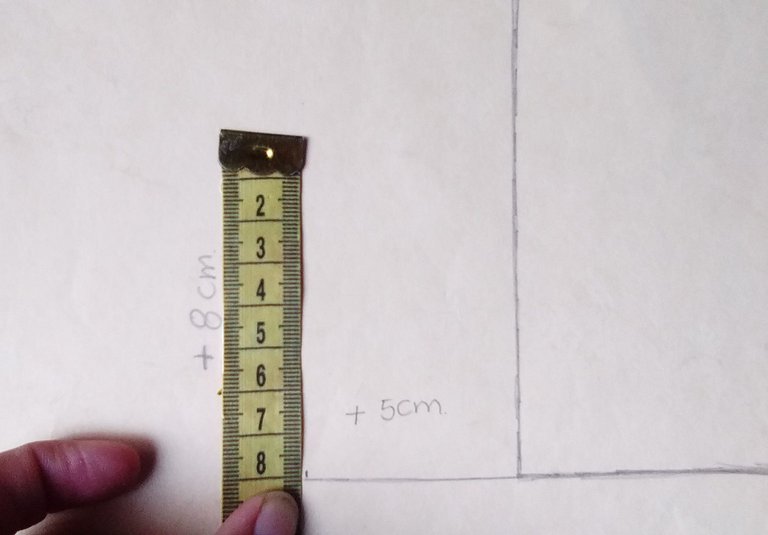
En el lado de 14,5 agrego 5cm, sobre la base de esos 5cm subo 8cm (esto depende si es para talla de niño son 5 o 7cm). Aquí se observa en la fotografía.
On the 14.5 side I add 5cm, on the basis of those 5cm I add 8cm (this depends if it is for a child's size, it is 5 or 7cm). Here you can see it in the picture.
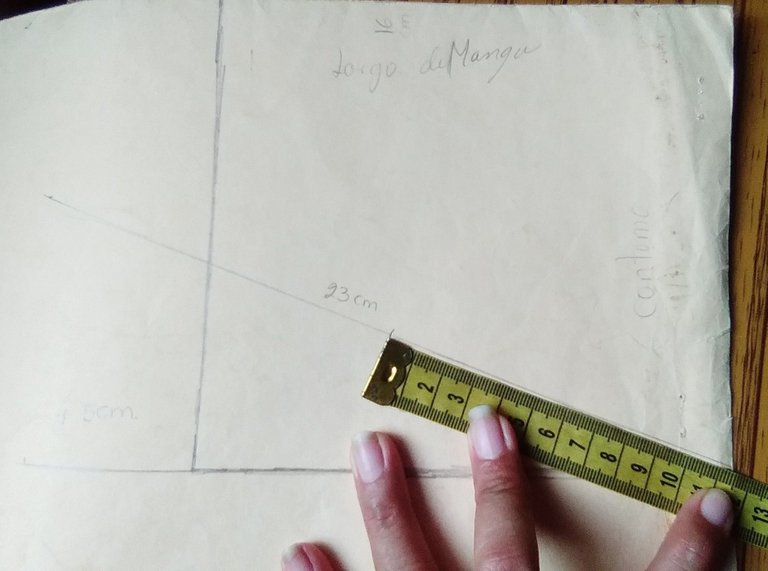
Luego trazo una línea diagonal. Desde ese último punto hasta la esquina del rectángulo, aquí se observa 24cm.
Then I draw a diagonal line. From that last point to the corner of the rectangle, here you see 24cm.

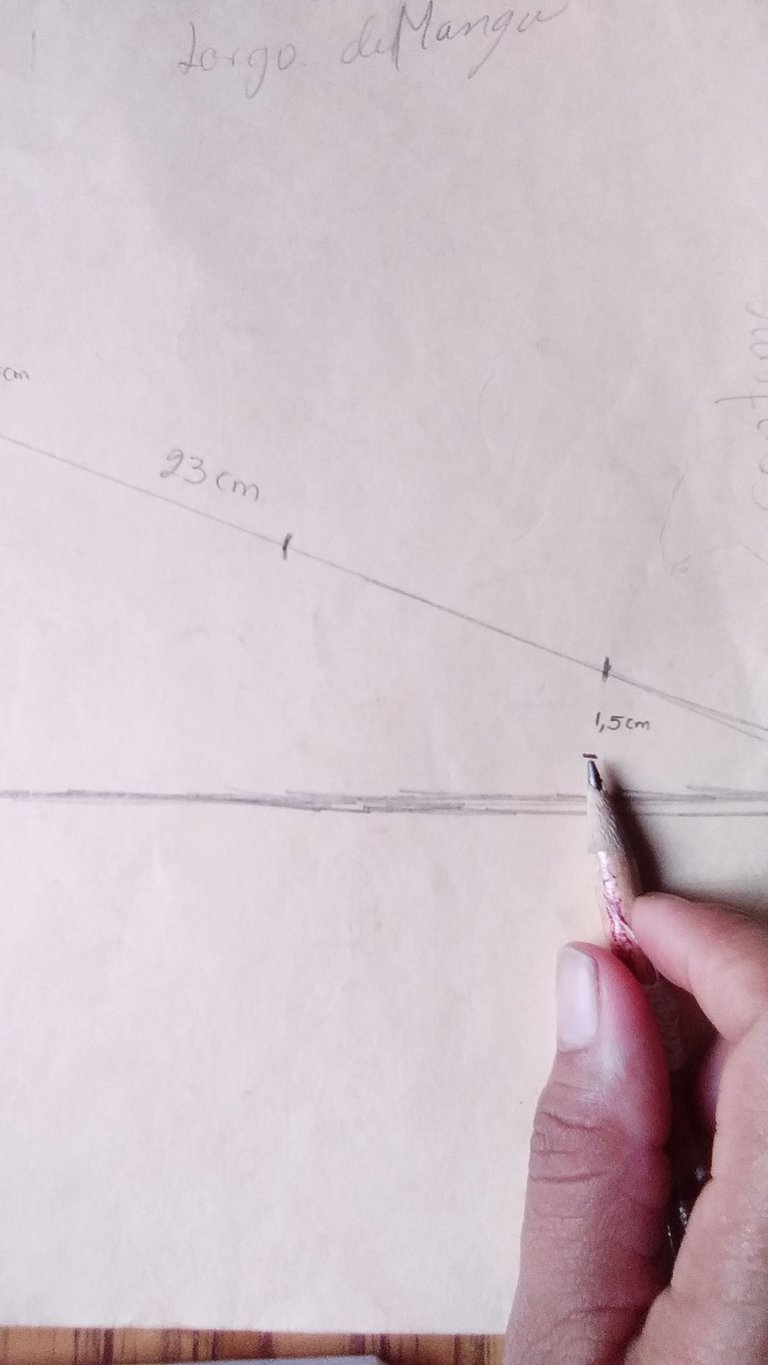
A esos 24cm se dividen en 4 partes, marcando las divisiones en la línea. Son cuatro puntos que se marcan en la línea de 6cm de distancia de punto a punto. En ese primer punto de 6cm subo 1,5cm (hago una marca) y desde el tercer punto -a los 18cm de la línea- bajo 1,5cm y hago otra marca.
These 24cm are divided into 4 parts, marking the divisions on the line. There are four points that are marked on the line of 6cm distance from point to point. In that first point of 6cm I go up 1,5cm (I make a mark) and from the third point -at 18cm of the line- I go down 1,5cm and make another mark.
Luego trazo una línea semicurva de punto a punto pero pasando por los nuevos puntos marcados . Aquí se muestra en la fotografía. También trazo una línea diagonal desde el final de esa línea hasta el punto superior de la esquina del rectángulo.
Then I draw a semi-curved line from point to point but passing through the newly marked points. Here it is shown in the picture. I also draw a diagonal line from the end of that line to the top corner point of the rectangle.
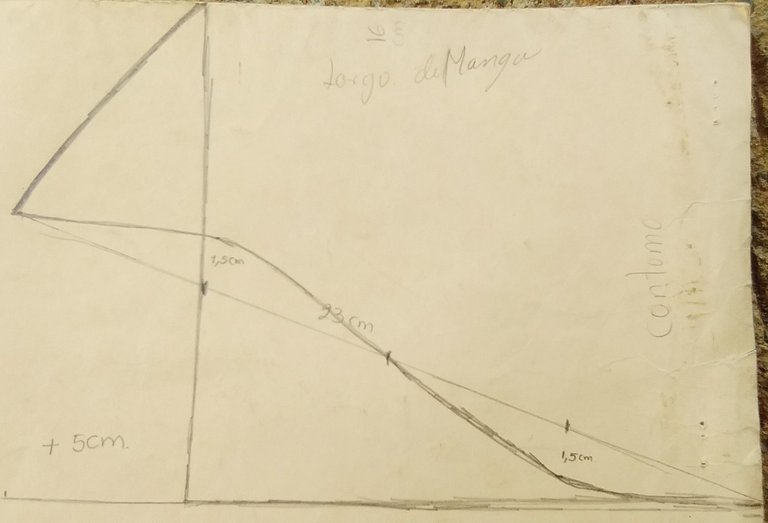
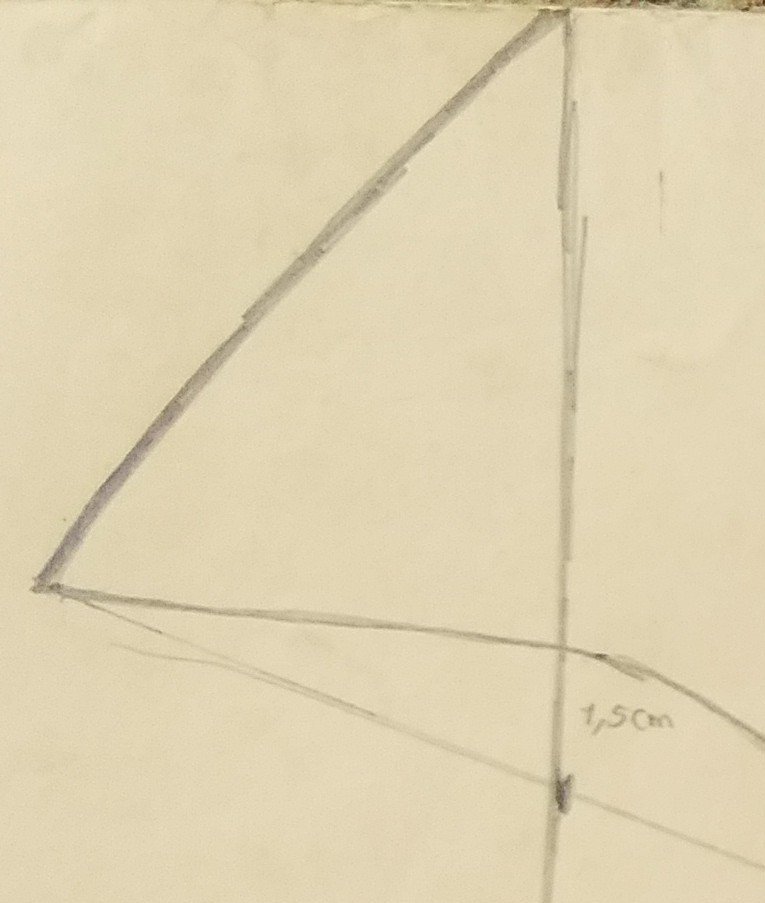
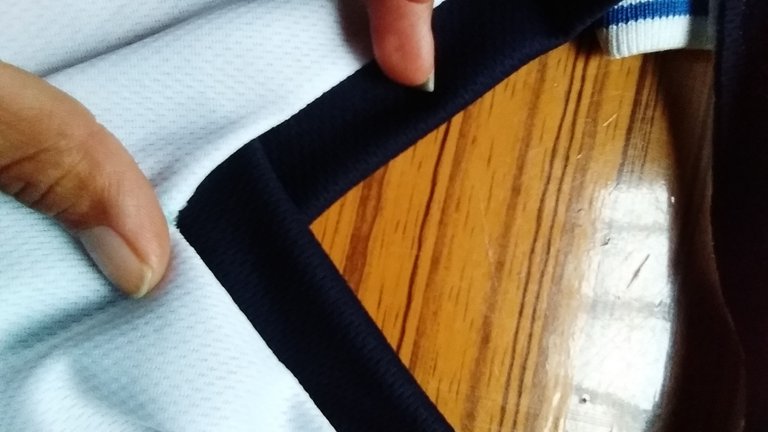
Ustedes se preguntarán ¿Y ahora por dónde cortaremos ? Bueno cortaremos precisamente por esas últimas línea que marcamos.
Debe quedar así:
You may be wondering, where do we cut now? Well, we will cut precisely along those last lines that we marked.
It should look like this:
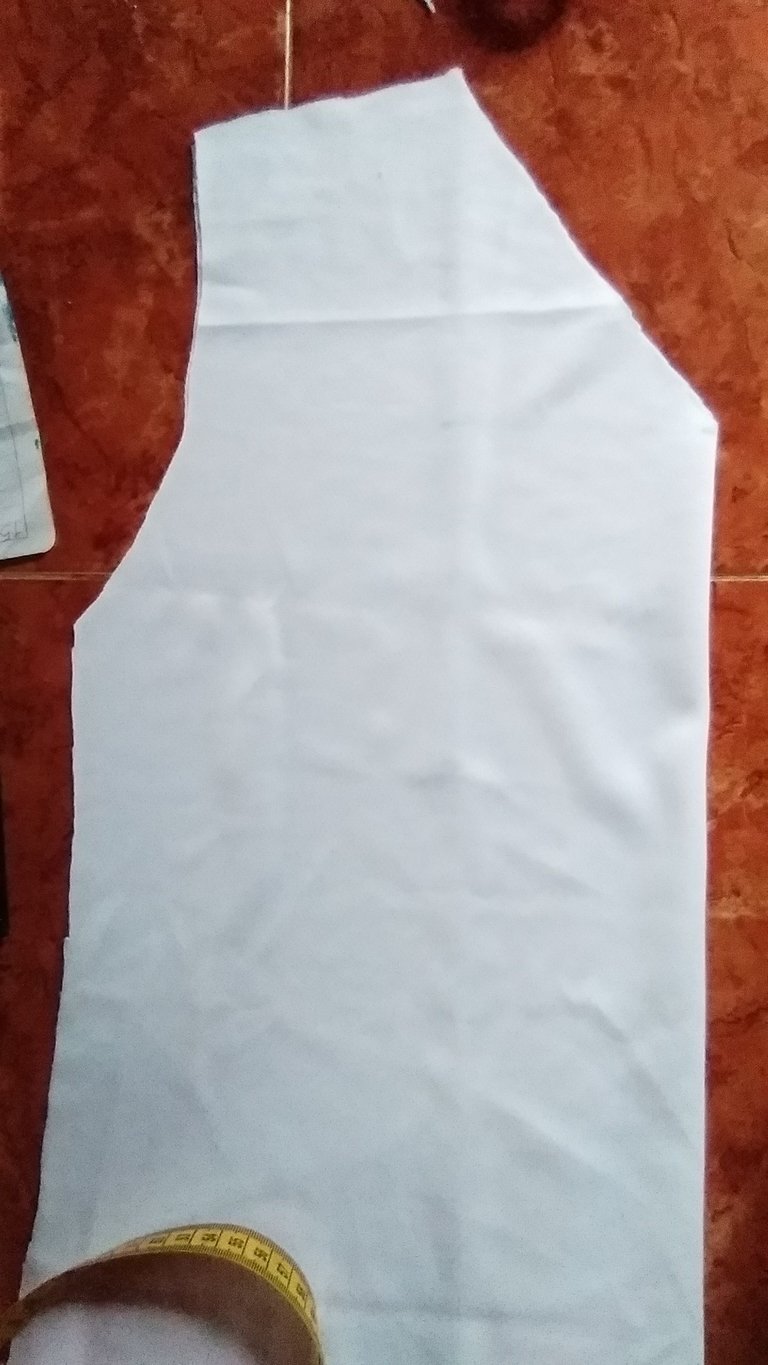
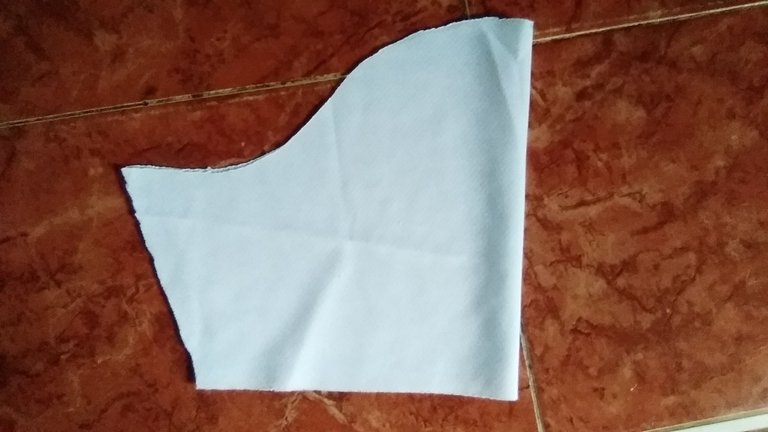
En la tela me quedó así:
On the fabric it looked like this:
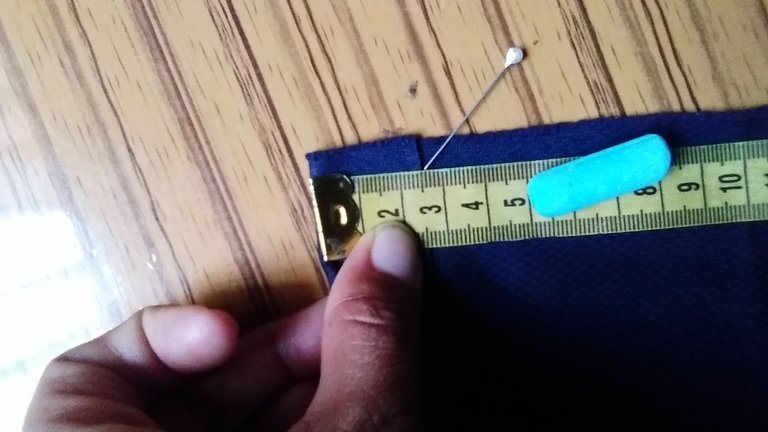
Para los bordes del cuello y el dobladillo de las mangas, use la tela color azul marino. Corte una tira de 5cm de ancho (doblado será 2,5) por 30cm de largo para la mangas. Otra con la misma medida de ancho por 60cm de largo.
For the edges of the collar and the hem of the sleeves, use the navy blue fabric. Cut a strip 5cm wide (folded will be 2.5) by 30cm long for the sleeves. Another strip of the same width by 60cm long.
Listas todas la piezas cortadas, comencé a unir cociendo a máquina, primero los hombros, seguidamente coci las mangas.
All the cut pieces ready, I started to machine sew together, first the shoulders, then the sleeves.

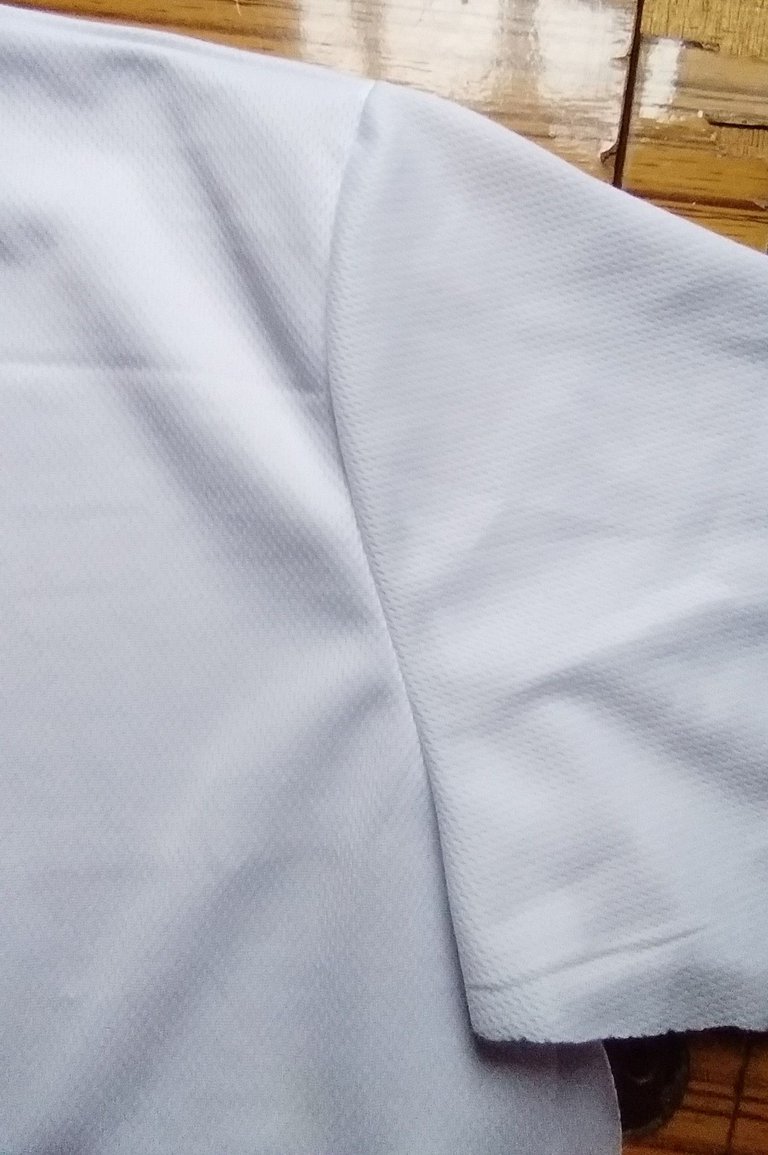
Luego pasé a cocer los bordes tanto de las mangas como el del cuello.
Then I went on to stitch the edges of both the sleeves and the collar.
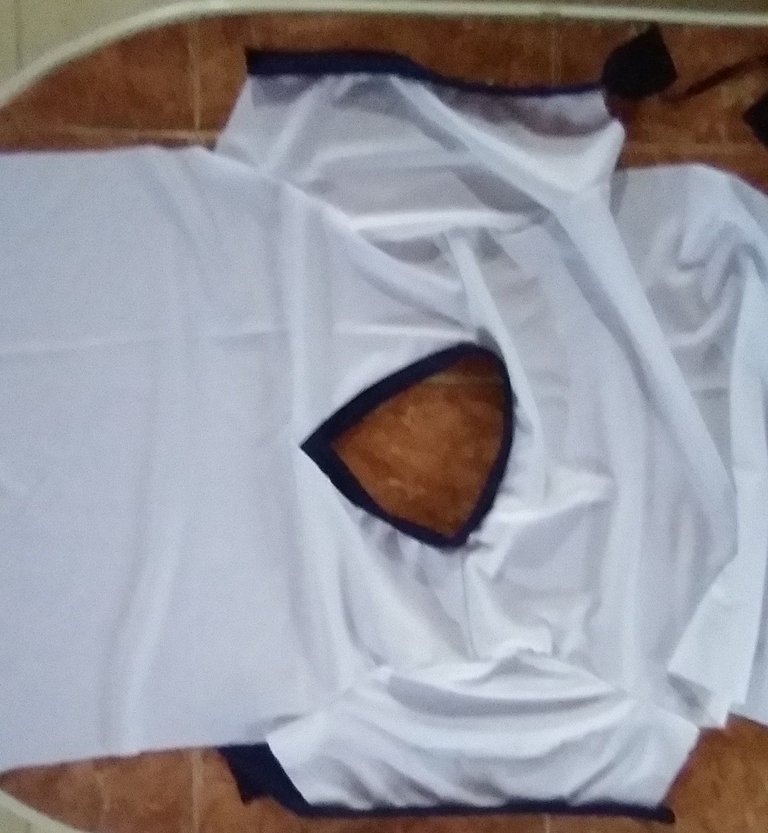
Cómo resultado de haber unido las piezas me quedó así:
As a result of having joined the pieces together, I was left with this:
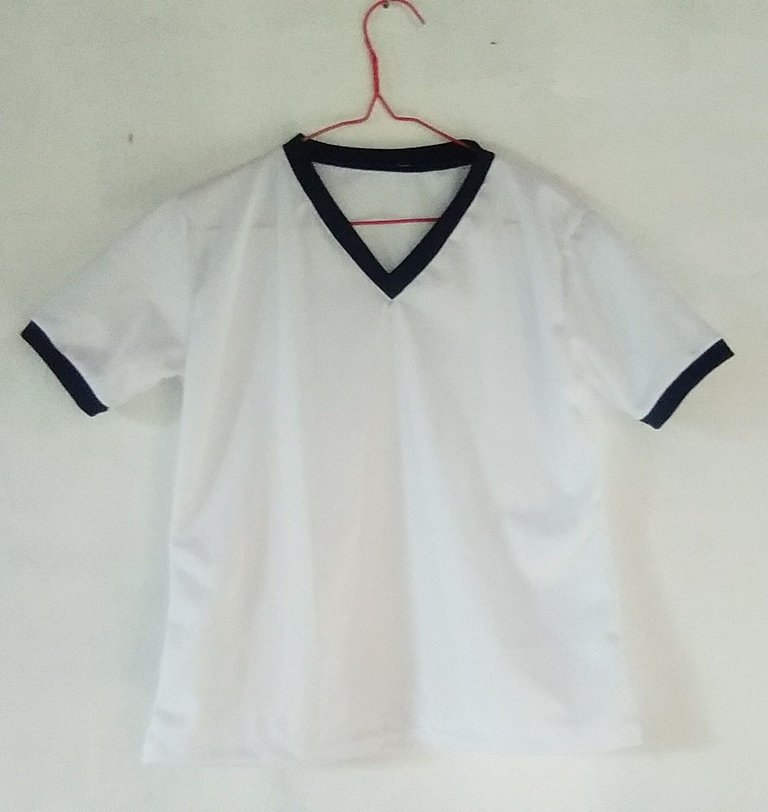
Solo de pasar la costura de los laterales y el ruedo final de la franela.
El resultado final 😉.
Just to pass the side seams and the final hem of the flannel.
The end result 😉.
Bueno hasta aquí apreciadas amigas, espero que sea de utilidad mi publicación. Particularmente quedé satisfecha con el trabajo. El esfuerzo valió la pena.
Muchas gracias por llegar hasta aquí, aprecio su tiempo al leer mi publicación. Hasta pronto, saludos🤗.
Well, so far, dear friends, I hope my publication is useful. I was particularly satisfied with the work. The effort was worth it.
Thank you very much for coming this far, I appreciate your time reading my publication. See you soon, best regards🤗.
Las fotos son de mi propiedad tomadas con mi teléfono Alcatel
The photos are my property you send with my Alcatel phone.
Foto de portada editada por mi con la aplicación pixiz.com
Cover photo edited by me with the pixiz.com application.
Está publicación fue traducida en DeepL
This publication was translated at DeepL
Amiga una excelente explicación de tu paso a paso.
He hecho algunos patrones y la verdad es lo más complicado de cocer, este te ha quedado bien chévere.
La camisa se ve muy bien hecha y bonita.
Hola amiga, Gracias por tu apreciado comentario. Con los patrones es más seguro a la hora de cortar la tela. Y bueno probó seguiré por esa bonita comunidad. Saludos nos seguiremos leyendo.
Hola Gladys :) La verdad que hacer nuestra propia molderia es lo más cómodo, nos permite usar las medidas que queramos y entender las transformaciones. Me gusto como te quedo esta camiseta, muy prolija y se nota que está hecha con amor. ¡Gracias por compartir!
Por otro lado, te recuerdo que la interacción con otros miembros de la comunidad también es algo valioso. A todos nos gusta que nos lean y apoyen.
Te mando un saludo, que tengas un buen día 😃.
Claro así es amiga, gracias por esa sugerencia aunque realmente tengo una constante lucha con el tiempo y el internet pero poco a poco seguiré. Saludos y nos estaremos leyendo.
Congratulations @rigel-gladys! You have completed the following achievement on the Hive blockchain And have been rewarded with New badge(s)
Your next target is to reach 400 upvotes.
You can view your badges on your board and compare yourself to others in the Ranking
If you no longer want to receive notifications, reply to this comment with the word
STOPCheck out our last posts:
Support the HiveBuzz project. Vote for our proposal!