Caricature Photo-Manipulation Created In Adobe Photoshop And The Detailed Tutorial With All Steps
Hey Dear Steemians, Happy New Year to all of you.
After the new years's celebration , I am back with another cool photo-effect and the detailed tutorial for it. We will learn how to make Caricatures in Adobe Photoshop.
In caricatures we exaggerate certain characteristics of a person to make it comic and distorted. This sometimes can be insulting and sometimes complimentary. These are widely used in political cartoons magazines and new-papers. But these can also be drawn only for entertainment purposes.
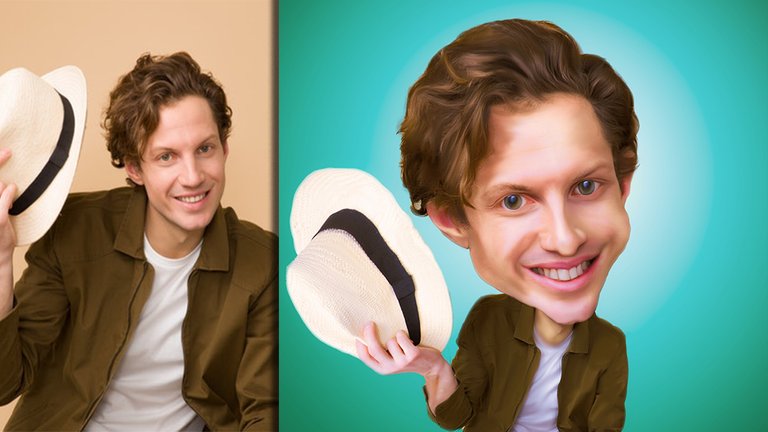
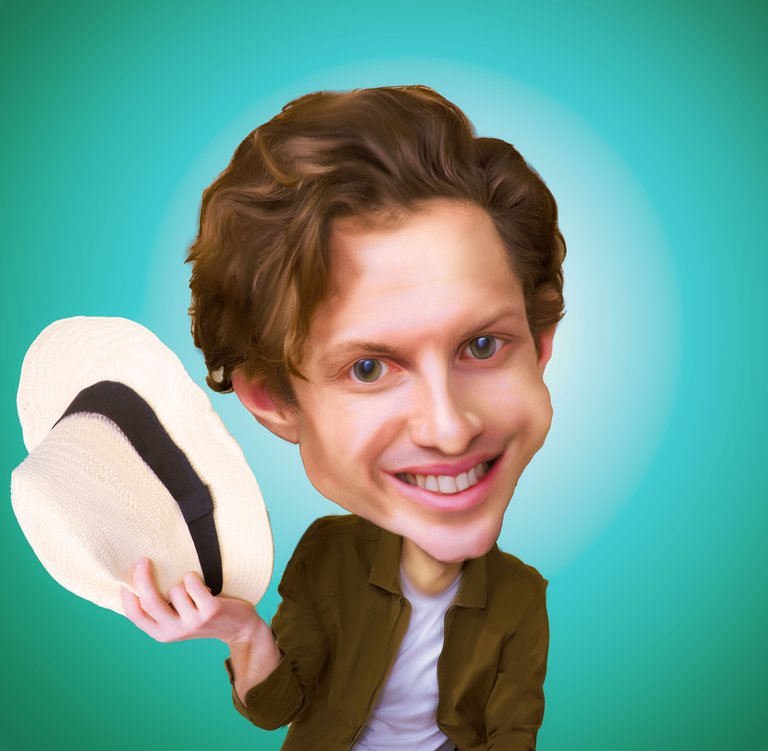
Here is the final image which we will be creating today.
Now let us start the tutorial for it.
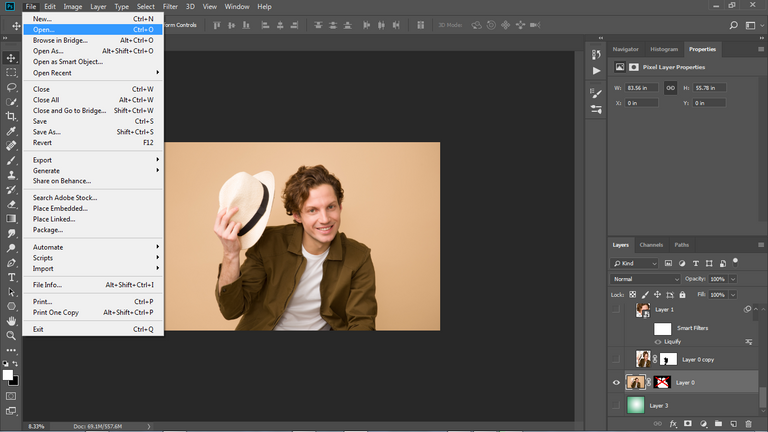
Step 1. Import the image in Photoshop.
Import the image in Photoshop or you can create a new document and place it over it. To open the image go to file and the open ( Shortcut is CTRL+O ) .
.jpg)
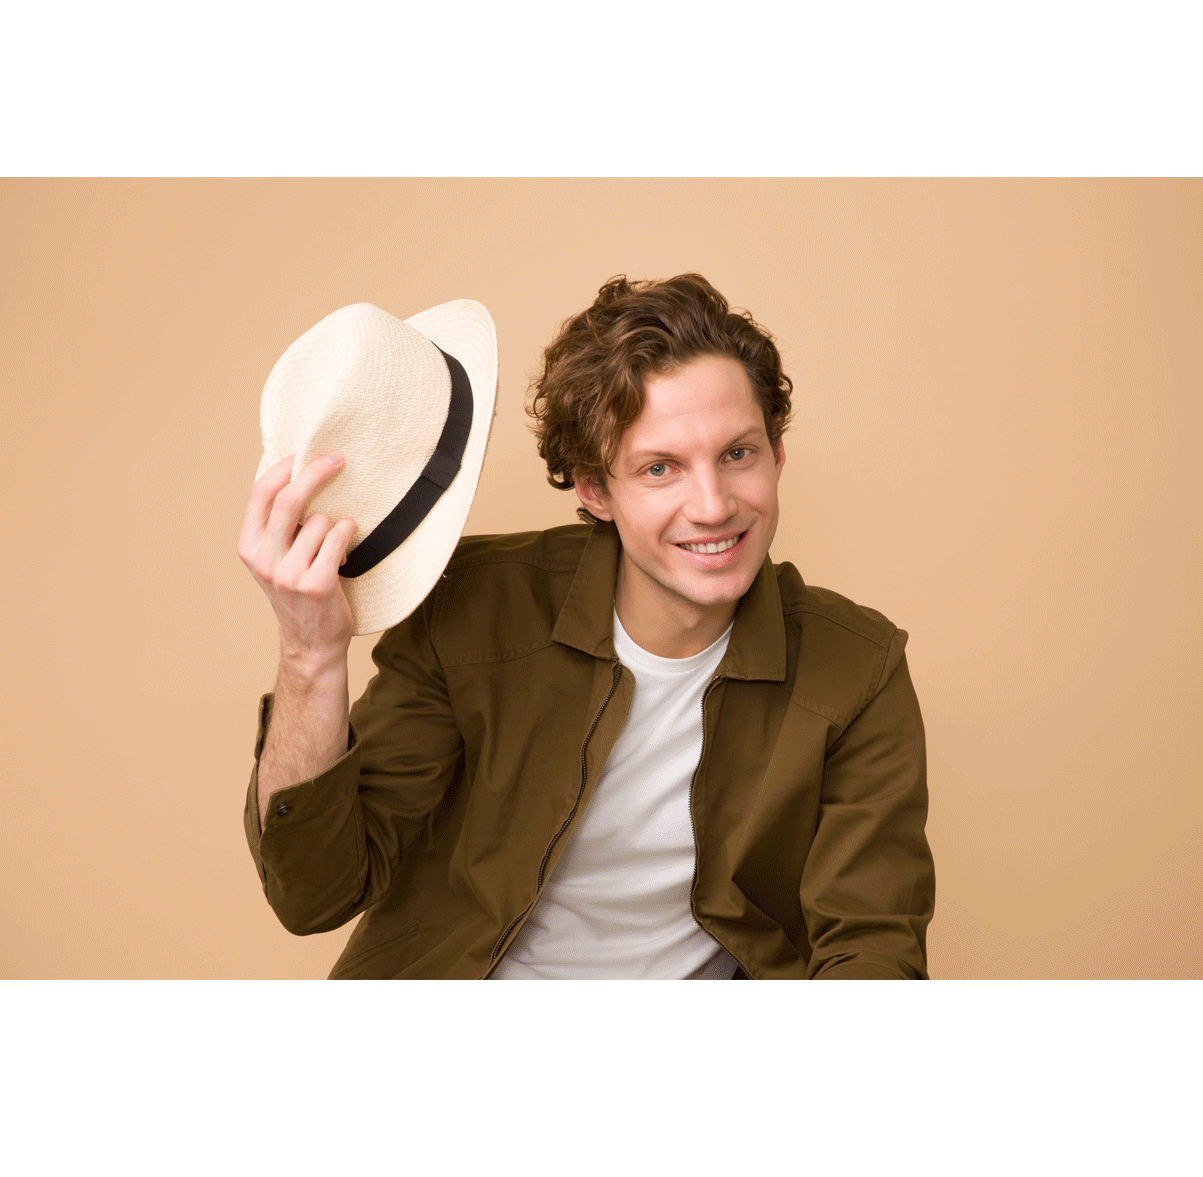
This is the stock image we will use in this tutorial, if you wanna download it go through the source link below it.
Step 2. Cutting Out the Subject.
With the Quick Selection Tool, we will select the subject and cut-out it from the background. In Photoshop CC, there is an option "select subject" in the properties panel of quick selection tool, which automatically selects the subjects in the images if they have not busy background otherwise you have to do it manually. But in this image this works really well.
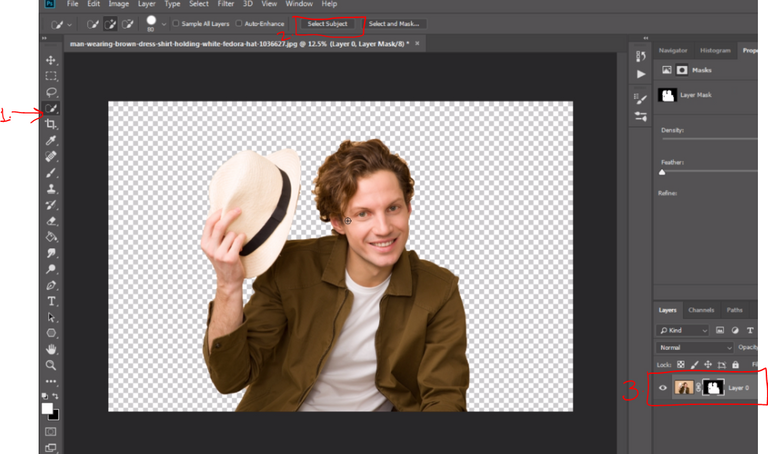
- select the quick selection tool (shortcut is w)
- click on select subject and wait for sometime and there will be outline around the subject.
- Apply the mask by clicking on the mask icon.
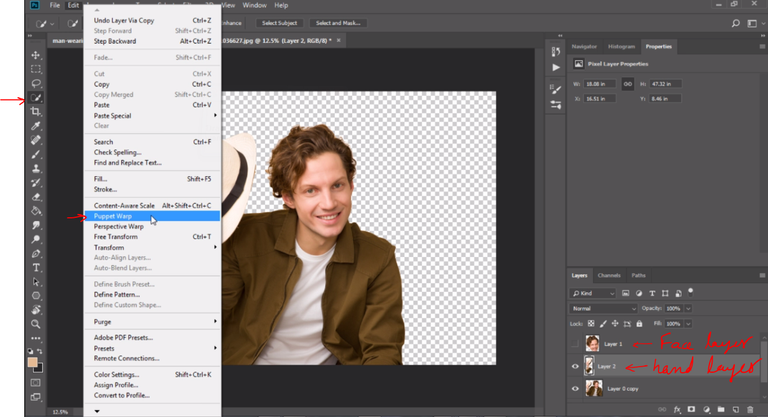
After that create a copy of this layer by pressing CTRL+J and apply the layer mask on this layer.

Then cut the face and left hand holding the hat from this layer and paste them on the new layers. And then select the left hand layer and go to puppet warp too in the edit menu.
Add the three pins in the puppet warp tool as shown in the following image.

Select the upper pin and rotate to the left like shown below.

Now press CTRL+T to open the transform option and increase its size , then apply liquify to it in the filters and mask out the undesired areas and this will be the final position of the hand.
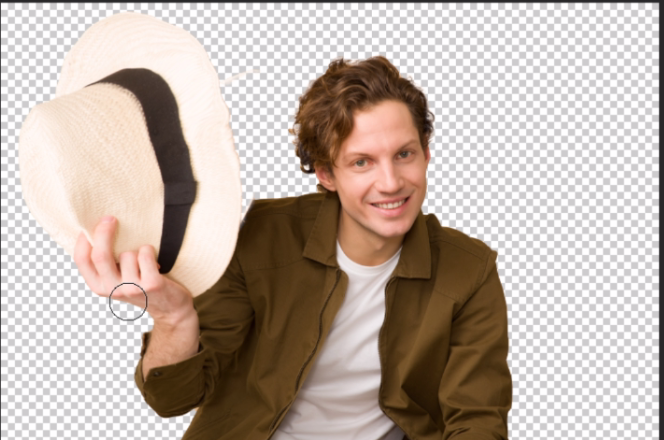
After this unhide the face copy we created previously and also increase its size with the transform option like this. Then convert to smart object the face layer.

Step 3. Using Liquify Tool To Change Facial Features.
Next, go to filter, then liquify too and change the eyes, lips, cheeks , forehead , teeth, chin , hair proportions to make it look like caricature or cartoon. This totally depends upon your imagination.

Using the bloat tool, you can make anything bigger here like eyes, lips , teeth.

And then selecting the forward warp tool , you can stretch or shrink any part of the face. Create like shown in the following image. And increase or decrease the brush size with [ or ] on the keyboard and paint very slowly to create the good effect.

Create a new layer underneath all the layers and fill it with the gradient to create the background for the image.

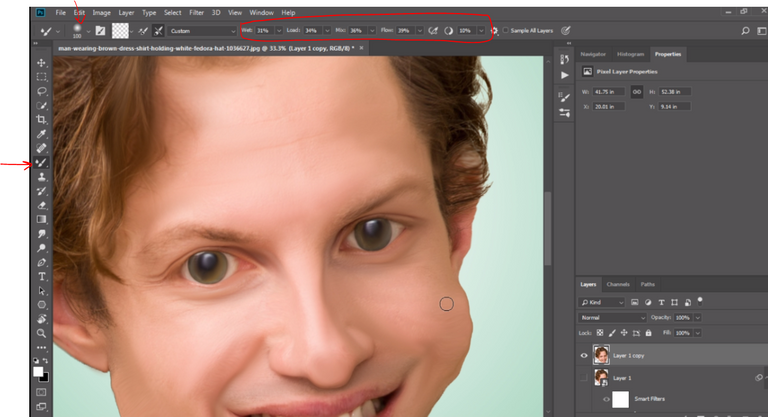
Step 4. Adding Smoothness To Skin And Clothes.
Take the mixer brush tool among the brushes and paint with the wet brush over the face to make the skin smoother and looking like the cartoons. See the settings for the brush in the below image. Always paint along with the direction of highlights and shadows and keep on changing the brush size accordingly. Also paint over the hair and clothes to make them smoother but not too much.

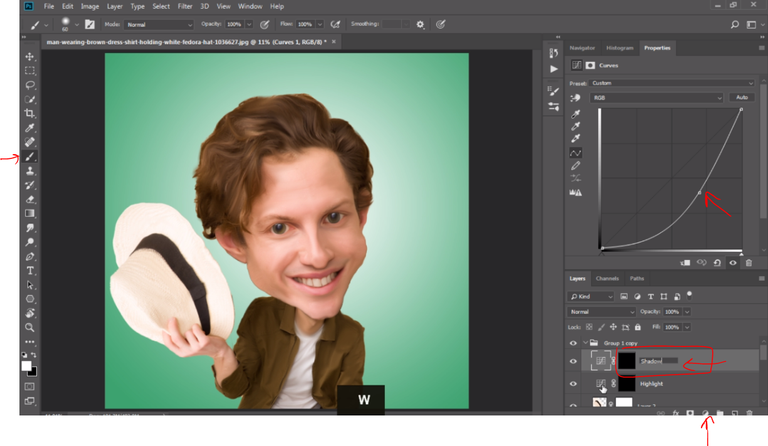
Step 5. Adding Highlights And Shadows To Bring Out The Details
As we have painted over the face and hair with the wet brush and it makes the images flat. We have to bring out the details with the curves adjustment layers in it. Create two curves adjustment layers and make the image brighter with first and darker with the second. After that invert the layer masks for both the curve adjustment layers and using the soft round brush paint over the highlight and shadow areas to bring out the details.


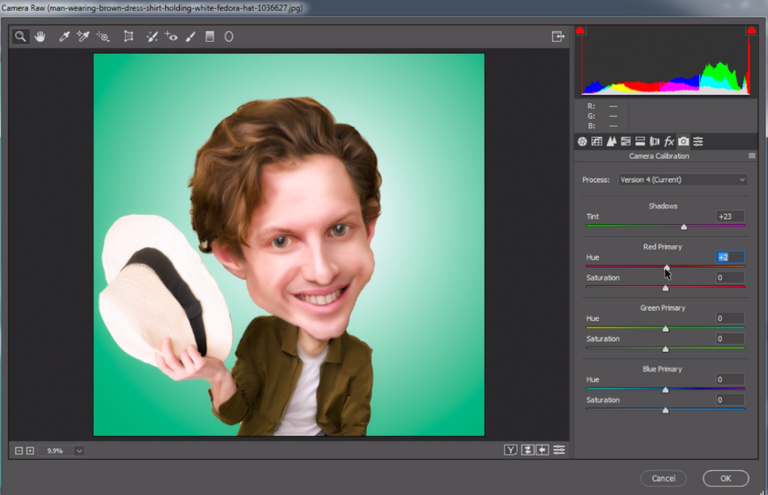
Step 6. Color Correction With Camera Raw Filter
Now merge all the layers into a new layer by pressing CTRL+ALT+SHIFT+E on the keyboard and convert it to smart object. Then go to filters and select camera raw filter. Change the various settings there as per your liking.


And we are done with this cool caricature effect. I have also uploaded the tutorial for the same on my YouTube Channel.
Here is the link to Watch it ...
I am a professional digital artist, photo-editor and motion designer having experience of 5 years. If you also want these cool effects and creative logo animations for your text, logo or graphics, I will design them for you at very reasonable prices. You may contact me on telegram, discord or Fiverr. Here are my contact ids for these social handles.
TELEGRAM : @gauravrocksg DISCORD : @rocksg#4832
FIVERR : https://www.fiverr.com/grocksg/ (Fiverr is a marketplace for the freelancer, you can watch my portfolio there and past works I have done for clients and place your own orders, it is very secure and safe)
Congratulations @rocksg! You have completed the following achievement on the Steem blockchain and have been rewarded with new badge(s) :
You can view your badges on your Steem Board and compare to others on the Steem Ranking
If you no longer want to receive notifications, reply to this comment with the word
STOPVote for @Steemitboard as a witness to get one more award and increased upvotes!
Thanks for using eSteem!
Your post has been voted as a part of eSteem encouragement program. Keep up the good work!
Dear reader, Install Android, iOS Mobile app or Windows, Mac, Linux Surfer app, if you haven't already!
Learn more: https://esteem.app
Join our discord: https://discord.me/esteem