How To Create The Glow Effect In Adobe Photoshop With Blending Modes
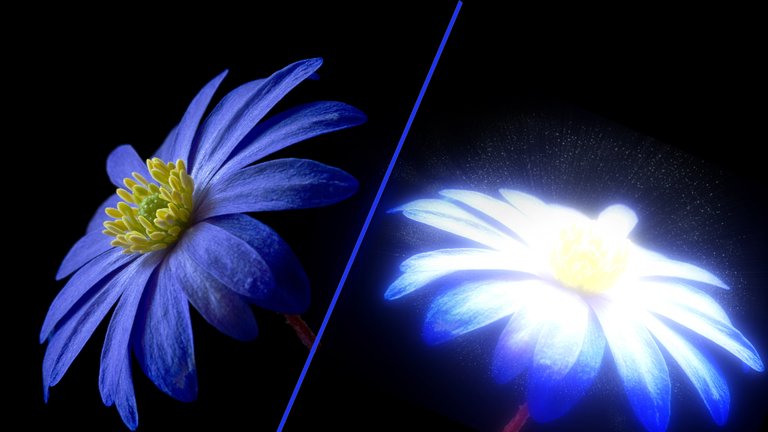
This is the glow effect I have created in Adobe Photoshop. Here I am sharing all the process to achieve this beautiful effect.
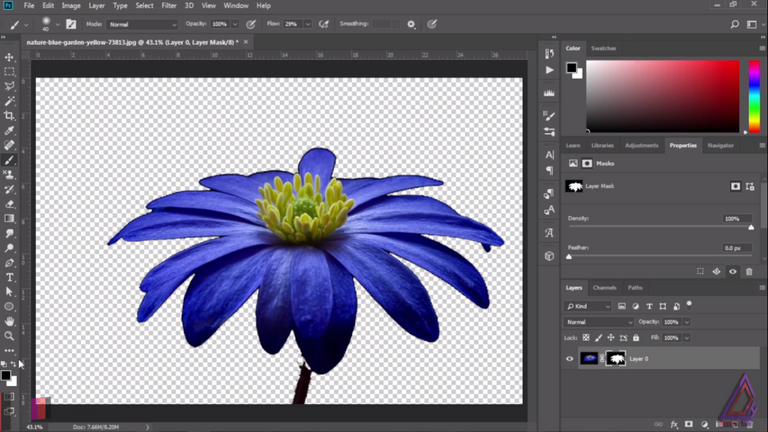
Open the image and separate it from the background using the quick selection tool.
(If you wanna use the same image, download it from here.)
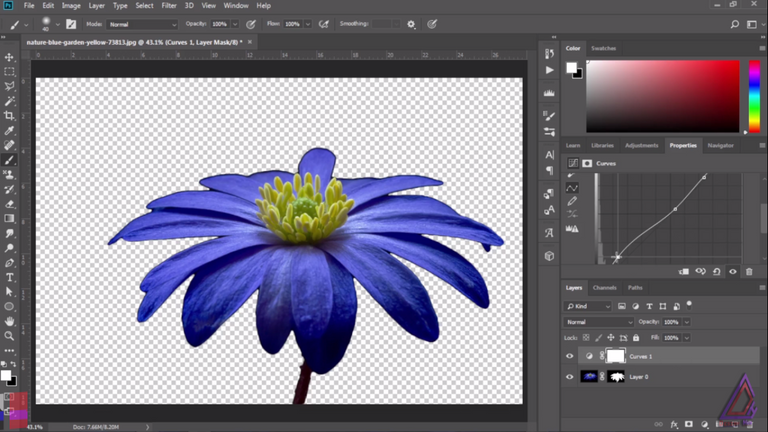
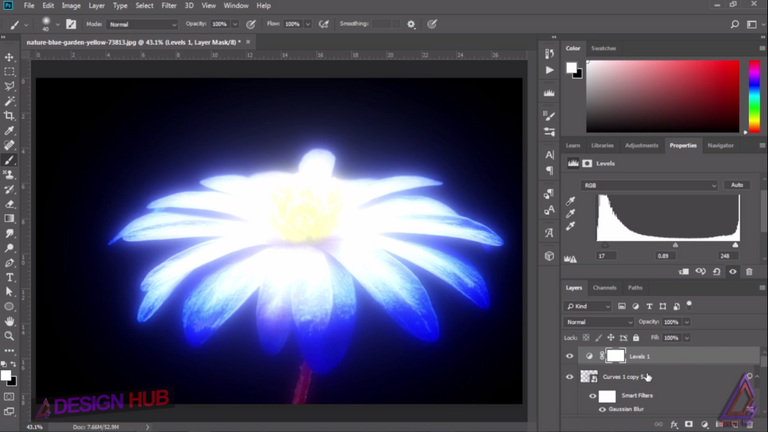
Add a curve adjustment layer and increase the brightness of the darker parts.
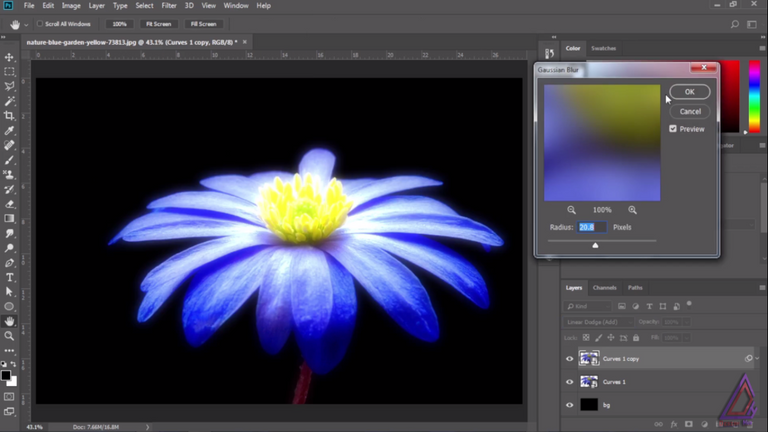
Now selecting both the layers, convert them to a smart object and copy this layer, put the new layer under linear dodge blending mode and apply the gaussian blur 20 in radius.
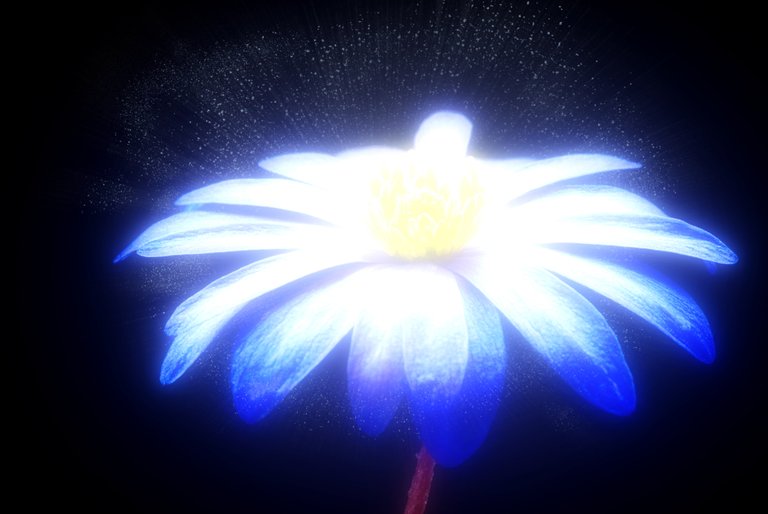
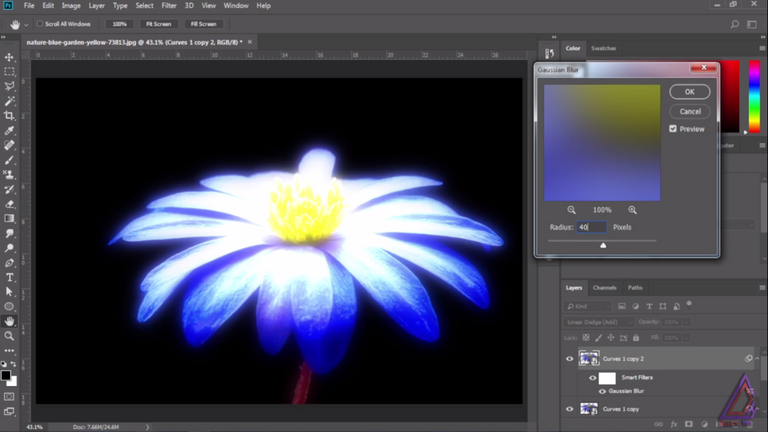
Repeat the above step and now set the blur amount to 40. Now your image will have great amount of glow.
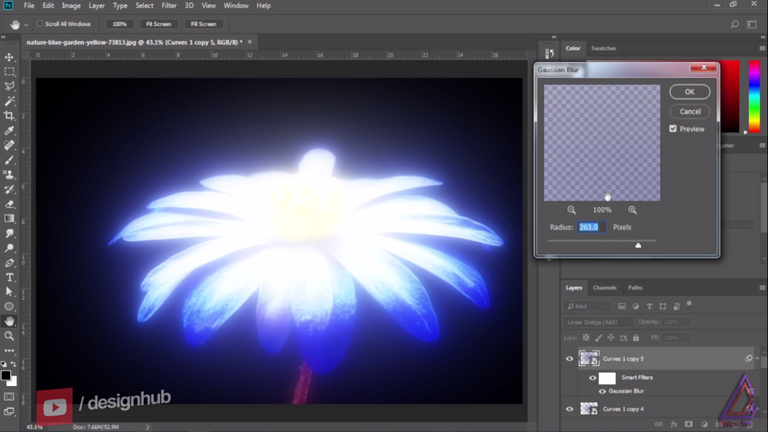
Add the above effect two more times and apply the gaussian blur of 80 and 263 each time. Blending modes for these two layers will be screen.

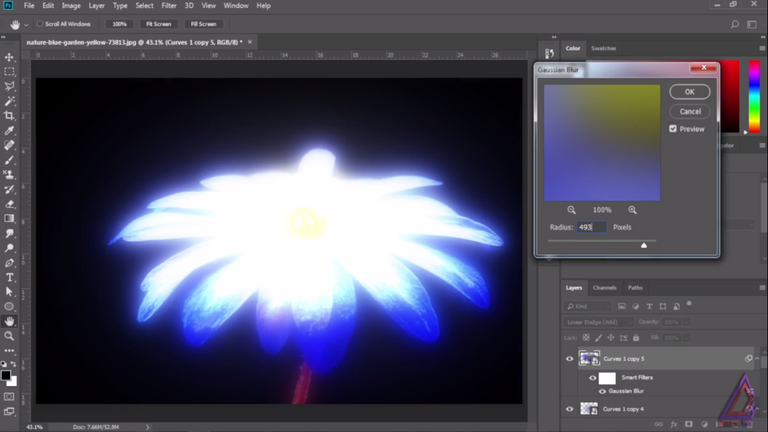
If you want more glow, you can add one more copy of this, change the blending mode to linear dodge and put the blur amount to 493. This step is optional if you have already achieved the desired effect in the above steps.
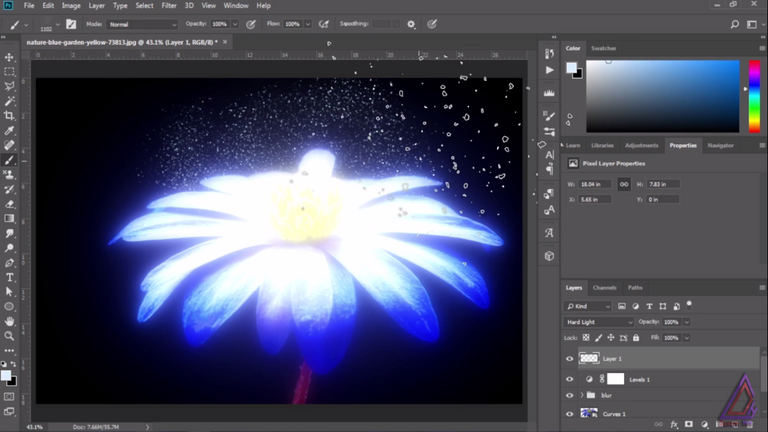
Add a new levels adjustment layer and adjust the brightness.
Paint some particles using the brush on a new layer and apply some radial blur to it.
These were all the quick steps in a short post. If you wanna learn from my YouTube tutorial here is the link to watch it.
Thanks a lot for visiting my profile and reading the entire post. I hope you have found this post to be helpful and learned some cool effect in Photoshop. Stay tuned for such insightful posts from me.

Animated GIF made by me @rocksg
I am a digital artist by profession from India. You can hire me at Fiverr for any graphics or animations like this.
0
0
0.000
Yay! 🤗
Your content has been boosted with Ecency Points, by @rocksg.
Use Ecency daily to boost your growth on platform!
Support Ecency
Vote for new Proposal
Delegate HP and earn more
@rocksg wow😍