Portrait with recyclable material of "Fire Wolf".
Hello dear friends of Hive. I am back after a lot of homework and student activities. In my favorite place which is Hive, I have found this nice Holozing community. I hope to be able to learn little by little about the characters and make more friends who also manage to give me their support. It's the first time I post in this community and I'm very excited but also a little nervous because I've managed to see many majestic drawings and designs, so I hope to be able to gradually achieve to live up to this great community.
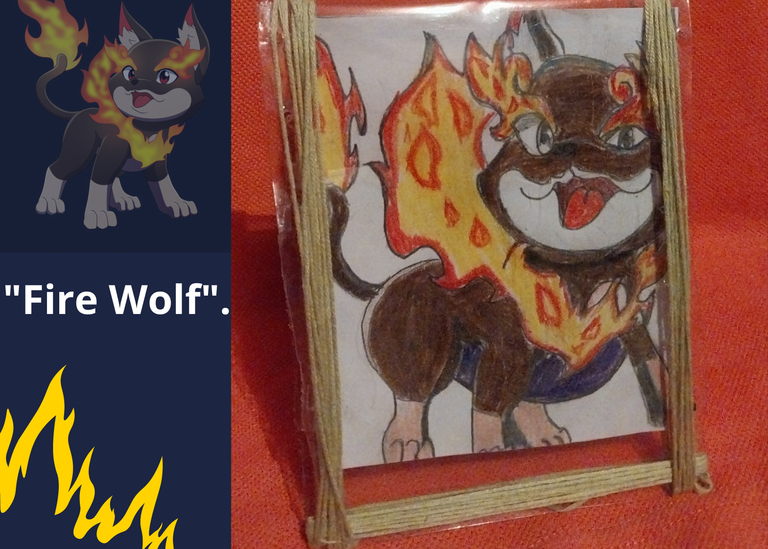
In this opportunity I want to show you the step by step to make a plastic portrait using a plastic bottle to line our drawing of "Fire Wolf".
I hope you like it.
We will need the following materials:
Materials:
- White sheet
- Colors
- Scissors
- Plastic bottle
- Straw
- awl
- candle
Step by step
1
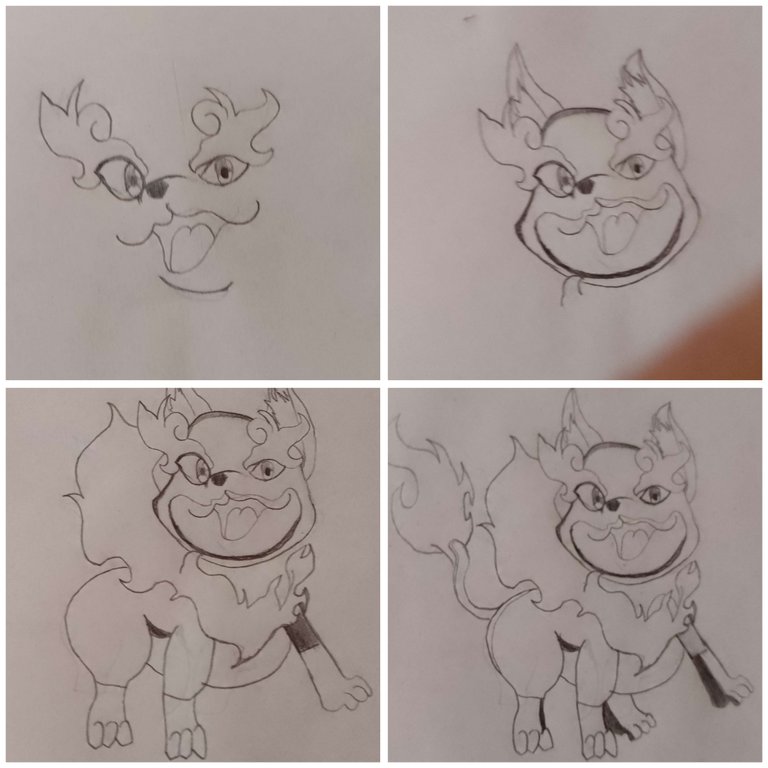
The first thing I did was to start tracing the face of our "Fire Wolf" card. Then I was making the body and shading the legs with the help of the pencil.
2
( )
)
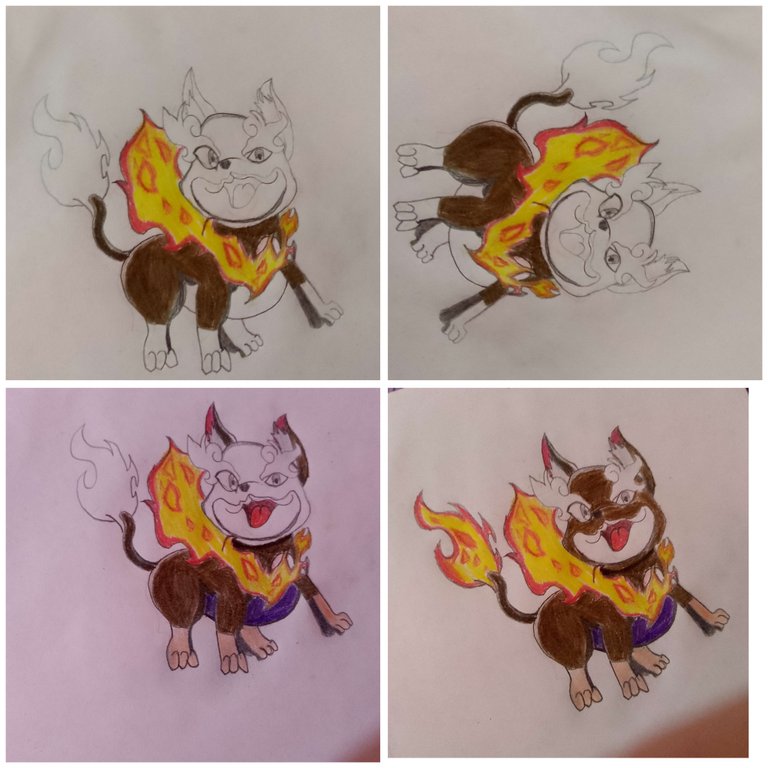
Then add color. The colors I used were brown for the body, dark blue for the belly area, and flesh color for the paws area.
3
( )
)
And the main design which is the tail and the eyebrows I used yellow and then in the edges I used red to make the figure of the flames.
Also add a little bit of certain marks inside the yellow area of the red color.
4
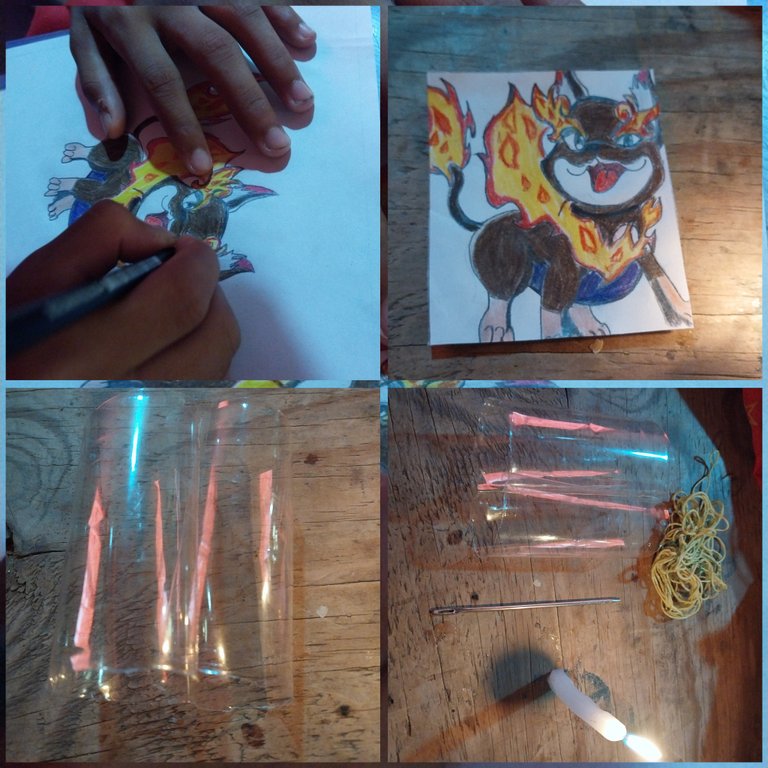
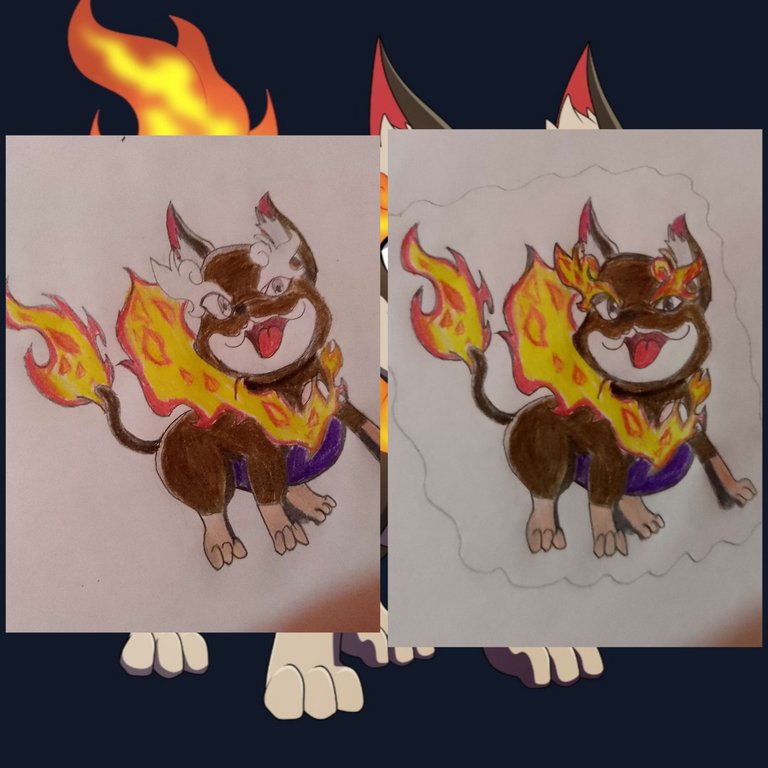
Then we are going to accentuate the colors and then we must cut out the drawing with the help of the scissors. We are also going to take a plastic bottle and cut out the smooth area in the middle of it, to make a square and then fold it in half. In this we are going to line the drawing.
5
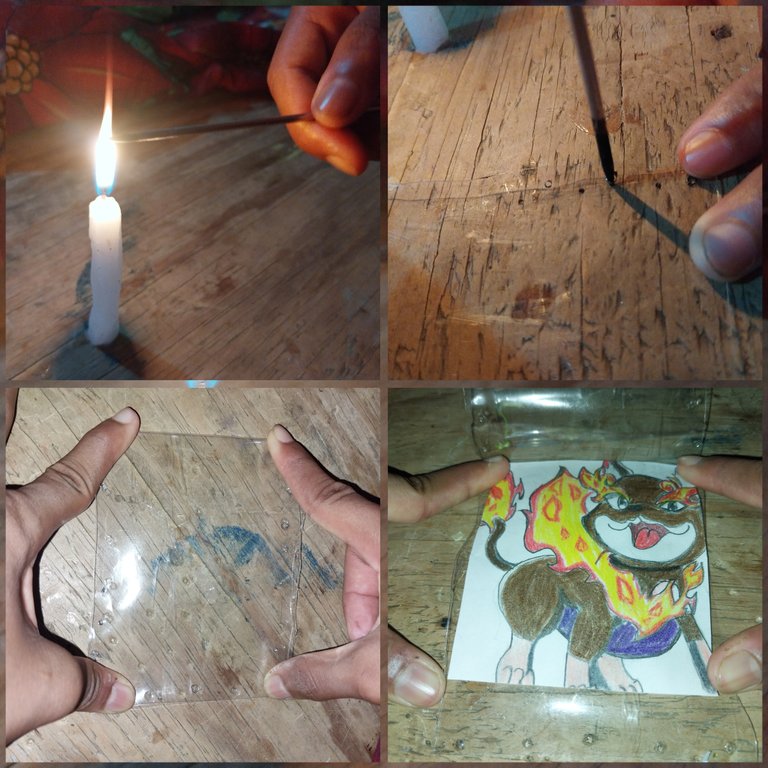
Next we must take the awl and heat this in the previously lit candle and penetrate the plastic material to open holes in this boys and girls.
Once we open all the holes in both layers we proceed to put the drawing and then cover it with the other layer of plastic.
Then we must weave the area with the green yarn and thus close the drawing that is encapsulated in the plastic.
6
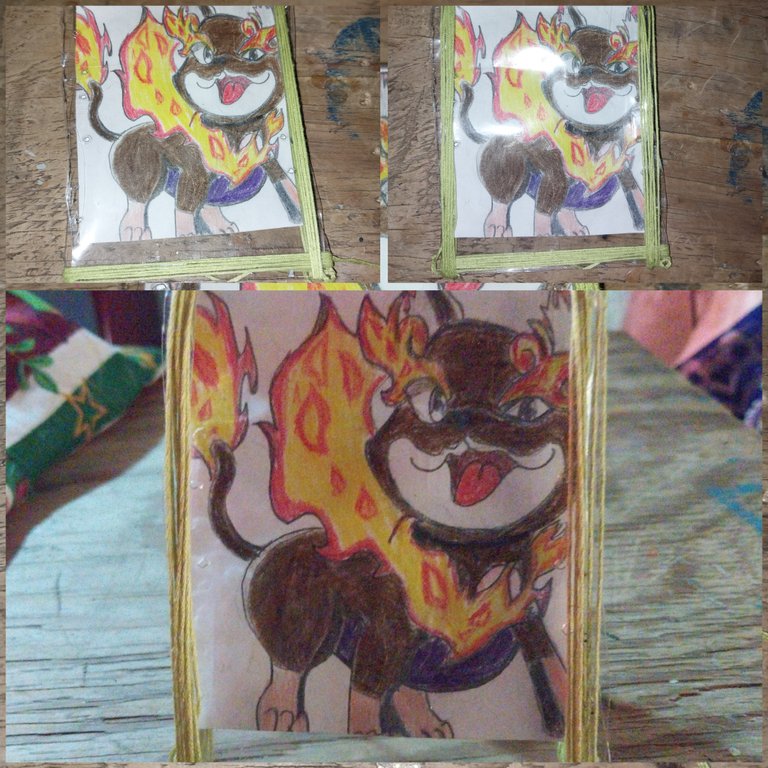
Finally we use more yarn to
We can then wrap the yarn around the edge of the plastic to give it a nice detail.
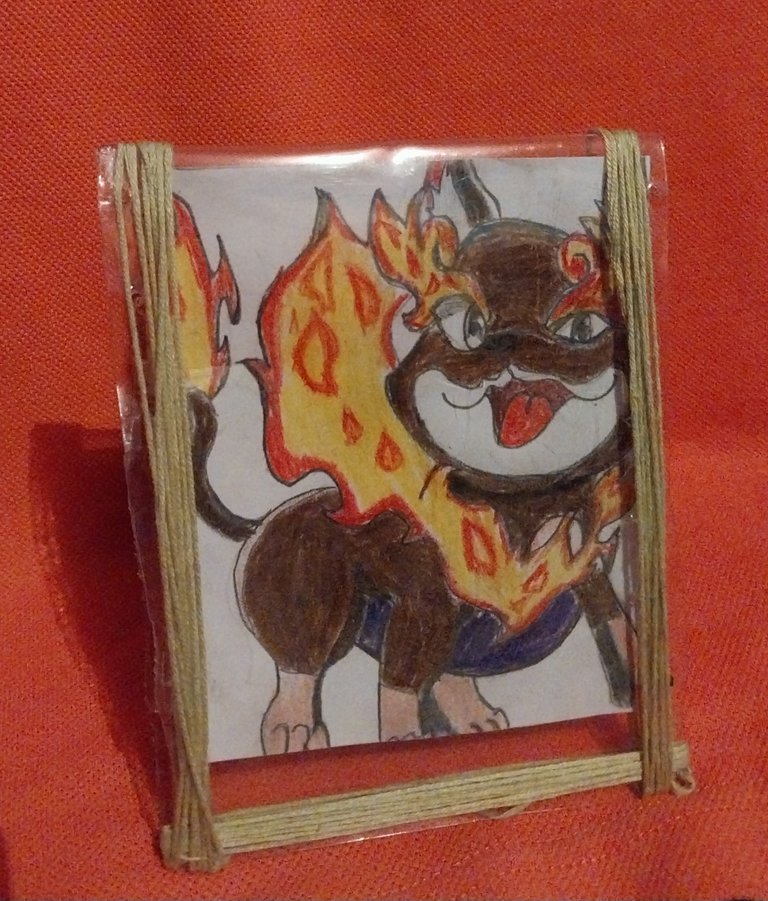
This way we would have the final result. I hope you like it my friend. Suggestions are welcome.
Thank you very much!
- Images belong to me
- Translator: Deepl Traslator
- Editing: Canva
Hola queridos amigos de Hive. He regresado depues de muchas tareas y actividades de estudiantes. En mi lugar preferido que es Hive, he encontrado esta bonita comunidad Holozing. Espero poder ir aprendiendo poco a poco sobre los personajes y hacer más amigos que también logren brindarme su apoyo. Es la primera vez que publico en esta comunidad y estoy muy emocionado pero también algo nervioso porque he logrado ver muchos dibujos y diseños majestuosos, así que espero poder poco a poco lograr estar a la altura de esta grandiosa comunidad.
En esta oportunidad quiero mostrarles el paso a paso para realizar un retrato de plástico utilizando botella de plástico para forrar nuestro dibujo de "Fire Wolf".
Espero les guste.
Necesitaremos los siguientes materiales:
Materiales:
- Hoja blanca
- Colores
- Tijera
- Botella de plástico
- Estambre
- punzón
- vela
Paso a paso
1
Lo primero que hice fue iniciar los trazos de la cara de nuestra carta "Fire Wolf". Luego fui realizadnod el cuerpo y colocando sombra en las patas con la ayuda del lápiz.
2
()
Luego añadir color. Los colores que utilicé fueron el marrón para el cuerpo, azul oscuro para la zona de la panza, y el.color carne para la zona de las patas.
3
()
Y el diseño protagonista que es la cola y las cejas utilicé el color amarillo y luego en los bordes el rojo para hacer la figura de las llamas.
También añadir un poco de ciertas marcas dentro del área amarillo del color rojo.
4
Luego vamos a acentuar los colores y seguidamente debemos recortar el dibujo con la ayuda de la tijera. También vamos a tomar una botella de plástico y recortar la zona lisa del medio de esta, para hacer un cuadrado y luego doblarlo a la mitad. En este vamos a forrar el dibujo.
5
Seguidamente debemos tomar el punzón y calentar este en la vela previamente encendida y penetar el material de plástico para abrir agujeros en este chicos y chicas.
Una vez que abrimos todos los huecos en ambas capas se procede a meter el dibujo y luego se tapa con la otra capa de plástico.
Luego debemos tejer la zona con el estambre verde y así cerrar el dibujo que está encapsulado en el plástico.
6
Por último utilizamos más estambre para
Dar varias vueltas sobre la orilla del platico y así darle un bonito detalle.
De esta manera nos quedaría el resultado final. Espero les guste amigo. Se aceptan sugerencias.
Muchas gracias!
- Las imágenes me pertenecen
- Traductor: Deelp traslator
- Edicion: Canva
Congratulations @rodriguezkike232! You have completed the following achievement on the Hive blockchain And have been rewarded with New badge(s)
Your next target is to reach 70 posts.
You can view your badges on your board and compare yourself to others in the Ranking
If you no longer want to receive notifications, reply to this comment with the word
STOPTo support your work, I also upvoted your post!
Check out our last posts: