Remodelando la caratula de un libro | Remodeling the cover of a book

Hola queridos amigos de Hive. Es in placer saludarlos y preguntarles una de las tareas que me gustan hacer y es recuperar cosas que a veces damos por perdidas por el pasar de los años.
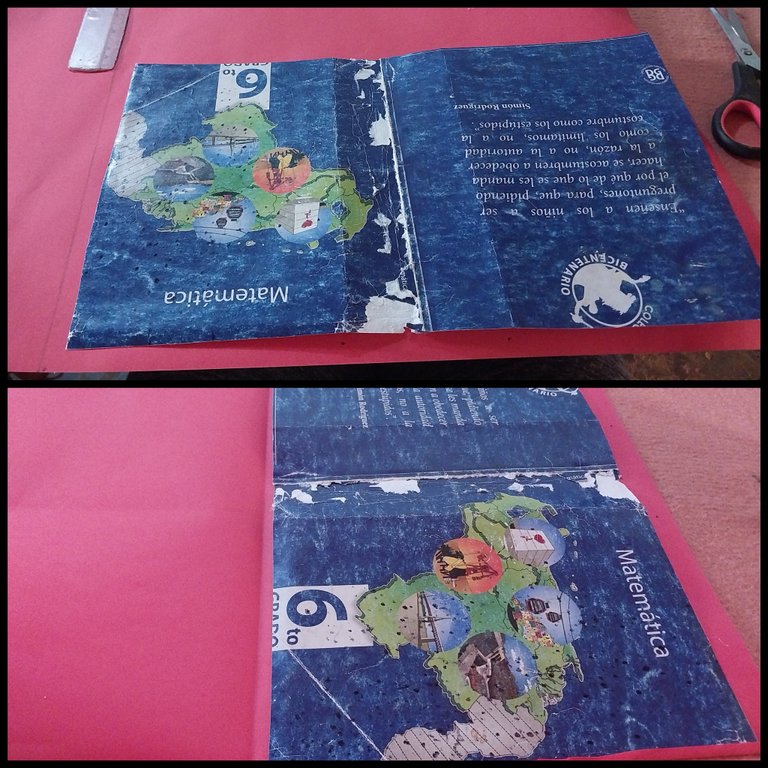
Esta vez le ha tocado a un antiguo libro de mi casa. Muchas veces tenemos libros que aunque ocupan un valioso lugar en nuestros corazones dejamos que el polvo y el pasar de los días terminen por estropear nuestros libros, poder recuperar los es un acto de amor para otras personas que en un futuro seguramente lo utilizarán.
Espero les guste.
Materiales:
- Cartulina
- Silicon
- tijera
- Regla
Paso a Paso
1
Se debe tomar la cartulina y sobre esta se va a colocar el libro, para trazar el margen que da la silueta del libro.y con un lápiz y la regla se traza el rectángulo, teniendo en cuenta wue no se debe marcar el atea exacta del li ro, para dejar un borde mayor que este.
2
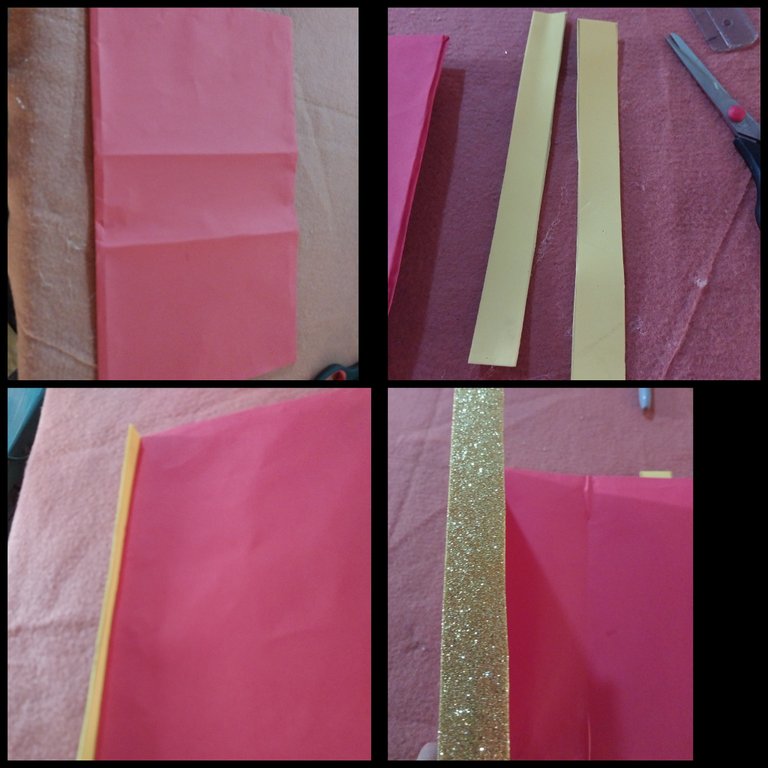
Una vez que este formado se debe tomar la caratula y doblar este en el área donde va el lomo del libro. Se toman dos cintas de foami, del mismo tamaño de la altura del libro.
3

Luego estos bordes se van a pegar en ambos lados de la caratula del libro.
Luego se toma o se aplica silicon en el lomo del libro u se pro ese a pegar
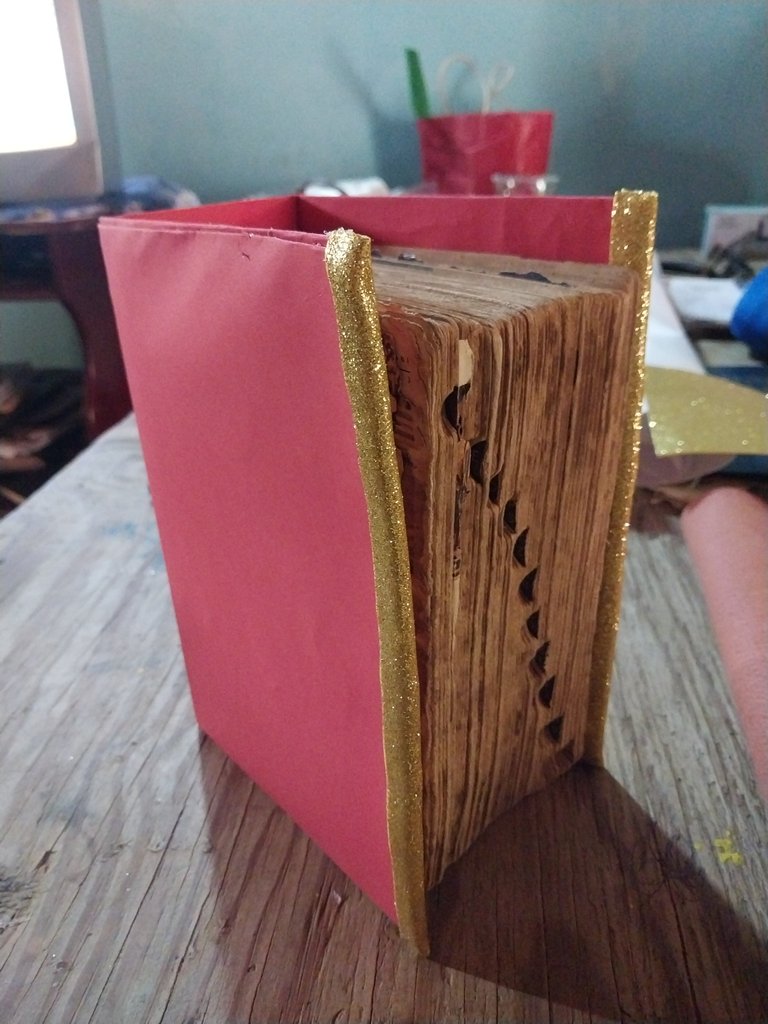
De esta manera quedaría forrado nuestro libro.
Espero que les guste
- Las imágenes me pertenecen
- Traductor: Deepl Traslator
Hello dear friends of Hive. It is my pleasure to greet you and ask you one of the tasks that I like to do and that is to recover things that sometimes we take for lost by the passing of the years.
This time it was the turn of an old book in my house. Many times we have books that although they occupy a valuable place in our hearts we let the dust and the passing of the days end up spoiling our books, to be able to recover them is an act of love for other people that in the future will surely use them.
I hope you like it.
Materials:
- Cardboard
- silicon
- scissors
- Ruler
**Step by Step
1
Take the cardboard and place the book on it, to trace the margin that gives the silhouette of the book. With a pencil and the ruler, trace the rectangle, taking into account that you should not mark the exact edge of the book, to leave a larger border than this one.
2
Once it is formed, take the cover and fold it in the area where the spine of the book goes. Take two strips of foami, the same size as the height of the book.
3
![1000093242.jpg](
Then these borders are going to be glued on both sides of the book cover.
Then you take or apply silicone to the spine of the book and glue it to the cover.
This way our book will be covered.
I hope you like it
- Images belong to me
- Translator: Deepl Traslator
Amiga que gran idea de cómo renovar carátulas éxitos para ti 🤠 saludos.
Thank you friend.
Espero tengas lindo día amiga
Bendiciones amigo que buena idea 😊
Amen. Gracias
Saludos
Que lindo quedó como nuevo 😘❤️
Muchas gracias!
Un buen cambio y el color lindo 😊
Muchas gracias amiga
This is a great concept and you did a great job remodeling the cover of this torn book.
Hello friend. Thank you
Very creative! this post is making me want to give book binding a try!
Thank you