>Centro de mesa con orquídeas de foami/Centerpiece with foam orchids
Buenos dias ! tengan tod@s amig@s de hive diy..... hoy les traigo una manualidad que me tenia inquieta desde hace tiempo...
Les cuento tengo en mi casa una planta de orquídeas que me regalaron, emocionada le compre un matero y la trasplante, estaba hermosa y vino mi perrito y se subió sobre ella y me la daño., ahora estoy tratando de salvarla.
queria unas orquídeas naturales, pero en vista de que todavía no va a poder ser , me imagine unas en foami sus colores son muy bonitos,.. y puse manos a la obra.
Good morning! Have all your friends from hive diy..... today I bring you a craft that had me worried for a long time...
I tell you, I have an orchid plant in my house that they gave me. I excitedly bought it a pot and transplanted it. It was beautiful and my dog came and climbed on it and damaged it. Now I'm trying to save it.
I wanted some natural orchids, but since that won't be possible yet, I imagined some foam ones, their colors are very pretty,... and I got to work.
MATERIALES
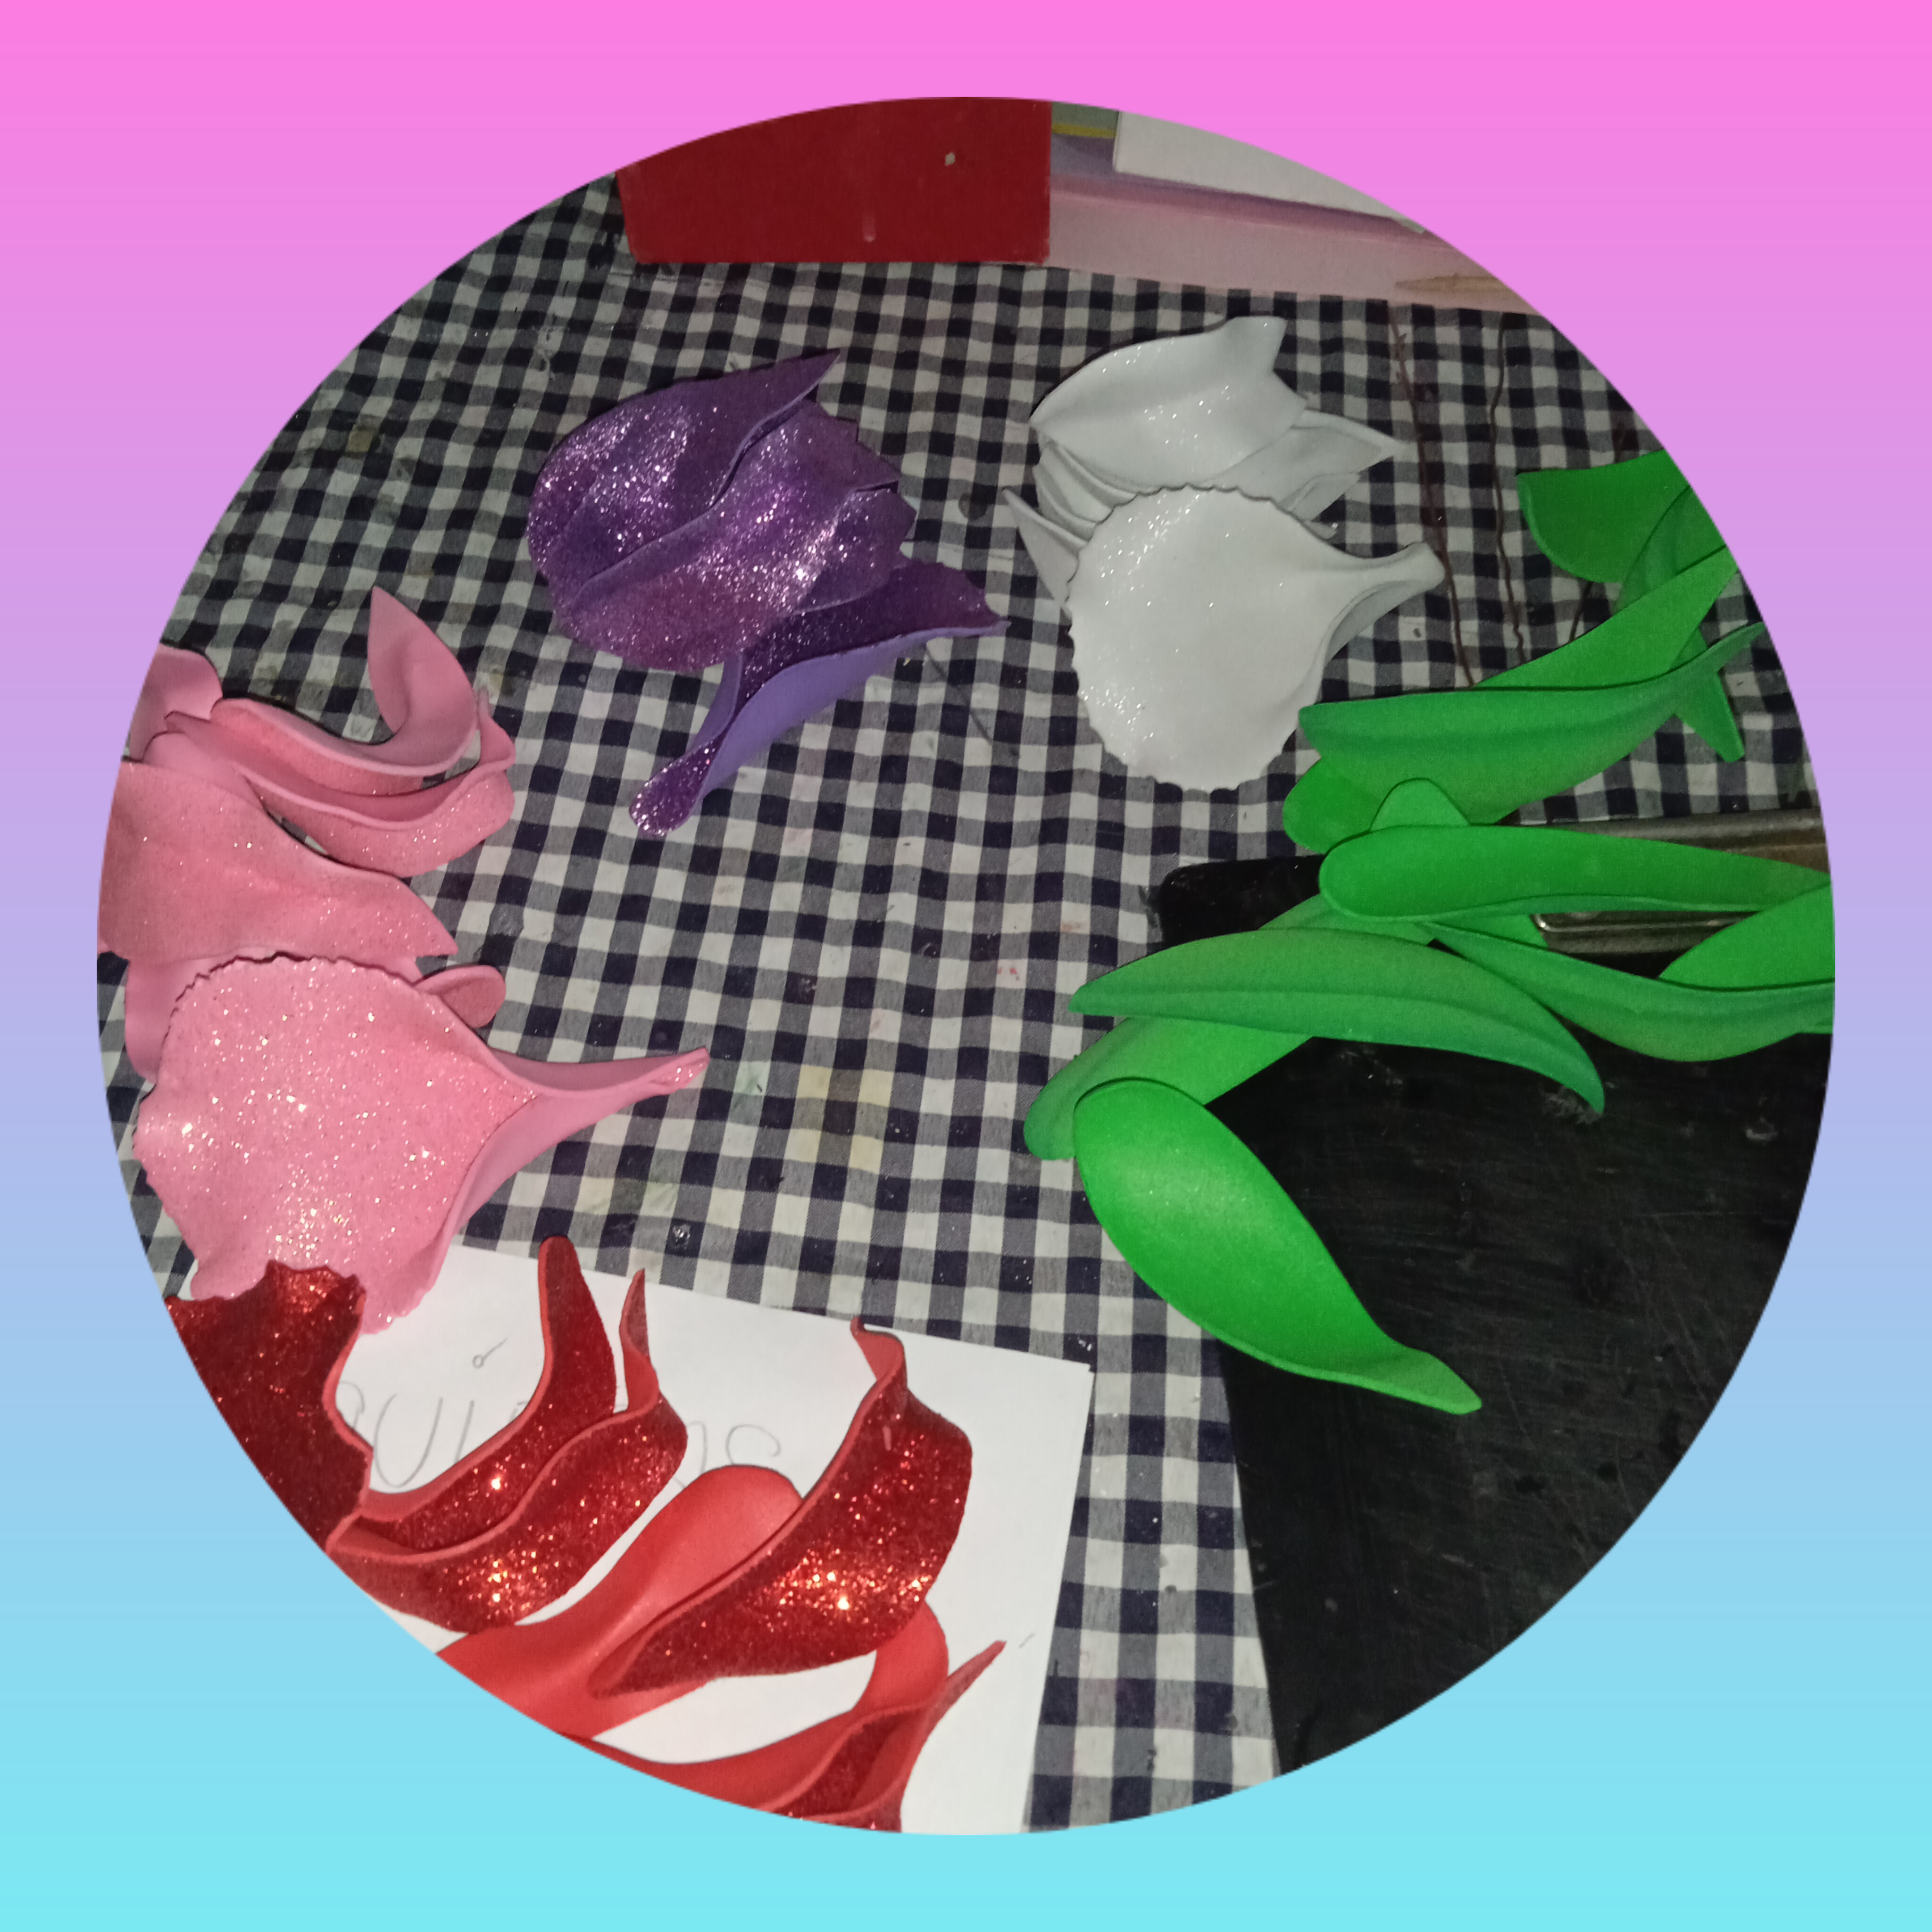
Foami escarchado rosado, rojo y blanco.
Foami verde normal.
Moldes de cartulina modelo orquídeas.
Conchas de coco, hojas y cascaras de alguna semilla grande,
Caja hecha de conchas de árbol(roble),musgo, y fomi verde
Tijeritas de formas, tijeras, plancha para ropa, silicon en barra
Hiedras de tela(opcional)
MATERIALS
Pink, red and white frosty foam.
Normal green foam.
Orchid model cardboard molds.
Coconut shells, leaves and shells of some large seeds,
Box made of tree shells (oak), moss, and green fomi
Shape scissors, scissors, clothes iron, silicone stick.
.Fabric ivies (optional).
.jpg)
PARTE 1.
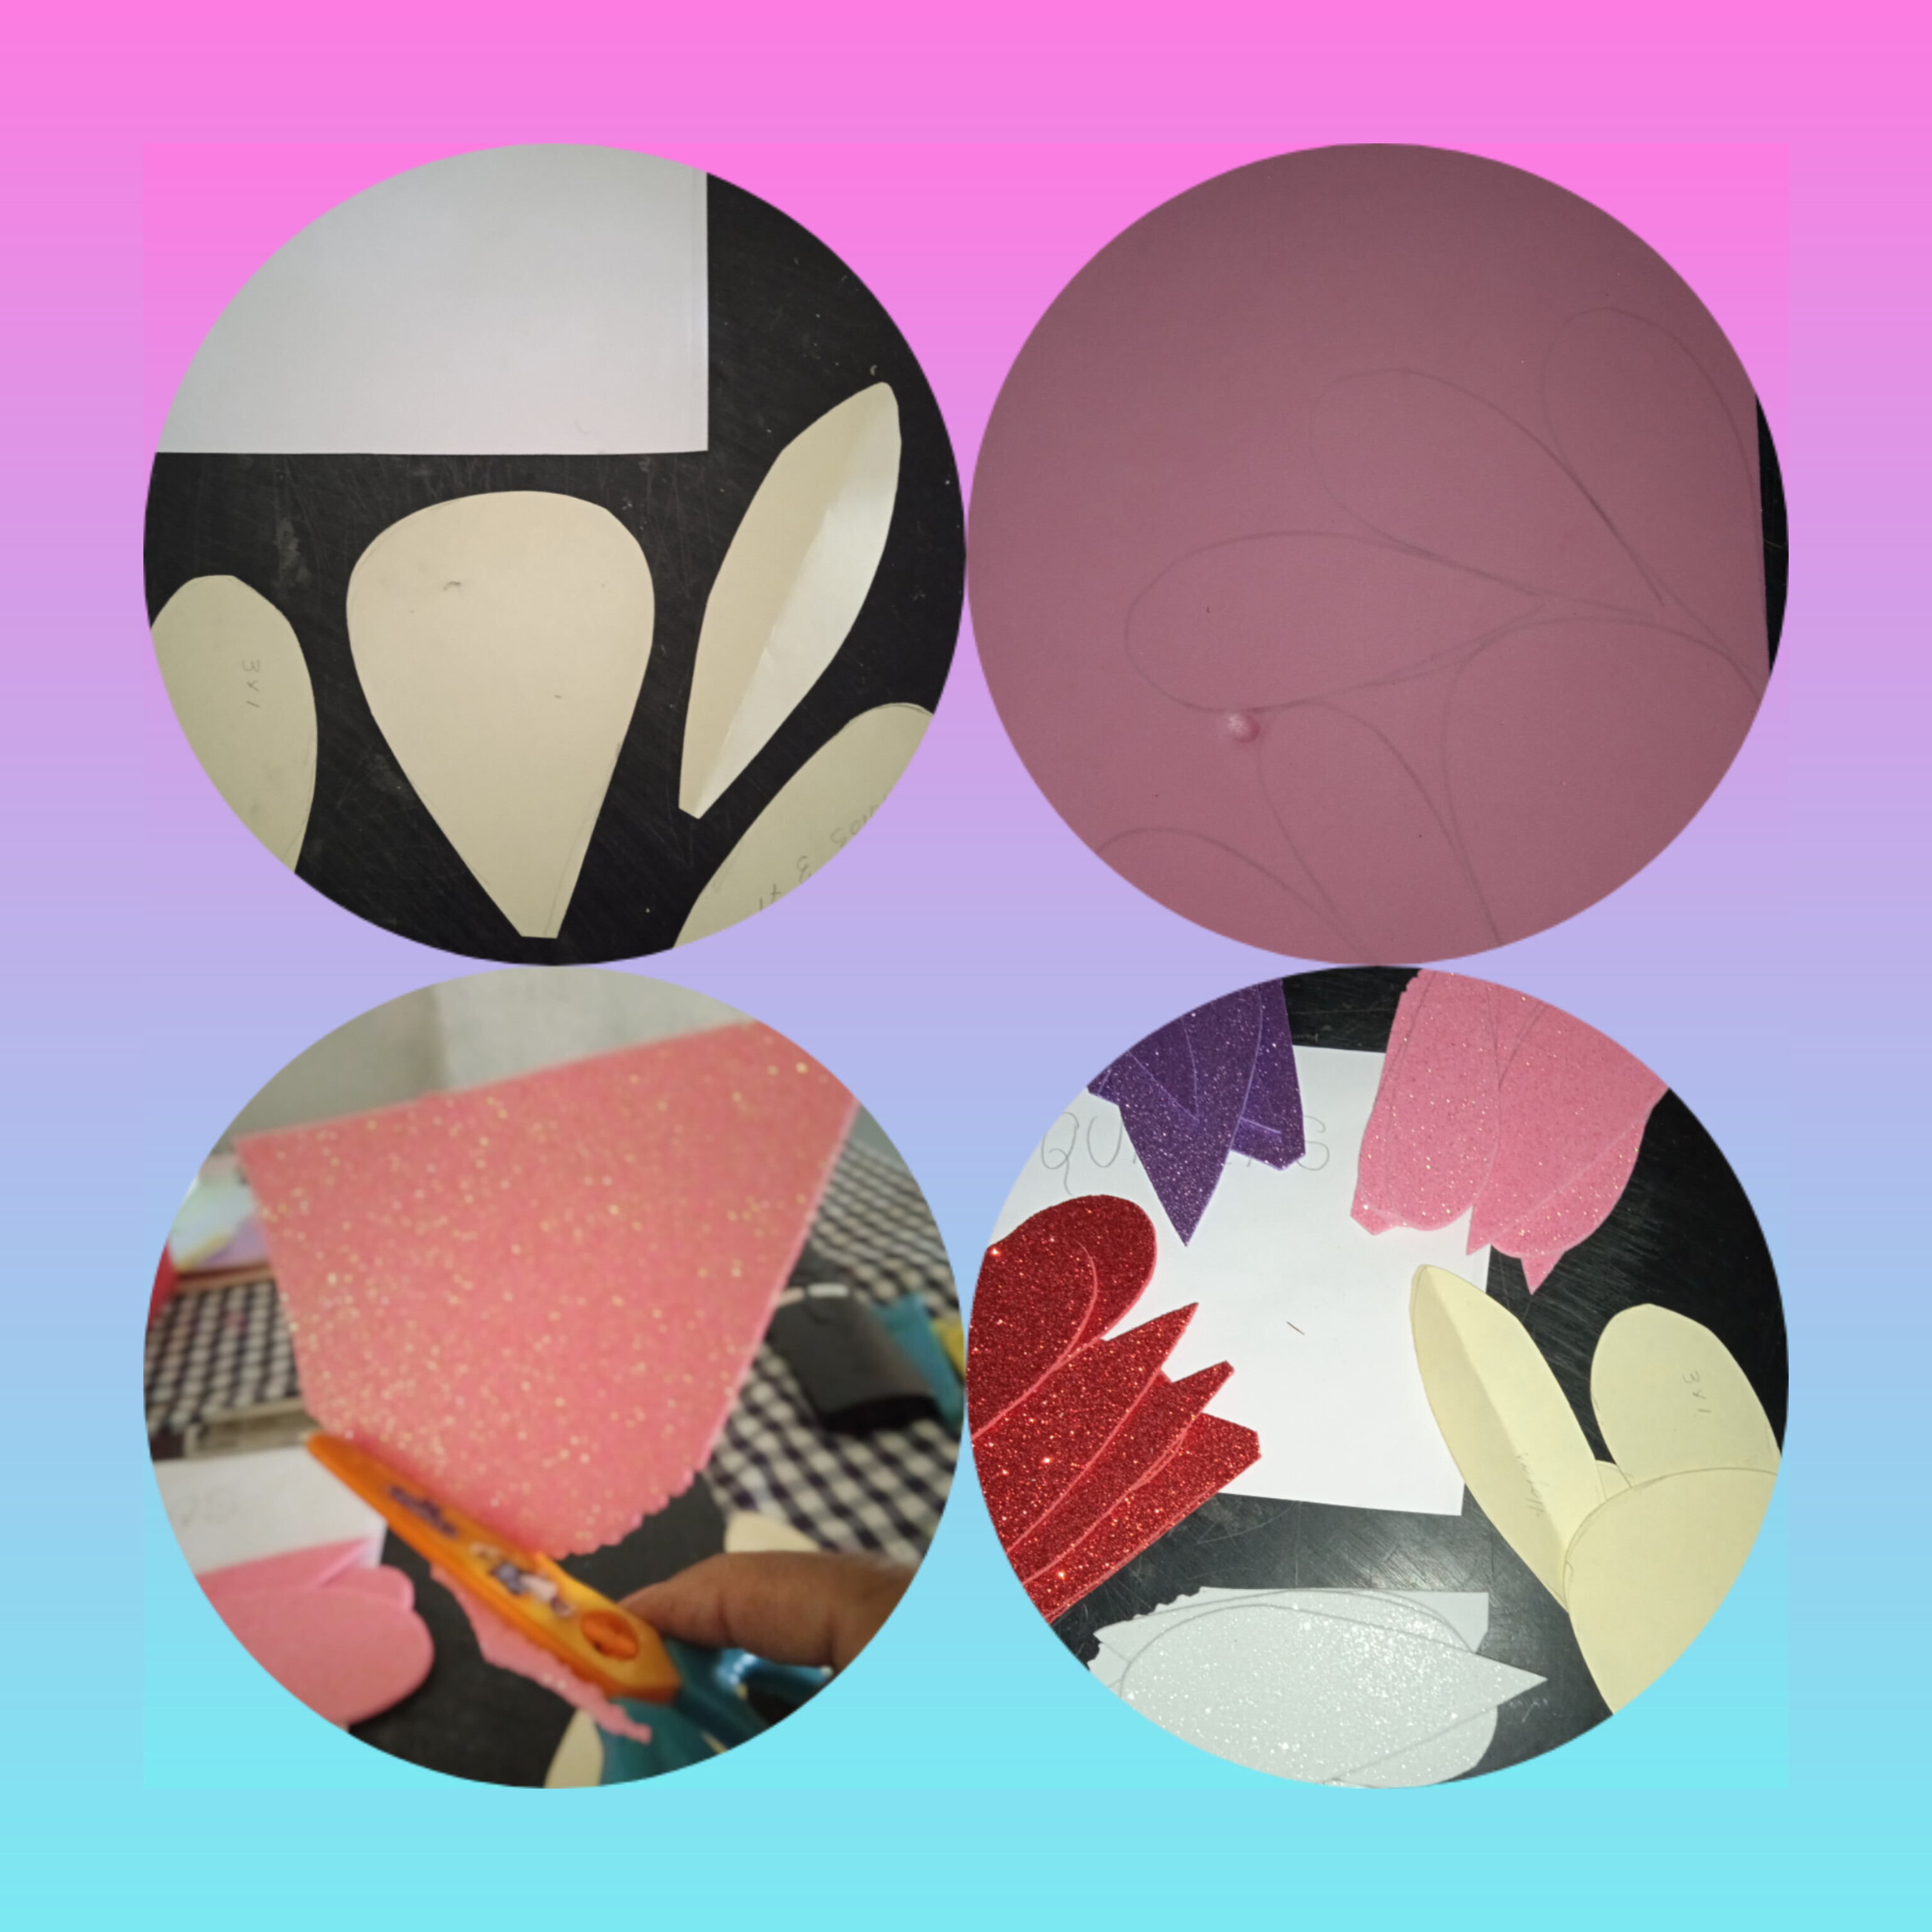
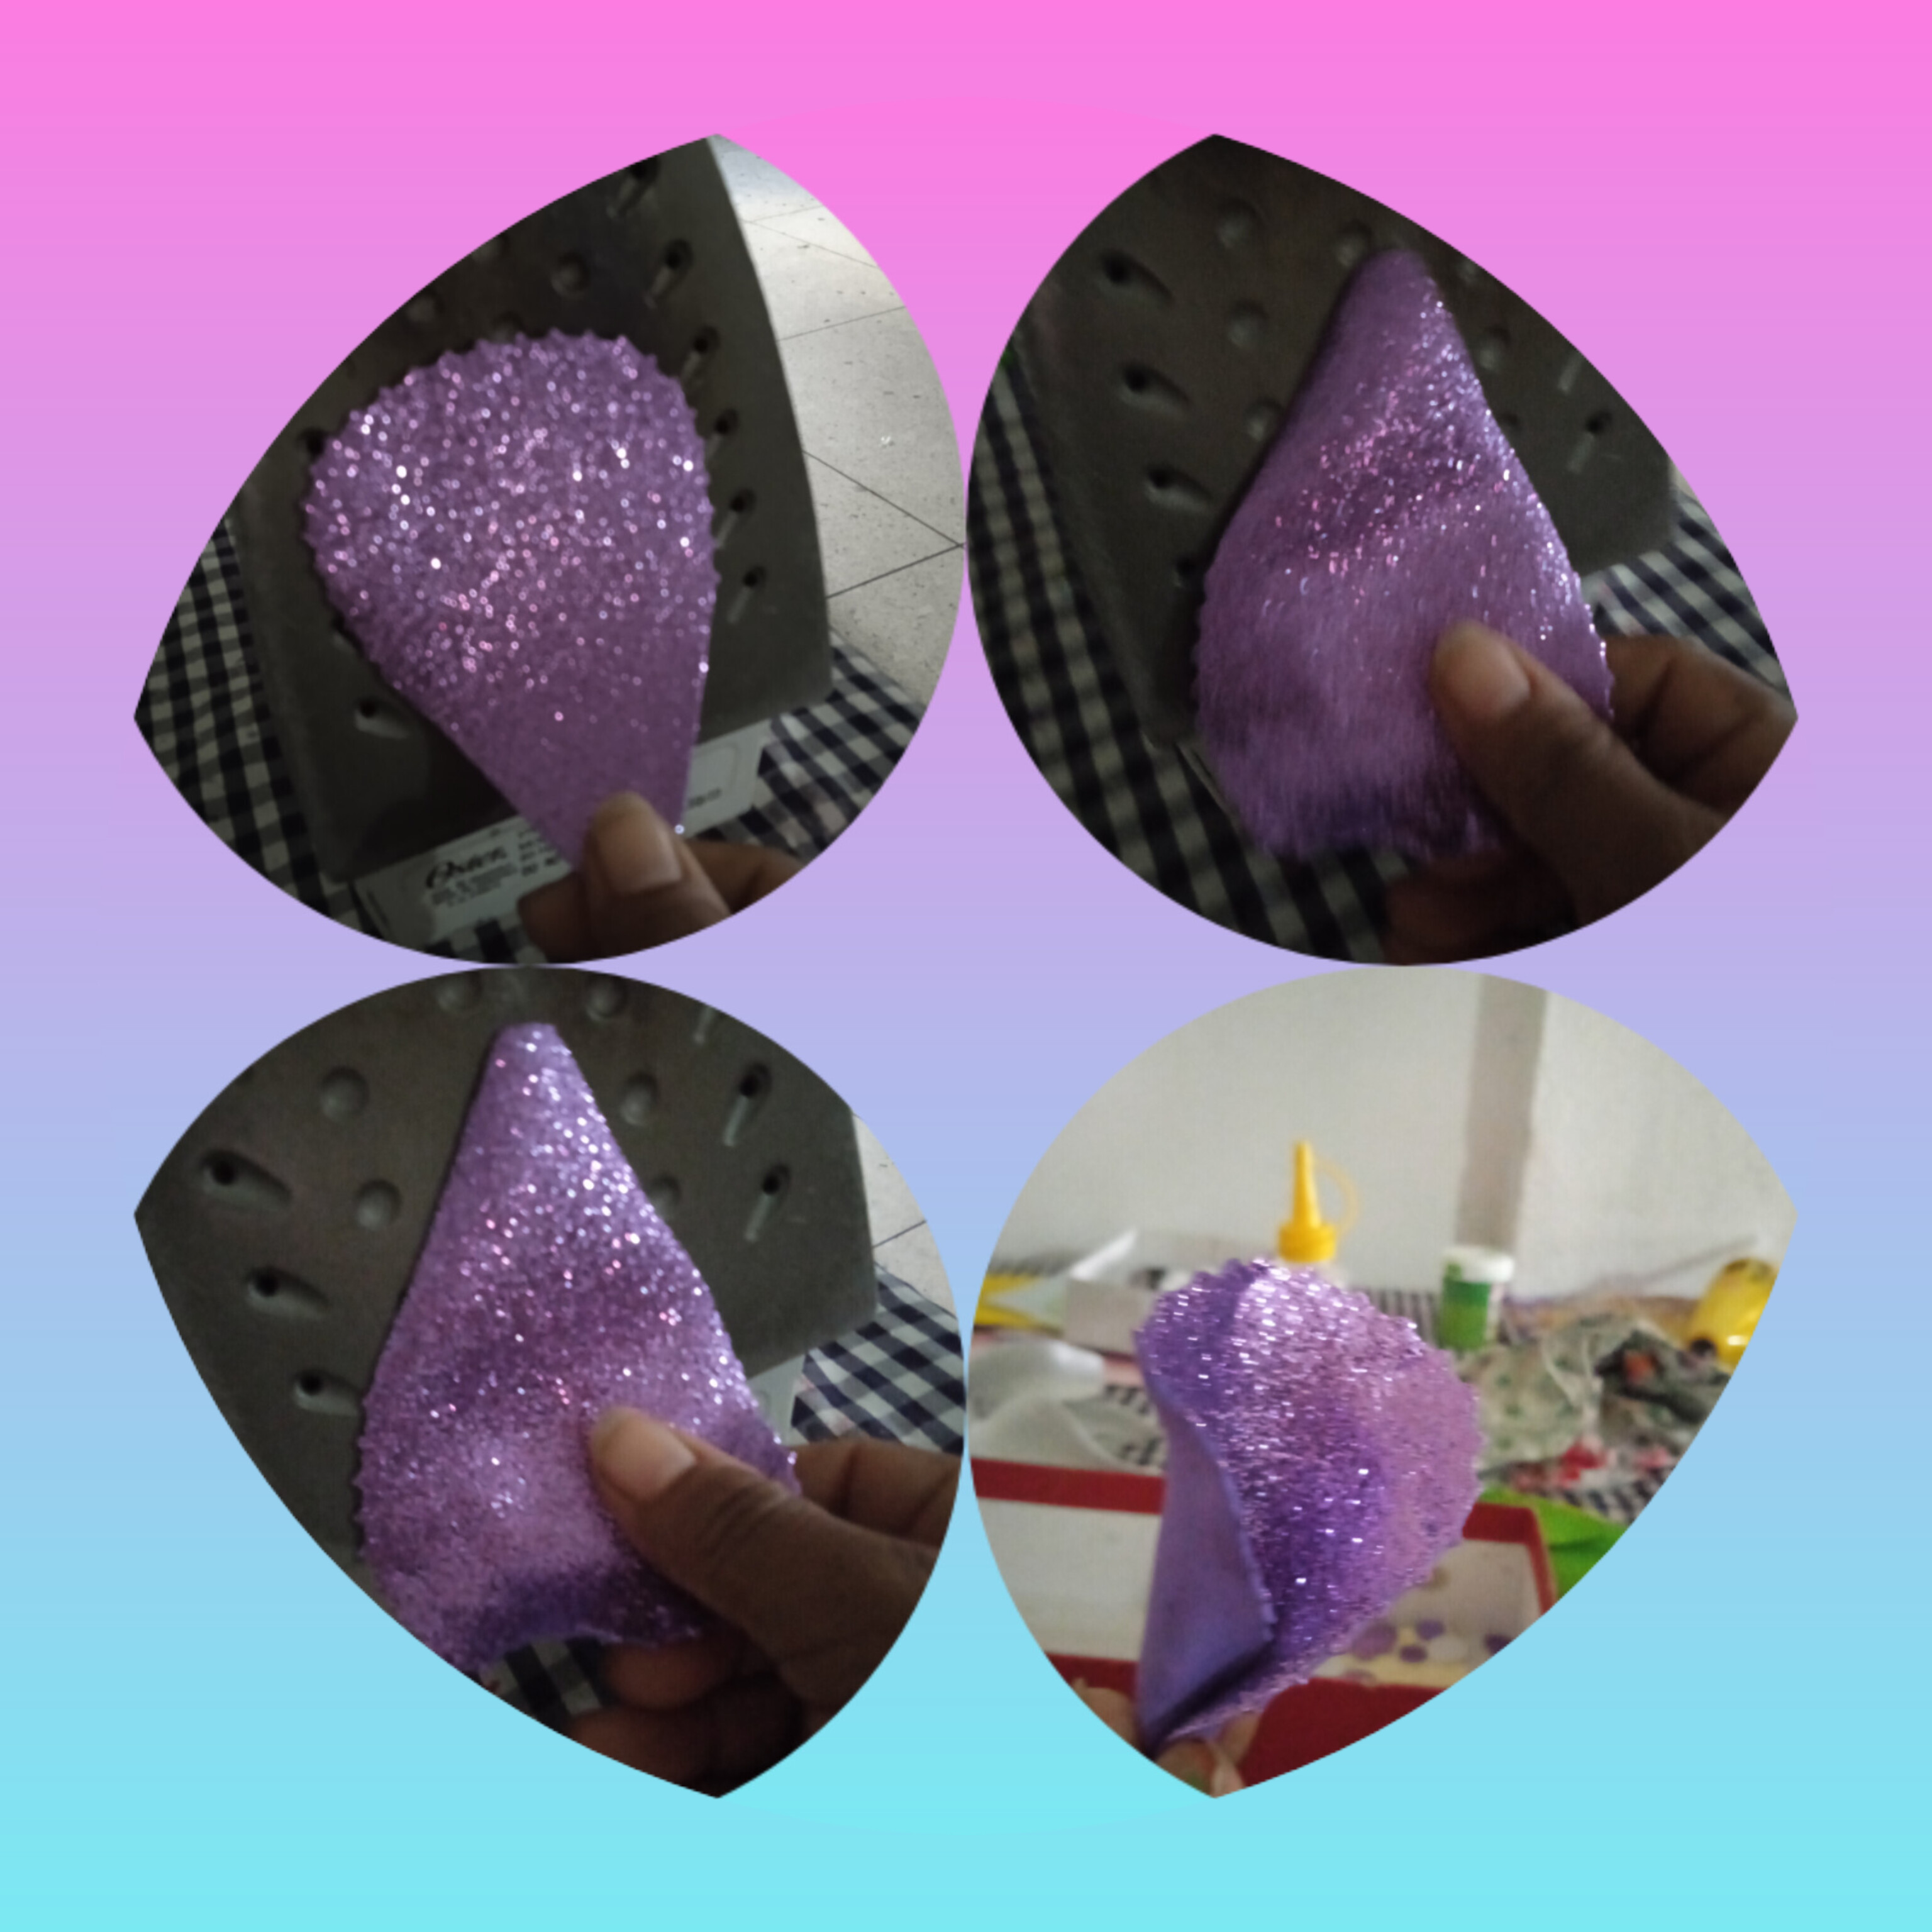
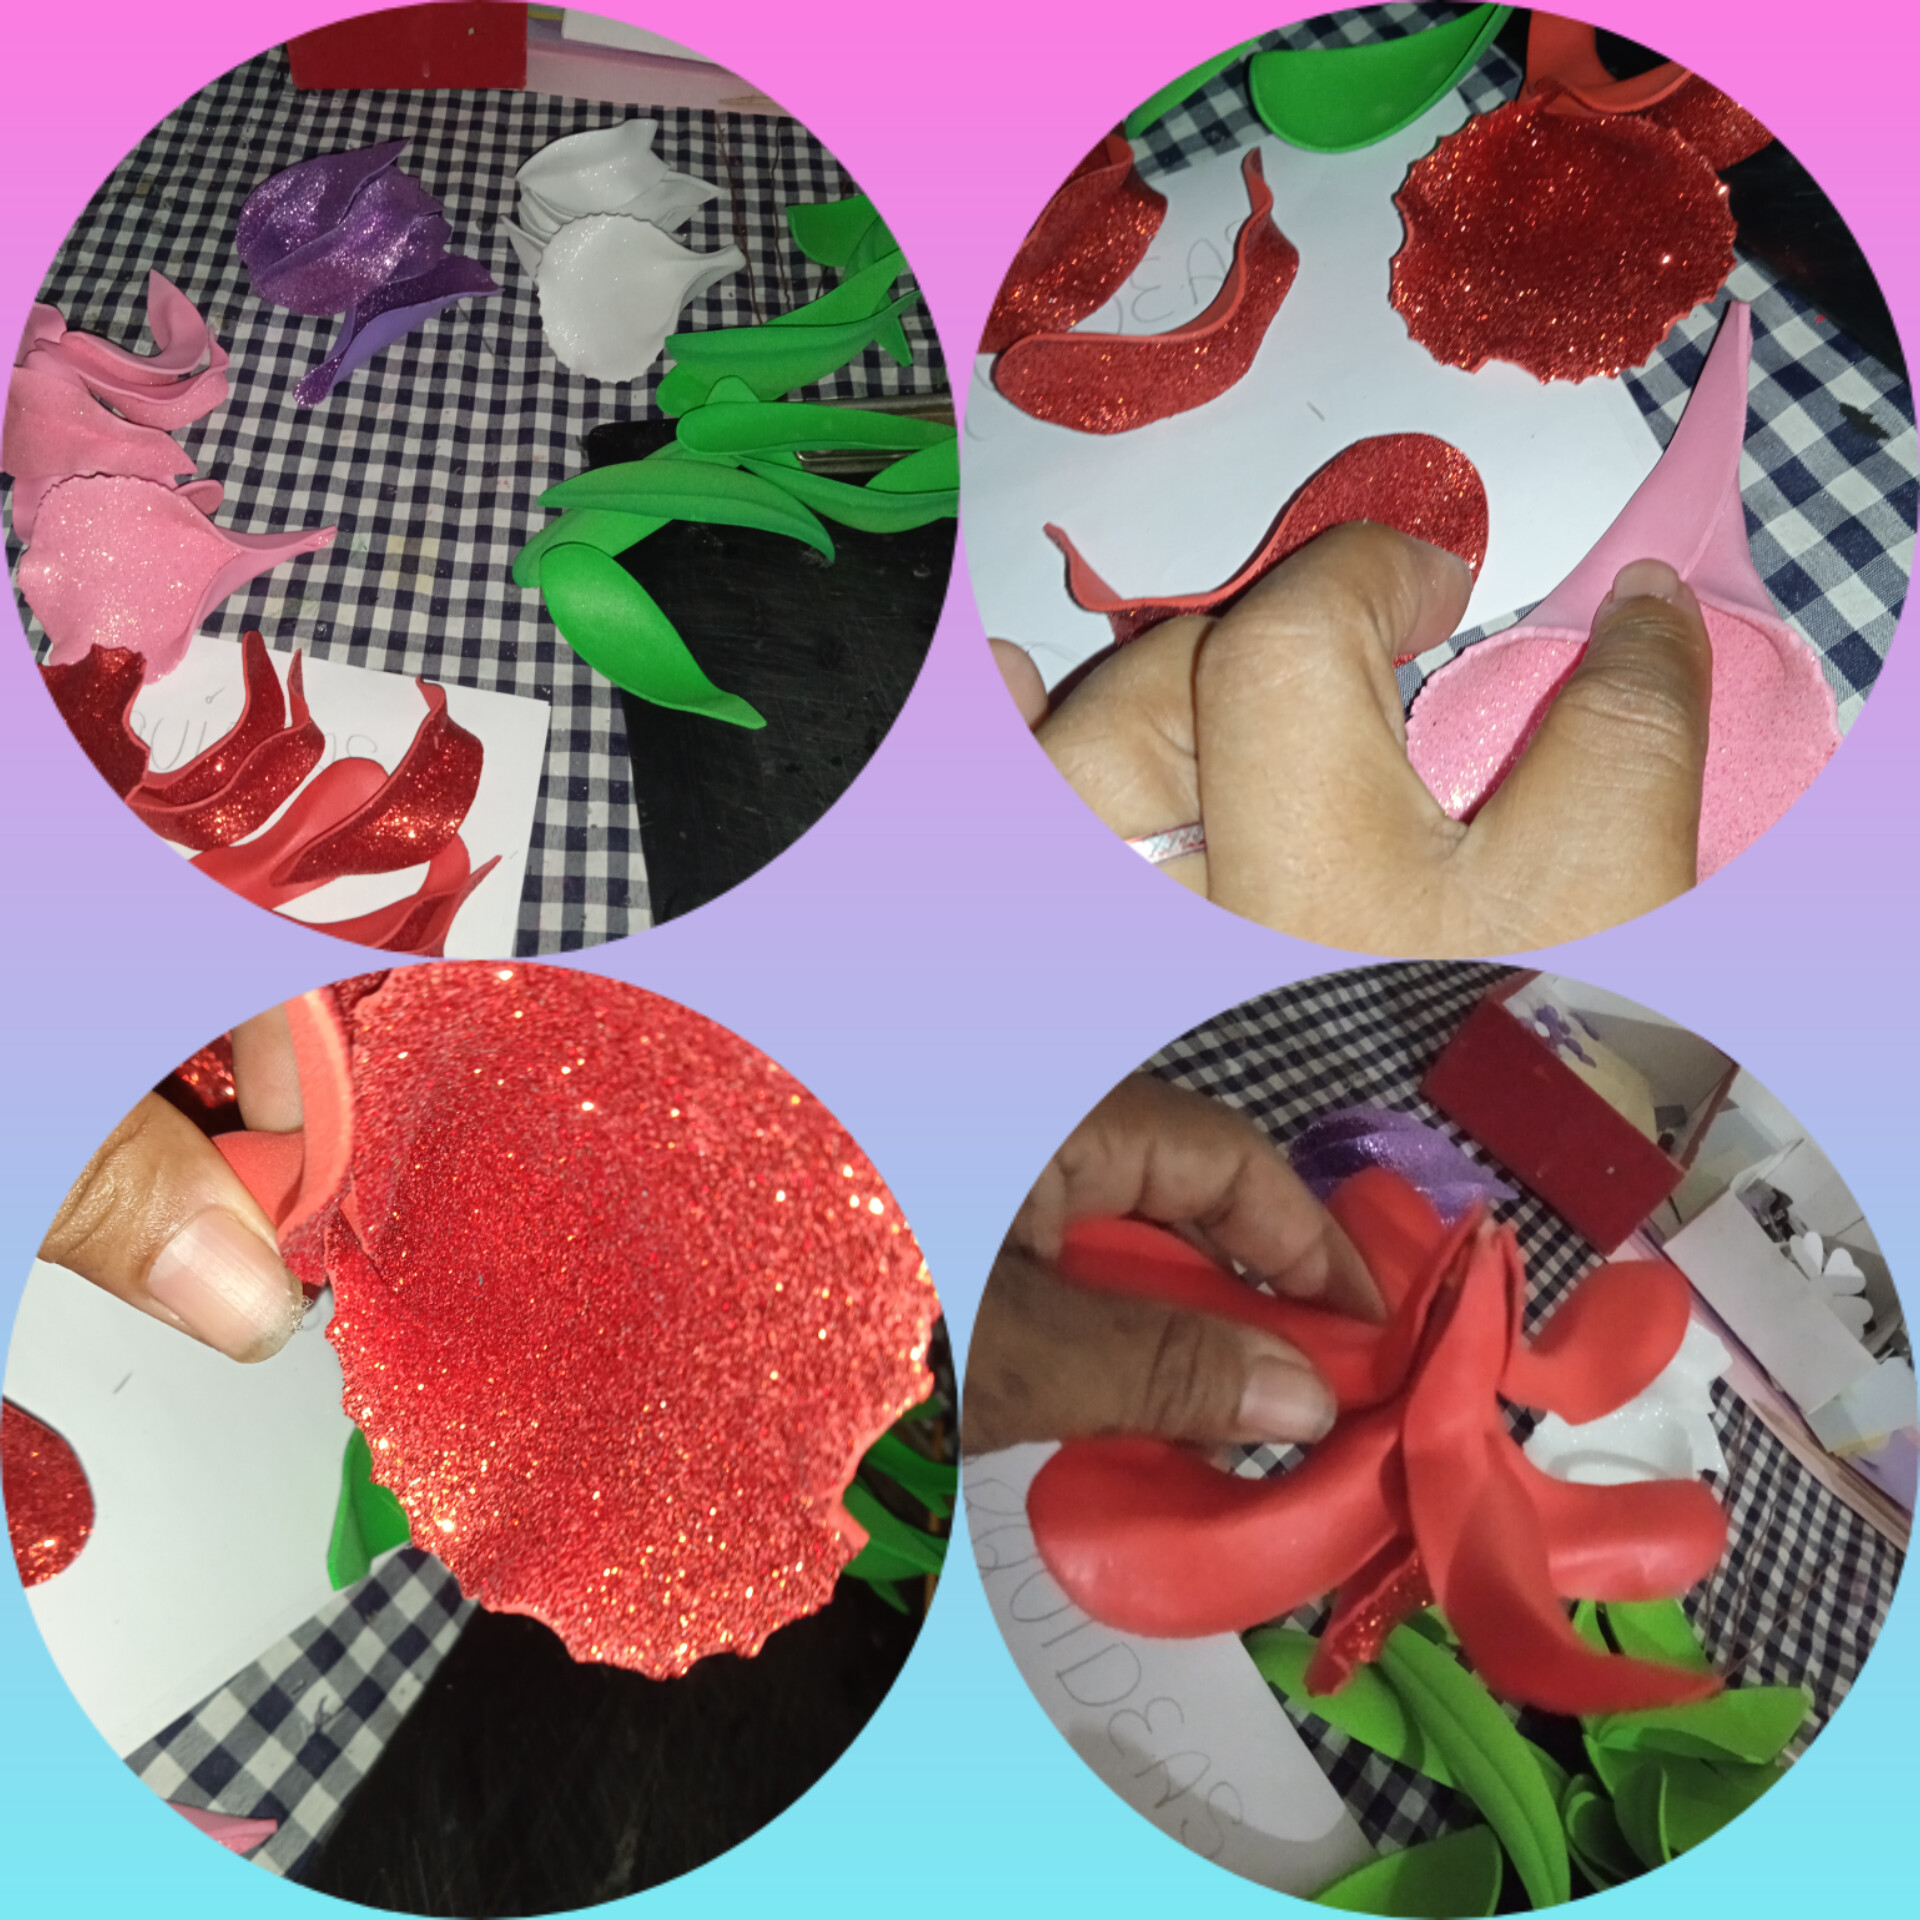
Tomamos los moldes y los marcamos por el lado anterior del foami escarchado, cortamos con la tijera lisa y luego el borde del pétalo superior de la flor con la tijeritas de formas .
PART 1.
We take the molds and mark them on the front side of the frosted foam, we cut with the smooth scissors and then the edge of the upper petal of the flower with the shape scissors.
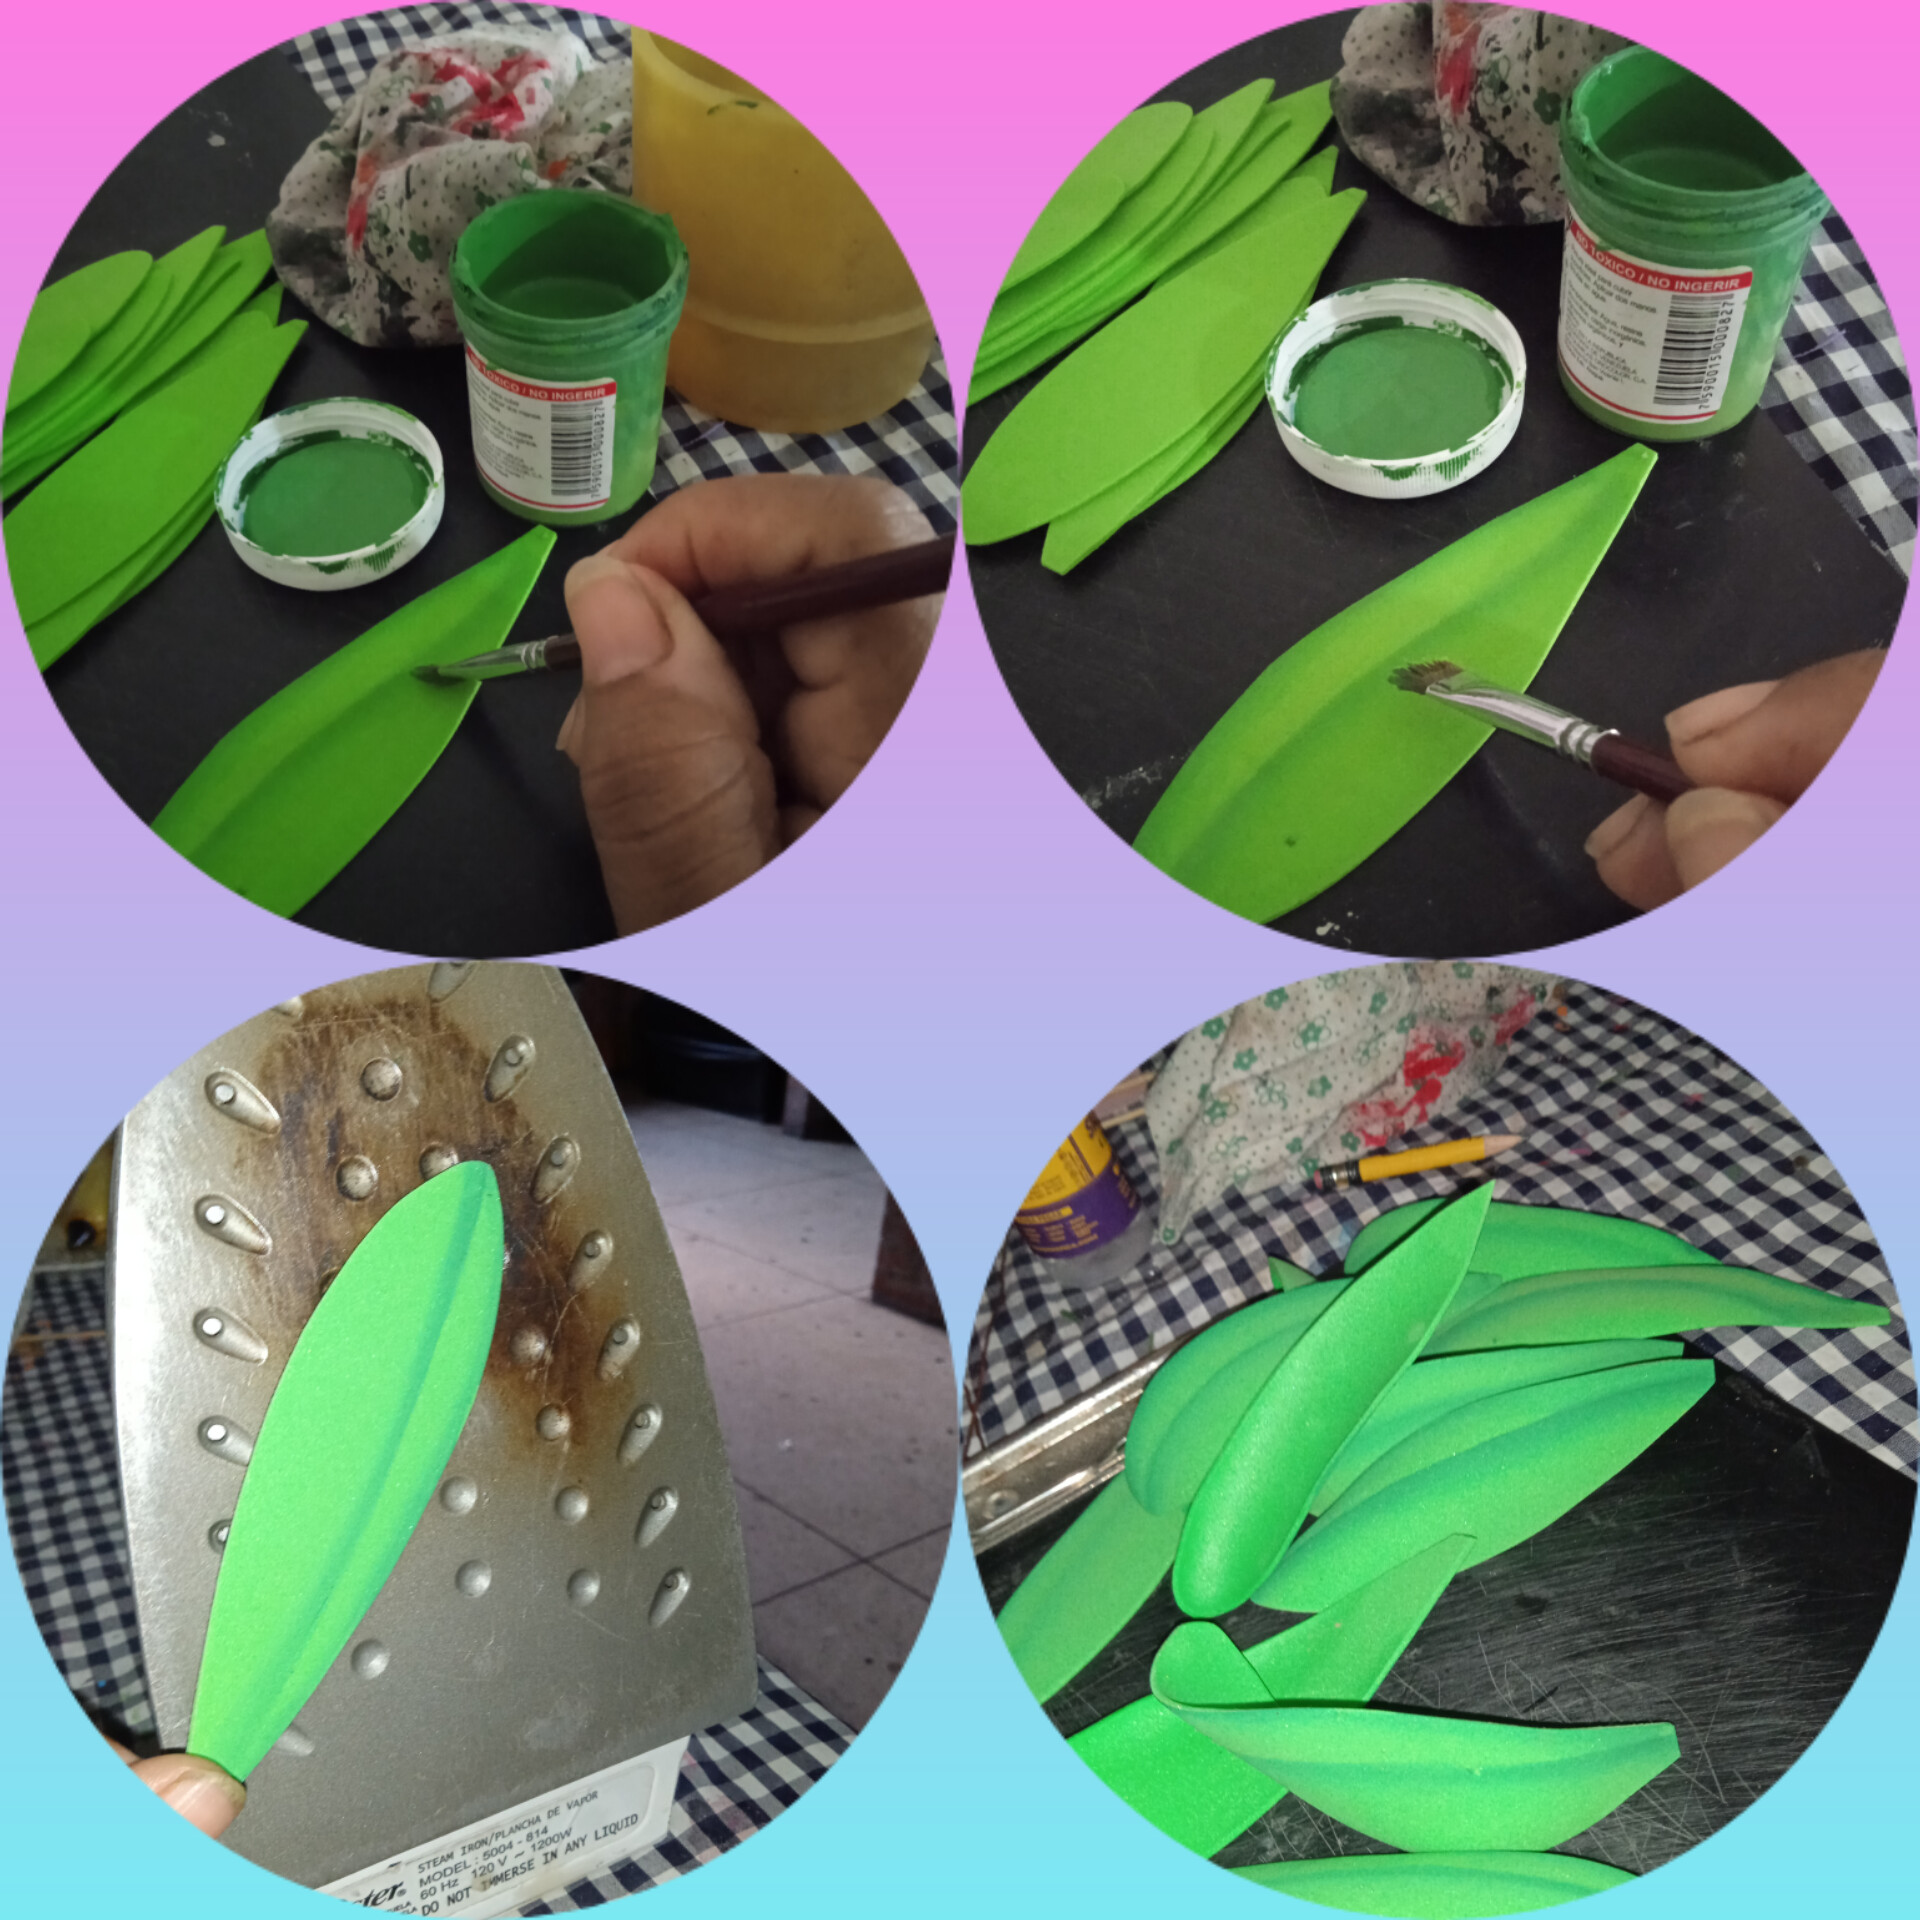
Como las hojitas son de otro foami después de que las corte las pinte y le hice borde con pintura al frío, y las coloque en la plancha a temperatura median para darle formas un poco curvas.
Since the leaves are made of other foam, after I cut them I painted them and made an edge with cold paint, and placed them on the iron at medium temperature to give them slightly curved shapes.
Continuamos con los pétalos de las flores hacemos el mismo procedimiento , un detalle es que al pétalo del centro le hacemos un modelo envolvente para dalle forma.
Ahora bien, organizamos todas las flores por colores y numero de pétalos, cada orquídea lleva seis pétalos pequeños, uno grande y tres hojas.
Now, we organize all the flowers by color and number of petals, each orchid has six small petals, one large petal and three leaves.
Luego viene la armada de las flores, primero la central porque de ahí es que vamos a pegar los otros pétalos , los medianos en segundo, los delgados y las hojas de ultimo,
Then comes the army of flowers, first the central one because that is where we are going to glue the other petals, the medium ones second, the thin ones and the leaves last,
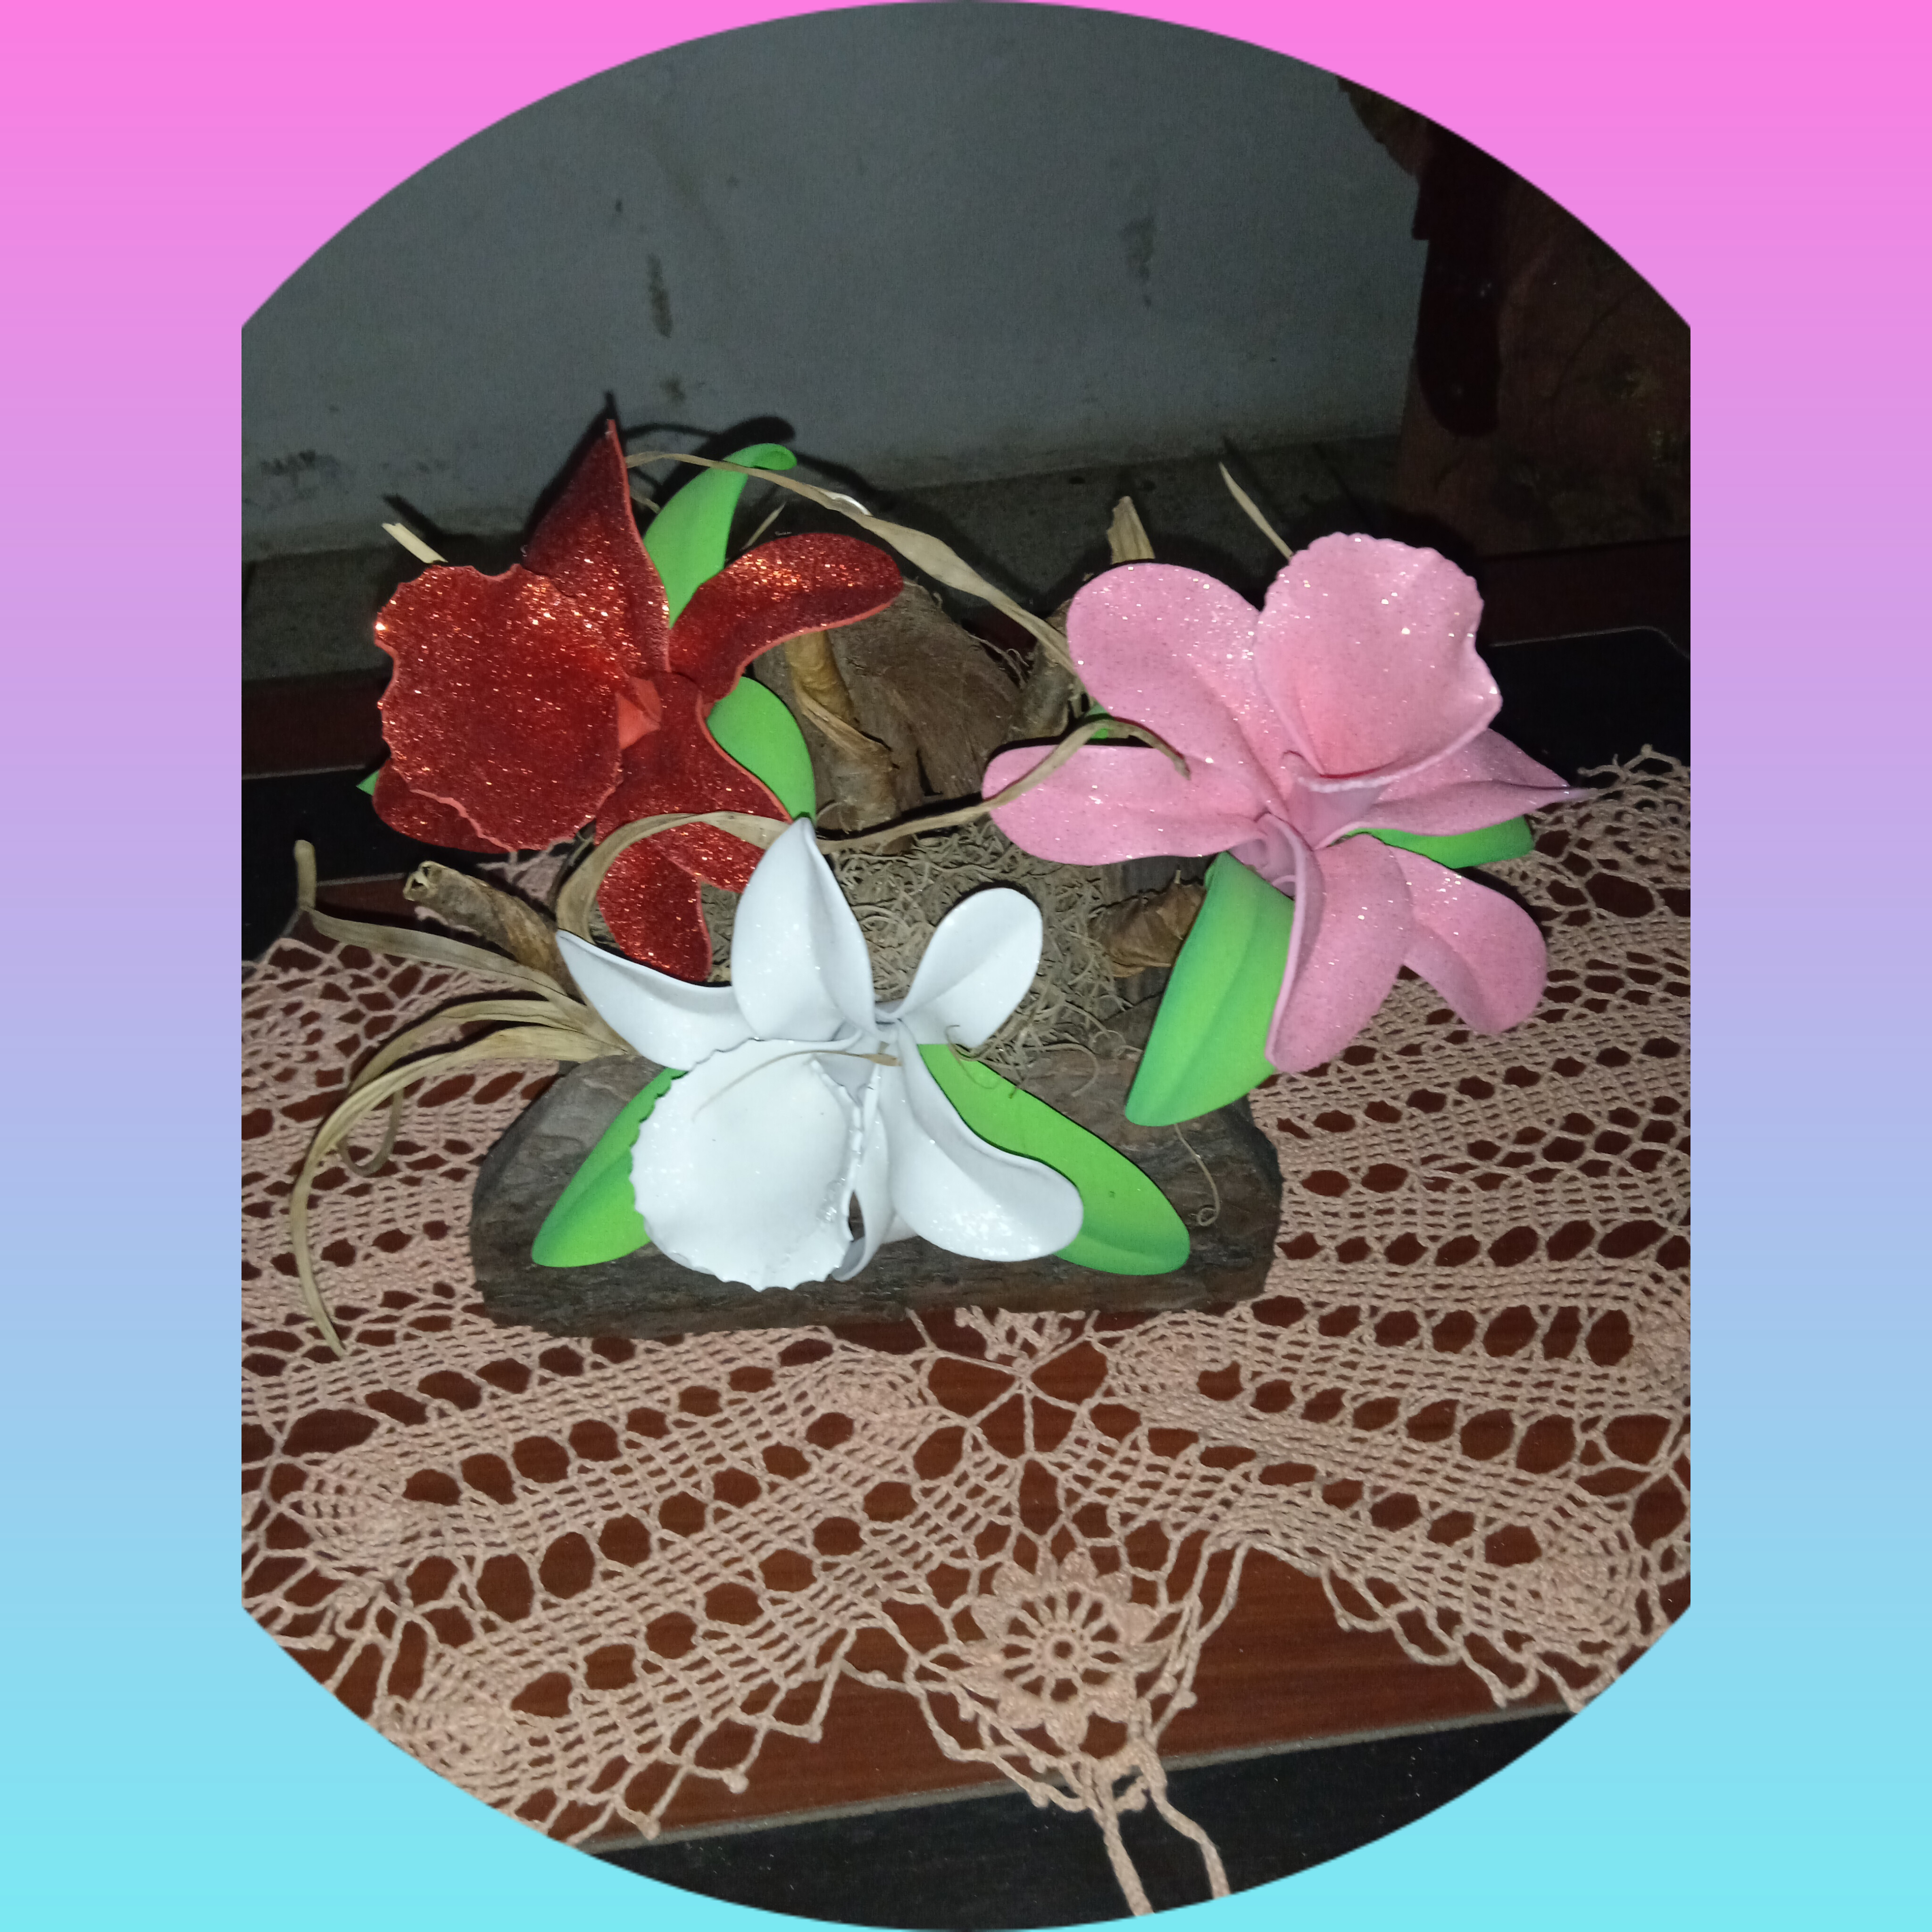
Ya tenemos las orquídeas listas , tengo una cajita hecha con trozos de madera de roble, coloque el fomi en el centro y comencé a colocar todo el material seco que conseguí, todos aleatoriamente.
We now have the orchids ready, I have a small box made with pieces of oak wood, I placed the fomi in the center and began to place all the dry material I got, all randomly.
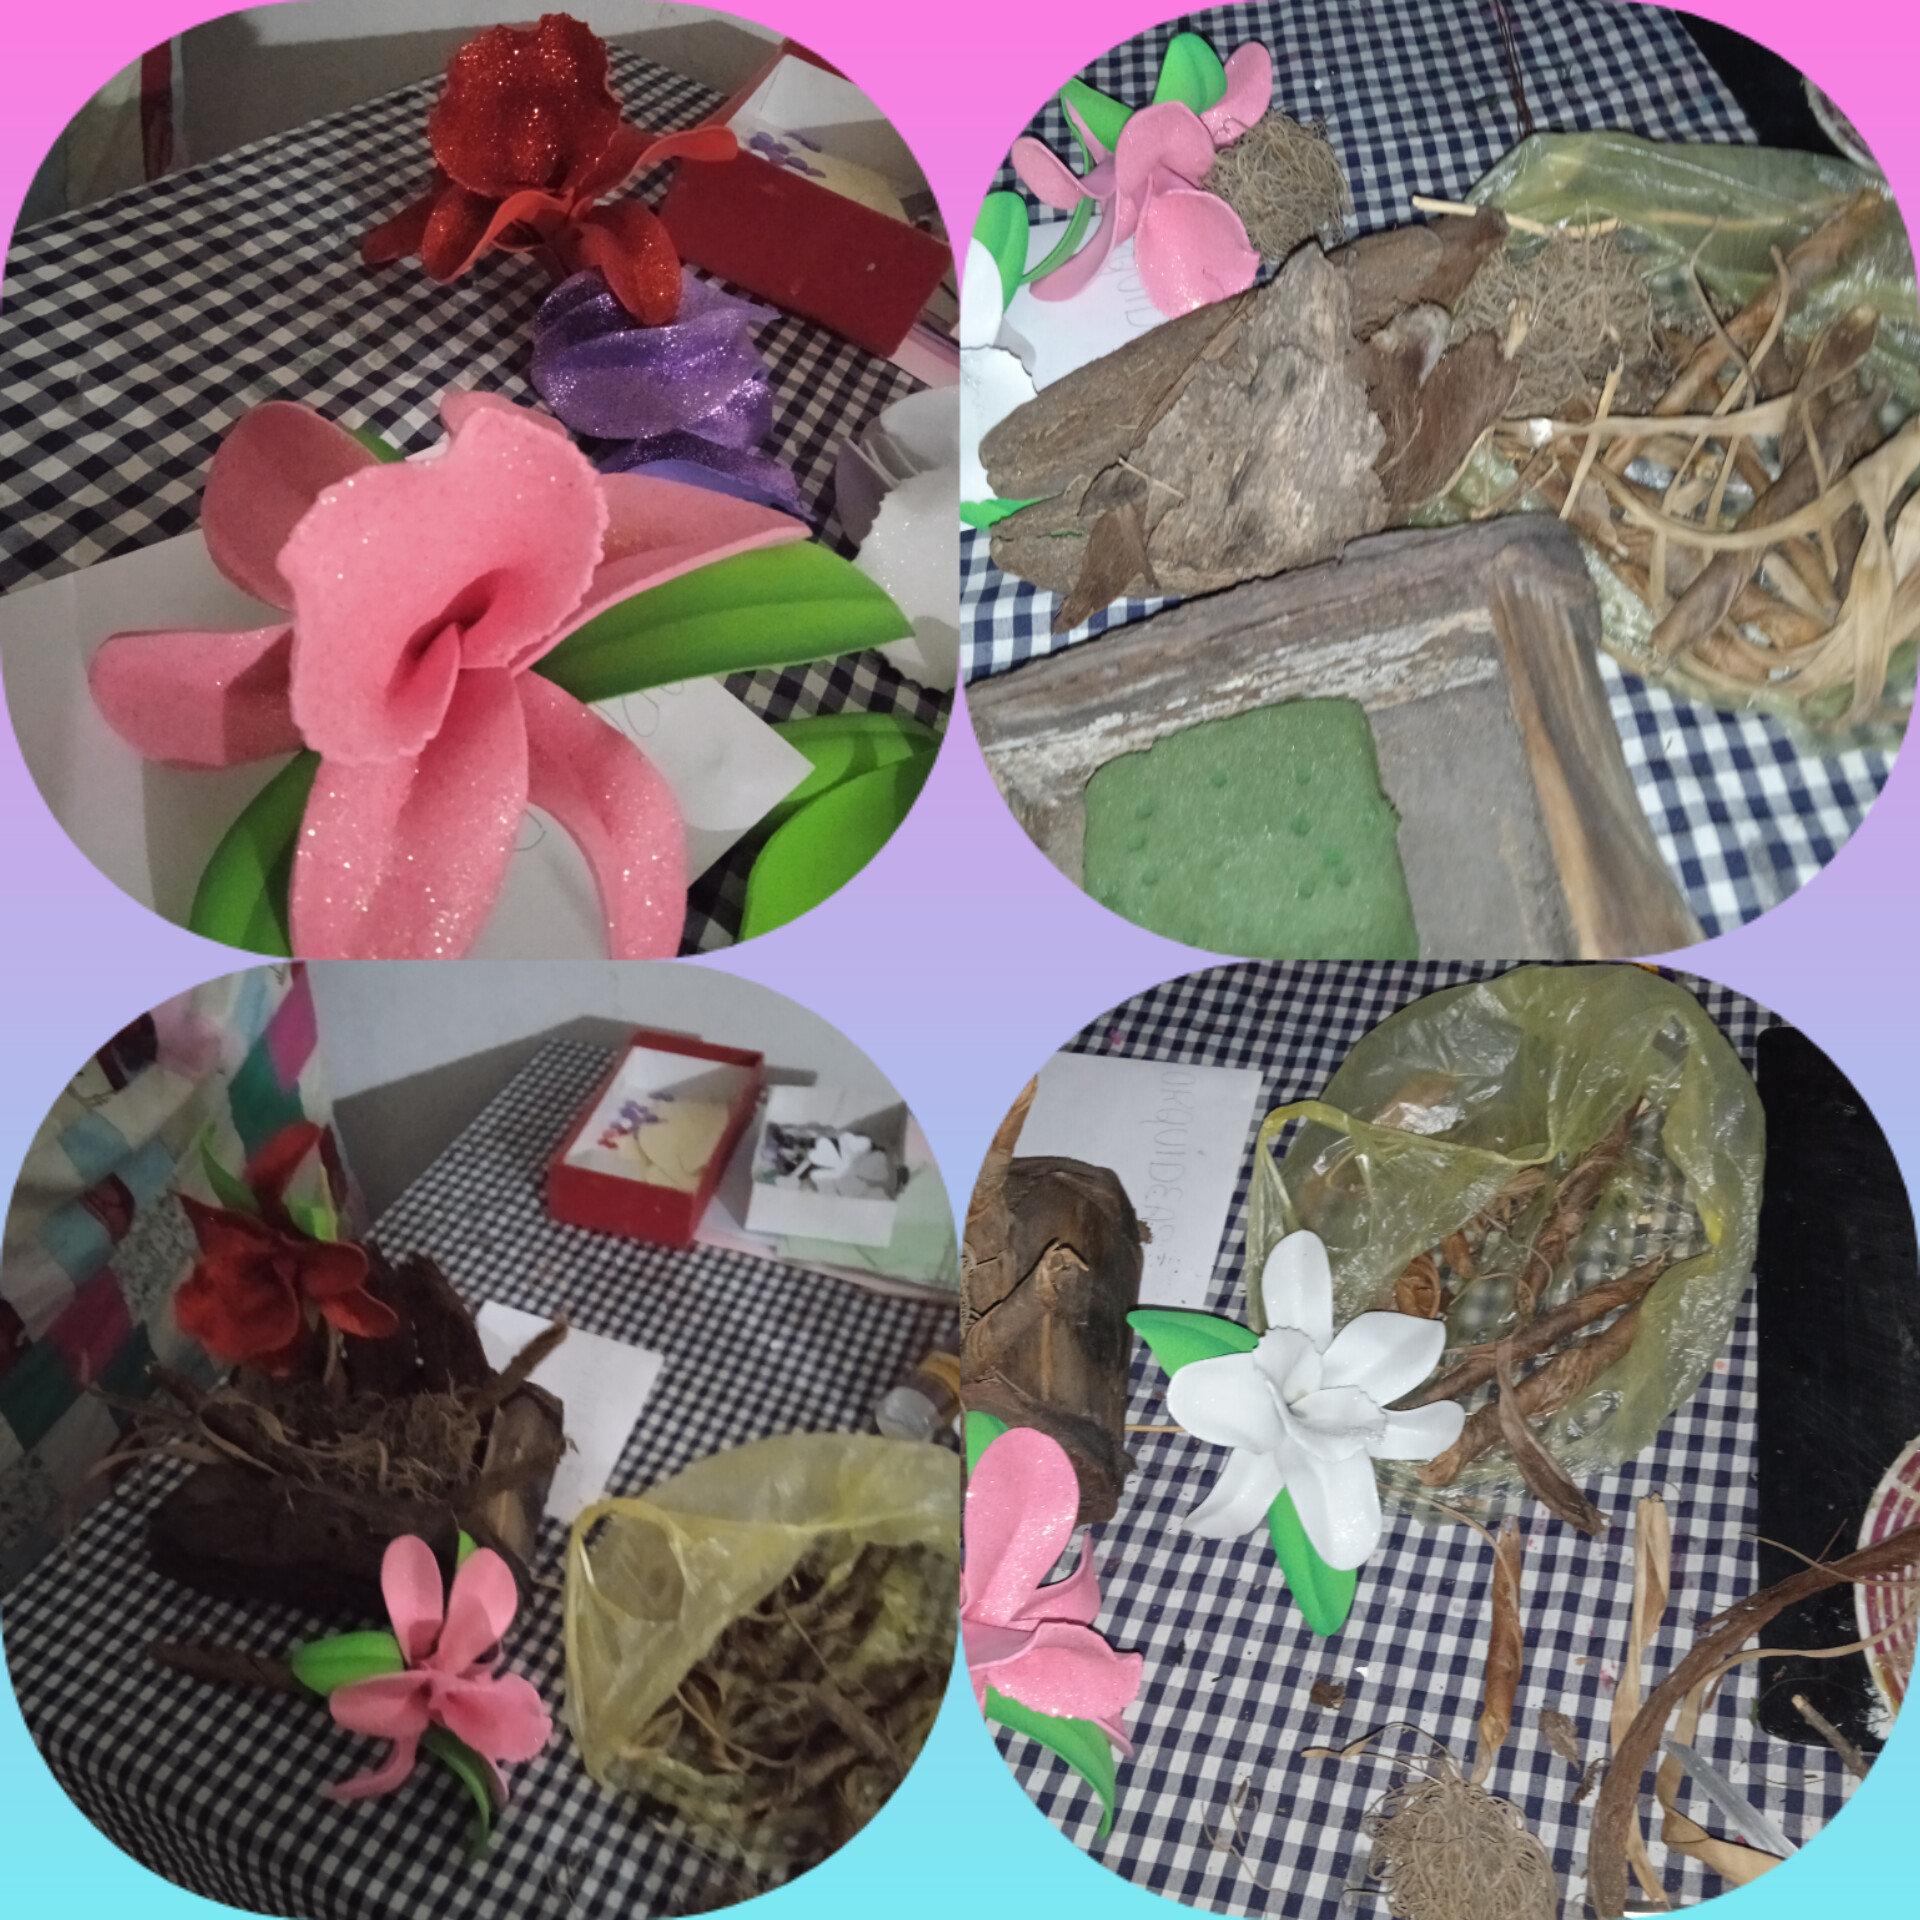
Después colocas las flores, como mejor se vean puedes tomar varios ángulos , para ver como se ven mejor, coloca el musgo en el inicio de las flores para darles follaje,..
Y así quedo este pequeño trabajo , a mi en lo particular quede muy satisfecha, me encanto el resultado, no tendré orquídeas naturales pero si unas muy brillantes!
And that's how this little job turned out, I was very satisfied, I loved the result, I won't have natural orchids but I will have very bright ones!
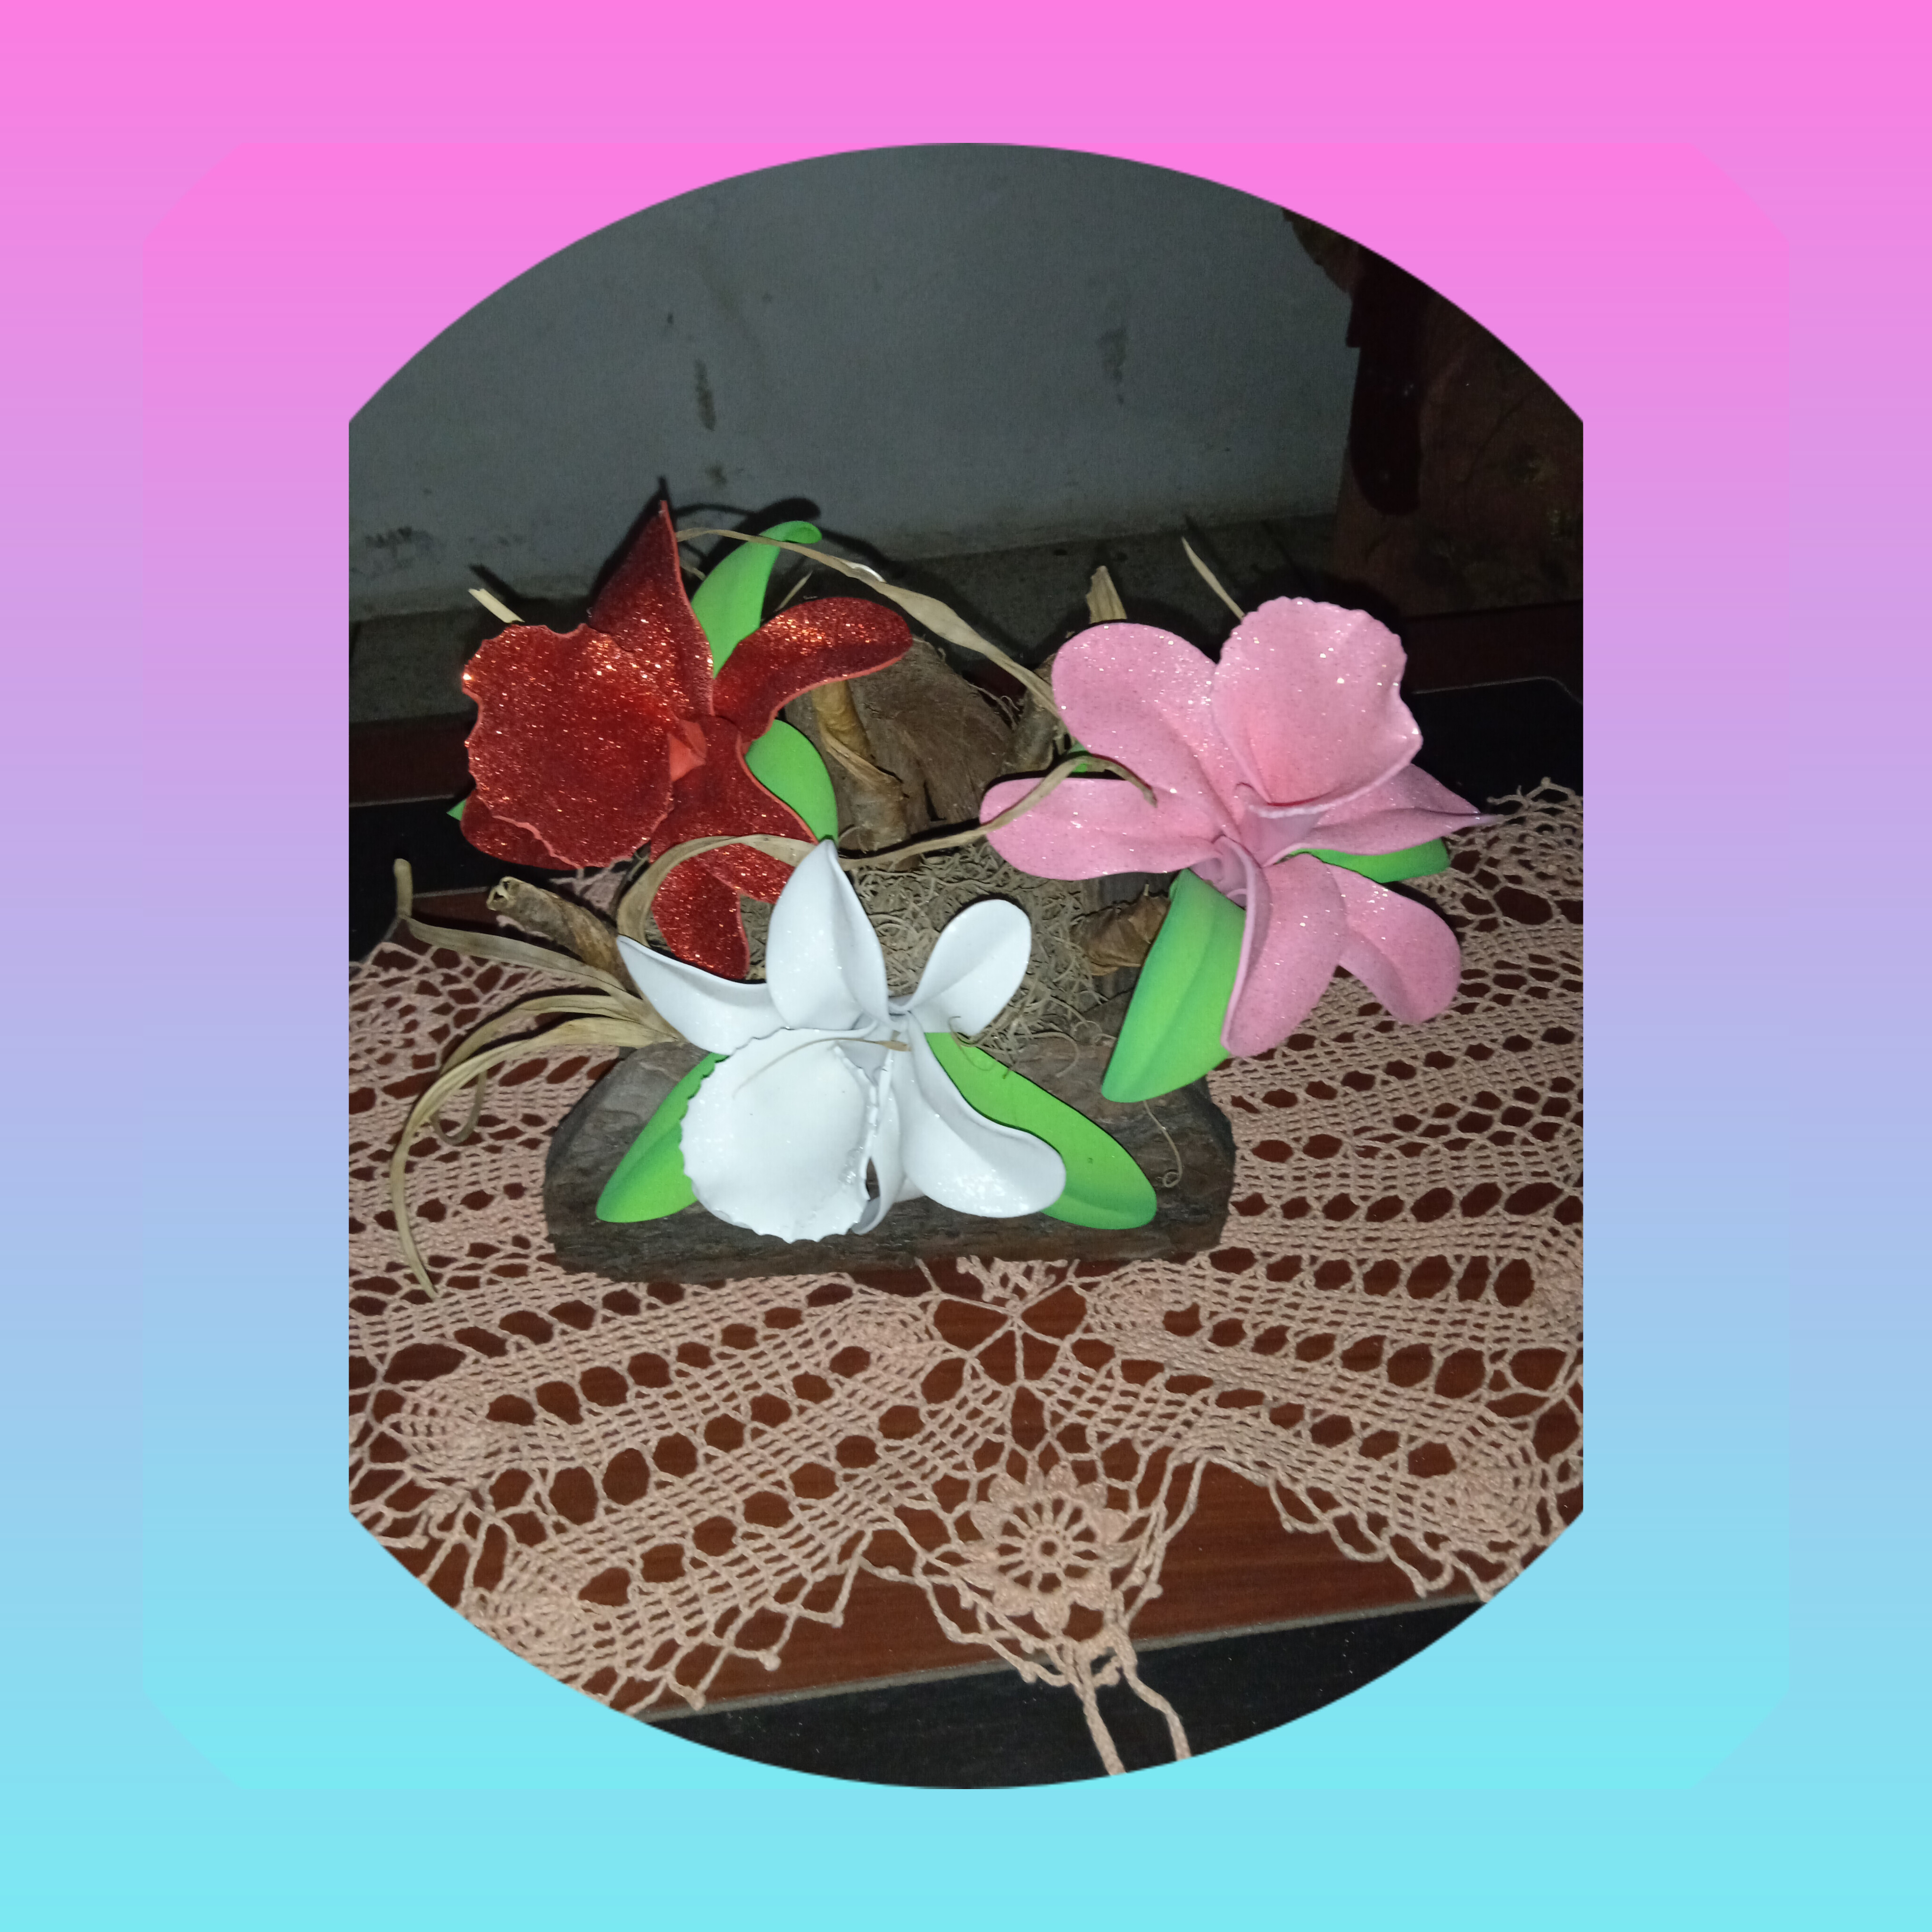
pequeño pero muy bonito!
small but very pretty!
Entonces nos veremos en otra florecita.... muy lindas tambien..
Then we will see each other in another little flower.... very pretty too.
Las fotos fuero tomadas por mi telefono xiaomi Rdmei 9A y editadas por inshop
The photos were taken by my Xiaomi Rdmei 9A phone and edited by inshop.
Hello Rolanjm you have been very beautiful orchids, realistic. and I'm going to do some because I loved them. Thanks for sharing.
@sagarkothari88 vote
Wow que hermosas orquídeas, me encantan, se ven muy realistas. Gracias por mostrarnos cómo hacerlas.
The thermoforming gives it the touch of realism together with the scissor cuts of shapes. Spectacular.
@sagarkothari88 vote
Very pretty!! 😍
¡¡¡Buen trabajo!!! Gracias por publicar tu excelente contenido en Hive Diy, un trabajo muy asombroso, hacer flores con foamis no es nada fácil.
Tu comunidad artesana ahora es testigo
