>Realizando decoracion y detalles de cumpleaños para mi nieto con temática de baby sharwMaking birthday decorations and details for my grandson with a baby sharw theme/
Buenos días tengan tod@s mis amig@ de hive, tenia días que no publicaba pero es que he estado ocupada y mi nieto estaba malito de salud,.. pero ya estoy de vuelta...
Ahora les voy a mostrar todo lo que hice para mi nieto que me dio la vida, su mama me dijo vamos a hacerlo de baby sharw porque cada vez que escucha la canción se pone como loco a bailar. y así comenzamos!...hice piñata , cotillones, decoración....
Good morning to all my hive friends, I haven't posted for days but I've been busy and my grandson was in poor health,... but I'm back...
Now I'm going to show you everything I did for my grandson who gave me life, his mom told me let's do it as baby sharw because every time he hears the song he starts dancing like crazy. and so we began!...I made piñata, party favors, decoration....
MATERIALES.
Cartulinas escolar de colores.
Cartulina doble fax amarilla.
Cartón de cajas reciclado.
Papel crepe de diferentes colores azules.
Laminas de anime de 1.2cm
Pinturas al frió rosada, azul,amarillo, negro y blanco.
Cintas de papel .
Silicon liquido y barra, tijeras cuter, .
Alambre dulce.
Estambre o lana azul.
Globos de diferentes colores.
MATERIALS.
Colored school cardboard.
Double yellow fax cardboard.
Recycled cardboard boxes.
Crepe paper of different blue colors.
1.2cm anime sheets
Pink, blue, yellow, black and white cold paints.
Paper tapes.
Liquid silicone and bar, cutter scissors,.
Sweet wire.
Worsted or blue wool.
Balloons of different colors
PASO 1.
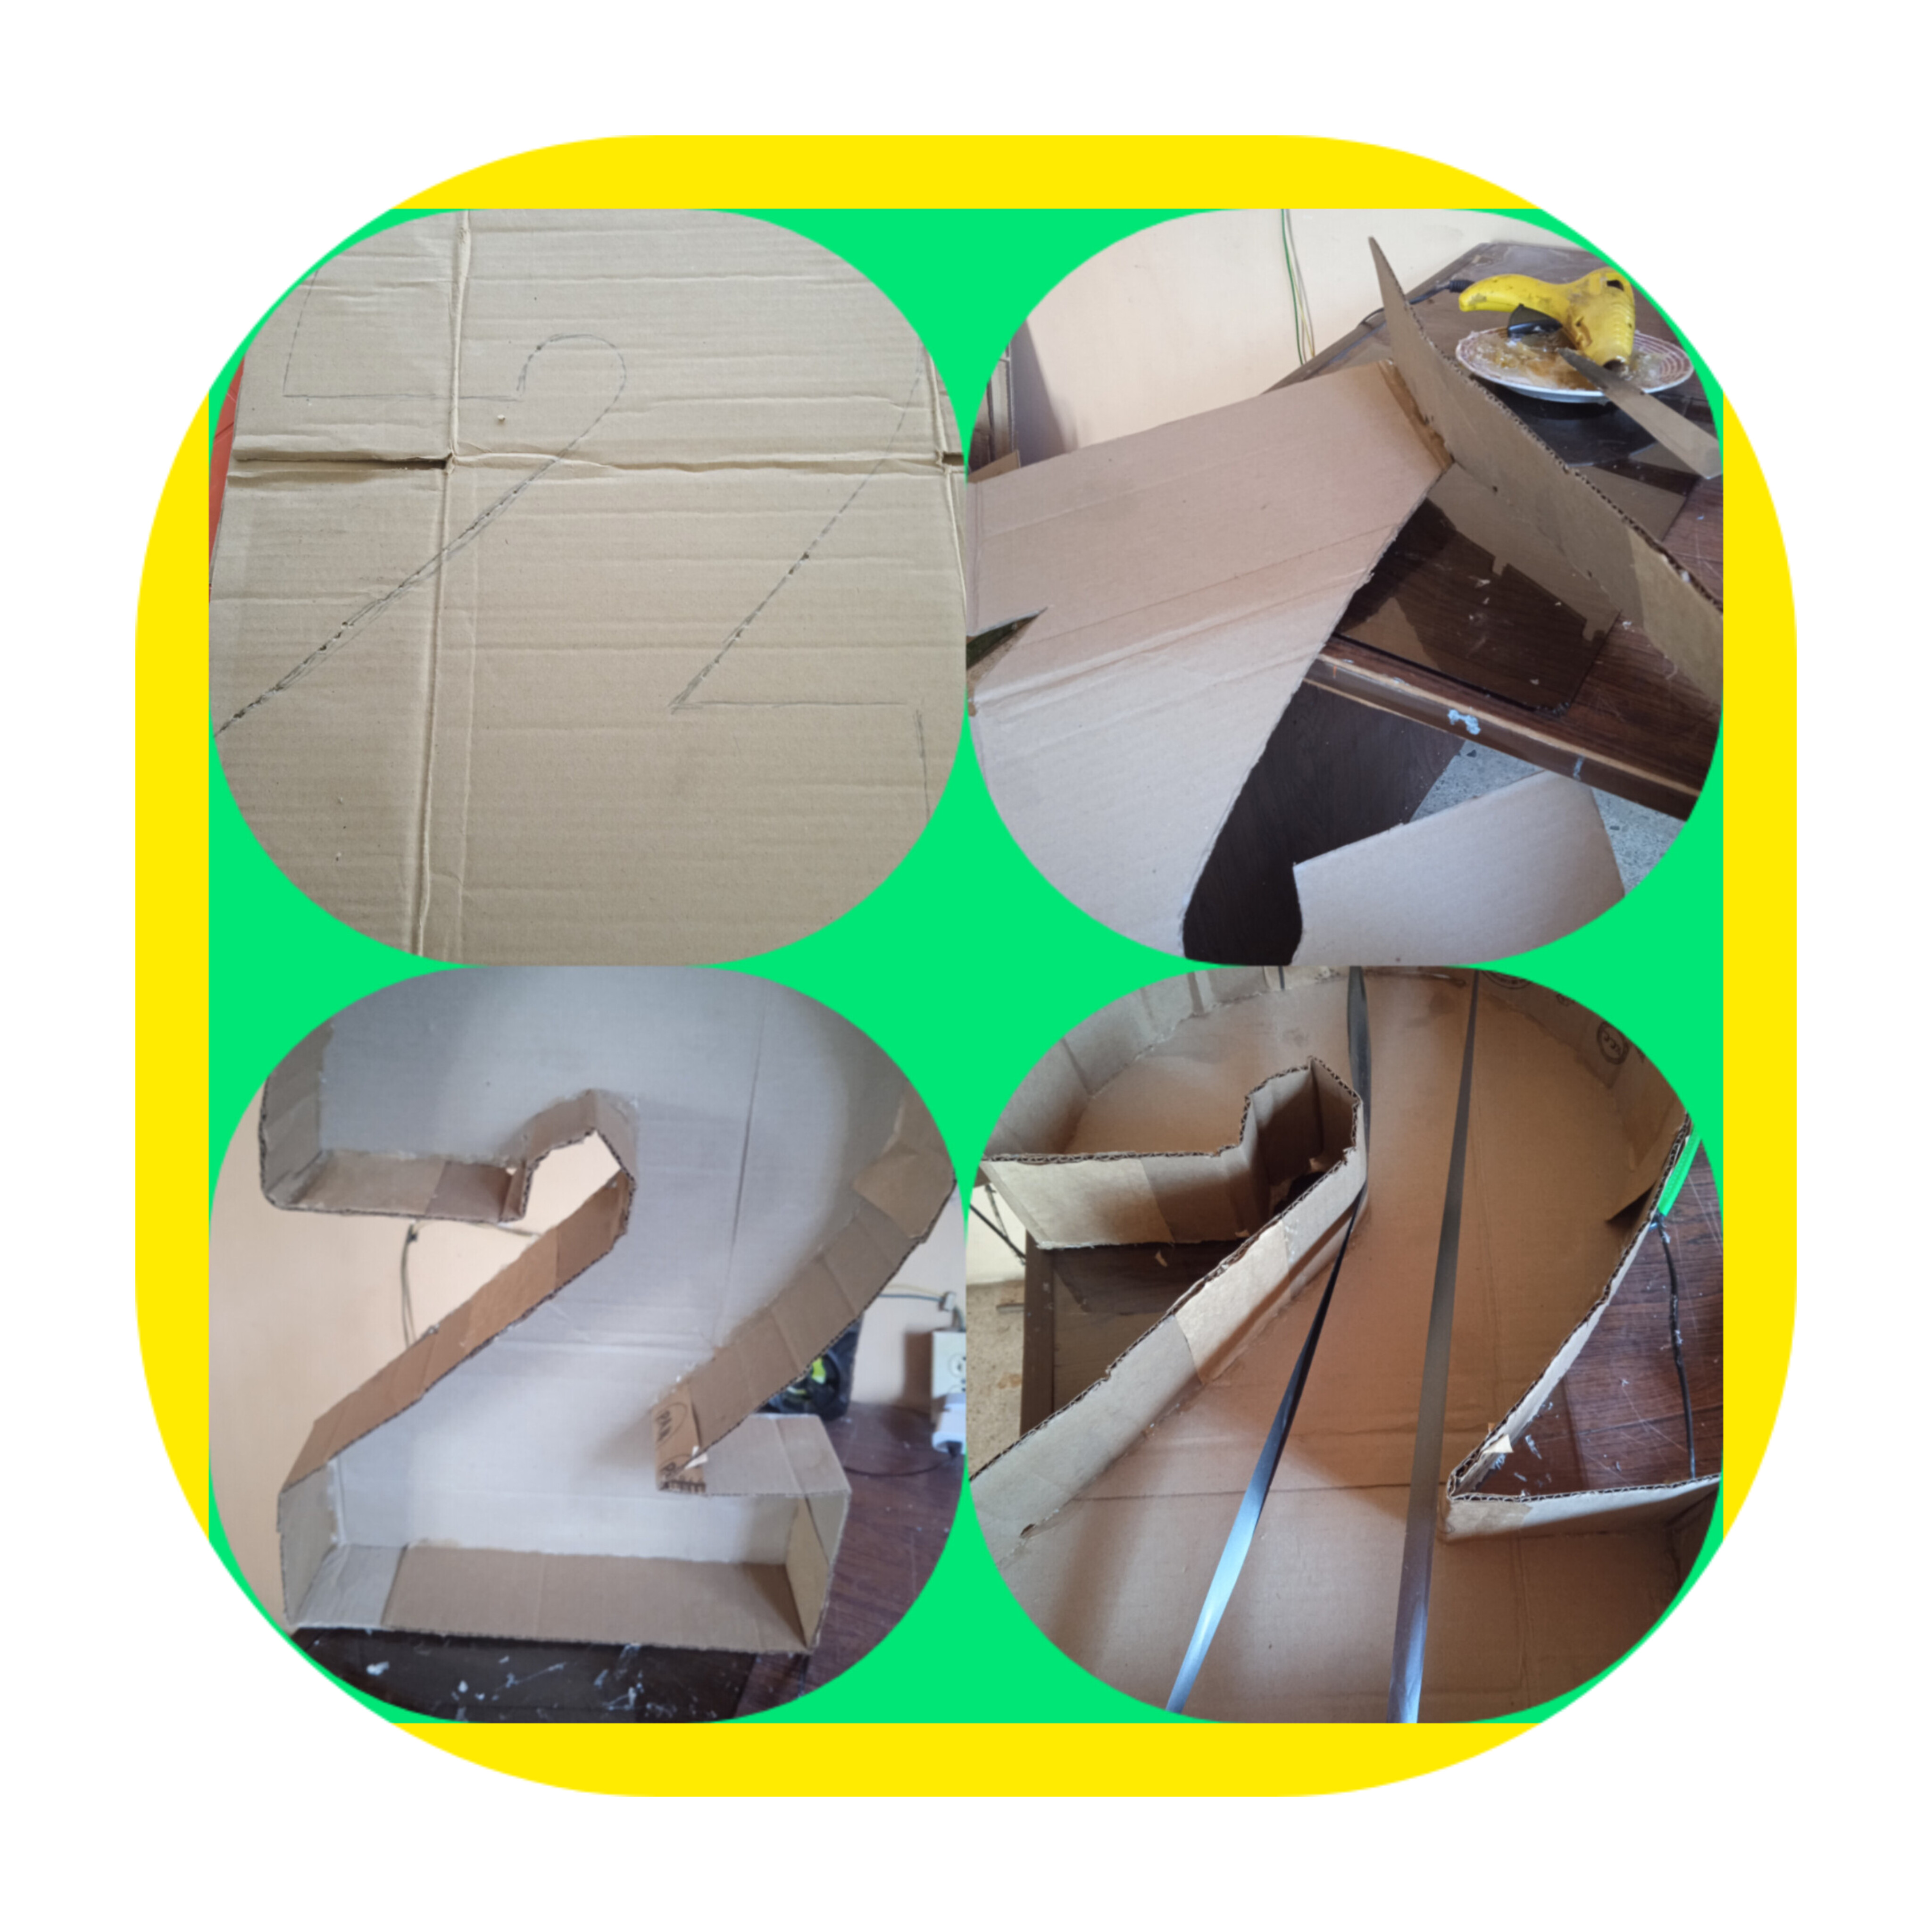
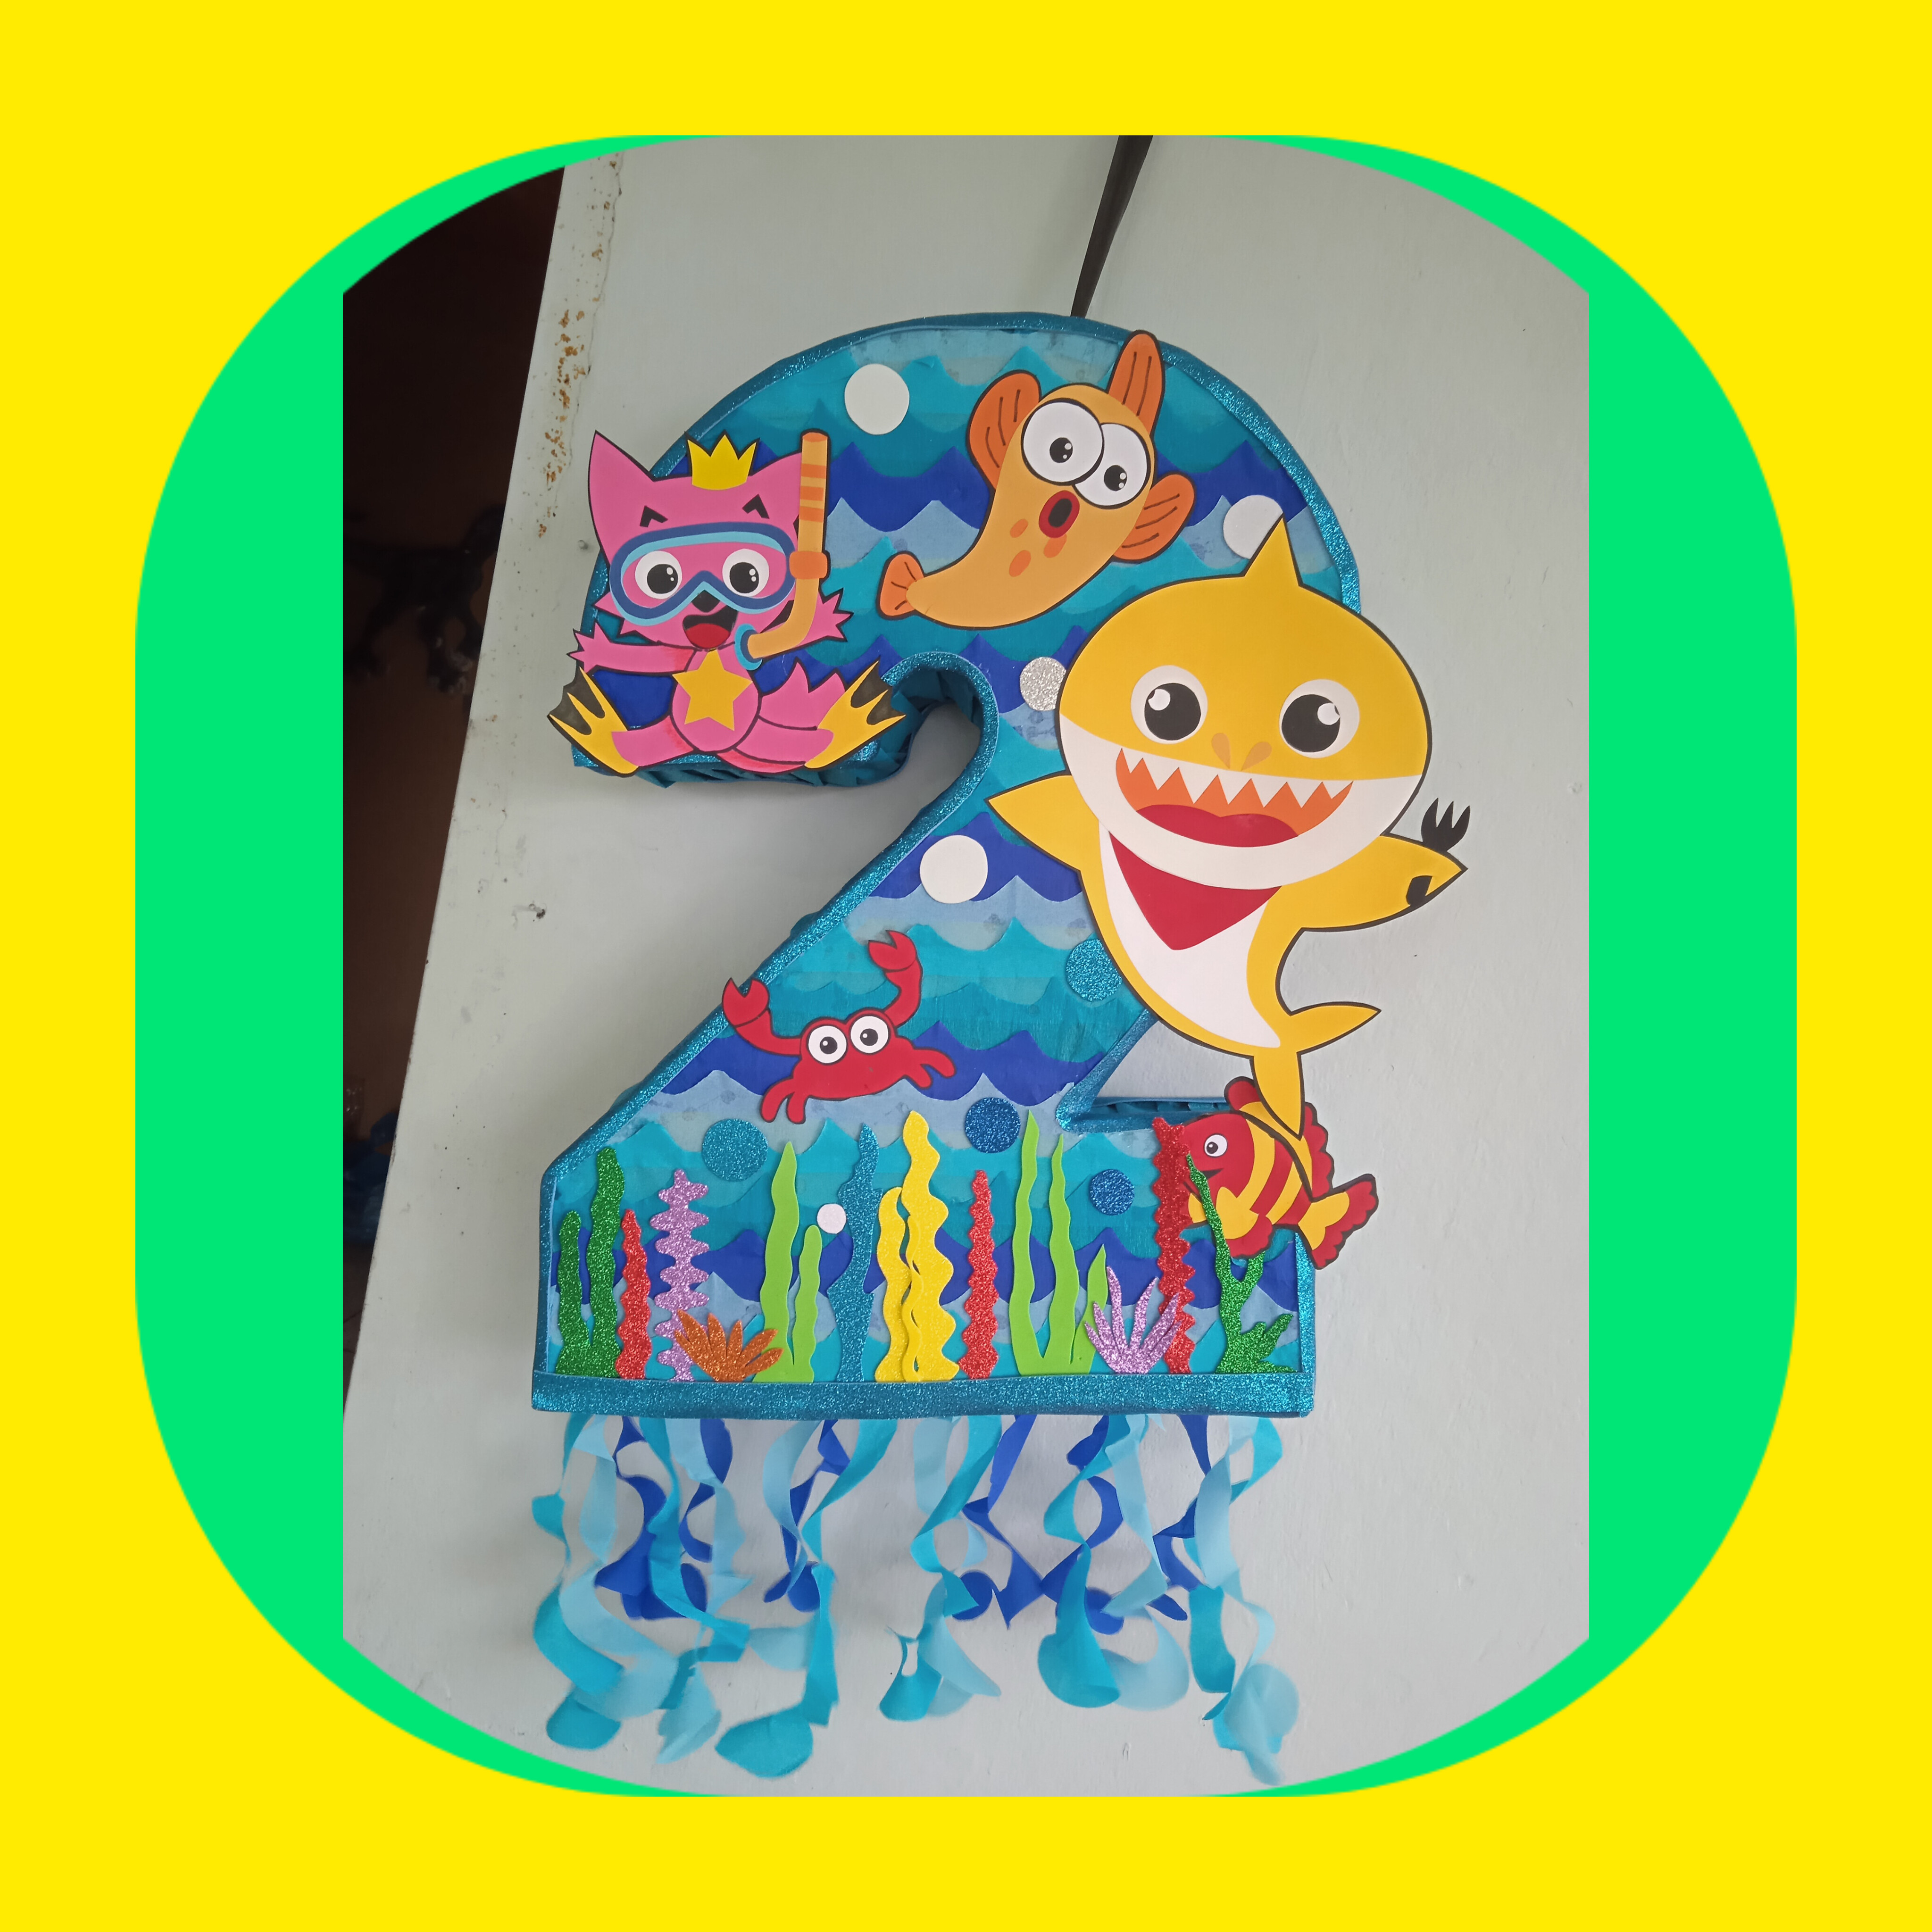
Primero vamos a hacer la piñata que es la que mas necesitaba para llenarla con tiempo , buscamos un modelo en la Internet y trate de hacerla lomas parecida posible, seleccionamos el cartón porque son cajas , sacamos las parte mas firmes y comenzamos a cortar la figura del numero dos con la pistola de silicon pegue las orillas y en medio amaramos con la cinta de papel como es resistente queda bien para hacer el colgador, ..
STEP 1.
First we are going to make the piñata, which is the one I needed most to fill it with time, we looked for a model on the Internet and tried to make it as similar as possible, we selected the cardboard because they are boxes, we took out the firmest parts and began to cut the figure of the Number two, with the silicone gun, glue the edges and in the middle we will tie with the paper tape, as it is resistant, it looks good to make the hanger, ..
Ya armada la base procedemos a pegar el papel crepe, tomamos un tono mediano y comenzamos pegando por los bordes en forma de plises y dejamos un espacio como de 1cm para después rematar las orillas.
Once the base is assembled, we proceed to glue the crepe paper, we take a medium tone and begin gluing the edges in the form of pleats and leaving a space of about 1cm to then finish off the edges.
Ahora cortamos el papel crepe en forma de ondas y pegamos tratando de hacer contrastes de azul claro a azul oscuro. pegamos de arriba hacia abajo para no perder la forma
.Now we cut the crepe paper in the shape of waves and glue it, trying to make contrasts from light blue to dark blue. We glue from top to bottom so as not to lose shape.
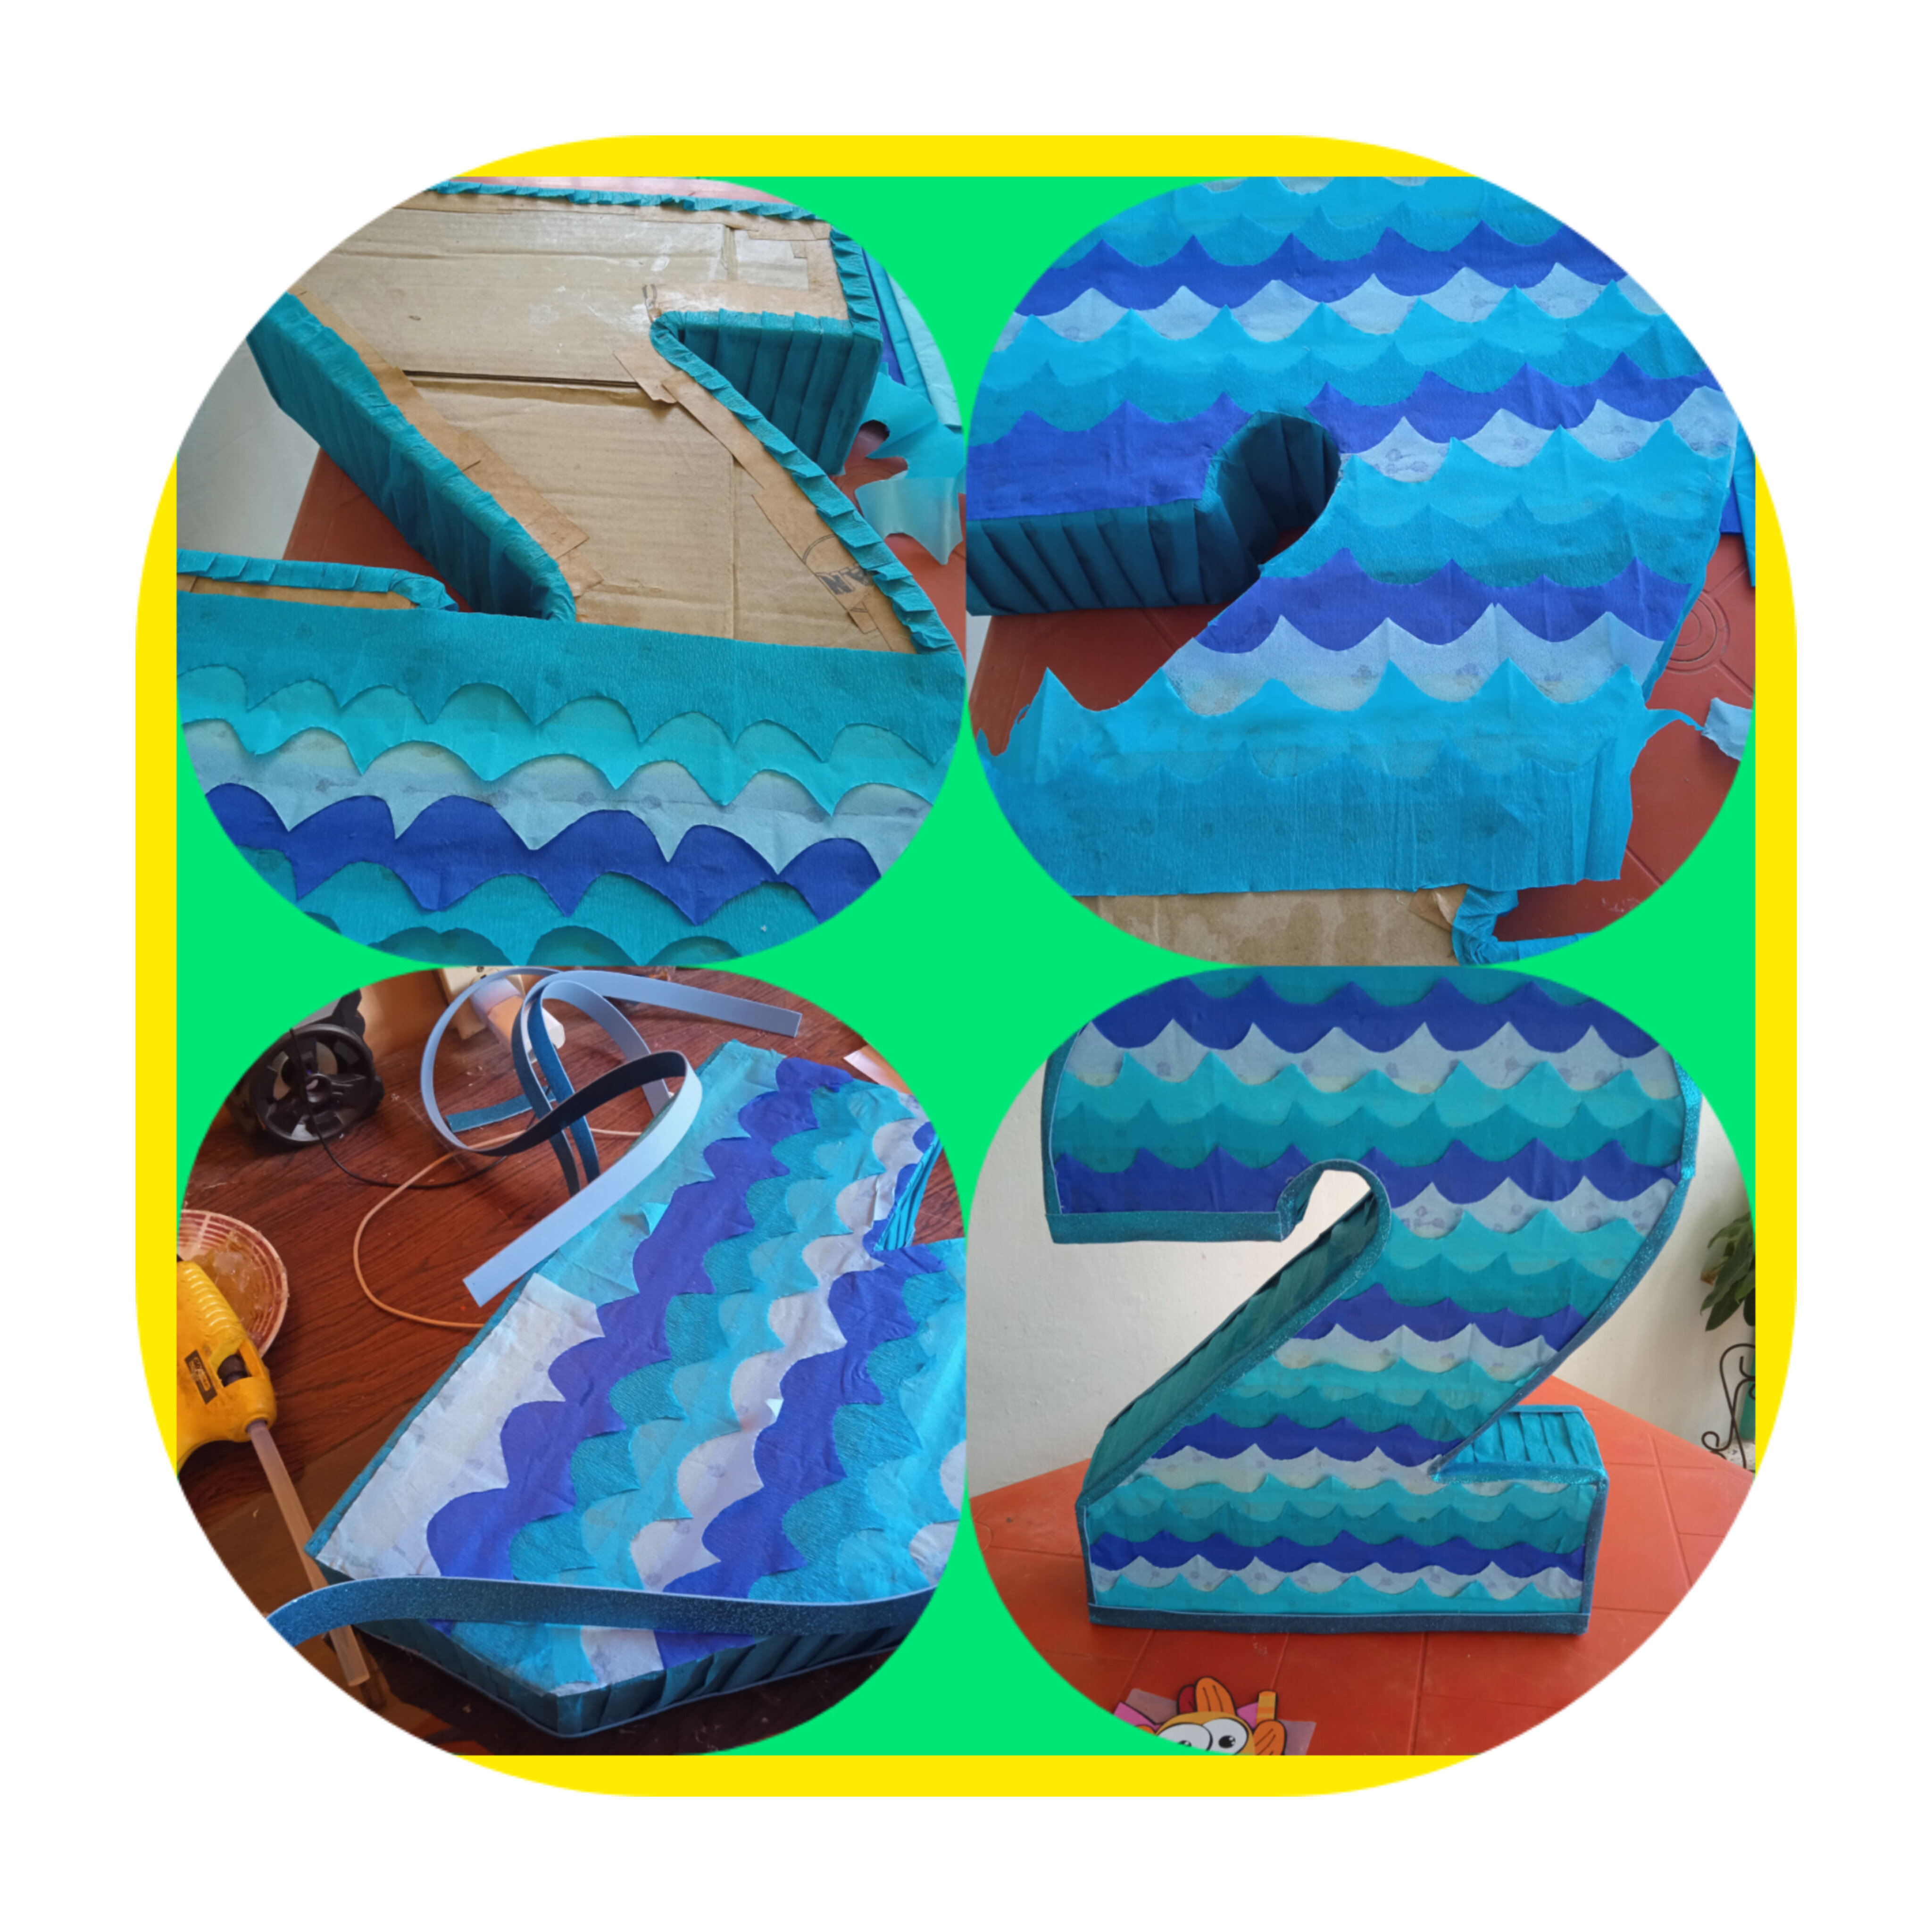
y ya lista pegue algunas imágenes alusivas a la temática y este es el resultado de la piñata.
.and once ready, paste some images alluding to the theme and this is the result of the piñata
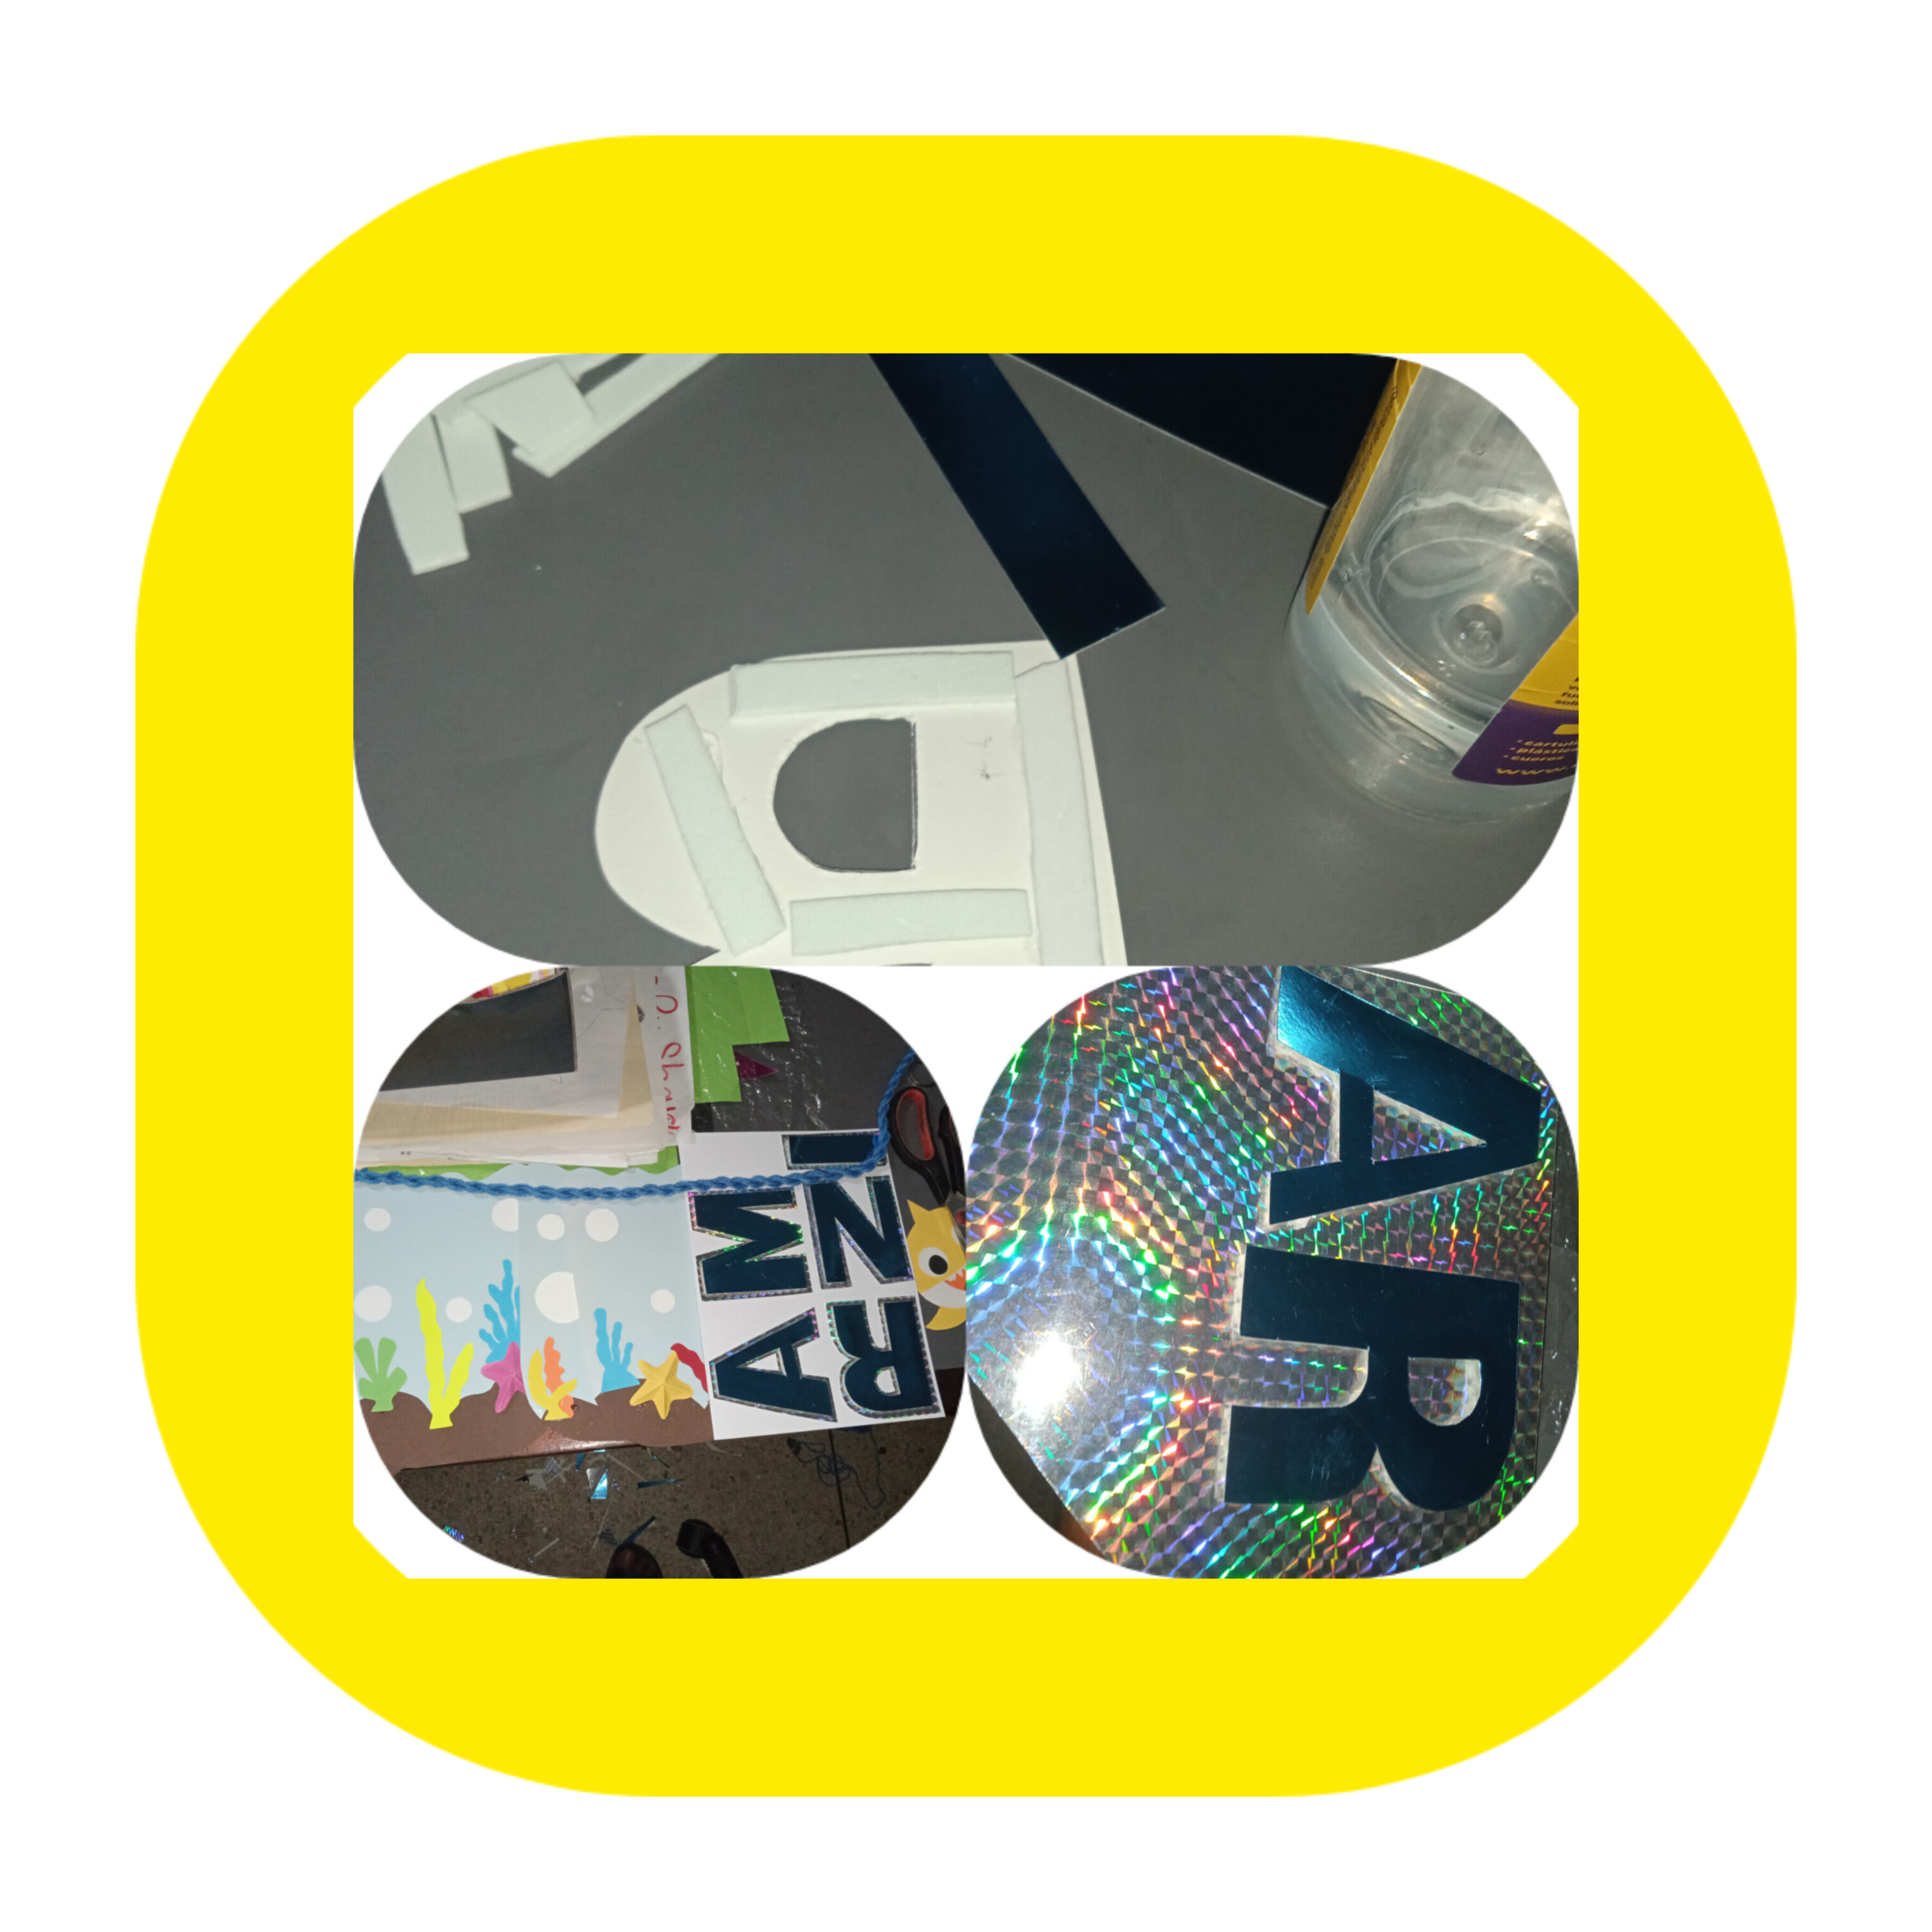
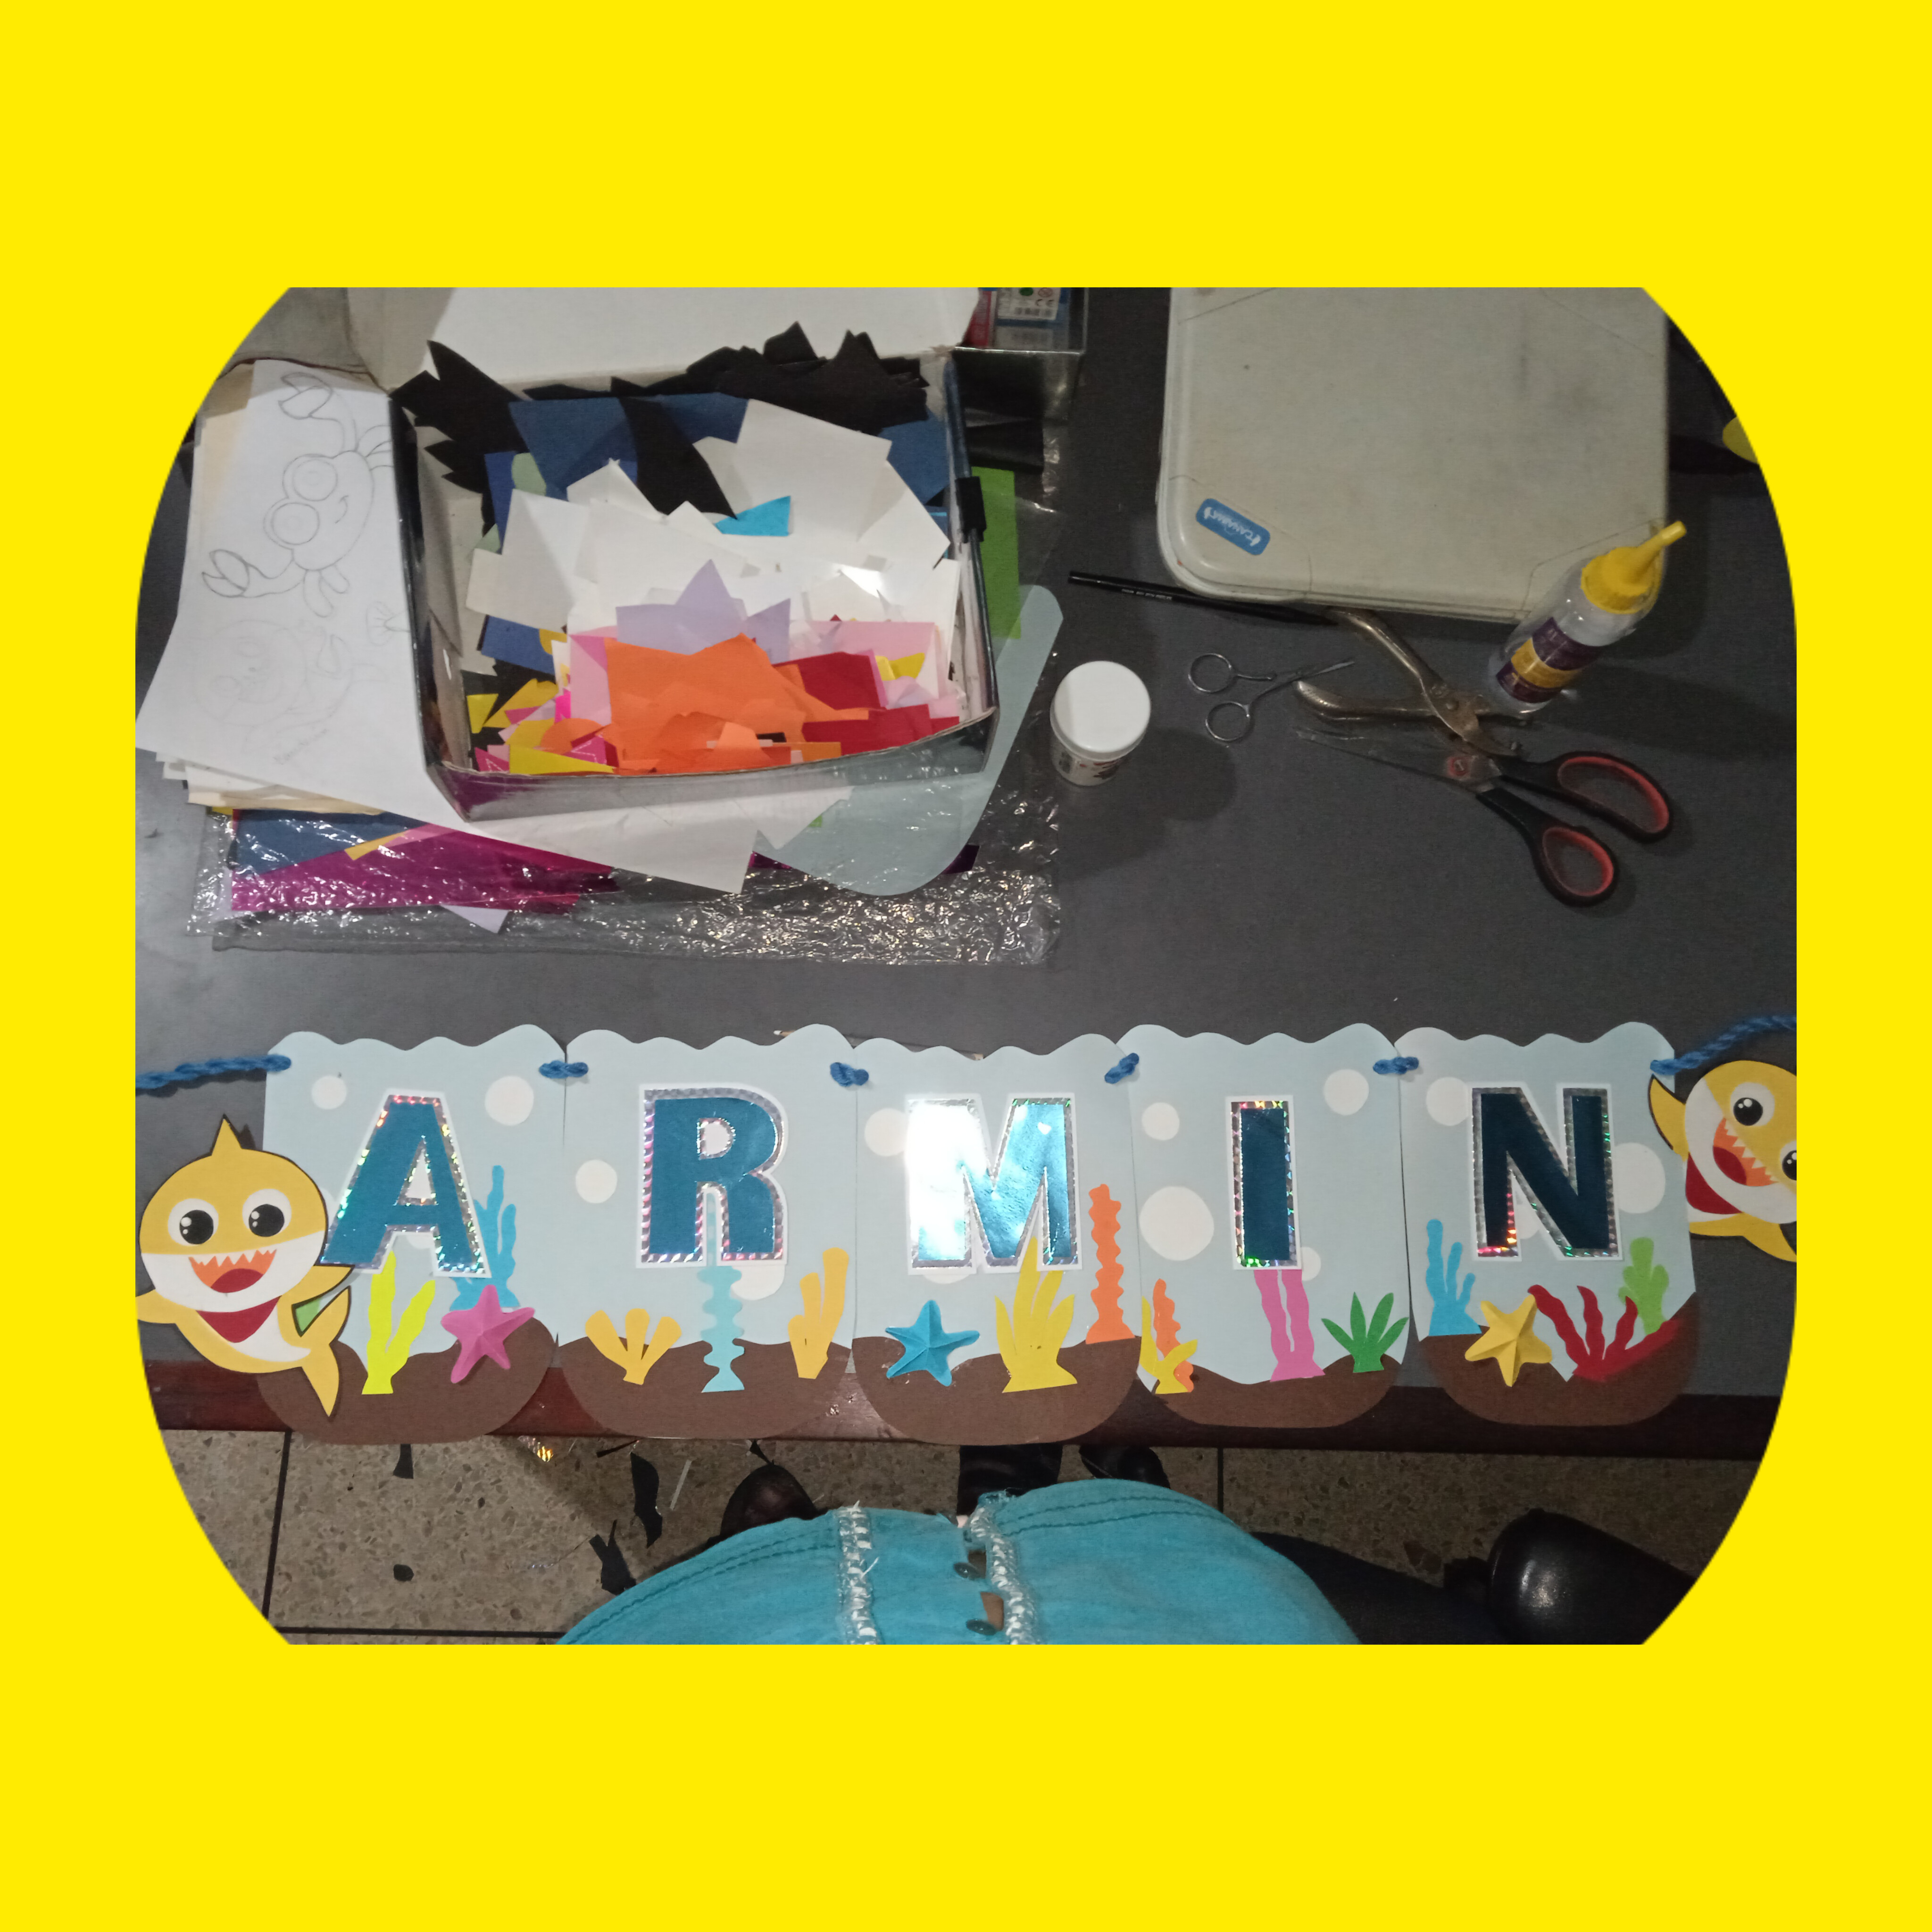
BANDERIN.
Ahora hice un banderín con el nombre de mi niño ARMIN y comencé por apartar el material y hacer las letras con un color destacado
.PENNANT.
Now I made a pennant with my child's name ARMIN and I started by separating the material and making the letters with a prominent color
.jpg)
Ahora marcar y recortar varias veces las letras para luego montarlas de la siguiente manera color metalizado, luego estampado y por ultimo blanco.
Now mark and cut out the letters several times and then assemble them in the following way: metallic color, then stamped, and finally white.
Corte en cartulina azul bebe los banderines en forna de pecera con en fondo marrón, para semejar el fondo del mar, también algunas formitas de algas estrellas y y peces , ya terminado el fondo coloque las letras y a pegar. , por ultimo abrí hoyitos en las esquinas y pase un estambre azul torcido a mano para hacerlo mas fuerte
Cut the pennants out of baby blue cardboard in the shape of a fish tank with a brown background, to resemble the bottom of the sea, also some shapes of star and fish algae, once the background is finished, place the letters and glue. Finally, I opened holes in the corners and passed a hand-twisted blue yarn to make it stronger.
.jpg)
Este es el resultado ,muy bonito y elegante.
This is the result, very beautiful and elegant.
COTILLONES
Ya tenemos la piñata , banderin y falta lomas impotante de una fiesta , !los cotillones!,
CARTILLIONS
We already have the piñata, pennant and missing important hills of a party, the party favors!
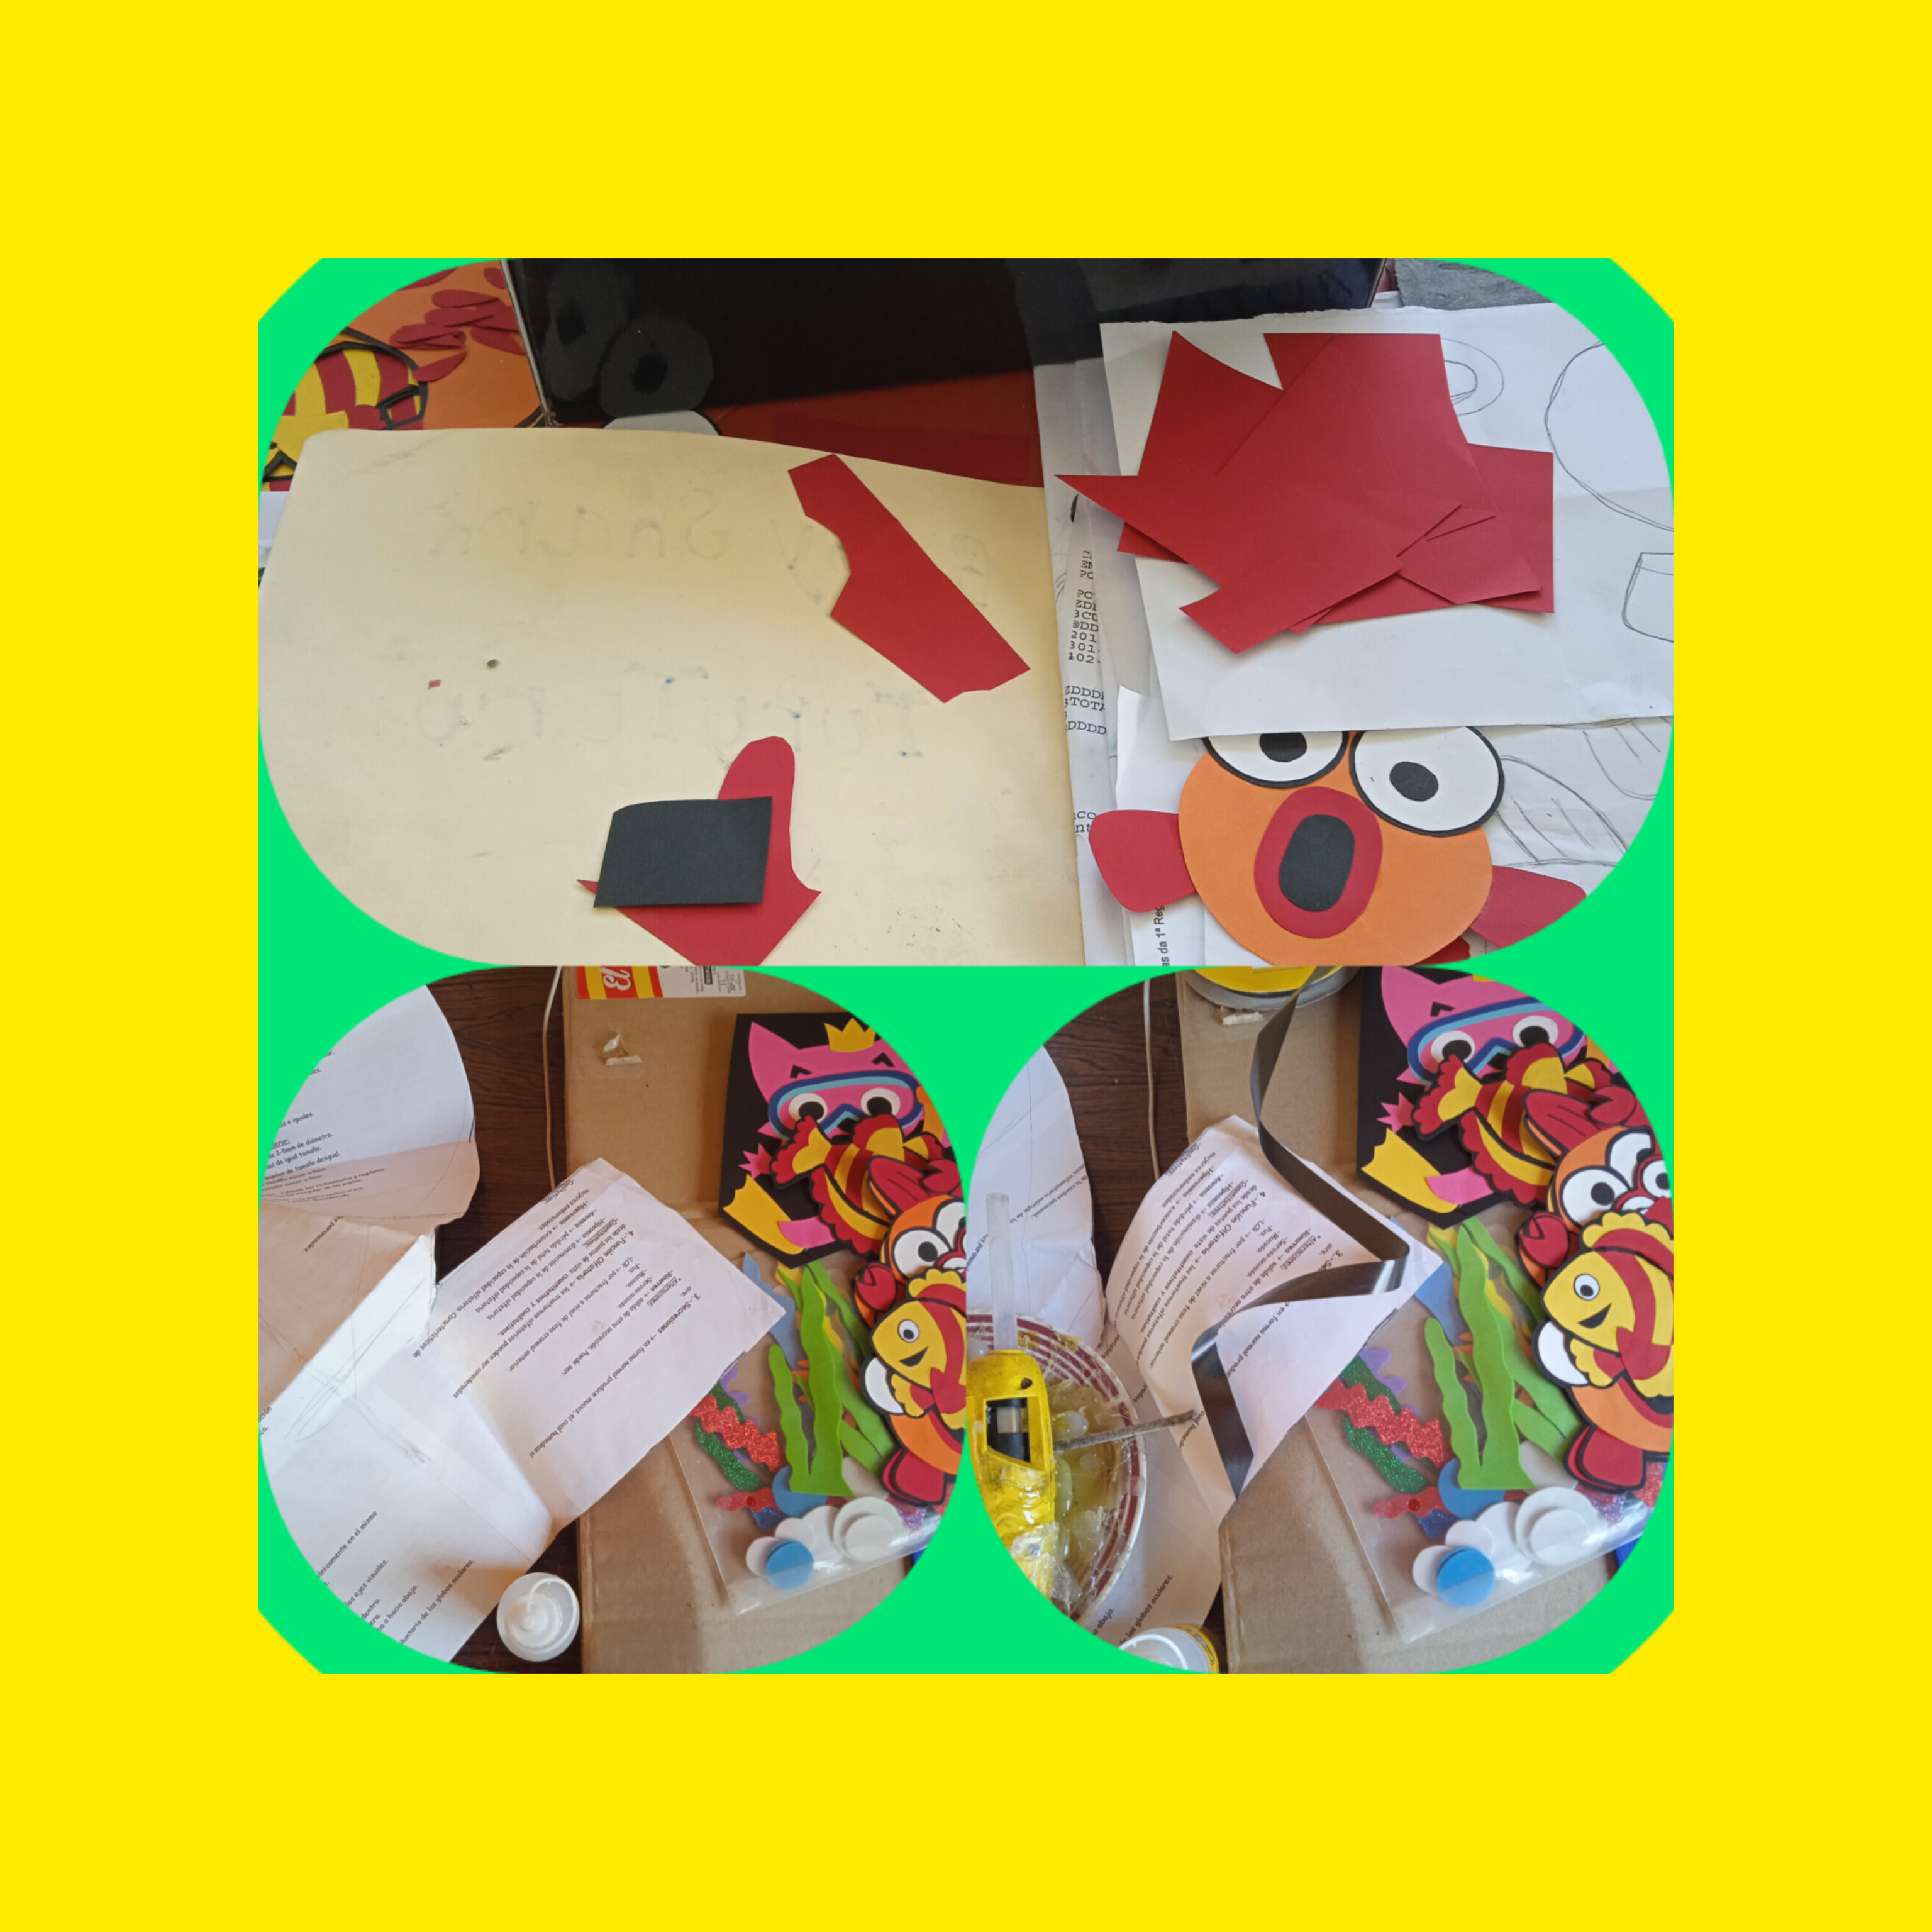
Para estos tome la cartulina doble fax amarilla y marque la carita del pescadito para hacer la base del cotillos y a cortar por pares.
For these, take the double yellow fax cardboard and mark the face of the little fish to make the base of the cotillos and cut them in pairs

Luego comencé a cortar la boca con los dientes y ojos cuadre como los iba a pegar y ya están litas las caritas.
Aparte cote un listón de 15cm y dejando 2cm por cada lado corte pestañas para pegar las dos piezas.
For these, take the double yellow fax cardboard and mark the face of the little fish to make the base of the cotillos and cut them in pairs
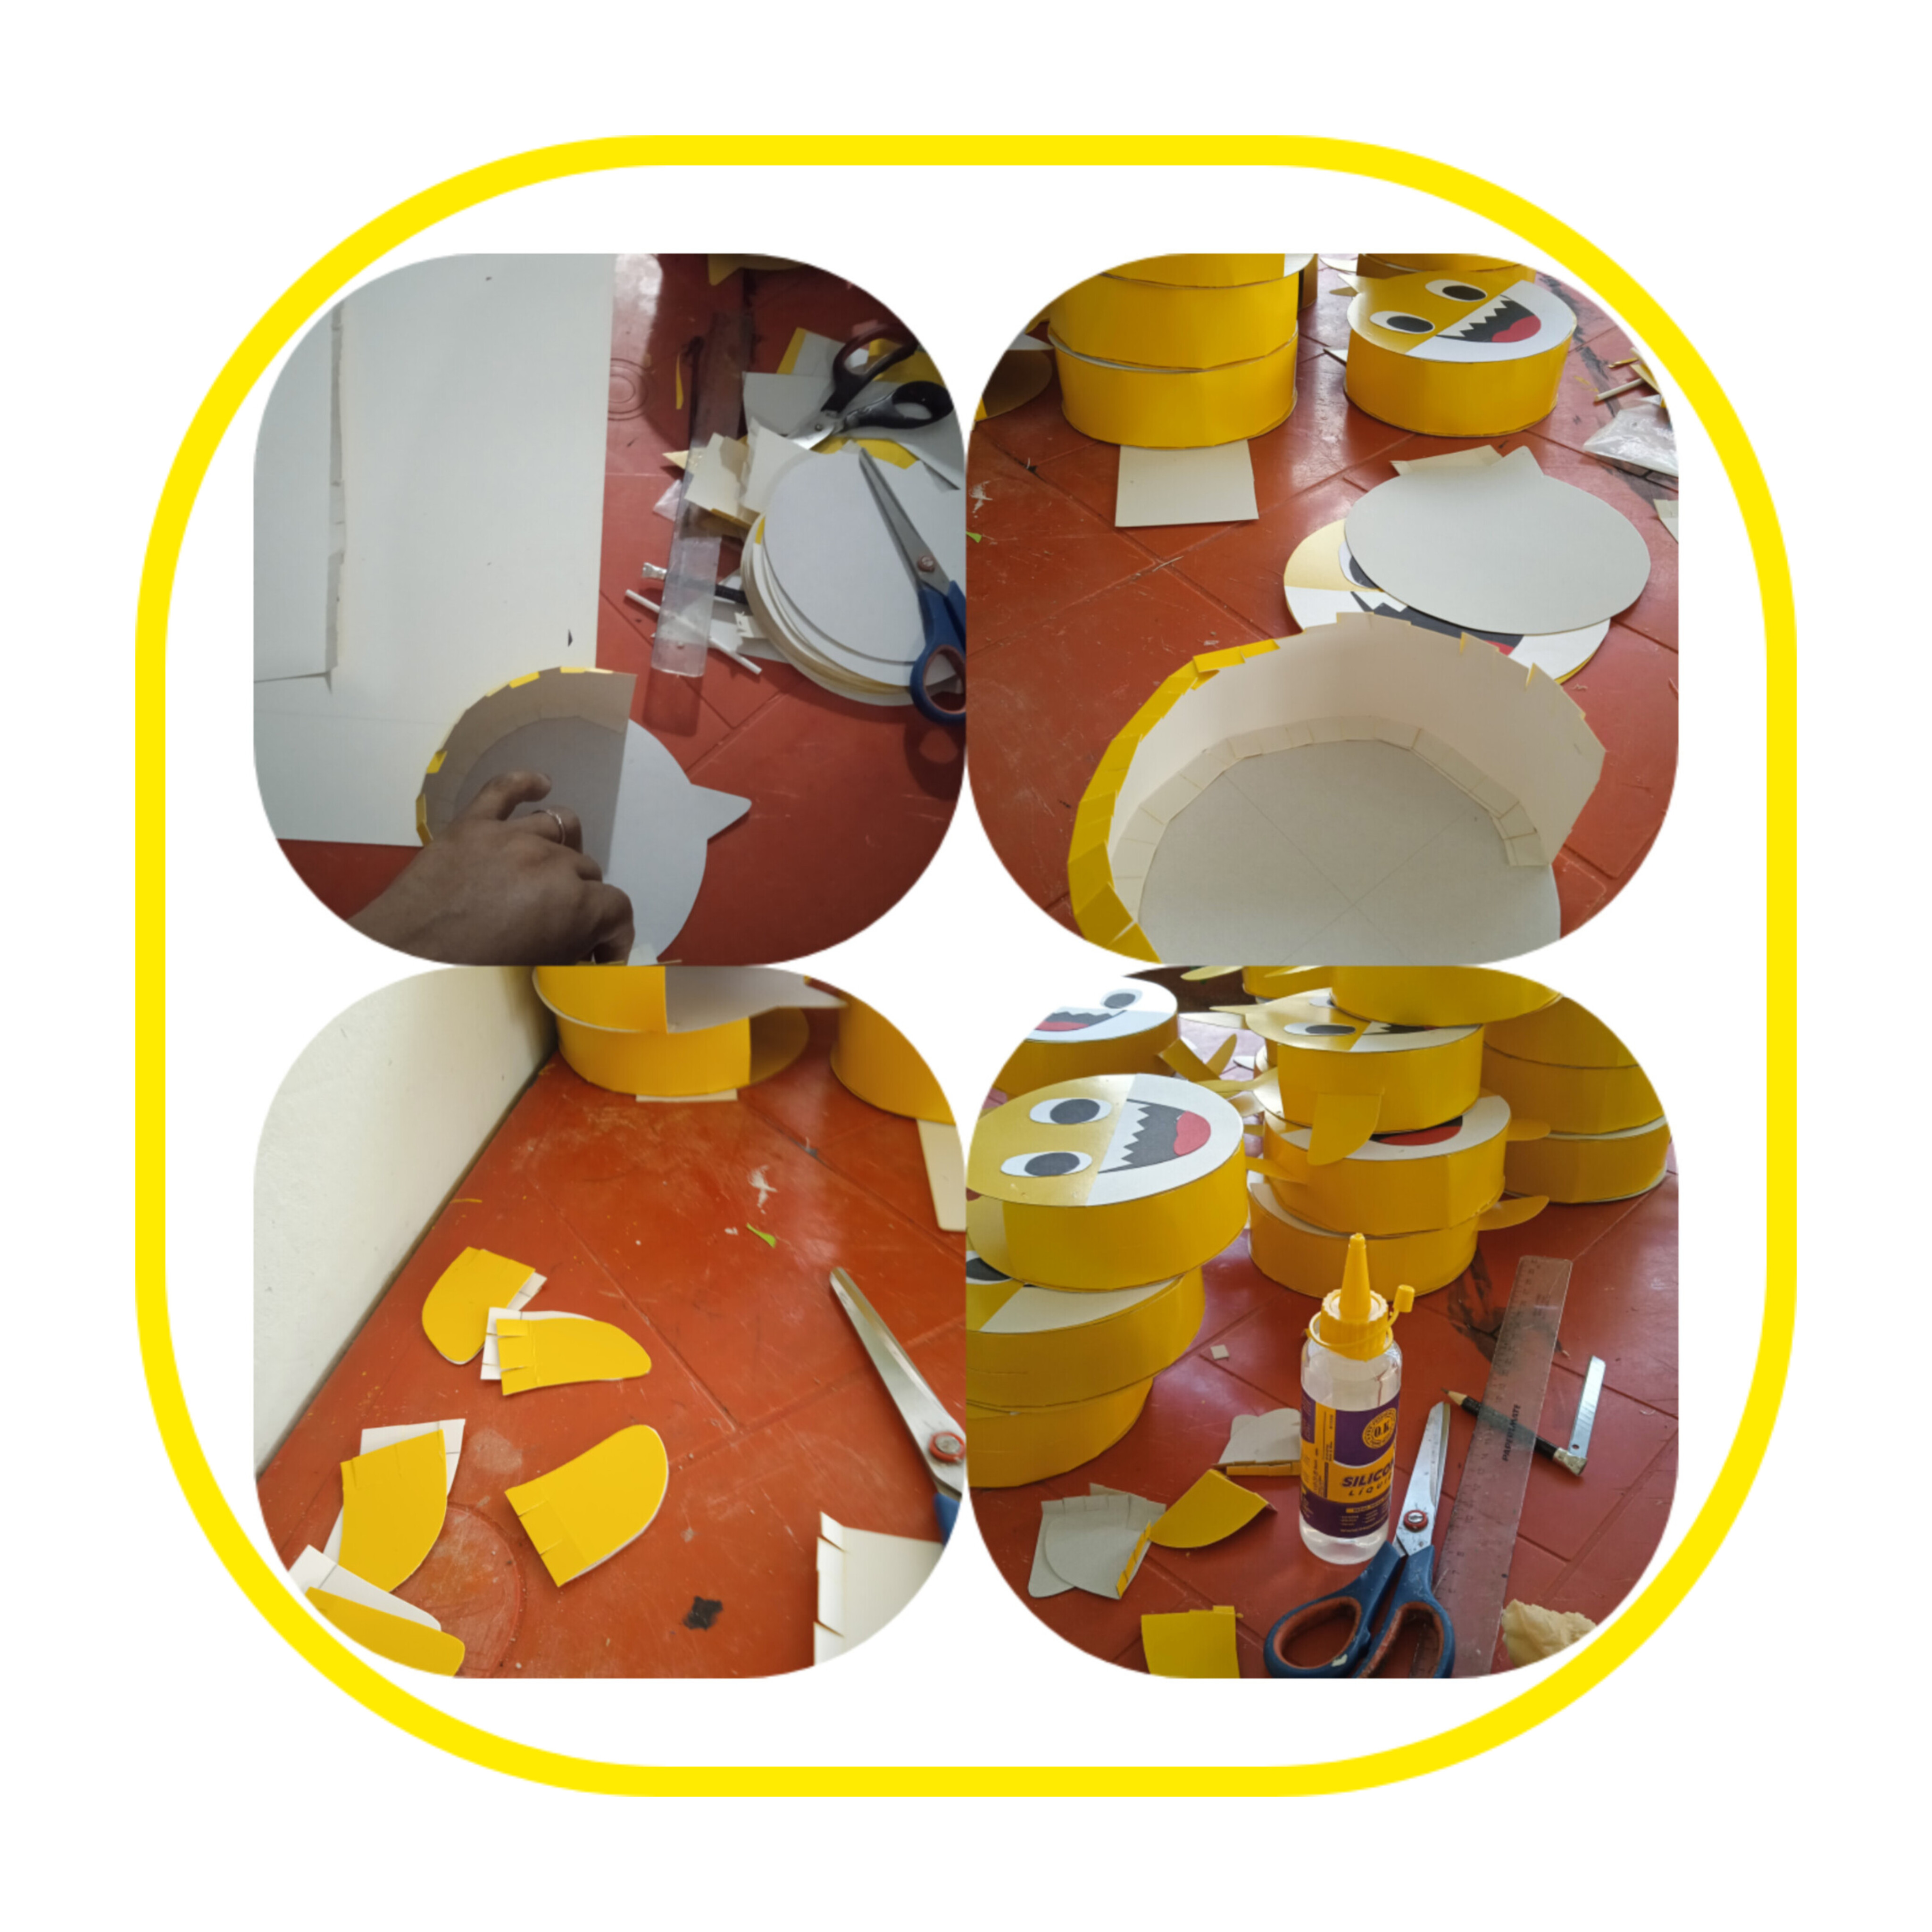
y ya esta casi todo listo es que cuando son cotillones se pone el trabajo un poquito tedioso, pero a pesar de todo quedaron lindos , después de armados solo faltaba pegar colitas , aletas, y un listón para hacer el agarre.
Este es el resultado del trabajo muy lindos!
And almost everything is ready, because when they are party favors the work gets a little tedious, but despite everything they turned out cute, after they were assembled, all that was left was to glue tails, fins, and a ribbon to make the grip.
This is the result of very beautiful work!
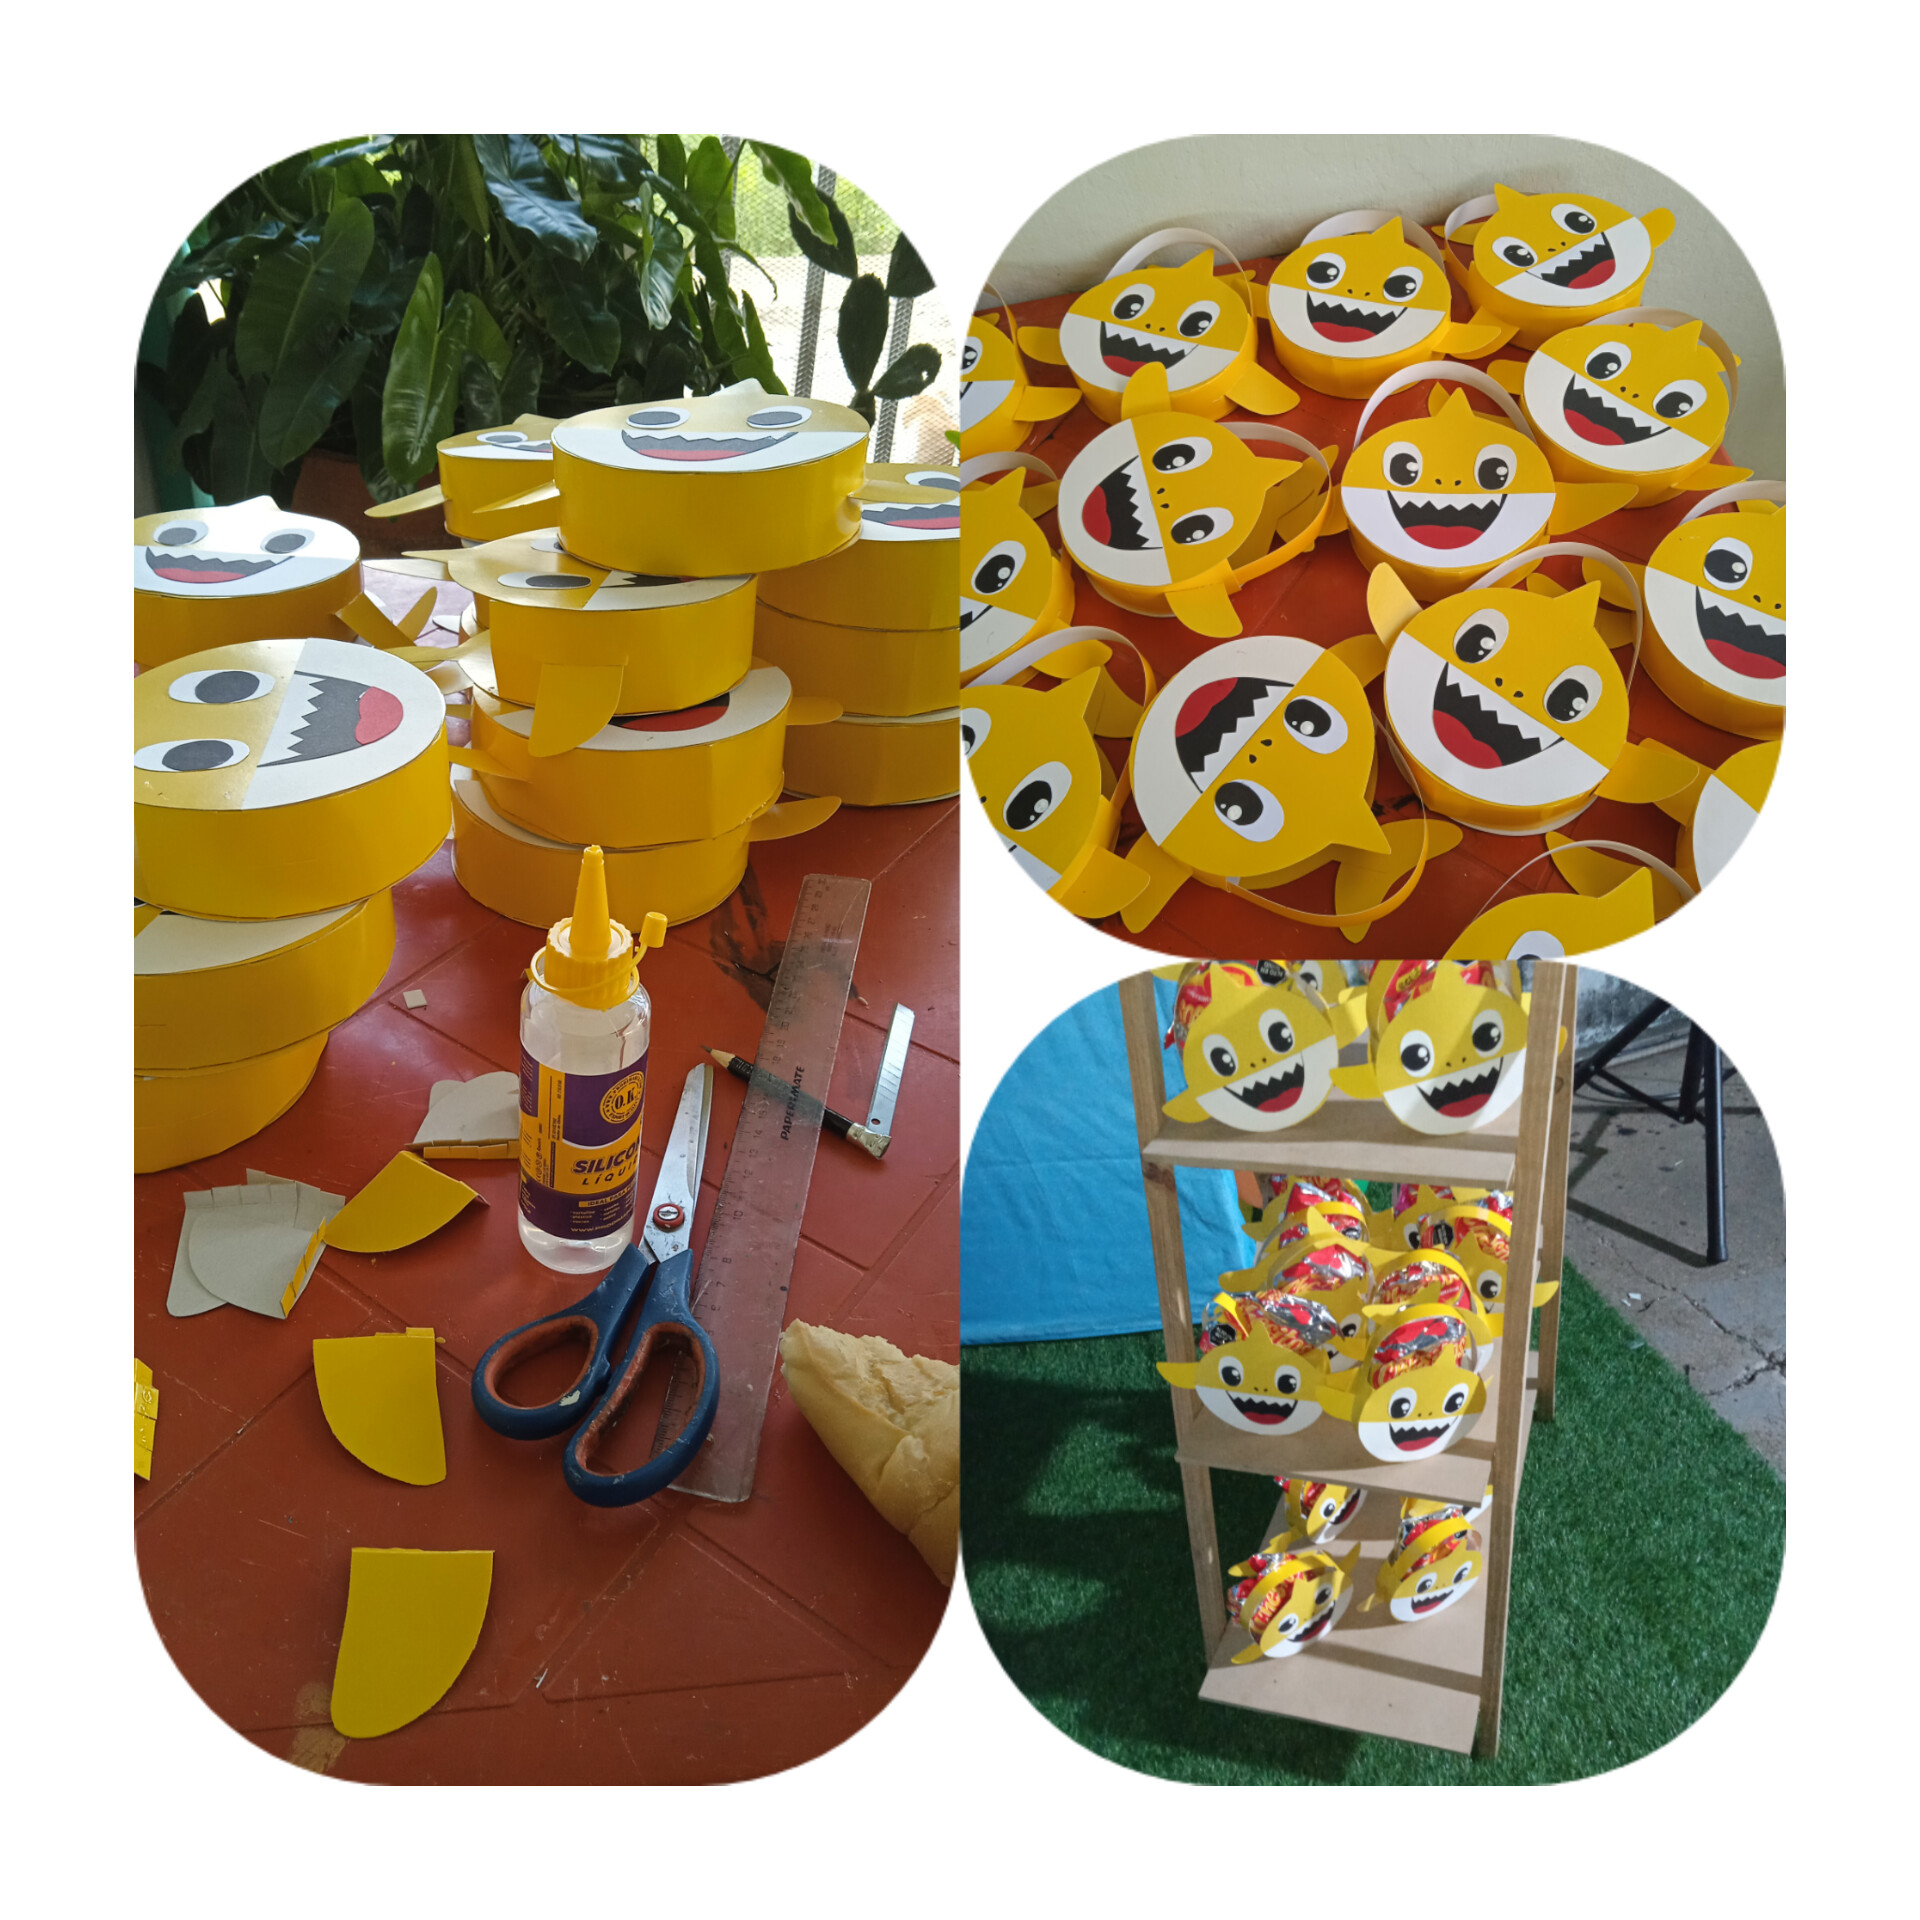
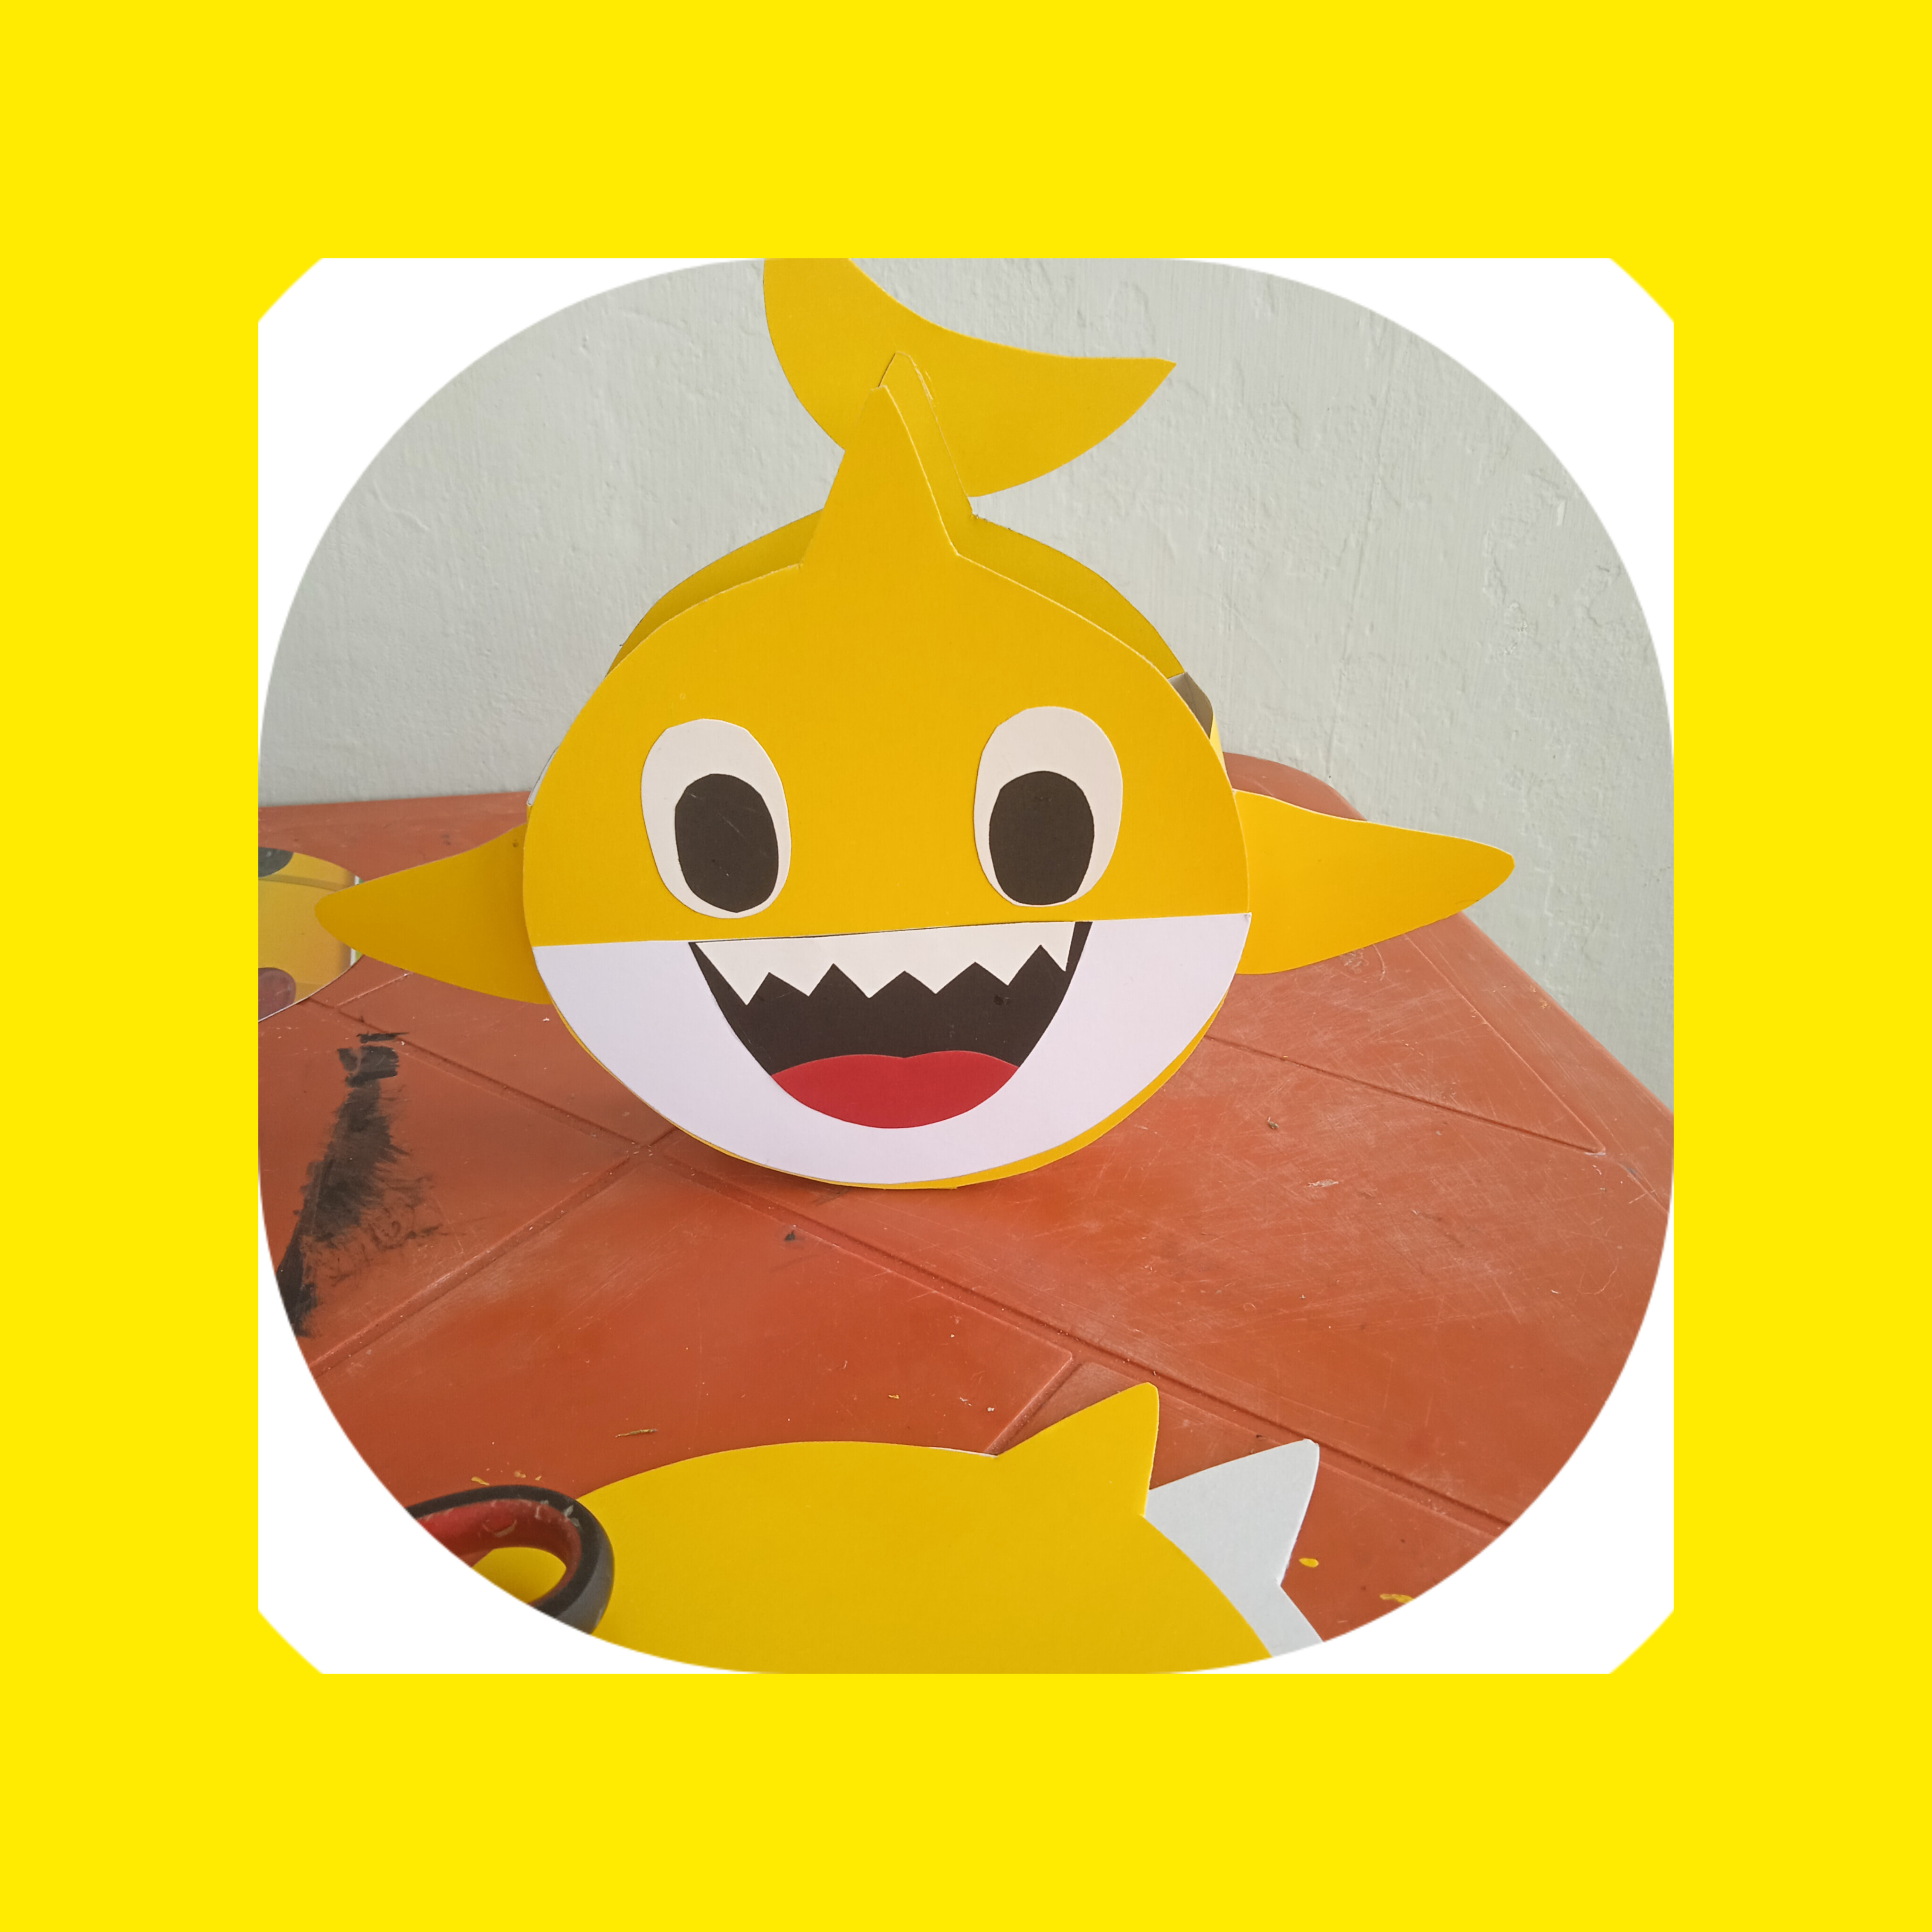
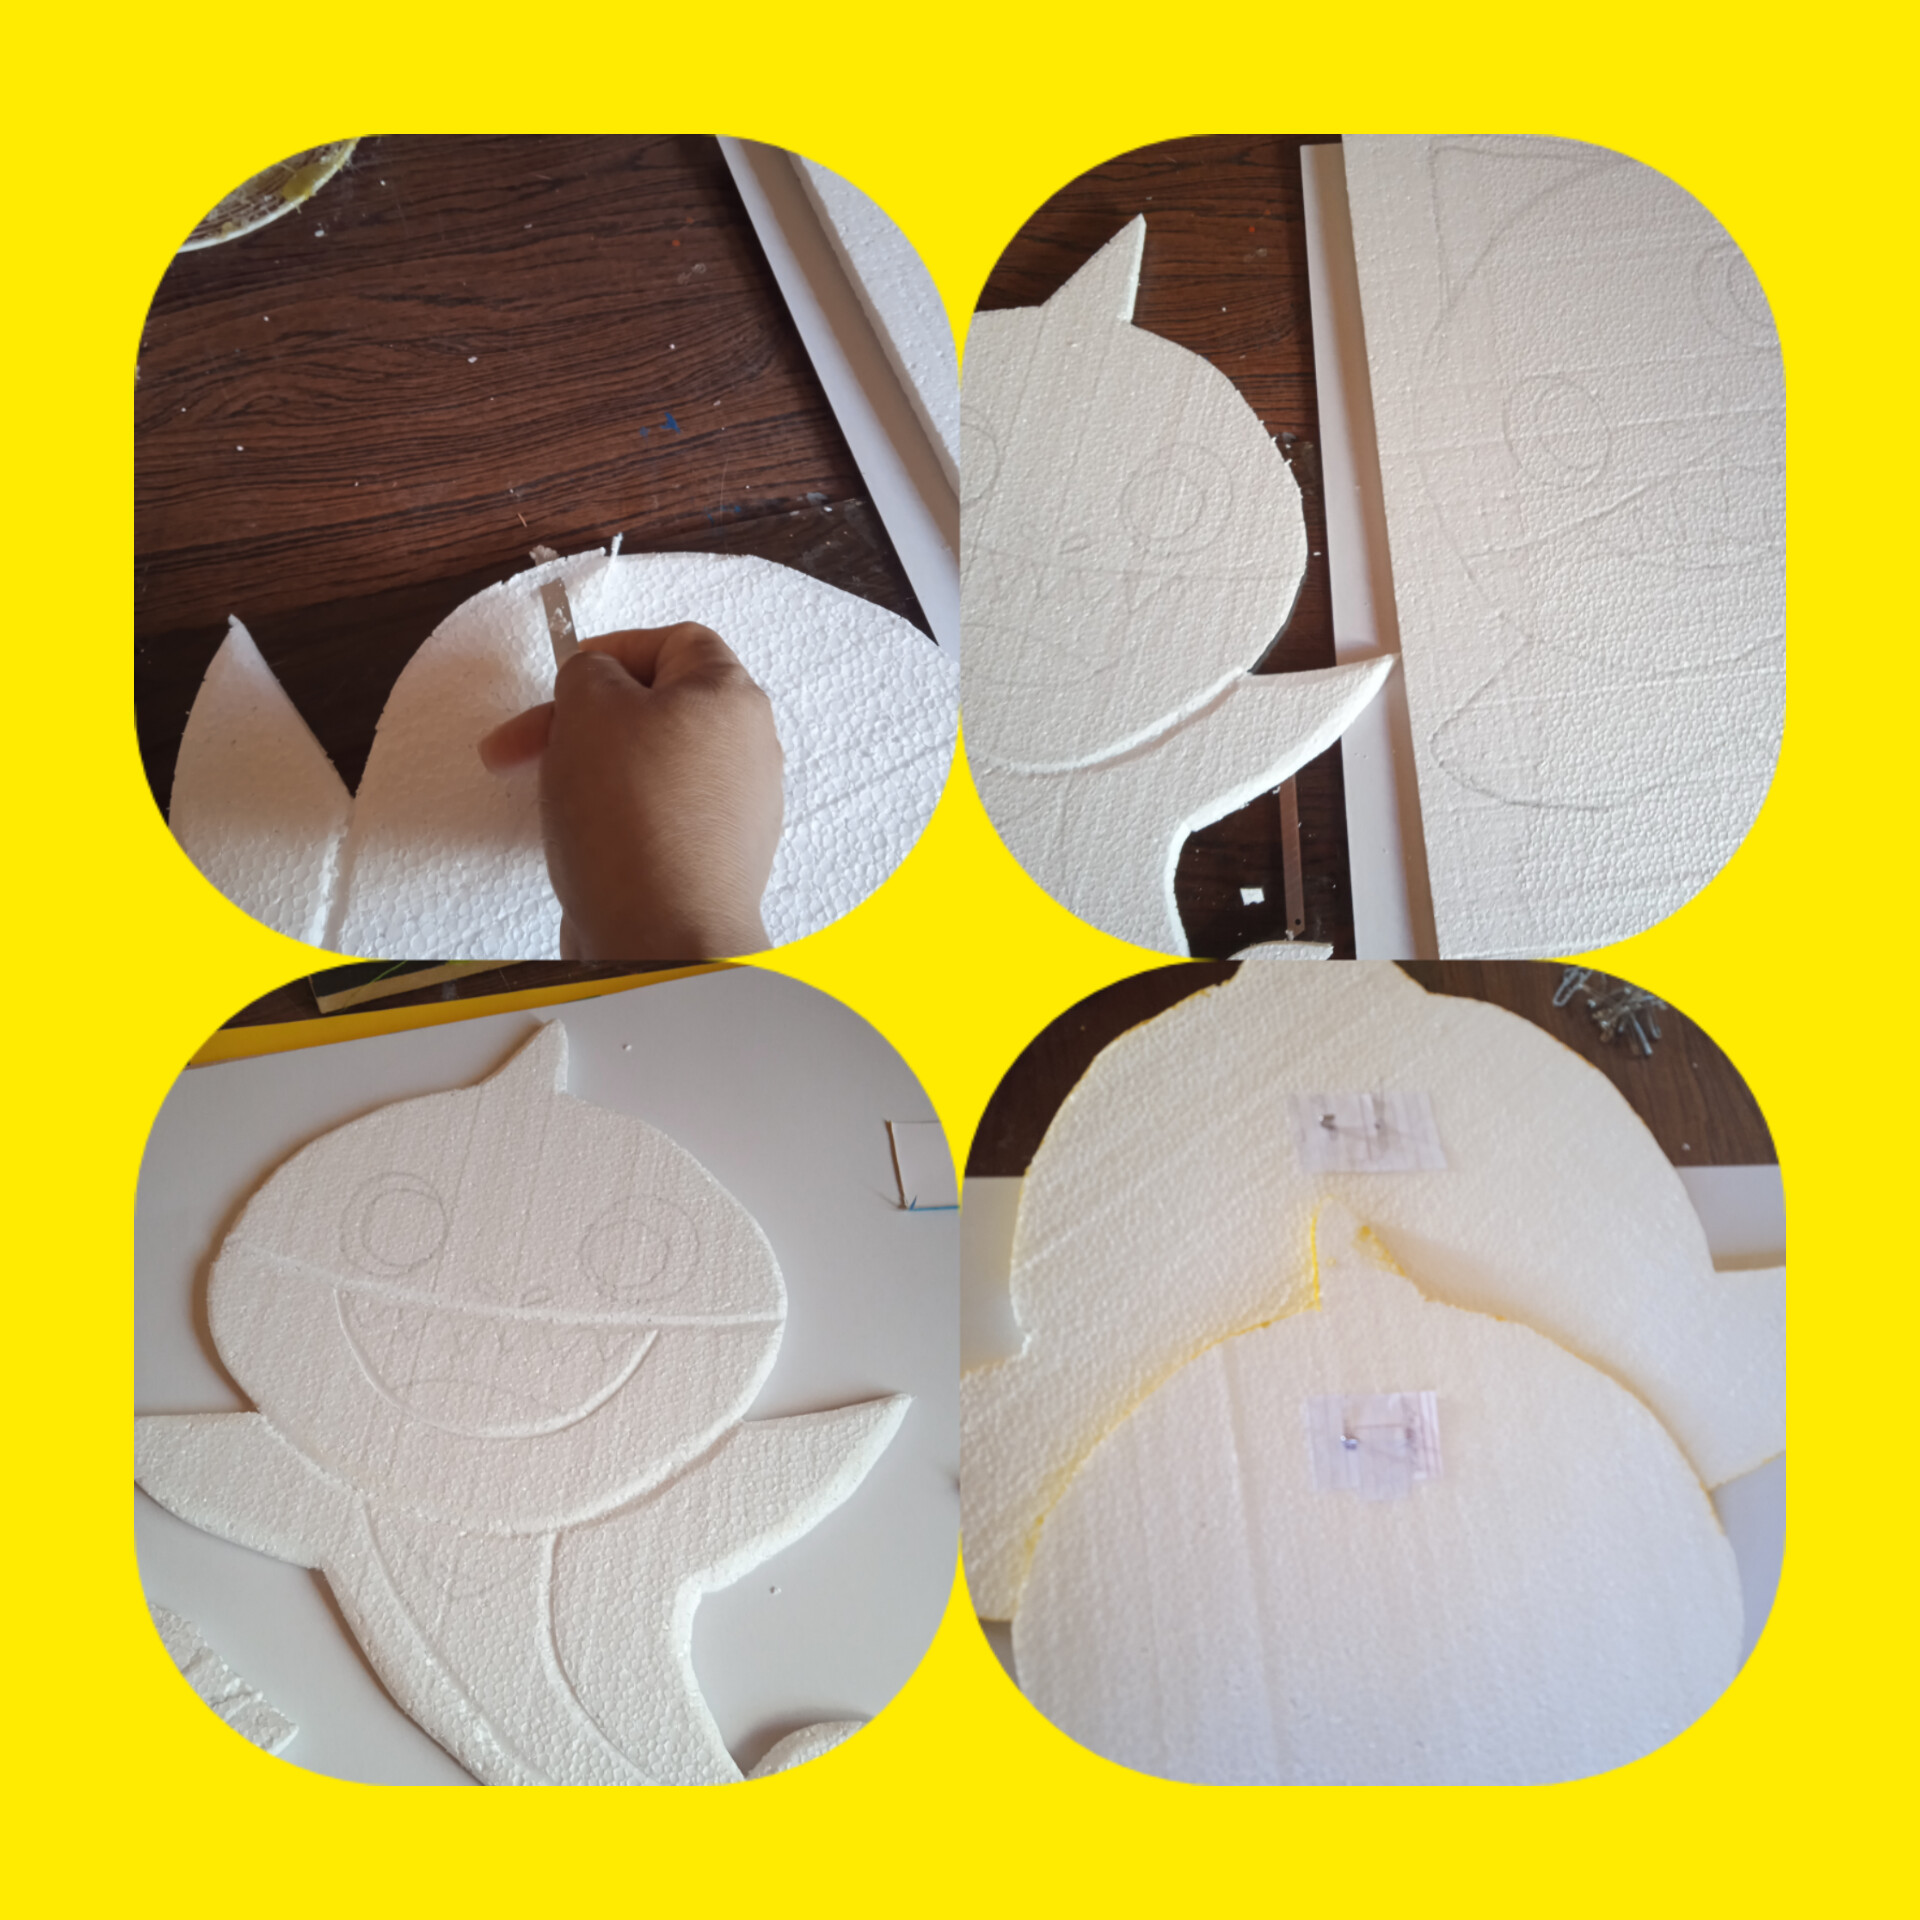
Por ultimo hice unas imágenes con las laminas de anime de la familia tiburón mama SHARK , papa SHARK, Y BEBE SHARK que es el invitado especial del cumple.
Finally I made some images with the anime sheets of the shark family, mom SHARK, dad SHARK, AND BABY SHARK who is the special guest of the birthday.
Marque las piezas con tiza y corte con un cuter les di forma y les coloque alfileres pequeños para poderlos colgar después
Mark the pieces with chalk and cut them with a cutter, shape them, and place small pins on them so you can hang them laters
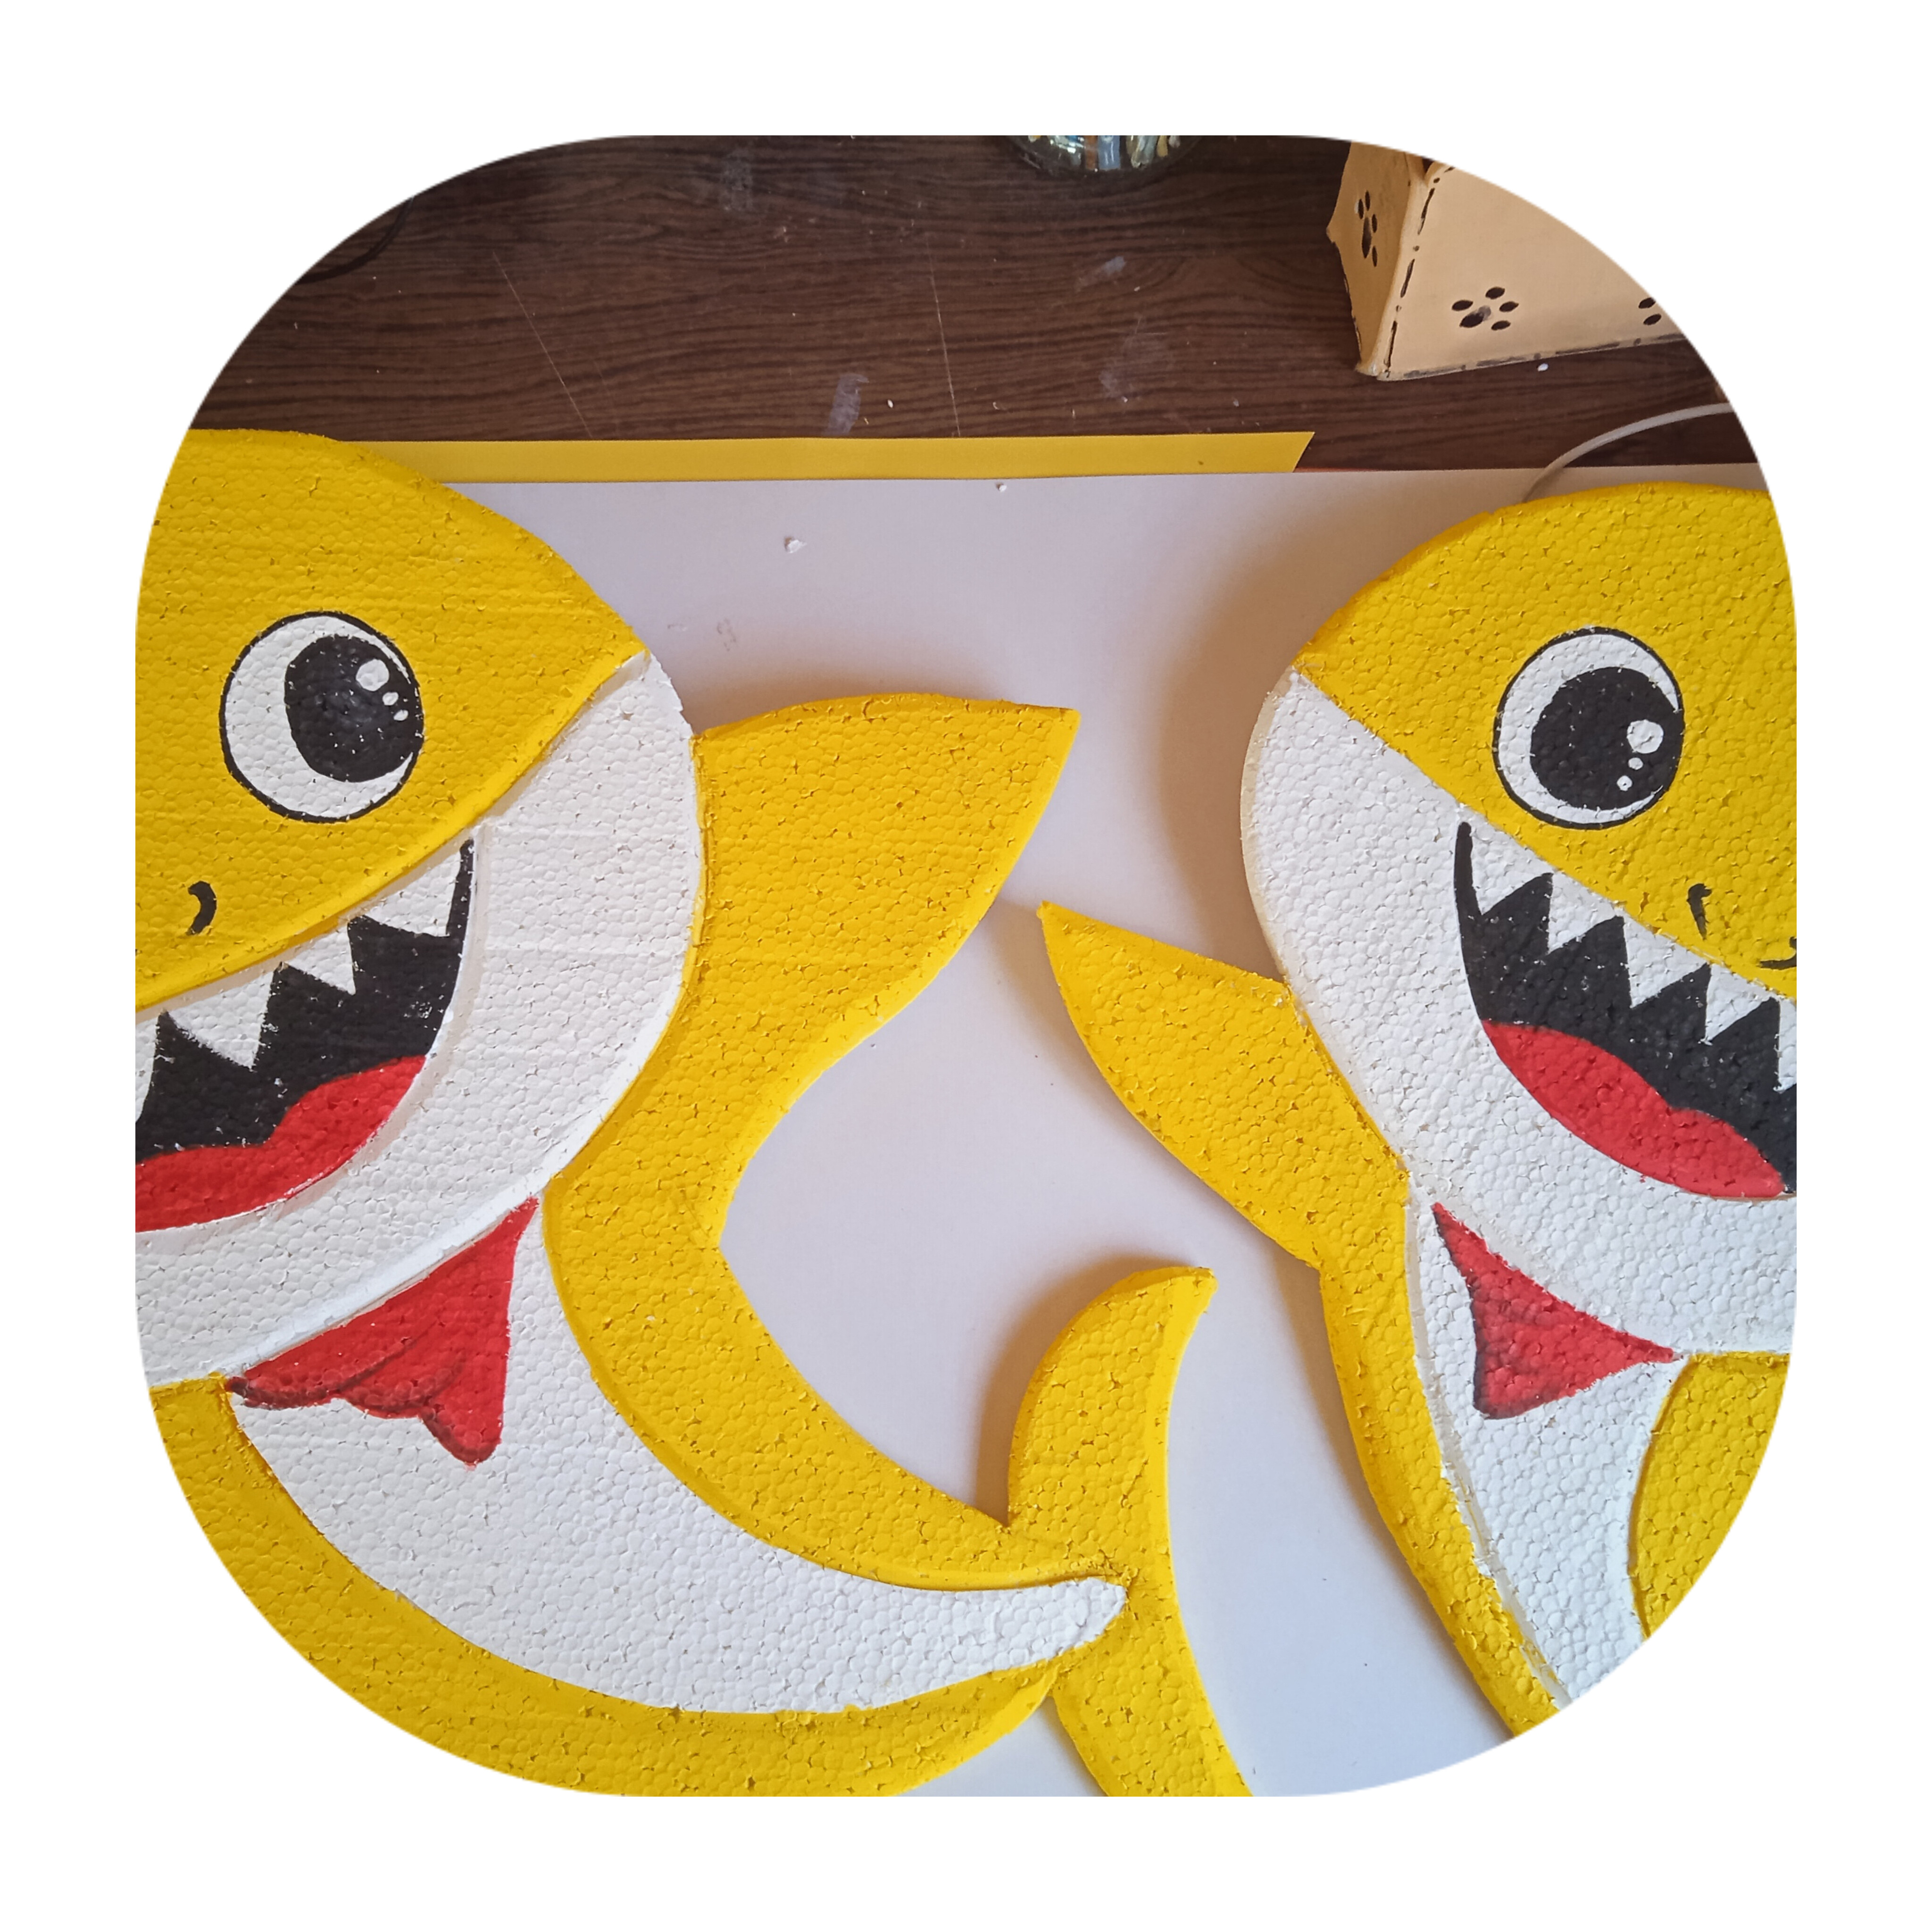
Ahora a pintarlos uno rosado, uno azul rey u no amarillo, después de pintarlos los cubro con pega blanca para proteger que no se dañen ni se lo coman los bichos...
Now to paint them one pink, one royal blue or not yellow, after painting them I cover them with white glue to protect them from being damaged or eaten by bugs..
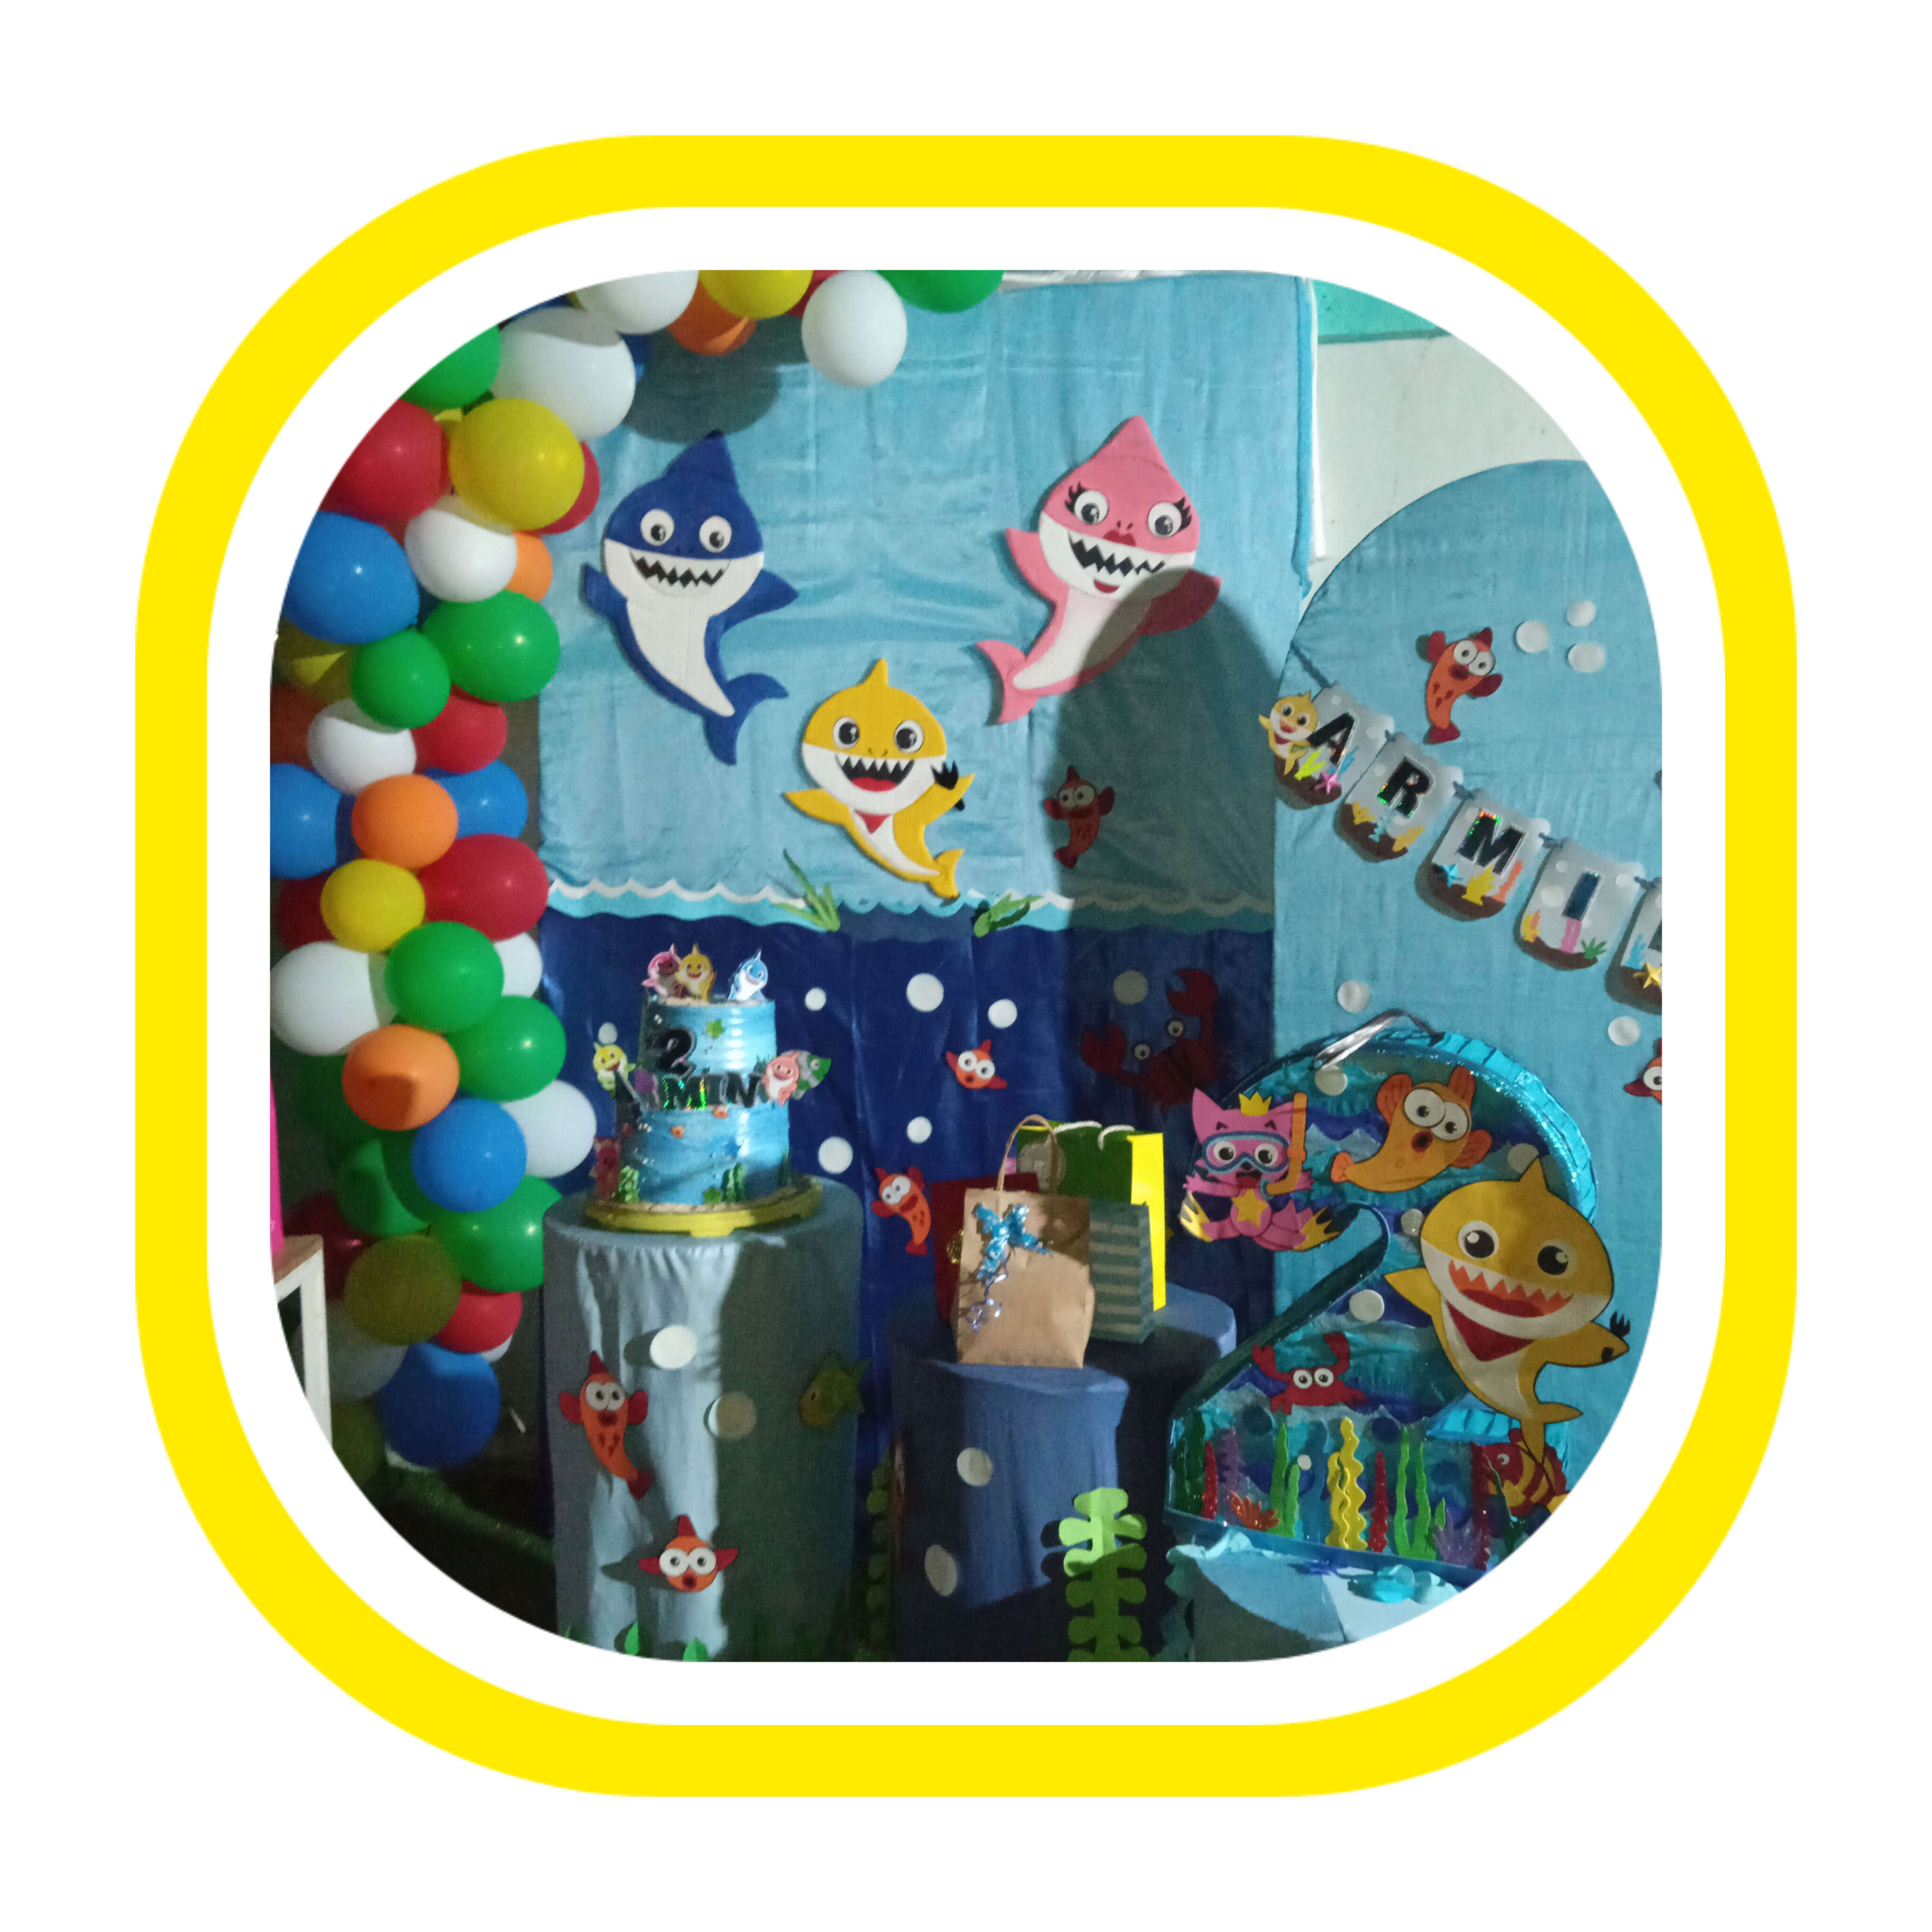
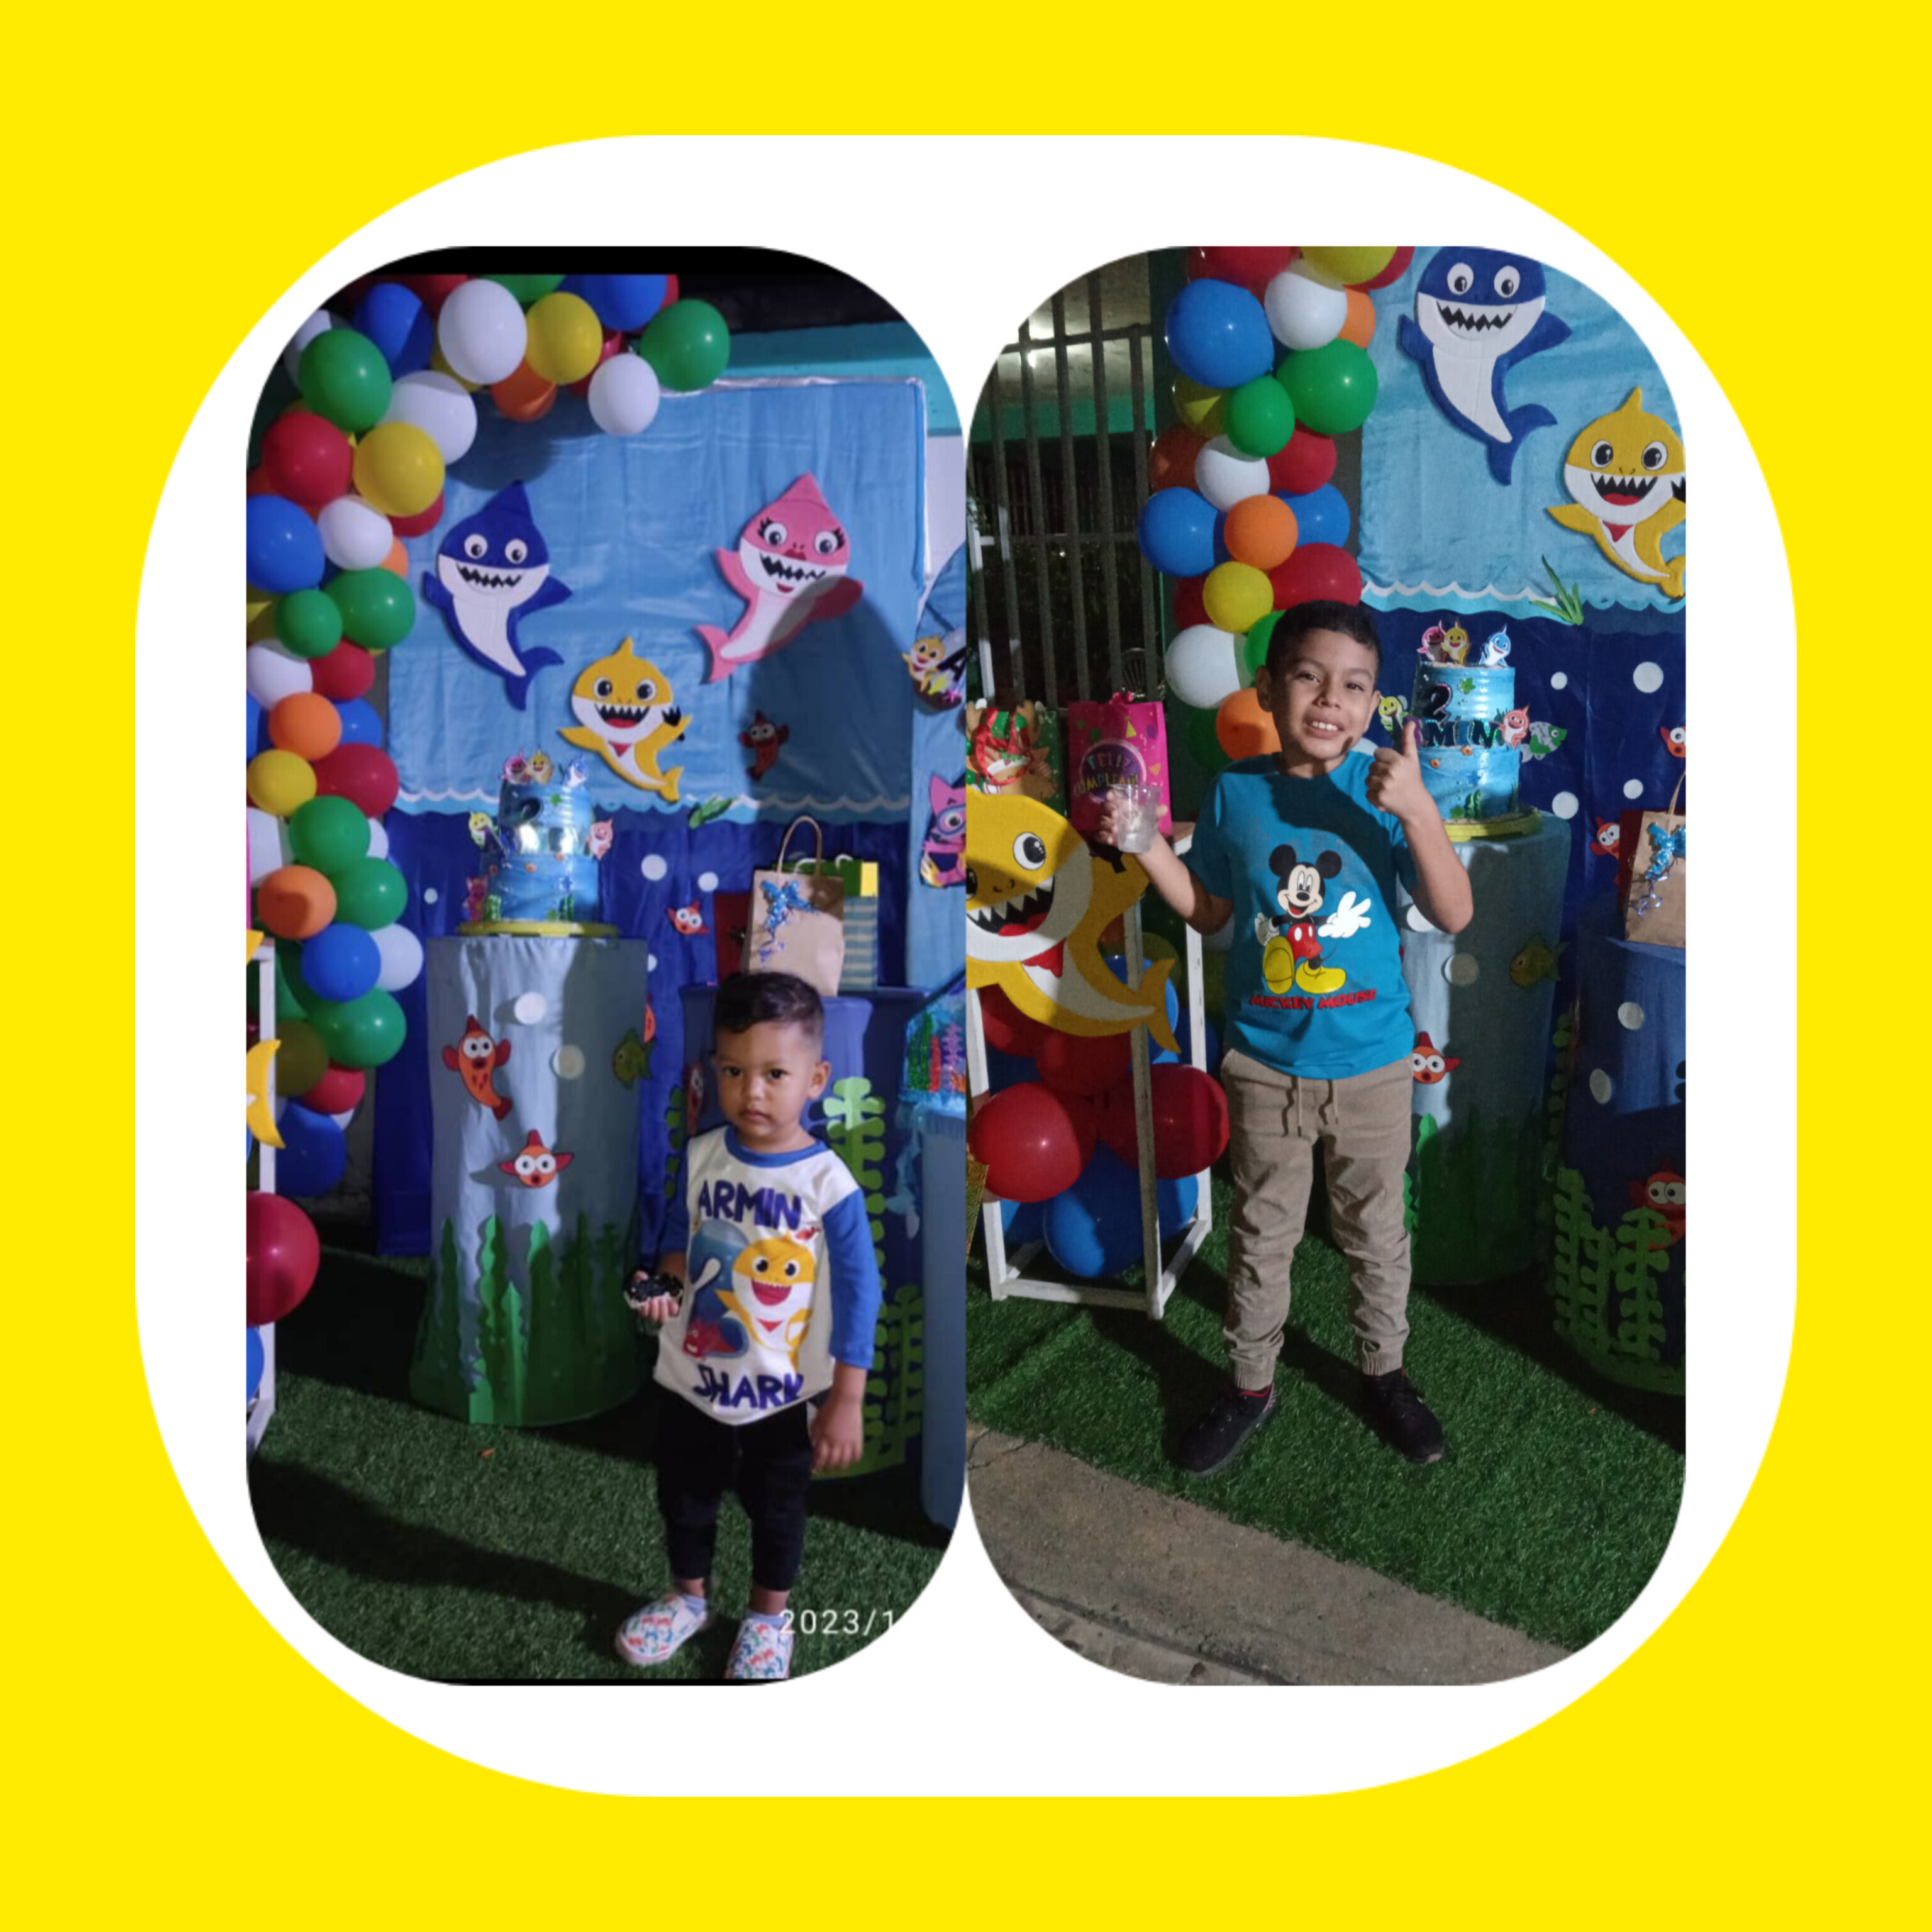
Ahora si ya esta todo listo , les muestro como quedo todo, en la casa estabamos muy contentos con todo lo realizado, quedo todo muy bonito,.. y ARMIN bailando BABY SHARK do do do !
.jpg)
Now if everything is ready, I'll show you how everything turned out, in the house we were very happy with everything done, everything was very nice,... and ARMIN dancing BABY SHARK do do do
Bueno amigos espero no haber sido tan expresiva con este trabajo, pero a veces la inspiración hace de las suyas, y este trabajo me gusto mucho es diferente a otros trabajos y cuando es para un ser querido hay que ponerle mas entusiasmo todavía..no vemos en un próximo trabajo ADIÓS!...
Well friends, I hope I have not been so expressive with this work, but sometimes inspiration does its thing, and I really liked this work, it is different from other works and when it is for a loved one you have to put even more enthusiasm into it...we don't see in a next job GOODBYE!..
las fotos fueron tomadas con mi telefono xiaomi redmi 9A editadas por inshop.
The photos were taken with my Xiaomi Redmi 9A phone edited by inshop.
!DIY
You can query your personal balance by
!DIYSTATSQue bonito me encanta la piñata! las formas de las olas quedaron muy bonitas!