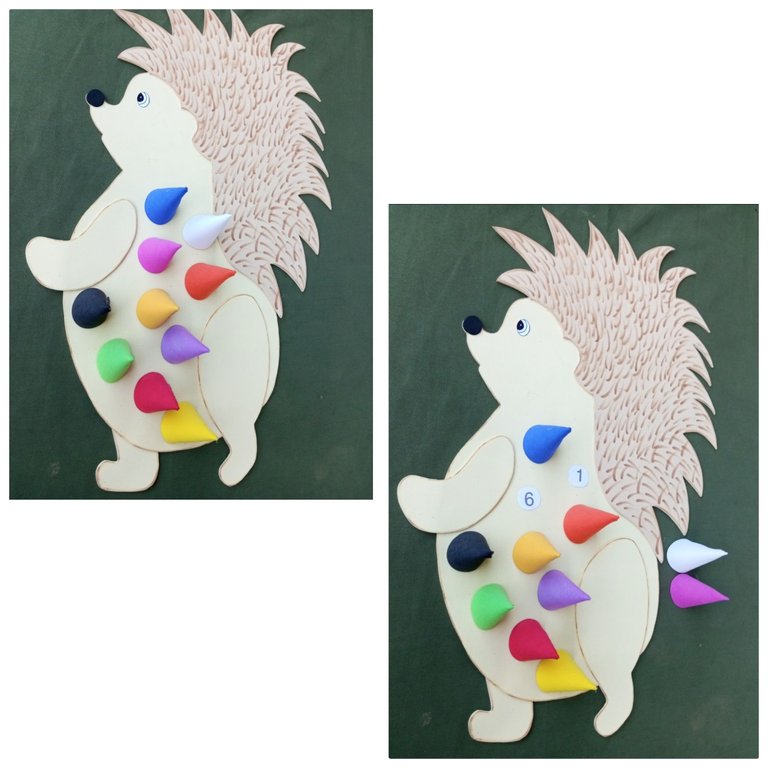
Colorido puercoespin/ Colorful porcupine/@rosmyplacen
Ya que considero que jugando los aprendizajes tienden a ser más significativos.
Así que manos a la obra.
I believe that learning tends to be more meaningful when playing.
So let's get to work.
| Materiales: | Materials: |
|---|
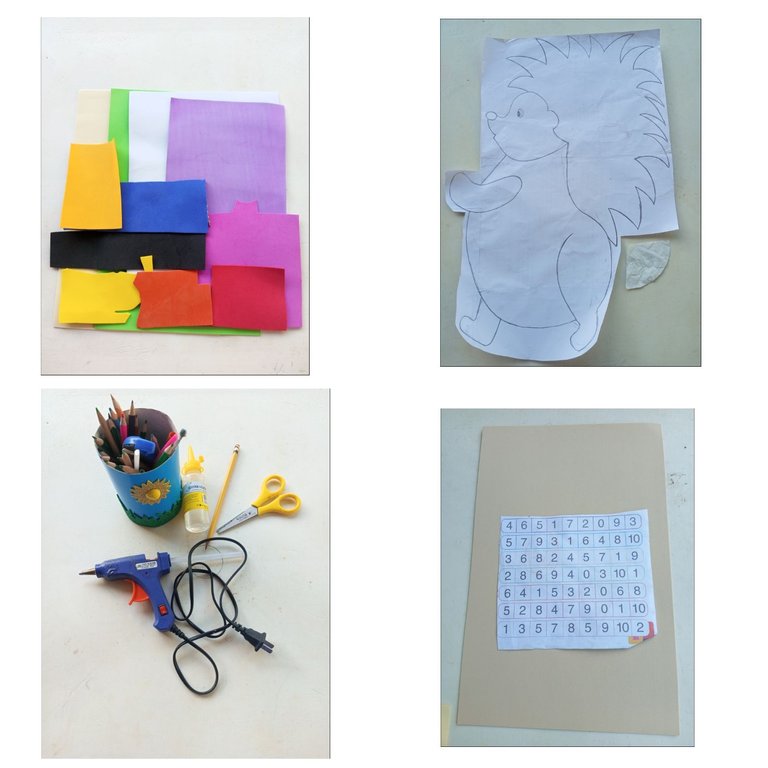
- Foami de colores:laminas de 2 tonalidades de color carne, recortes de color blanco,negro,morado, fucsia,azul, amarillo, naranja,rojo verde,y color mostaza.
- Plantilla de número ( cualquier recorte de números).
- Silicón en barra y líquido ( el que prefiera).
- Tijera, lápiz.
- Colores (Marrón).
- Un dibujo de puercoespin y de 1 triángulo obalado.
- Colored Foami: sheets of 2 shades of flesh color. white, black, purple, purple, fuchsia, blue, yellow, orange, red, green and mustard colors.
- and mustard color.
- Number template (any number cutout).
- Silicone stick and liquid glue (whichever you prefer).
- Scissors, pencil.
- Colors (Brown).
- A drawing of a porcupine and 1 oval triangle.
Paso a Paso: / Step by Step:
| Paso 1: | Step 1: |
|---|
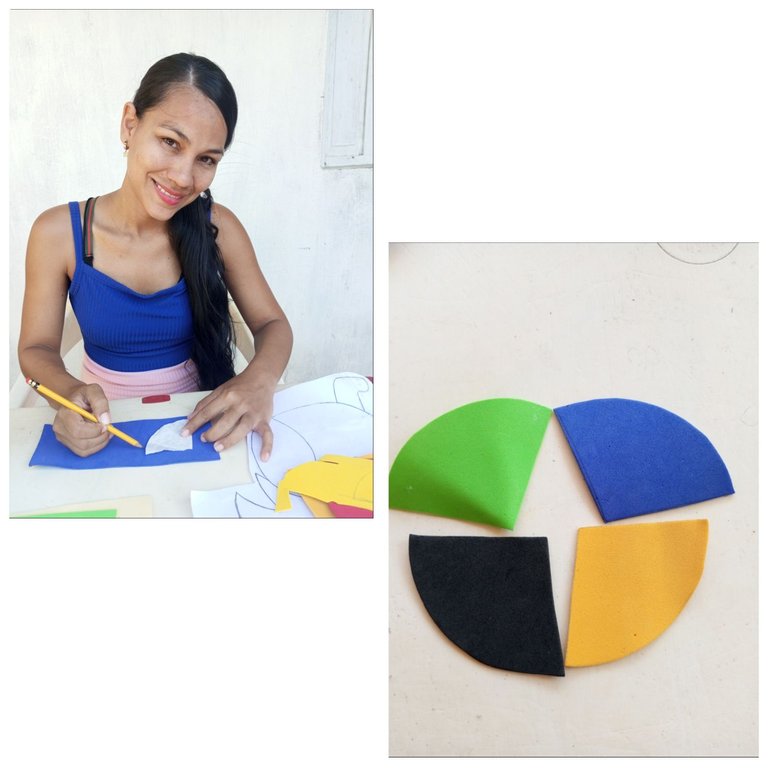
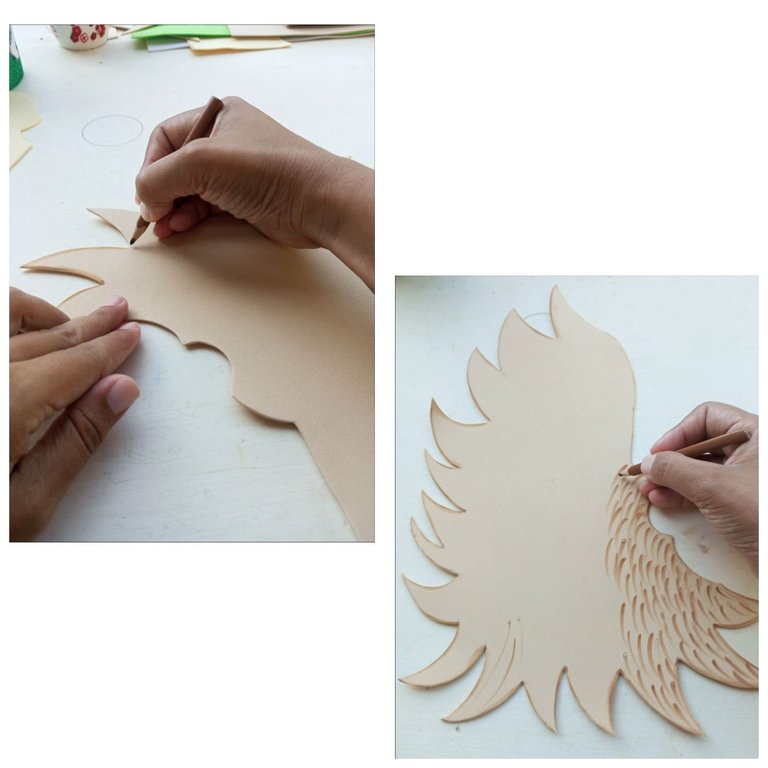
Lo primero que hacemos es tomar el patrón del triángulo ovalado y comenzamos a marcarlo en cada color de foami.
The first thing we do is to take the pattern of the oblate triangle and start marking it on each color of foami.
| Paso 2: | Step 2: |
|---|
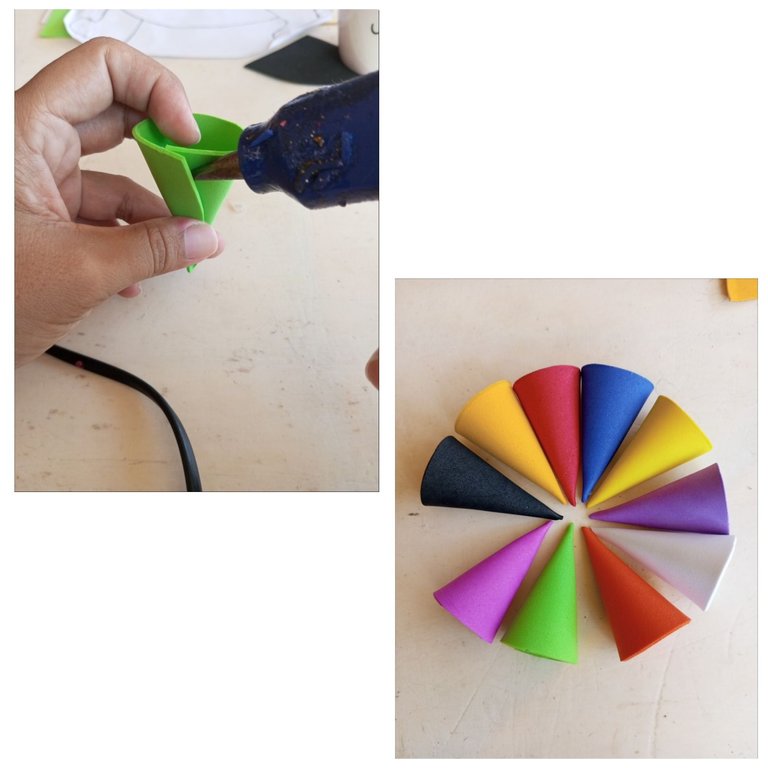
Luego le damos vuelta ,buscando unir un extremo con otro para formar un cono y pegarlo.
Then we turn it over, trying to join one end with the other to form a cone and glue it.
| Paso 3: | Step 3: |
|---|
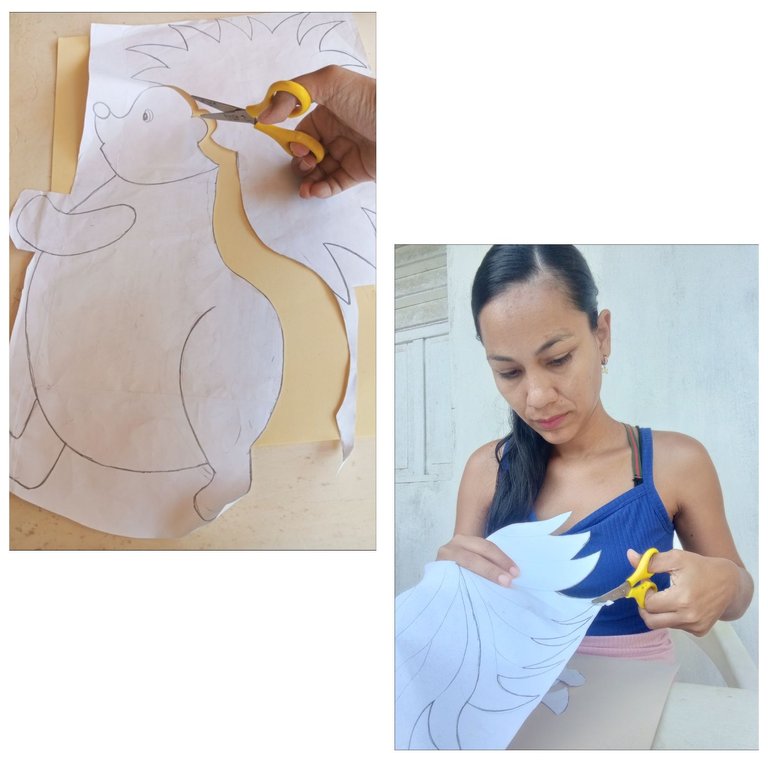
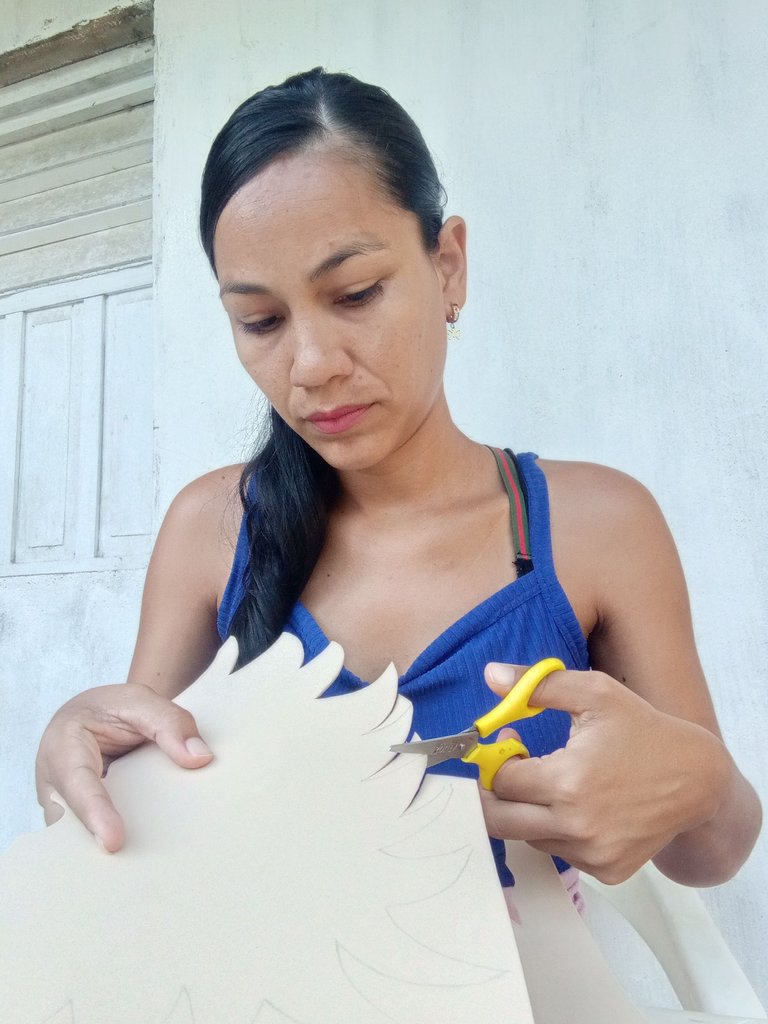
Recortamos cada parte del cuerpo del dibujo ( tronco, extremidades y melena)
We cut out each body part of the drawing (trunk, limbs and mane).
| Paso 4: | Step 4: |
|---|
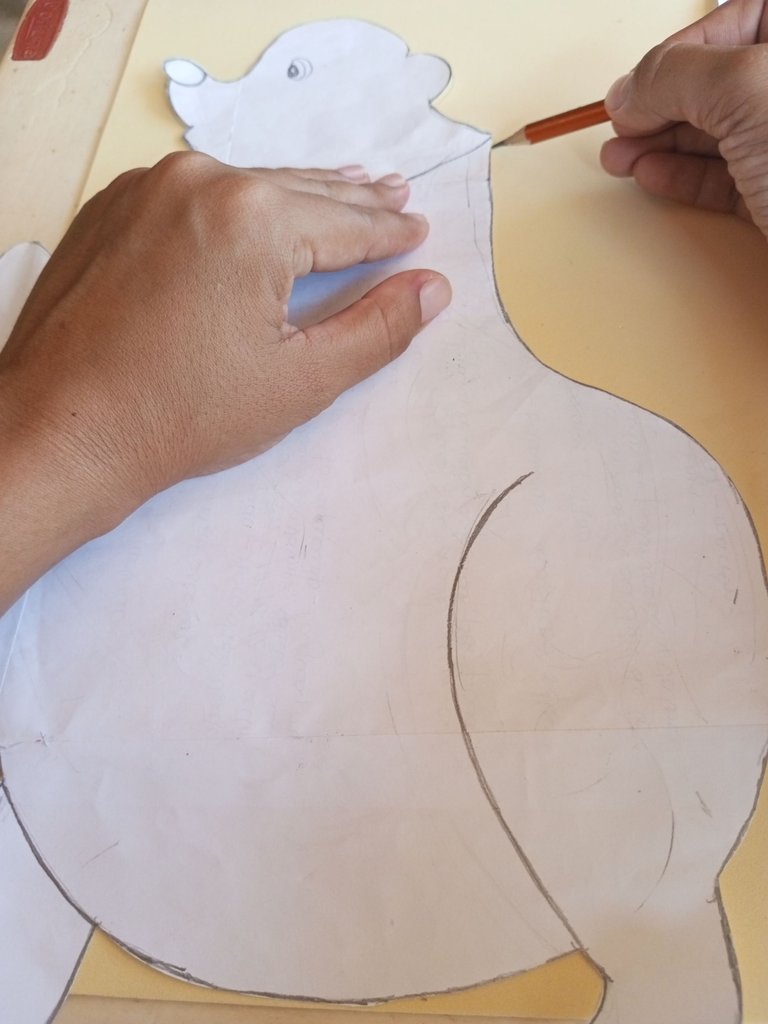
Los remarcamos en el foami
We mark them on the foami.
| Paso 5: | Step 5: |
|---|
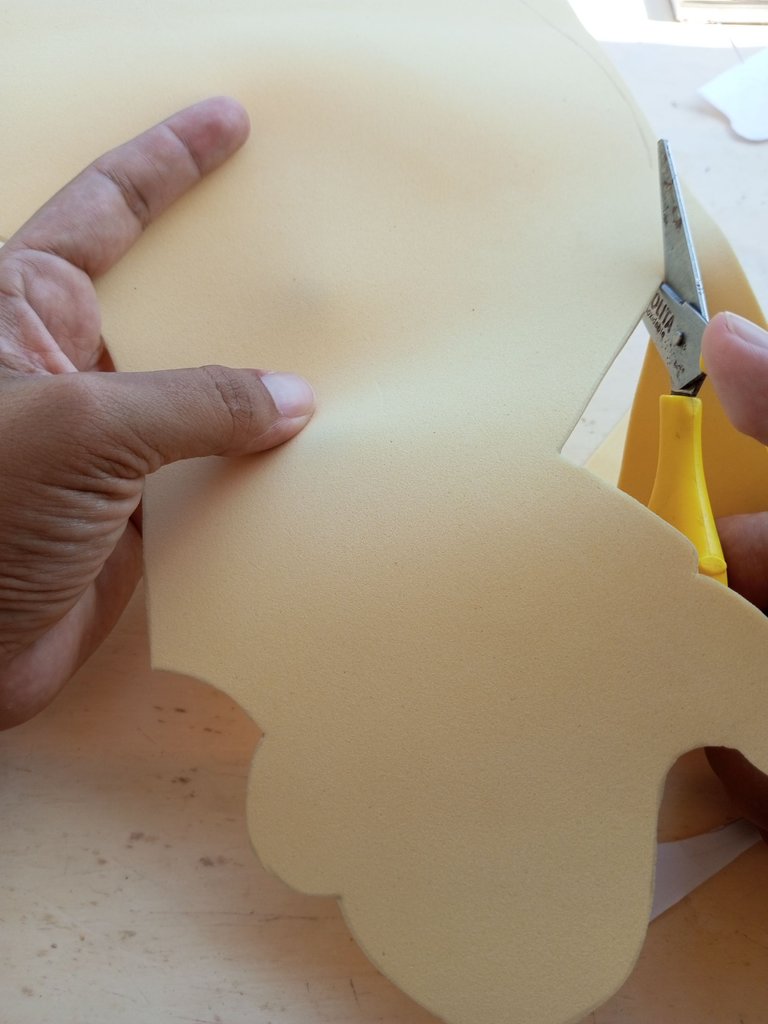
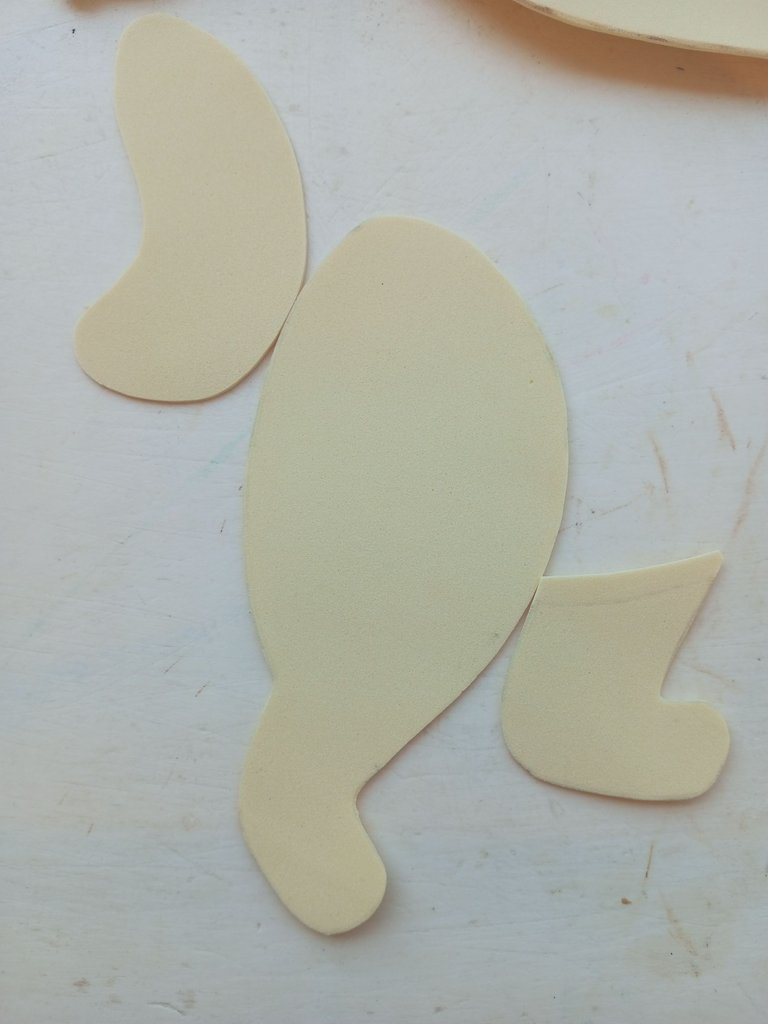
Para proceder a recortar cada pieza, los tendremos así.
To proceed to cut out each piece, we will have them like this
| Paso 6: | Step 6: |
|---|
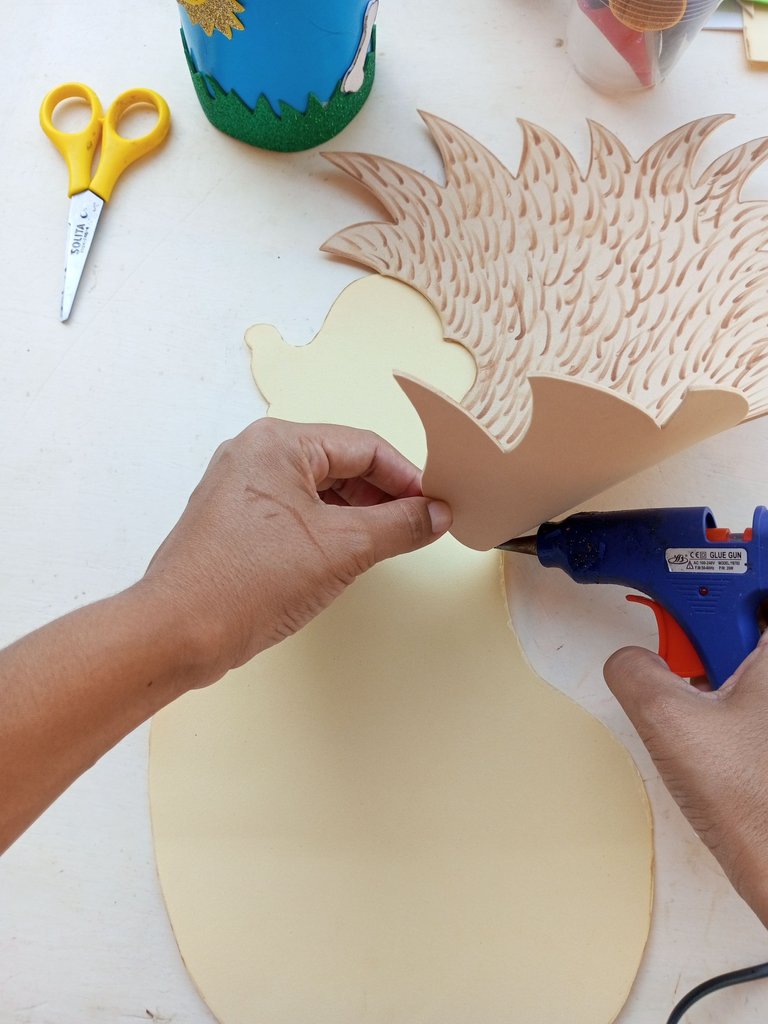
Sombreamos cada parte de su cuerpo y con un color marrón simulamos sus espinas.
We shaded each part of its body and with a brown color we simulated its thorns.
| Paso 7: | Step 7: |
|---|
Pegamos cada pieza.
We glue each piece.
| Paso 8: | Step 8: |
|---|
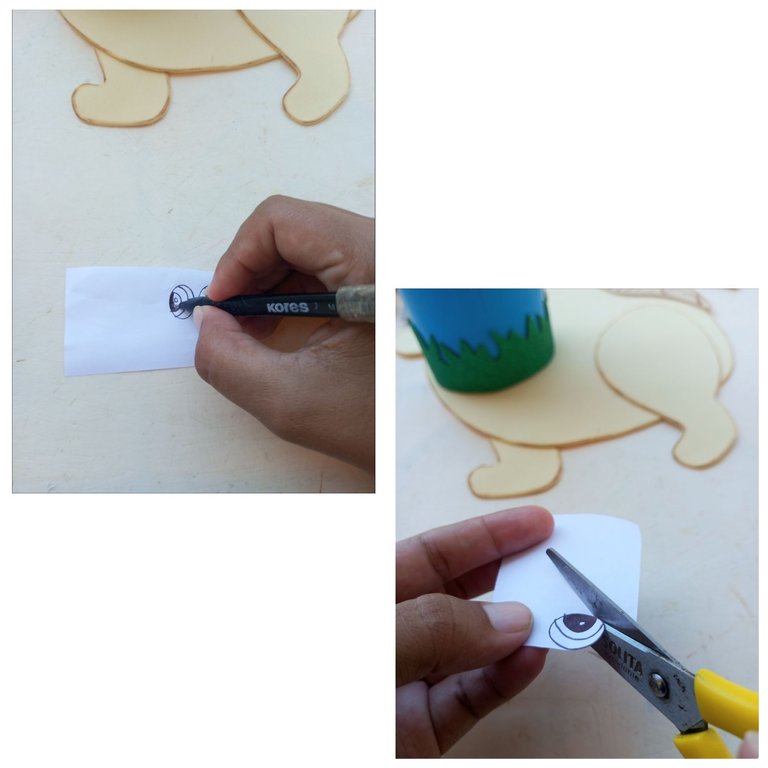
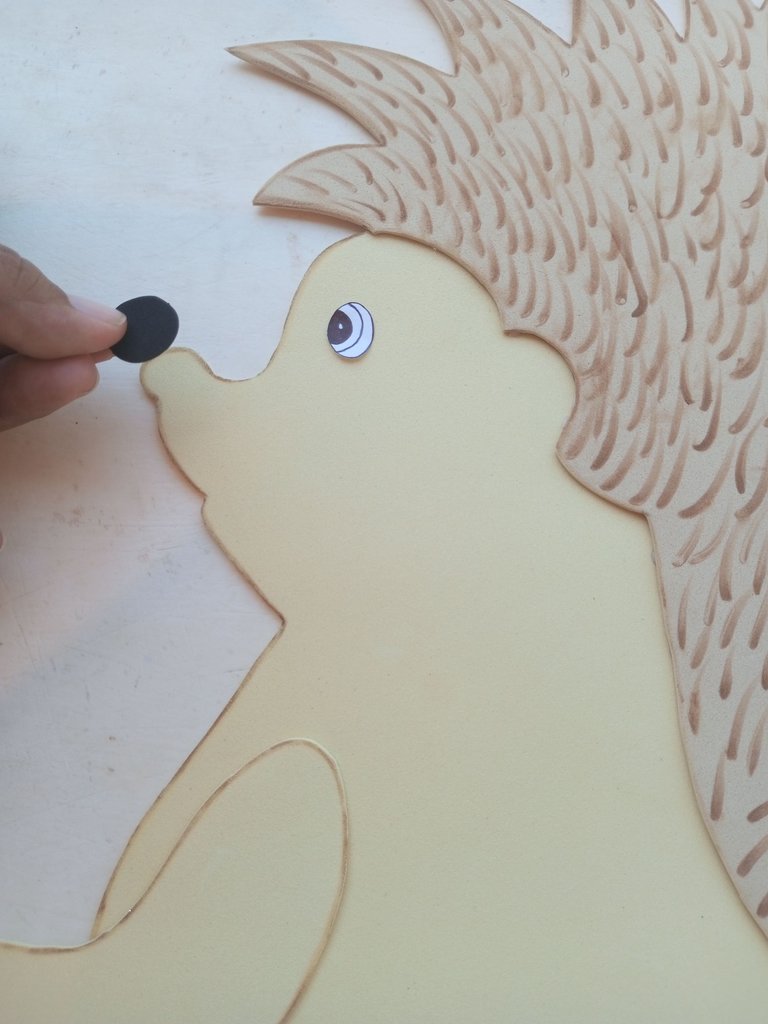
Pintamos los ojos y la nariz, con un color negro.
We paint the eyes and the nose, with a black color.
| Paso 9: | Step 9: |
|---|
Los colocamos en el rostro de nuestro animalito.
We place them on our animal's face.
| Paso 10: | Step 10: |
|---|
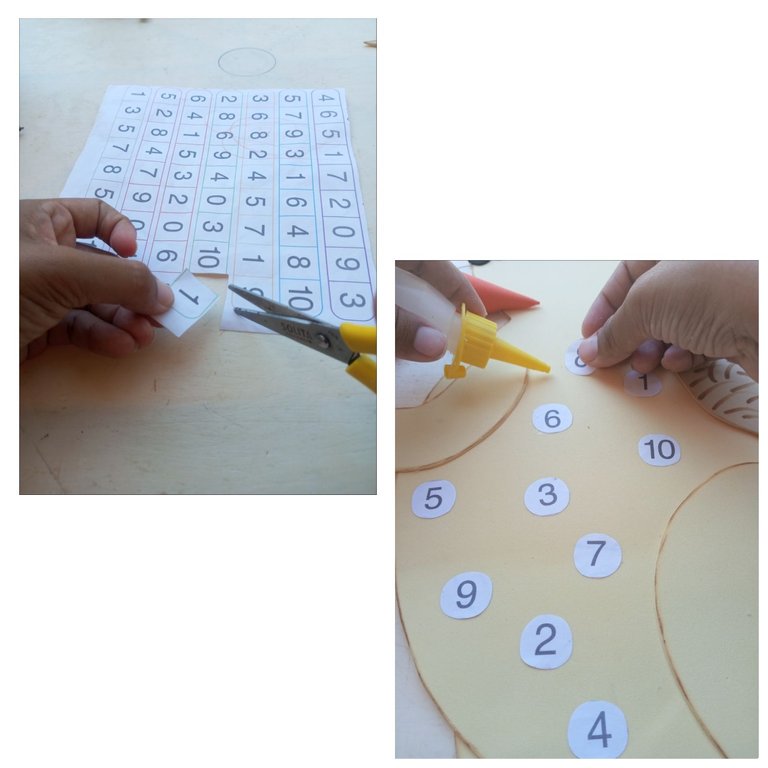
Recortamos números en forma circular y los pegamos en la barriguita de nuestra creación,para finalmente decir lo logramos.
We cut out numbers in a circular shape and glue them on the belly of our creation,to finally say we did it.

Me despido deseándoles éxitos y muchas bendiciones para su vida, gracias por tu visita.
- Todas las fotos son de mi propiedad.
- Editadas por la aplicación LyrebirdStudio Photo Collage Editor.
- Traductor utilizado Deepl.
I say goodbye wishing you success and many blessings for your life, thank you for your visit.
- All photos are my own,
- Edited by LyrebirdStudio Photo Collage Editor application.
- Translator used Deepl.
https://twitter.com/Rosmyplacen/status/1715312270312394881?t=UF821NrRZ26S_DcplXWM-A&s=19
Un trabajo espectacular el que nos presentas, tiene como la finalidad enseñar a nuestros niños, me encantó la idea.💡
Saludos.
Gracias por tu visita amiga,me alegra que te haya gustado. Saludos.
Me agrado mucho tu post. Las manualidades no son algo que se me de con facilidad, pero desde que soy padre me ha tocado aplicarme para poder ayudar a mis hijas. gracias por compartir esto
Fue todo un gusto haber podido compartir esta manualidad con ustedes. Bendiciones.
Congratulations @rosmyplacen! You have completed the following achievement on the Hive blockchain And have been rewarded with New badge(s)
Your next target is to reach 100 comments.
You can view your badges on your board and compare yourself to others in the Ranking
If you no longer want to receive notifications, reply to this comment with the word
STOPTo support your work, I also upvoted your post!
Gracias por esa nueva insignia y apoyo. Saludos.
De nada @rosmyplacen 😊👍 ¡Le deseamos un buen día!
Saludos @rosmyplacen, que cuchitura de puercoespín, me encantó se ve tierno, gracias por compartir.
Feliz y bendecido fin de semana!
Ay gracias por tu apreciación amiga,lo realice con mucho cariño.Bendiciones.
@rosmyplacen
https://inleo.io/threads/view/hive-130560/re-leothreads-2szvdgnvv
https://twitter.com/hivediy47901/status/1715807964429226489
Gracias por el apoyo, bendiciones.
Que hermoso mi niña tienes mucha creatividad. Bendiciones 🙏
Amén 🙏 muchas gracias amiga.🤗