[Esp/Eng]Cómo hacer una hermosa cajita de regalo // How to make a beautiful gift box
[Esp/Eng]Cómo hacer una hermosa cajita de regalo // How to make a beautiful gift box
Saludos apreciados amigos de la comunidad #hivediy la casa de todos los artesanos donde podemos mostrar nuestras manualidades y obras realizadas hoy les traigo otro hermoso proyecto espero les guste

Aprovechando que ya vamos a celebrar el día de la mujer en este mes de marzo, estoy preparando unas cajitas especiales, de manera de entregar un pequeño obsequio para algunas mujeres especiales que han hecho grandes cosas para mí y con esto expresarle mis agradecimientos por todas las cosas buenas que he vivido con el apoyo de ellas
Aunque pienso que no debemos esperar que llegue el mes de marzo para brindarle un homenaje a las mujeres porque nosotras merecemos un trato especial todos los días, a continuación les explico todo el proceso de elaboración de este proyecto
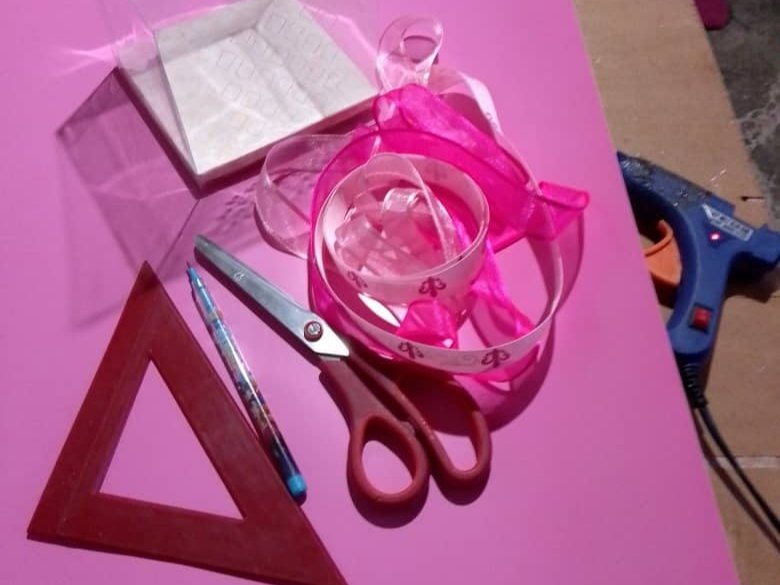
Los materiales que utilice para realizar esta bella cajita son los siguientes:
- Cartulina escolar color rosada
- Una lámina de foamy escarchado rosado
- Tijera
- Pistola de silicón caliente
- Cinta de varios colores
- Una cajita de acetato
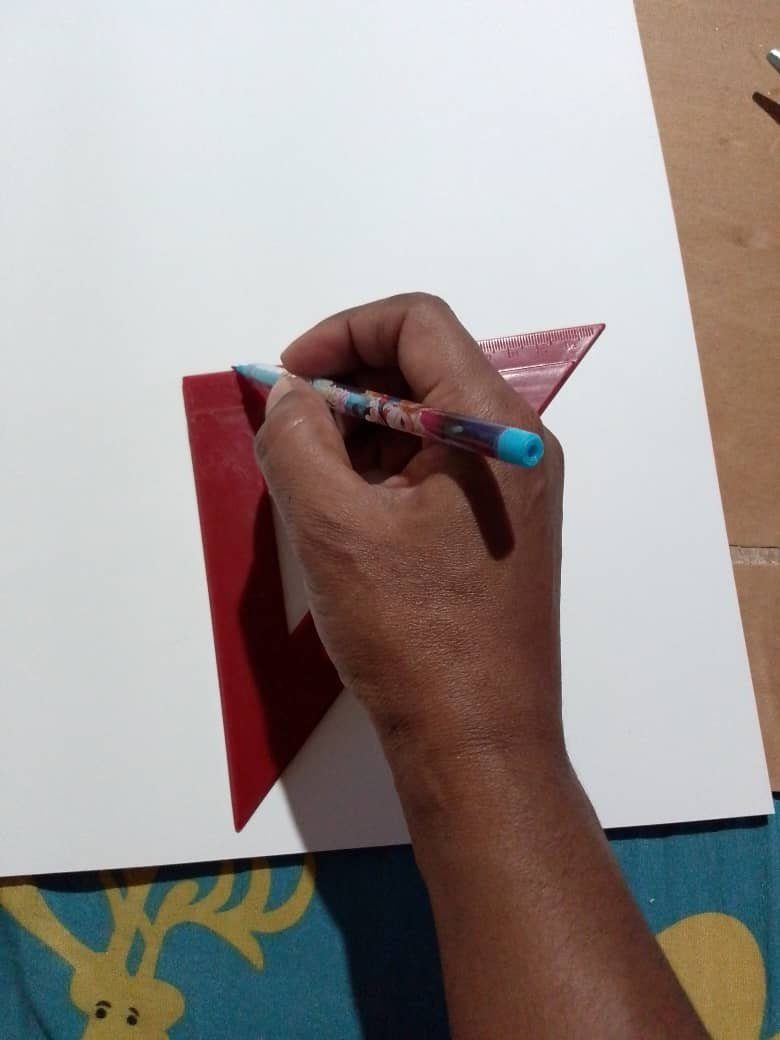
Primero vamos a tomar las medidas de la cajita de acetato que eran 12 por 12 centimetros, entonces trace dos cuadrados, luego trace otra línea para poder formar dos tapas con la cartulina escolar , estás las vamos a colocar una debajo y una arriba, esto para hacer más llamativa la cajita y como el color rosado representa a la mujer queda perfecto en el obsequio
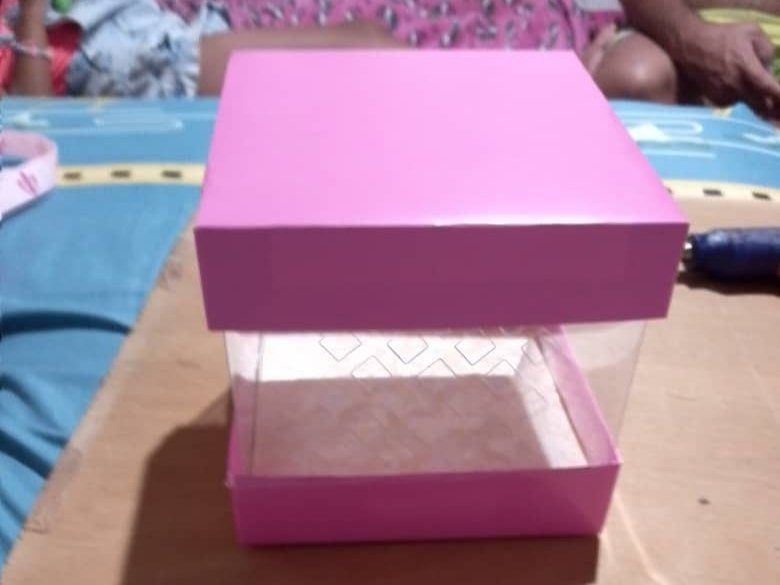
Una vez que tengamos las tapas armadas y listas pegamos con la pistola de silicón caliente una de las tapas en la base de la cajita de acetato, la de la tapa superior no la vamos a pegar para poder destapar la caja sin dañarla
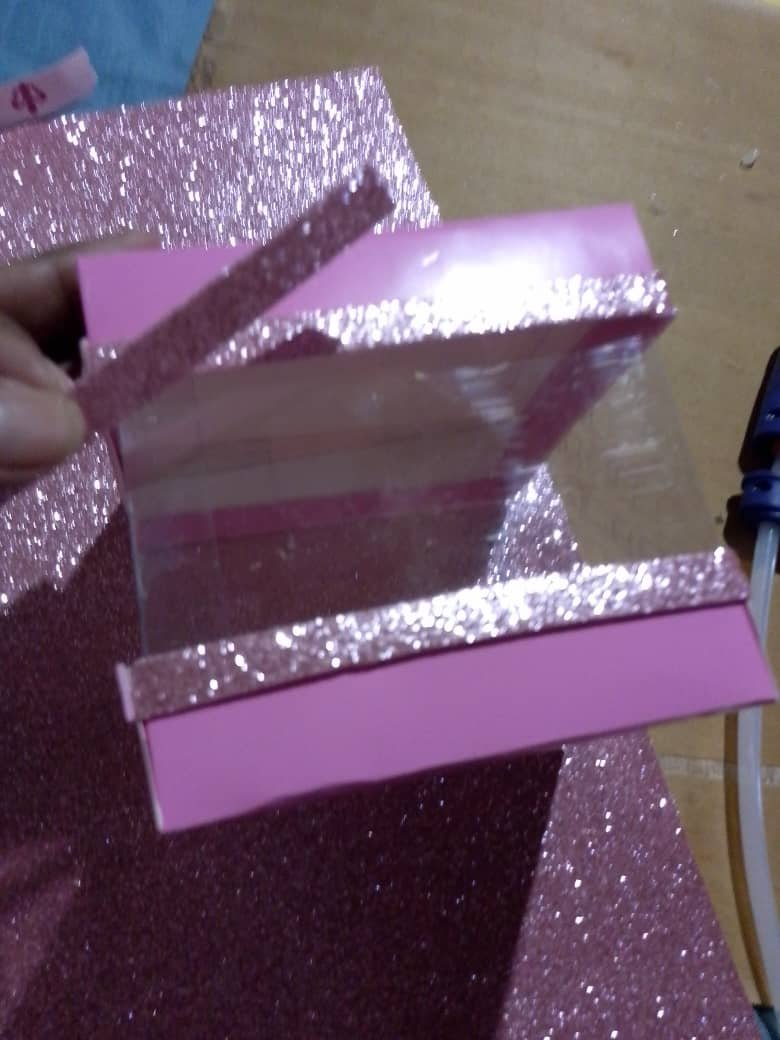
Lo siguiente será cortar una tiras del foamy escarchado de aproximadamente un dedo de ancho y luego la vamos a pegar en uno de los bordes de las tapas que hicimos con la cartulina escolar
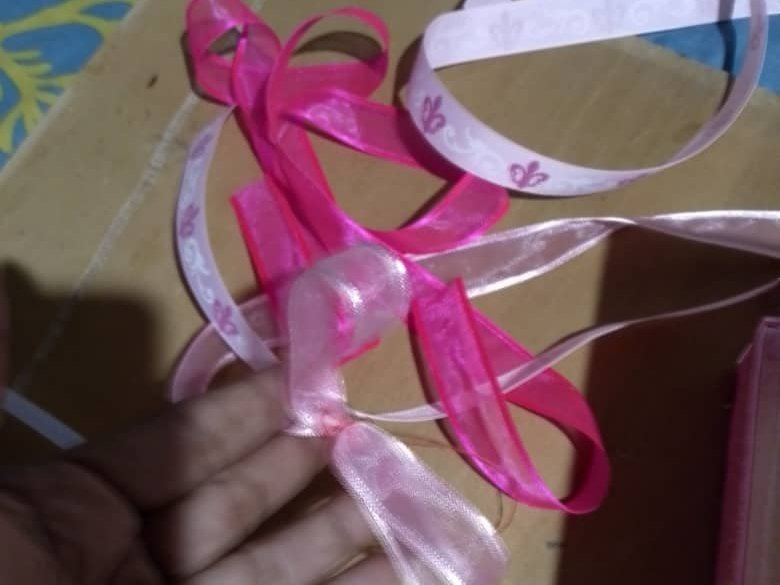
El próximo paso es cortar las cintas de lazo y formamos pequeños lacitos tipo corbatín, para luego ir formando un rosa que pagaremos en la parte superior de la cajita
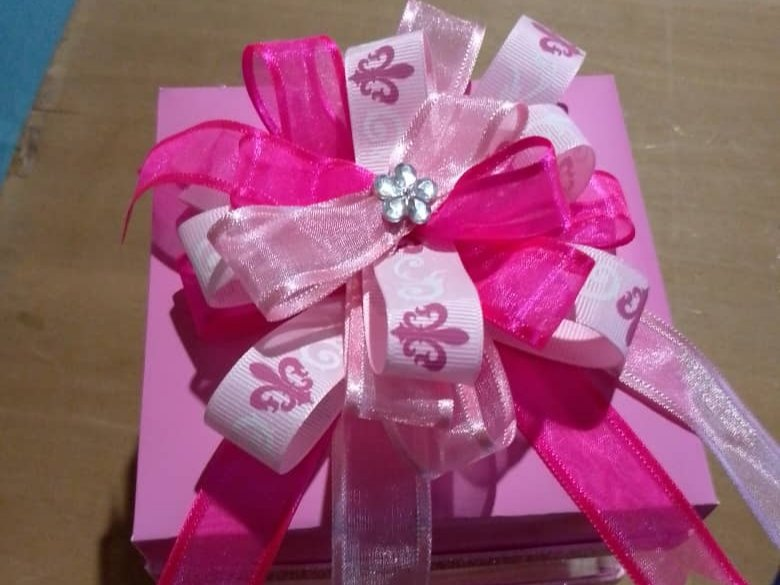
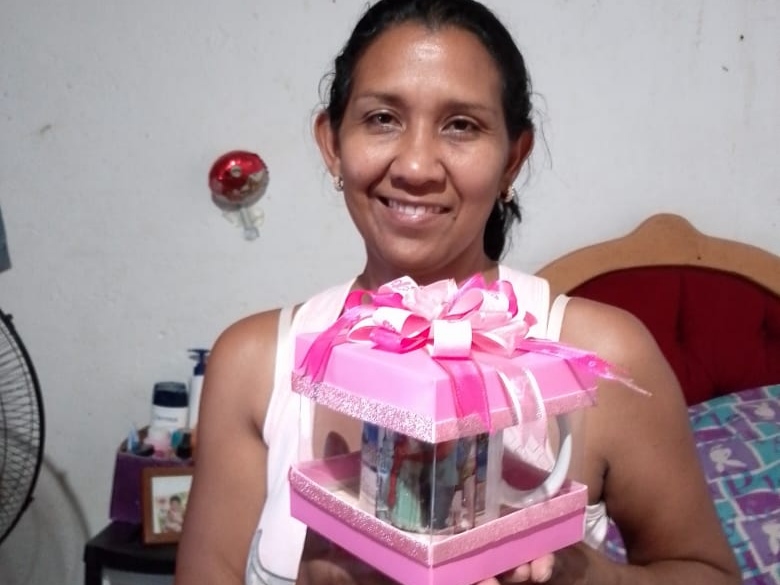
Cuando ya tenemos formados todos los lacitos con los tres colores diferentes de cintas, las iremos colocando una encima de la otra intercambiando los colores tal como vemos en la imagen, solo resta colocar chocolates o un pequeña taza o hasta un pequeño peluche, yo le puse una taza para tomar café dentro de la cajita y listo el pequeño presente
Todas las imágenes mostradas fueron realizadas con mi teléfono Infinity Hot play 12
Traducido en Google on line
Greetings, dear friends of the #hivedi community, the house of all artisans where we can show our crafts and works made today I bring you another beautiful project I hope you like it
Taking advantage of the fact that we are already going to celebrate Women's Day this month of March, I am preparings ome special boxes, in order to give a small gift to some special women who have done great things for me and with this to express my gratitude for all the good things that I have experienced with their support
Although I think that we should not wait for the month of March to arrive to pay tribute to women because we deserve special treatment every day, below I explain the entire process of developing this project< /div>
The materials used to make this beautiful box are the following:
- Pink school cardboard
- A sheet of pink frosty foam
- Scissors
- Hot glue gun
- Ribbon of various colors
- A small acetate box
First we are going to take the measurements of the acetate box, which were 12 by 12 centimeters, then draw two squares, then draw another line to be able to form two lids with the school cardboard, we are going to place them one below and one above, this to make the box more striking and since the pink color represents the woman, it looks perfect on the gift
Once we have the lids assembled and ready, we glue one of the lids to the base of the acetate box with the hot silicone gun. We are not going to glue the top lid to be able to uncover it. the box without damaging it
The next thing will be to cut a strip of frosted foam approximately one finger wide and then we will glue it to one of the edges of the covers that we made with the school cardboard
The next step is to cut the bow ribbons and form small bows like a bow tie, and then form a pink one that we will place on the top of the box
When we have formed all the bows with the three different colors of ribbons, we will place them one on top of the other exchanging the colors as we see in the image, all that remains is to place chocolates or a small cup or even a small stuffed animal, I put a cup to drink coffee inside the box and the little present was ready
All images shown were taken with my Infinity Hot play 12 phone
Translated on Google online
0
0
0.000
Muchas gracias por el apoyo amigos
My love for acetate boxes is immense, I love the transparencies, your model is great, I loved the decor and the colors used with the ribbons. Wonderful.
@sagarkothari88 vote
Agradecida por el apoyo @equipodelta
Me encanta lo delicada que quedó, y el lazo es el toque final.
Está hermosa amiga, felicidades.
Muchas gracias por pasar amiga agradezco mucho el apoyo saludos