Esp / Eng ||Practico imán para nevera con forma de sombrero hecho con materiales de reciclaje o provecho /Practical fridge magnet in the shape of a hat made with recycling or waste materials
Esp / Eng ||Practico imán para nevera con forma de sombrero hecho con materiales de reciclaje o provecho /Practical fridge magnet in the shape of a hat made with recycling or waste materials
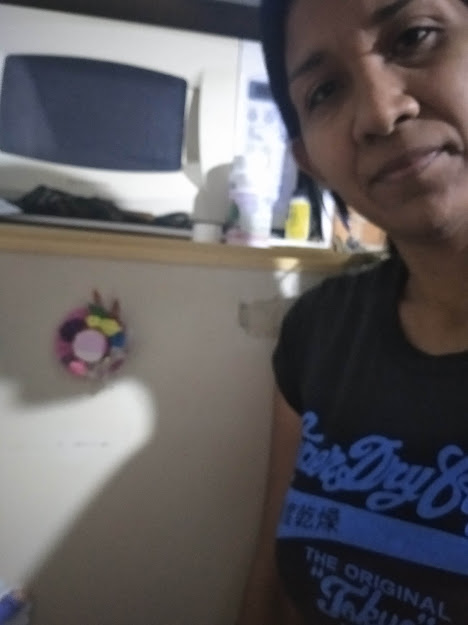
Hola amigos de #hive y de la comunidad #hivediy hoy quiero mostrar como reutilice un imán que tenía guardado y pensé que no servía y lo recicle creando un adorno para nuestra nevera con materiales reciclados, para darle un muy buen uso y no desecharlos, espero sea de su agrado
Muchas veces desechamos tantas cosas pensando que ya no son útiles, pero con un poco de ingenio e imaginación podremos construir muchas cosas sin saberlo
Many times we discard so many things thinking that they are no longer useful, but with a little ingenuity and imagination we can build many things without knowing it
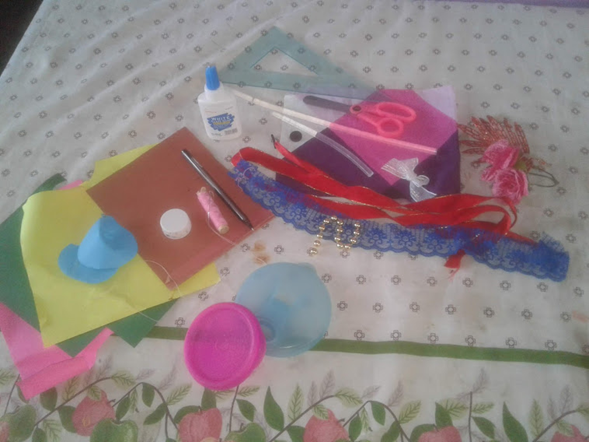
Para este proyecto utilice los siguientes materiales para su elaboración:
• Un trozo de cartón
• Un trozo de cinta de lazo
• Pega escolar
• Pistola de silicón
• Tijera
• Regla
• Lápiz
• Retazos de hojas de colores
• Aguja e Hilo
• Una tapa de refresco plástica
• Retazo de tela
• Un trozo de imán
For this project use the following materials for its elaboration:
• A piece of cardboard
• A piece of ribbon
• School hit
• Silicone gun
• Scissors
• Rule
• Pencil
• Scraps of colored leaves
• Needle and thread
• A plastic soda cap
• Piece of cloth
• A piece of magnet
Paso 1 / Step 1
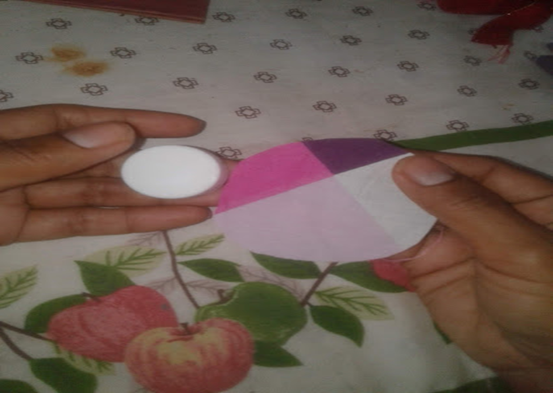
Primero vamos a comenzar por forrar nuestra tapa de refresco, para esto vamos a trazar un circulo en nuestra tela de aproximadamente 10 cm de radio como muestra la figura
First we are going to start by lining our soda cap, for this we are going to draw a circle on our fabric with a radius of approximately 10 cm as shown in the figure
>
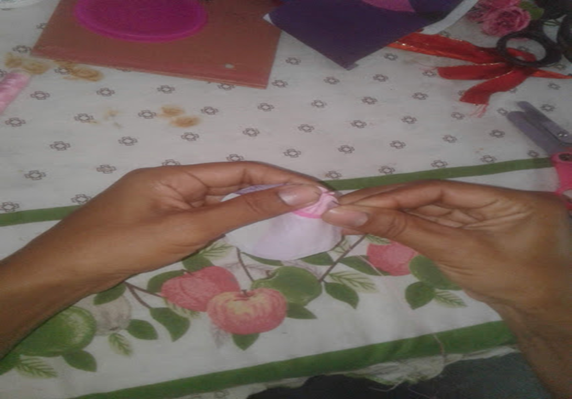
Ahora tomamos nuestra aguja e hilo y comenzamos a coser la tela por el borde de dicho circulo para luego envolver nuestra tapa de refresco
Now we take our needle and thread and start sewing the fabric along the edge of said circle to then wrap our soda cap
Paso 3 / Step 3
En la siguiente figura veremos cómo va quedando nuestra tela con la que forraremos la tapa de refresco, esto lo reservamos para usarlo más adelante
In the following figure we will see how our fabric with which we will cover the soda lid is looking, we will reserve this for later use
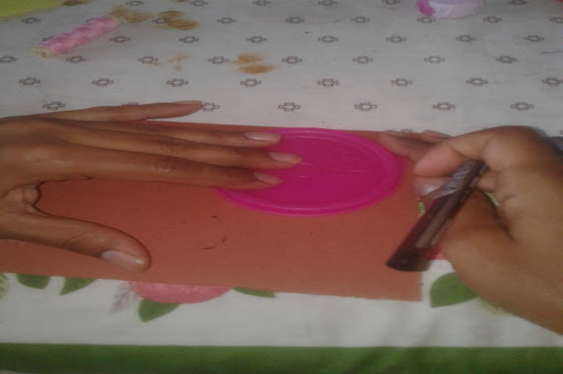
Hora vamos a dibujar un circulo sobre un cartón para esto usamos una tapa de un vaso de 10 centímetros de radio acorde al tamaño de nuestra tapa de refresco ya forrada, y cortamos con nuestra tijera
Now we are going to draw a circle on a cardboard for this we use a glass lid with a radius of 10 centimeters according to the size of our already lined soda lid, and we cut with our scissors
Paso 4 / Step 4
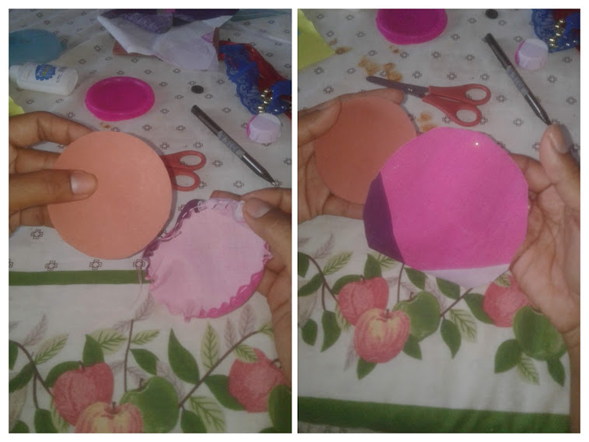
Ahora con el circulo de cartón ya cortado trazamos un circulo sobre la tela, pero un poco más grande que el circulo de cartón, esto será la base de nuestro pequeño sombrero y con esta tela repetiremos todo el proceso que realizamos con la tela que cubrimos la tapa de refresco, esto sera la base de nuestro sombrero iman
Now with the cardboard circle already cut we trace a circle on the fabric, but a little bigger than the cardboard circle, this will be the base of our little hat and with this fabric we will repeat the whole process that we make with the fabric that we cover the soda cap, this will be the base of our magnet hat
Paso 5 / Step 5
Lo siguiente será unir la tapa de refresco forrada con tela con el circulo forrado en tela para esto usamos la pistola de silicon caliente
The next thing will be to join the fabric-lined soda cap with the fabric-lined circle for this we use the hot glue gun
Paso 6 / Step 6
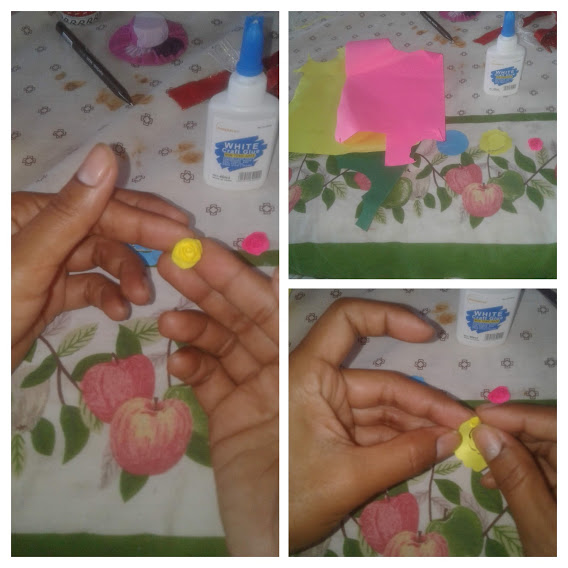
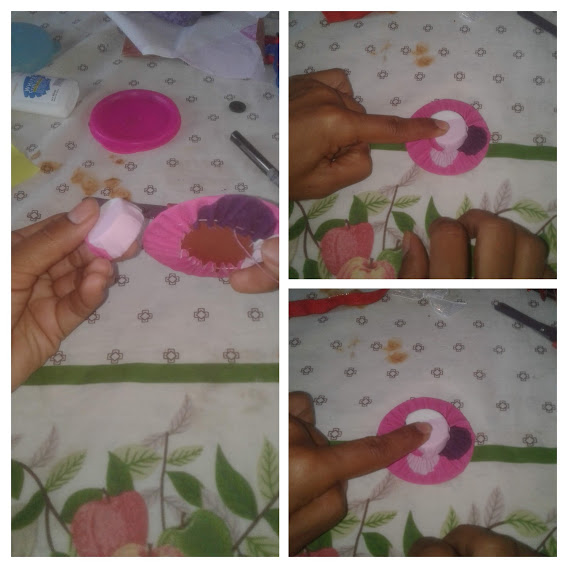
Ahora vamos a trazar unos círculos de 10 cm de diámetro sobre el papel de color amarillo y azul y luego vamos a cortar dicho circulo en forma de espiral de afuera hacia adentro con una tijera de picos o haciendo pequeñas olas con la tijera normal, para formar pequeños botones, iremos pegando el borde del papel amarillo pegando con la cola blanca esto nos dara la forma de boton de rosa
Now we are going to trace some circles of 10 cm in diameter on the yellow and blue paper and then we are going to cut said circle in the form of a spiral from the outside to the inside with a pair of scissors or by making small waves with the normal scissors, to form small buttons, we will stick the edge of the yellow paper with the white glue, this will give us the shape of a rose button
Paso 7 / Step 7
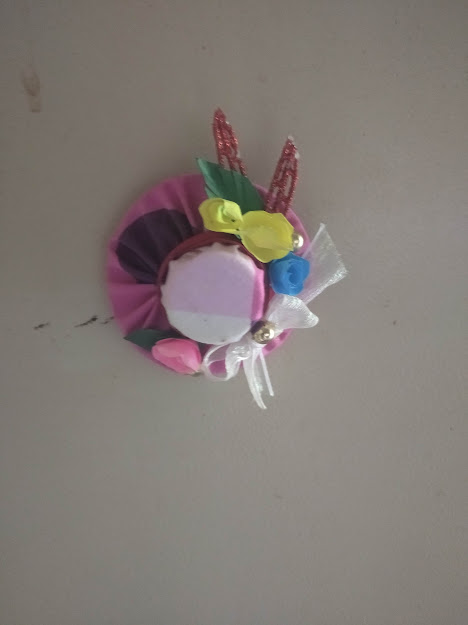
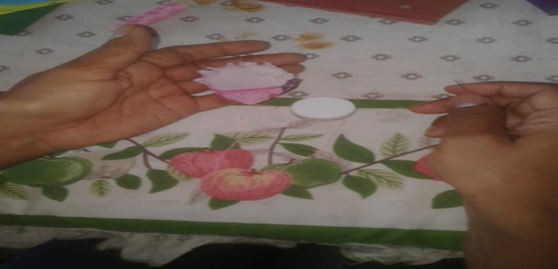
Ahora pegamos con la pistola de silicon, nuestros botones sobre el sombrerito y adornamos con unos lacitos o cualquier otra cosita que queramos agregar y pegamos el imán por la parte de atrás del sombrerito y tendremos nuestro imán para la nevera listo, otro uso que le podemos dar a esta obra es pegarlo sobre un ganchete para el cabello
Now we glue our buttons on the hat with the glue gun and decorate with some bows or any other little thing we want to add and stick the magnet on the back of the hat and we will have our magnet for the fridge ready, another use that we can give to this work is to stick it on a hair clip
Bueno amigos espero les guste mi publicación, todas las fotos son de mi propiedad y fueron tomadas con mi teléfono Blue Studio X9 y como traductor use el traductor google en linea
Well friends, I hope you like my publication, all the photos are my property and were taken with my Blue Studio X9 phone and as a translator I used the google translator online
0
0
0.000
Thank you for sharing this amazing post on HIVE!
Your content got selected by our fellow curator @rezoanulvibes & you just received a little thank you via an upvote from our non-profit curation initiative!
You will be featured in one of our recurring curation compilations and on our pinterest boards! Both are aiming to offer you a stage to widen your audience within and outside of the DIY scene of hive.
Join the official DIYHub community on HIVE and show us more of your amazing work and feel free to connect with us and other DIYers via our discord server: https://discord.gg/mY5uCfQ !
If you want to support our goal to motivate other DIY/art/music/homesteading/... creators just delegate to us and earn 100% of your curation rewards!
Stay creative & hive on!
Thank you so much for your support my friend
Dear @rosselena, we need your help!
The Hivebuzz proposal already got important support from the community. However, it lost its funding a few days ago when the HBD stabilizer proposal rose above it.
May we ask you to support it so our team can continue its work?
You can do it on Peakd, Ecency, Hive.blog or using HiveSigner.
https://peakd.com/me/proposals/199
All votes are helpful and yours will be much appreciated.
Thank you!