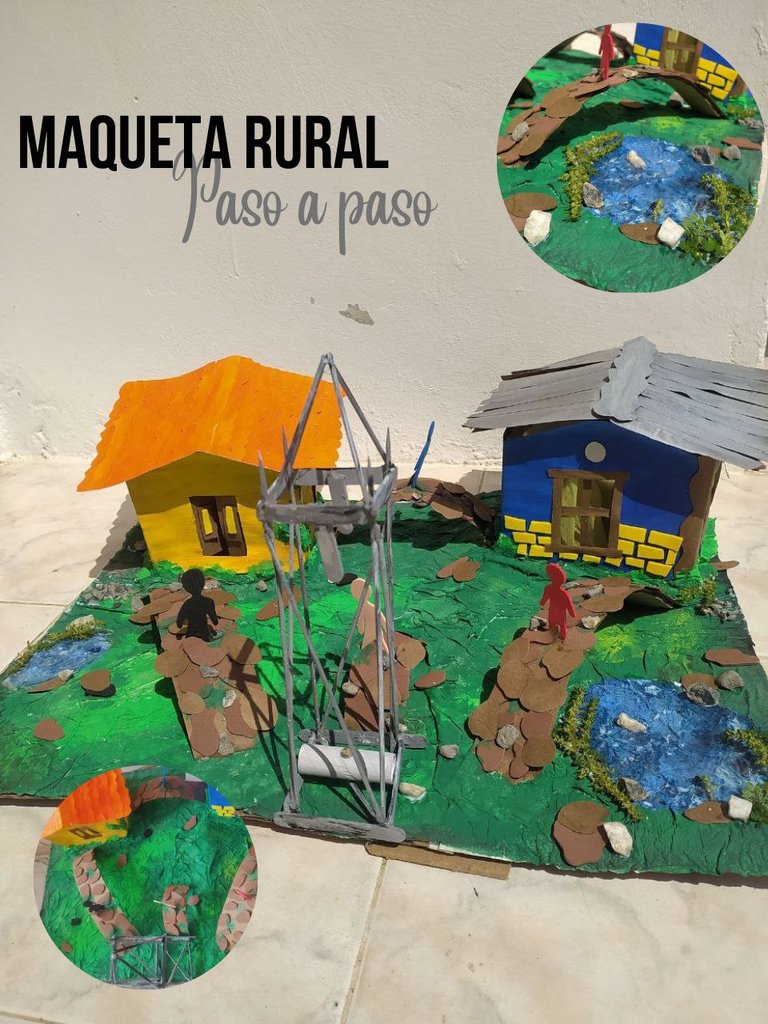
Maqueta Rural | Paso a paso - Rural Scale Model | Step by step
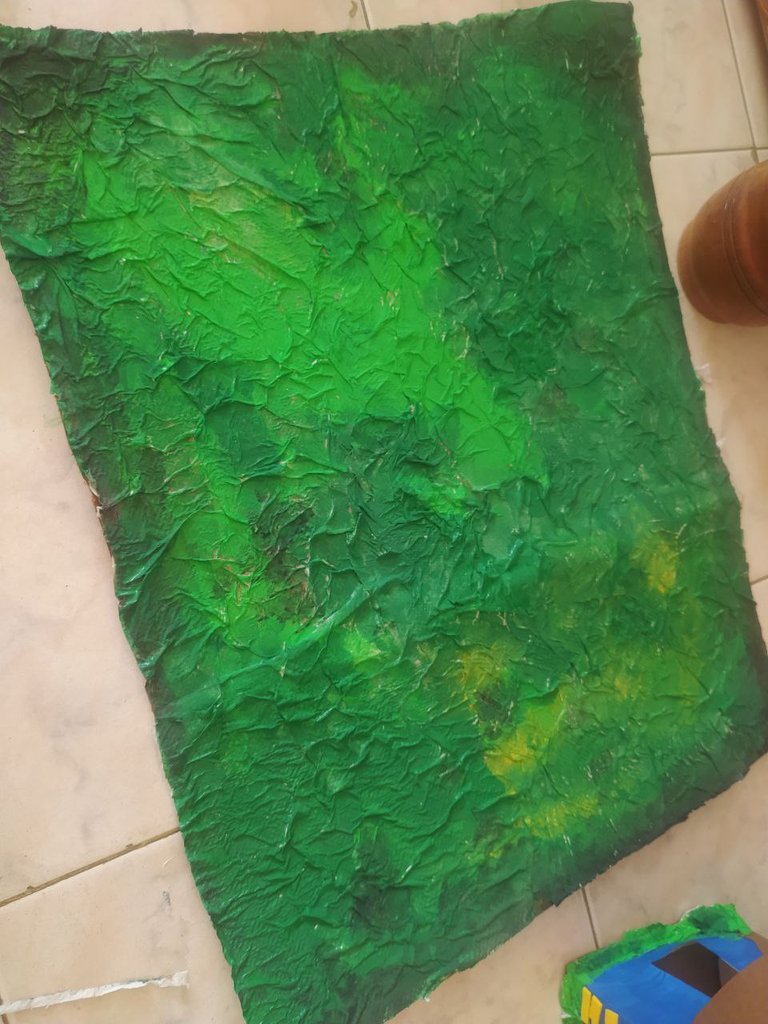
Para comenzar tomé un pedazo de cartón de 50 cm x 46 cm. Y comencé a llenarlo de papel toalla húmedo con pega blanca escolar, el cual posteriormente pinté de verde con diversas tonalidades para simular el pasto.
 |  |
|---|
 |  |
|---|
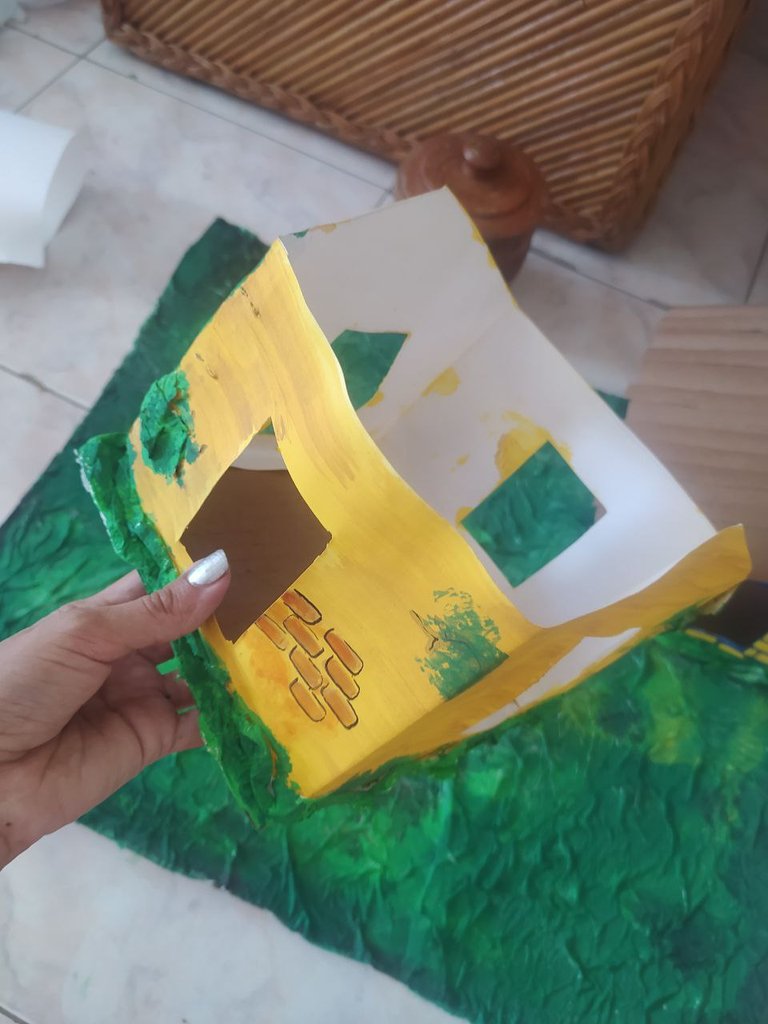
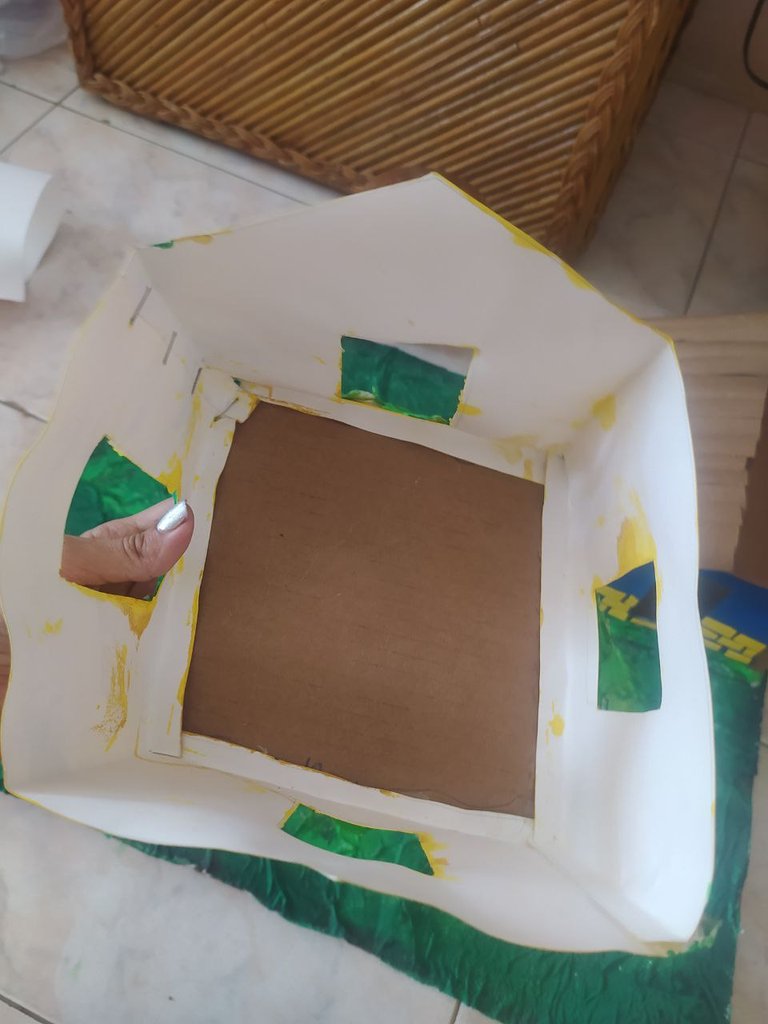
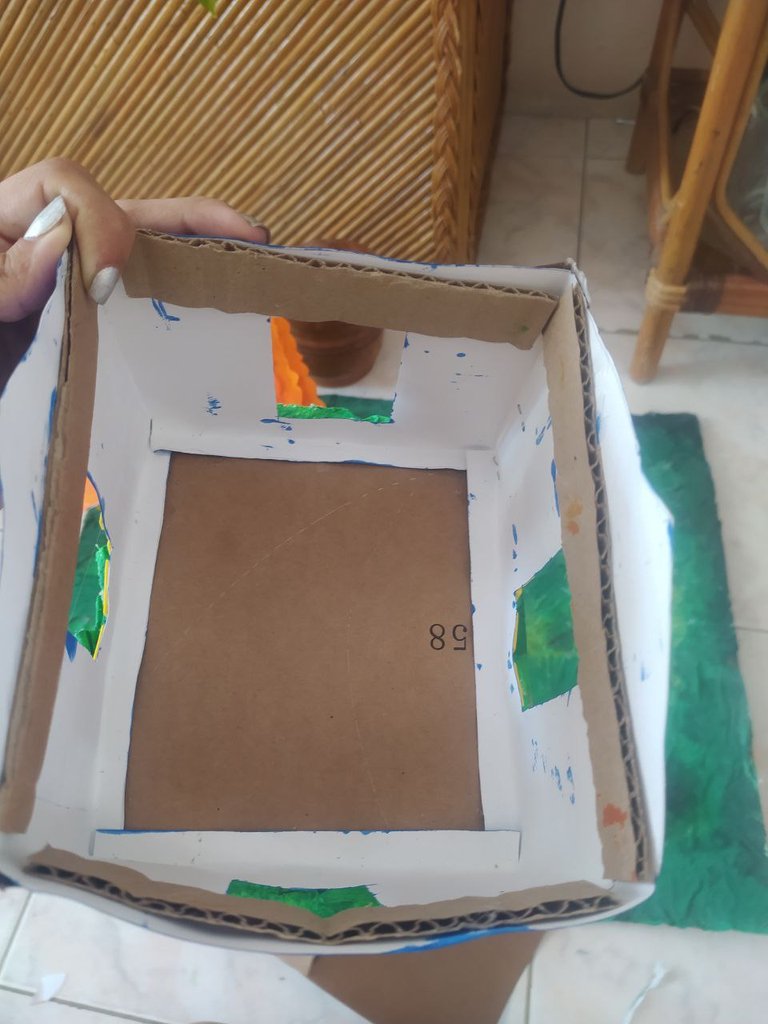
Para realizar las casas tomé cartulina escolar de un espesor bajo al cual le realice dobleces como un cuadro para lograr que se levantara. Abrí los orificios correspondientes q las ventanas y lo pegue sobre su base de cartón no sin antes pintar ambas, en este caso me decidí por un tono amarillo y un tono azul rey.
 |  |
|---|
 |  |
|---|
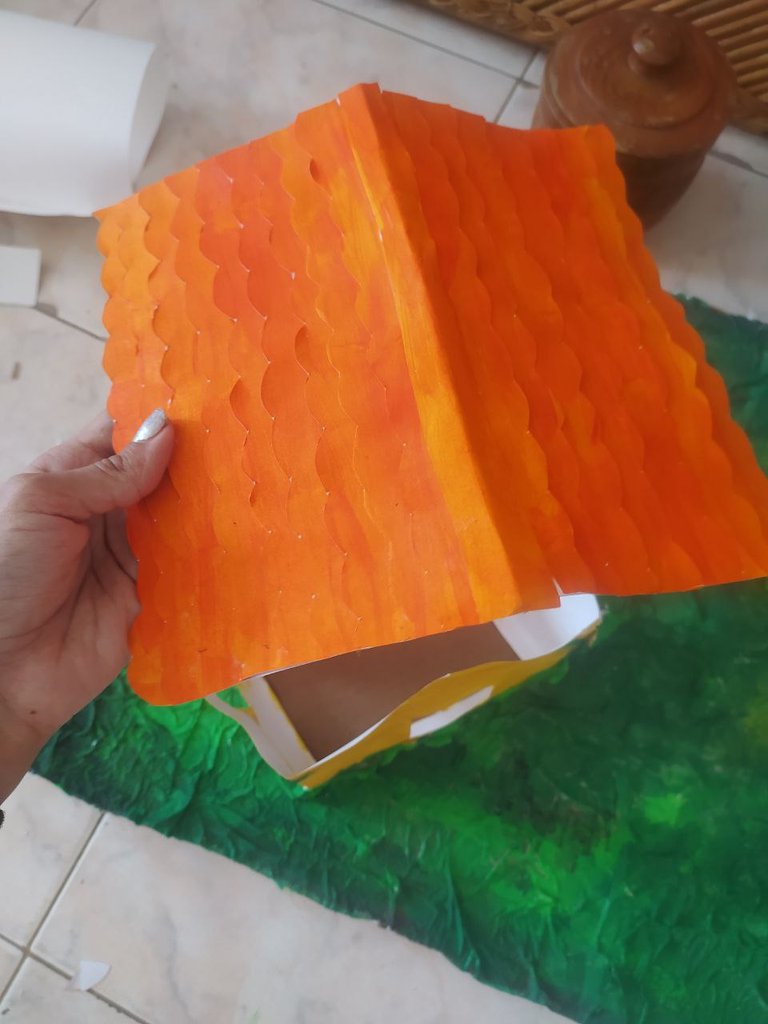
Para los techos hice dos diferentes de dos diversas maneras, el primero,
Tome una pieza de cartulina más grande que el diámetro del cuadrado y lo doblé a la mitad, con otra pieza de cartulina la pinté de naranja y comencé a cortar tiras con ondas de un solo lado, de esta manera simule las tejas del techo.
 |  |
|---|
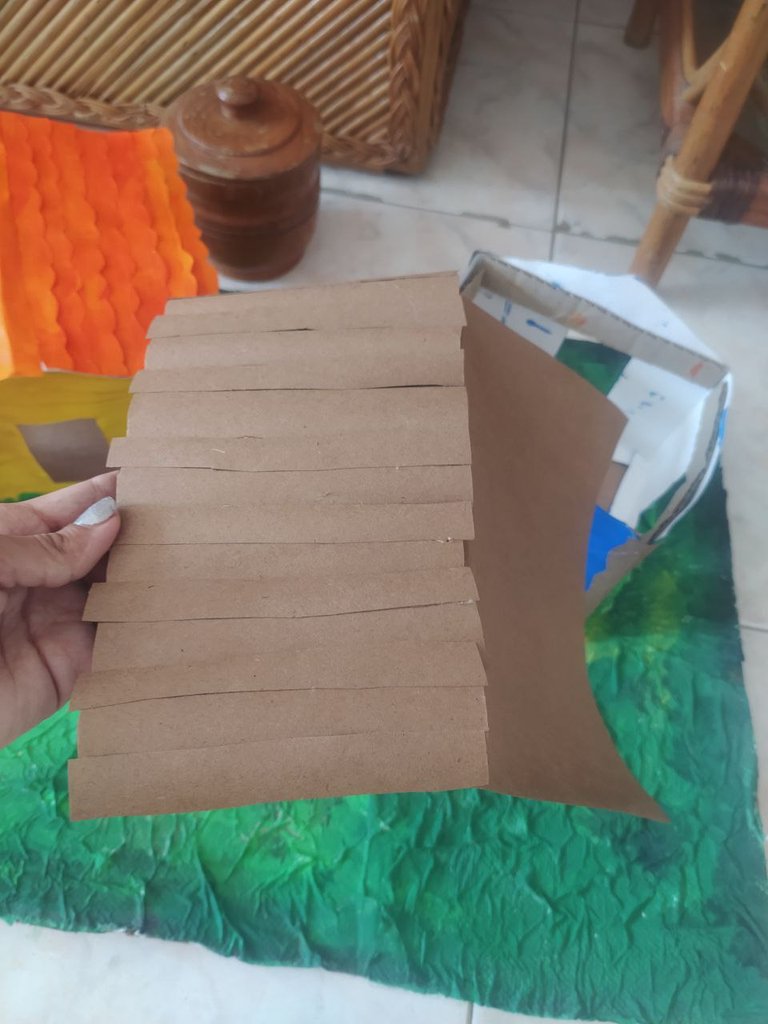
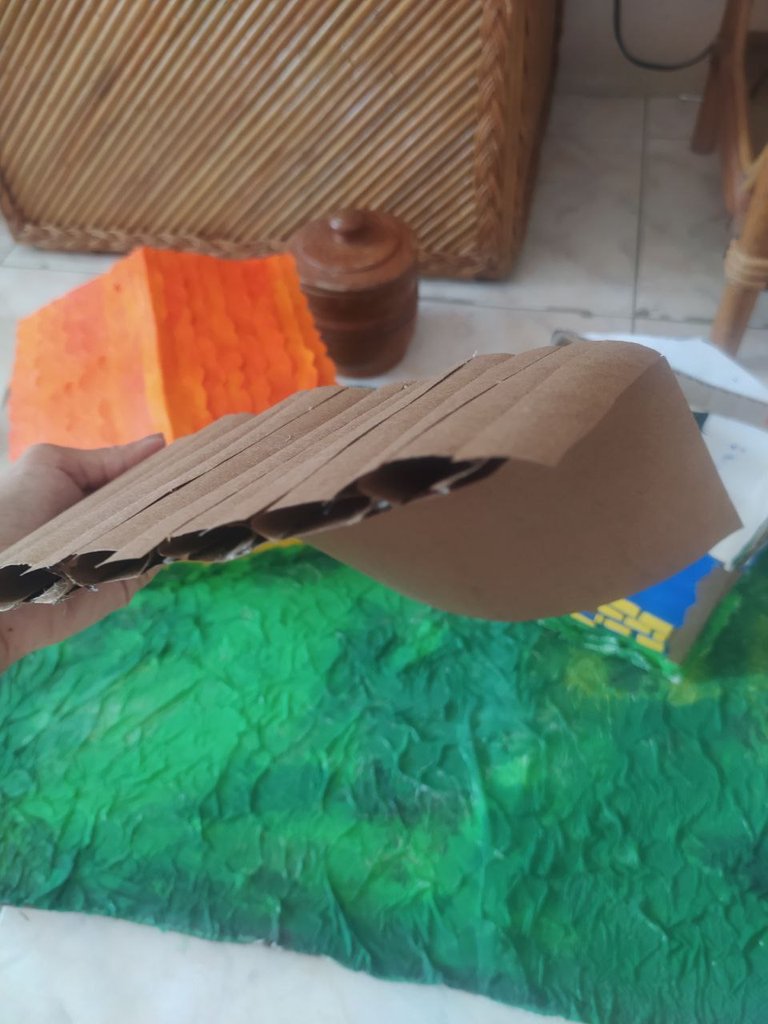
Para el siguiente techo tomé papel craft y con el realice unas tejas largas con una canaleta sobre cada terminación, como se puede divisar en la foto.
 |  |
|---|
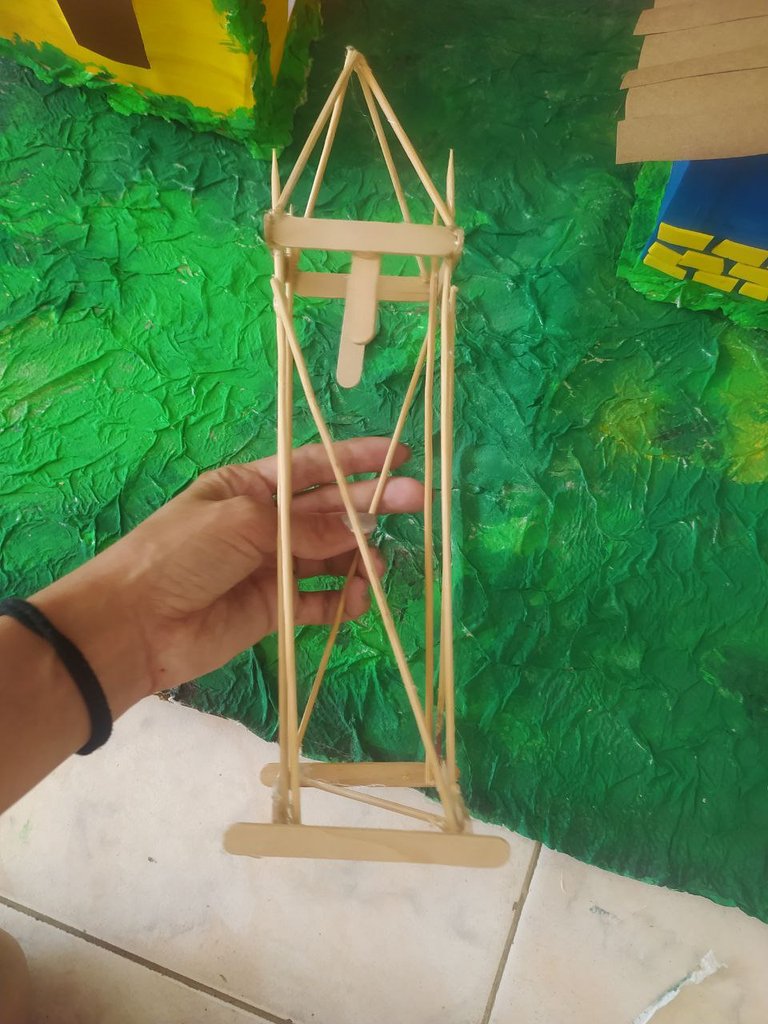
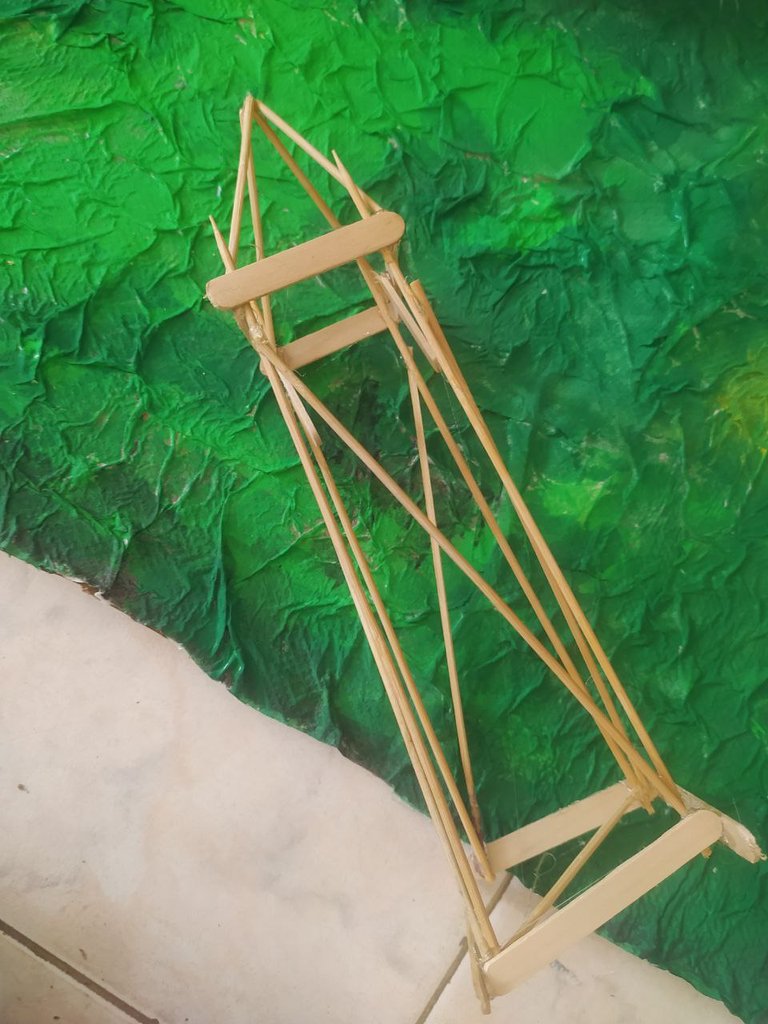
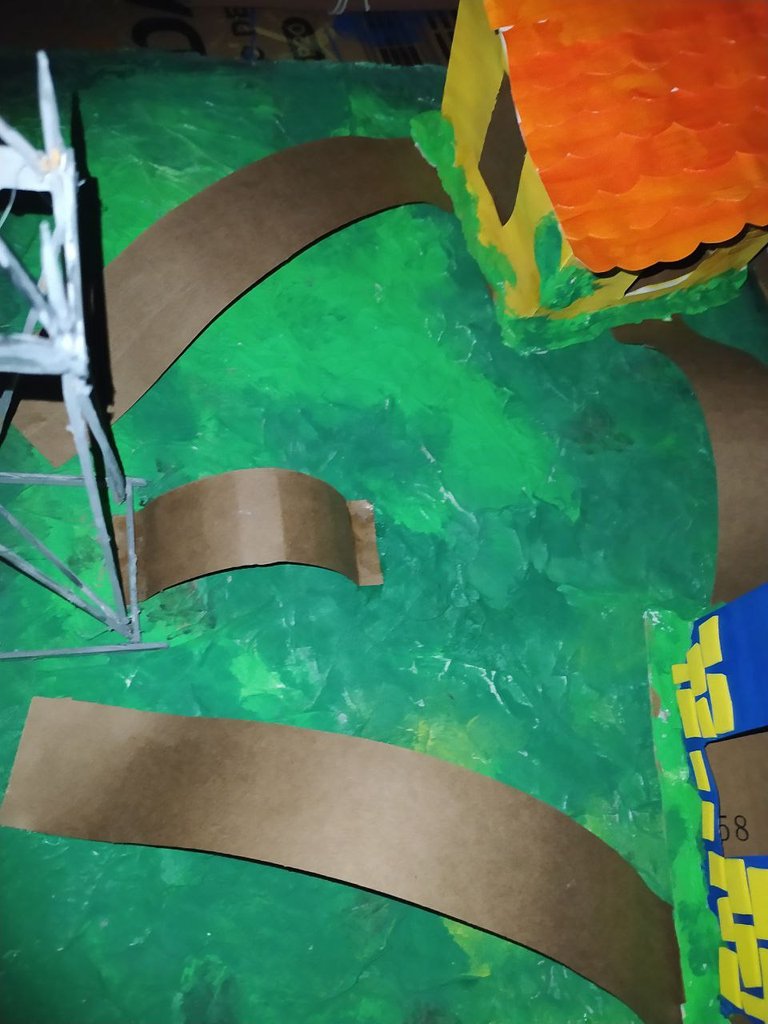
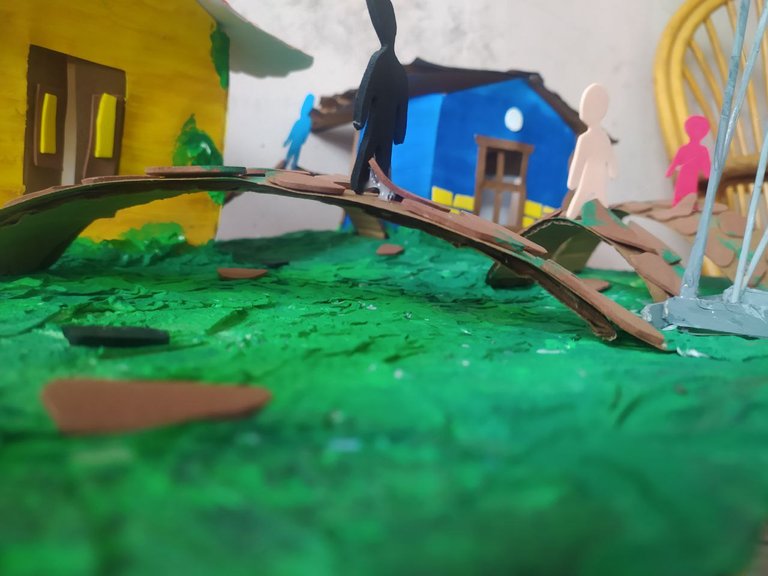
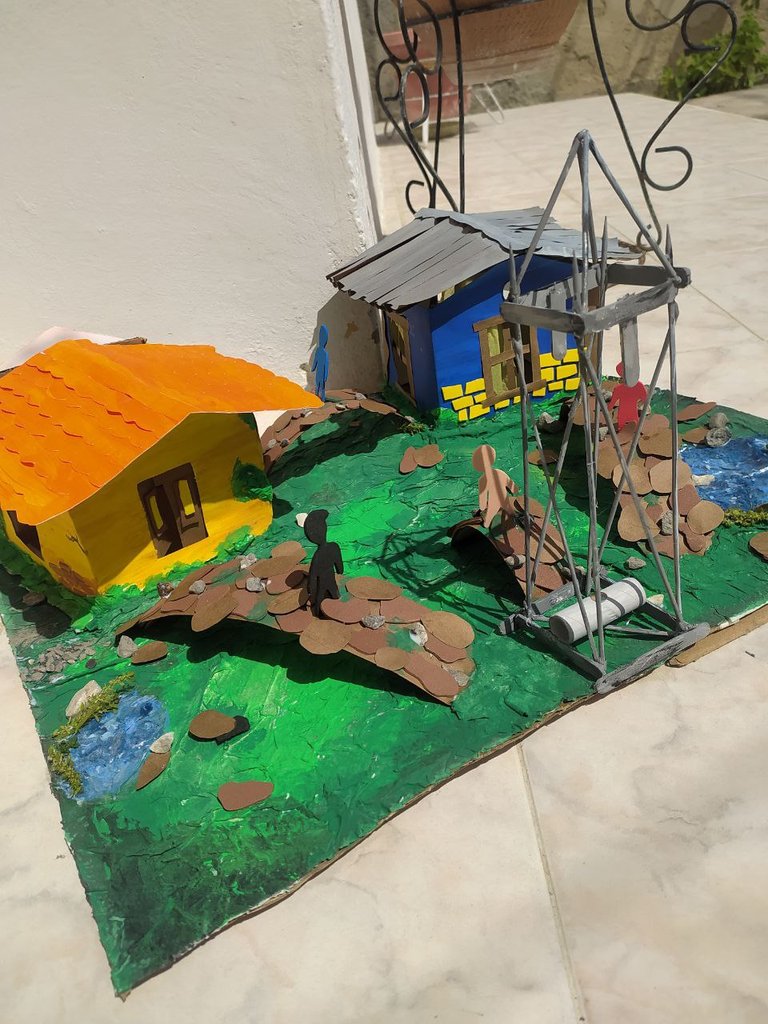
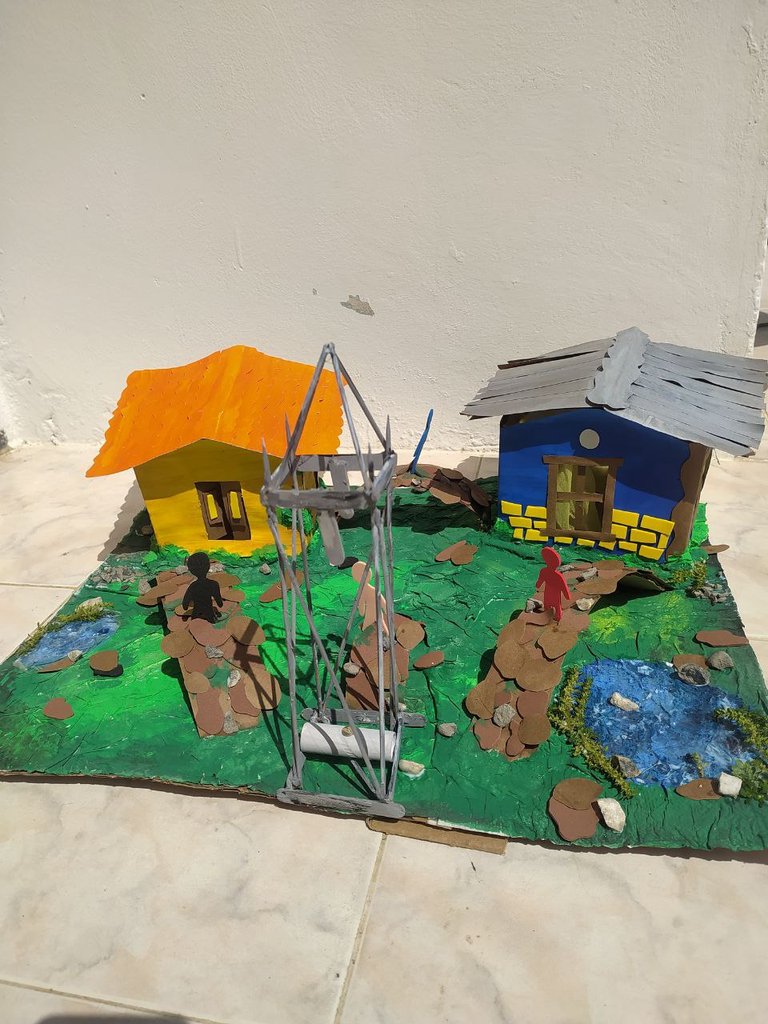
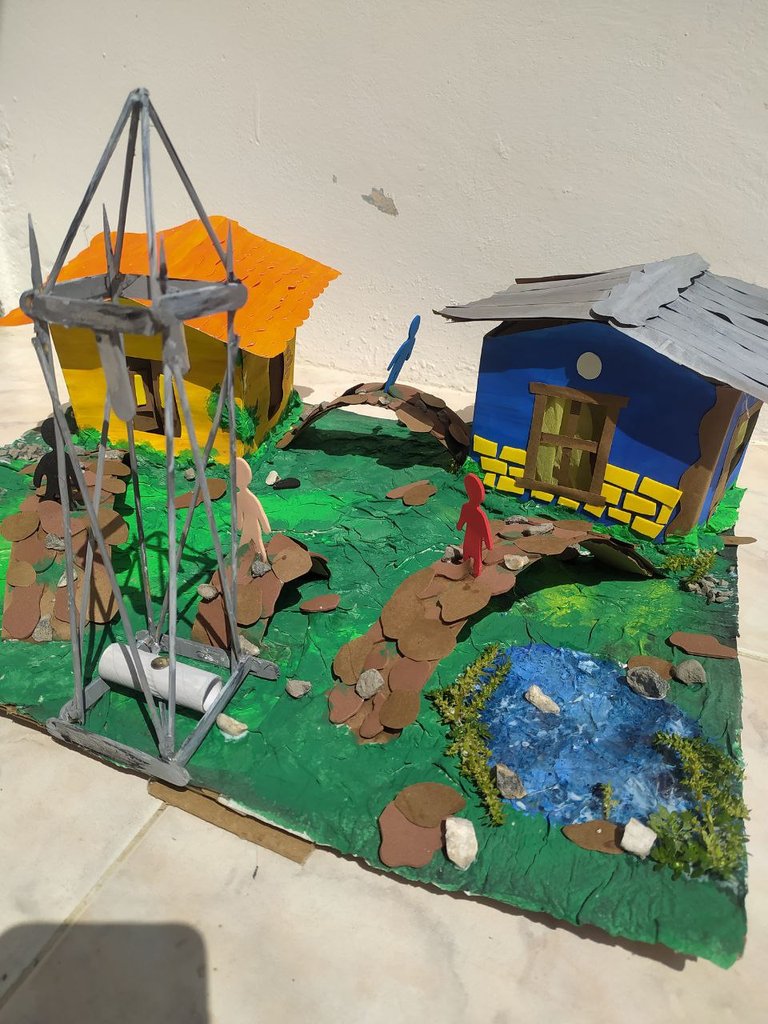
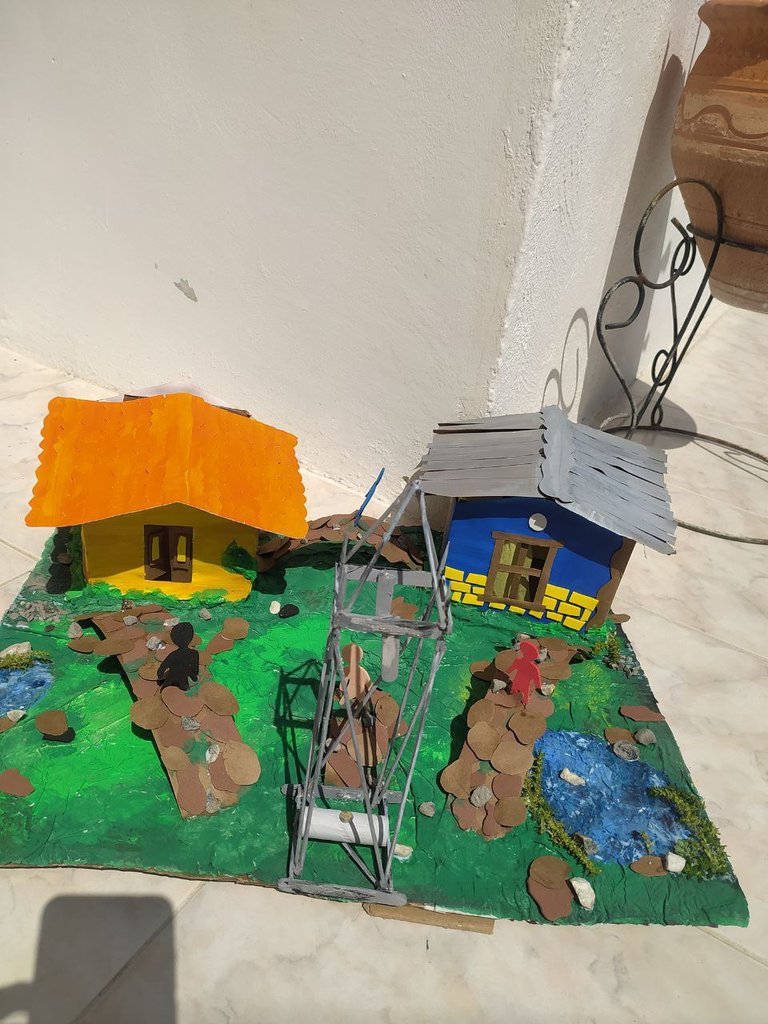
Realicé la torre de electricidad con palillos de altura y algunas paletas médicas que corté a la medida y lijé para llegar a la medida exacta, además de esto, realicé unos puentes que comunicaban una casa con la otra y cada una de las casas hacia la torre de electricidad, y de la torre de electricidad directamente hacia el centro del área.
 |  |
|---|
 |  |
|---|
Continué dando algunos detalles adicionales a los puentes, tales como una simulación de texturas de piedra sobre los puentes y el pasto usando fomi color marrón y para dar un toque adicional un poco de verde disperso por el puente para dar un poco el aspecto de pasto creciente entre las rocas, además de cuatro siluetas de individuos sobre los puentes.
 |  |
|---|
Para finalizar agregue detalles adicionales para incluir realismo, comenzando con:
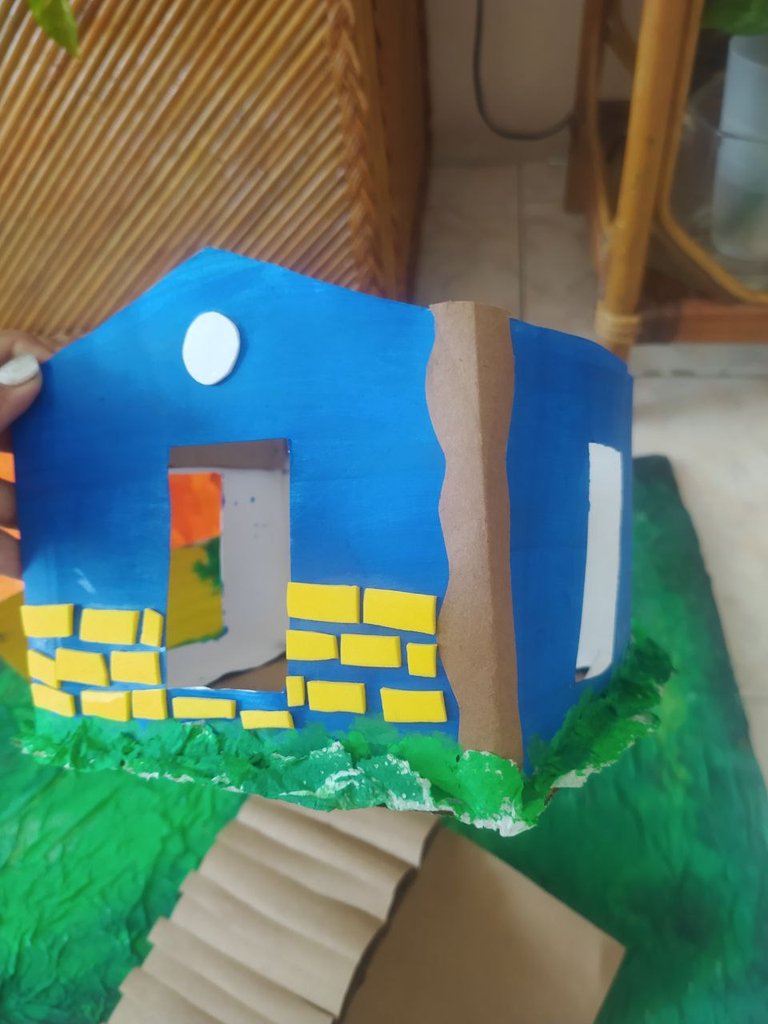
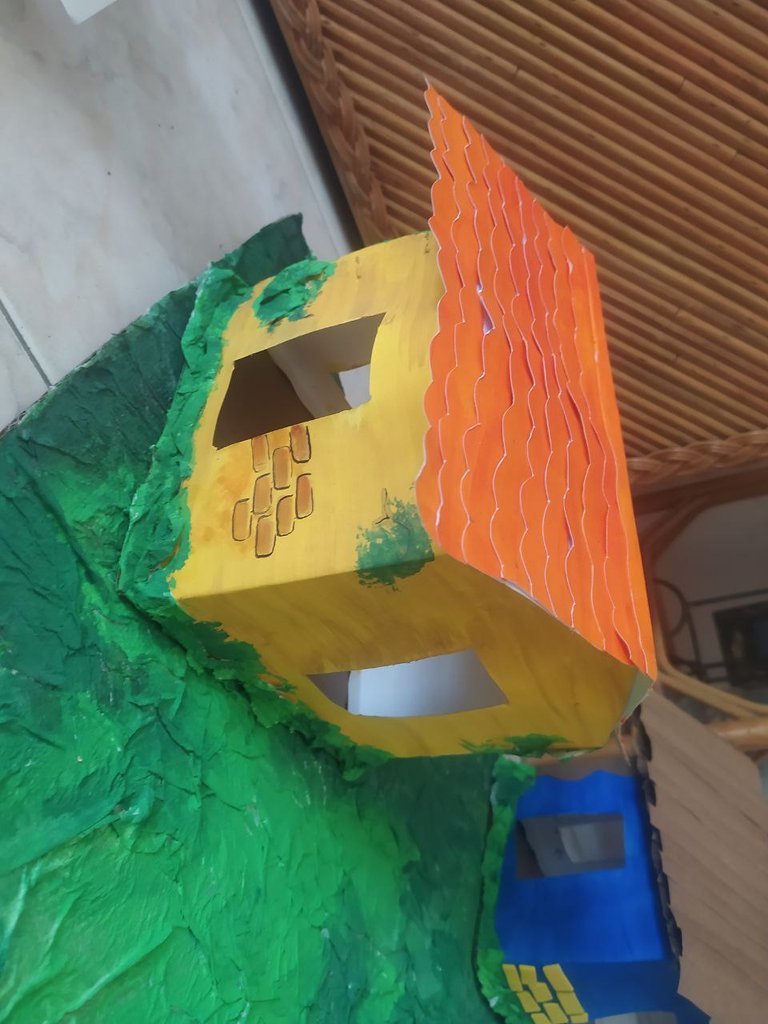
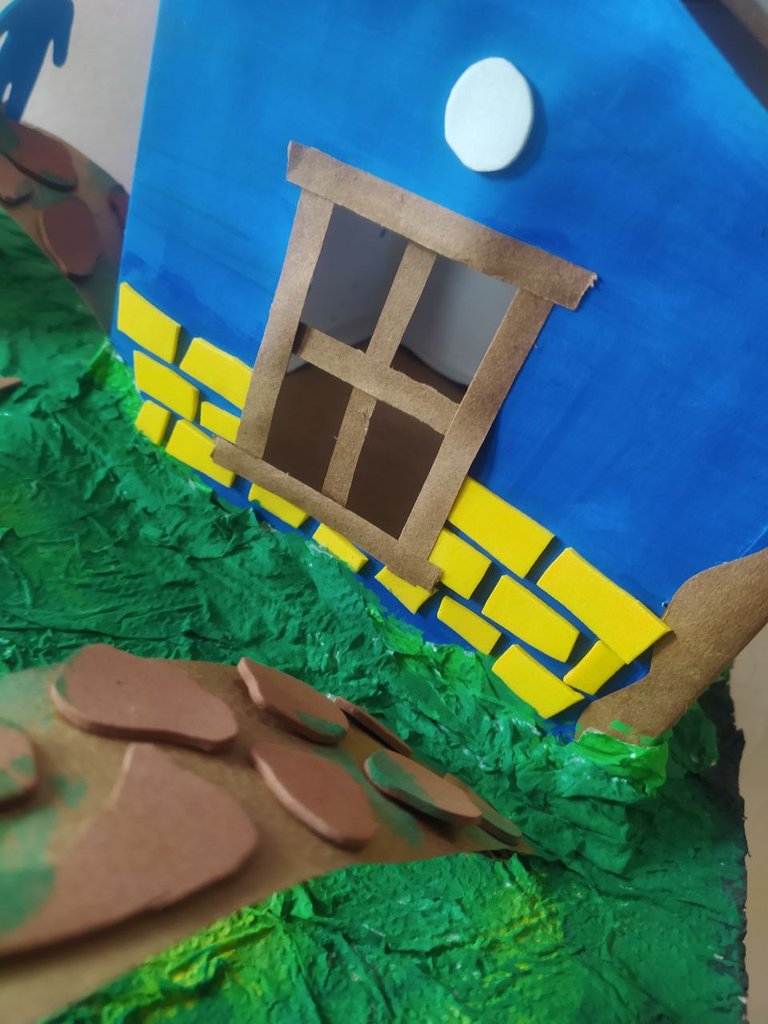
A la casa de color azul, le añadí los barrotes a cada una de las ventanas así como también unas cortinas por dentro de color amarillo las que así como dan un bonito contraste con el color de la casita, combinaban a la perfección con los ladrillos decorativos externos.
A la casa de color amarillo le agregué puertas ventanas con movimiento en cada una de ellas, para que de esta manera se puedan cerrar y abrir al gusto.
Para los puentes, les agregué algunos detalles de rocas usando papel craft y algunas rocas reales.
Para el pasto en la base, me parecía que los laterales estaban muy vacíos, por lo que quise añadir un par de lagos pequeños para rellenar esos espacios vacíos, esto lo logré pintando con azul de dos tonalidades (azul rey y azul marino) y blanco que posteriormente al haberlos mezclado dio como resultado una mezcla interesante de tonos y textura que semejaba el agua.
 |  |
|---|
Cuando todo estuvo seco, tomé papel celofán transparente y corte dos círculos con el tamaño del diámetro del lago y los arrugue con la finalidad de que quedasen con el efecto del agua oleante, lo pegue usando la suficiente cantidad de pegamento blanco y sobre el área añadí algunas rocas en papel craft y rocas pequeñas reales así como un poco de musgo el cual generalmente se encuentra en los laterales de los lagos y lagunas, para finalizar algunas piedras reales en toda la zona y así culminé esta maqueta.
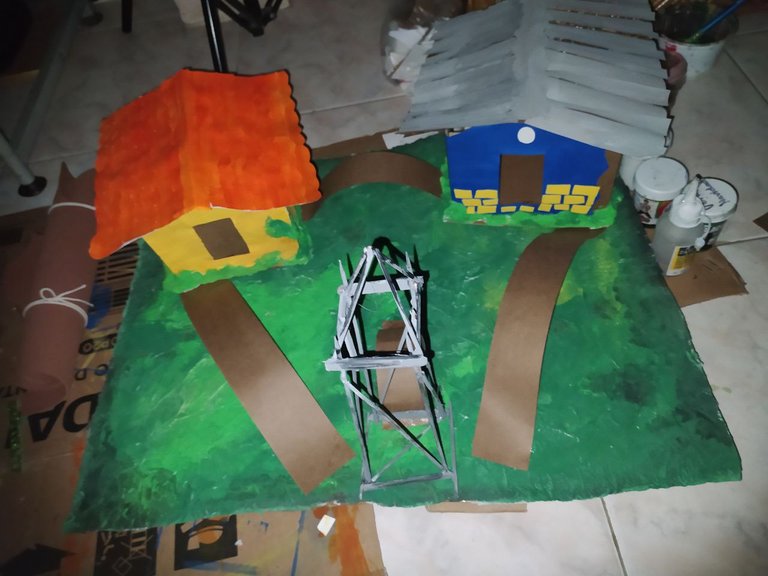
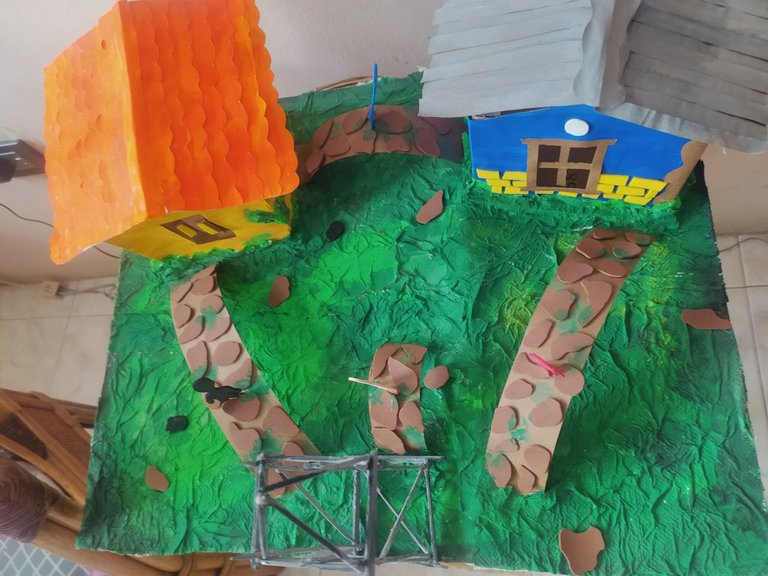
Resultado final
¿Qué te pareció mi trabajo? ¿Te gustó?
¿Qué le agregarías y que quitarías? ¡Los leo!
Hasta un próximo post.
ENGLISH VERSION
Hello everyone again in this beautiful community, today I will join you to make a beautiful model with recycled material step by step.
To begin I took a piece of cardboard 50 cm x 46 cm. And I began to filled it with damp paper towel with white school glue, which I then which I then painted green with different shades to simulate grass.
| |
|---|
| |
|---|
To make the houses I took some thin school cardboard and folded it like a square to make it stand up. I opened the corresponding holes, the windows and glued it on its cardboard base but not before painting both, in this case I decided for a yellow tone and a royal blue tone.
| |
|---|
| |
|---|
For the ceilings I made two different ones in two different ways, the first one, I took a piece of cardboard larger than the diameter of the square and folded it in half, with another piece of cardboard I painted it orange and started cutting strips with waves on one side only, this way I simulated the roof tiles.
| |
|---|
For the next roof I took craft paper and with it I made long tiles with a gutter on each termination, as you can see in the photo.
| |
|---|
I made the electricity tower with high sticks and some medical pallets that I cut to size and sanded to get the exact size, in addition to this, I made some bridges that connected one house to the other and each of the houses to the electricity tower, and from the electricity tower directly to the center of the area.
| |
|---|
| |
|---|
I went on to give some additional details to the bridges, such as a simulation of stone textures on the bridges and the grass using brown fomi and for an extra touch some green scattered around the bridge to give a bit of the look of growing grass between the rocks, plus four silhouettes of individuals on the bridges.
| |
|---|
To finish I added additional details to include realism, starting with:
To the blue colored house, I added the bars to each of the windows as well as some yellow curtains on the inside which as well as giving a nice contrast with the color of the house, combined perfectly with the external decorative bricks.
To the yellow house I added window doors with movement in each one of them, so that they can be opened and closed as you like.
For the bridges, I added some rock details using craft paper and some real rocks.
For the grass at the base, it seemed to me that the sides were very empty, so I wanted to add a couple of small lakes to fill those empty spaces, I did this by painting with two shades of blue (royal blue and navy blue) and white, which later when mixed together resulted in an interesting mix of tones and texture that resembled water.
| |
|---|
When everything was dry, I took transparent cellophane paper and cut two circles with the size of the diameter of the lake and crumpled them in order to get the effect of the oily water, I glued it using enough white glue and on the area I added some craft paper rocks and real small rocks as well as some moss which is usually found on the sides of the lakes and ponds, to finish some real stones in the whole area and so I finished this model.
Final result
What did you think of my work, did you like it?
What would you add and what would you take away? I'll read them!
See you in a next post.
Traductor / Translator: DeepL

From Venezuela, our witness drives decentralization and the adoption of Web3 technology, creating opportunities for the local community and contributing to the global ecosystem. // Desde Venezuela, nuestro testigo impulsa la descentralización y la adopción de la tecnología Web3, generando oportunidades para la comunidad local y contribuyendo al ecosistema global.
Sigue, contacta y se parte del testigo en: // Follow, contact and be part of the witness in:
Gracias por el apoyo!!
@tipu curate 2
Upvoted 👌 (Mana: 35/75) Liquid rewards.
Gracias por el apoyo mi querido yonnathan
Quedo linda. Hoy estaba ayudando a mi mamá a hacer una de mi hermano.
Hola, muchísimas gracias por el apoyo y tú comentario. Estoy segura la maqueta quedó muy bonita.
I thought it can be nice recycle activities especially with children as well. Some of student here have task to make those type of recycle things
Thanks for your comment. To me it's really important to recycle and make these activities with children. They are learning and we are learning too.
https://twitter.com/hivediy47901/status/1731663701332156597