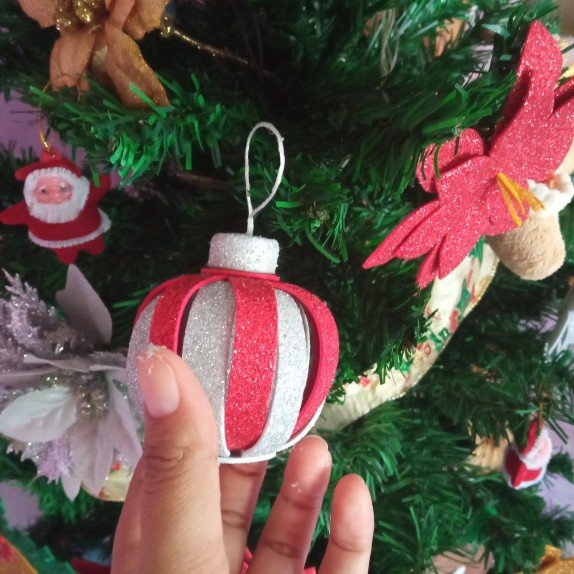
Hello friends readers happy weekend, today I will be presenting a beautiful Christmas ball made with eva rubber, it is super flirty and it is also an easy material to get, stay with me until the end of the post and live the magic of Christmas making step by step this beautiful craft.
Hola amigos lectores feliz fin de semana, hoy les estaré presentando una hermosa bola de navidad realizada con goma eva, queda super coqueta y además es un material fácil de conseguir, quédate conmigo hasta el final del post y vive la magia de la navidad elaborando paso a paso esta hermosa manualidad.
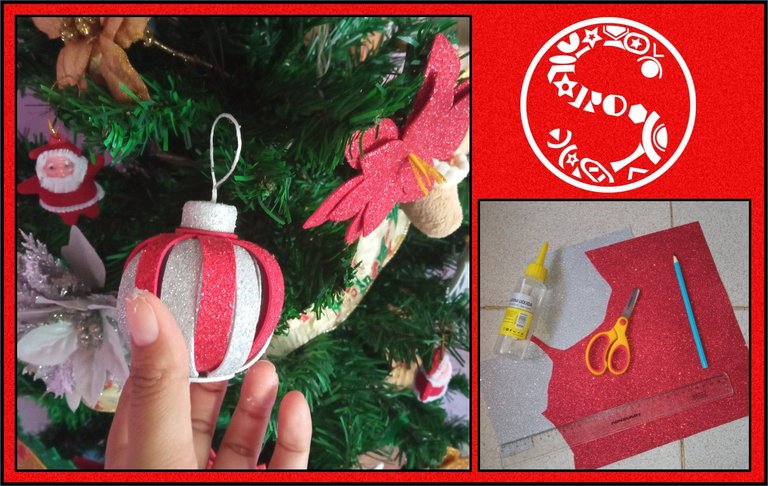
I am still making my Christmas arrangements but this time I wanted to make some lovely Christmas balls for the tree, you can make them in different sizes, I made a small one for the presentation, but then I made a bigger one in gold tone with silver and they look super cool.
Aún continúo realizando mis arreglos navideños pero está vez quise realizar unas encantadoras bolas de navidad para el arbolito, las pueden hacer de diversos tamaños yo hice una pequeña para la presentación, pero luego hice una más grande en tono dorado con plateado quedan super cool.

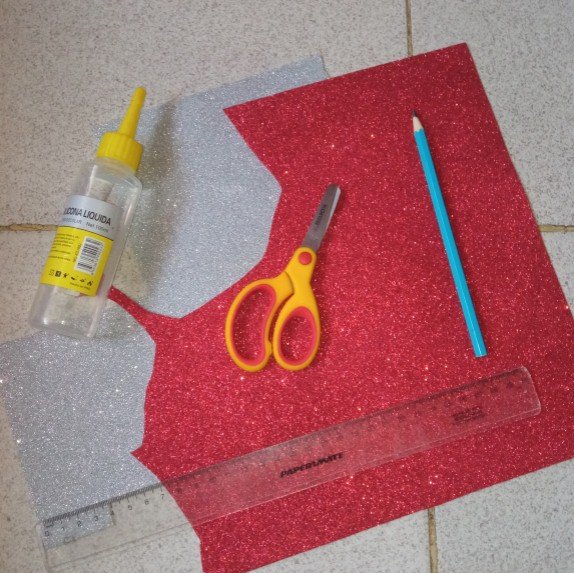
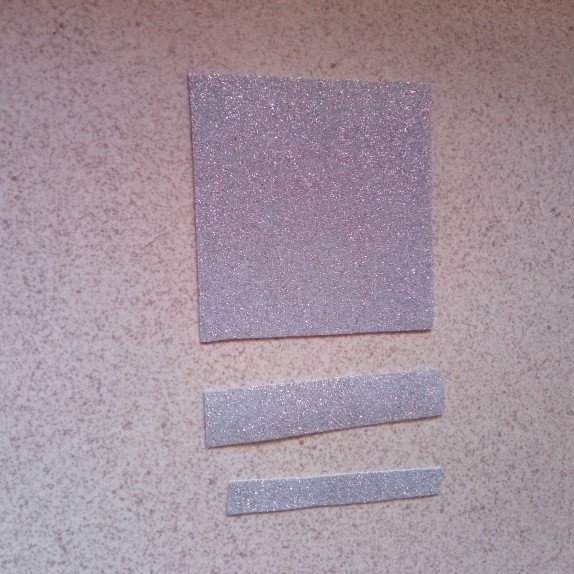
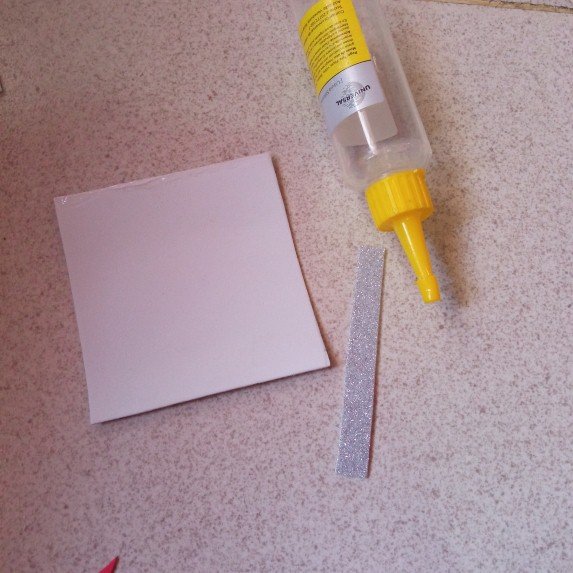
The materials to be used were the following: eva rubber, scissors, silicone, pencil and ruler.
Los materiales a realizar fueron los siguientes: goma eva, tijera, silicón, lápiz y regla.

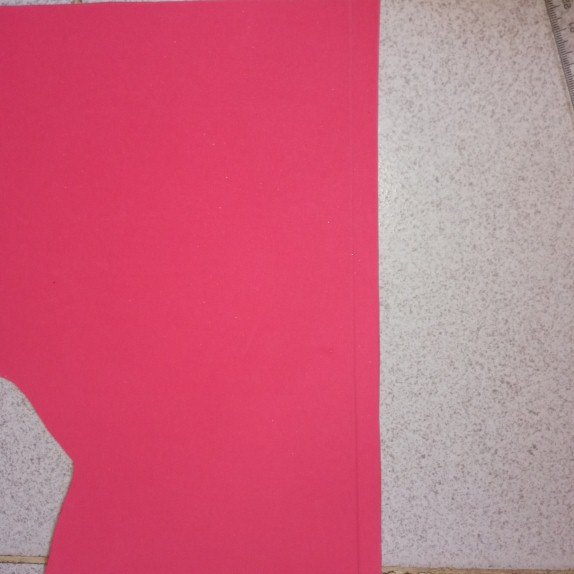
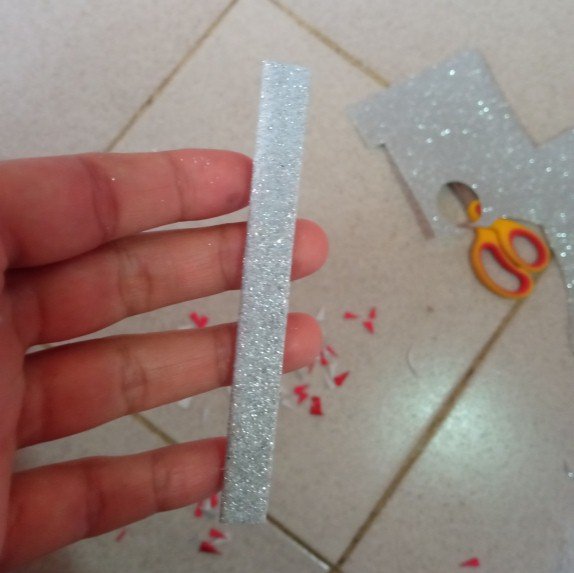
The first thing I did was to mark one centimeter wide rows on the red and silver plates.
Lo primero que hice fue marcar en las planchas de color rojo y plateada unas hileras de un centímetro de ancho.

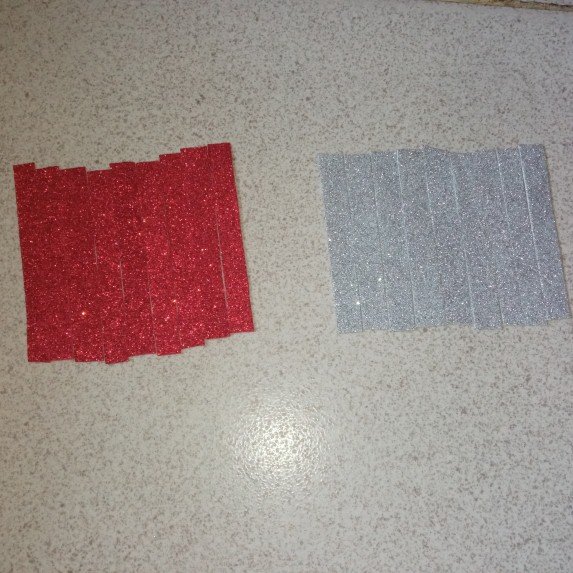
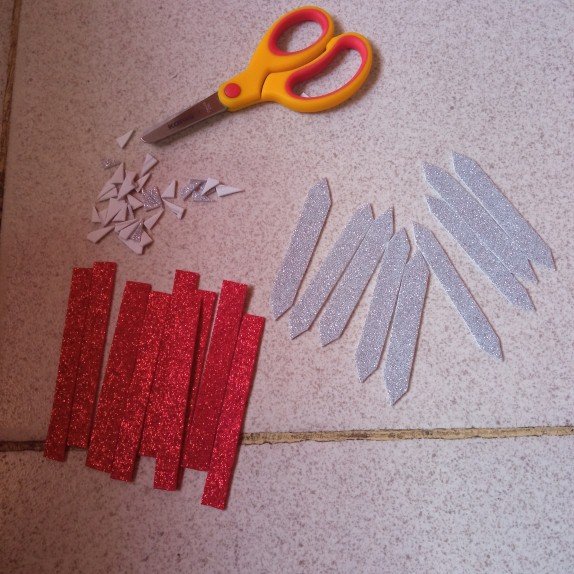
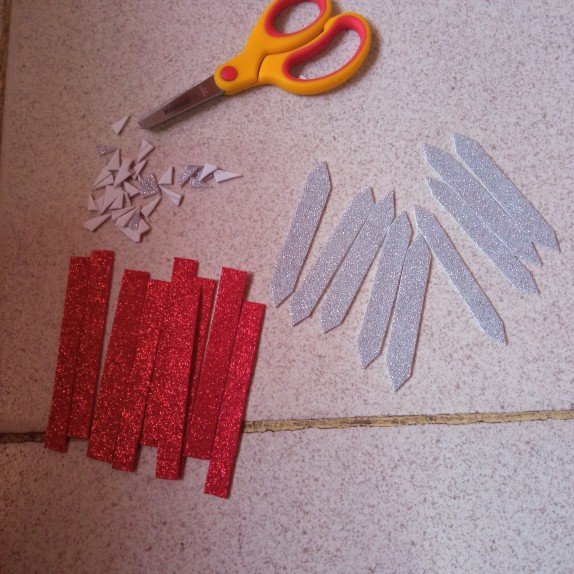
Then cut out 1 cm strips of eva rubber and cut each one into 3 pieces, obtaining 9 red and 9 silver ones.
Luego se recortan las tiras de goma eva de 1cm y cada una las recortamos en 3 pedazos, obteniendo 9 rojas y 9 plateadas.
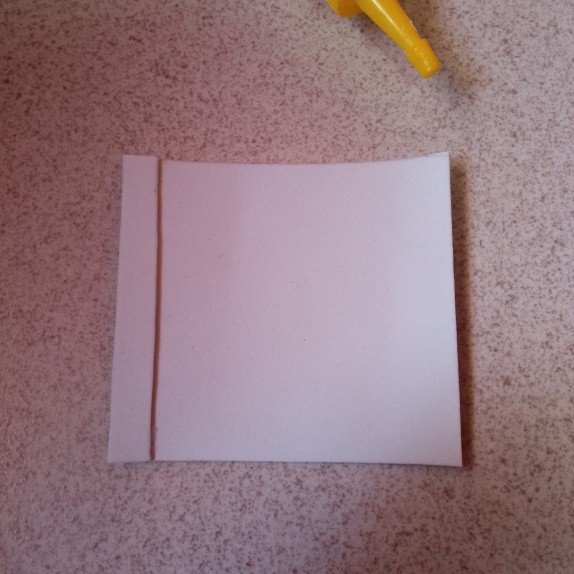
We also make a square of 4 wide by 4 high and a strip of eva rubber of 1cm and another of 2cm.
También se hace un cuadrado de 4 de ancho por 4 de alto y una tira de goma eva de 1cm y otra de 2cm.
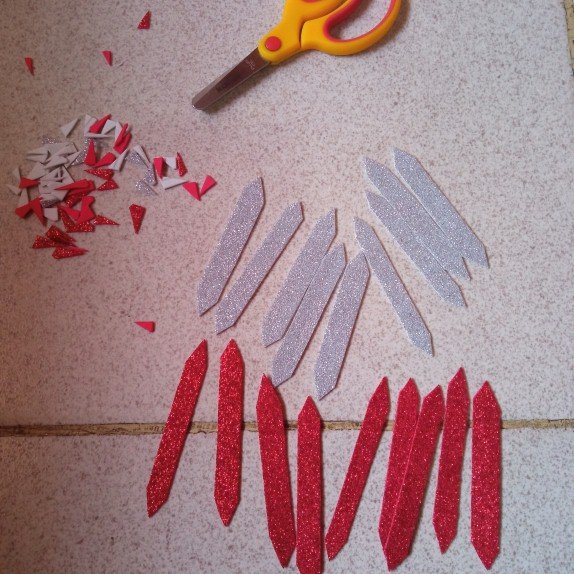
Already obtained the 18 pieces of eva rubber, that is to say the 9 in red color and the 9 in silver tone, both colors we will cut the tip leaving the triangle shape.
Ya obtenidos los 18 trozos de goma eva , es decir los 9 de color rojo y los 9 en tono plateado, ambos colores le recortaremos la punta dejando la forma de triángulo.
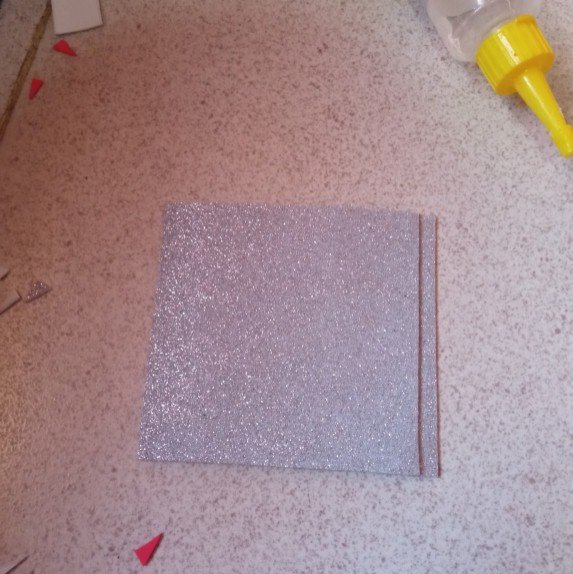
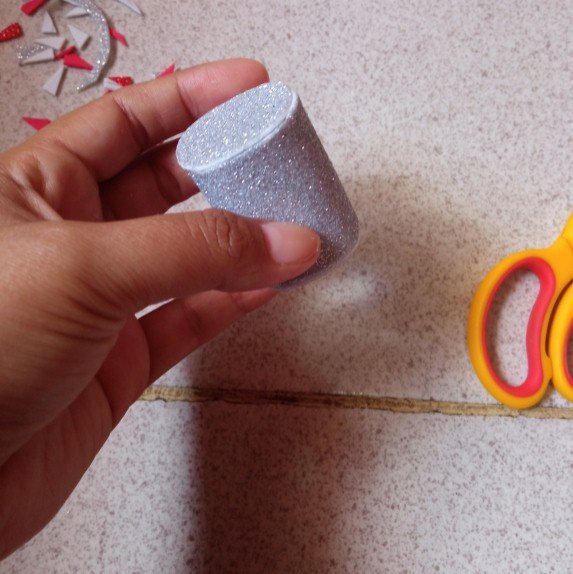
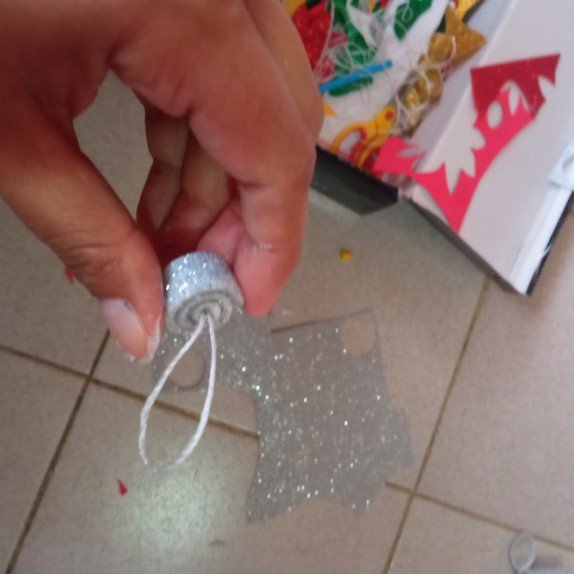
Here we take the 4*4 square and on one of the edges we put silicone and glue the eva rubber strip, leaving a small tab to glue the other edge on the other side, we make some circles to cover the small silver cylinder, as you can see in the images.
Acá agarramos el cuadrado de 4*4 y en una de las orillas le colocamos silicón y pegamos la tira de goma eva dejando una pequeña pestaña para pegar la otra orilla del otro lado, le hacemos unos círculos para tapar el pequeño cilindro plateado, quedando así como podrán ver en las imágenes.
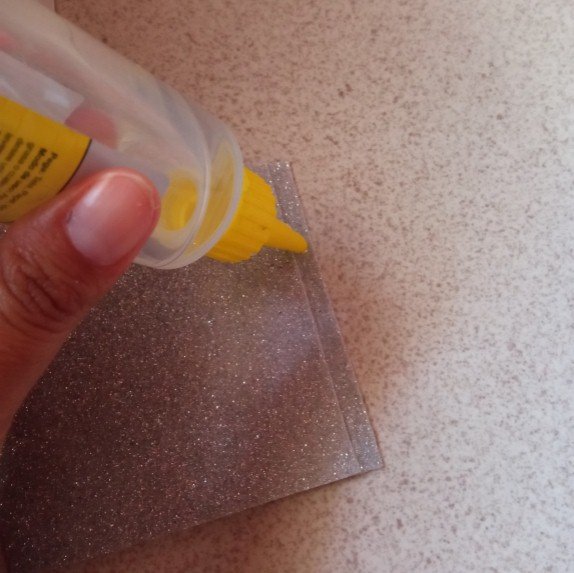
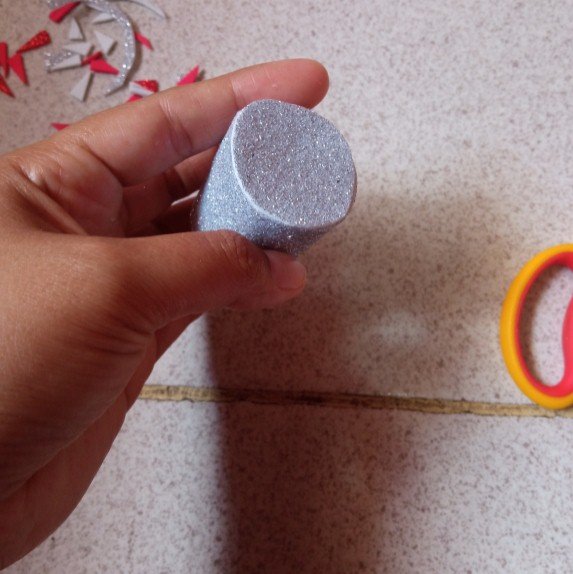
We put silicone on the circles of the cylinder and proceed to glue the eva rubber strips as shown in the images.
Le colocamos silicón en los círculos del cilindro y procedemos a pegar los tiras de goma eva así como se muestra en las imágenes.
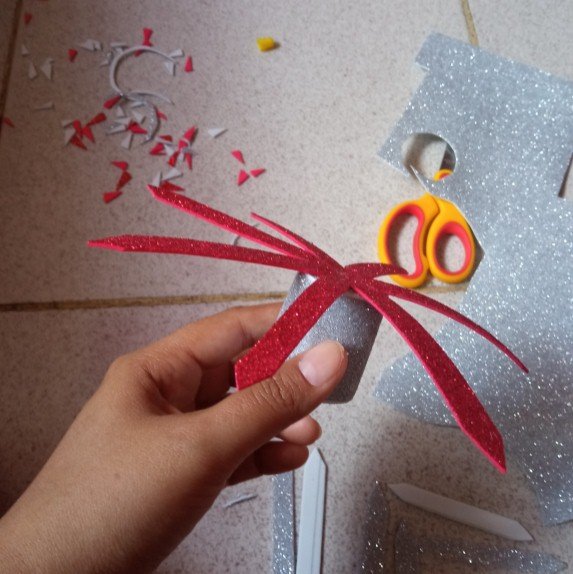
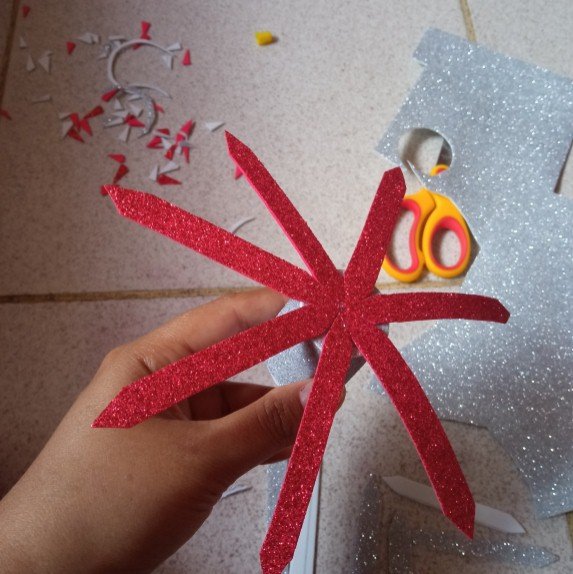
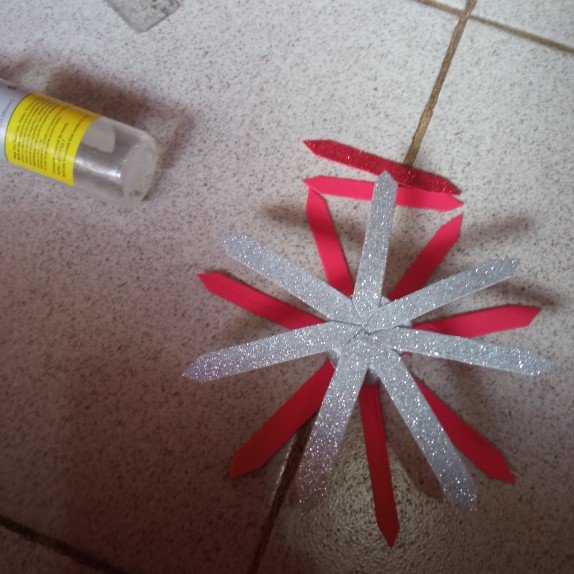
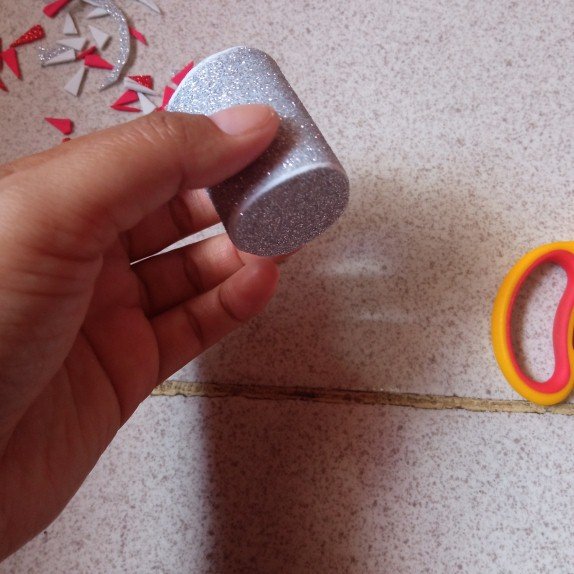
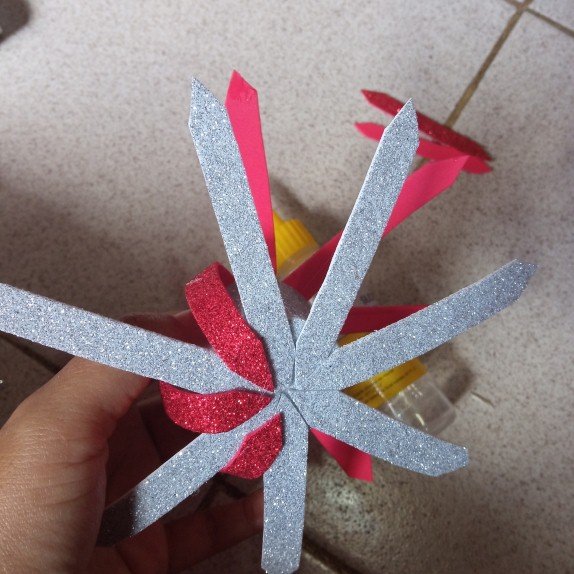
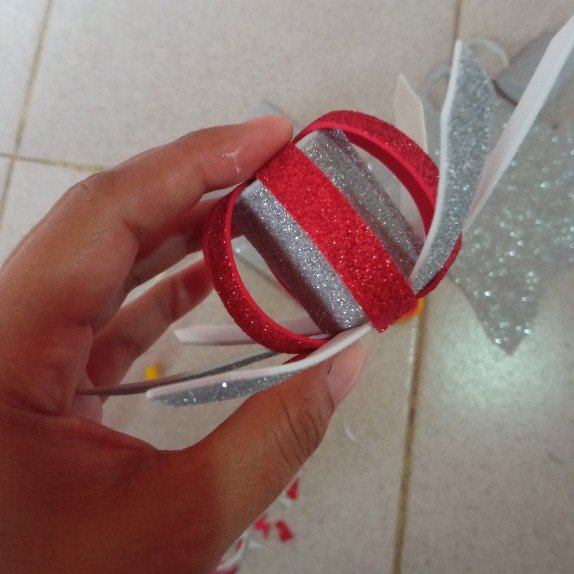
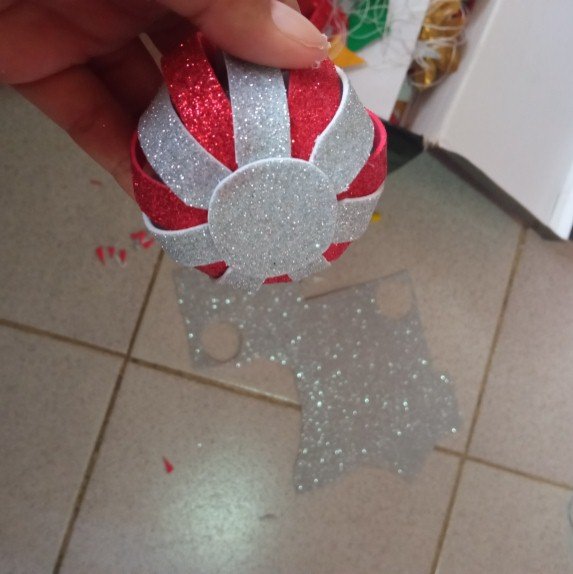
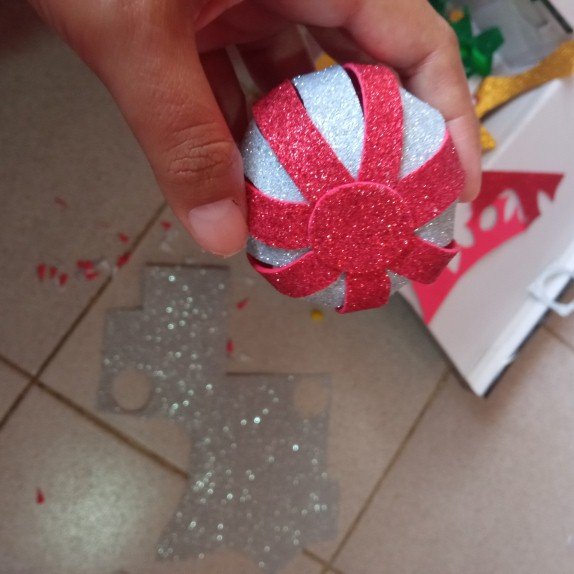
Here in this step they are intertwined and the red ones go up towards the silver ones and the silver ones towards the red ones, thus forming a beautiful Christmas ball.
Aquí en este paso se van entrelazando y las rojas suben hacia las plateadas y las plateadas hacia las rojas y así se va formando resta hermosa bola de navidad.
l

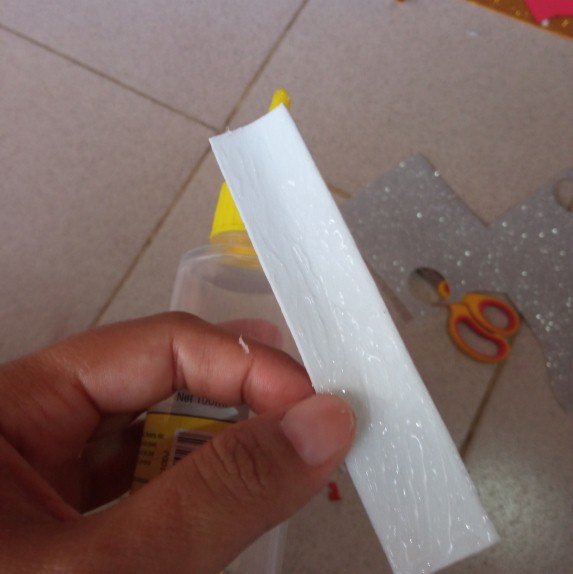
Here we use a 2cm strip of silver eva rubber and place liquid silicone or silicone stick on the back and then bend it forming a thinner strip, then we place silicone on it and place the desired thread that will hold the ball and we bend it forming a spiral with the same strip.
Aquí se usa la tira de goma eva plateada que de 2cm y le colocamos silicón líquido o en barra por la parte de atrás y luego se dobla formando una tira más delgada, luego agarramos le colocamos silicón colocamos el hilo deseado que sostendrá la bola y vamos doblando formando un espiral con la misma tira.
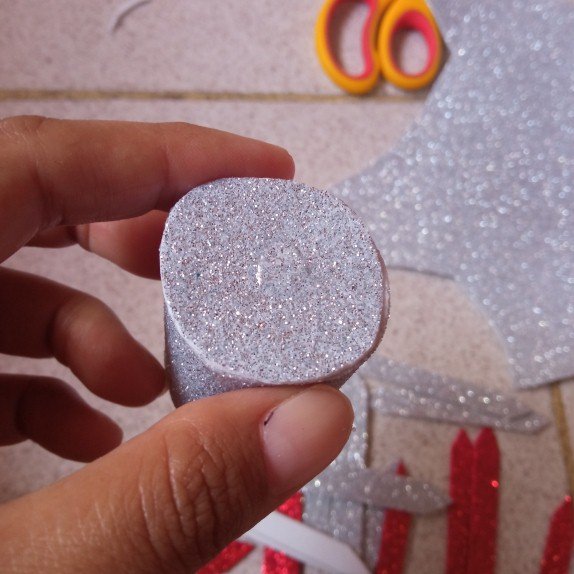
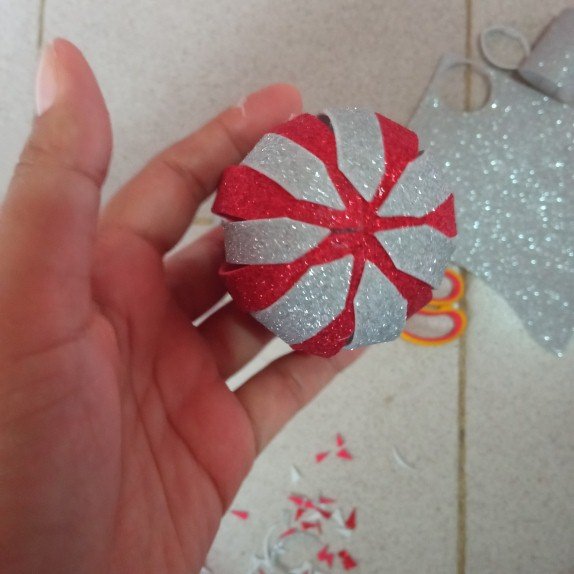
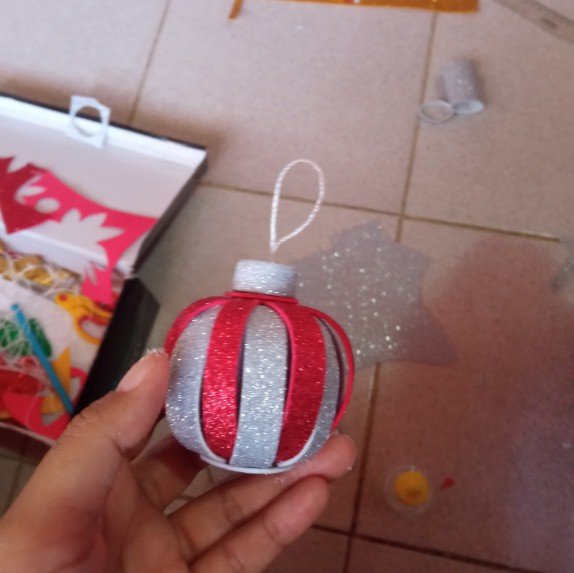
We take out two small circles and use them to cover both the top and the bottom of the Christmas ball.
Sacamos dos círculos pequeños y lo usamos para tapar tanto la parte de arriba como la de abajo de la bola de navidad.
l
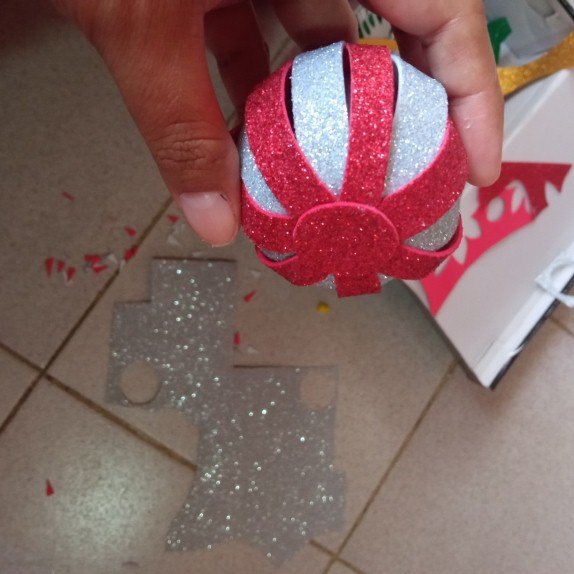
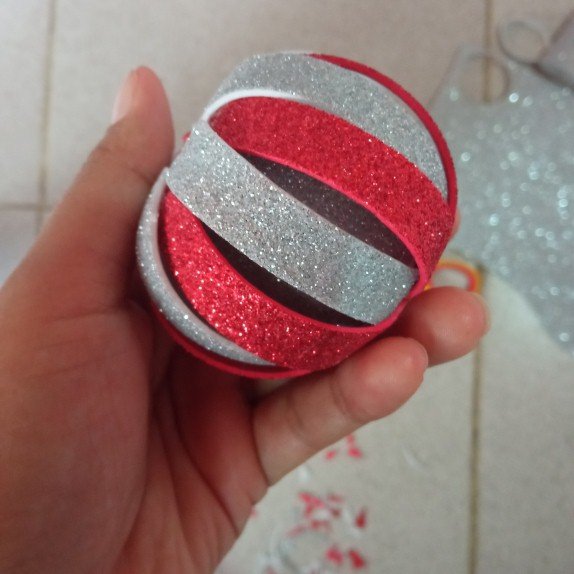
Finally, we grab and glue the spiral-shaped strip on top of the Christmas ball on the red side and proceed to glue.
Por último agarramos y pegamos la tira en forma de espiral encima de la bola de navidad por la parte roja y procedemos a pegar.
l
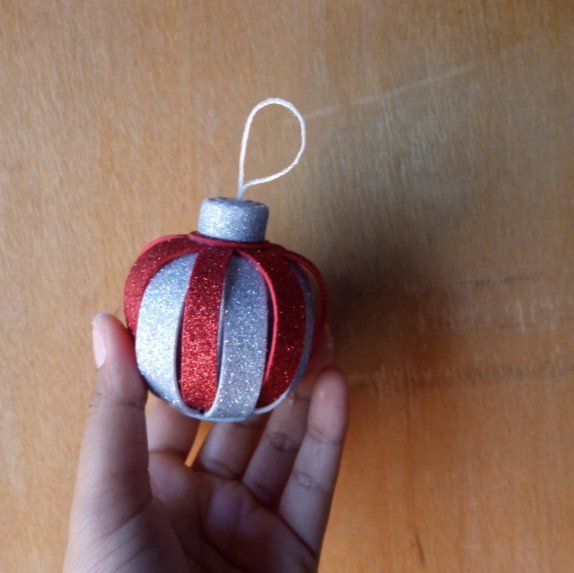
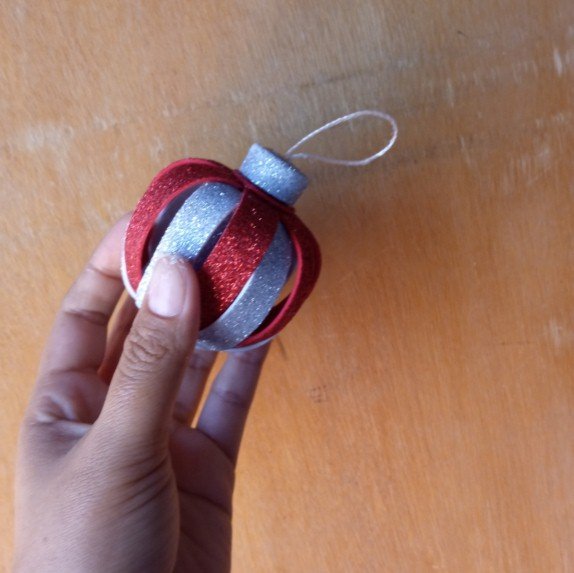
Let it dry and after the Christmas ball is completely ready, we take it to the Christmas tree where it will be hung.
Dejamos secar y luego de estar totalmente lista la bola de navidad la llevamos al árbol de navidad dónde se colgará.
l
Sin más que decir y esperando que este post de manualidad sea del agrado de cada lector me despido con un gran y caluroso abrazo, los quiere @shirahoshi. Hasta una próxima oportunidad.
Sin más que decir y esperando que este post de manualidad sea del agrado de cada lector me despido con un gran y caluroso abrazo, los quiere @shirahoshi. Hasta una próxima oportunidad.
The photographs are my own and were taken by me with a Redmi 9 and were edited in powerpoint.
Las fotografías son de mi autoría y fueron tomadas por mí con un Redmi 9 y se editaron en powerpoint.
The Step by Step Gif was made by me in AdobePhotoshop CC2014.
El Gif de Paso a Paso fue realizado por mi en AdobePhotoshop CC2014.
The logo was designed by me in Adobe Illustrator CC 2015 and its animated version was made in After Effects CC 2017.
El logo fue diseñado por mí en Adobe Illustrator CC 2015 y su versión animada la realice en After Effects CC 2017.
Language corrector used Deepl.
Corrector de idioma utilizado Deepl.
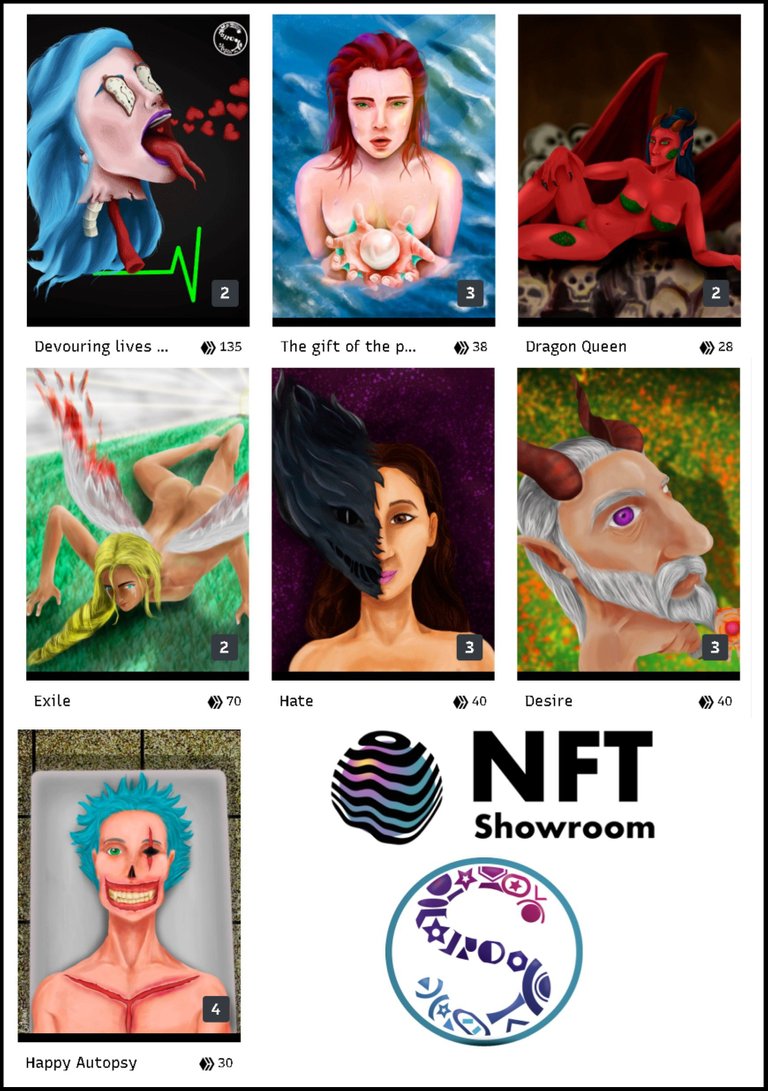
Remember that you can purchase these beautiful pieces of art made and tokenized by me at Nftshowroom at an excellent price. Link to the gallery here
https://twitter.com/shiraho47800990/status/1465008586287980549
The rewards earned on this comment will go directly to the person sharing the post on Twitter as long as they are registered with @poshtoken. Sign up at https://hiveposh.com.
Hermosas bolas de navidad @shirahoshi
@shirahoshi! The Hive.Pizza team manually curated this post.
PIZZA Holders sent $PIZZA tips in this post's comments:
You can now send $PIZZA tips in Discord via tip.cc!
Thank you for sharing this amazing post on HIVE!
Your content got selected by our fellow curator @priyanarc & you just received a little thank you via an upvote from our non-profit curation initiative!
You will be featured in one of our recurring curation compilations and on our pinterest boards! Both are aiming to offer you a stage to widen your audience within and outside of the DIY scene of hive.
Join the official DIYHub community on HIVE and show us more of your amazing work and feel free to connect with us and other DIYers via our discord server: https://discord.gg/mY5uCfQ !
If you want to support our goal to motivate other DIY/art/music/homesteading/... creators just delegate to us and earn 100% of your curation rewards!
Stay creative & hive on!
Que hermoso trabajo final y excelente explicación brindas con el paso a paso, me encanto ver tu trabajo, yo no soy muy buena para las manualidades, pero personas como tu han hecho que me motive a realizarlas. Bendiciones. Felices tiempo de Adviento.🙏🏻🤗🌹🎄
Buena propuesta para estas fechas y fáciles de hacer por lo que se ve.
me gusta mucho esta idea muy practica para moldear amiga suerte en el concurso
Wow! Hermoso trabajo. Muy bueno el paso a paso!