HANDMADE PUPPETS // TO WORK ON LOVE AND RESPECT WITH CHILDREN [ENG-ESP]
(Edited)
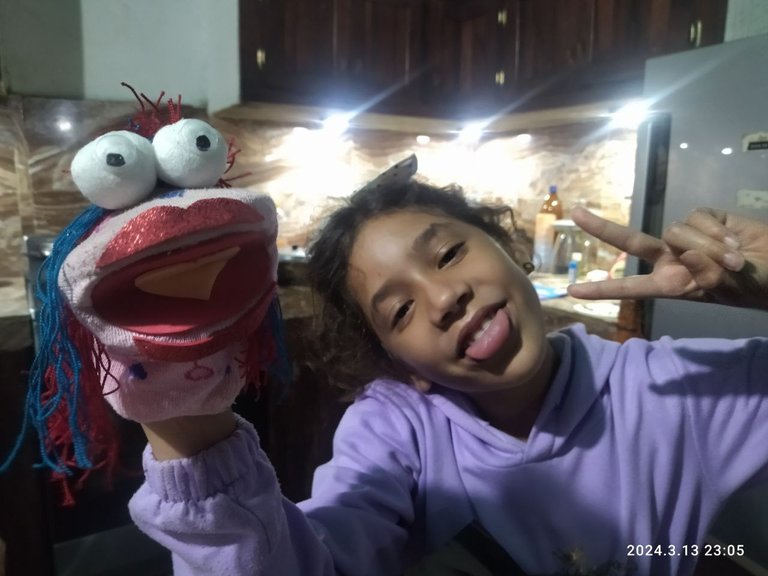
Greetings dear friends and readers in general. After almost 3 years on this great platform, I have decided to share with you a little puppet work that I dared to make for a school activity for my princess Camila.
My little girl told me that I had to make a puppet, I confess that crafts are not my forte so the first option was to make her something very basic with an old sock and improvise her eyes and hair.

However, later she told me that she needed another puppet for the closing of her final project where they were going to develop a play about her values, it was there where I said to myself shake your laziness and take an extra step for your princess, I looked for videos on YouTube and to make it I made use of the following materials.
- The sock.
- Foami in red, beige, fuchsia. Bench
- Hot silicone.
- Yellow, blue and red wool.
- A wet baby towel (dry)
- Cotton or white stuffing
- Cardboard
- Foam rubber
- Pill capsules (blister packs)
- 6 colored rubber bands or pigtails
- Patterns
- Adhesive tape
- Scissors
The first thing I did was to print some patterns that I was going to need to make the corresponding molds and the sock or socks to use, I am characterized by being somewhat methodical, since I do not have much experience in this area.

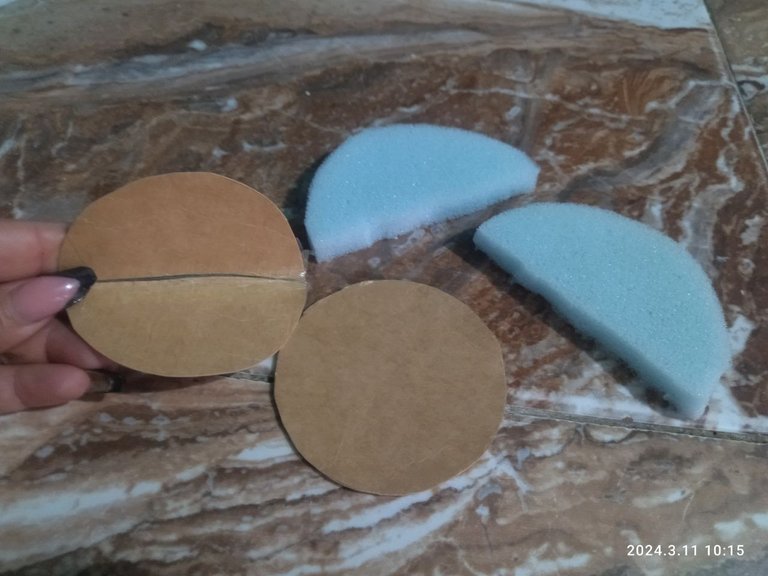
Once this was ready, I only replicated them initially in the cardboard and the foam rubber that were the main steps, I divided the cardboard almost in half, leaving one part bigger than the other, which was to differentiate the top from the bottom which was smaller and once ready, I reattached it with the help of the tape, so that we could fold it with great flexibility.

I took the foam rubber and also cut it in half and after that I glued it with the help of hot silicone to the cardboard on the outside, as you can see in the following image, this would make it easier to place the fingers and make the corresponding movements with the puppets.
Once this was ready, I proceeded to glue this mold on the inside of the sock, previously stretching the tip of the sock so that it would be without wrinkles when I turned it over. With this we now have the base sketch of the puppet and we only have to give it a little life with the help of foami and other materials.

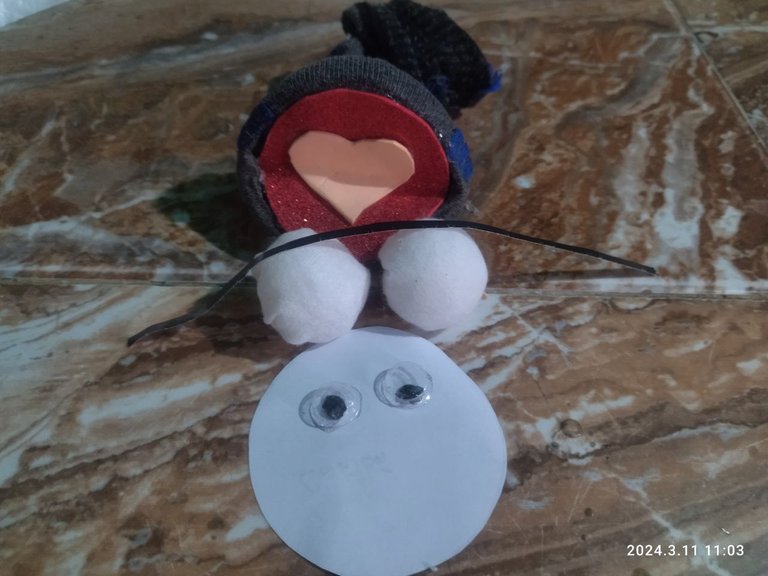
I can tell you that the molds were indispensable for this work, I cut with the corresponding pattern the mold of the mouth with frosted red foami and for the tongue I used the beige color and both were glued with silicone to the sock.

This part was very improvised as I didn't have eyes or something circular to help me represent it, I took a wet towel that I use for my babies, I put it to dry and once dry, I stuffed it with cotton and then with a ponytail I tied it and sealed it with hot silicone and with the help of my fingers I made them as round as possible and I repeated this procedure for the next eye.

That was only going to be useful for the eyepiece, but I needed the pupil and the iris, so I took a piece of frosted white foami and painted it with a black permanent marker to make the pupil and with the help of a blister pack I made the iris so that his eyes could move and give him that particular touch.
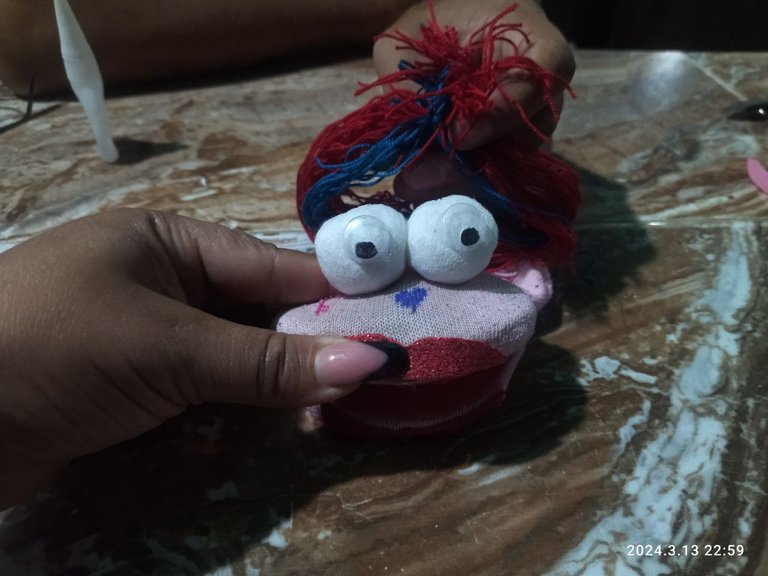
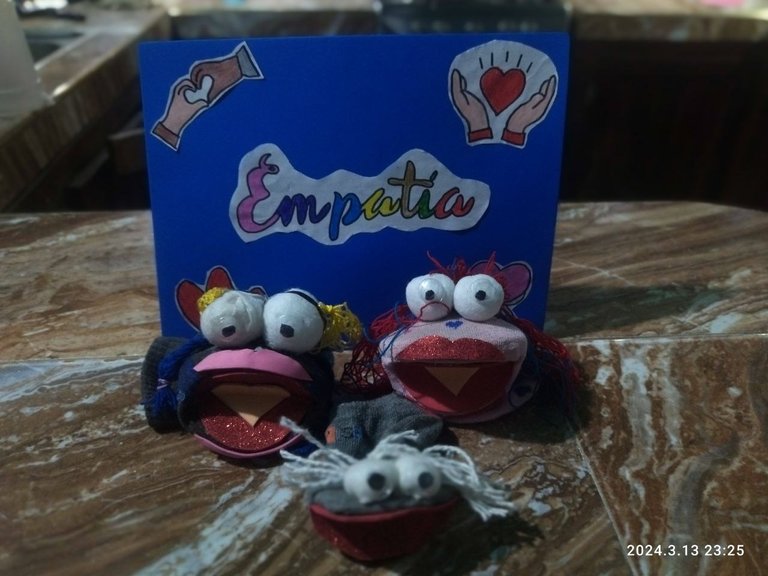
Then I cut a black strip to glue on the outside of the eye and once everything was ready, I fixed them both with silicone and then we placed them on the top of the sock. We were almost ready, but I needed the hair, that's when I remembered that I had some wool from when I dared to tackle some scarves for my children and with the help of it I made her braids to the sock that was going to represent Respect and with the red and blue wool I made the hair of love. I also made some lips to give her a more feminine touch.
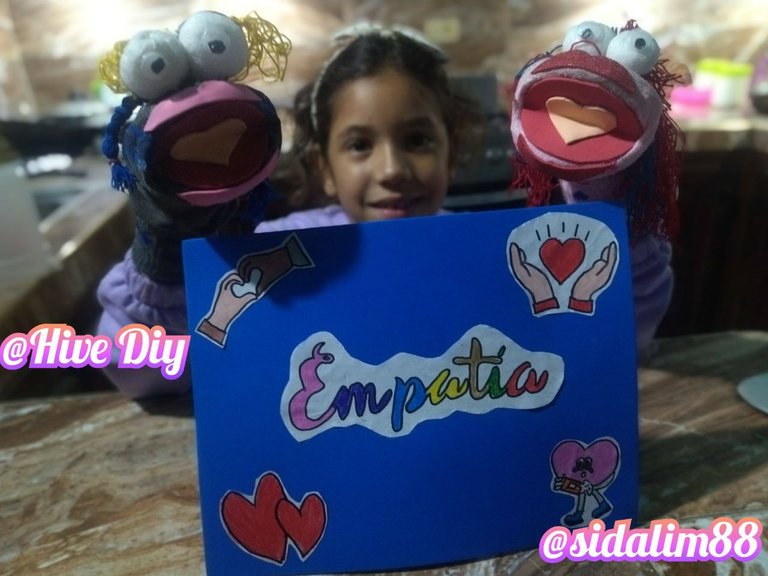
My little girl was very happy for the work done and waited until almost midnight to see the result and to be able to show off her 2 puppets with their empathy poster, which was an essential part of the values they were going to work on in their project.
First of all I apologize because I am aware that it is not a totally clean work, but what is really important is to see how our children take us out of that comfort zone and push us to put into practice the dormant creativity that we all have inside.
I thank you in advance for dedicating part of your valuable time to read my work and may God multiply the support you give to my publication. Blessings.
All photos used here are my property and were taken with the camera of my Redmi Note 9T phone. The design was made with the GridArt application.
Saludos apreciados amigos y lectores en general. Después de casi 3 años en esta gran plataforma he decidido darme paso a compartir con ustedes un pequeño trabajo de títeres que muy osadamente me atreví a realizar para una actividad escolar de mi princesa Camila.
Mi niña me comento que debía llevar un títere, les confieso que las manualidades no son mi fuerte por lo que la primera opción fue hacerle algo muy básico con un calcetín viejo e improvise sus ojos y cabello.
Sin embargo, después me dijo que necesitaba otro títere para el cierre de su proyecto final donde iban a desarrollar una obra de teatro sobre sus valores, fue allí donde me dije sacude tu pereza y da un paso extra por tu princesa, busque videos por YouTube y para poder realizarlo hice uso de los siguientes materiales.
El calcetín
Foami de color rojo, beige, fucsia. Banco
Silicona caliente
- Lana de color amarilla, azul y roja.
- Una toalla humedad para bebe (seca) .
- Algodón o relleno blanco.
- Cartón.
- Goma espuma.
- Capsulas de pastillas (blíster) .
- 2 ligas o coletas de colores.
- Patrones.
- Cinta pegante.
- Tijera.
Lo primero que hice fue imprimir unos patrones que iba a necesitar para hacer los moldes correspondientes y el o los calcetines a usar, me caracterizo por ser algo metódico, ya que no tengo mucha experiencia en esta área.
Una vez listo esto, solo los replique inicialmente en el cartón y la goma espuma que eran los pasos principales, el cartón lo dividí casi a la mitad, deje una parte más grande que la otra, la cual iba a diferenciar la parte de arriba de la de abajo que era más pequeño y una vez listo, la volví a unir con ayuda de la cinta pegante, de tal manera que la pudiésemos doblar con mucha flexibilidad.
Tome la goma espuma y también la corte a la mitad y posterior a ello la pegue con ayuda del silicón caliente al cartón por la parte externa, tal cual lo pueden evidenciar en la siguiente imagen, esto iba a facilitar el colocar los dedos y hacer los movimientos correspondientes con los títeres.
Una vez listo esto, procedí a pegar este molde en la parte interna del calcetín, estirando previamente la punta del mismo para que este quedara sin arrugas al voltearlo. Con esto ya tenemos el bosquejo base del títere y solo nos resta darle un poco de vida con ayuda del foami y otros materiales.
Les puedo decir que los moldes fueron indispensable para este trabajo, corte con el patrón correspondiente el molde de la boca con foami rojo escarchado y para la lengua use el color beige y ambos fueron pegados con silicón al calcetín.
Esta parte fue muy improvisada como no contaba con ojos o algo circular que me ayudara a representarlo, tome una toalla humedad de las que les uso para mis bebes, la puse a secar y una vez seca, la rellene con algodón y luego con una coleta la amarre y selle con silicón caliente y con ayuda de mis dedos las hice lo más redonda posible y repetí este procedimiento para el siguiente ojo.
Eso solo me iba a servir para el ocular, pero necesitaba la pupila y el iris, por lo que tome un trozo de foami blanco escarchado y lo pinte con un marcador permanente negro para hacer la pupila y con ayuda de un blíster de pastilla hice el iris para que sus ojos pudiesen moverse y darle ese toque particular.
Luego recorte una tira negra para pegarle por el exterior al ojo y una vez todo listo, los fije a ambos con silicón y después los colocamos en la parte superior del calcetín. Ya estábamos casi listo, pero necesitaba el cabello, es allí donde recordé que tenía una lana de cuando me atreví a abordar unos pañuelos para mis niños y con ayuda de ella le hice sus trenzas al calcetín que iba a representar el Respeto y con la lana roja y azul el cabello del amor. También le hice unos labios para darle un toque más femenino.
Mi niña estaba muy feliz por el trabajo realizado y espero hasta casi la media noche para ver el resultado y poder presumir de sus 2 títeres con su cartel de la empatía, la cual era parte esencial de los valores que iban a trabajar en su proyecto.
De ante mano pido disculpa porque estoy consciente que no es un trabajo totalmente limpio, pero lo realmente importante es ver como nuestros hijos nos sacan de esa zona de confort y nos impulsan a poner en practica la creatividad dormida que todos tenemos dentro.
De ante mano agradezco el que dediques parte de tu valioso tiempo para leer mi trabajo y que Dios te multiplique el apoyo que le aportes a mi publicación. Bendiciones
Todas las fotos aquí utilizadas son de mi propiedad y fueron tomadas con la cámara de mi teléfono Redmi Note 9T. El diseño fue realizado con la aplicación GridArt.


0
0
0.000
Excelente trabajo amiga me gustaron tus pequeños moppets ideal para trazar con los niños en e colegio
Es una manera muy didáctica y sencilla de trabajar los valores en el aula de clases. Del mismo modo, impulsa este a que sea más significativo
Son excelentes trabajos estimada. Encantado de verte por la comunidad publicando manualidades, espero no sea la última vez que te veamos por acá.
!discovery 50
Muchas gracias por agregarle valor a mi publicación apreciado amigo @gaboamc2393.
También espero que continúe cultivando el arte en mi vida para continuar visitándolos más seguido.
Saludos
This post was shared and voted inside the discord by the curators team of discovery-it
Join our Community and follow our Curation Trail
Discovery-it is also a Witness, vote for us here
Delegate to us for passive income. Check our 80% fee-back Program
Que linda publicación de manualidades, a pesar de ser tu primera vez te quedo hermoso, disfrute mucho verla, porque se ve lo hiciste con el corazón, desde el amor y eso es lo importante, lo que llena y lo que satisface.
Que bello mensaje transmites.
Abrazos y bendiciones infinitas para ti amiga @sidalim88
!DIY
Gracias amiga @dayadam por estás hermosas y emotivas palabras. Viniendo de ti son un verdadero elogio.
No te equivocas amiga por los hijos uno hace cosas inimaginable y definitivamente me encantó está gran aventura.
Un gran y muy fuerte abrazo mi bella. Amén por tus bendiciones
Very beautiful handicraft, and above all the message it conveys. Success, and blessings...
Thank you for the receptiveness of my work, I was fascinated to dare to work with this project and even more if it is for the education of my princess.
Greetings @diyhub
You can query your personal balance by
!DIYSTATSThank you so much for the support @dayadam 🙂😊 y @diyhub
https://twitter.com/hivediy47901/status/1769245766537584861
Gracias por el apoyo 😊@hive-130560