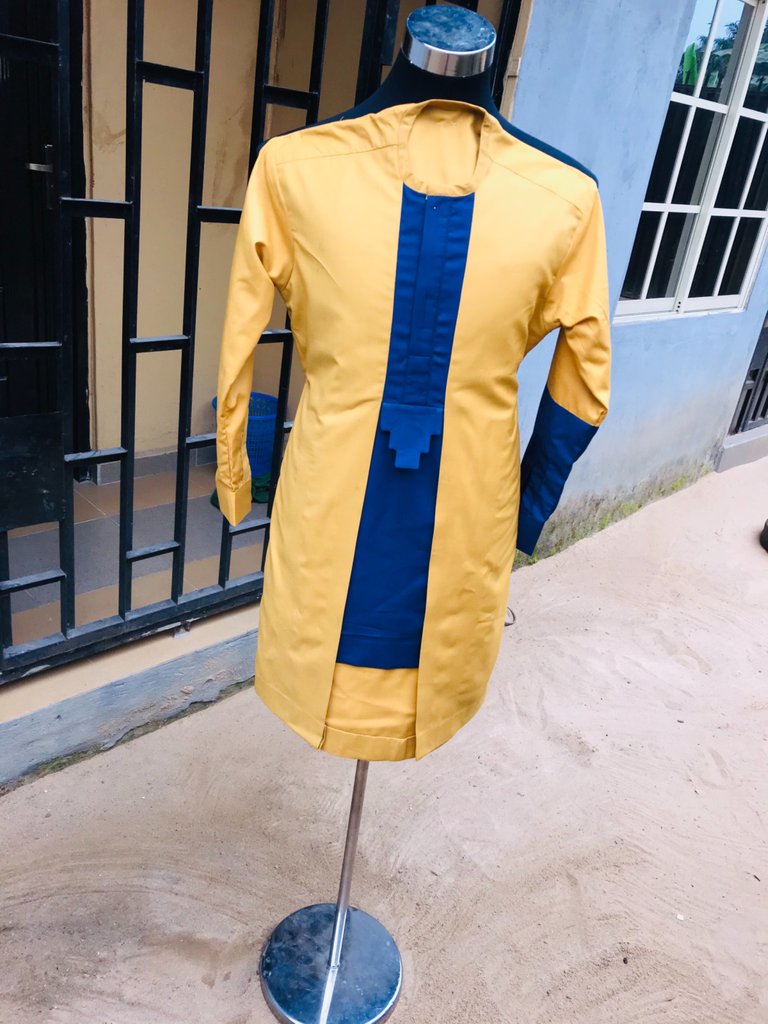
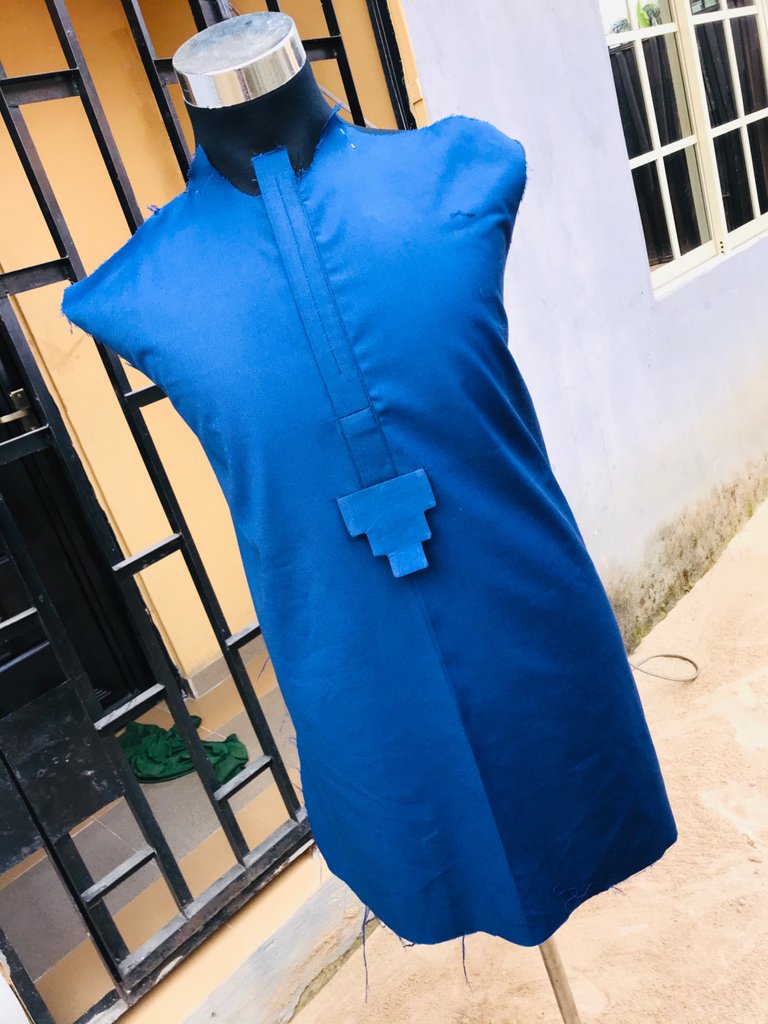
Customizing this outfit at first I wasn’t sure how it will turn out, when I was done some People say it’s lovely while some say it’s beautiful but i say it’s just perfect 👌 @smilestitches😊
Hello friends,
good morning to you all, how you’ll doing, I trust you all are doing perfectly fine, am not doing bad either am super fine and work has been amazing starting the new year with so many expectations and plans so in everything I do I just pray and hope for the best and that everything I do should just go smoothly and I know that we all do have our expectations and plans we’ve all set out and also goals to achieve maybe in the next quarter of the year. I just pray our expectations should not be cut off. I
Just pray and hope we all succeed in what ever we do this year amen and also our business must be fruitful and it must multiply everything we lay our on to do this year must work out amen!!!!
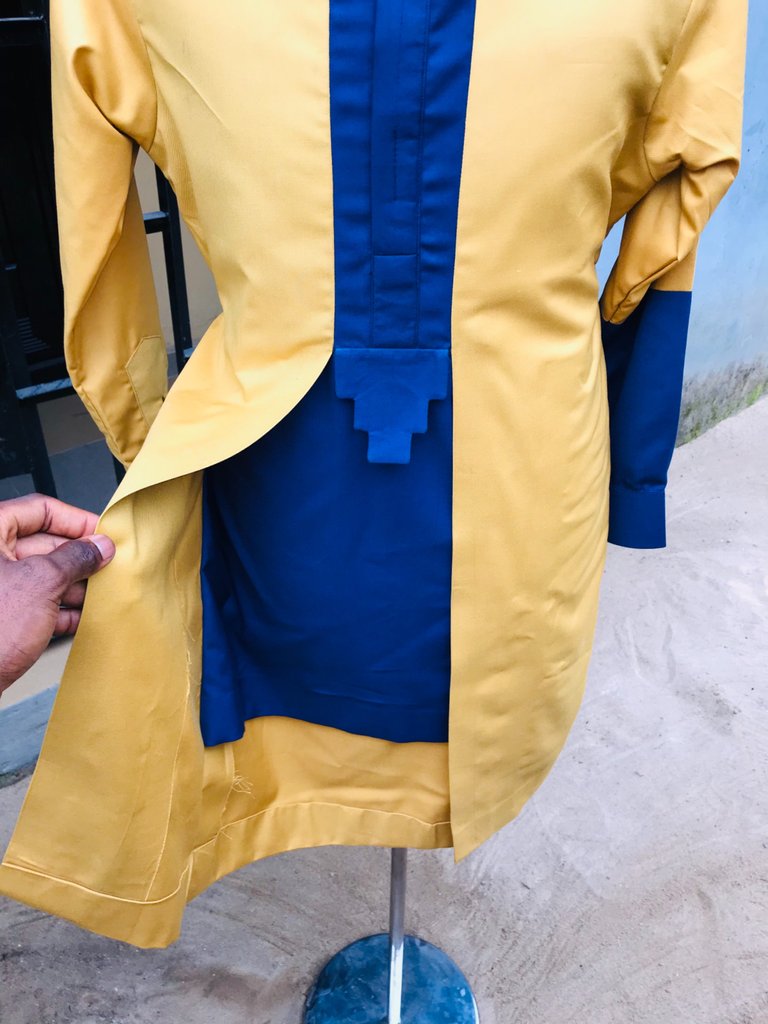
So Friends l want to share with you all a am amazing outfit I made for my client today and He’ll be rocking it to a traditional marriage. So friends stay focused and enjoy the session on your favorite brand @smilestitches.


Items used:
- A gold color fabric
- Navy blue color fabric
- Paper gum
- Tissue gum
- Collar gum for the sleeve band.
My sewing processes:
Step 1:
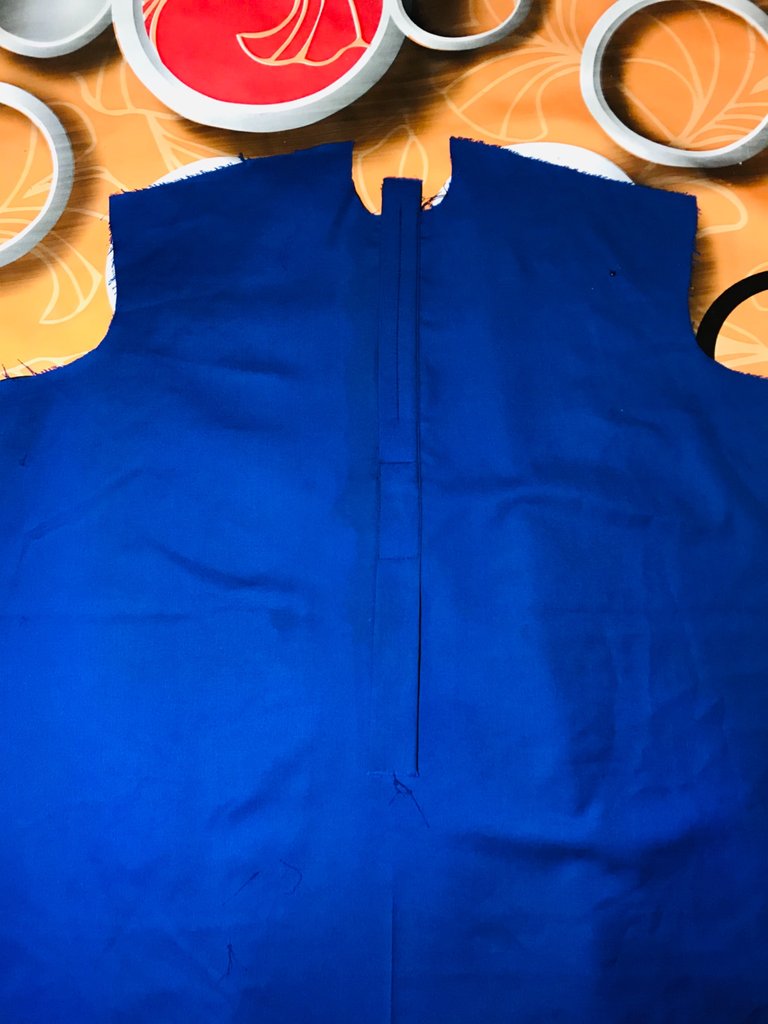
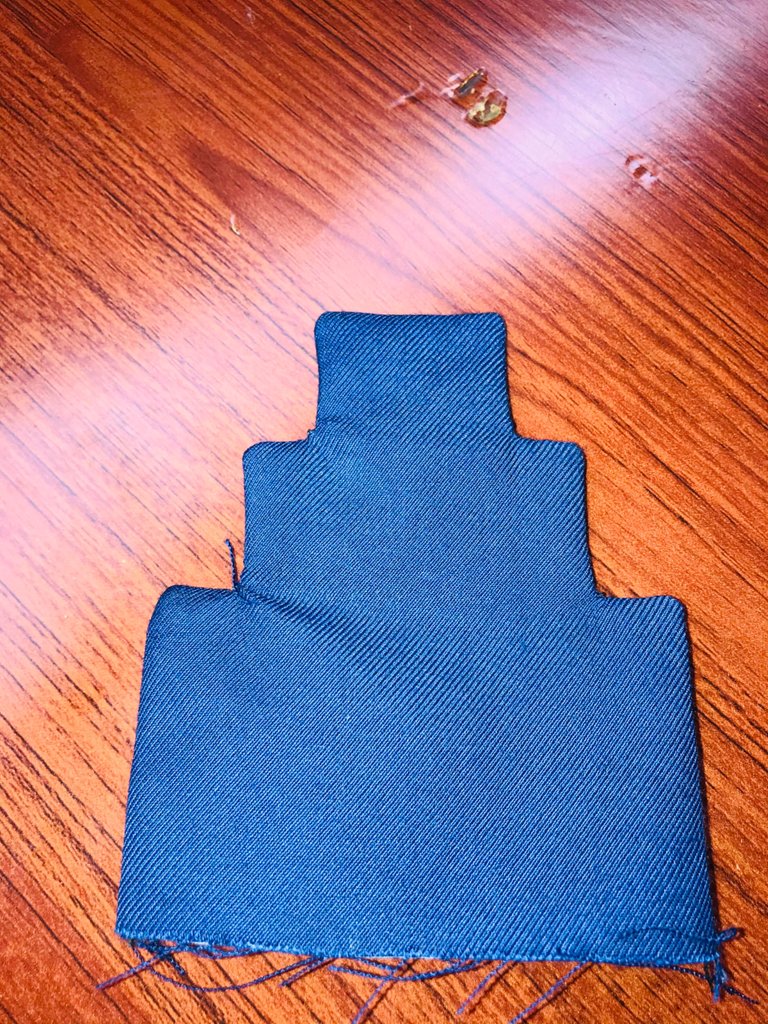
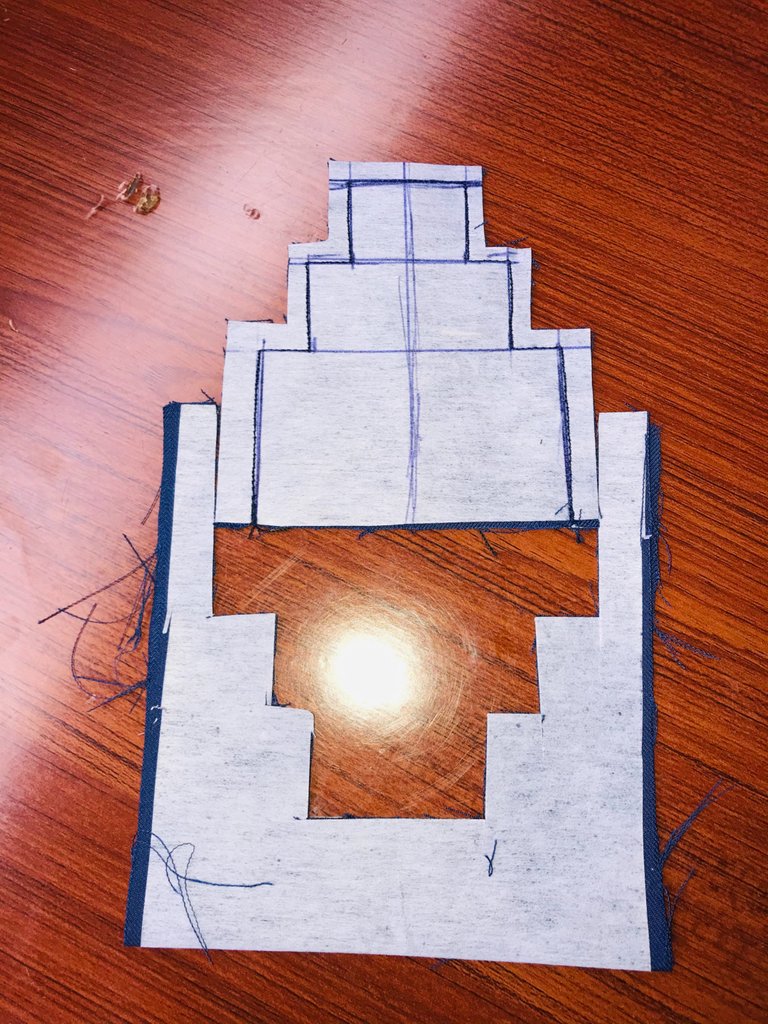
I lay the navy color fabric, and I drew out my client body measurement and I cut it out.
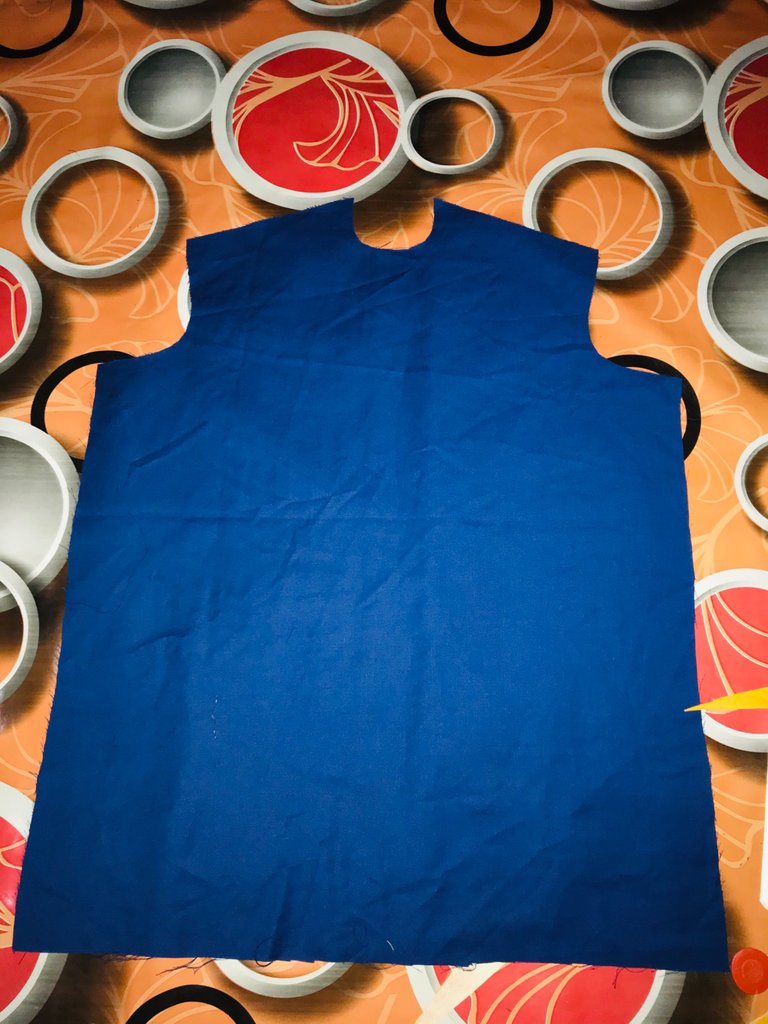
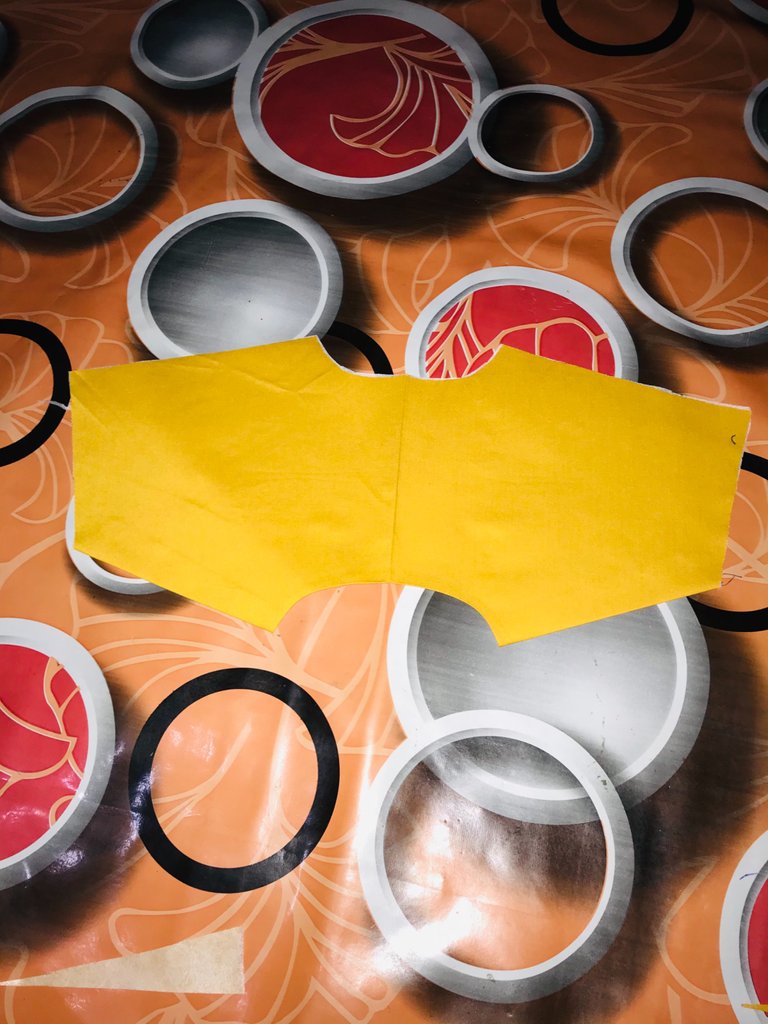
Now for the back and sleeve I used the gold color fabric to cut them.

Step 2:
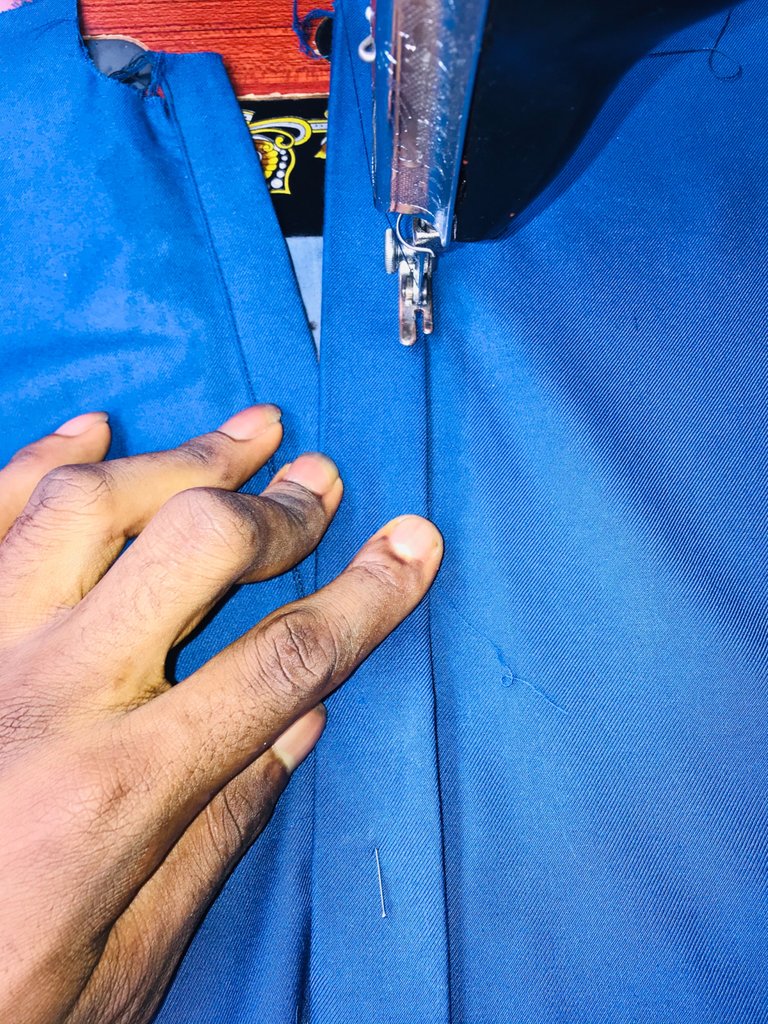
I took out the front, iron out a straight line at the middle as usual to guide me when designing and to make my design look professional and attractive when am done.
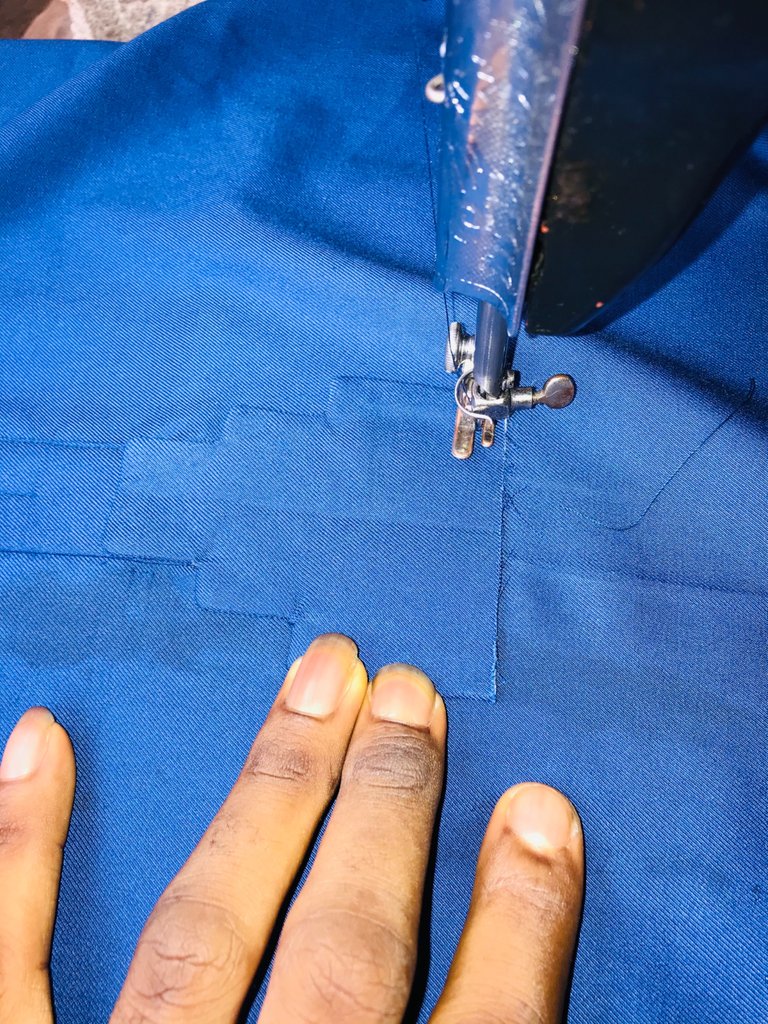
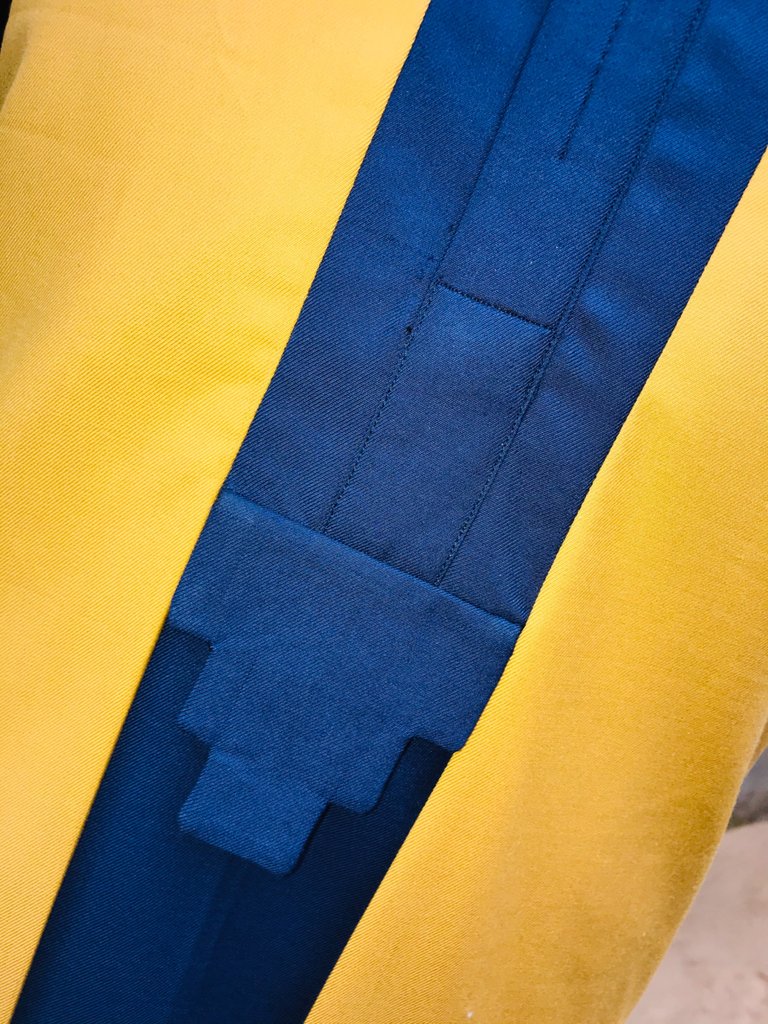
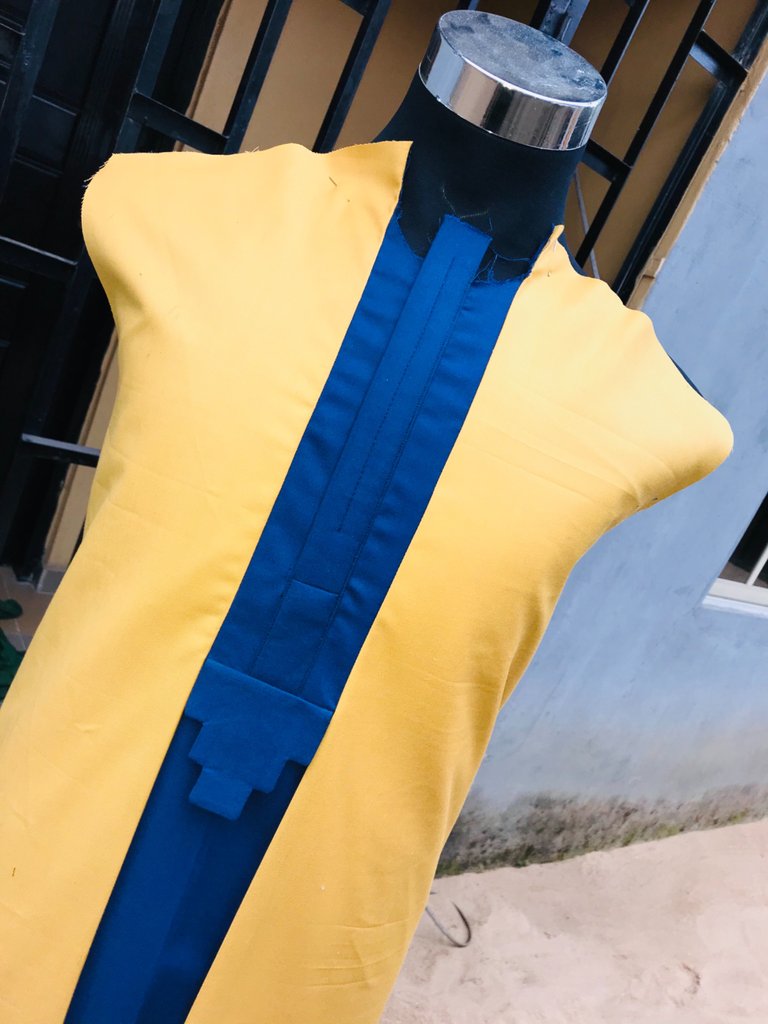
Step 3:
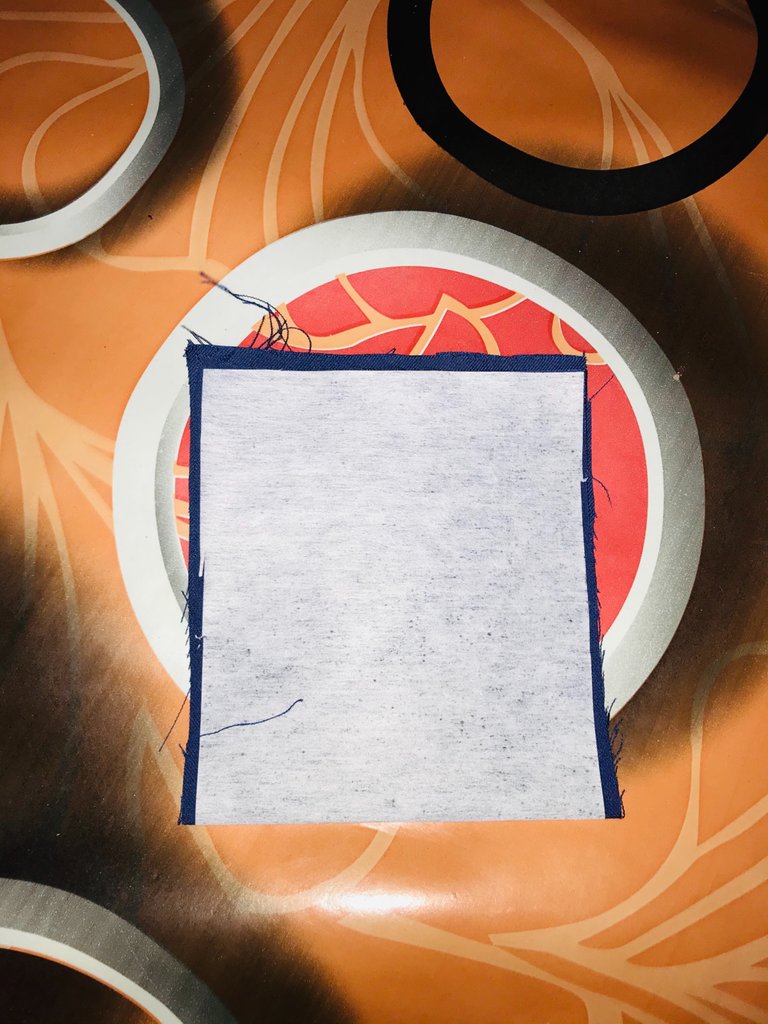
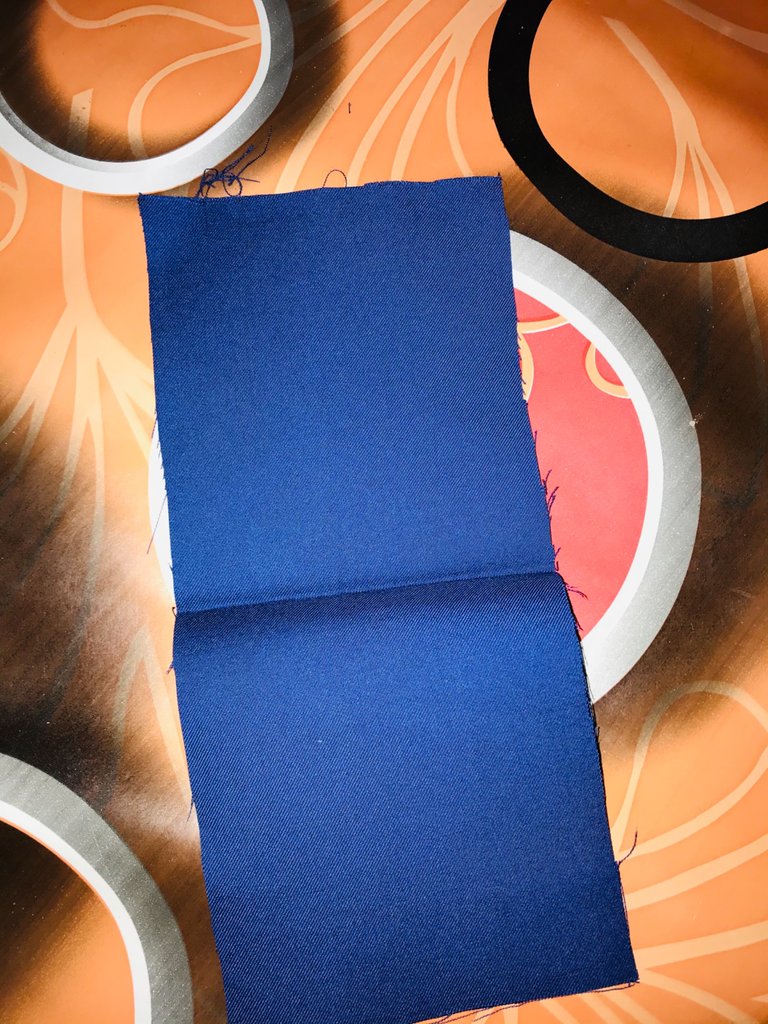
After the iron, i took my paper gum and cut length of 14inches and size of 3inches, I cut the second length of 12inches and size of 2inches and I gummed them both to the navy blue color fabric.
Step 4:
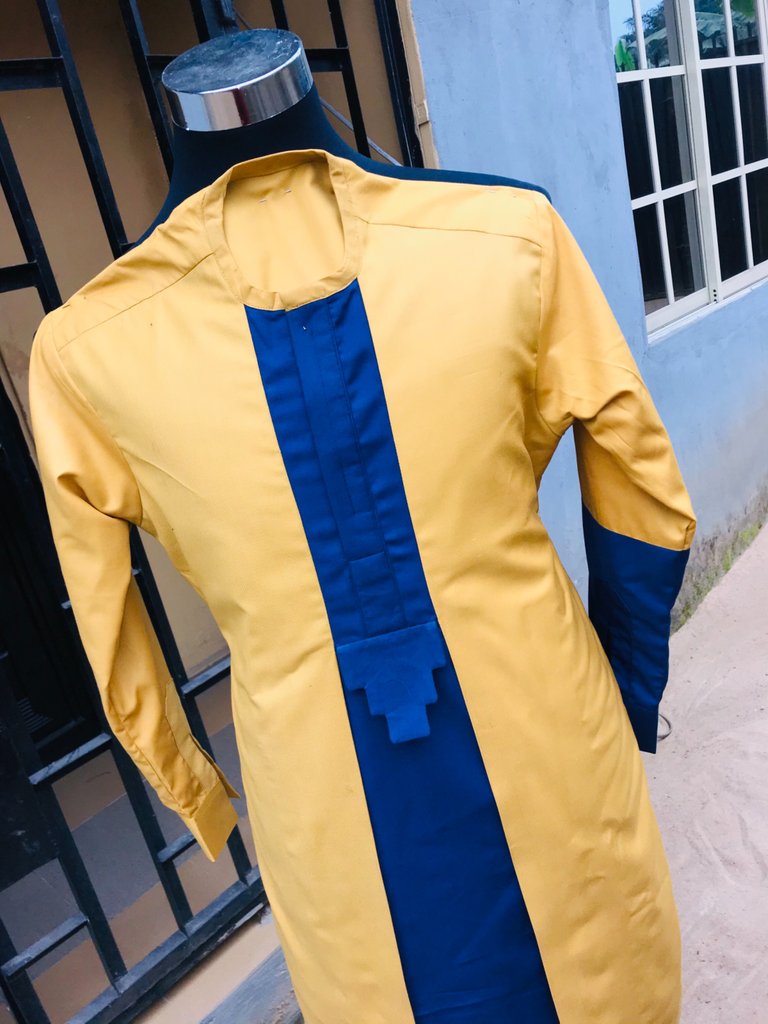
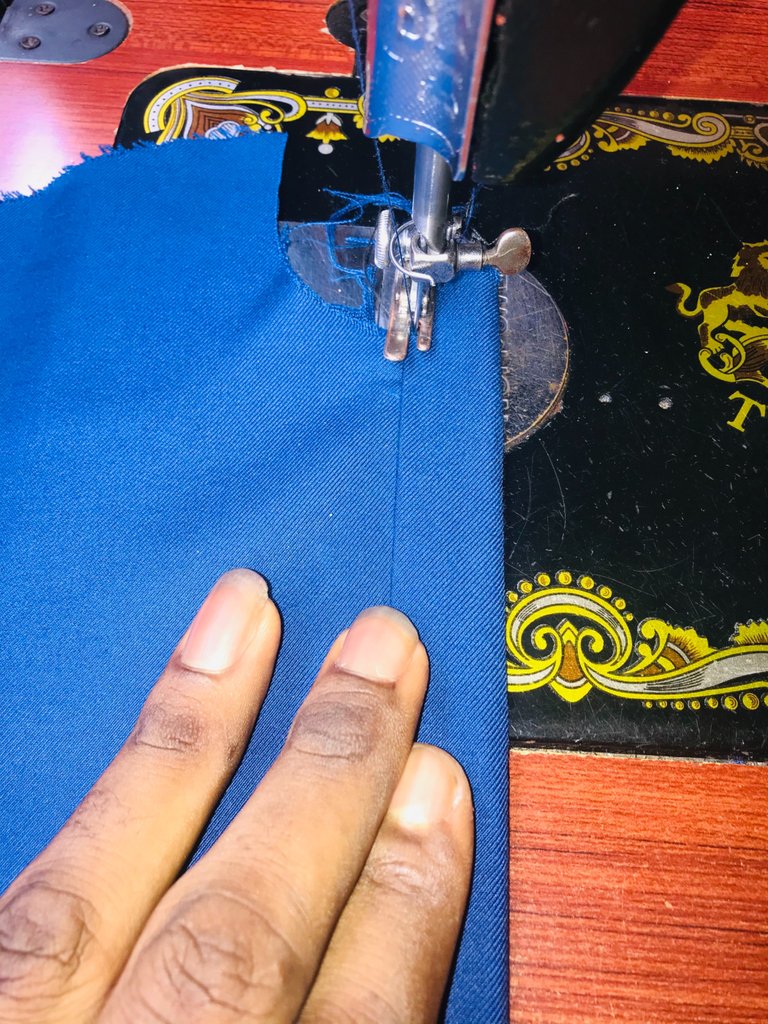
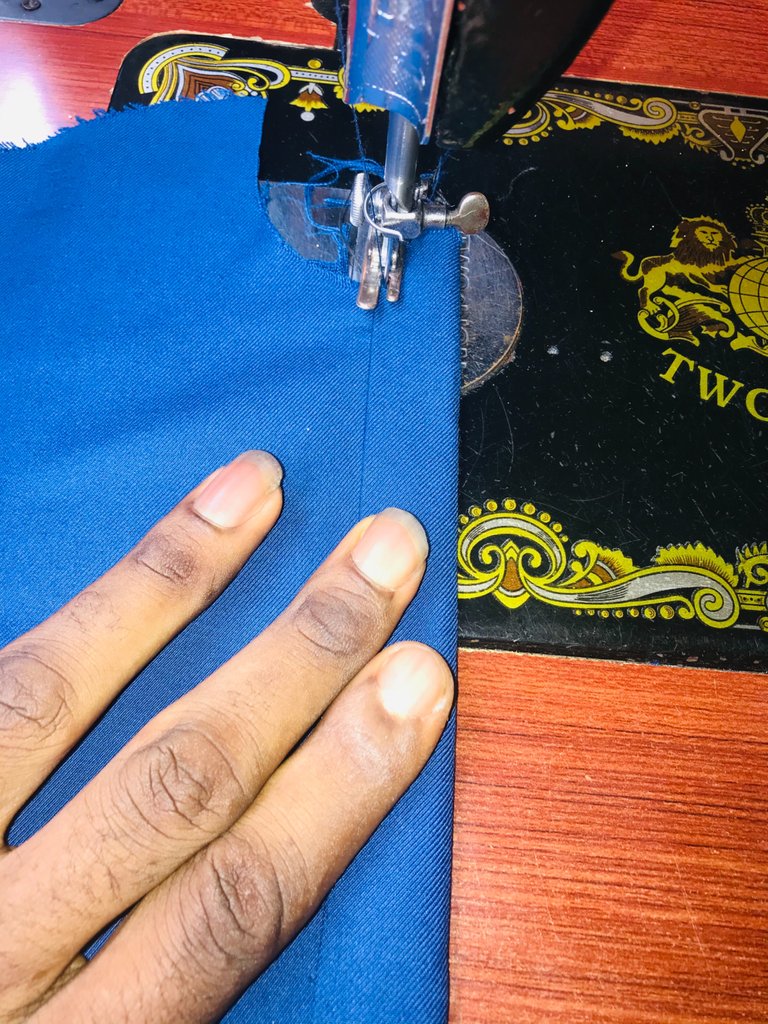
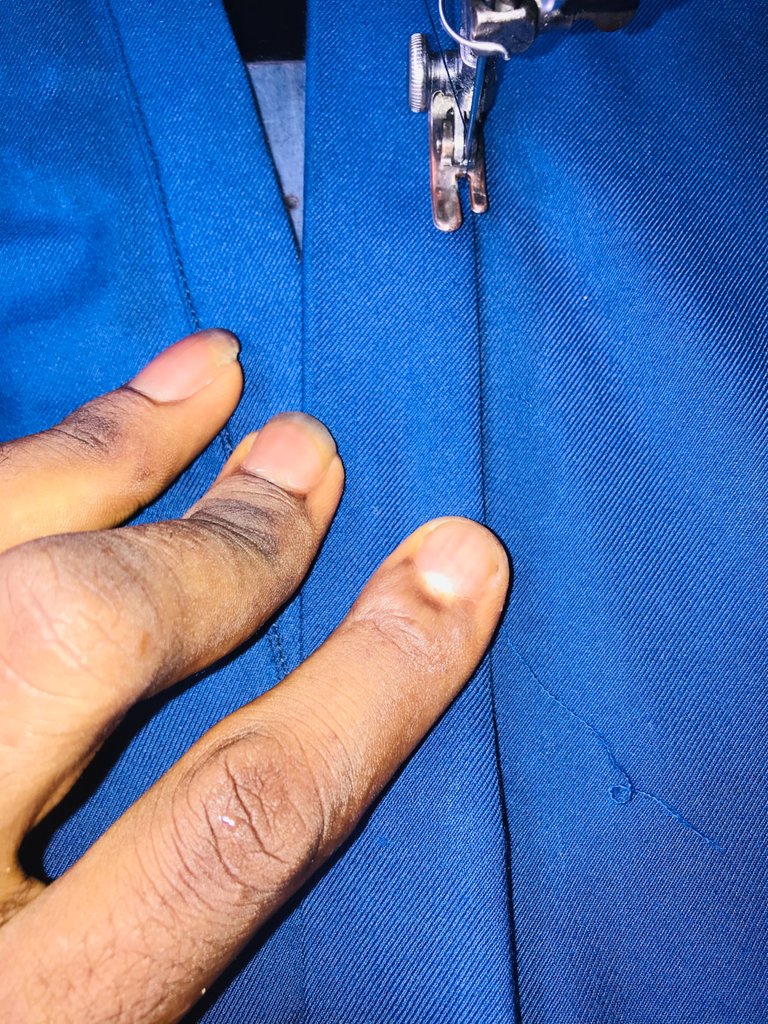
After that, I divided the front and I sewed this gummed ones to the front and I formed a flap at the front.

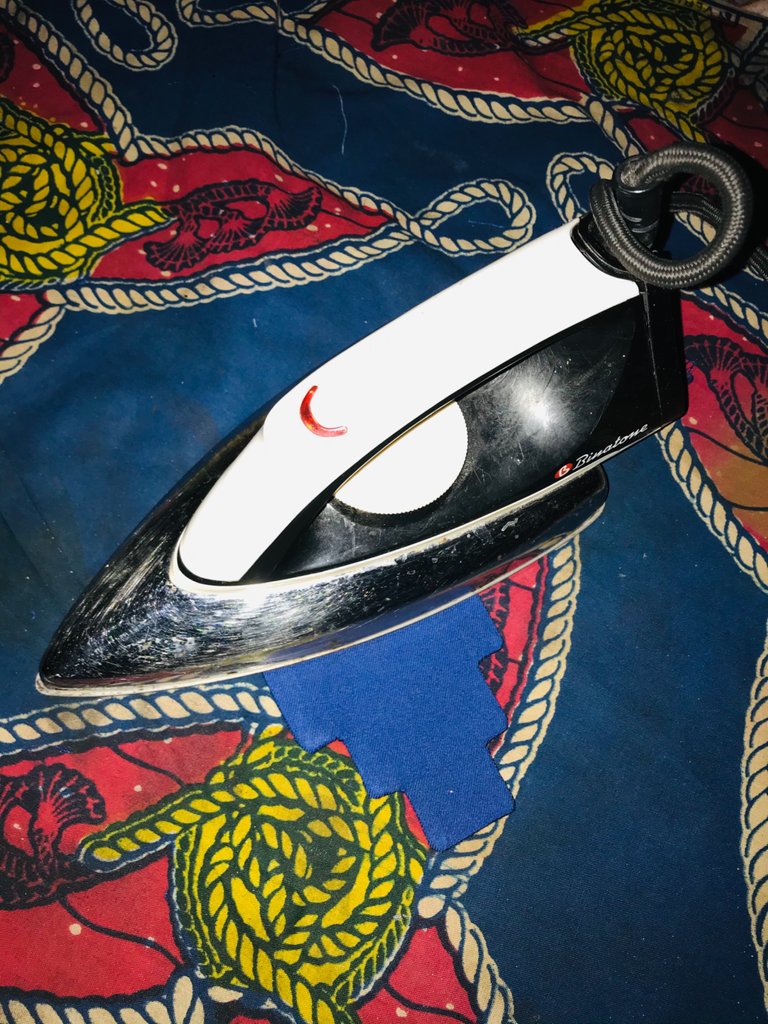
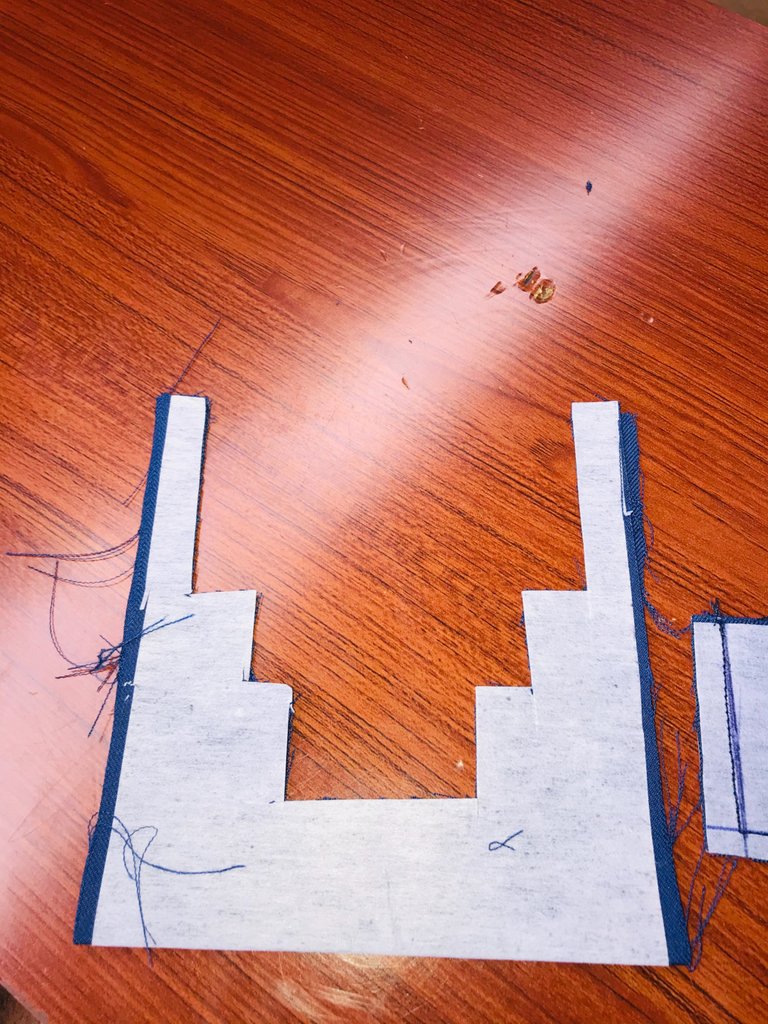
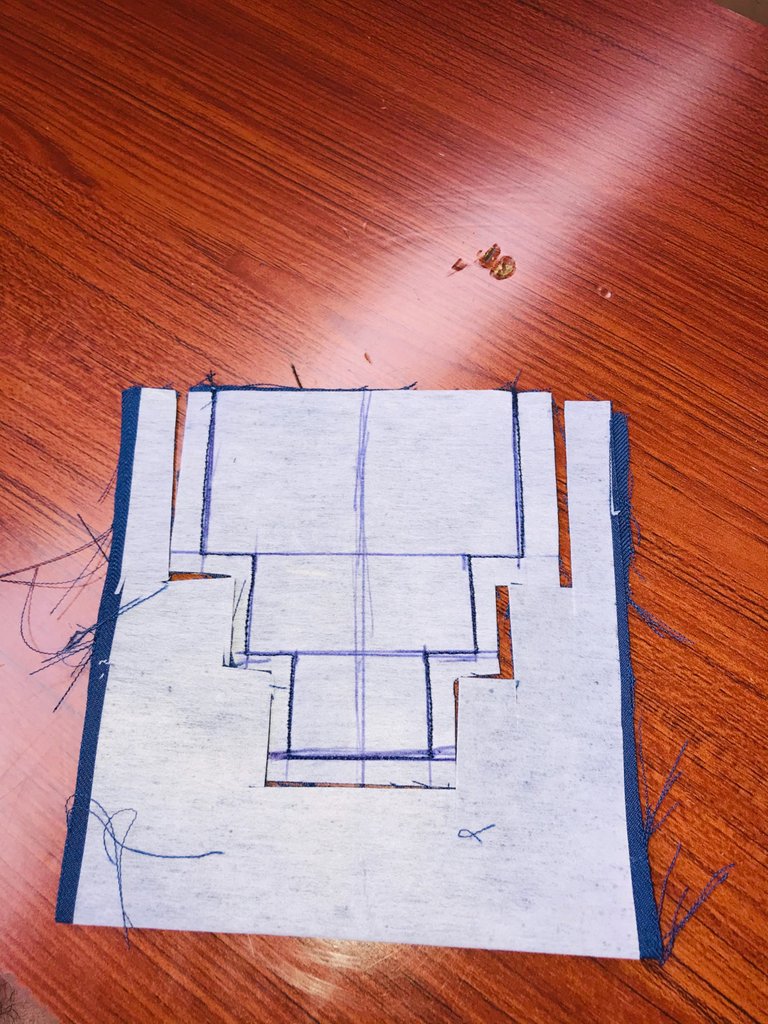
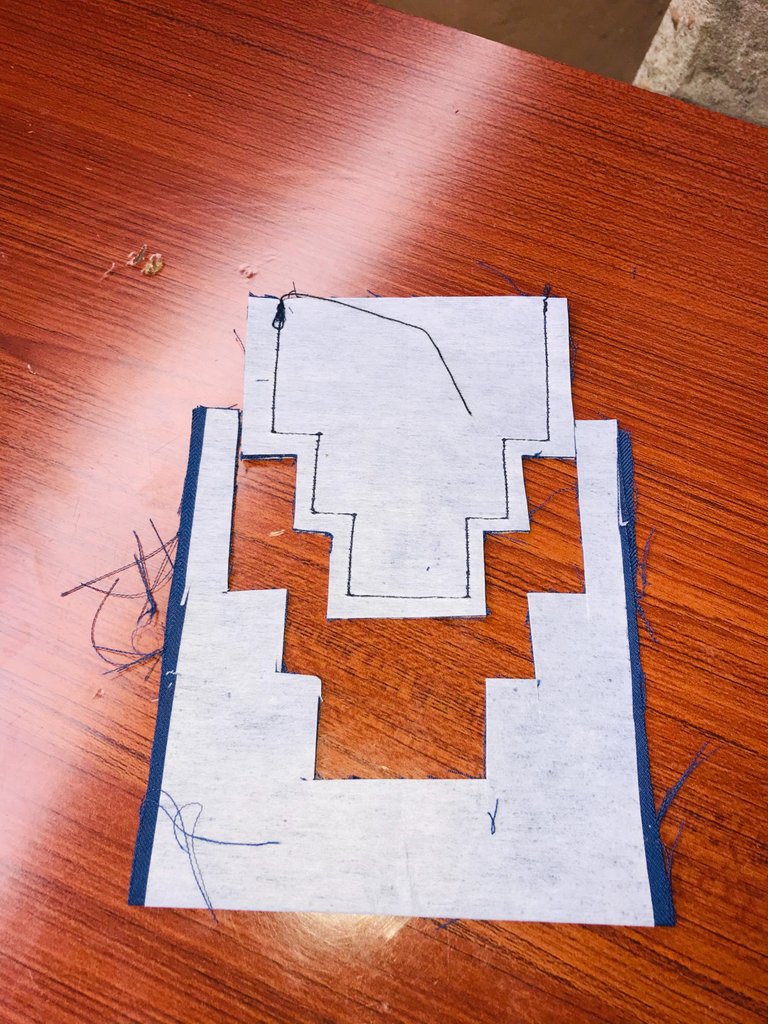
Step 5:
I cut the paper cum length of 8inches, size of 4inches and I gummed it on that same fabric, and I drew a step after step and I also sewed it, after sewing I turn it to the front side and I ironed and sewed it to the down part of the flap I just finished making.
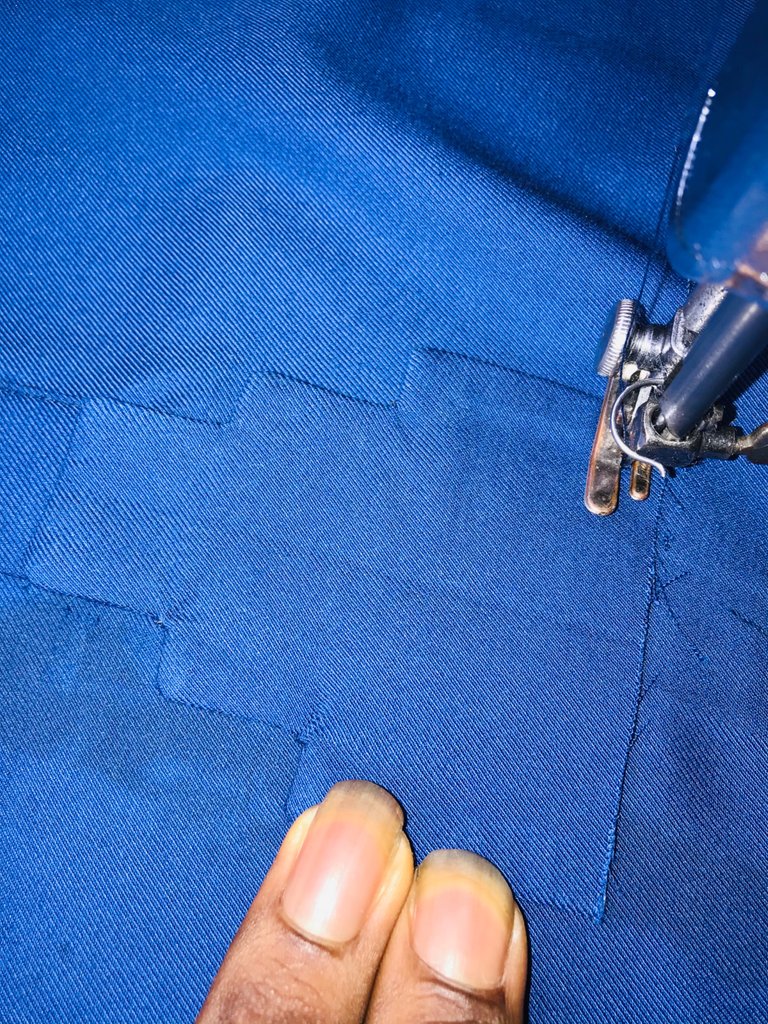
I tried playing with it.

Step 6:
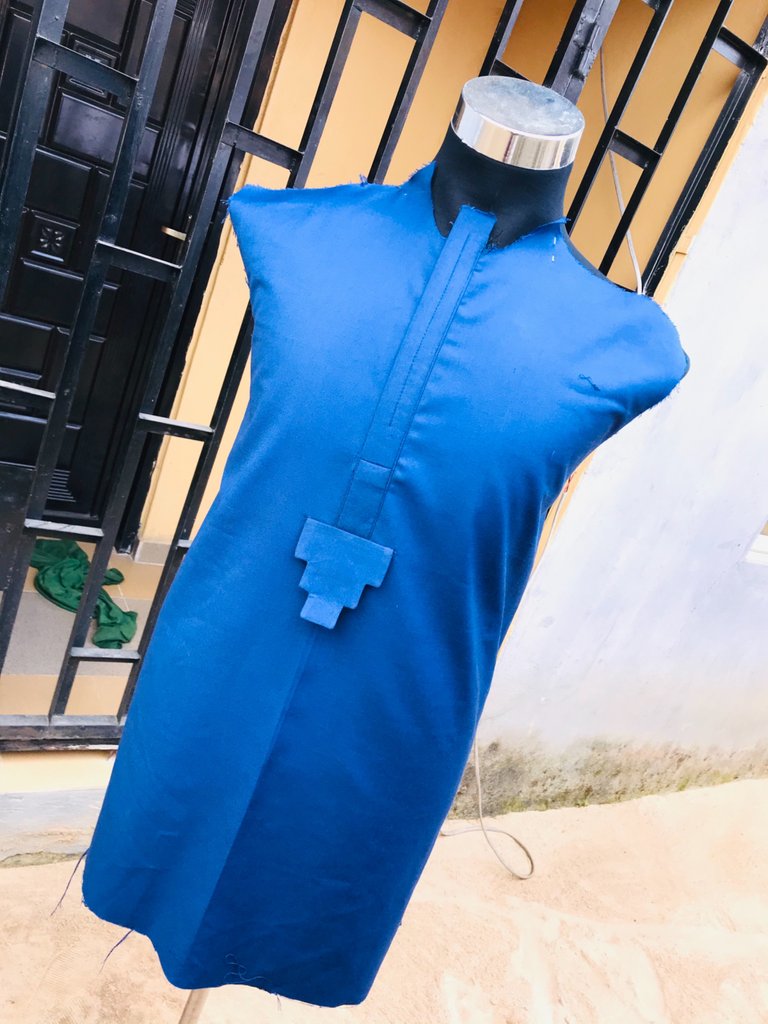
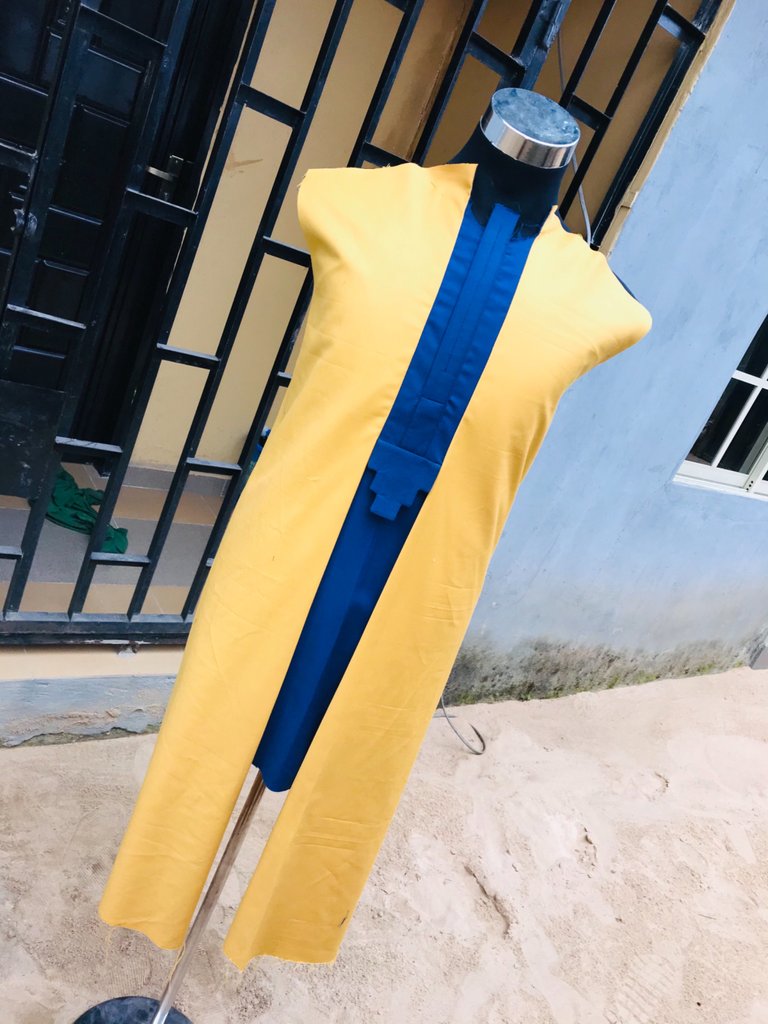
I then cut the gold color fabric and added it to the front from where the step design ended at the down part, I cut the gold color fabric using the measurement from where the step by step design ended to the side part and I cut the other one for the right side same measurement and I bend and sewed then to the front both left and right side.
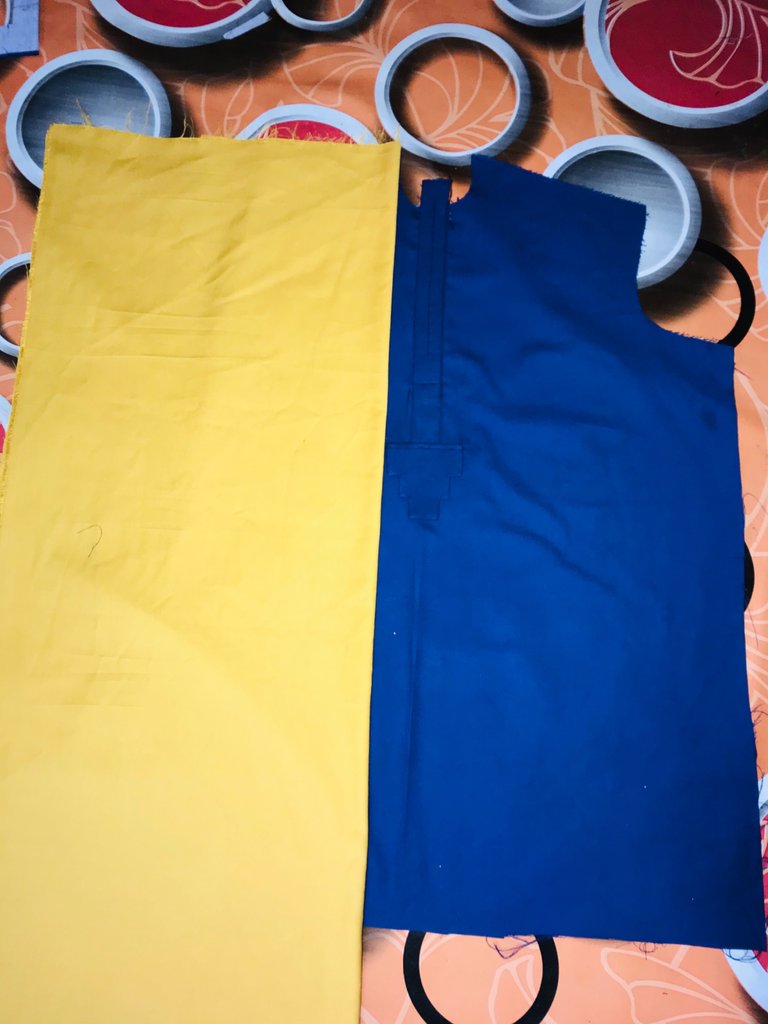
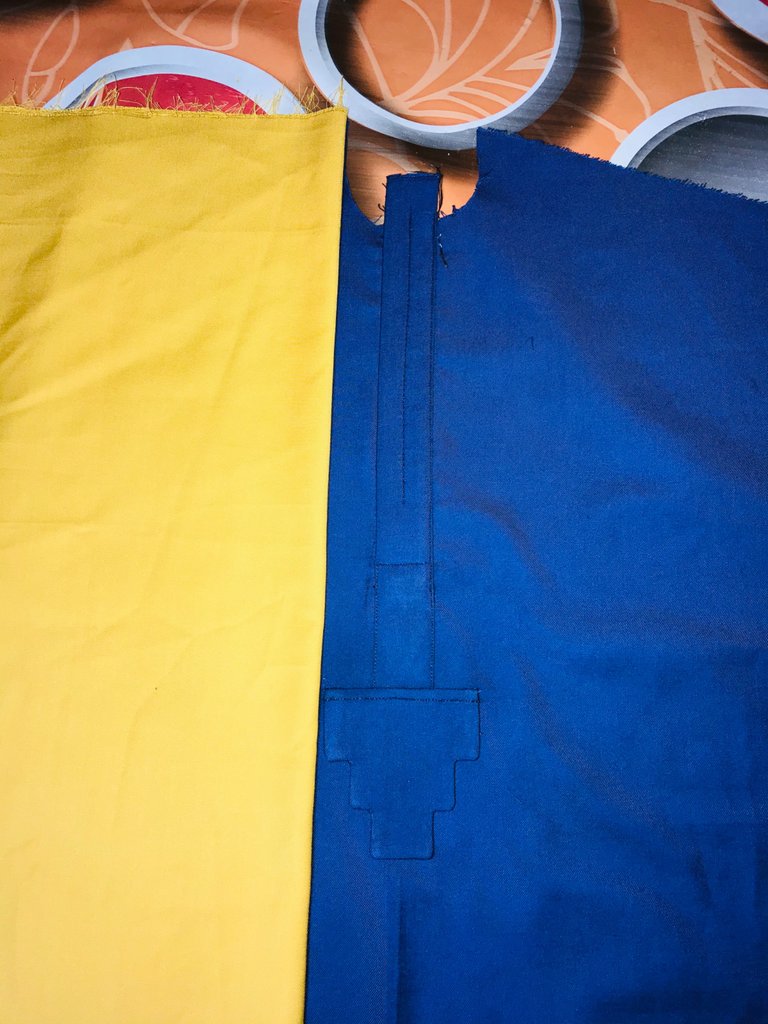
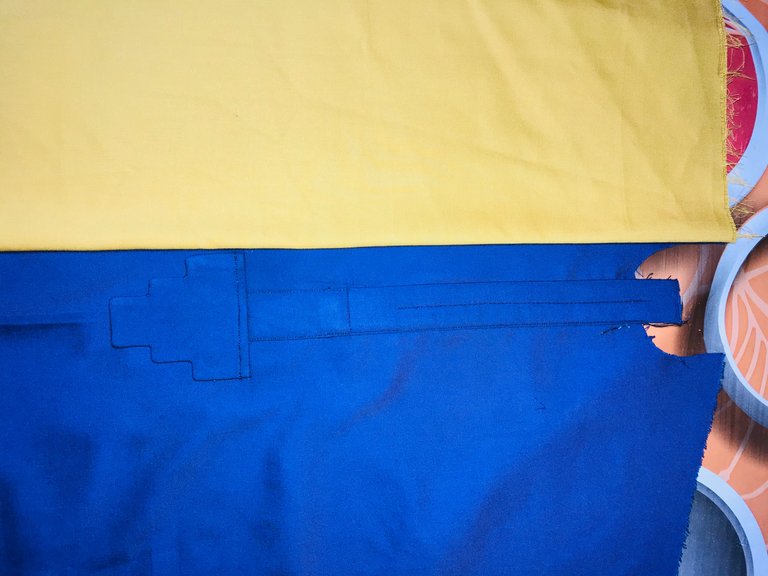
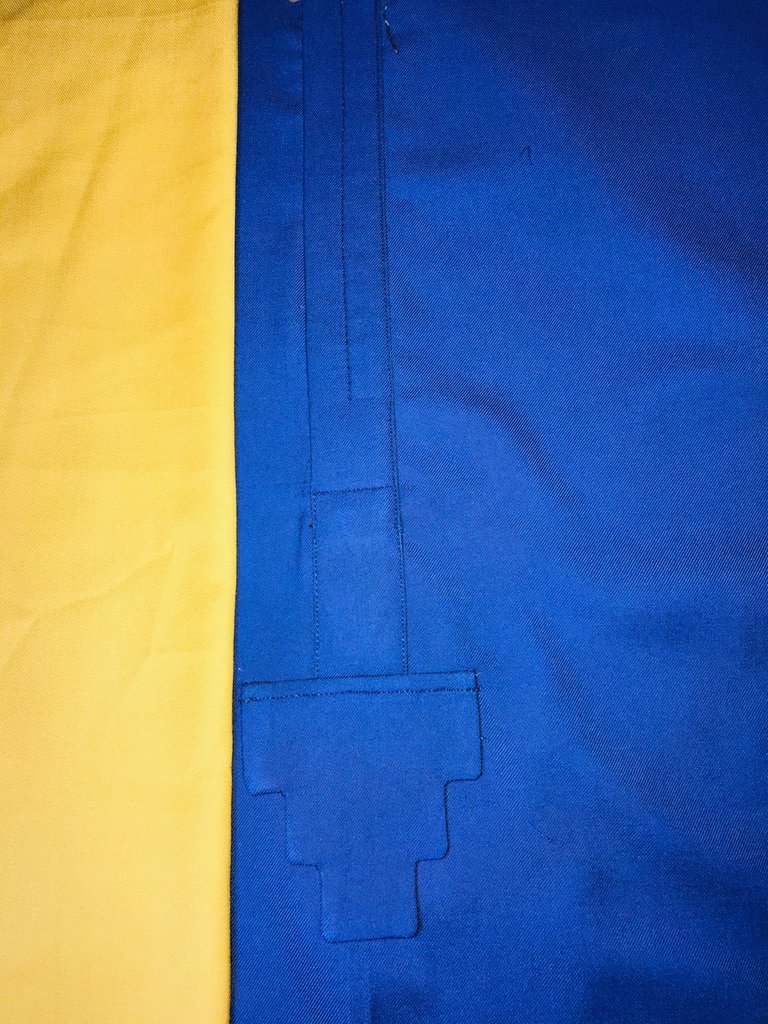
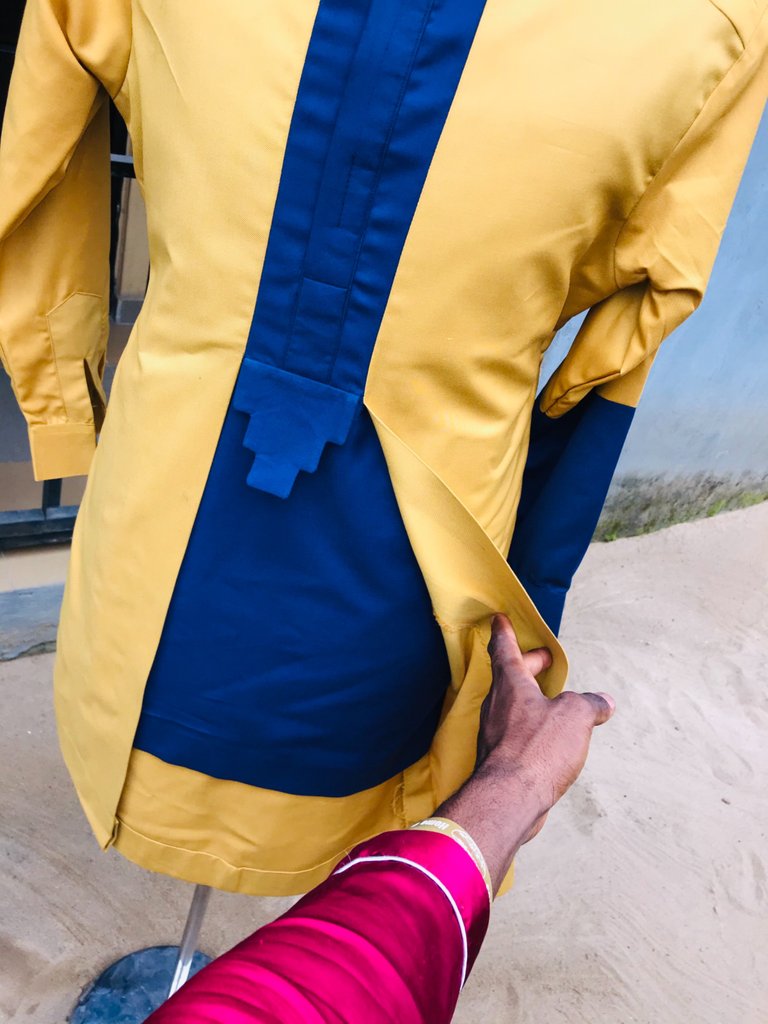
Now the idea was to sew from the top and top at where the steps stoped do from where the step stop down to the down part for the outfit was supposed to be open and just be there like that and that just want I did. Now I made the back view same length so it could just rhyme together with the front. After those the front of my client’s cloth was ready!!
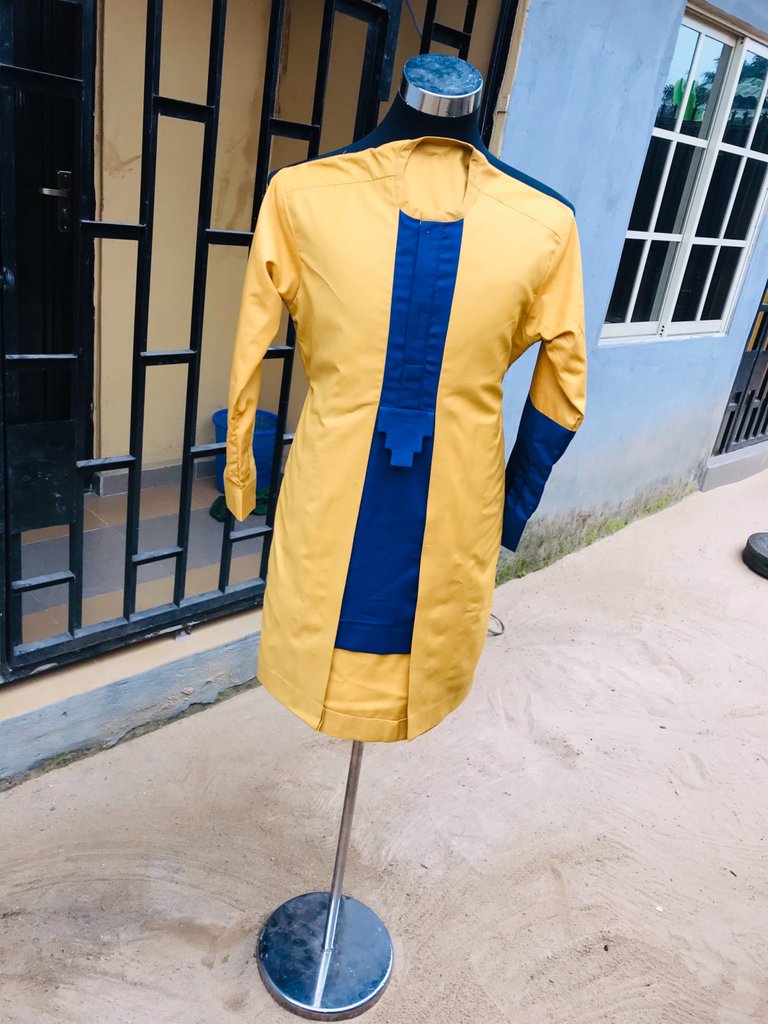
Step 7:
And I piped the neck and trimmed the shoulder, I added the both sleeves and I joined the body size to my client measurement. I cut the navy blue and added it to the left sleeve from the half of it down. And I made my hand band using navy blue and included it at the down part of the sleeves and the other sleeve was just
I bend the length and my client outfit was ready.

Thanks you so much guy for consistency on my every posts, I say a very hug thanks you to you all for your support and your comments and your time I say thanks you and God bless you all real good! And this new year shall be a prosperous one for use all amen!!
Have a blessed evening friends!!!!
It's a wonderful suit!
Thanks you so much @tibaire
What a nice suit, I really like the detail on the front
Thank you for commenting @youyowi
This is very lovely, very cool and neat. Nice combination. @smilestitches well-done boss
Thank you so much @olubato boss my always reading me
Amigo lo felicito! usted es todo un profesional en su arte, hermoso trabajo...