Christmas gnomes | Craft from scratch [ENG/ESP]
Hola a todos mis queridos hivers, espero que se encuentren muy bien y hayan tenido un excelente día, el día de hoy les traigo una manualidad muy linda y fácil de hacer, se trata de unos Gnomos de navidad (en realidad los pueden hacer de cualquier motivo, pero como estamos en navidad los hice con este motivo), los materiales que utilizaremos son muy fáciles de conseguir y con las explicaciones que les daré les quedarán unos lindos Gnomos, no sé si lo sabían pero estos “Gnomos” son seres mitológicos, según las creencias se dice que trabajan de en minas, custodiando tesoros subterráneos y cuidando de los metales y piedras preciosas, no diré que creo en ellos, sin embargo, se me hacen muy tiernos y me encantan las películas basadas en ellos, siento que son muy lindos la verdad jsksdj. Ahora sí, les mostrare como realizarlos.

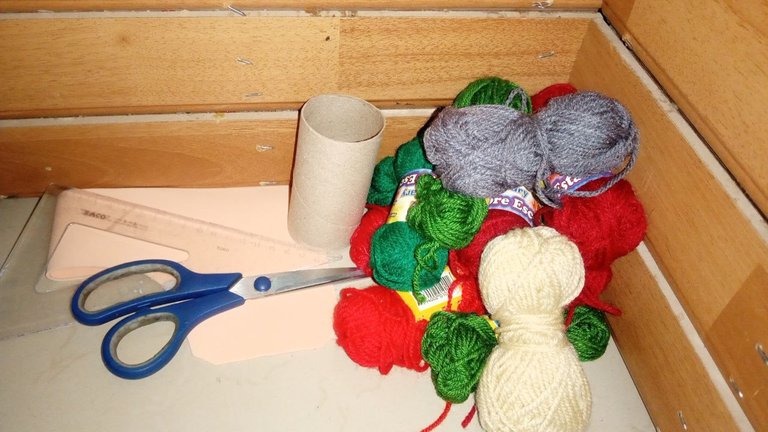
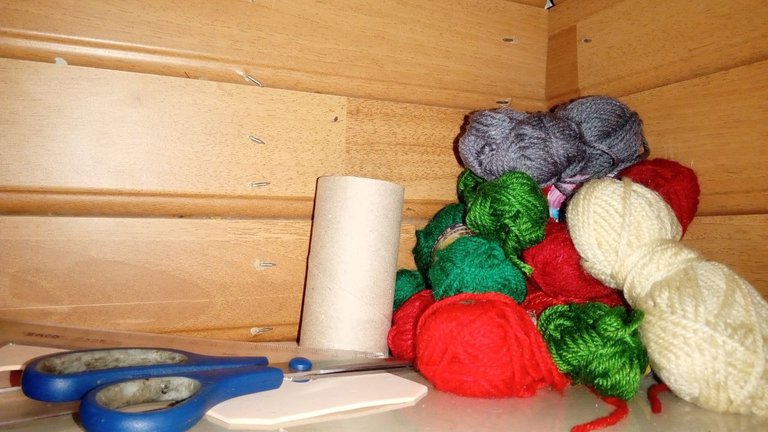
Materials:
Colored stamens (red, green, beige and gray).
Flesh-colored Foami.
Silicone.
Scissors.
Stuffing.
A roll of toilet paper.
A ruler.
Materiales:
Estambres de colores (rojo, verde, beige y gris)
Foami de color “carne”.
silicon.
Tijeras.
Relleno.
Un rollo de papel higiénico.
Una regla.
 |  |
|---|
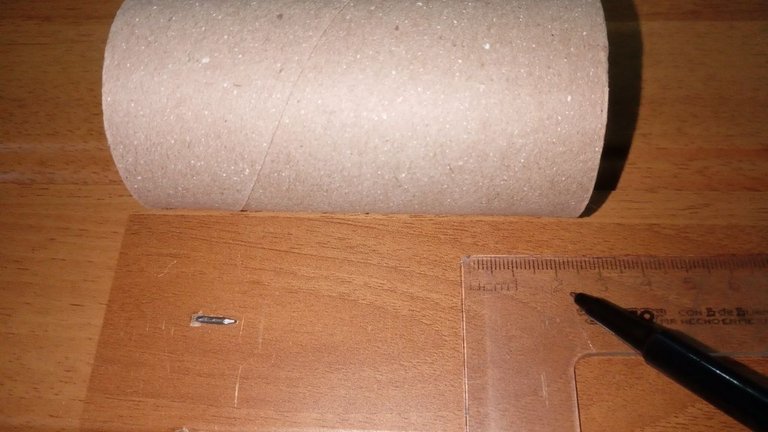
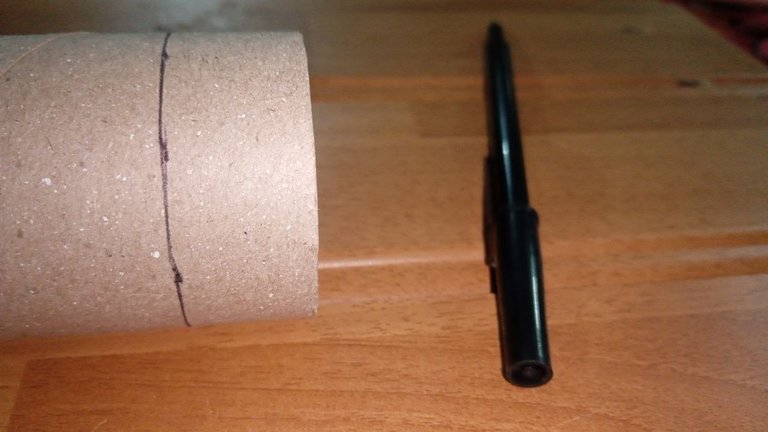
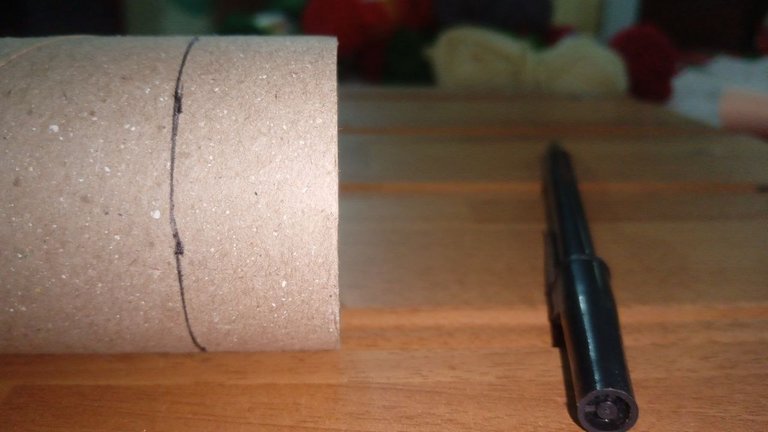
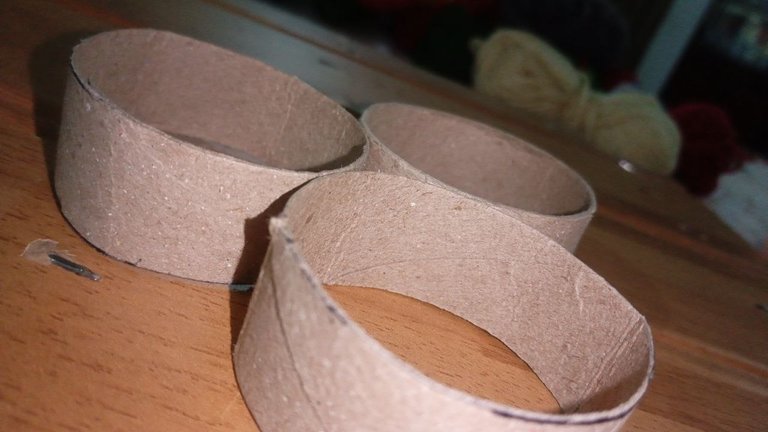
The first step that we will carry out will be to mark a circumference of 2 centimeters in our toilet paper roll with the help of our ruler, from that roll we should get 4 round figures of 2 centimeters, you can use all 4, but keep in mind that these are the bases of the cap of our nomos, I wanted only 3 nomos so I only used 3, if you prefer to make the 4 there is no problem jsksjsk.
El primer paso que llevaremos a cabo será marcar una circunferencia de 2 centímetros en nuestro rollo de papel higiénico con la ayuda de nuestra regla, de ese rollo nos deben de salir 4 figuras redondas de 2 centímetros, las pueden utilizar las 4, pero tenga en cuenta que estos son las bases del gorro de nuestros nomos, yo quería solo 3 nomos así que solo utilice 3, si usted prefiere hacer los 4 no hay ningún problema jsksjsk.
 |  |
|---|
 |  |
|---|
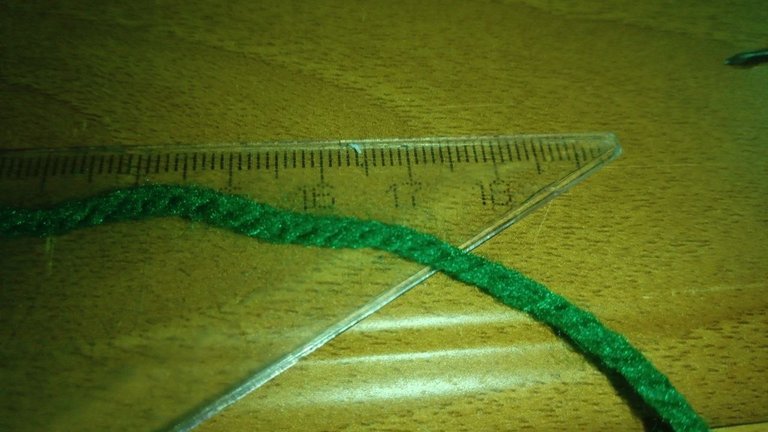
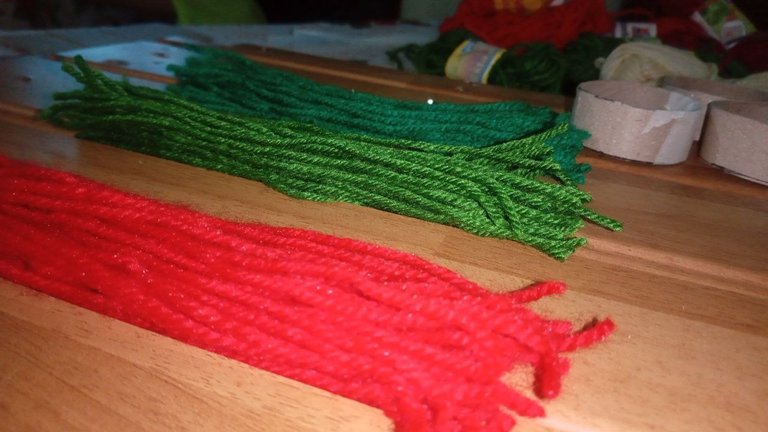
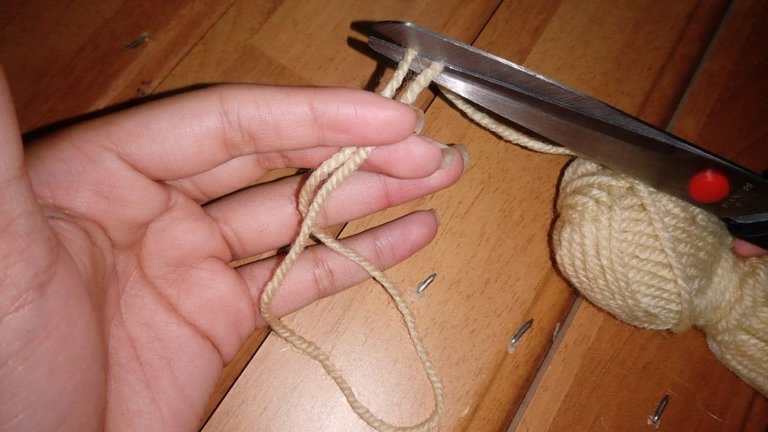
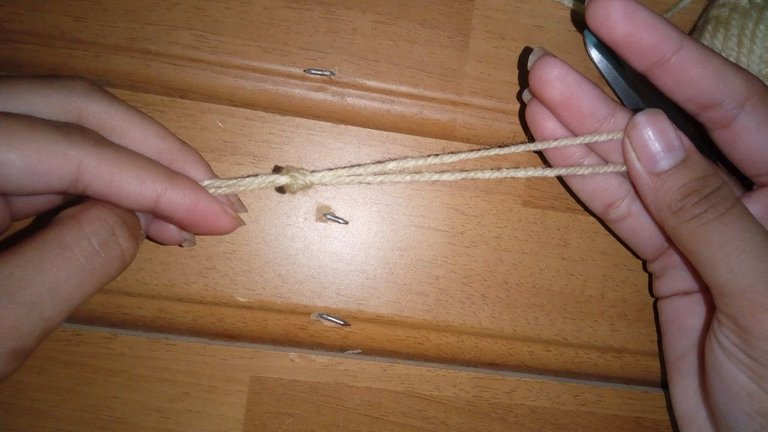
For our second step we will make the top of our hat, with the help of our ruler we will cut strips of 34 centimeters (I made a mistake in this part, I cut them in half by accident, then I had to join them, do not make that mistake then it will not give you the desired length!!!).
Para nuestro segundo paso realizaremos la parte de arriba de nuestro gorro, con la ayuda de nuestra regla cortaremos tiras de 34 centímetros (yo en esta parte me equivoque, las corte a la mitad sin querer, luego tuve que unirlas, no cometan ese error luego no les dará el largo deseado!!!).
 |  |
|---|
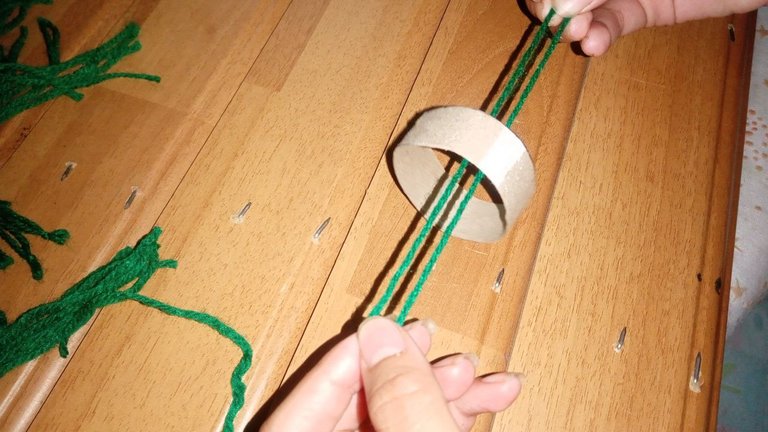
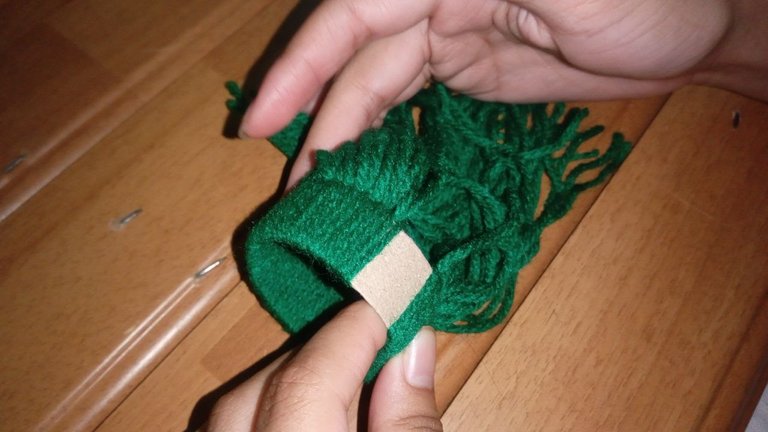
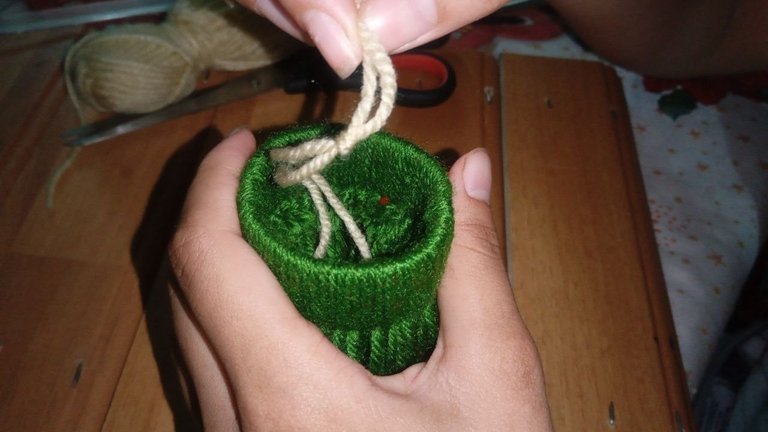
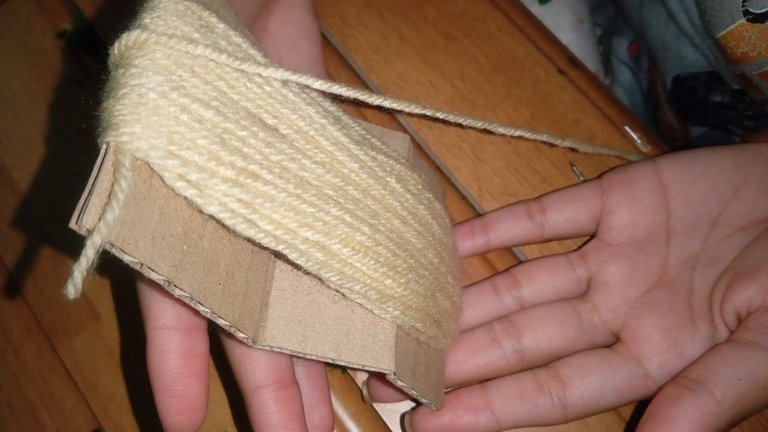
We have our hat ready, we just have to assemble it, pay close attention to this step because I have no idea how to explain it, so I will do my best sjskassjk, we will take one of the strips and we will fold it in half then we will place it inside the circle of toilet paper and pass it between each other (you know what, I don't understand myself, but in the pictures that I'll leave below you can see this process much better sjdkjd), and so on with all the strips until we fill each empty space that is left.
Ya tenemos listo nuestro gorro, solo tenemos que ensamblarlo, presten mucha atención en este paso porque no tengo ni idea de como explicarlo, así que haré mi mayor esfuerzo sjskasjk, vamos a tomar una de las tiras y la vamos a doblar a la mitad luego está la colocaremos dentro de el círculo de papel higiénico y la pasamos entre sí (saben que, ni yo misma me entiendo, pero en las fotos que les dejaré aquí abajito se aprecia mucho mejor este proceso sjdkjd), y así sucesivamente con todas las tiras hasta llenar cada vacío que quede.
 |  |
|---|
 |  |
|---|
 |  |
|---|
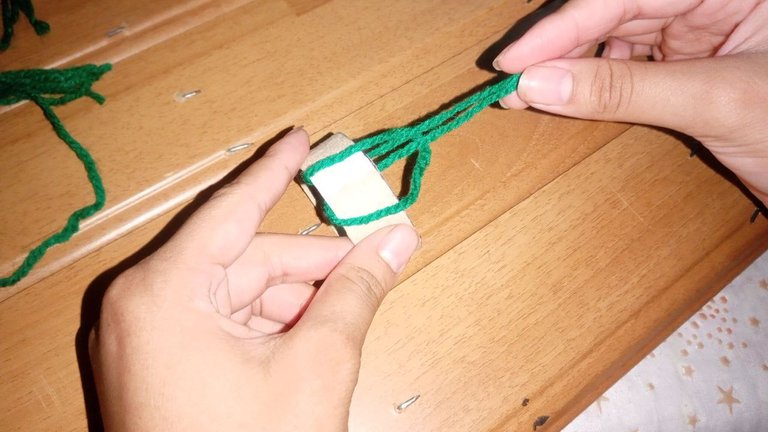
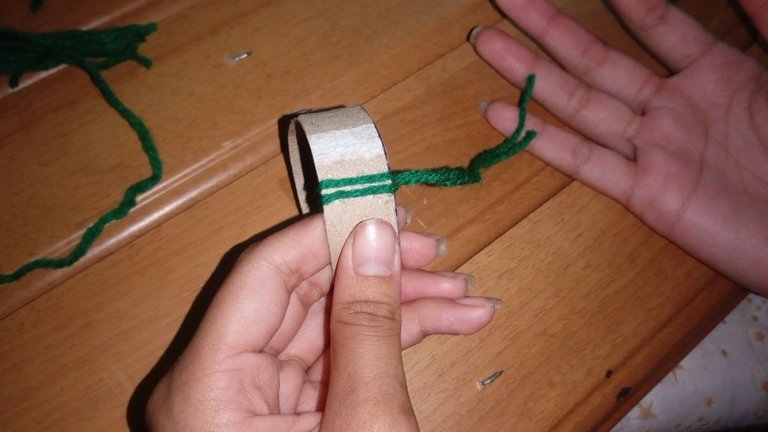
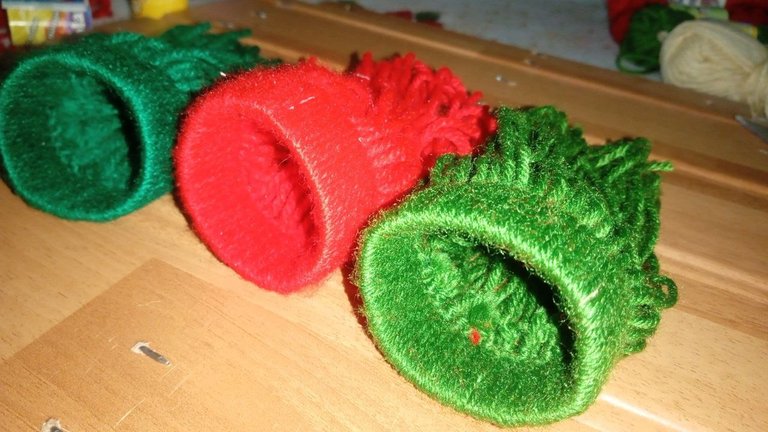
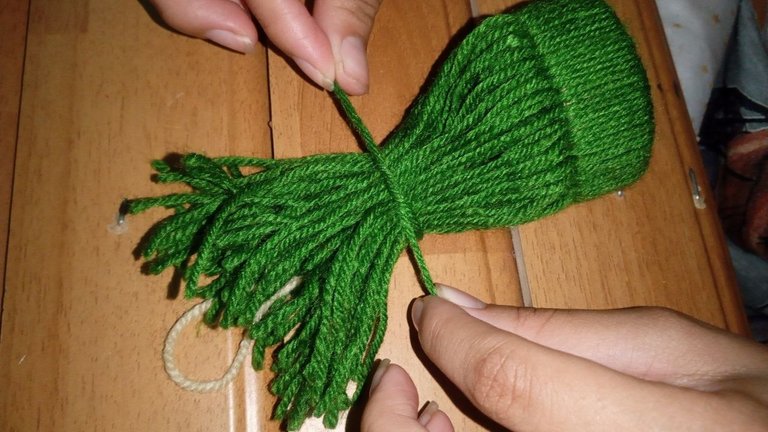
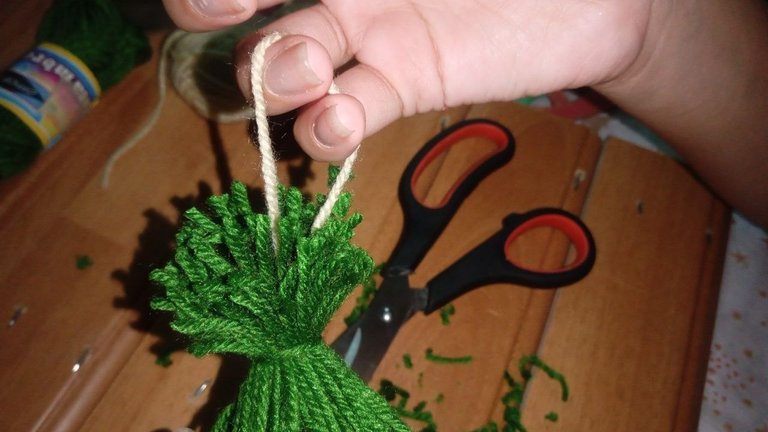
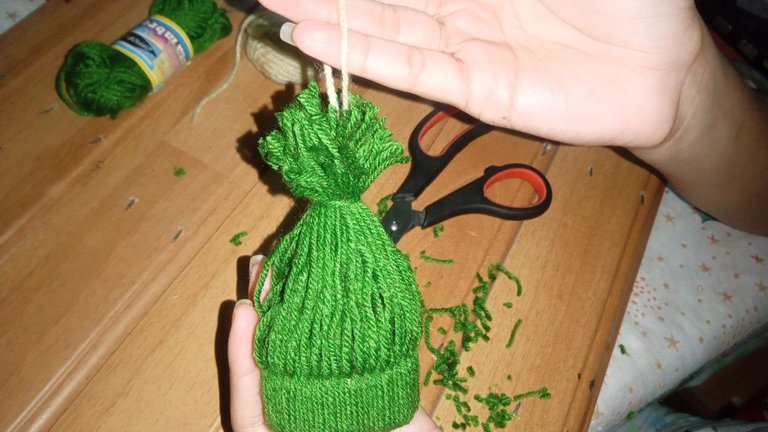
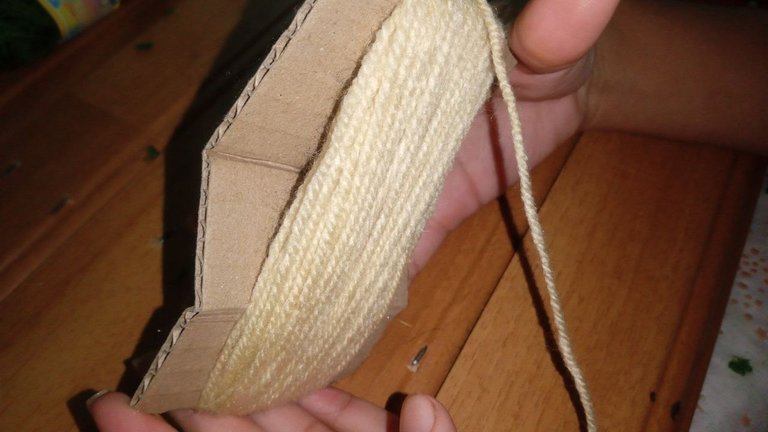
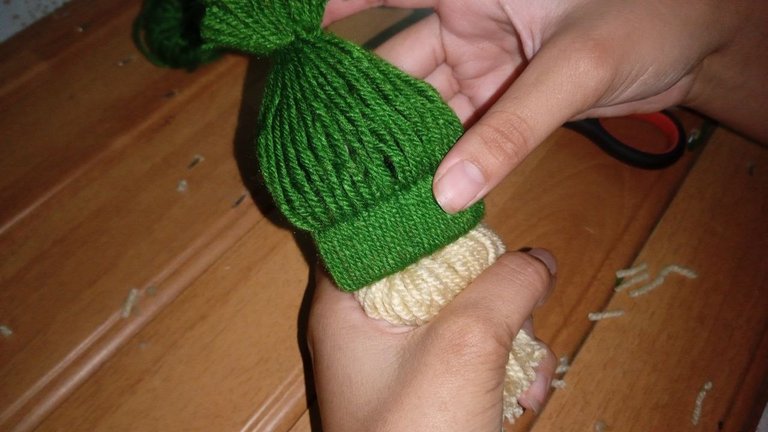
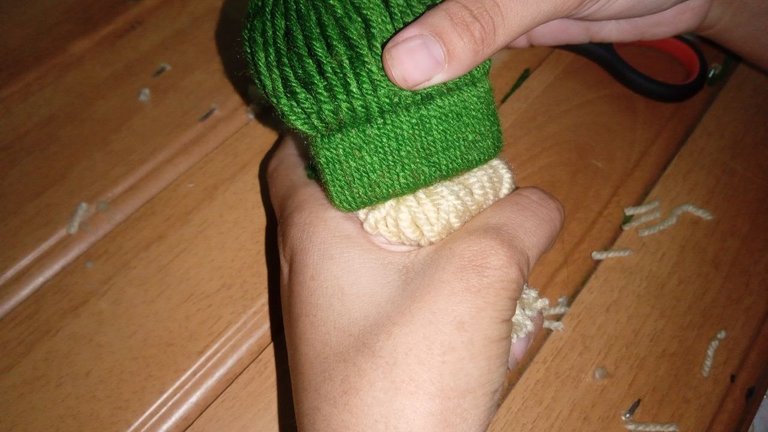
In this step we will basically finish the upper part of our hat, the first thing we are going to do is to cut a strip of the color of your preference (this we will use as a base to hang them anywhere), when we cut it we will fold it in half and we will make a knot (so that it does not disassemble), then we will pass it through the inside of our "hat" (I don't know if you understood me, but in the pictures you can see it much better), once we have our base to hang, we will take some of the same yarn with which we made the hat and we tie it 3 centimeters below the end. I did this step 3 times, since I am making 3 Gnomes.
En este paso básicamente terminaremos la parte superior de nuestro gorro, lo primero que vamos a realizar es cortar una tira del color de su preferencia (esta la utilizaremos como base para guindarlos en cualquier lugar), al cortarla la doblaremos a la mitad y le hacemos un nudo (para que no se nos desarme), luego este lo pasaremos por dentro de nuestro “gorro” (no sé si me entendieron, pero en las fotos se aprecia mucho mejor), ya teniendo nuestra base para guindar, tomaremos un poco del mismo estambre con el que hicimos el gorro y lo amarramos 3 centímetros más abajo del final. Este paso lo realicé 3 veces, ya que estoy realizando 3 Gnomos.
 |  |
|---|
 |  |
|---|
 |  |
|---|
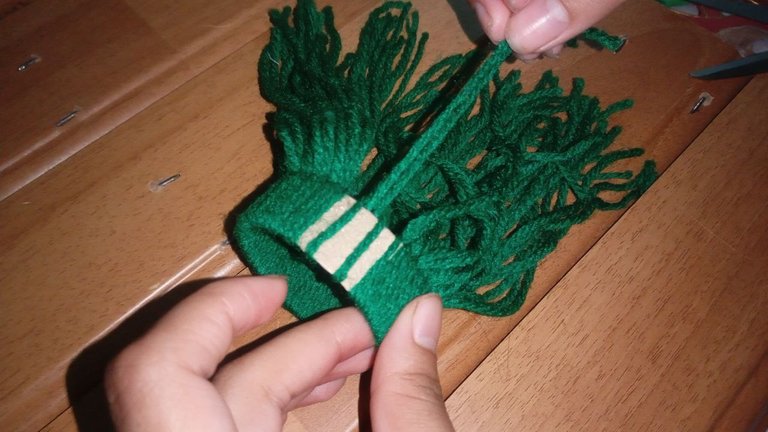
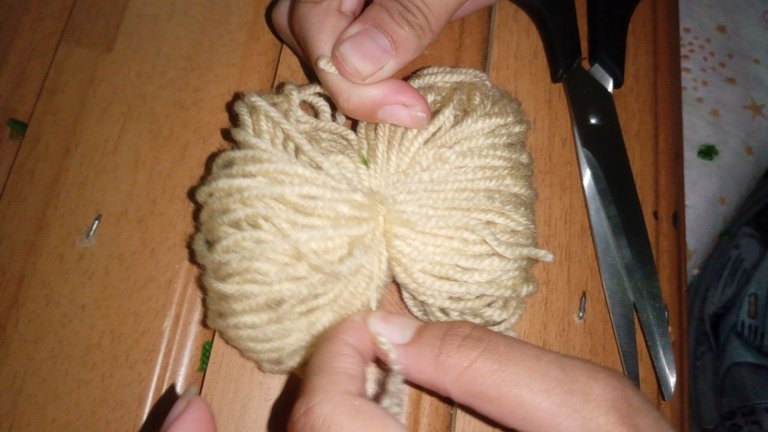
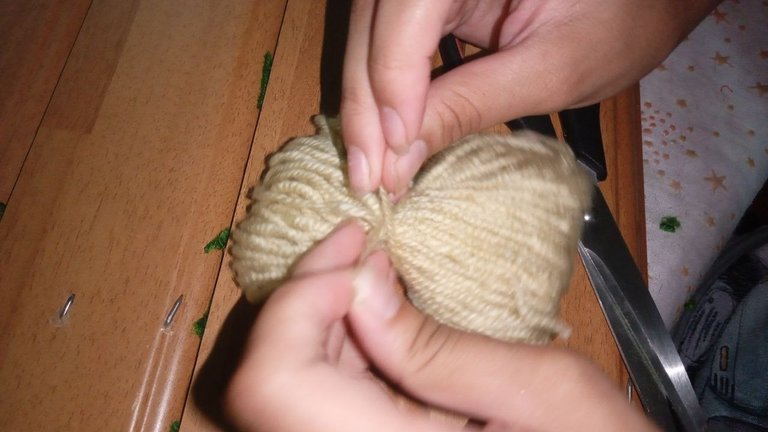
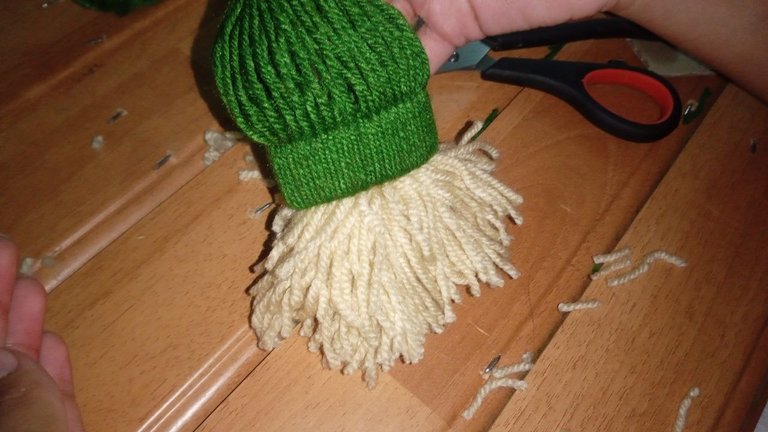
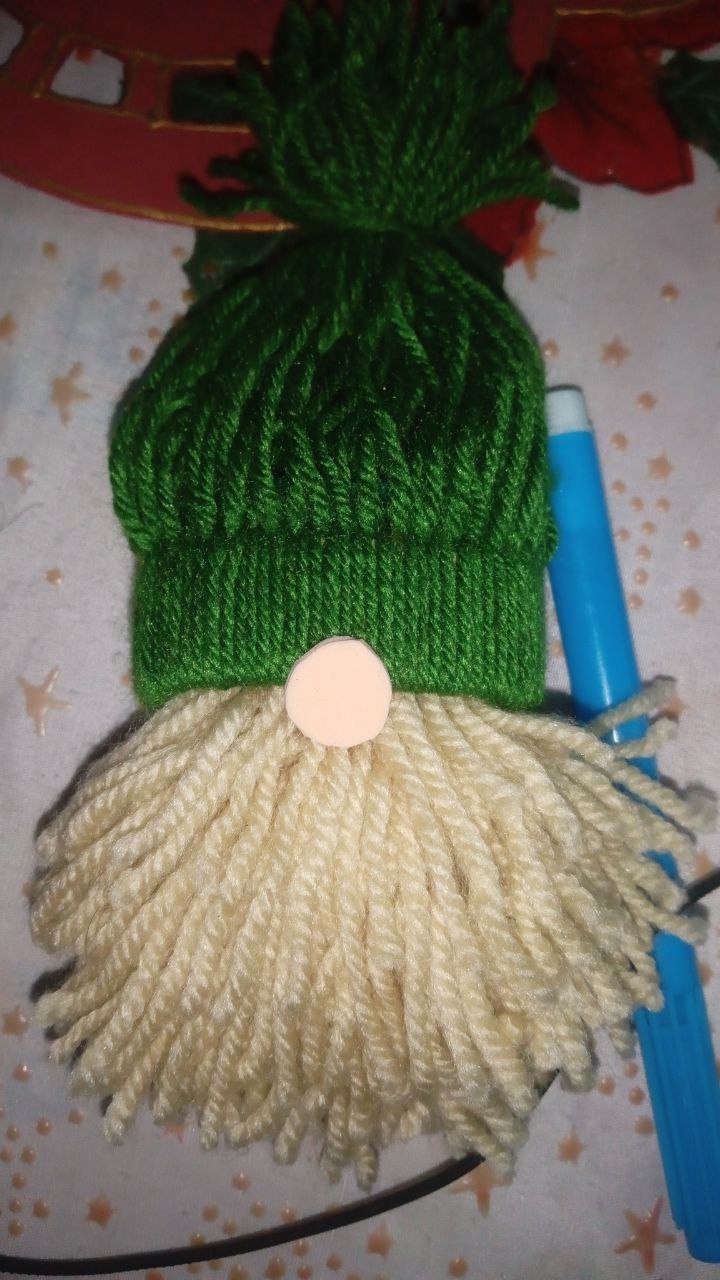
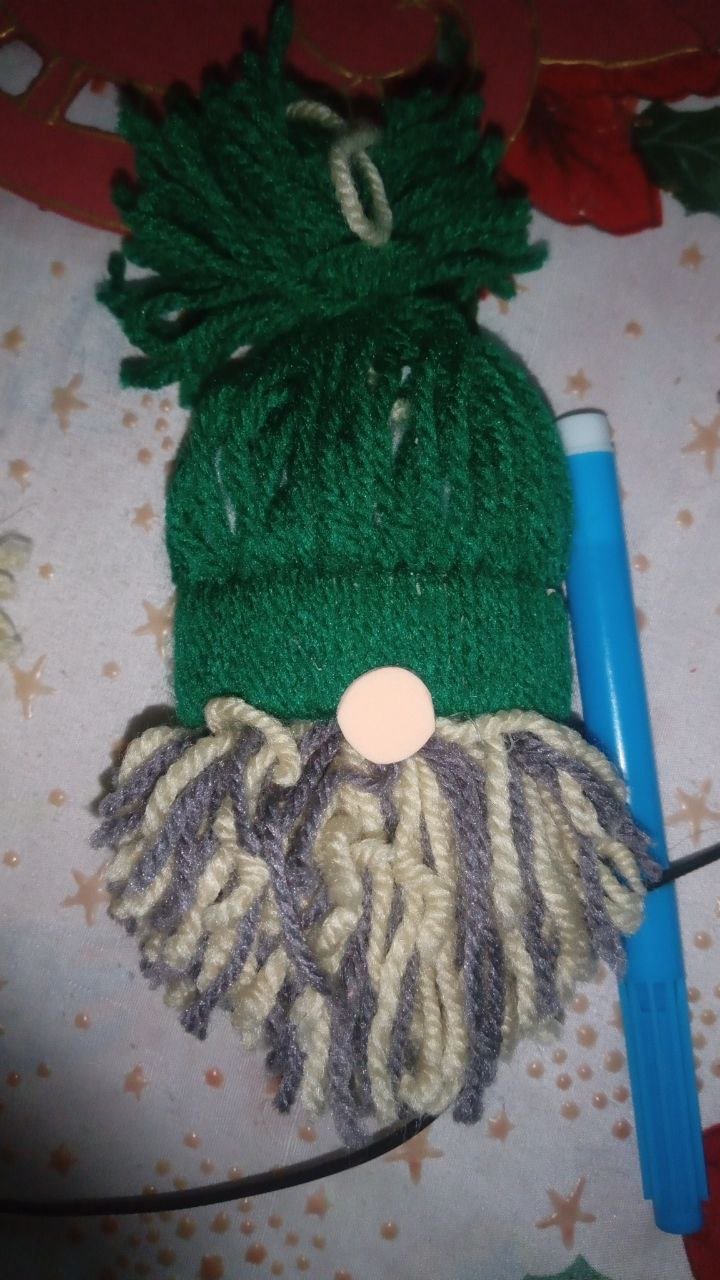
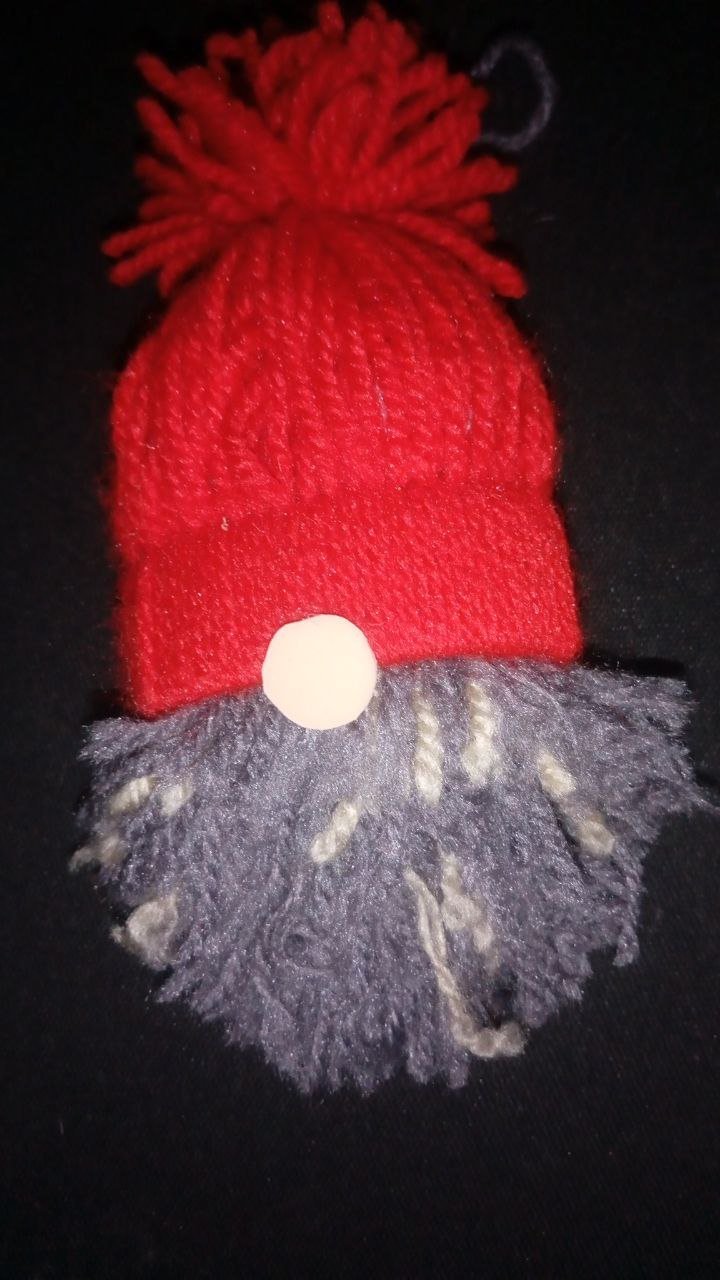
We already have ready the top part is that the cap, now comes the part of his body that practically is his beard that covers the whole body and is taken as his body, this we will do with beige yarn, but also use gray yarn for one, and link these two tones for the other, what we will do will be to take a piece of cardboard or with our own hand to go rolling the yarn as if we were wrapping it in the same, then with a piece of yarn of the same color we tie it in half and cut it on both sides, and we will have the shape of a loop, to this we match a little the edges and then we fold it in half and glue it to our hat with the help of our silicone.
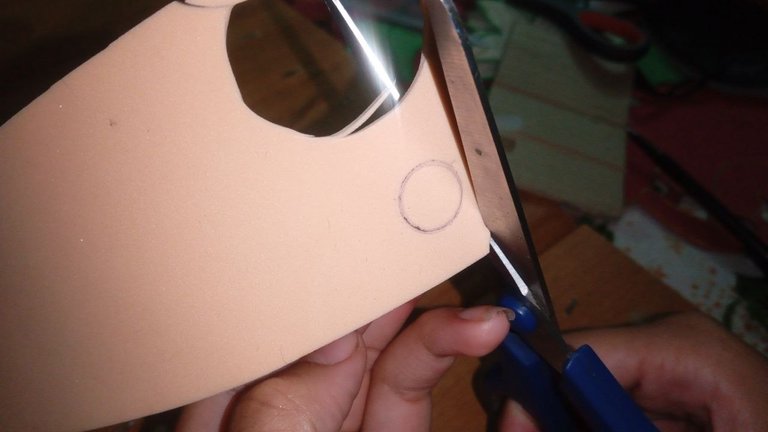
The next step is to glue his nose so that it already has a shape, with the help of the cap of a marker we mark a circle on our "flesh" colored foami and then cut it out, then we glue it in the center of our Nomo.
Ya tenemos lista la parte de arriba es que el gorro, ahora bien, viene la parte de su cuerpo que prácticamente es su barba que le cubre todo el cuerpo y se toma como su cuerpo, este lo haremos con estambre de color beige, aunque también utilice estambre de color gris para uno, y ligue estos dos tonos para el otro, lo que realizaremos será tomar un pedazo de cartón o con nuestra propia mano ir enrollando el estambre como si lo estuviéramos envolviendo en el mismo, luego con un trozo de estambre de ese mismo color lo amarramos a la mitad y lo cortaremos de ambos lados, y nos quedará la forma como de un lazo, a este le emparejamos un poco los bordes y luego lo doblamos a la mitad y lo pegamos a nuestro gorro con la ayuda de nuestro silicón.
El siguiente paso es pegar su nariz para que ya tenga forma, con la ayuda de la tapa de un marcador marcamos un círculo en nuestro foami de color “carne” y luego lo recortamos, seguidamente lo pegamos en el centro de nuestro Nomo.
 |  |
|---|
 |  |
|---|
 |  |
|---|
 |  |
|---|
 |  |
|---|
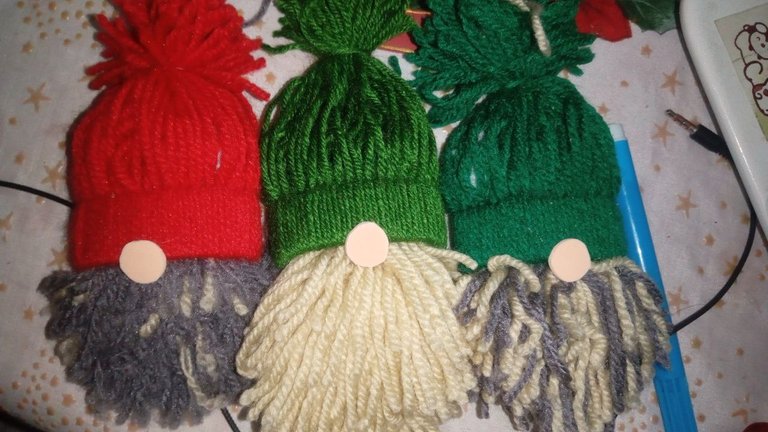
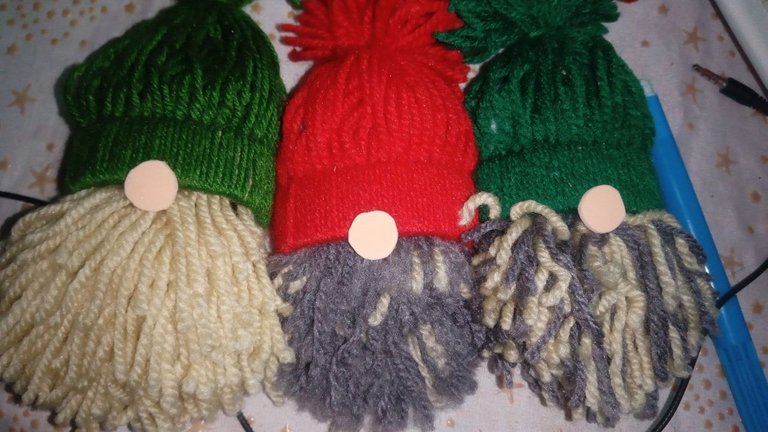
Ready! We have ready our amazing worsted Gnomes, they are very easy to make and as you could notice it doesn't require a lot of materials, below I show you the final result.
¡Listo! Tenemos listo nuestros asombrosos Gnomos de estambre, son muy fáciles de hacer y como pudieron notar no requiere muchos materiales, a continuación les muestro el resultado final.
 |  |
|---|
 |  |  |
|---|
With nothing more to say, I hope you enjoyed this nice craft, thank you for your time and support, I wish you a nice evening. Bye bye.
Sin más nada que decir, espero que hayan disfrutado de esta linda manualidad, agradezco su tiempo y apoyo, les deseo una linda noche. Chauuuu.
Credits
Pictures taken from my phone an Alcatel 1V.
The banner was edited with PicsArt.
Fotografías sacadas desde mi teléfono un Alcatel 1V.
El banner fue editado con PicsArt.
Congratulations @solecitosalazar! You have completed the following achievement on the Hive blockchain And have been rewarded with New badge(s)
Your next target is to reach 300 replies.
You can view your badges on your board and compare yourself to others in the Ranking
If you no longer want to receive notifications, reply to this comment with the word
STOPCheck out our last posts:
Support the HiveBuzz project. Vote for our proposal!
Thank you for sharing this post on HIVE!
Your content got selected by our fellow curator ashikstd & you just received a little thank you upvote from us for your great work! Your post will be featured in one of our recurring compilations which are aiming to offer you a stage to widen your audience within the DIY scene of Hive. Stay creative & HIVE ON!
Please vote for our hive witness <3
Thank you very much, I appreciate it, have a nice evening<3