Lemon pie and guava jam mini-tarts / Recipe [ENG - ESP]
Hello my dear hivers!!
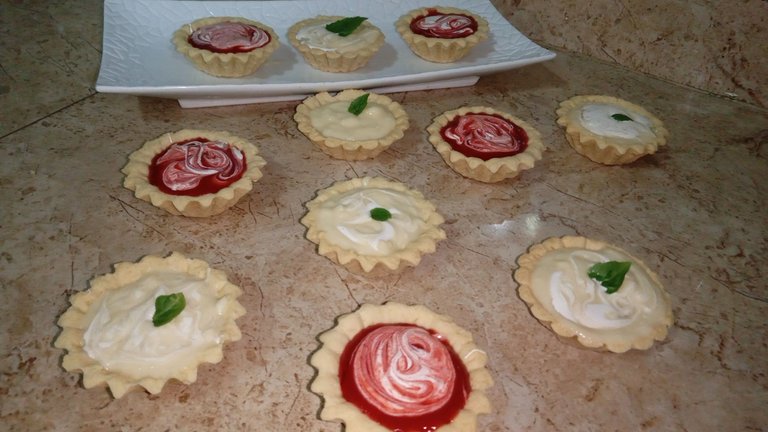
I hope you are very well, and you are having a very nice day, full of joy and happiness, today I bring you a recipe very different from what I usually do, try to get out of my comfort zone a little I have made some delicious cakes of lemon pie and guava jam, the recipe is very simple and does not require many ingredients, come with me to see the procedure.
¡¡Hola mis queridos hivers!!
Espero se encuentren muy bien, y estén teniendo un día muy lindo, lleno de alegría y felicidad, el día hoy les traigo una receta muy diferente a lo que suelo hacer, trate de salir un poco de mi zona de confort he hice unas ricas tartas de lemon pie y mermelada de guayaba, la receta en muy simple y no requiere de muchos ingredientes, acompáñame a ver el procedimiento.
for the shortcrust pastry
Ingredients:
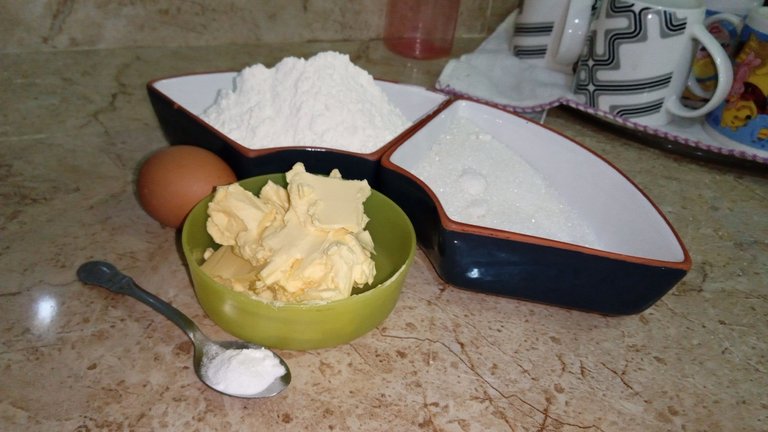
- 200 gr of wheat flour.
- 1 teaspoon of baking powder.
- 60 grams of sugar.
- 100 grams of butter.
- 1 egg.
- 1 tsp vanilla.
Para la masa quebrada
Ingredientes:
- 200 gr de harina de trigo.
- 1 cdita de polvo de hornear.
- 60 gr de azúcar.
- 100 gr de mantequilla.
- 1 huevo.
- 1 cdita de vainilla.
Preparation
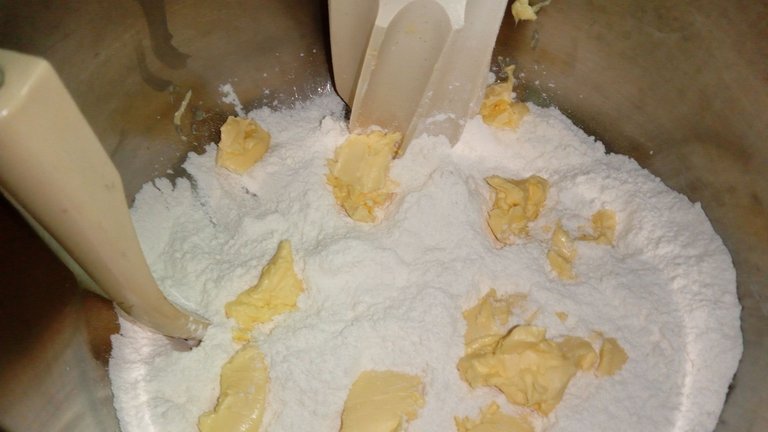
Having all the ingredients previously weighed, we proceed to unite the flour with the baking powder, then we pass it to a container where it is more feasible to knead, in my case I have a kitchen assistant and I simply put the ingredients and he or she is kneading, we introduce the wheat flour that we had already prepared, the sugar and the butter that has to be cold and we begin to beat. A piece of advice, so that the dough takes less time to incorporate, you can add the butter cut into pieces.
Preparación
Al tener ya todos los ingredientes previamente pesados procedemos a unir la harina con el polvo de hornear, luego lo pasamos a un recipiente donde se le haga más factible amasar, en mi caso con tengo un asistente de cocina y simplemente pongo los ingredientes y este los va amasando, introducimos la harina de trigo que ya teníamos preparada, la azúcar y la mantequilla que tiene que estar fría y empezamos a batir. Un consejo, para que la masa tarde menos en incorporarse puede añadirle la mantequilla cortada en trozos.
 |  |
|---|
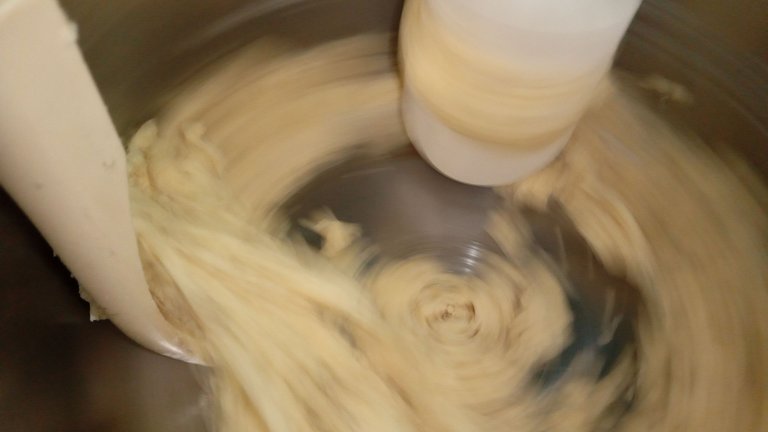
I am going to be honest with you, for some reason the mace remains compact, in this step the mass has to be dusty, although if it turns out like this there is no problem, it will still be a record for our consumption and the only thing that affects it is that it will be a softer cup. When we already have the powdery or compact dough, we proceed to incorporate the vanilla and the egg and mix it until the dough stops sticking to the container or otherwise the fingers, it is important not to over-beat the mixture since as it has butter it can become a sticky flake and we don't want that.
Voy a serles sincera, por alguna razón la maza me quedo compacta, en este paso la masa les tiene que quedar polvorosa, aunque si les queda así no hay problema de igual seguirá siendo acta para nuestro consumo y en lo único que afecta es que será un poco mas suave. Al ya tener la masa polvorosa o compacta procedemos a incorporar la vainilla y el huevo y lo mezclamos hasta que la masa se deje de pegarse en el recipiente o en otro caso los dedos, es importante no sobrebatir la mezcla ya que como esta tiene mantequilla puede llegar hacerse un poco pegajoso y no queremos eso.
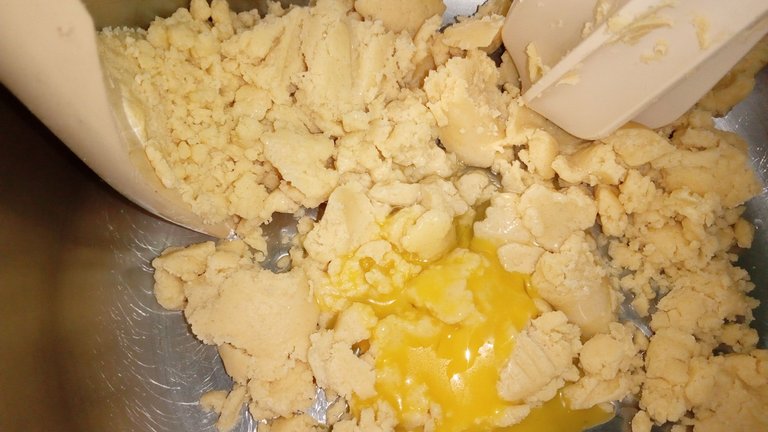
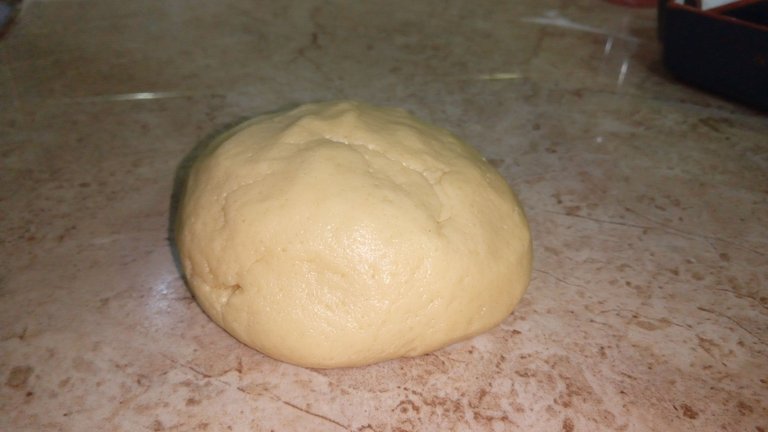
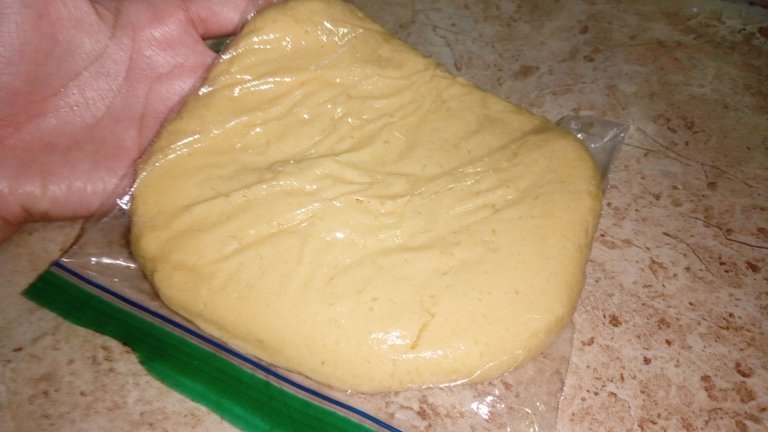
Once we have the compact dough, we proceed to wrap it in plastic wrap or you can also put it in a bag and send it to the refrigerator for at least 1 hour, make sure that it is well sealed so that it does not extract any unwanted flavor.
Al ya tener la masa compacta procedemos a envolverla en papel film o también la puede meter en una bolsita y la mandamos al refrigerador por al menos 1 hora, asegúrese de que esta este bien sellada para que no extraiga ningún sabor no deseado.
 |  |
|---|
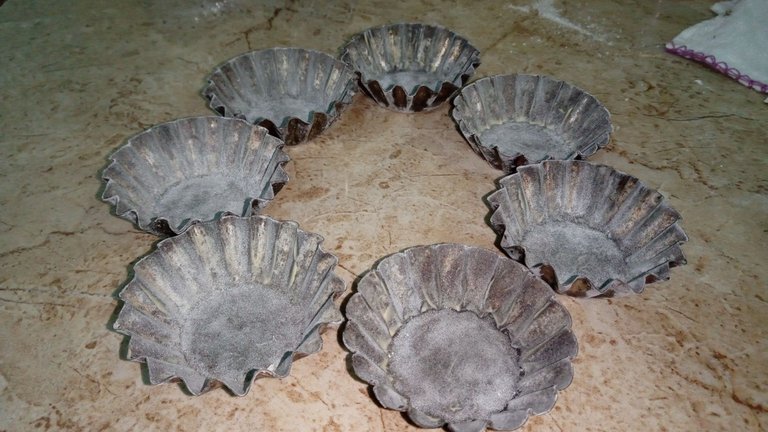
While the dough is in the refrigerator we can sprinkle our molds with butter and flour, I used small cake molds of 7.5 centimeters but if you prefer you can make a large cake, this will cover a mold of approximately 18 centimeters.
Mientras la masa está en el refrigerador podemos ir espolvoreando con mantequilla y harina nuestros moldes, yo utilicé unos moldes pequeños para tartas de 7,5 centímetros pero si usted prefiere puede hacer una tarta grande, esta le abarcara un molde de aproximadamente 18 centímetros.
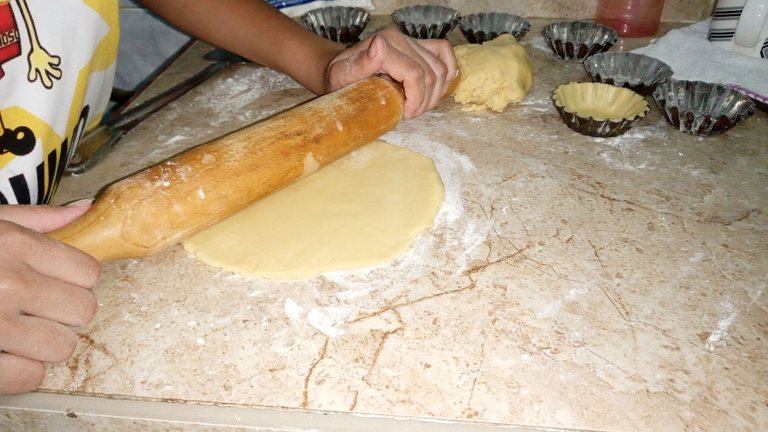
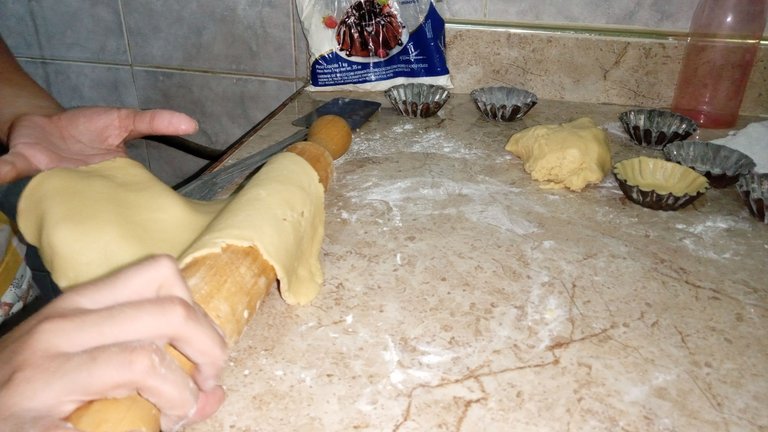
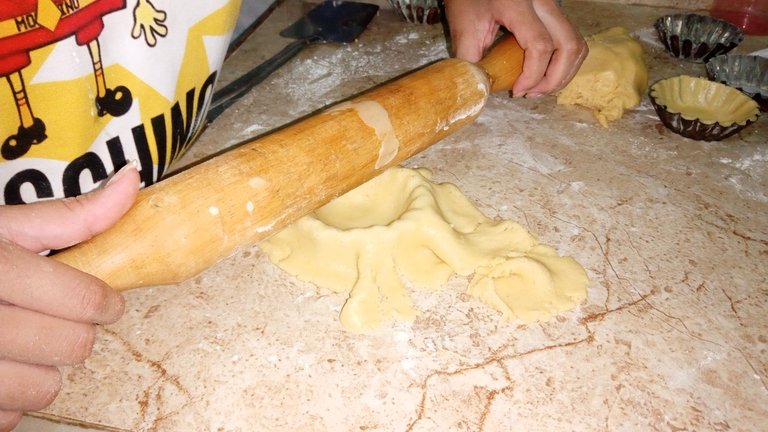
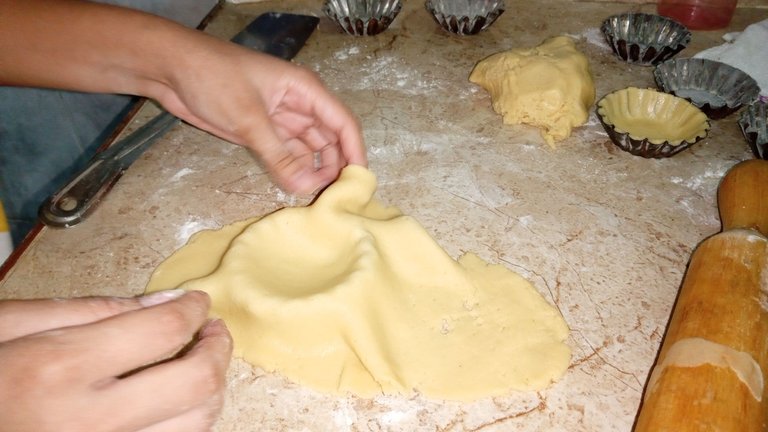
After 1 hour has passed, we proceed to remove our dough from the refrigerator, sprinkle a little flour on our work area and begin to stretch with a rolling pin, preferably smooth. Stretch until it is at least 4 millimeters thick, having already stretched the dough, we roll it on our rolling pin and pass it to our first mould, having the dough already placed in the mold, we begin to crush it with our fingers and further define the thickness, then From this we pass the rolling pin over our cake in order to chop the leftovers of the dough, if for some reason you see that you did not stretch it enough you can continue flattening it with your fingers and then run a knife to chop the leftovers. To finish this step we proceed to prick them with a fork throughout the base and on the sides so that it does not increase in size and we have a space left where we can add our filling. Then we send them to the refrigerator for 30 minutes, after this we send them to the oven at 180º for 15-20 minutes depending on the power of your oven.
Luego de que ya pasará 1 hora procedemos a sacar nuestra masa del refrigerador, espolvoreamos un poco de harina en nuestra área de trabajo y empezamos a estirar con un rodillo, de preferencia liso. Estiramos hasta tener al menos 4 milímetros de grosor, al tener ya la masa estirada la enrollamos en nuestro rodillo y la pasamos a nuestro primer molde, al tener ya la masa colocada en el molde empezamos aplastar con nuestros dedos y a definir más el grosor, luego de esto pasamos el rodillo por encima de nuestra tarta para así poder picar los sobrantes de la masa, si por alguna razón ves que no lo estiraste lo suficiente puedes seguir aplanando con los dedos y luego pasar un cuchillo para picar lo sobrante. Para finalizar este paso procedemos ha pincharlos con un tenedor en toda la base y en los laterales para que este no eleve su tamaño y nos quede un espacio en donde añadir nuestro relleno. Luego los mandamos 30 minutos al refrigerador, después de esto los mandamos al horno a 180º por 15-20 minutos dependiendo de la potencia de su horno.
 |  |
|---|
 |  |
|---|
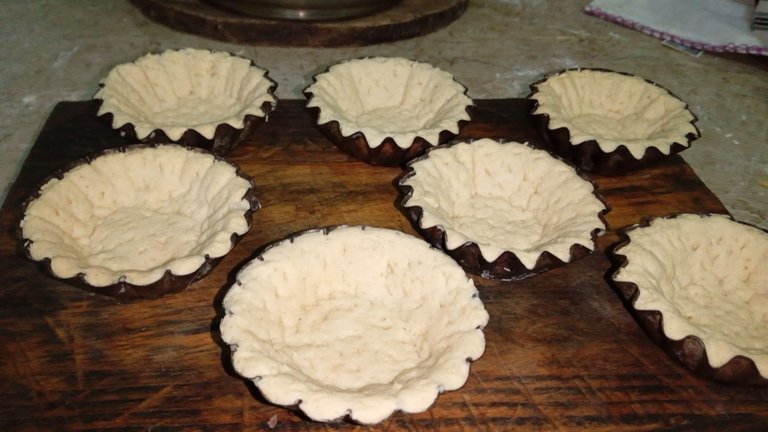
After 15 minutes we take them out and let them cool for at least 7 minutes, after this we take them out of the mold and let them cool at room temperature on a rack, and ready we have our beautiful cake bases ready to be filled.
Ya pasados los 15 minutos los sacamos y dejamos enfriar por al menos 7 minutos, luego de esto los sacamos del molde y los dejamos enfriar a temperatura ambiente en una rejilla, y listo tenemos nuestras hermosas bases de tartas listas para ser rellenadas.
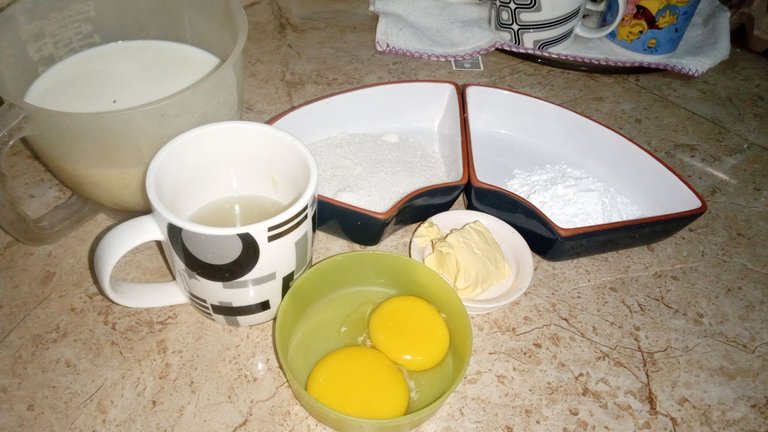
For the lemon filling
Ingredients
- 600 ml of milk
- 100 grams of sugar
- 2 yolks
- 35 g of cornstarch
- 100 ml lemon juice
- 25 grams of butter
Para el relleno de limón
Ingredientes
- 600 ml de leche
- 100 gr de azúcar
- 2 yemas
- 35 gr de maicena
- 100 ml de jugo de limón
- 25 gr de mantequilla
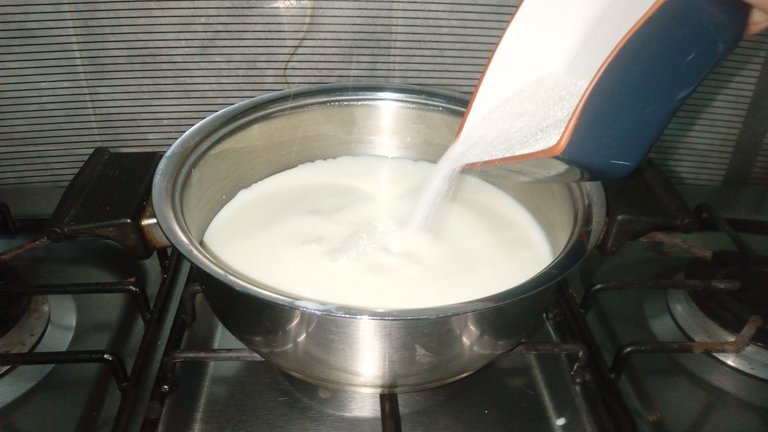
Preparation
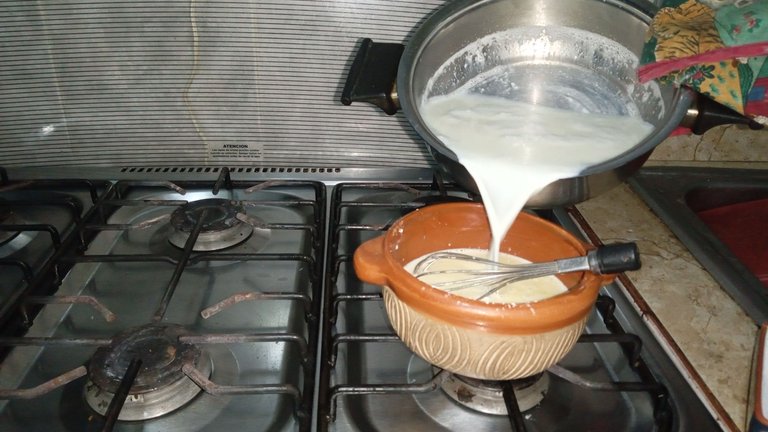
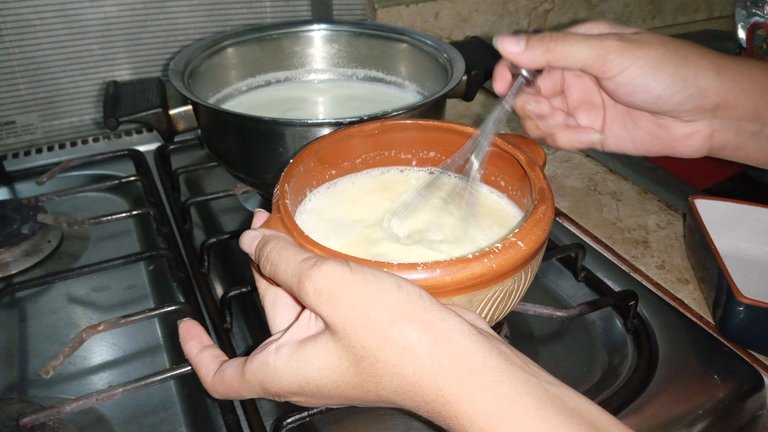
We start by heating our milk with the sugar in a pot over medium high heat, on the other hand we are beating the yolks and cornstarch in a container and then add the lemon juice (make sure it does not have any seeds).
Preparación
Empezamos calentando nuestra leche con el azúcar en una olla ha un fuego medio alto, por otro lado vamos batiendo las yemas y la maicena en un recipiente para luego incorporar el jugo de limón (asegúrese de que este no tengan ninguna semilla) .
 |  |  |
|---|
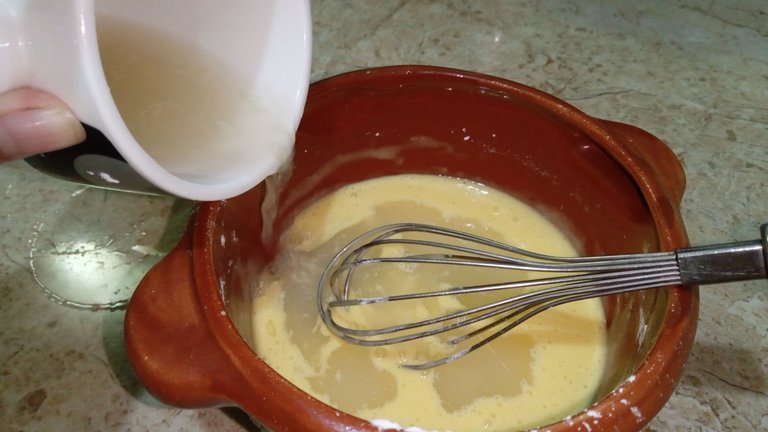
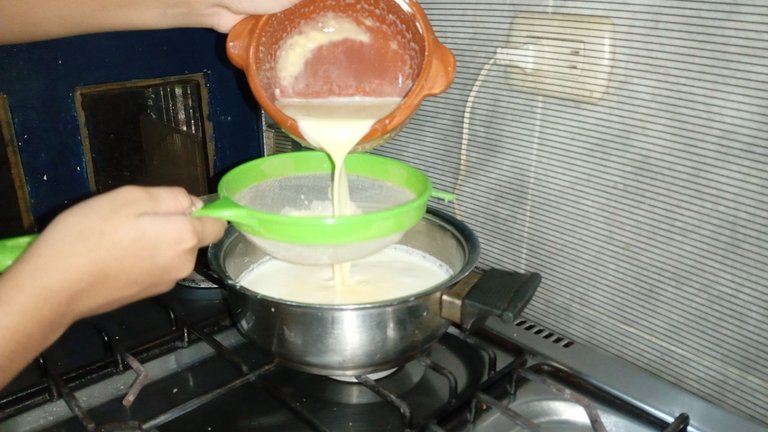
After the milk has heated up (not boiled) we pour a little into our container where we have our other preparation and beat until it is completely mixed. Having mixed everything, we proceed to pour it back into the pot but pass it through a sieve, lower the heat and begin to beat with a whisk until it thickens.
Luego de que la leche se haya calentado (no hervir) echamos un poco en nuestro recipiente donde tenemos nuestra otra preparación y batimos hasta que se me mezcle por completo. Al haber mezclado todo procedemos a echarla nuevamente ha la olla pero pasándola por un colador, bajamos el fuego y empezamos a batir con un batidor hasta que espese.
 |  |  |
|---|
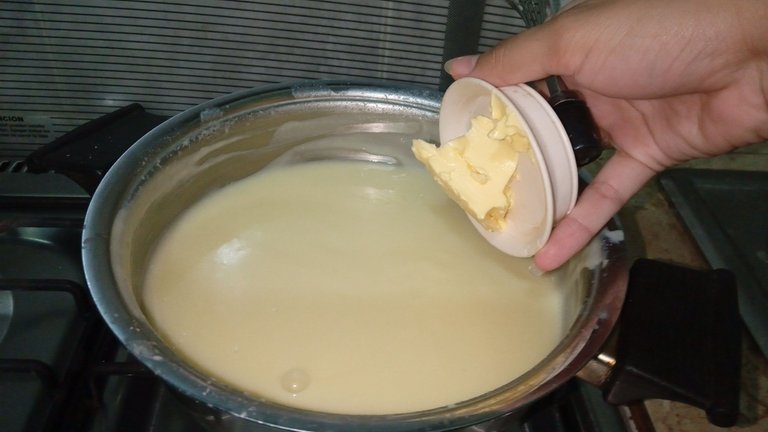
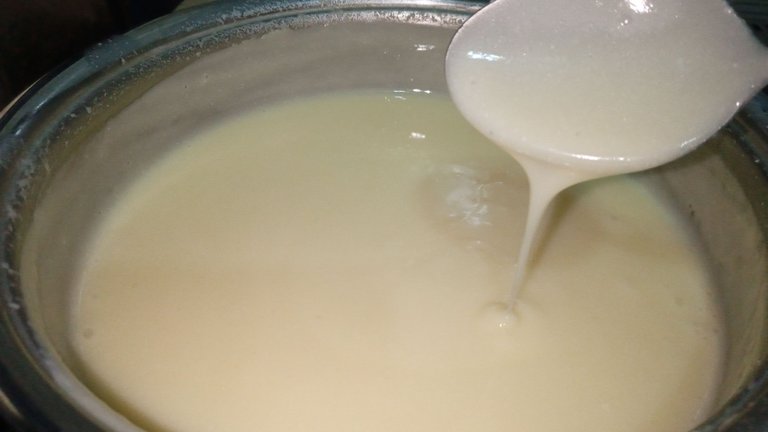
After a few minutes this will already be thick, we remove it from the heat and add the butter, let it rest at room temperature and then transfer it to a container, and ready we have our delicious lemon cream, perfect for filling some delicious cakes.
Luego de unos minutos este ya estará espeso, lo retiramos del fuego y le agregamos la mantequilla, lo dejamos reposar a temperatura ambiente para luego pasarlo a un recipiente, y listo tenemos nuestra rica crema de limón, perfecta para rellenar unas ricas tartas.
 |  |
|---|
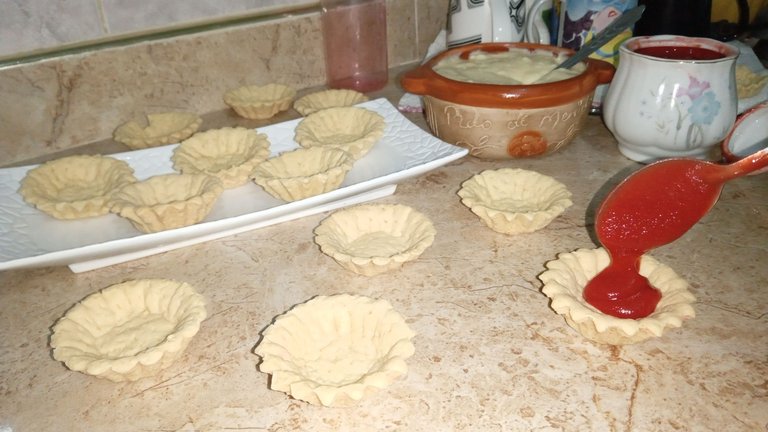
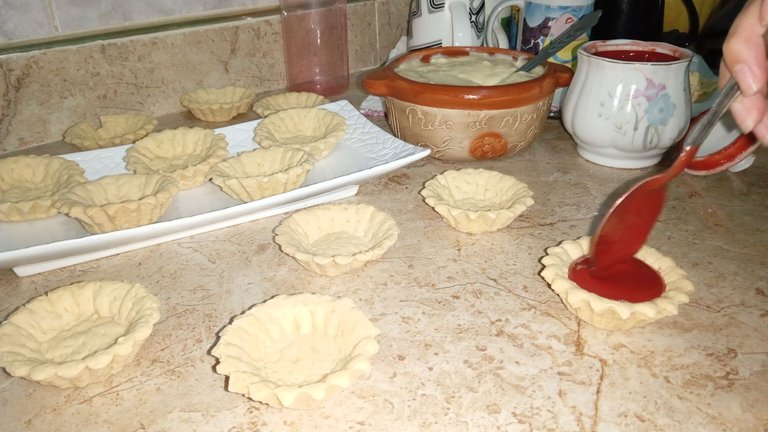
preparation of the cakes
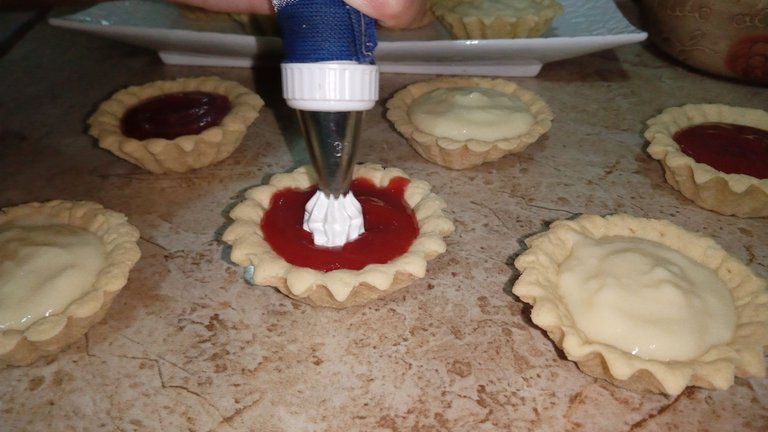
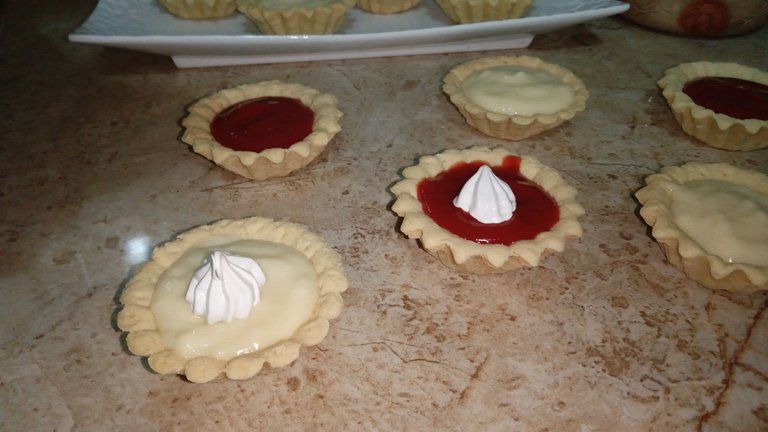
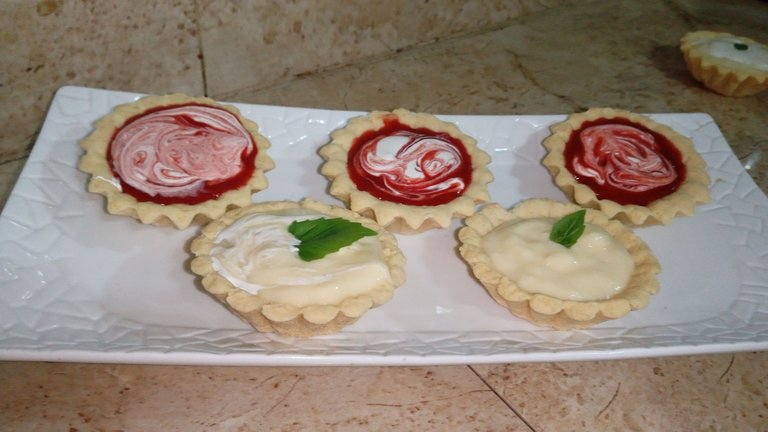
This step is very simple, it consists of filling each one of the cakes separately with our rich filling of lemon cream and guava jam (I will be posting the recipe for the jam) after this a nice spiral is placed on them of Italian meringue on top, sadly my meringue fell and did not stay firm, as that was not an impediment I used a wooden stick to make them a design almost similar to that of a marbled cake, in the end I liked them a lot, and finally, the one from lemon cream I put a basil leaf (this is very optional).
Preparación de las tartas
Este paso es muy simple, consiste en ir rellenando cada una de las tartas por separado con nuestro rico relleno de crema de limón y de mermelada de guayaba (la receta de la mermelada se las estaré publicando) luego de esto se les coloca un lindo espiral de merengue italiano encima, tristemente mi merengue se cayo y no se mantenía firme, como eso no era impedimento utilice un palito de madera para hacerles un diseño casi parecido al de una torta marmoleada, al final me gustaron mucho, y para finalizar, al de crema de limón les puse una hojita de albahaca (esto muy opcional).
 |  |
|---|
 |  |
|---|
I hope you liked this delicious recipe and have the opportunity to recreate it.
Thanks for reading and supporting me! I say goodbye until the next post.
Espero les haya gustado esta rica receta y tengan la oportunidad de recrearla.
¡Gracias por leer y apoyarme! Me despido hasta el próximo post
.The images were taken by my phone an Alcatel 1v.
Las imágenes fueron tomadas por mi teléfono un Alcatel 1v.
https://twitter.com/608922928/status/1580914022538674176
The rewards earned on this comment will go directly to the people( @kawsar8035 ) sharing the post on Twitter as long as they are registered with @poshtoken. Sign up at https://hiveposh.com.
En esta ocasión si puedo comprobar que este postre estaba demasiado delicioso, me gustó mucho y se me había olvidado agradecerte, yo me comí el de limón jsjsjs. Me encanta la manera en la explicas esta receta, es realmente fluida, espero sigas compartiendo con todos nosotros tus ricas recetas!<3
omgggg, me alegra mucho que te haya gustado, algo me decía que agarrarias el de limón jakjskajs, personalmente el de guayaba me gusto mucho mas jakjsjsj. Gracias por tu lindo comentario<33
Se ven deliciosas, probaría las de guayaba pues el limón me da alergia. Me gustó que explicaras el paso a paso de forma muy detallada. Continúa con el buen trabajo. Saludos.
Muchas gracias, tratare de que todas mis recetas estén así de detalladas. En mi caso me dejaron sin tartas de limón jajaja. Saludoss!!!!
Súper provocativas esas tartas @solecitosalazar. Me encantan las recetas súper fáciles....
Muchas gracias!!!!
Congratulations @solecitosalazar! You have completed the following achievement on the Hive blockchain and have been rewarded with new badge(s):
Your next target is to reach 500 upvotes.
You can view your badges on your board and compare yourself to others in the Ranking
If you no longer want to receive notifications, reply to this comment with the word
STOPCheck out the last post from @hivebuzz:
Support the HiveBuzz project. Vote for our proposal!
Que bonito quedó el resultado final Sol!!!! Se ven deliciosas esas tartas, ve a ver si te activas y haces algunas para la fiesta de Halloween jajajajaj, me encantan este estilo de recetas fáciles. Saluditos!
Siiii, Creeme que ando viendo la idea más realista y "asquerosa" para un postre de halloween, aunque tambien me gustaria irme por lo más fácil, ir a comprar jksjskajs. Gracias por tu comentario, saludoss!!!!
¡Se ven muy sabrosas!. Gracias por compartir esta receta, trataré de hacerlas con mi hija.